
- Wet Filament: Prevention, Symptoms & Drying - July 18, 2024
- Sovol SV08 – Best PrusaSlicer Settings & Profile - June 26, 2024
- Sovol SV08 – Best Orca Slicer Settings & Profile - June 26, 2024
Disclosure: Links marked with * are Affiliate Links. I earn from qualifying purchases if you decide to make a purchase through these links – at no additional cost for you!
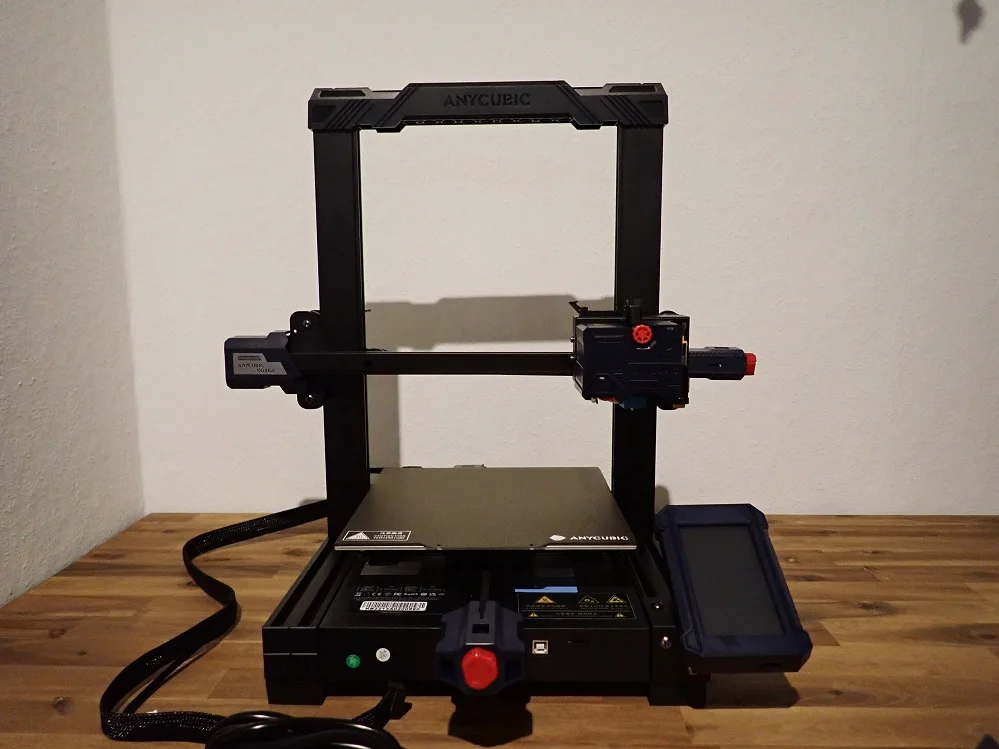
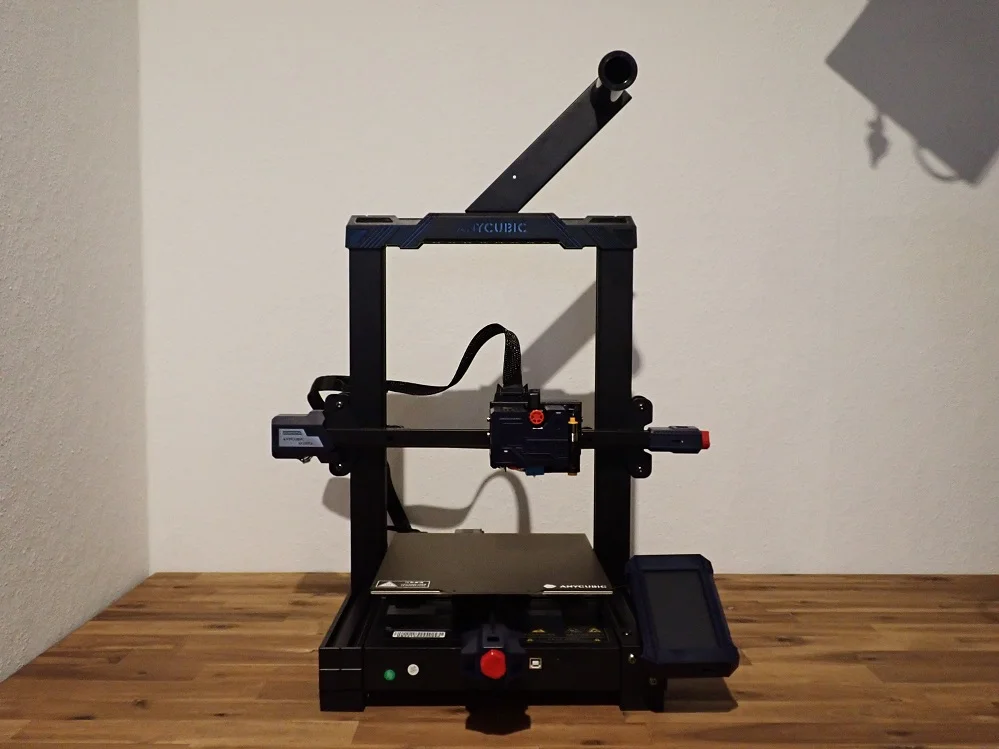
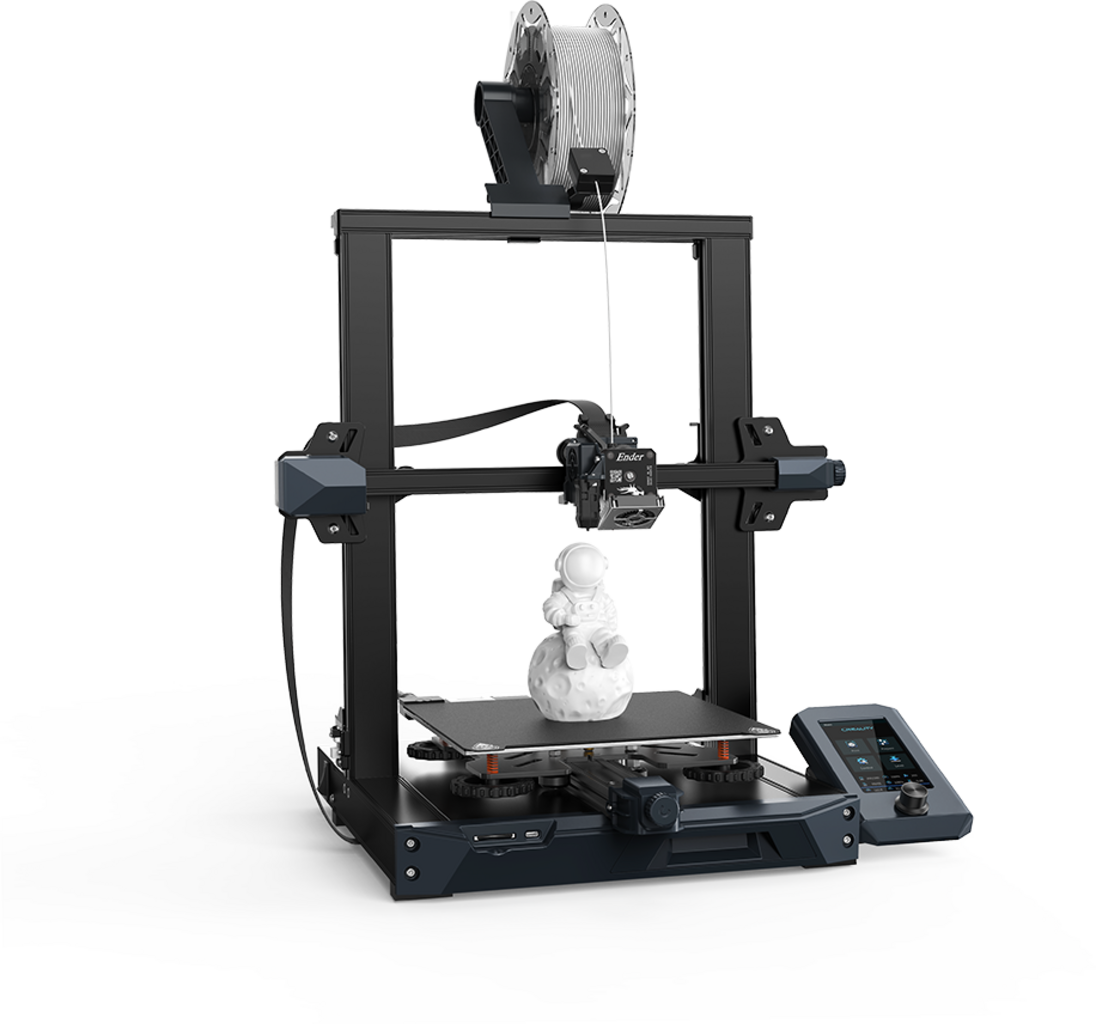
3D printers in the low to mid-range price segment are becoming more and more user-friendly. Anycubic launches the Kobra*, a 3D printer that offers such easy assembly and hassle-free handling that it resembles a plug-and-play device.
The Anycubic Kobra has a print volume of 220 x 220 x 250 mm, can print layer thicknesses from 0.05 to 0.3 mm and has automatic print bed leveling. It has various other features that improve handling and print quality.
I have thoroughly tested the Anycubic Kobra in almost 100 printing hours. In this practical review, you can find out why the Kobra passed this test with only a few exceptions.

Check Price at:
Table of Contents:
- 1 Key Takeaways
- 2 Who Should Buy the Anycubic Kobra?
- 3 Advantages & Disadvantages > Anycubic Kobra Review
- 4 Technical Specifications > Anycubic Kobra Review
- 5 Scope of Delivery > Anycubic Kobra Review
- 6 Setup > Anycubic Kobra Review
- 7 Features > Anycubic Kobra Review
- 8 Heating Times > Anycubic Kobra Review
- 9 Noise Levels > Anycubic Kobra Review
- 10 Print Speed > Anycubic Kobra Review
- 11 Operation > Anycubic Kobra Review
- 12 Slicer > Anycubic Kobra Review
- 13 Print Quality > Anycubic Kobra Review
- 14 Anycubic Kobra VS. Ender 3 V2 VS. Ender 3 S1
- 15 Is the Anycubic Kobra Worth It?
- 16 Similar 3D Printers
Key Takeaways
- Print quality up to 0.05 mm
- Direct drive extruder
- Magnetic, flexible print bed with excellent adhesion
- Automatic print bed leveling at the push of a button (no turning screws under the print bed)
Who Should Buy the Anycubic Kobra?
The Anycubic Kobra is very suitable for beginners. Its assembly is done in 10 to 20 minutes and the print bed is automatically leveled. Advanced users can also benefit from the trouble-free handling and reliable print quality.
Advantages & Disadvantages
> Anycubic Kobra Review
PRO:
- Good print quality
- Direct drive extruder
- Good print bed adhesion
- Easy setup and operation
- Belt tensioner
- Good Cura profile on MicroSD card
CON:
- Filament getting stuck sometimes while loading
- Fairly loud (49 dB)
- No double Z-axis
Technical Specifications
> Anycubic Kobra Review
DEVICE
- Technology: FDM (Fused Deposition Modeling)
- Assembly: Mostly pre-assembled
- Size: 487 x 433 x 645 mm
- Weight: 7,5 kg
PRINTING
- Print volume: 220 x 220 x 250 mm
- Layer thickness: 0.05 – 0.3 mm
- Max. nozzle temperature: 260 °C
- Max. print bed temperature: 110 °C
- Extruder: Direct Drive
- Nozzle quantity: 1
- Nozzle diameter: 0.4 mm
- Filament diameter: 1.75 mm
- Filaments: PLA, ABS, PETG, TPU, wood, etc.
- Print bed material: PEI coated spring steel
- Print bed leveling: Automatic
- Print speed: max. 100 mm/s, standard 50 mm/s
- Resume Print: Yes
SOFTWARE
- Slicer: Cura, Simplify3D, Repetier-HOST
- File types: STL, OBJ, AMF, JPG, PNG
- Connectivity: USB, microSD
Check Price at:
Scope of Delivery
> Anycubic Kobra Review
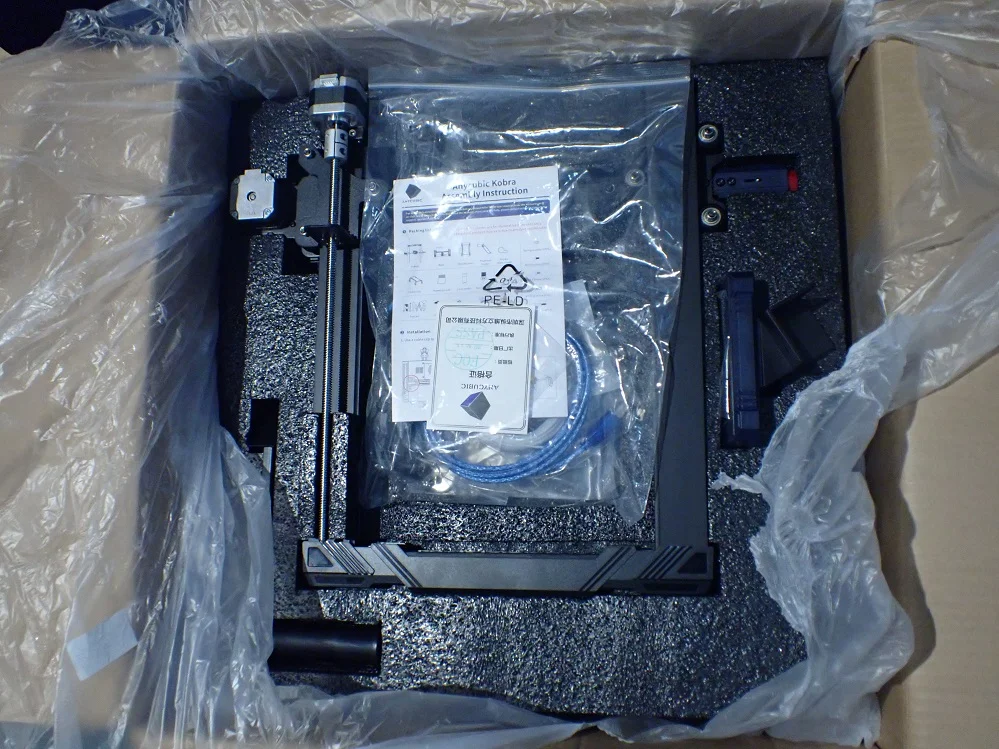
The scope of delivery of the Anycubic Kobra seems minimalistic, as everything is extremely well and cleverly packaged. In addition, the 3D printer is mostly pre-assembled, which means that only very few individual parts are included in the package.
To get started with the first test prints you only need what is included. There is even some PLA filament included. Also, all necessary tools for the assembly and a test model are available on the MicroSD card.
However, since the filament is only very small, you should get more filament when you buy the 3D printer. Anycubic also offers very good PLA filament, with which I myself have had good experience (here is my detailed review).
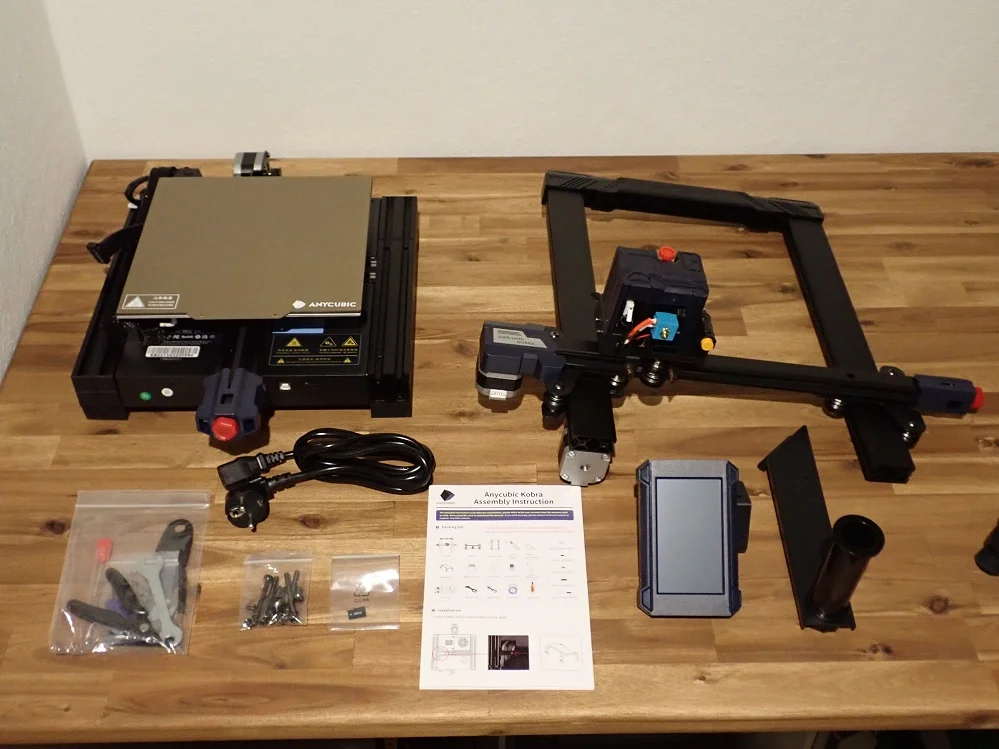
Included with the Anycubic Kobra are the following items:
- Pre-assembled 3D printer:
- Frame with X-axis incl. print head, extruder and toothed belt
- Base with print bed
- Touchscreen with mount
- Filament holder
- All necessary screws and clamps
- Replacement nozzle
- Tools:
- Screwdriver
- Side cutter
- Spatula
- Needle for nozzle cleaning
- Allen keys
- Wrenchs
- Instruction manual
- PLA filament (small sample)
- Power & USB cable
- Card reader
- MicroSD card:
- Digital instruction manual
- Test model
- Cura slicer
- Cura profile
- Drivers
Setup
> Anycubic Kobra Review
The setup of the Anycubic Kobra also seems minimalistic, as it is done very quickly thanks to the mostly pre-assembled components. I only needed about 10 minutes for the assembly!
The assembly is done in 6 steps. Each of these steps is very well documented in the user manual and only includes easy tasks. The most difficult assembly steps have been done already by Anycubic. Among them are mainly the assembly of the printhead and the timing belts.
Here are the steps to assemble the Anycubic Kobra:
- Screw pre-assembled frame to the base
- Mount the touchscreen to the base
- Attach filament holder to the top of the frame
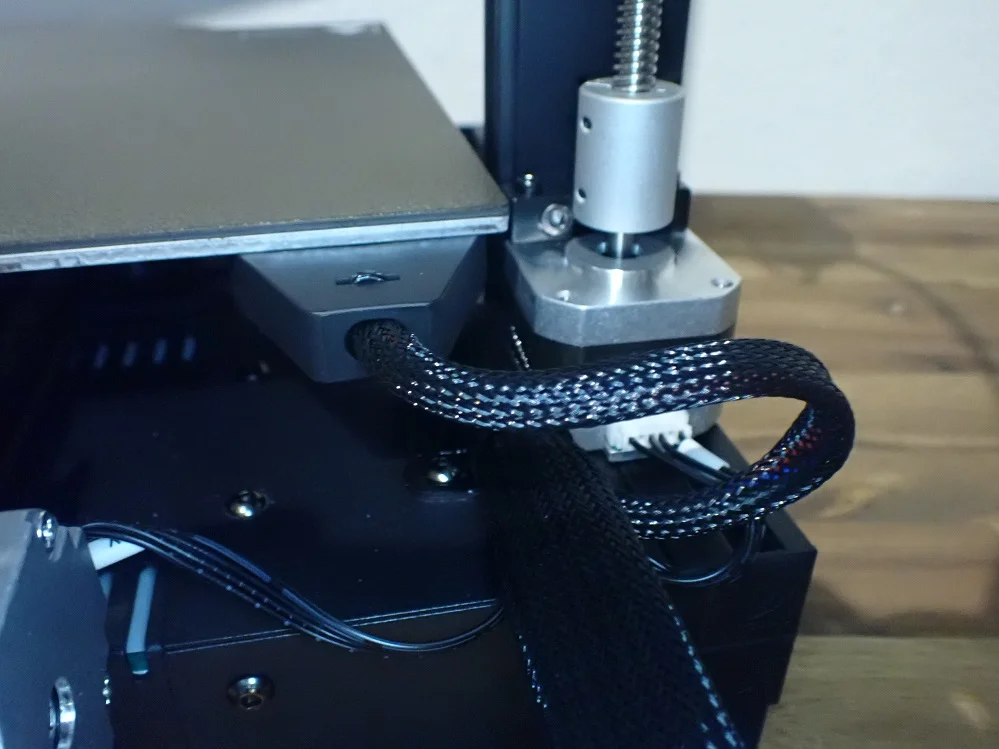
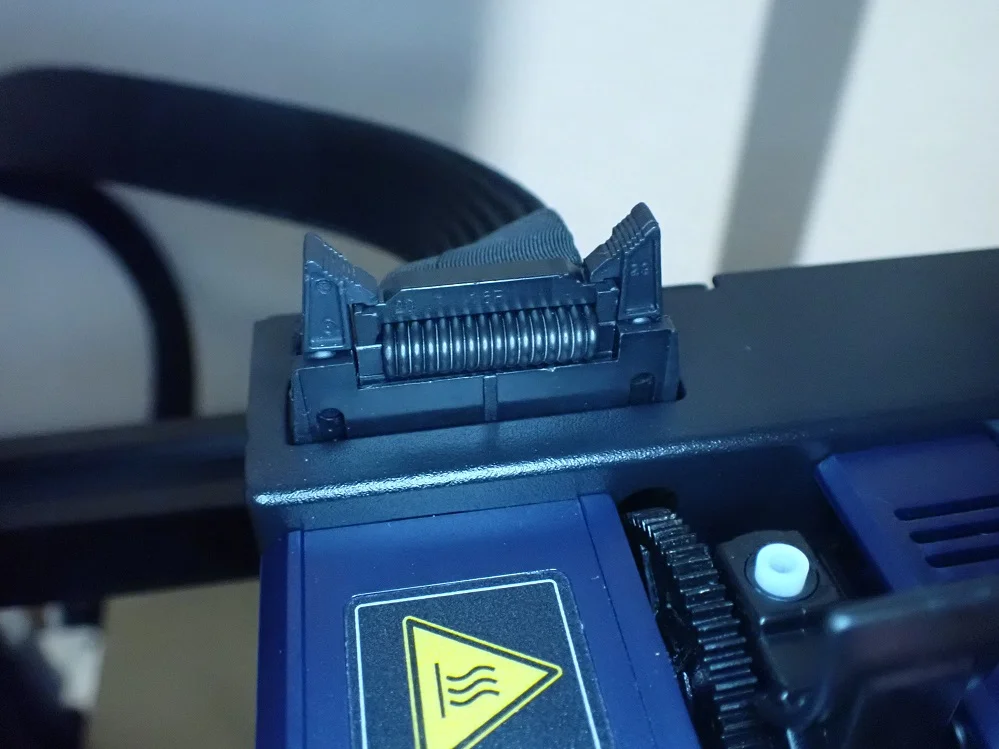
- Connect all the cables
- Check the tension of the wheels and the toothed belts.
- Switch voltage to the correct value (230 V or 115 V)
After the assembly is complete, you can start with the print bed leveling.
Print Bed Leveling

As you may have noticed, there are no turn screws under the print bed to adjust the tilt of the print bed. The Anycubic Kobra does most of the leveling! Print bed leveling happens automatically on the Anycubic Kobra with the Anycubic LeviQ leveling system. Unlike many other 3D printers with automatic print bed leveling, there is no BL-Touch or CR-Touch installed.
The print bed leveling is divided into two steps on the Anycubic Kobra:
- Automatic 25-point print bed leveling by the proximity sensor
- Setting the Z-Offset with one sheet of paper
Both of these steps are supported by the menu. In addition, the entire process of print bed leveling is explained very simply in the operating instructions.
In the first step, the print bed is leveled at 16 points at the push of a button. This means that the 3D printer measures the distance from the nozzle to the print bed at these 16 points in order to compensate for the tilt during printing.
The second step is to fine-tune the distance between the nozzle and the print bed. To do this, you need a sheet of paper and set the Z-offset via the menu so that there is a slight friction when you move the paper between the nozzle and the print bed.
Check Price at:
Features
> Anycubic Kobra Review
The Anycubic Kobra has been stripped down to all the features that have been proven in other 3D printers. This gives it a very streamlined look and makes it very user-friendly, as there are only a few things to consider.
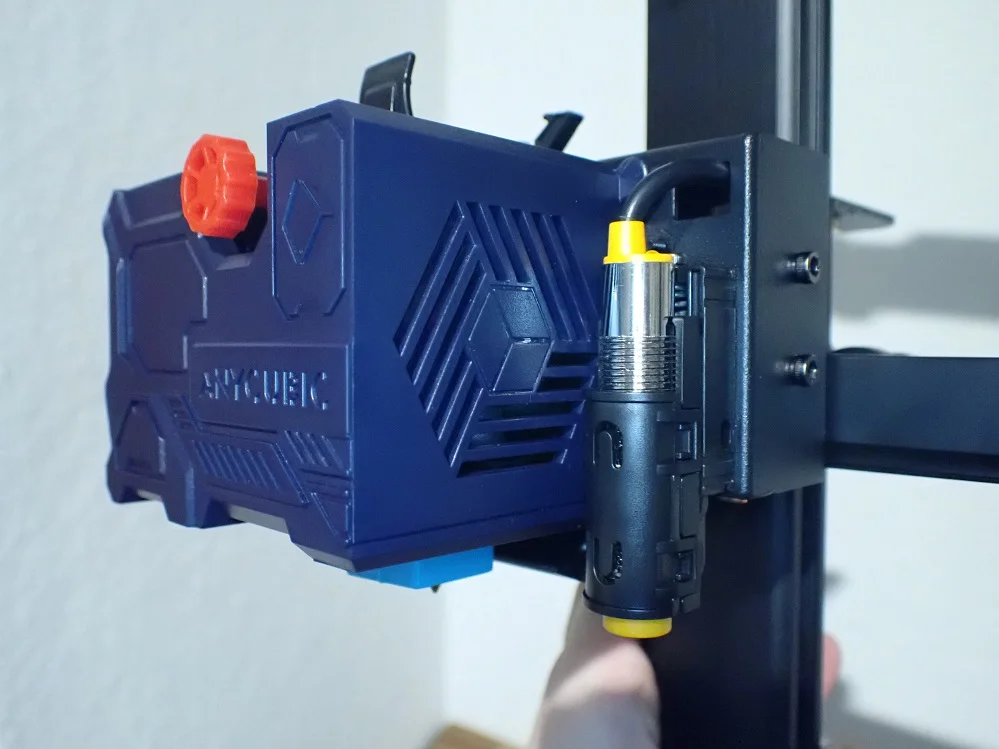
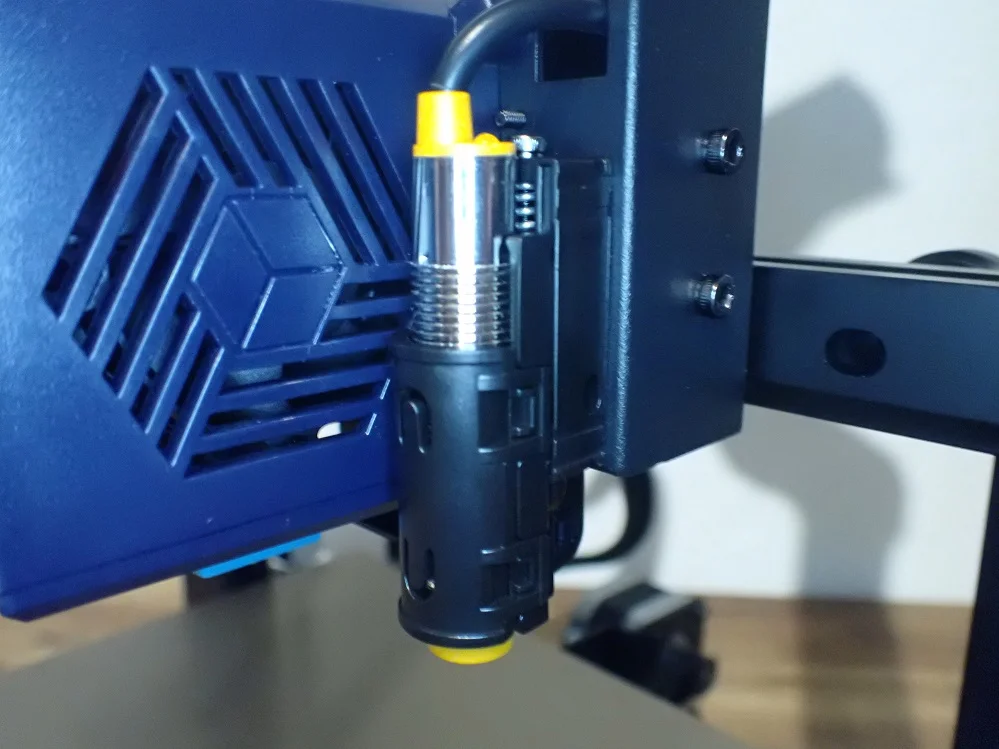
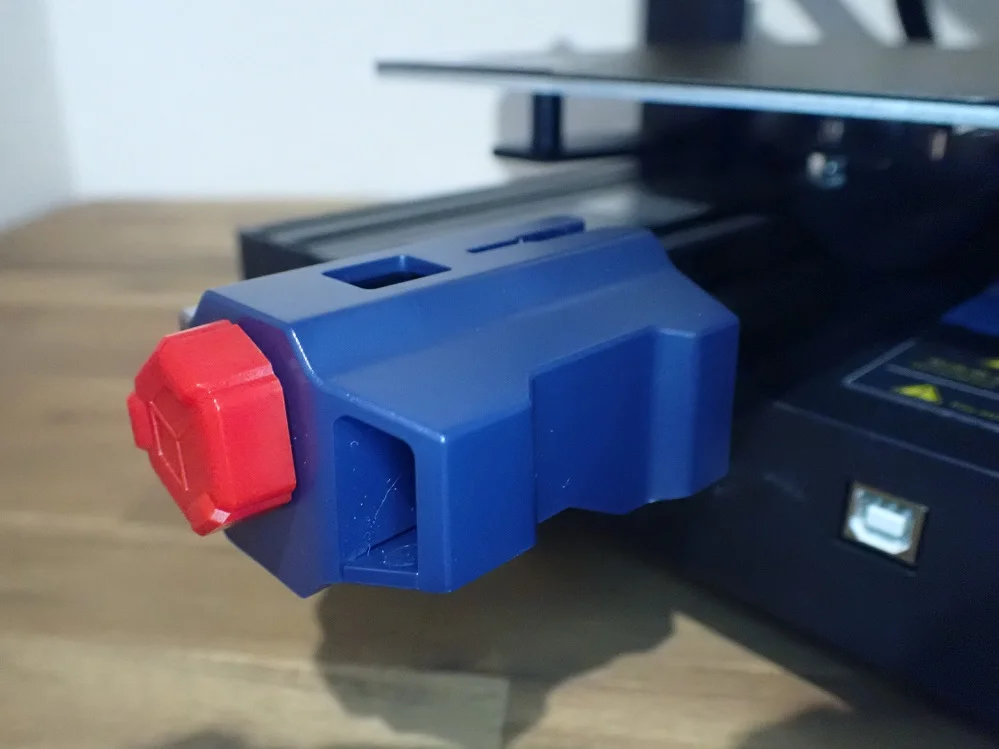
Direct Drive Extruder
At first glance, the direct drive extruder looks quite bulky when compared with the direct drive extruder Sprite from the Ender 3 S1, for example. Nevertheless, it is so light that no vibrations occur at a normal printing speed (approx. 50 mm/s). Only the maximum printing speed is reduced to 100 mm/s.
A direct drive extruder system has several advantages over a Bowden extruder system. With a direct drive extruder, the extruder sits directly above the nozzle, reducing the distance the extruder has to push the filament to a minimum.
This is particularly advantageous for flexible filaments, as the filament can get tangled on a long path between the extruder and the nozzle. But also for normal filaments like PLA, a direct drive extruder has a positive effect, because the extrusion accuracy is more precise.
One drawback I have noticed with this extruder is the sometimes difficult insertion of filament. There seems to be a larger diameter between the extruder and the nozzle where the filament can get stuck. Therefore, the filament must be very straight before you insert it.
Flexible Magnetic PEI Print Bed
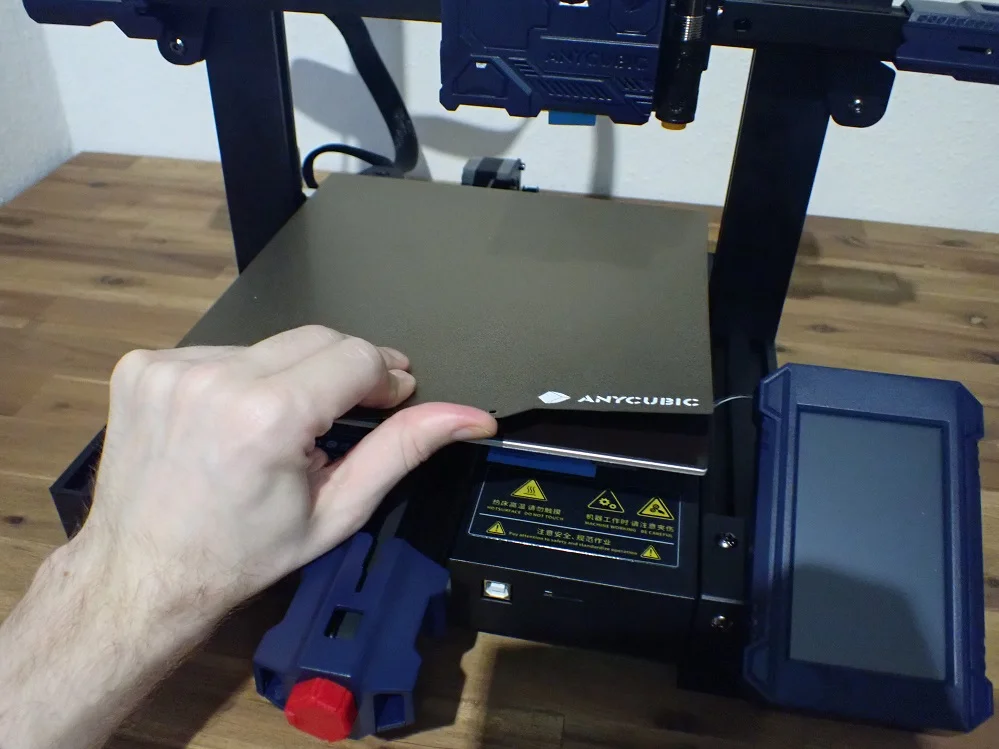
The Anycubic Kobra features a flexible magnetic print bed with a PEI coating. PEI has long been proven for many filament types and provides excellent print bed adhesion – especially with a heated print bed.
Once the print bed has cooled down, the object can be easily detached. To support the removal even better, the print bed is flexible and magnetic. After printing, you can simply remove it from the printing plate, bend it and remove the object by hand. With PLA, the object usually comes off all by itself.
Nevertheless, the print bed adhesion is so good that I only had to use aids such as Magigoo to increase the print bed adhesion for very delicate first layers. The print bed can be heated up to 110 °C and thus offers the possibility to print many different filament types.
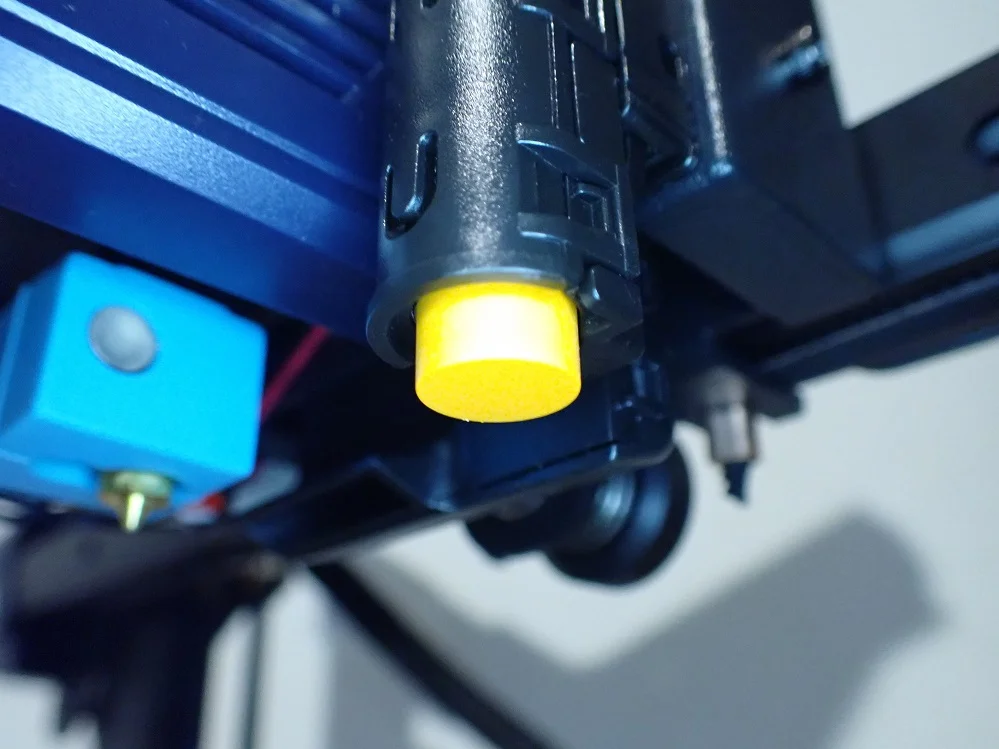
Automatic Print Bed Leveling
Manual print bed leveling can be very annoying in the long run. Although you get used to the process and it becomes faster and faster, automatic print bed leveling is much more convenient and usually more accurate.
For low-budget 3D printers, an upgrade with an automatic Z-probe like the BL-Touch or CR-Touch is very popular. Meanwhile, more and more newer 3D printers have such an automatic print bed sensor included.
The sensor on the Anycubic Kobra is located on the side of the printhead and automatically measures the distance to the print bed. Anycubic will patent this new “Anycubic LeviQ” technology. The print bed itself has no rotating screws to change the inclination. The tilt is compensated completely independently by the 3D printer. The only thing you have to do manually is to adjust the Z-Offset.
This is rarely necessary and can be done within 2 minutes. All you need is a piece of paper that you move back and forth between the nozzle and the print bed until the distance is adjusted so that there is some friction when moving.
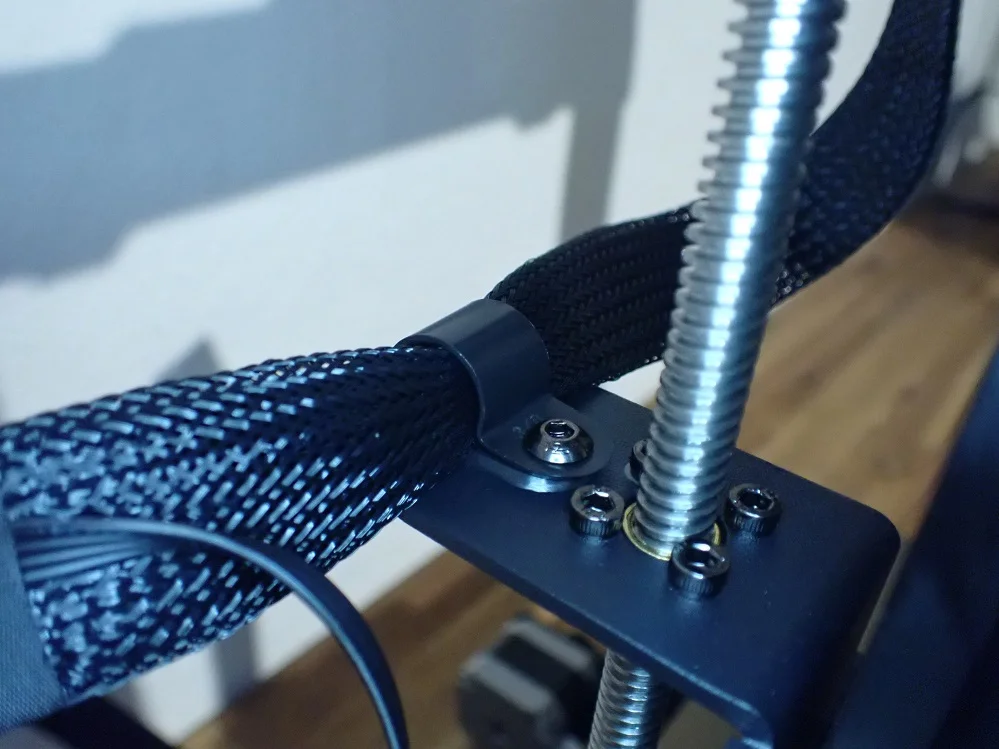
Belt Tensioner
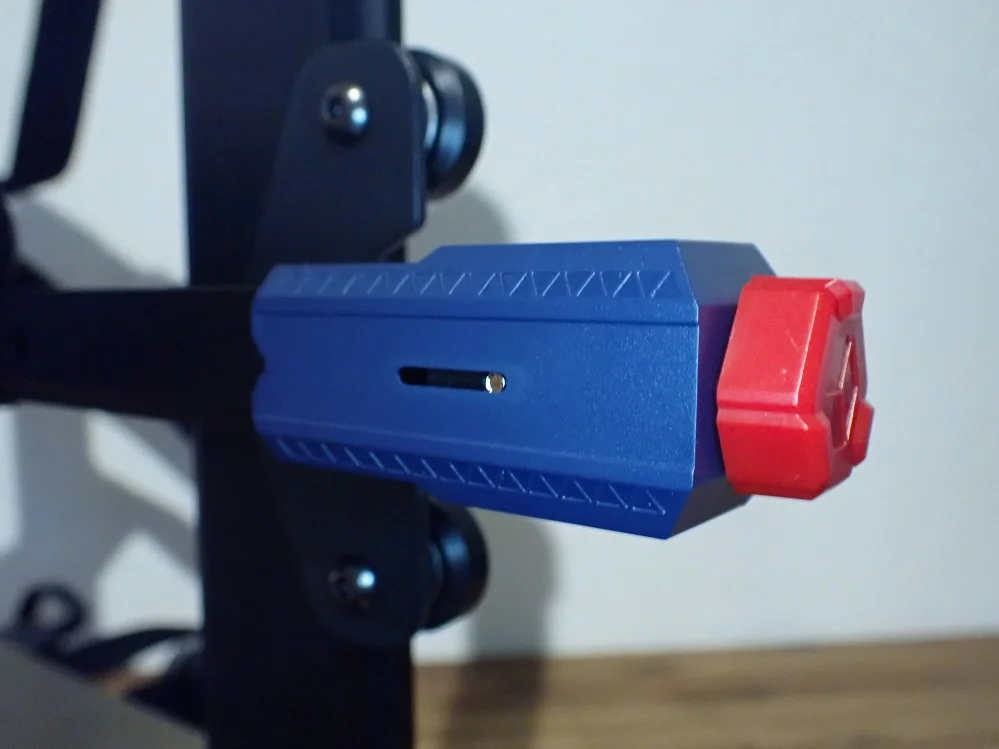
The tension of the toothed belts on the Anycubic Kobra can be conveniently adjusted via rotary screws. These are located on both axes with toothed belts, one at the front in front of the print bed and one on the right on the X-axis.
Adjusting the belt tension without such a belt tensioner would require complete disassembly of the axis. Therefore, this feature is very convenient!
The operating instructions explain the tension of the toothed belts within the assembly. The tension must not be too tight or too loose. If the tension is too high, the toothed belt could rip, and if the tension is too low, vibrations could occur.
You have set the correct tension when the timing belt makes a high-pitched sound when you flick it with your finger. I know that this is a rather vague indication, but you need not worry much about a timing belt breaking, as they are very robust.
4.3” LCD Touchscreen
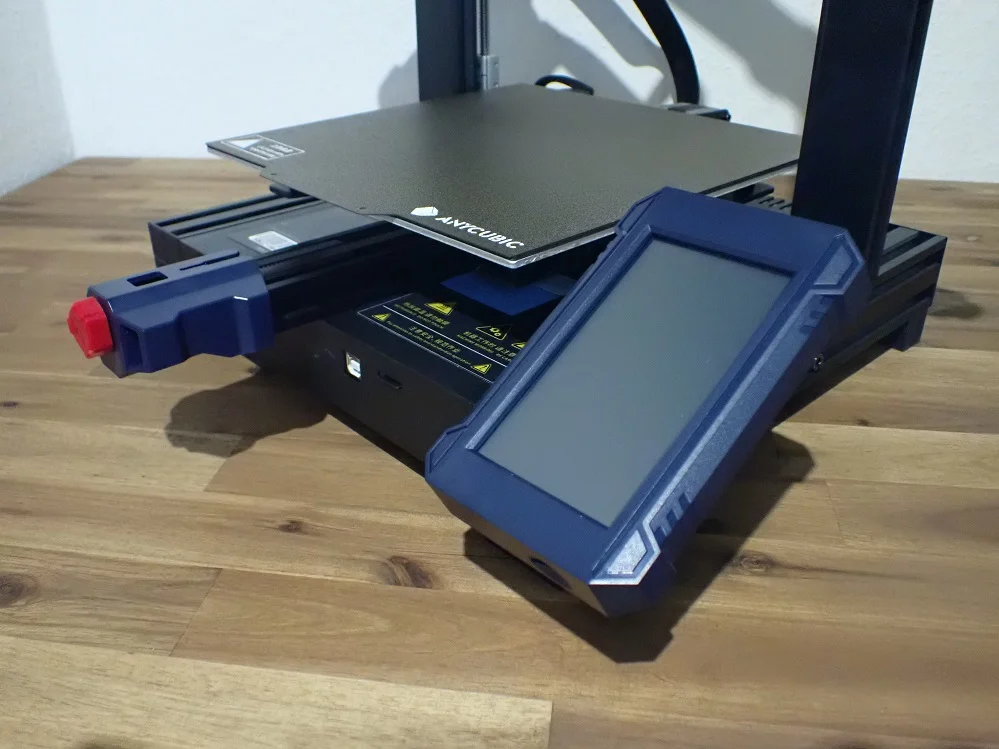
The color touchscreen surprised me a bit, since 3D printers in this price segment usually have a normal LCD screen with a rotary knob operation (like the Ender 3 V2 or Ender 3 S1).
The LCD touchscreen is 4.3 inches and colorful. This makes it easy to see all menu items without needing a magnifying glass. The touchscreen operation also makes navigating a bit faster than with a rotary knob. The touchscreen responds quickly and reliably to your inputs, which allows you to quickly get to the desired settings in the menu.
The menu itself is very clearly structured and divided into the main menu and four submenus (Print, Prepare, Tools, System). This division has also proven itself with other manufacturers, as the individual functions are logically separated from each other and navigation becomes intuitive and fast.
There are preset programs to preheat the 3D printer to specific filaments, a menu for print bed leveling, for loading filament, for manually entering temperature and position, and more. Also, in the system menu, you can turn off the menu “beep” noise, which I really like!
Easy Setup
The assembly of the Anycubic Kobra is very quick and easy thanks to the mostly pre-assembled components. It is done within 10-20 minutes and does not require extensive technical understanding.
The assembly consists of only 4 steps plus 2 steps in which the pre-assembled wheels of both axes and the belt tension are checked. Compared to the Ender 3 V2, the assembly is very user-friendly (unless you enjoy assembling complex technical devices).
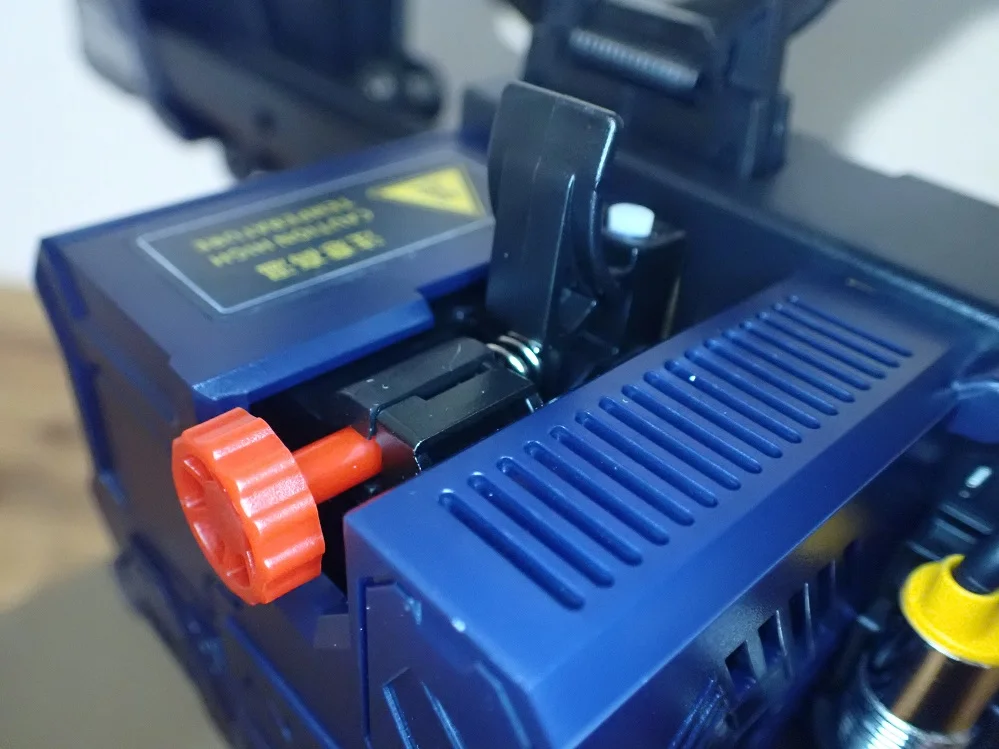
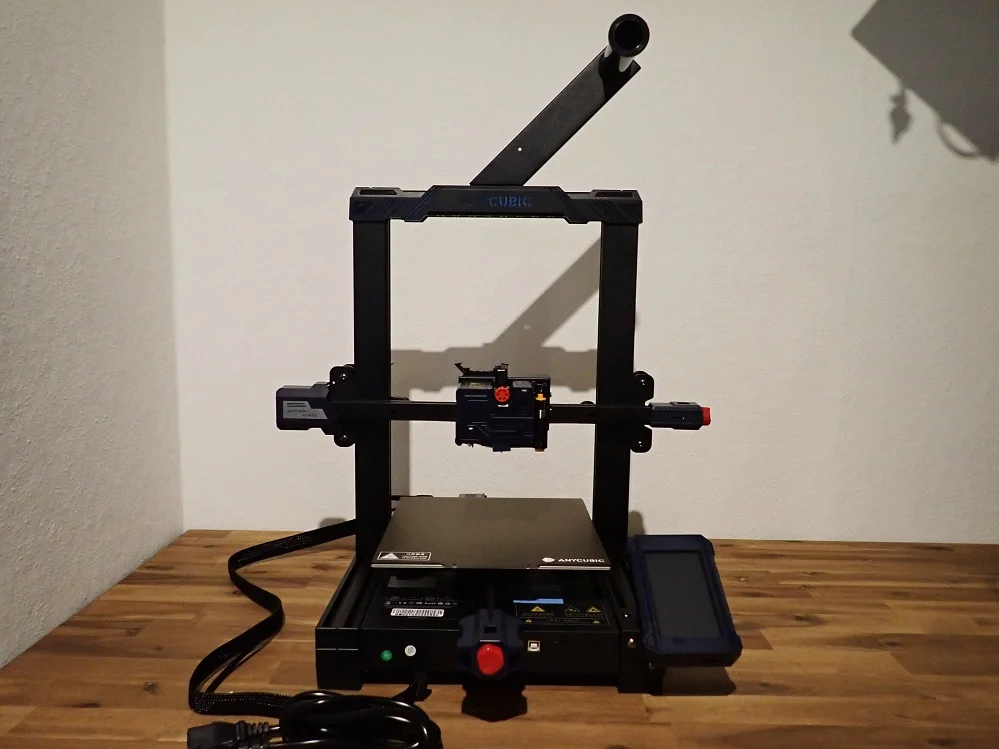
Filament Holder
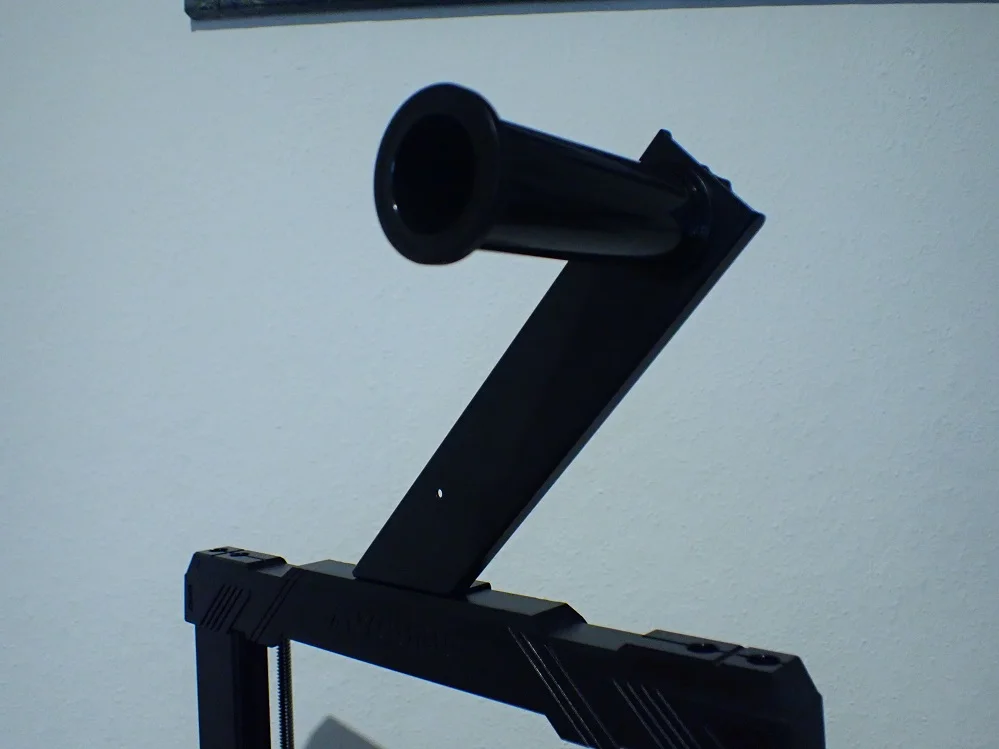
At the top of the frame is a filament holder suitable for most spool sizes. It is positioned so that the filament goes exactly vertically down into the extruder when it is in the center of the X-axis. This minimizes the risk of the filament getting tangled.
Lightweight Construction
The Anycubic Kobra has a print volume that is comparable to other 3D printers in its price range and above. Nevertheless, the total weight of the 3D printer is very low at 7.5 kg (for comparison: Ender 3 S1 9.1 kg, Aquila S2 9.5 kg).
It is also unusual that the top horizontal piece of the frame is not also made of the black aluminum profile like the rest of the frame. Anycubic has opted for a sturdy plastic part here. However, this part is very sturdily constructed and should do just fine with its task of preventing vibrations and stabilizing the frame.
Check Price at:
Heating Times
> Anycubic Kobra Review
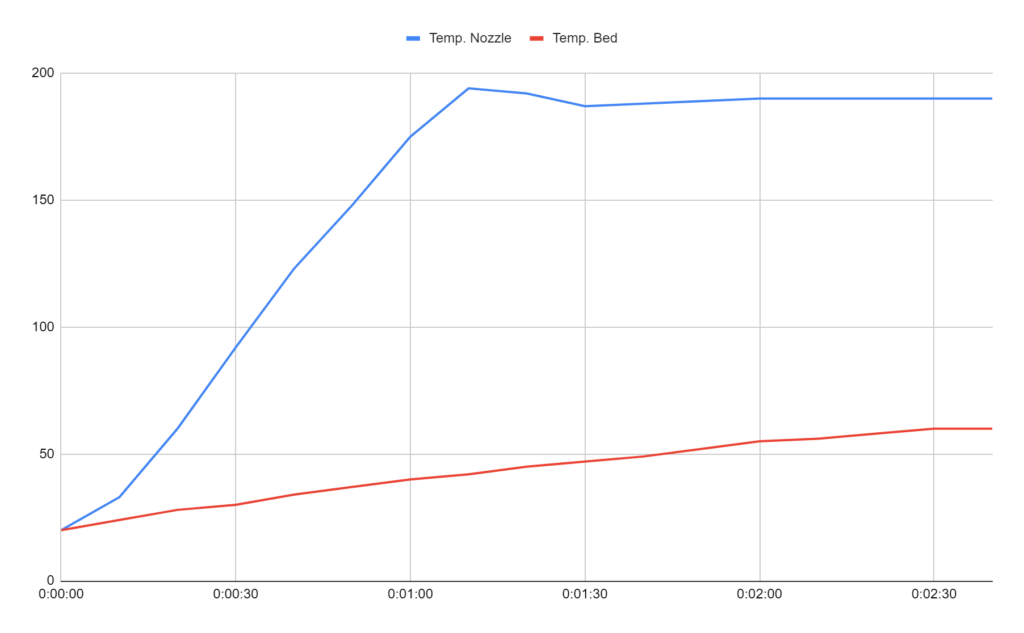
The heat-up times of the Anycubic Kobra are very fast. For temperatures suitable for PLA filament (190 °C for the nozzle and 60 °C for the print bed), it takes just 2.5 minutes. This is comparable to other 3D printers with a thin magnetic print bed.
| Time | Temp. Nozzle | Temp. Bed |
|---|---|---|
| 00:00:00 | 20 | 20 |
| 00:00:10 | 33 | 24 |
| 00:00:20 | 60 | 28 |
| 00:00:30 | 92 | 30 |
| 00:00:40 | 123 | 34 |
| 00:00:50 | 148 | 37 |
| 00:01:00 | 175 | 40 |
| 00:01:10 | 194 | 42 |
| 00:01:20 | 192 | 45 |
| 00:01:30 | 187 | 47 |
| 00:01:40 | 188 | 49 |
| 00:01:50 | 189 | 52 |
| 00:02:00 | 190 | 55 |
| 00:02:10 | 190 | 56 |
| 00:02:20 | 190 | 58 |
| 00:02:30 | 190 | 60 |
| 00:02:40 | 190 | 60 |
The fast heat-up time of the print bed is due to its low mass. Compared to glass print beds of other 3D printers, the print bed of the Anycubic Kobra is much lighter. With very heavy and therefore very thermally inert print beds, you still have to wait for one to two minutes until the print bed temperature is evenly distributed on the surface. With the thin PEI print bed, this takes only a fraction of the time, making the 3D printer ready to print faster.
Noise Levels
> Anycubic Kobra Review
Surprisingly, the direct drive extruder of the Anycubic Kobra is the quietest of the entire 3D printer. In order to keep the weight of the print head as low as possible, cheap, lightweight and therefore quite loud fans are usually installed in direct drive extruders.
However, the 3D printer base with the mainboard and power supply is much louder than the print head in the Anycubic Kobra. To keep the purchase price low, apparently cheap fans were used here. There is definitely upgrade potential here!
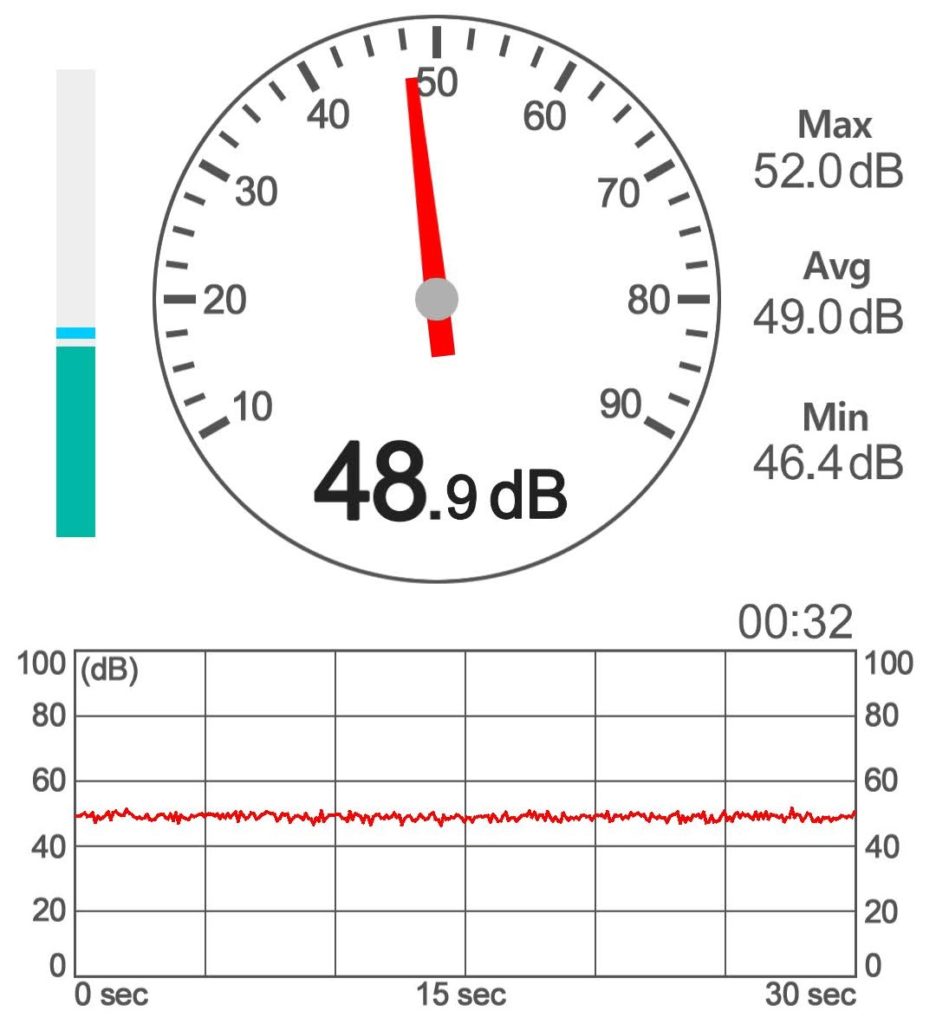
The volume of the Anycubic Kobra is 49 decibels during printing, which is comparable to a conversation. For comparison, the Ender 3 S1 only has a volume of 34 decibels, which is a significant difference. So if you want to use the Kobra in the same room where you need to concentrate, you should change the fans in the base.
Print Speed
> Anycubic Kobra Review
According to the manufacturer, the printing speed of the Anycubic Kobra can be between 20 and 100 mm/s. However, 50 mm/s is recommended, as with most other direct drive extruder 3D printers. I have also kept to the 50 mm/s and achieved good printing results.
The maximum print speed of 100 mm/s is slower than other 3D printers, but this is due to the direct drive extruder system with only one driven Z-axis. However, this high printing speed is only used in rare cases, such as very rough prototypes or mechanical objects that do not require high accuracy.
Due to the direct drive extruder, the Anycubic Kobra is also perfectly suitable for flexible filaments such as TPU. The print speed should be lower for flexible filaments. I have always achieved very good results with 30 mm/s so far. One more tip for flexible filaments: try to set all speeds in the slicer to 30 mm/s. This way the filament gets as little acceleration as possible. This way the filament gets as little acceleration as possible and has only a very small chance to get tangled or to be extruded inaccurately.
Operation
> Anycubic Kobra Review
UI: Controlling the Anycubic Kobra is very simple. Thanks to the clear menu and the touchscreen, setting up the 3D printer is child’s play.
The menu is very intuitive, but small preview images could be displayed for the print files.
Print bed: The print bed with the PEI coating provides excellent print bed adhesion. This makes the handling of the print bed very comfortable and is even improved by removing and bending the print bed. As a result, the objects come off almost by themselves after printing.
Printing: Aside from the filament getting stuck from time to time during loading, the entire printing process of the Anycubic Kobra is very user-friendly. The only steps from turning on the 3D printer to printing are loading filament and selecting the print file (and leveling the print bed from time to time).
Slicer: The Anycubic Kobra is compatible with many slicers. As with most of my FDM 3D printers, I used Cura as the slicer for this 3D printer. Included on the MicroSD card is a very well-tuned profile for Cura. With this profile, I needed to do virtually no calibrations and there was practically no stringing or other extrusion issues such as over or under extrusion.
Slicer
> Anycubic Kobra Review
The Anycubic Kobra is compatible with most slicers often used for FDM 3D printers. Among them are Cura, Simplify3D and Repetier-HOST.
Since the included MicroSD card contains a preset profile for Cura and I like to work with this slicer anyway, I used Cura for this test. Cura is one of the most popular slicers for FDM 3D printers, because it is very easy to use, delivers very good results and the print results can be optimized via numerous options.
You can choose from pre-made profiles in Cura and need to care very little about the settings. The important thing is the print quality, i.e. the layer height and settings like the pattern and density of the infill, the wall thickness and the temperature for the filament used. Apart from that, you can also generate the popular tree supports and use experimental settings like fuzzy skin.
I calibrated my Kobra in Cura – here is the guide: Anycubic Kobra | Best Cura Settings & Profile – Guide & List
Check Price at:
Print Quality
> Anycubic Kobra Review
The Anycubic Kobra*can print layer thicknesses of 0.05 – 0.3 mm. This makes objects with small details possible. However, the fine layers are still visible to the naked eye.
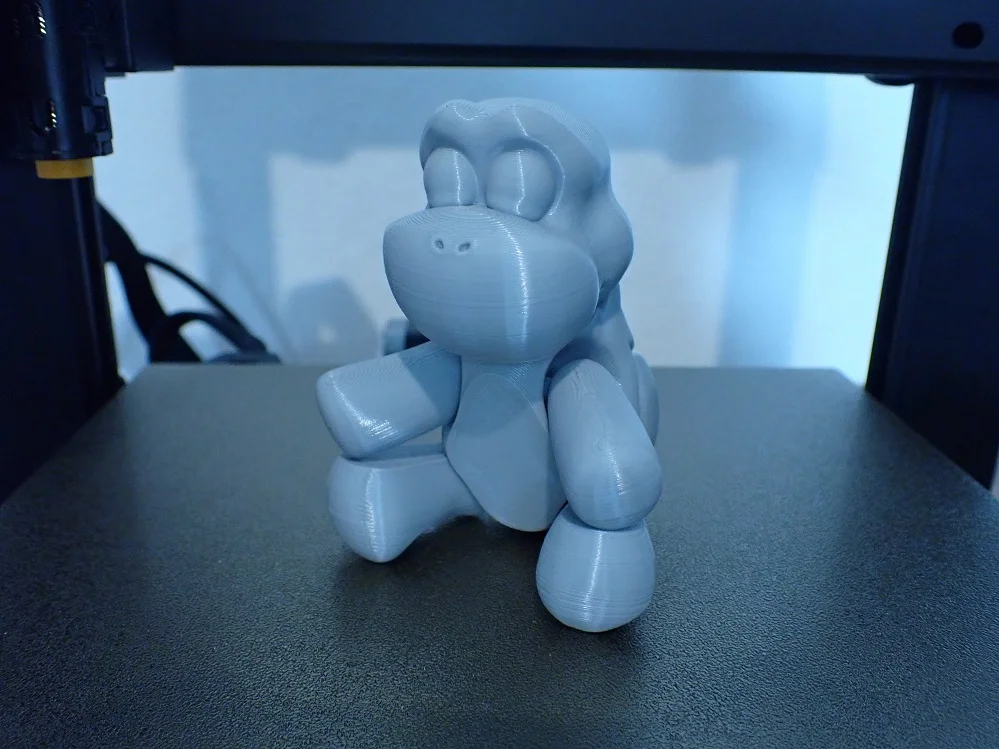
To test the print quality in practice, I first printed the test object on the MicroSD card.
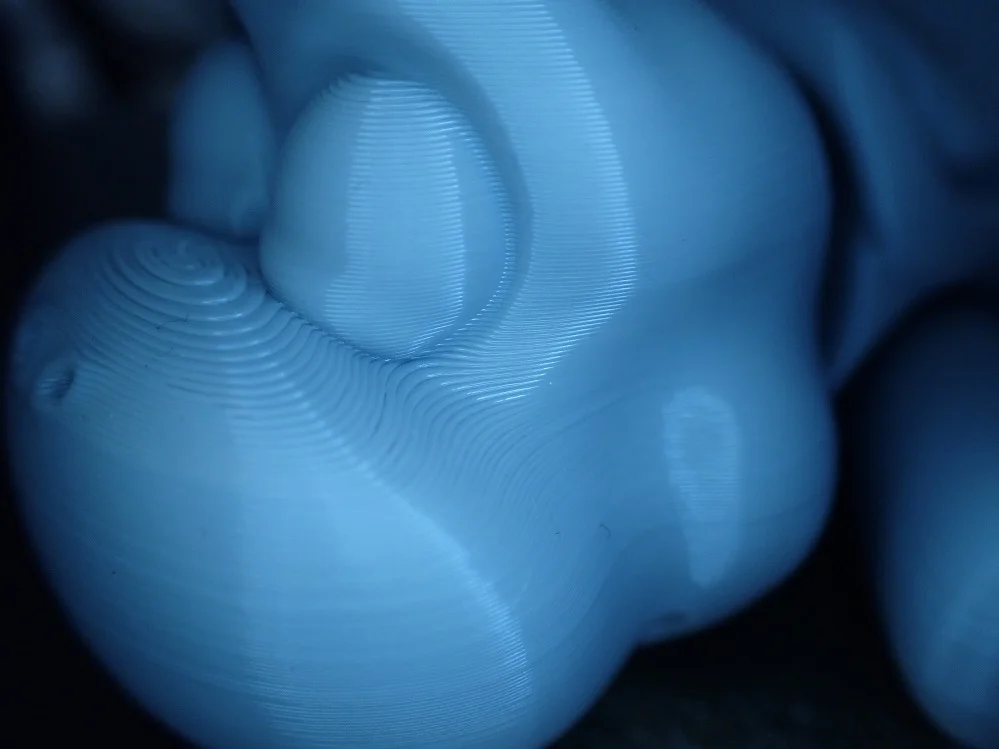
Owl
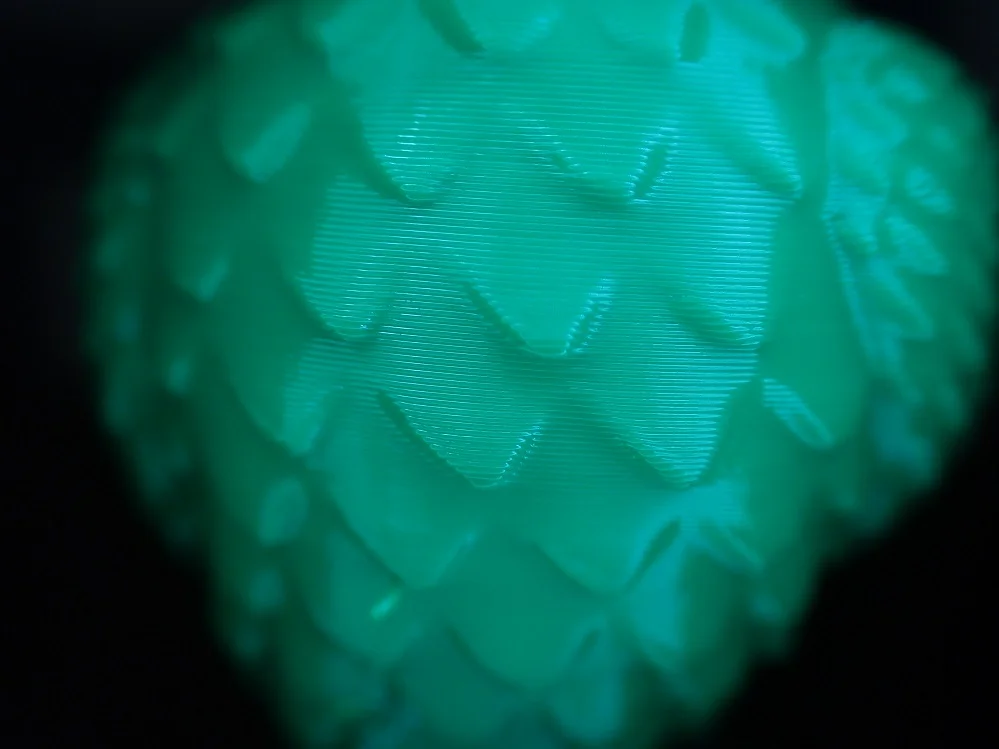
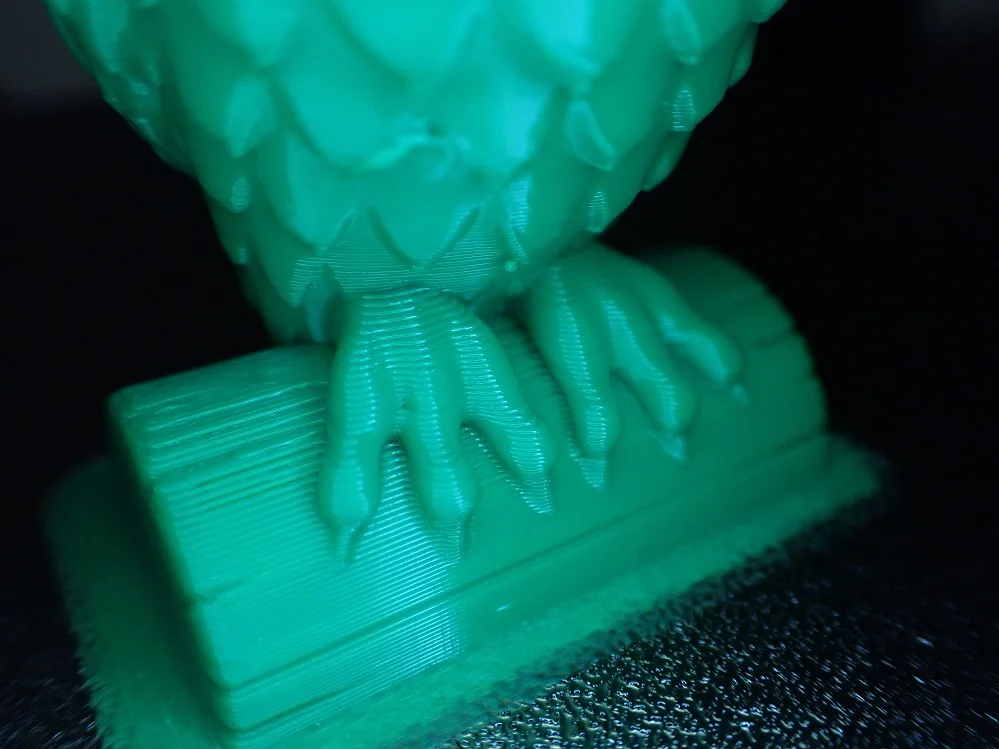
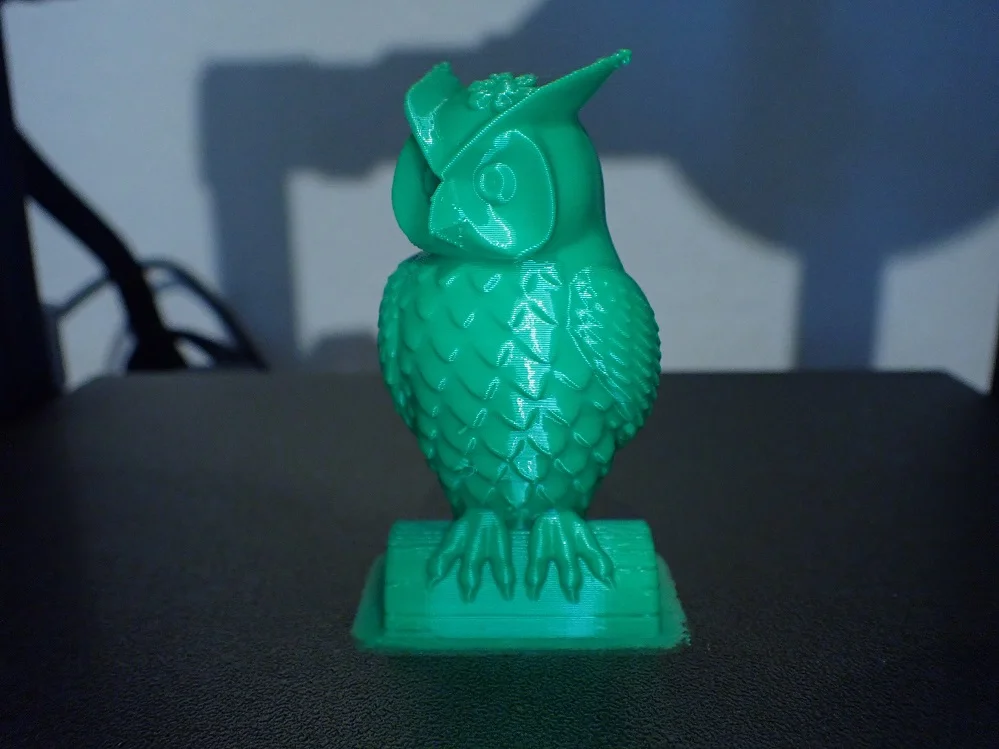
The MicroSD card contained a pre-sliced model of an owl. So I didn’t have to use a slicer for this. The print result is quite respectable, although the fine details on the ears and beak have slight extrusion problems. However, it turned out that this was eradicated in the Cura profile that I used for the other models.
Onix Pokémon
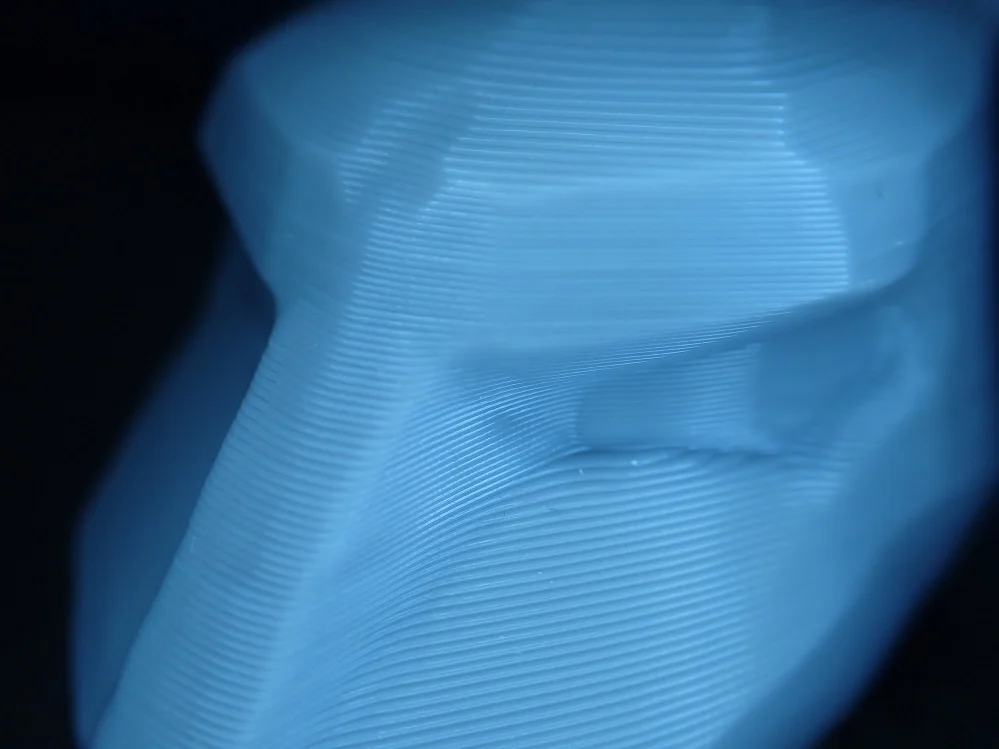
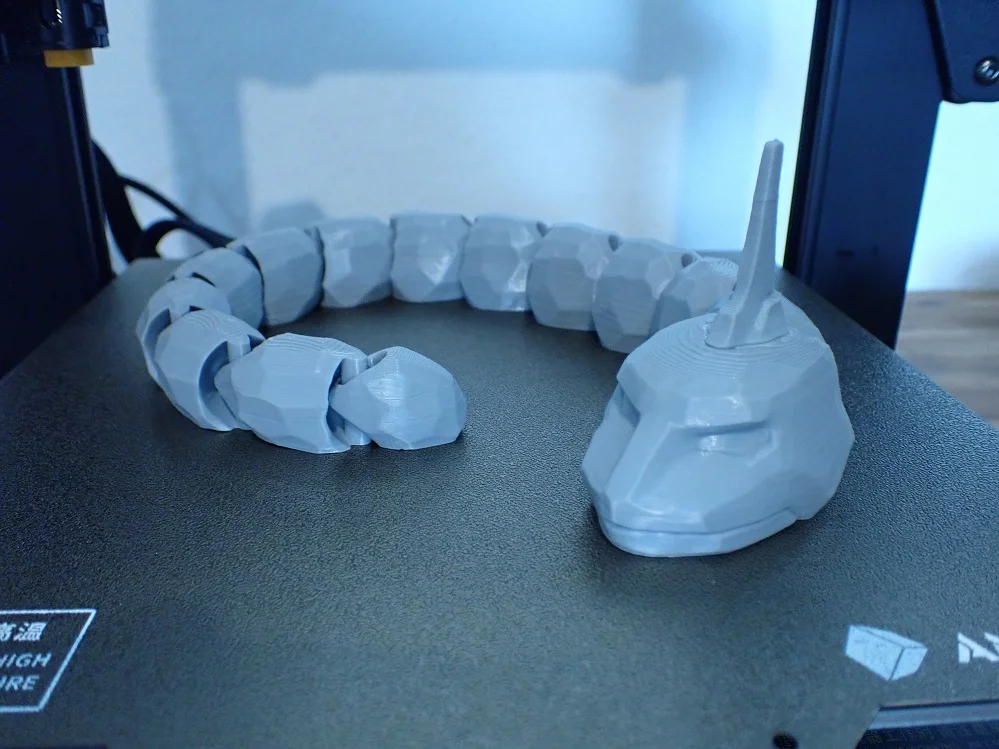
With the Onix Pokémon (link to model), I wanted to test dimensional accuracy and stringing behavior. With mechanically moving objects, printing errors can quickly lead to a destroyed print, since the movement is then no longer given.
The result was flawless and there was no stringing at all. I printed this model with a layer thickness of 0.2 mm, otherwise, it would have taken too long at this size.
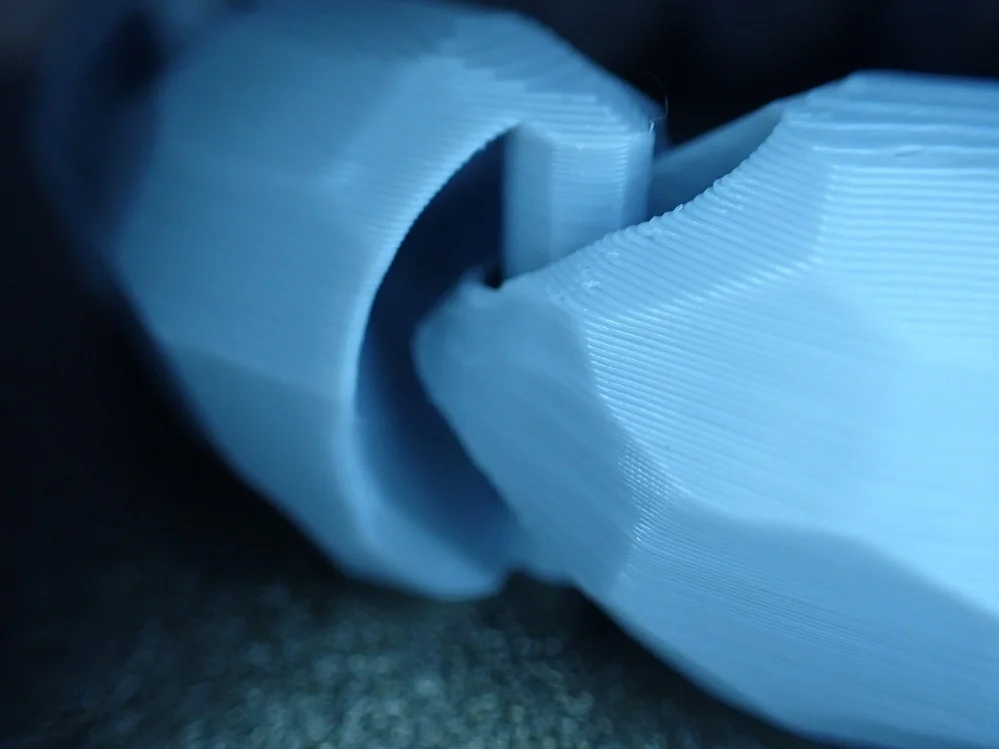
Flexi Turtle
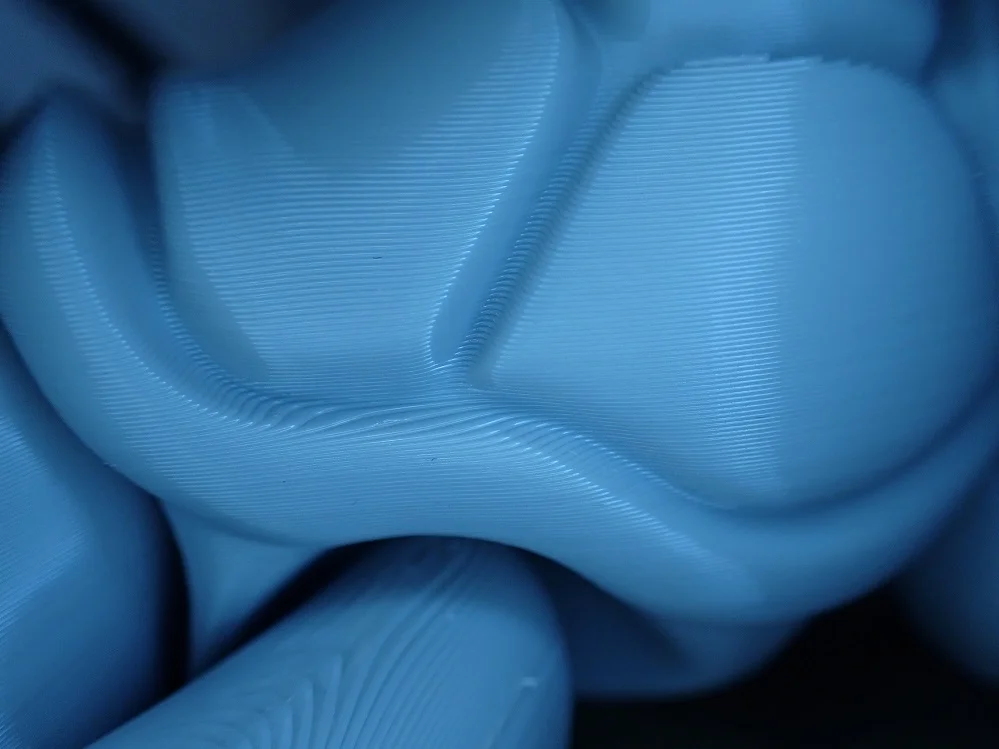
The Flexi Turtle (link to model) was also printed flawlessly. The filigree first layer also adhered perfectly to the print bed and I didn’t need any aids like Magigoo or Blue Tape.
Anycubic Kobra VS. Ender 3 V2 VS. Ender 3 S1
The Anycubic Kobra’s biggest competitors are two 3D printers from Creality, the Ender 3 V2 and its successor the Ender 3 S1. They all have a comparable print volume and similar print quality.
However, the print quality does not always correspond to the layer thickness values specified on paper but depends on many other factors. These include certain features such as the extruder and the positioning accuracy of the axes.
I have practically tested these three devices myself. If I were to rank the 3D printers in order of print quality, the Ender 3 S1 would be first, the Anycubic Kobra second, and the Ender 3 V2 third.
The same order results when you compare the features. The direct drive extruder system of the Ender 3 S1 is extremely sophisticated and very light. As a result, the positioning accuracy and print speed are a lot better than the Anycubic Kobra. In addition, the noise level of the Ender 3 S1 is much quieter.
If price is not an issue, the Ender 3 S1 is the better 3D printer. Its price-performance ratio is so good that I would recommend it even at a higher price.
Otherwise, you can’t go wrong with the Anycubic Kobra. If you don’t care about its volume, you have an almost perfect entry-level 3D printer!
| Anycubic Kobra | Ender 3 V2 | Ender 3 S1 | |
|---|---|---|---|
| Size: | 487 x 433 x 645 mm | 475 x 470 x 620 mm | 487 x 453 x 622 mm |
| Print volume: | 220 x 220 x 250 mm | 220 x 220 x 250 mm | 220 x 220 x 270 mm |
| Display: | color 4.3 inch LCD touch screen | color 4.3 inch LCD display with rotary knob | color 4.3 inch LCD display with rotary knob |
| Structure: | mostly pre-assembled (~ 15 min.) | Partially pre-assembled (> 45 min.) | mostly pre-assembled (~ 15 min.) |
| Extruder: | Direct Drive | Bowden | Direct Drive |
| Print bed leveling: | Automatic | Manual | Automatic |
| Accuracy: | 0,1 mm | 0,1 mm | 0,1 mm |
| Min. layer thickness: | 0,05 mm | 0,1 mm | 0,05 mm |
| Nozzle: | 1 x 0.4 mm | 1 x 0.4 mm | 1 x 0.4 mm |
| Filament: | 1.75 mm (PLA, ABS, PETG, TPU) | 1.75 mm (PLA, ABS, PETG, TPU) | 1.75 mm (PLA, ABS, PETG, TPU) |
| Max. nozzle temperature: | 260 °C | 255 °C | 260 °C |
| Max. print bed temperature: | 110 °C | 100 °C | 100 °C |
| Print speed: | 50 mm/s (max. 100 mm/s) | 30-60 mm/s (max. 180 mm/s) | 30-60 mm/s (max. 150 mm/s) |
| Volume: | 49 dB | 41 dB | 34 dB |
| Resume print: | Yes | Yes | Yes |
| Filament sensor: | No | No | Yes |
| Double Z-axis | No | No | Yes |
| Tool drawer | No | Yes | Yes |
| Print bed: | PEI on spring steel, flexible, magnetic | Textured glass bed | PC on spring steel, flexible, magnetic |
Check Price at:
Is the Anycubic Kobra Worth It?
The Anycubic Kobra* is definitely worthwhile for anyone looking for a user-friendly, medium-sized 3D printer with reliable print quality. Due to its easy assembly and automatic print bed leveling, this device almost belongs to the “plug & play device” category.
Anycubic has found a good balance of spartan design and comfortable features without overloading the 3D printer unnecessarily. This makes it very easy to use and the price is low – a clear buy recommendation!
If you like the new Kobra, check out the Kobra Max* too!
Similar 3D Printers
Creality Ender 3 S1
The Ender 3 S1 has a print volume of 220 x 220 x 270 mm, can be automatically leveled and has a flexible magnetic PC print bed made of spring steel. Its extremely lightweight direct drive extruder and double Z-axis guarantee high print quality.
Check Price at:
Voxelab Aquila S2
The Voxelab Aquila S2 has a print volume of 220 x 220 x 240 mm and a print bed made of flexible spring steel with PEI coating. Its direct drive extruder is very well suited for flexible filaments and can also be used for exotic filament types as it reaches up to 300 °C.
Disclosure: This website is the property of Martin Lütkemeyer and is operated by Martin Lütkemeyer. Martin Lütkemeyer is a member of the Amazon Services LLC and other Affiliate Programs. These are affiliate advertising programs designed to enable websites to earn advertising revenue through advertising and linking to Amazon.com and others. Links marked with * are affiliate links.
