
- Wet Filament: Prevention, Symptoms & Drying - July 18, 2024
- Sovol SV08 – Best PrusaSlicer Settings & Profile - June 26, 2024
- Sovol SV08 – Best Orca Slicer Settings & Profile - June 26, 2024
Disclosure: Links marked with * are Affiliate Links. I earn from qualifying purchases if you decide to make a purchase through these links – at no additional cost for you!
A dirty or clogged 3D printer nozzle can cause various printing errors or even prevent extrusion altogether. Inevitably, each nozzle must be cleaned or replaced.
Depending on how dirty or clogged the nozzle of your 3D printer is, I will show you the best cleaning method in this article.
At the end of the article, you will find preventive measures to keep the nozzle from clogging and the most extensive cleaning measures.
Table of Contents:
Nozzle Cleaning Methods
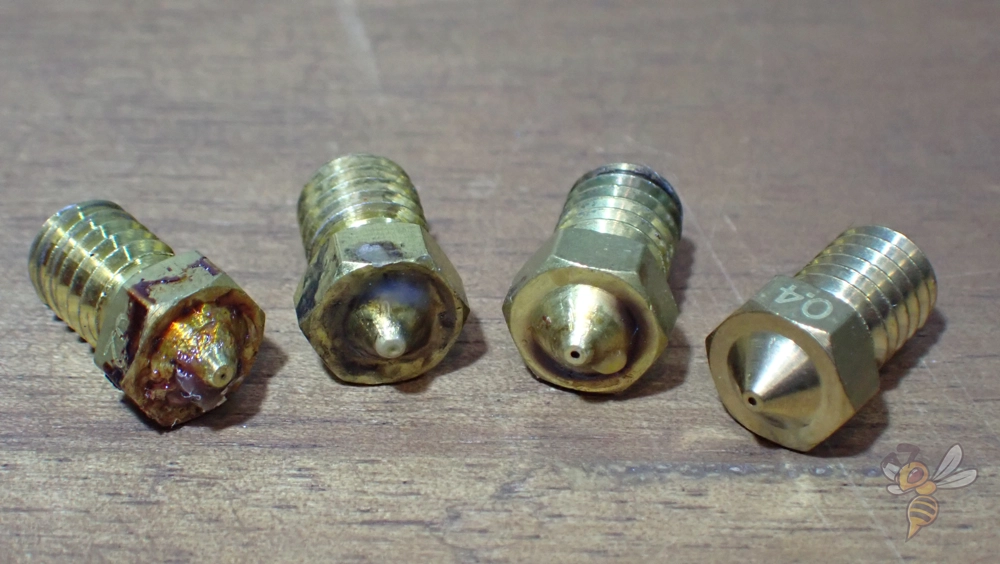
There are many methods on how to clean a 3D printer nozzle. Depending on how dirty the nozzle is, there are different methods for cleaning it. In some cases, you may even need to replace the nozzle.
To help you find the right cleaning method as quickly as possible, I have sorted the cleaning methods according to the degree of contamination of the nozzle.
CAUTION: Be careful not to touch the hot nozzle with your fingers. The temperatures are so hot that burns can occur immediately.
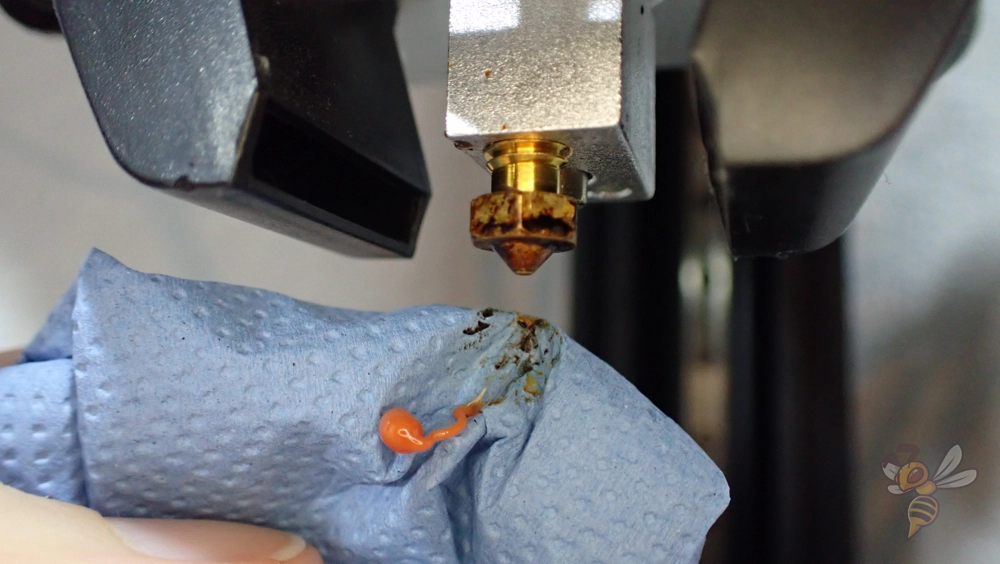
Paper Towel

When to use?
- Before each print, if filament has collected on the nozzle during heating.
- After each print, if filament has collected on the nozzle during printing.
How to use?
- Heat the nozzle to the printing temperature of the filament.
- Clean the nozzle with a paper towel (Attention: hot!)
- A little water enhances the effect.
Symptoms and consequences without cleaning:
- The liquid filament burns onto the nozzle.
- Stronger cleaning methods must be used earlier and more often.
- Stringing
How to prevent / delay?
This cleaning method is relatively self-explanatory. Be careful not to burn yourself in the process, though! Paper towels are thin, so you can burn yourself quickly.
For an even stronger effect, you can put a bit of water on the paper towel. The resulting steam will loosen the filament even better.
This cleaning method is also the best prevention for stronger residues. I have gotten into the habit of wiping the nozzle once with a paper towel before each print. This way, you rarely have to use stronger measures for cleaning.
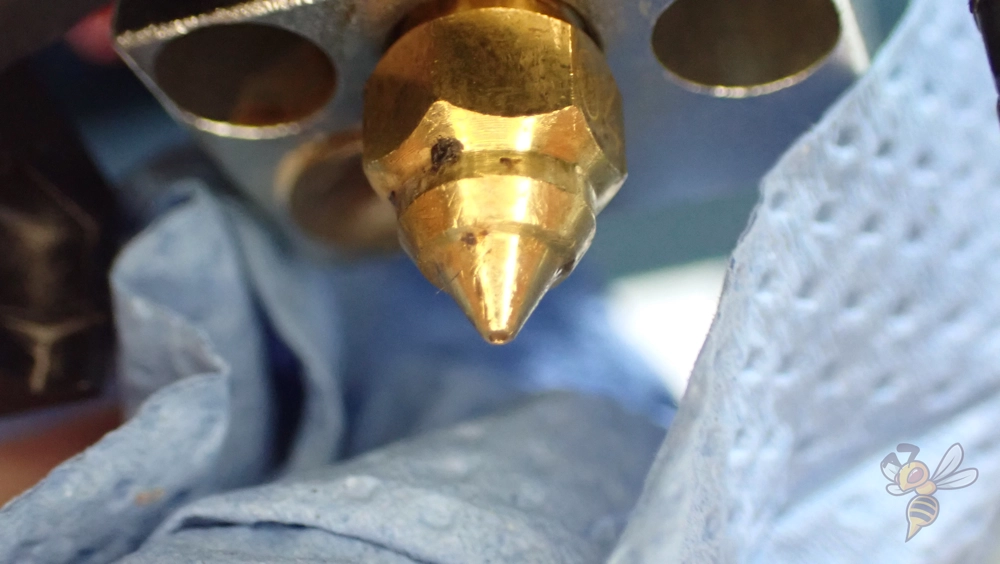
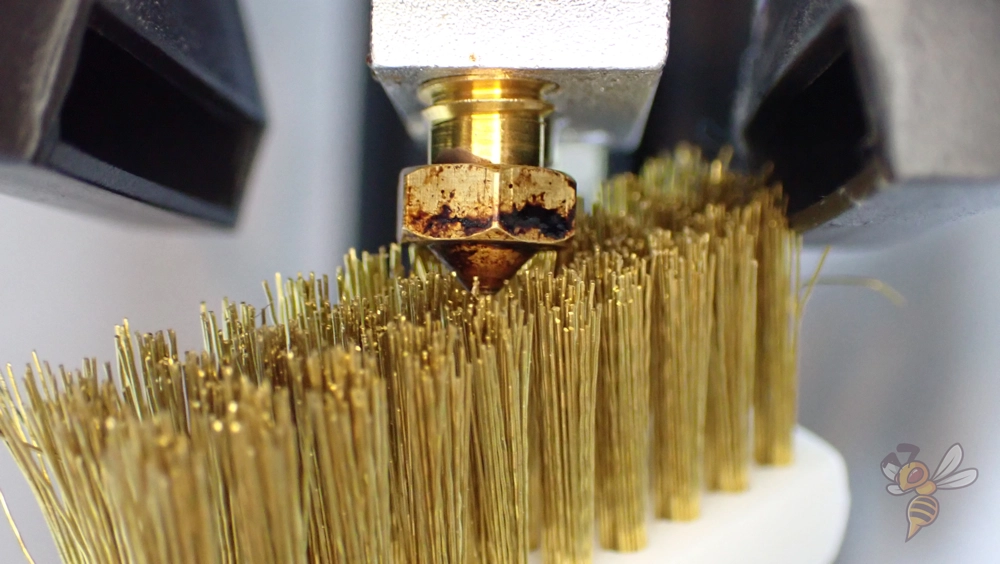
Wire Brush
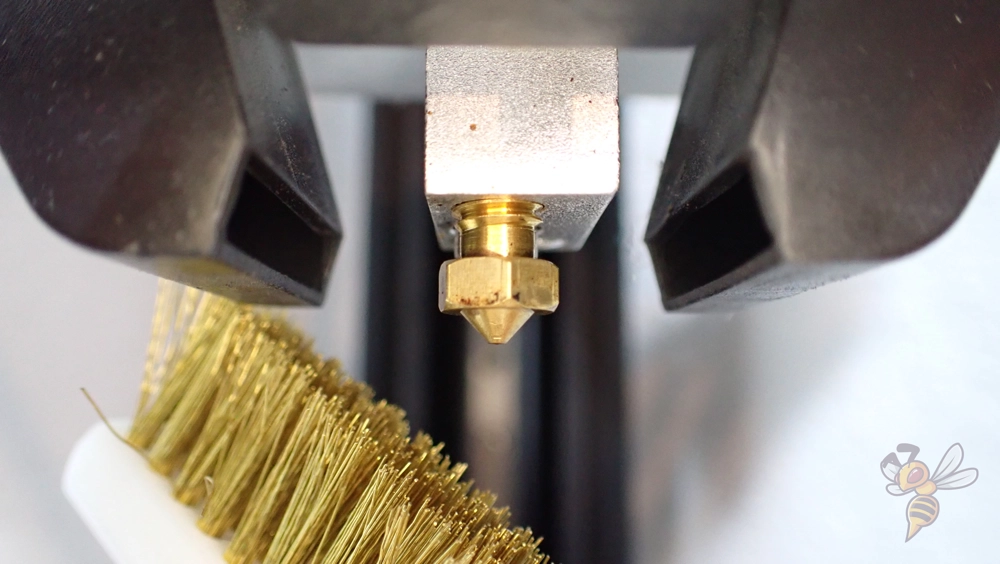
When to use?
- In case of heavy deposits.
- If stringing becomes more frequent and severe.
How to use?
- Carefully brush the nozzle from all sides with the wire brush.
- Do not overdo it, as a wire brush can damage the nozzle eventually.
Symptoms and consequences without cleaning:
- Clogging occurs more frequently.
- The more deposits, the more stringing.
- Deposits can become detached and incorporated into the object during extrusion.
- Protruding debris can collide with already printed filament and get on or displace it.
How to prevent / delay?
- Wipe still liquid filament off the nozzle before and after a print (see above ⇧).
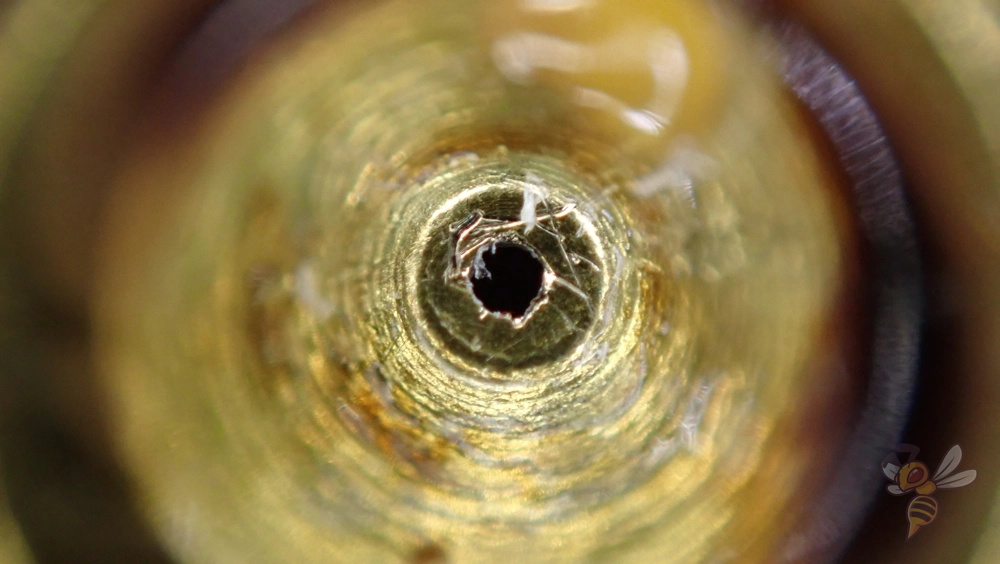
Liquid filament that remains on the hot nozzle turns black and deposits there in thin layers. Depending on how strongly they are burned in, they can then no longer be removed with a damp cloth.
Irregular deposits on the nozzle can lead to increased stringing. The extruded filament likes to adhere to these deposits and can partially stick there and pull threads.
Over time, heavy deposits can protrude over the opening of the nozzle and partially or completely clog it from the outside. Also, these deposits can come off during printing and cause unsightly stains on the object.
Since a wire brush is made of metal, overuse can also cause scratches on the surface of the nozzle. Therefore, be especially careful near the opening so you don’t create dents.
Cleaning Filament
When to use?
- Regularly to prevent clogging.
- For deposits and blockages.
How to use?
- For few deposits and partial clogging: Extrude cleaning filament at 200 to 230 °C until clear.
- For complete clogging: Apply Cold-Pull (see below ⇩).
Symptoms and consequences without cleaning:
- Accumulating deposits inside the nozzle can lead to clogging.
- No extrusion due to complete clogging.
- Extruder cracks when clogging prevents or greatly reduces extrusion.
- Under-extrusion due to partial clogging when too little filament is extruded.
- Inconsistent extrusion due to pressure building up and spontaneously releasing in the nozzle in case of partial clogging.
How to prevent / delay?
- Store filament clean and dust-free (see below ⇩)
- Use high-quality filament (see below ⇩)
- Use a nozzle with a larger diameter (see below ⇩)
Cleaning filament is a special filament that is not used for printing, but only for cleaning the nozzle. It has special properties and some adhesive in it so that it can remove deposits inside the nozzle as effectively as possible.
Ideally, it should be used regularly to remove deposits inside the nozzle. This involves heating the nozzle to 200 to 230 °C and extruding the cleaning filament. As soon as the cleaning filament comes out of the nozzle clean, the cleaning is complete.
You can also use cleaning filament to remove partial and complete blockages. To do this, you use the cold pull method with cleaning filament (see below ⇩). This makes this method even more effective because the cleaning filament can grip the deposits in the nozzle even better than normal filament.
I clean my 3D printer with cleaning filament every few weeks. Especially if I have used filament with additives, this cleaning pays off to prevent damage to the nozzle and clogging.
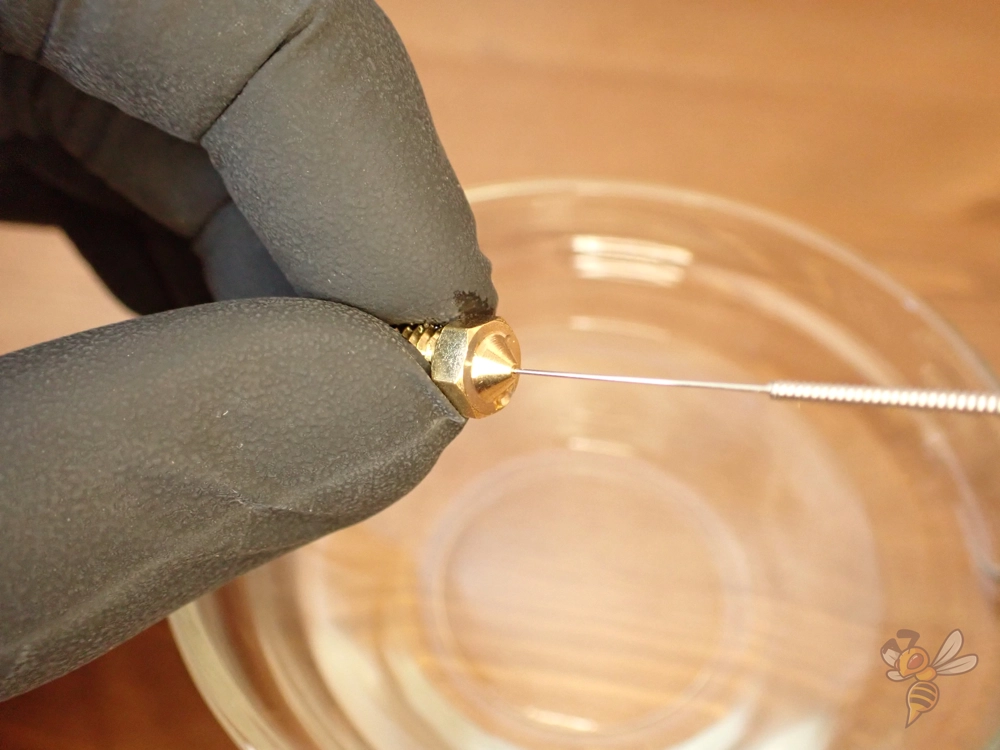
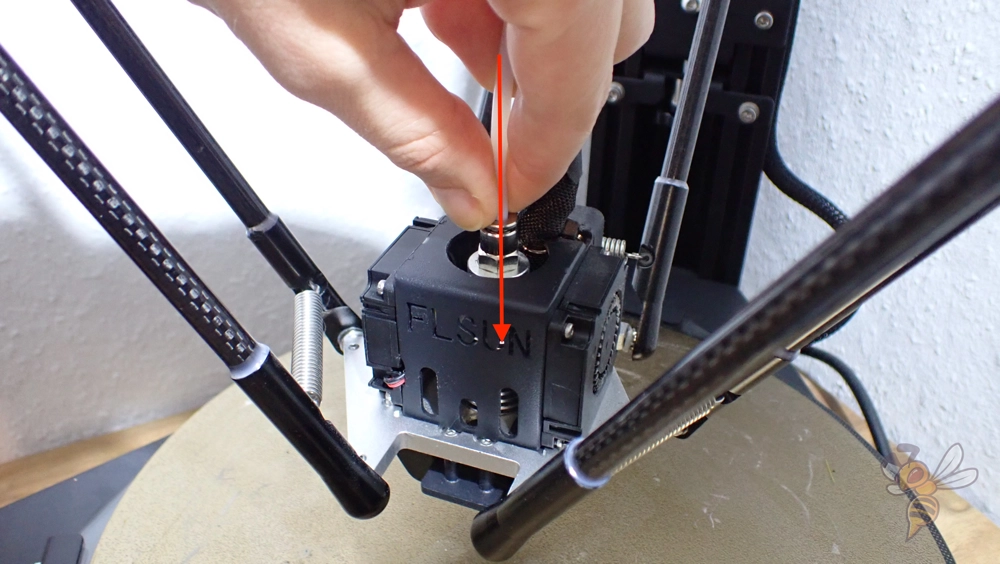
Needle
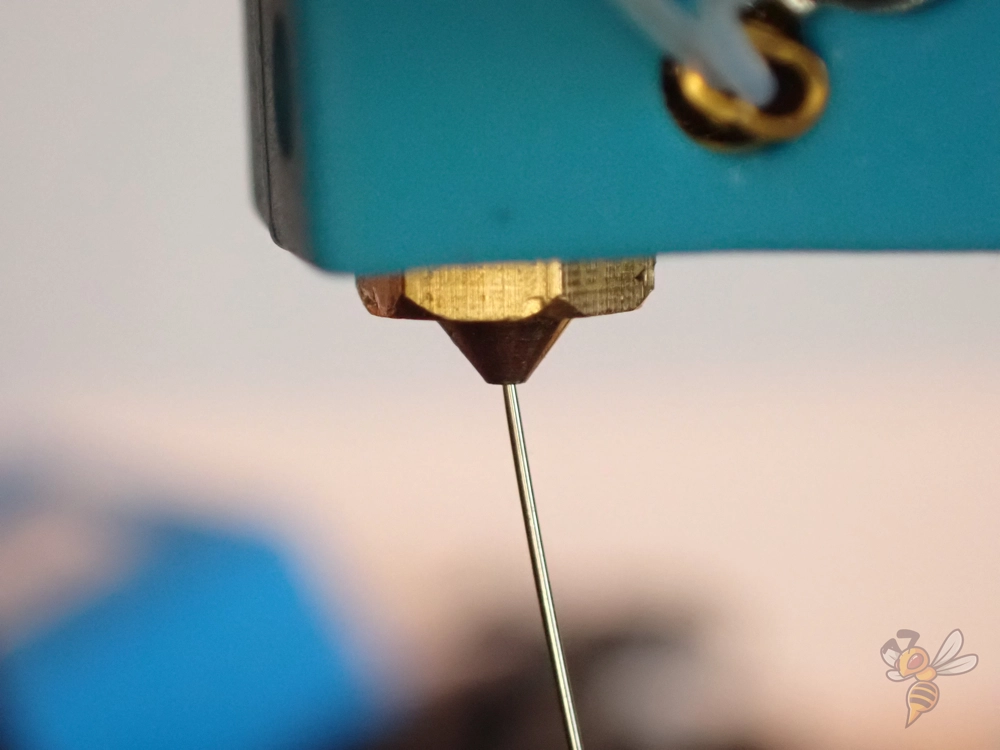
When to use?
- For partial or complete clogging.
How to use?
- Insert a fine needle into the nozzle at print temperature.
- Gently move the needle back and forth until the clog loosens.
- The broken up debris from the clog will come out of the nozzle as filament is extruded.
- Ideally, use cleaning filament afterward.
Symptoms and consequences without cleaning:
- No extrusion due to complete clogging.
- Extruder cracks when clogging prevents or greatly reduces extrusion.
- Under-extrusion due to partial clogging when too little filament is extruded.
- Inconsistent extrusion due to pressure building up and spontaneously releasing in the nozzle in case of partial clogging.
How to prevent / delay?
- Use cleaning filament regularly (see above ⇧)
- Store filament in a clean and dust-free place (see below ⇩)
- Use high-quality filament (see below ⇩)
- Use a nozzle with a larger diameter (see below ⇩)
Use a needle to easily remove light clogs. Heat the hotend to the printing temperature of the last filament and poke around in the nozzle with the needle until you can easily pass it through.
The thickness of the needle must match the diameter of the nozzle. If you use too thick a needle, you could damage the nozzle. Also, the needle should be long enough so that you can insert it far enough into the nozzle without touching it with your fingers.
The best needles to use are those from special cleaning kits for 3D printers*. The needles from these sets are adapted to the thickness of the nozzles and fit perfectly in the hand.
Be especially careful with standard brass nozzles, as they are relatively soft and can be quickly damaged by a needle. If you accidentally damage the opening of the nozzle, stringing can result.
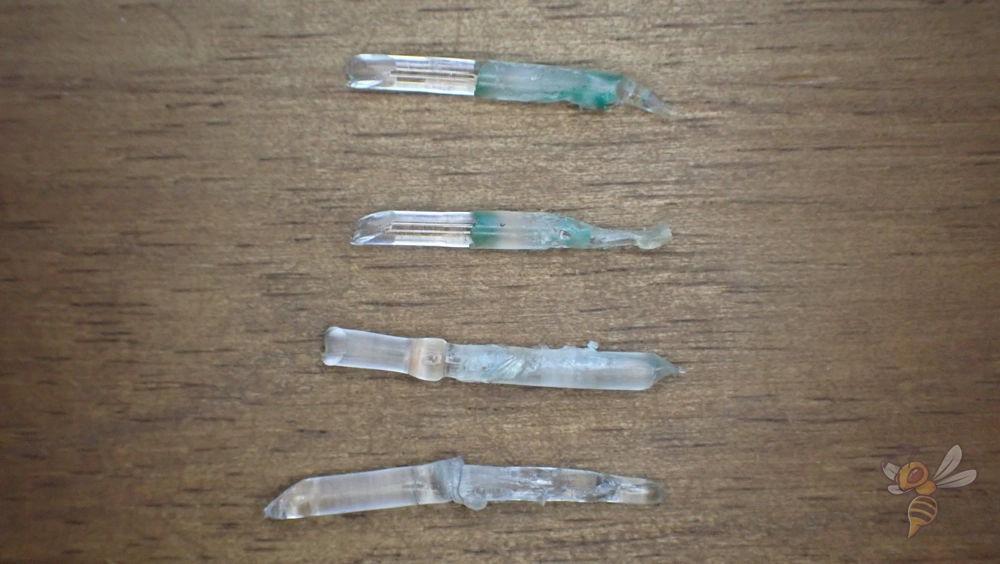
Cold-Pull
When to use?
- For partial or complete blockages.
How to use?
- It is best to use nylon or PETG for this purpose. PLA could snap inside of the hotend.
- Use a neutral color like white, transparent or gray.
- Heat the nozzle to the printing temperature of the filament.
- Load the filament as far as it will go into the nozzle.
- Cool the nozzle while pushing the filament further towards the nozzle.
- Reheat the nozzle to printing temperature and pull on the filament while doing so.
- The filament will come off with a jerk, pulling debris along with it.
- Repeat the process until no more debris sticks to the filament and the clog is cleared.
Symptoms and consequences without cleaning:
- Accumulating debris inside the nozzle can cause clogging.
- No extrusion due to complete clogging.
- Extruder cracks when clogging prevents or greatly reduces extrusion.
- Under-extrusion due to partial clogging when too little filament is extruded.
- Inconsistent extrusion due to pressure building up and spontaneously releasing in the nozzle in case of partial clogging.
How to prevent / delay?
- Use cleaning filament regularly (see above ⇧)
- Store filament in a clean and dust-free place (see below ⇩)
- Use high-quality filament (see below ⇩)
- Use a nozzle with a larger diameter (see below ⇩)
The cold-pull method is very effective for cleaning a clogged 3D printer nozzle. However, it is also somewhat more complex and requires special filament. To prevent the filament from tearing in the hotend when you pull on it, you should choose either nylon or PETG. Very rigid filaments like PLA might snap and clog the hotend even more.
While cooling, continue to push the filament hard towards the nozzle. This will cause it to flow around any debris. When you pull it out again during heating, you will notice that it has partially taken the complete shape of the nozzle.
Depending on how badly your 3D printer’s nozzle is clogged, you may need to repeat the cold pull method several times. It is not uncommon for this to take more than three or five repetitions until all debris is removed.
Note: Sometimes the cold pull method is also called hot pull or atomic pull. However, in all of these methods, the only difference is the temperature at which you pull the filament back out. In my experience, the cold-pull method, i.e. when pulling on the filament immediately, is the most effective.
Acetone Bath
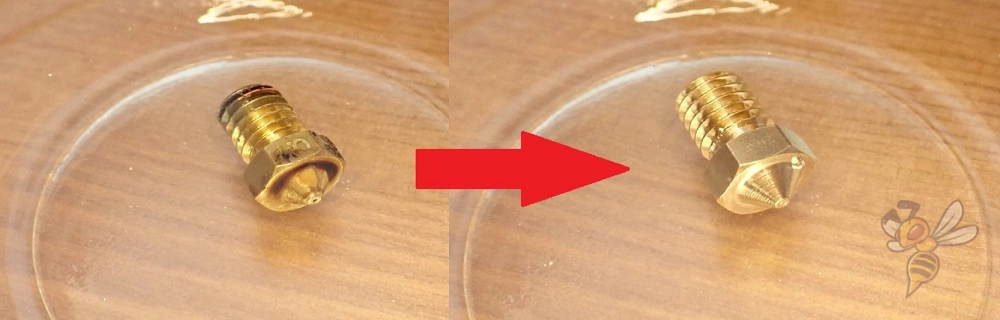
When to use?
- For severe clogging.
- Most effective with ABS.
How to use?
- Heat up to printing temperature.
- Remove nozzle and wait until it has cooled to room temperature.
- Place nozzle in acetone.
- Wait several hours.
- If necessary, use a needle to loosen deposits inside.
- Rinse the nozzle with water.
- Reinstall the nozzle.
Symptoms and consequences without cleaning:
- No extrusion due to complete clogging.
- Extruder cracks when clogging prevents extrusion.
How to prevent / delay?
- Use cleaning filament regularly (see above ⇧)
- Store filament clean and free of dust (see below ⇩)
- Use high-quality filament (see below ⇩)
- Use a nozzle with a larger diameter (see below ⇩)
Acetone is a solvent for many plastics. Therefore, it is also often used for gluing, as it fuses the two surfaces together. However, the effectiveness of acetone varies depending on which filament it is applied to. Nevertheless, it dissolves filament residues even inside the nozzle, either partially or completely.
For very stubborn clogs, you can then simply break up the loosened deposits inside the nozzle with a needle and rinse again with acetone.
When handling acetone, you should wear gloves to protect your skin. Although acetone is also used as a nail polish remover and will inevitably touch your skin there, prolonged contact such as when cleaning a nozzle can cause irritation.
After cleaning the nozzle with acetone, you must rinse it with water and dry it. If liquid acetone remains in the nozzle, this can have a negative effect on the next print result.
Depending on how valuable your time is and if you have acetone available, it may make more sense to simply replace the nozzle. Especially with standard brass nozzles, the price is usually so low that the effort of an acetone bath is not worth it.
Replace the Nozzle
When to use?
- In case of very severe blockages that can only be removed with great effort.
- If the nozzle is damaged.
- If an inexpensive brass nozzle is used, it is often worth replacing the nozzle instead of cleaning it.
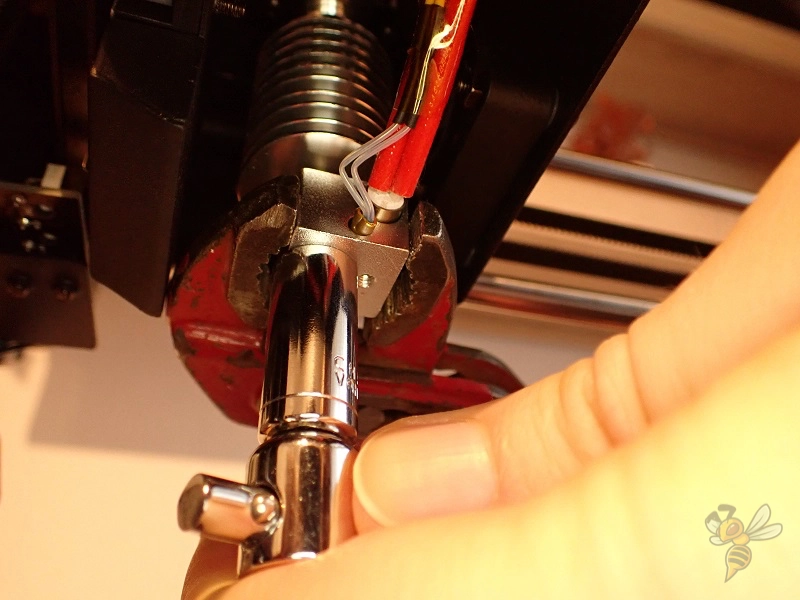
How to use?
- Heat the nozzle to the printing temperature of the last filament.
- Use a suitable tool to rotate the nozzle out of the hot end (danger of burns!).
- Mount a new, clean nozzle.
Symptoms and consequences without cleaning:
- No extrusion due to complete clogging.
- Extruder cracks when clogging prevents extrusion.
How to prevent / delay?
- Use cleaning filament regularly (see above ⇧)
- Store filament clean and free of dust (see below ⇩)
- Use high-quality filament (see below ⇩)
- Use larger diameter nozzle (see below ⇩)
- Loosen clogs in an acetone bath (see above ⇧).
Sometimes the nozzle is so badly clogged that the usual cleaning methods fail or require a great deal of effort. Depending on what kind of nozzle you used, it might be worth just replacing it.
Regular brass nozzles are very inexpensive and can be replaced easily if they become extremely worn or clogged.
If you’re working with a filament with additives, a hardened nozzle* might be worth considering. This will prevent wear and tear on the inside.
In a professional context, a ruby nozzle* might even be worthwhile here. They are, of course, considerably pricier than other variants, but in return, they last extremely long, usually even longer than the 3D printer itself.
Prevention
Most cleaning methods for a clogged nozzle can be avoided with the right prevention.
In addition to using cleaning filament, there are other prevention measures. Used properly, they can prevent your 3D printer’s nozzle from becoming clogged with debris.
Keep the Filament Clean and Dust-Free
Often the cause of nozzle clogging is due to dusty filament. Dust that is deposited on the filament and fed through the extruder to the nozzle can collect and clump there.
While very little dust enters the nozzle this way, over time enough dust can still collect and cause clogging. So keeping the filament clean and dust-free is essential in preventing clogging.
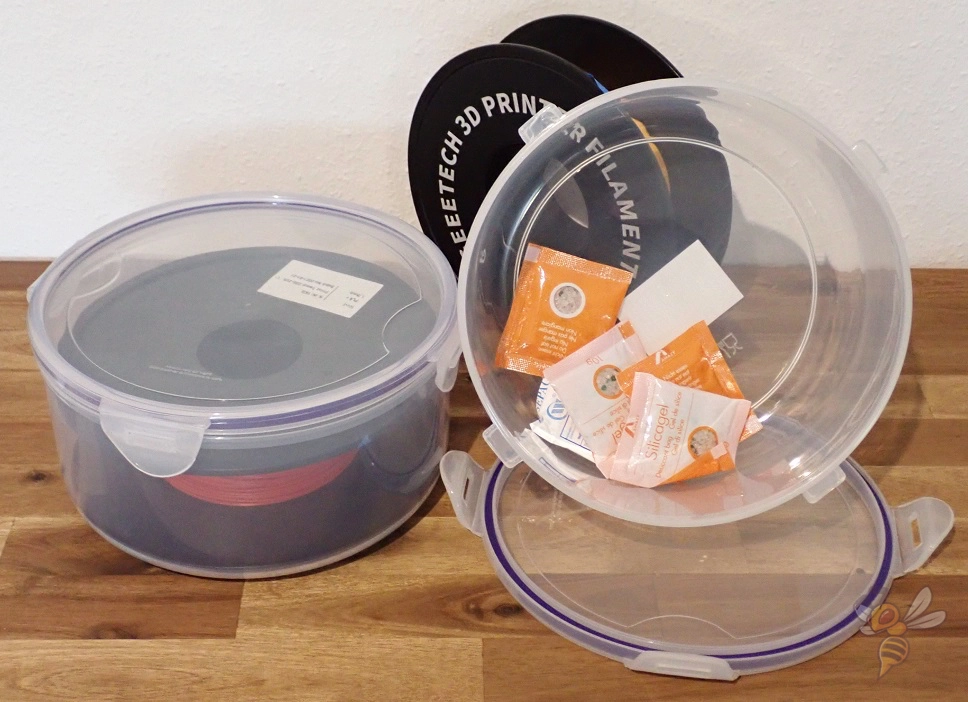
One of the easiest ways to store filament that is not only clean but also dry is to use suitable containers with a desiccant such as silica gel*.
Check Price at:
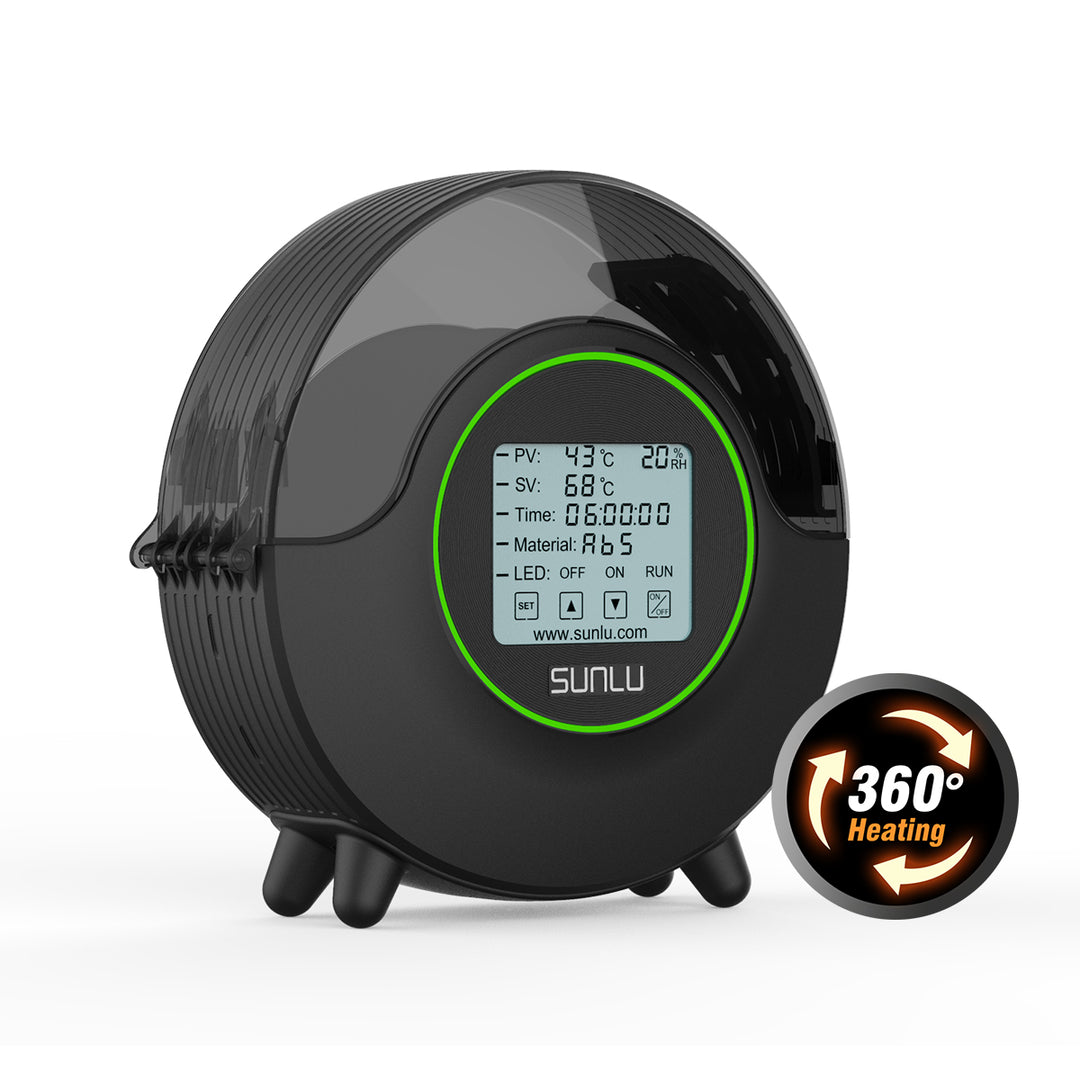
For highly hygroscopic filaments such as PETG, it may also be worthwhile to use a filament dryer, which not only stores the filament dust-free, but can also dry it before printing. The filament is fed from the dryer directly to the extruder, which means that virtually no dust can collect on it.
Use a Larger Nozzle
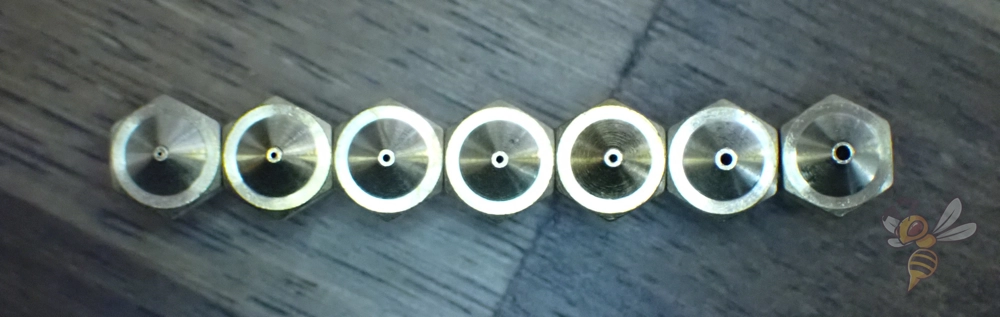
The probability of clogging decreases with the diameter of the nozzle. If you use a nozzle with a large diameter, deposits in the nozzle can be extruded out more easily.
Especially for filaments with additives, a wider nozzle is worthwhile because the additives in the filament have more space in the nozzle. Some such filaments have large wood fibers, for example, which can quickly cause clogging in fine nozzles.
Have a look at this article to find the right layer height for your nozzle: 3D Printing Layer Height vs. Nozzle Diameter – Table & Guide
Use High-Quality Filament
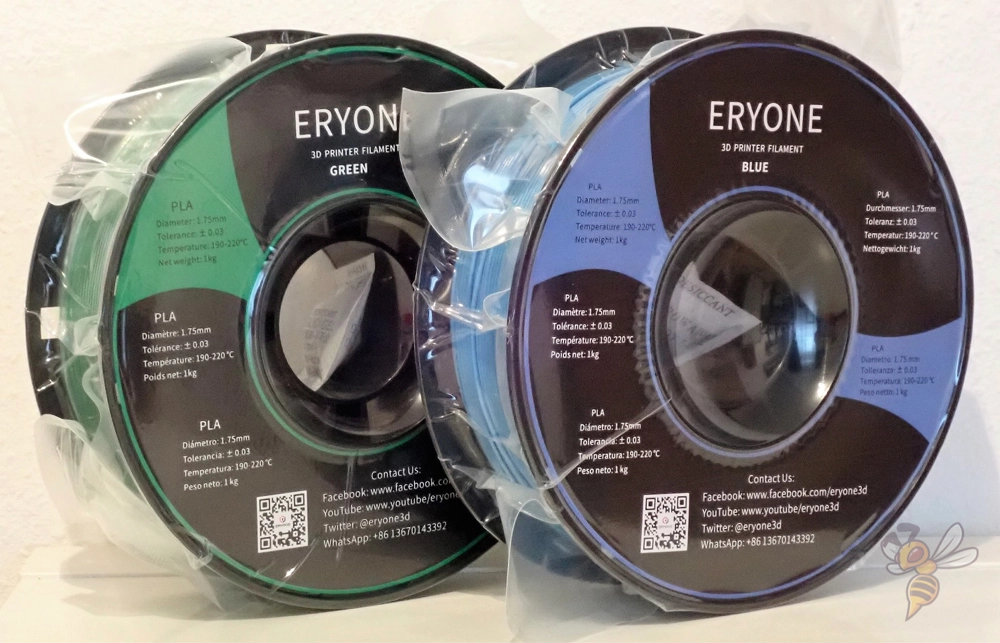
In rare cases, the filament itself may have caused the clogging of a nozzle. Low-quality filament often contains lumps or even foreign objects that can clog the nozzle.
High-quality filament is characterized by consistent properties across the entire spool. The diameter and density should also remain the same and the filament’s additives should be well mixed and homogeneously distributed over the entire spool.
To rule out inferior filament as a cause, you should stick to filaments that come from reputable manufacturers. Moreover, reviews in online stores give a good indication of whether they can cause clogging or other quality issues.
Close the PTFE Hot End Gap
Even if you follow all the preventative measures, in unfortunate cases you may still end up with a clog in the hotend of your 3D printer. Many 3D printers have some PTFE tubing between the nozzle and the extruder.
If there is a small gap between the nozzle and this PTFE tube, the filament can collect here and gradually clog the hotend. If you are very unlucky, you will have to completely disassemble the hotend to unclog it.
With a Bowden extruder, the PTFE hose is relatively long, with a direct drive extruder it is very short. With the latter, it is more complicated to rule out this cause or to remove the blockage, since the PTFE tube is only accessible if you partially disassemble the hotend.
Disclosure: This website is the property of Martin Lütkemeyer and is operated by Martin Lütkemeyer. Martin Lütkemeyer is a member of the Amazon Services LLC and other Affiliate Programs. These are affiliate advertising programs designed to enable websites to earn advertising revenue through advertising and linking to Amazon.com and others. Links marked with * are affiliate links.
