
- Wet Filament: Prevention, Symptoms & Drying - July 18, 2024
- Sovol SV08 – Best PrusaSlicer Settings & Profile - June 26, 2024
- Sovol SV08 – Best Orca Slicer Settings & Profile - June 26, 2024
Disclosure: Links marked with * are Affiliate Links. I earn from qualifying purchases if you decide to make a purchase through these links – at no additional cost for you!
PLA is the most widely used filament for hobby 3D printing. It is considered environmentally friendly, recyclable, food-safe and easy to handle. It is also inexpensive and available in many colors.
From prototypes to miniatures and fan art to spare parts, you can make just about anything out of PLA. That’s because of the properties of the material, which is derived from plant starch.
But that’s not all you need to know about PLA. In this complete guide, you will find all the answers to all questions about the most popular filament in the 3D printing hobby.
| Setting | Value |
|---|---|
| Printing Temperature | 200 °C ± 15 °C |
| Print Bed Temperature | 20 – 60 °C |
| Retraction (Bowden) | 4-8 mm at 20-45 mm/s |
| Retraction (Direct) | 0,5-2 mm at 20-45 mm/s |
| Printing Speed | 30 – 90 mm/s |
| Cooling | 100% |
Table of Contents:
PLA Best Brands
The best settings won’t help you if you use a low-quality filament. Therefore, here are the top 4 best PLA filaments before we move on to the correct print settings, print bed adhesion, and other things related to PLA.
I have tested the filaments listed here extensively myself and can fully recommend them to you!


PLA Print Settings
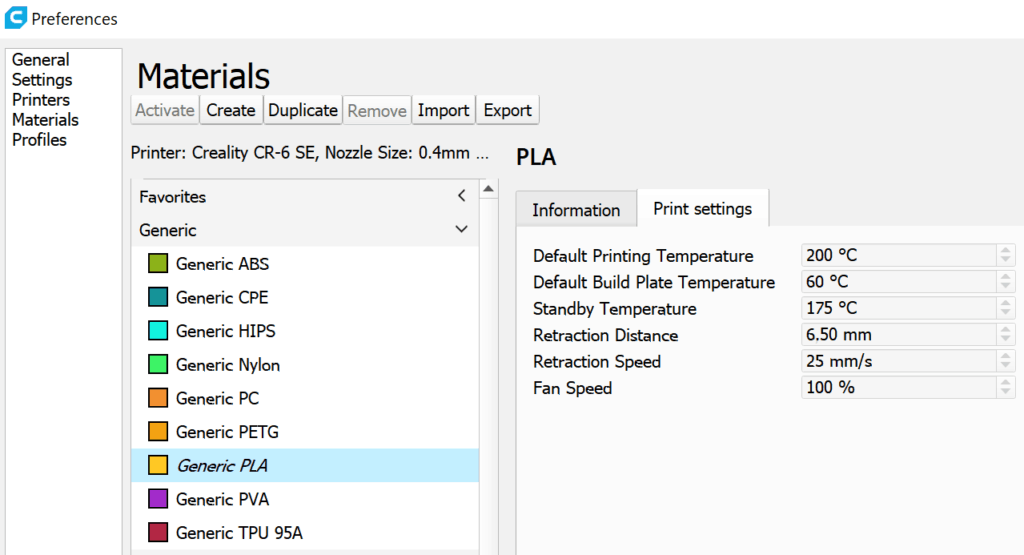
In order for your printed part to look really good in the end, the print settings have to be right. PLA is a common filament, so you will probably already find a profile for PLA in your slicer.
The manufacturers of the filaments also often specify which print settings are suitable for printing PLA. However, you often can’t use these settings exactly the same way. Because the manufacturer of the filament does not know which 3D printer you are using. And every printer is a little different.
This is an important point: not all PLA is the same, and not all printers are the same. The settings listed in the following guide are guidelines that you can use as a starting point. They are not a guarantee for a good print result.
So you should always remember: 3D printing is an adventure. Half the time you have no idea what you’re doing or why you’re doing it. You learn how to use your printer slowly and through trial and error.
You will therefore approach the ideal print settings slowly and step by step. If you change a parameter, the result changes. And with the adjustment of another parameter, the entire print model looks completely different again.
The various settings are interrelated. If something goes wrong during printing, it is rarely due to just one setting. It’s perfectly normal to slowly work your way up to the right settings over several attempts – and to keep producing misprints.
Tip: For many settings, there are special test prints with which you can optimize exactly this setting. On Thingiverse, for example, you can find numerous models for stringing or temperature settings.
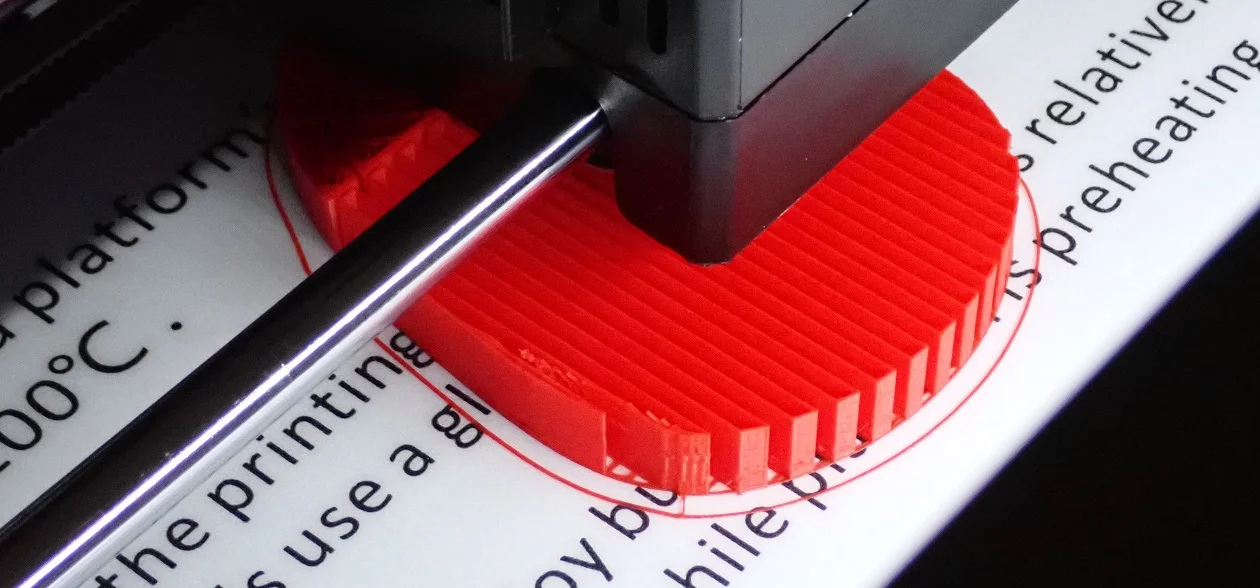
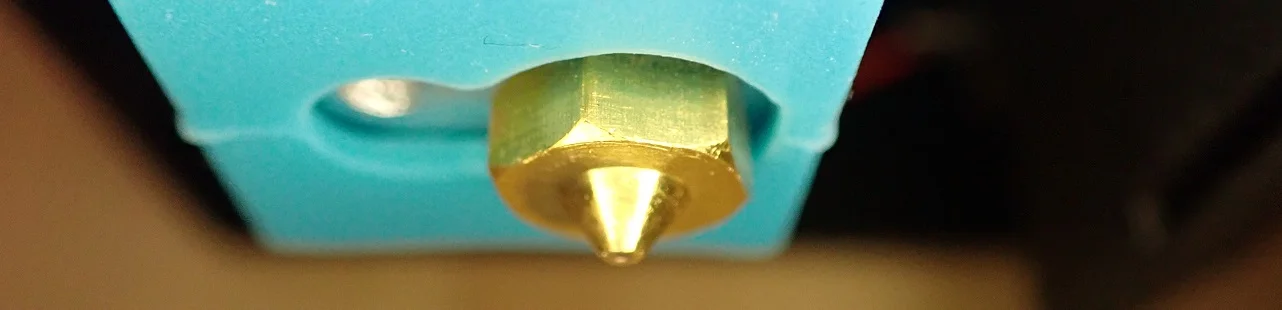
PLA Printing Temperature
200 °C ± 15 °C
200 °C is usually a good starting point for printing PLA. If it becomes apparent during printing that the temperature is not yet optimal, you can approach the perfect value in 5 °C steps until you are satisfied with the quality of the print result.
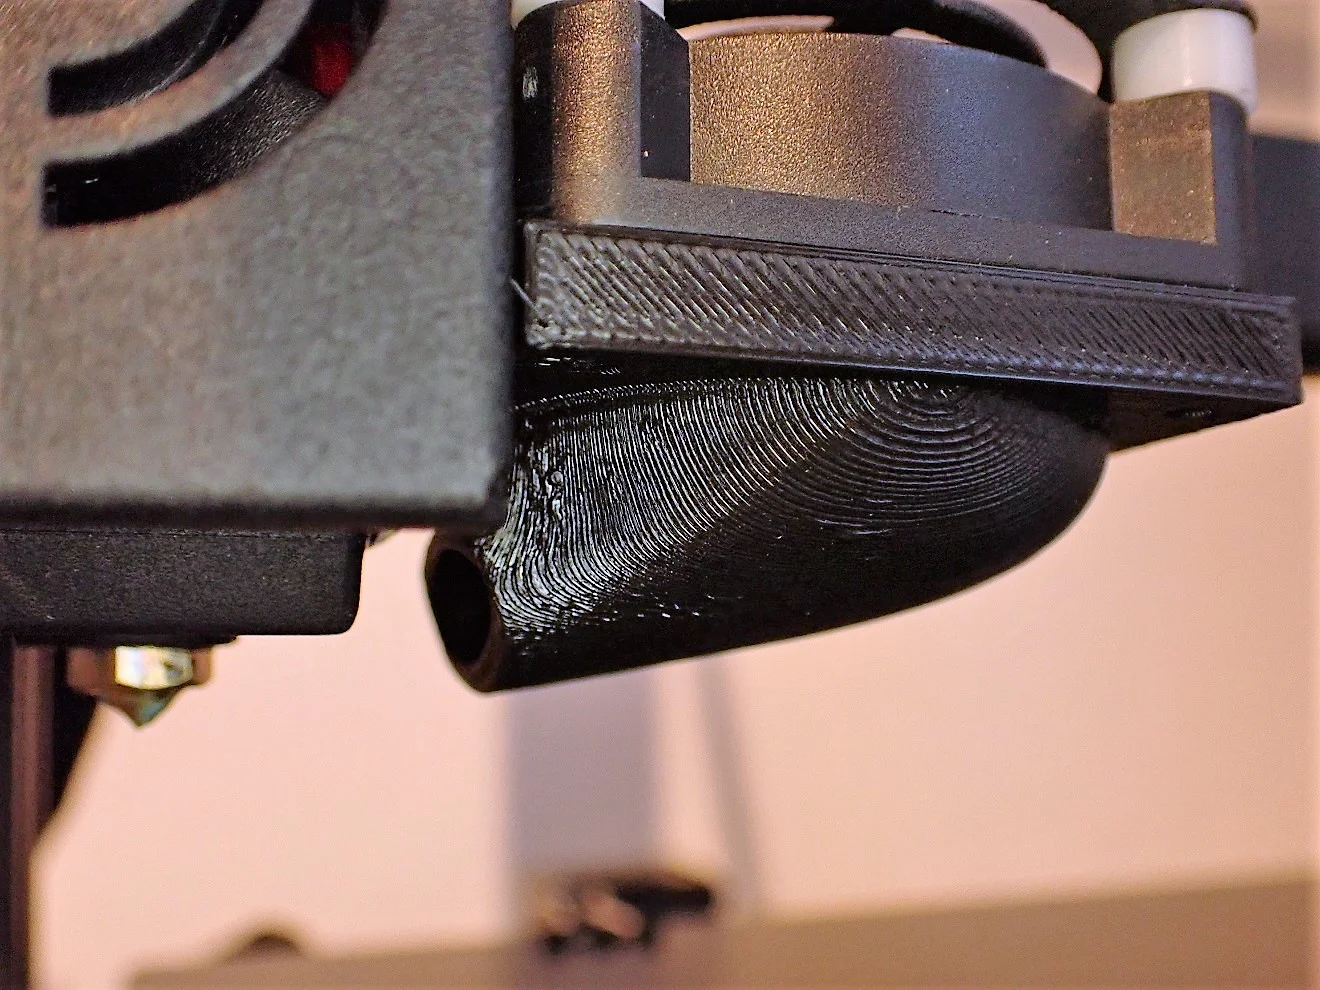
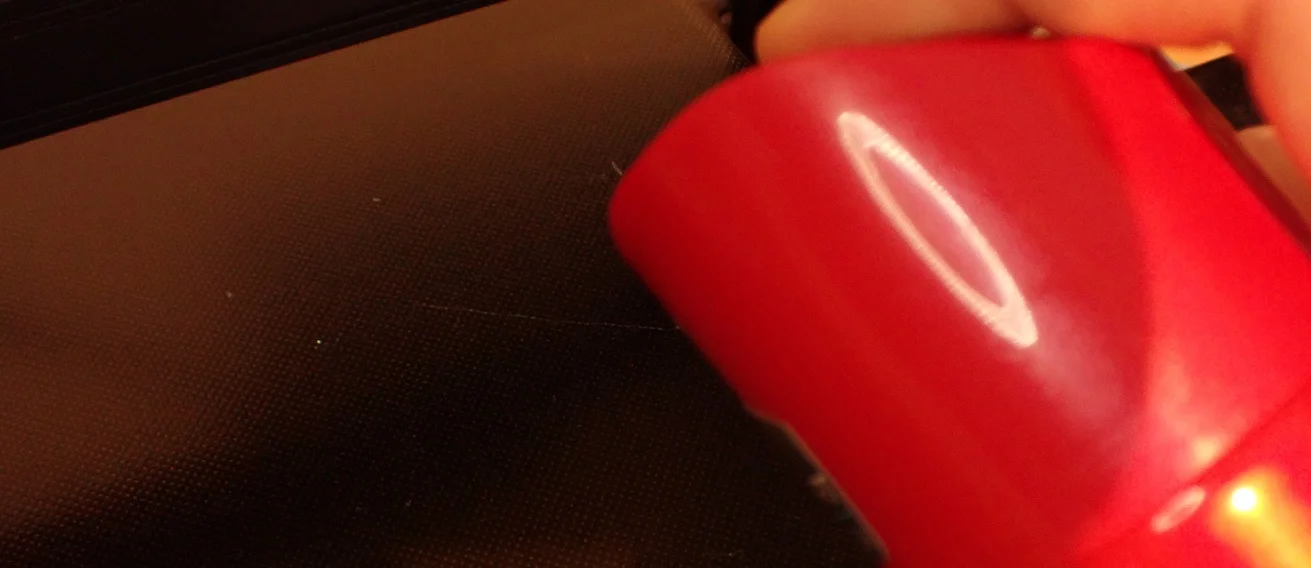
Problems are easy to spot. If the temperature is too high, you will see threads between the individual parts of your printed model. Stringing is a typical problem with too high temperatures when printing with PLA.
You can prevent this problem by lowering the temperature a little. But always do this carefully and in small steps, because a too low temperature leads to the fact that the individual layers no longer adhere to each other. Your model would then lose its strength.
Too high a temperature is not always the cause of stringing. Sometimes the retraction is not correct. If a lower temperature does not lead to the desired result, increase the retraction in small steps of 0.5 mm.
If the extruder temperature is set too low, the filament will not adhere. The individual layers will only lie loosely on top of each other and will not bond correctly. The surface of your printed model will be extra rough. Because the layers do not bond, the model is not strong enough and can be easily disassembled. It crumbles when you pull on it.
If you notice such problems, you should increase the temperature in small increments of 5 °C at a time. Just keep trying until the layers adhere well to each other.
Important to know: The temperature displayed to you in the print settings is not always exactly the same as the actual temperature at the extruder. Most of the time the print settings are a bit inaccurate. So before you are afraid of destroying your print with too high temperatures, you can simply measure first. The extruder temperature can vary by up to 10 °C between devices.
I would rather advise you to start at about 190 °C if you have never printed PLA with your 3D printer before. From there you don’t even have to experiment with lower temperatures.
What exactly the final best temperature for your PLA looks like also differs from one roll of filament to another. Admixtures for the coloring have an influence on it. And the material from different manufacturers reacts differently. The way you store the PLA also influences the behavior of the filament during printing.
Complete Post:
Best Temperatures for Extruder and Printing Bed for PLA
PLA Print Bed Temperature
20 – 60 °C
PLA doesn’t necessarily need a heated print bed. So you can print on a cold print bed, that’s perfectly fine. If the adhesion of the famous first layer on the unheated build plate is not right, you can definitely use a heated bed. Temperatures of 40 °C to a maximum of 60 °C are usually suitable.
However, this is only necessary if the first layer does not adhere. What other possibilities you have to make the first layer stick, more about that later. In the print settings, it is only about the heating plate, which you do not necessarily need.
Important to know: When it comes to print bed temperature, there is also no one right solution for PLA. How well the PLA adheres to the printing plate depends not only on the temperature but also on the printing speed, the quality of the PLA, the condition and material of the printing plate and many other parameters.
PLA can also be printed without a heating bed because the material shows no or almost no shrinkage. This makes the filament especially interesting for beginners and newcomers in 3D printing because it is very easy to process and guarantees quick success.
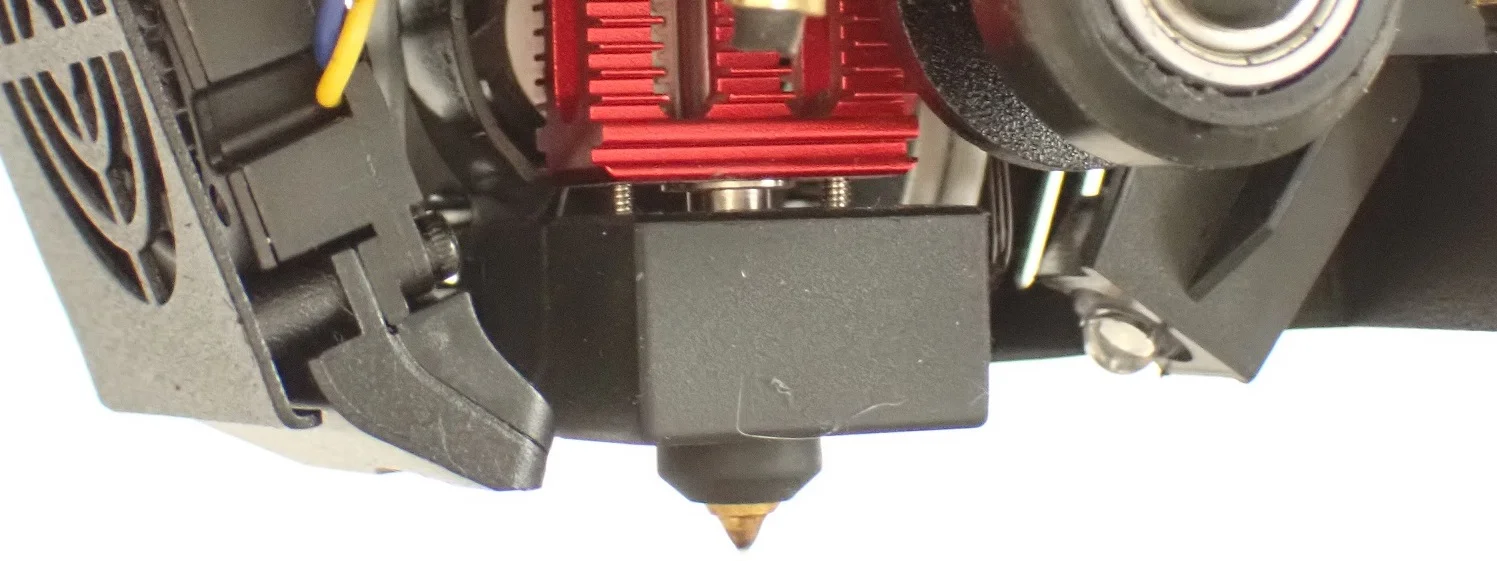
PLA Retraction
Retraction means the retraction of the filament into the nozzle. Sometimes the nozzle does not print continuously, but has to hold back the material for a short time before it continues printing elsewhere. To avoid unsightly threads running through your print model, you should set the retraction appropriately.
Slicers like Cura, for example, allow for several different settings. These are the common settings:
- Retraction Speed: 20 to 45 mm/s, adjustable in steps of 5 mm/s.
- Retraction Distance for a Direct Extruder: 0.5 to 2 mm, adjustable in steps of 1 mm each.
- Retraction Distance for a Bowden Extruder: 4 to 8 mm, also adjustable in steps of 1 mm.
- Retraction Minimum Travel: 0.1 mm, can be increased in steps of 0.5 mm each.
- Wiping distance: can be increased from 0.4 mm in steps of 0.1 mm.
- Coasting volume: 0.064 mm³, can be increased in steps of 0.01 mm³.
Which settings are useful for PLA? Orientate yourself on the profile that is already created in your slicer for PLA. If the settings are not good, you will notice stringing.
You can either remove the fine threads between the individual pieces of your print model during post-processing. Or you can experiment with the retraction settings.
Important to know: Sometimes small changes in settings really make a big difference. Try out the individual parameters and decide on the basis of the print result, which settings are appropriate for you.
By the way, PLA becomes soft at temperatures of about 40 °C. If you work with the PLA in the printer on a hot summer day, the parameters set two months earlier on a cool spring morning can be completely wrong.
This is because the heat from the nozzle transfers across the parts of your 3D printer, causing the temperature to rise everywhere. If you are experimenting with retraction, you should always take this into consideration!
Start at a speed of 25 mm/s. Make a test print. You can increase the speed by 5 mm/s at a time until you are satisfied with the result.
PLA Printing Speed
30 – 90 mm/s
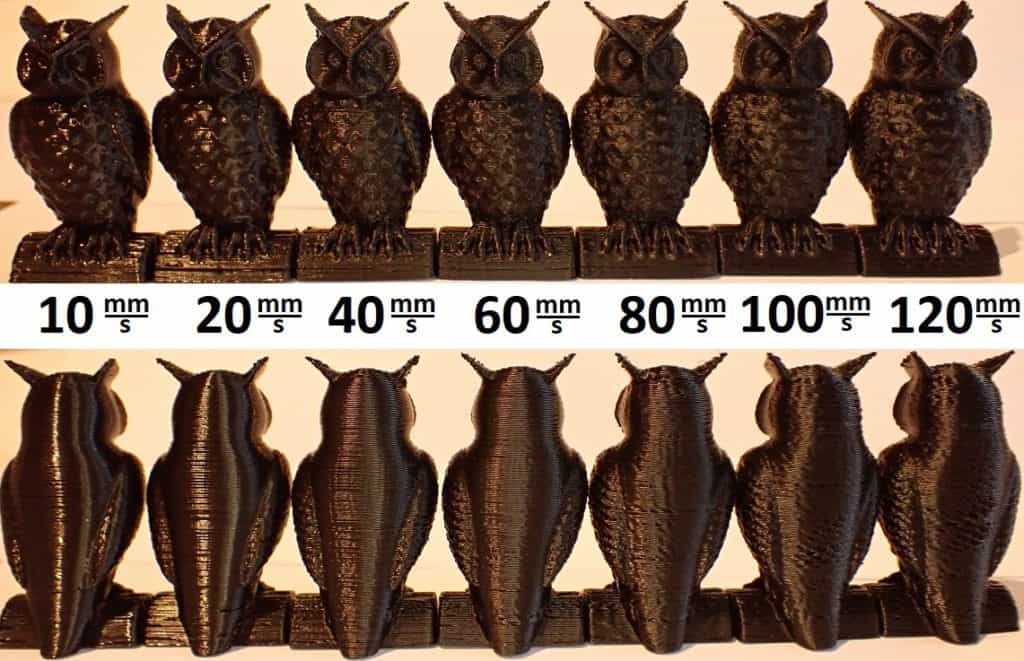
PLA is usually printed at speeds between 30 mm/s and 90 mm/s. Which setting works for you depends on the material, printer and planned model.
The print speed is one of the most important points when it comes to the quality of your printed model. The print speed controls how fast the extruder motors and the X-axis and Y-axis motors move in the printer.
If the print speed is set incorrectly, you will see it immediately. If you print too slowly, the printed material will deform. This is because the hot nozzle remains too long on the already printed model and liquefies it again. If you print too fast, however, this often leads to overheating. This is because the fan does not have time to provide sufficient cooling.
If the print speed is too low, the individual layers will not bond as well. You have four individual settings to regulate the print speed:
- The speed for printing the outer wall: For a better quality of the surface you usually set a rather low speed here.
- The speed for printing the inside walls: The speed is ideally oriented to the overall printing speed. Because this shortens the printing time and at the same time guarantees the necessary print strength and quality.
- The infill speed: The infill of the walls of your model is printed at the overall printing speed. This speed is an ideal compromise between high stability and low printing time.
- The top and bottom speed: Here we are talking about the top and bottom of your component, i.e. the first layer and the last layer, roughly speaking. For both layers, the speed should be set a little lower so that the quality of the surface is better.
In addition, you will find the setting for the travel speed in the slicer. This is how fast the print head of your 3D printer moves. However, you only set the speed that the print head has when it is not ejecting filament. Because you have already set the speed during printing with the points mentioned above.
A high travel speed is great because it saves a lot of time. Your print won’t take as long. But the speed is also related to the retraction. The longer the filament is held back, the less helpful it is. Because retained filament in the extruder can lead to clogging.
So those are already two reasons to set the travel speed as high as possible. But there is also a reason against it. If the speed is too high, your print model can warp. Sometimes the individual layers align themselves incorrectly.
Both are printing errors that you want to avoid at all costs. When setting the travel speed, you should therefore also find a compromise that is acceptable to you through trial and error. Start with the settings at 100 mm/s. Doesn’t fit? Then increase the speed by 5 mm/s. Do this until you find a compromise. Do this until you are satisfied with the result.
If you find that the print quality deteriorates with a further increase, take a step back – you have probably found the ideal speed.
PLA Cooling
Not every filament needs to be cooled, so not every FDM printer has a built-in cooler or fan. With PLA, however, the component fan is a sensible investment. Because PLA has a very low glass point.
The glass transition point is the temperature at which the material changes from a solid state to a soft state, i.e. becomes viscous. And this point is 45 °C for PLA.
Important to know: The glass point is not the melting point! PLA only becomes truly drop-liquid at even higher temperatures. Above the glass point, the material becomes ductile.
If you are printing delicate parts, the fan is important. Because the print nozzle is hot. When it applies a new layer, a hot nozzle moves over already soft material in order to apply hot, soft material. It goes without saying that this does not produce a proper print result.
Therefore, you should use the cooler so that your component does not deform. By the way, this danger exists for all structures, not only for filigree shapes. If the room temperature is somewhat higher, because you like it cozy and warm in winter or the sun is shining through the skylight in summer, the cooler is even more important.
However, you always print the first layer of PLA without cooling. This is especially important when printing on a glass build plate or on a DDP. This first layer must adhere perfectly. Only then can the cooler be adjusted.
You print your PLA at temperatures of about 190 to 205 °C. A good cooler will manage to reduce the temperature of the model by about 100 °C. So you still have a residual temperature of about 90 to 105 °C in your PLA, which softens at anything higher than 45 °C…
So it’s clear that you don’t have to be squeamish with the cooler when printing PLA. Set it to medium or high power. If you experience problems printing, you can turn the cooling down a bit.
PLA Print Bed Adhesion
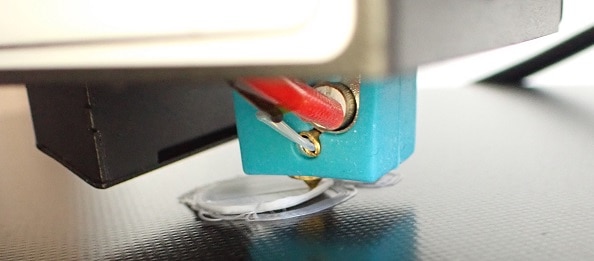
The first layer that comes out of the printer must adhere perfectly to the print bed. Because your entire printed part is built on this layer. If the first layer is screwed up, the whole model is ruined. That’s why we pay special attention to the print bed adhesion.
PLA is a bit difficult in this respect. The material is generally easy to print. But in contact with a completely cold print bed, it hardens quickly under certain circumstances and detaches from the substrate.
Also annoying is if the filament smears over the build plate when printing the first layer and doesn’t stick at all or warps. You have already received the most important tip: Don’t turn on the fan until the first layer is printed perfectly!
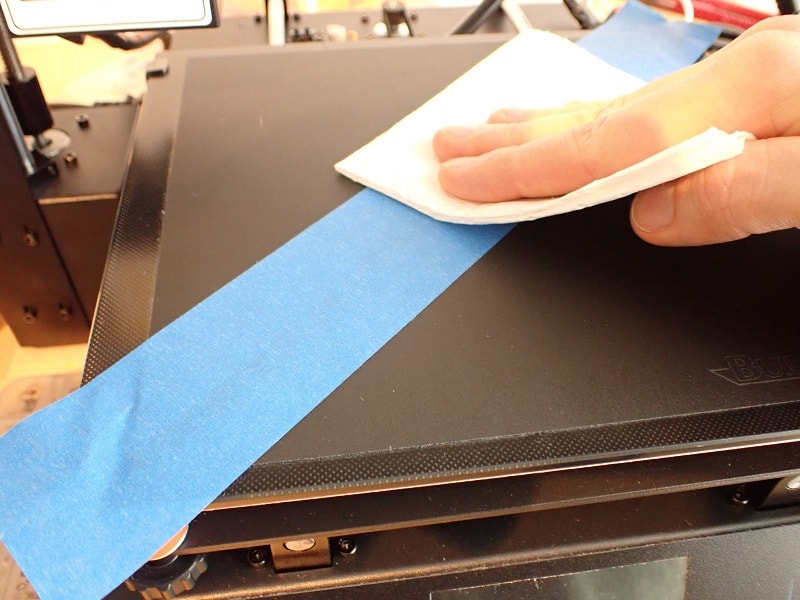
It often helps to clean the build plate thoroughly before printing (here’s an illustrated guide on how to do this). Greasy fingerprints, dust or filament residue on the plate will prevent your first layer from adhering well. Normally alcohol is used for cleaning because it removes invisible prints easily.
If you work with gloves when cleaning, the danger of new fingerprints on the printing plate is minimized. Sometimes such little things save the whole project! This also applies to the leveling of the print bed, which you should of course do before every print.
Most devices support you with the integrated leveling menu.
Related Post:
PLA 3D Print Not Sticking to the Bed? – Try This!
PLA Type of Print Bed

The material of the print bed influences how well the famous first layer adheres to it. Many print fans swear by glass*. This actually has advantages: Glass is smooth and creates a wonderfully smooth surface when the model can simply be removed from the build plate.
A heating plate can be placed under the glass plate to heat the glass. In this way, PLA in particular adheres quite passably with quite good adhesive properties.
PEI is also often mentioned when talking about the material of the print bed. It is usually a film or coating that is slightly rougher and leaves a characteristic texture on the underside of your printed model. PEI is usually applied to thin metal plates or heat-resistant plastic plates.
This has the advantage that you can take the printing plate out of the printer and bend it. Good adhesion is desirable. However, it can also lead to the print model not wanting to come off the plate – and that is undesirable.
PEI adhesive sheets* are sold individually by some manufacturers, so you can also equip your printing plate with them yourself.
PLA Blue Tape

If the first layer does not stick to the print bed even after many attempts, you can try using adhesive tape. Especially if you are not using a heated print bed, this will help.
The so-called Blue Tape from the manufacturer 3M* has established itself. This is a type of painter’s tape.
Note: When you put the tape on, there should be no overlap. The tape must be absolutely flat and smooth.
If individual areas of the tape are damaged, replace the entire Blue Tape surface. Otherwise, you will not achieve a smooth surface. Blue Tape is ideal because PLA sticks to it perfectly!
Keep in mind that when you apply tape to the printing plate, it changes the distance between the nozzle and the surface. It may be necessary to re-level the print bed.
PLA Adhesive Spray / Hair Spray
No Blue Tape at hand and the first layer just won’t hold? 3D printing can sometimes cause a lot of frustration.
Ask a lady of your choice if there’s any hairspray in the house. No kidding: The spray coats the printing plate with a slightly sticky layer. This can be enough to apply the PLA reasonably after all. After printing, the hairspray can be easily removed with a damp cloth.
If hairspray is too mundane for you, there are also special adhesive sprays*. They are more expensive than the hair care product from the discount store, but they are not as heavily scented. And they serve the same purpose, just on a professional level.
It is important that you take your building plate out of the printer before you spray it evenly with a thin layer of spray. It’s best to go into another room to do this. Hairspray should never get into your printer!
Once you have successfully printed your model and removed it from the build plate after it has cooled, clean it thoroughly. Before you print the next part, you will want to remove the hairspray.
PLA Glue Stick
Commercial glue sticks leave a smeary layer on the printing plate, which holds PLA in place during printing. If your PLA doesn’t want to stick to the plate at all, the glue stick can still make it do so.
However, you should only use the glue stick as a last resort. Because the whole thing usually turns into a real mess. Removing glue stick from the print model and building plate is no fun. Paper towels are not enough – the paper simply sticks to the greasy mass.
You won’t get anywhere with a damp or wet cloth either, because glue sticks are usually not easily soluble in water. You can see that it’s going to be unpleasant. Try to get a grip on the adhesion problems by adjusting the print settings. This usually works, so that experiments with glue are not necessary.
There are also speacial glue sticks for 3D printing!*
PLA Common Problems
3D printers always cause surprises because they simply don’t make the printed object the way it was intended. The two most common problems with PLA are warping and stringing. We briefly address both of these in the following section.
PLA Warping
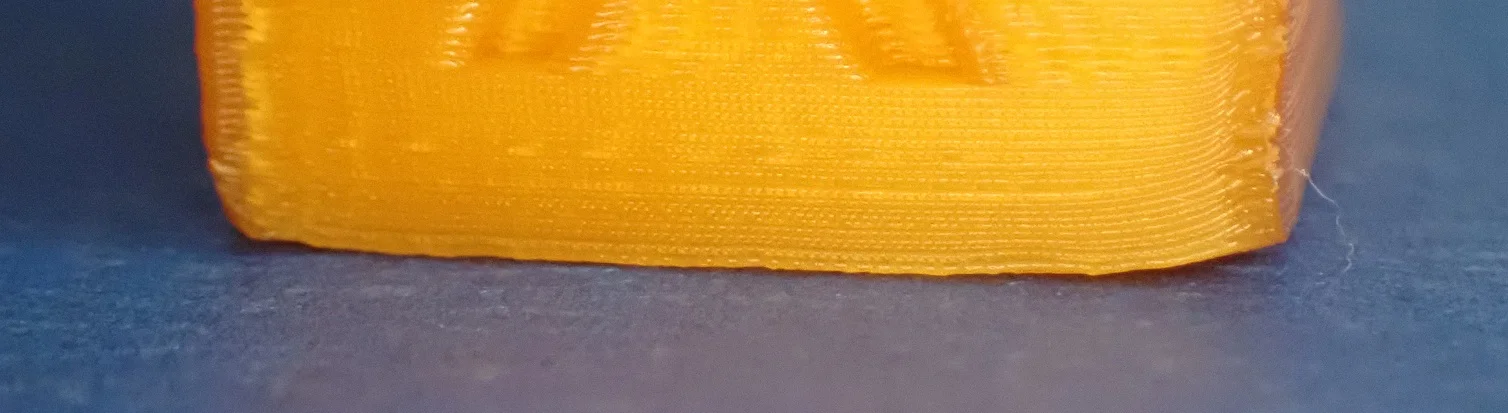
Warping occurs when the filament builds up too much tension internally. This typically happens during cooling: When the individual layers cool at different rates, the material also shrinks at different rates.
This causes the outer edges to pull upwards, the print model jumps off the build plate and warps. With PLA, warping occurs from time to time, but is rarer than with other materials. This is because PLA does not have such a high shrinkage rate when cooling down.
You can still prevent the effect. Use the hotplate when printing, do not set the fan too extreme. If the other print settings are correct, warping should not occur with PLA.
PLA Stringing
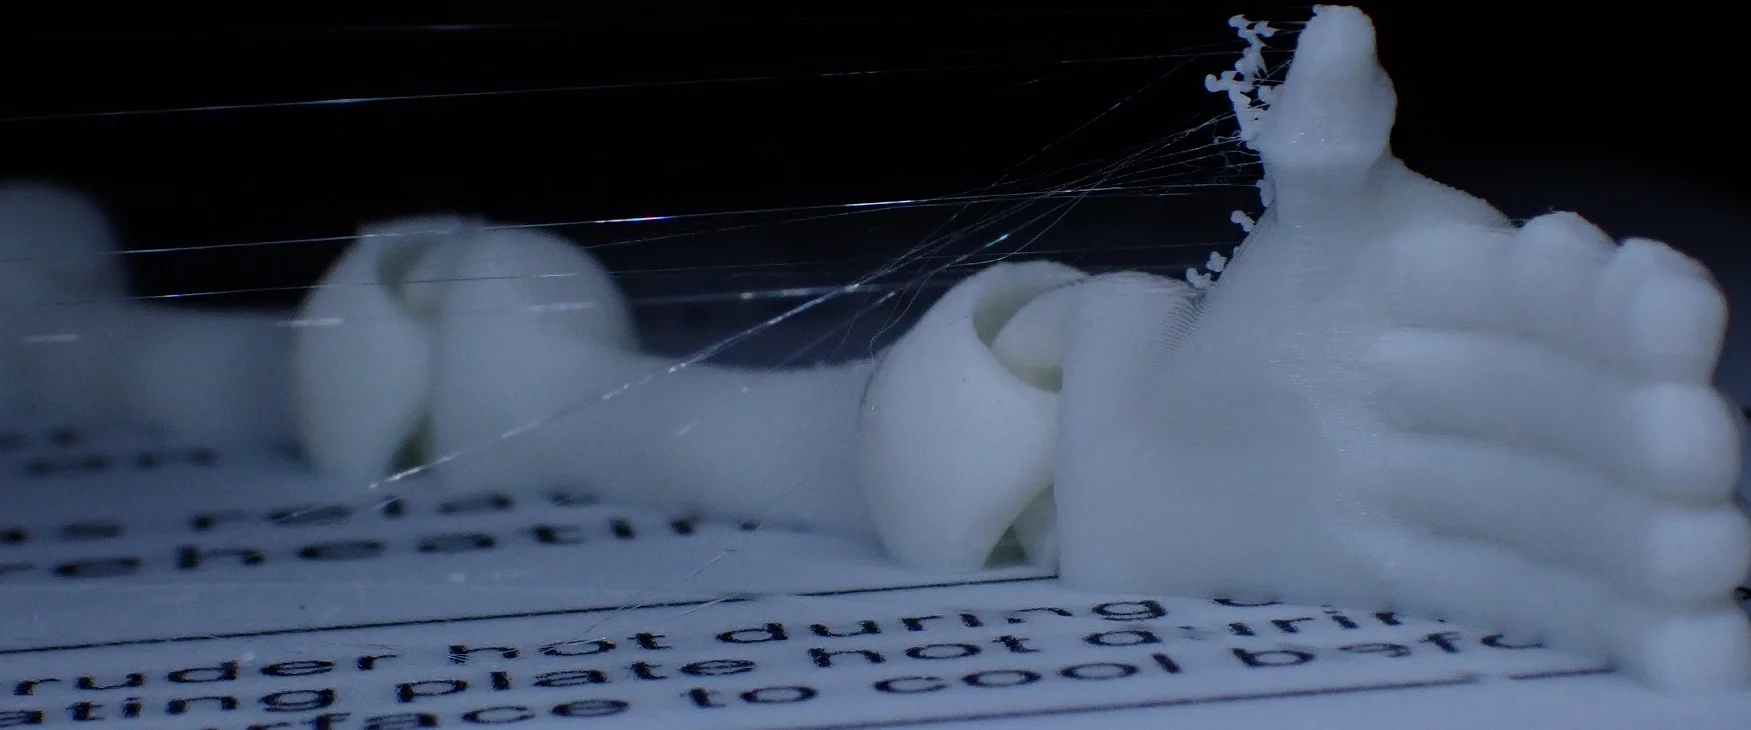
Stringing happens whenever the soft PLA is not sufficiently pulled back into the extruder. This is necessary when the print nozzle passes through the air between two parts to be printed without ejecting material.
If you notice stringing on your print model, you have two options: You can ignore it and cut off the loose material threads during post-processing. Or you can set a faster and further retraction. Most of the time, the second option is more effective, because it generates a better print result over the whole area.
Sometimes the temperature of the nozzle is also too high, which causes the filament to become too liquid and unintentionally escape during movement.

Complete Guide:
PLA Stringing Guide: 12 Easy Solutions to Avoid PLA Strings
PLA Storage
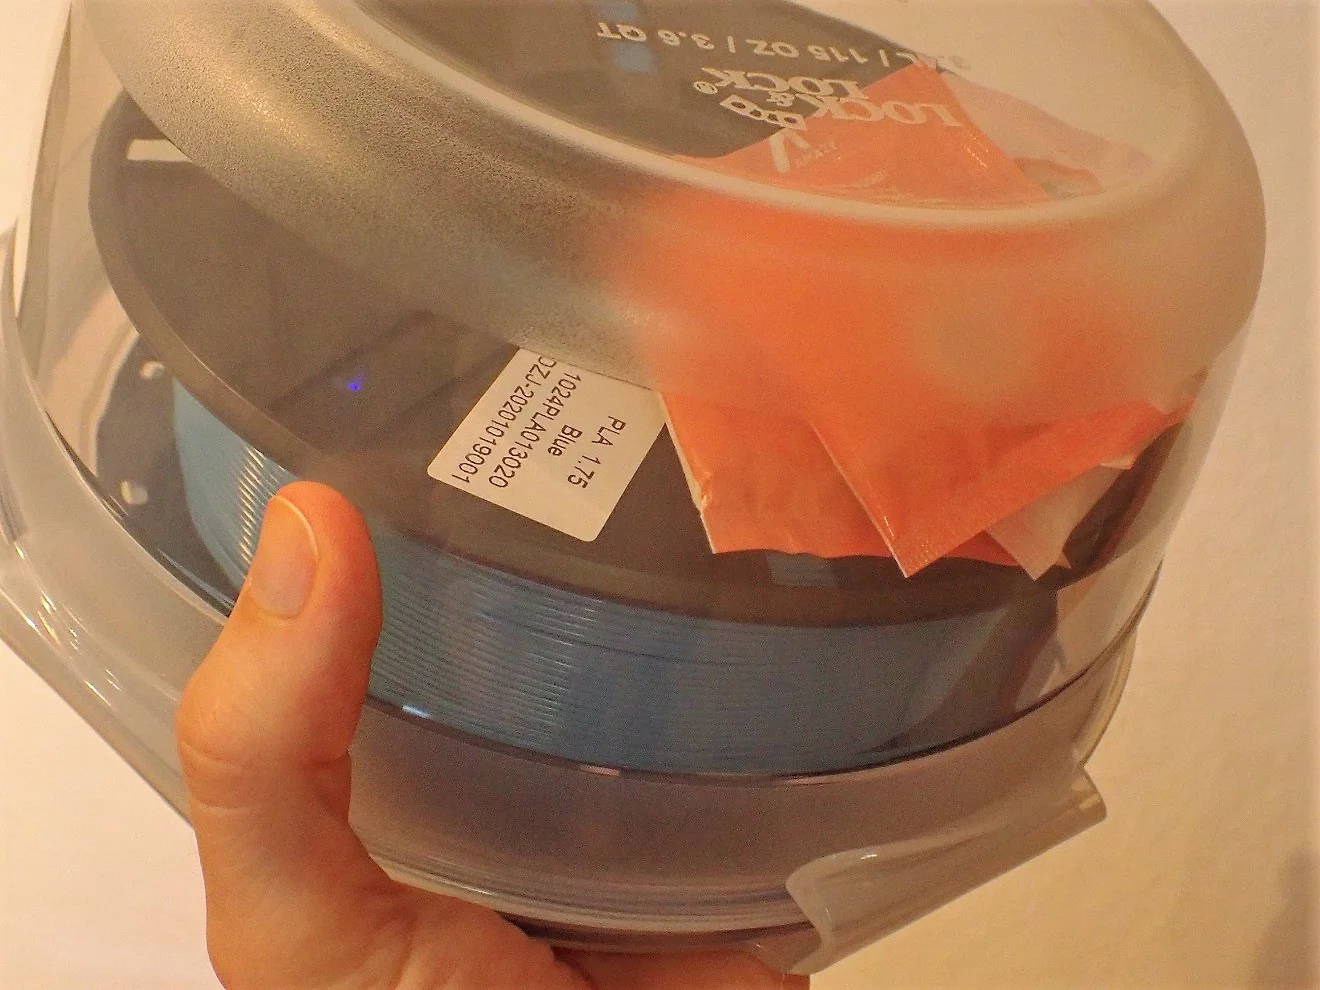
PLA should be stored away from light and especially moisture. Due to its nature, the material can draw some moisture in high humidity – and then it can no longer be printed so well.
Because PLA has a low glass point, you should store your filament at a roughly constant temperature, which should not exceed 25°C. This also serves to keep the filament in a high-quality condition.
Special airtight containers for filament* are best. This protects the filament from dusty and moist air.

Complete Guide:
3D Printer Filament Storage: Complete Guide
PLA Durability and Properties
PLA has useful properties if you want to print prototypes, decorations or even spare parts for your RC toys. The material is easy to handle and reasonably robust.
PLA Durability
PLA is quite durable if it is not exposed to too high temperatures. For most applications in the field of hobby 3D printing, it is therefore perfectly suitable.
PLA filaments are made from vegetable starch. You might know this stuff from the kitchen: corn and potato starch are used to bind sauces and soups. Starch attracts and binds moisture. But once PLA has gone through the printer, it’s not so extreme.
This has an influence on the durability of PLA: In experiments, it was found that PLA printed objects can certainly be composted. However, even very small printed objects need many years to slowly dissolve.
That’s why you can safely use PLA for your longer-lasting projects. From vases and aquarium decorations to garden toys and even replacement kitchen knife handles, you can make anything out of PLA.
PLA UV Resistance
PLA is moderately UV resistant. There’s really not much more to say about it. The colors of your print object may change if the piece sits on a windowsill or in the front yard for an entire summer.
However, this is not due to the PLA as a material, but to the pigments, which decompose under UV radiation. The PLA itself becomes brittle at some point if it is permanently exposed to UV radiation.
PLA Chemical Resistance
How does PLA react when it comes into contact with solvents, alcohol, water, oils and greases, acetone or other chemicals? For home use, this is not entirely unimportant, because after all, you don’t just want to display your PLA printed parts in a glass showcase. For normal everyday use, PLA is completely harmless.
PLA is a polyester that is produced from sugar (starch) in several stages. One intermediate stage is lactic acid: the sugar ferments to lactic acid and then polymerizes to polylactide (PLA). There are two different PLA variants: Poly-D-Lactide (PDLA) and Poly-L-Lactide (PLLA).
The material is basically transparent, crystalline and rigid. PLA has a high mechanical strength and is resistant to fat, water and alcohol. However, it also shows a relatively high hydrophilicity and is permeable to water vapor. It becomes brittle under UV radiation, but not as quickly.

Related Article:
Can you Dissolve PLA? Solvent for Cleaning & Smoothing
PLA Water
Running or standing water is no problem for PLA. The material does not dissolve and is not attacked by water. However, water vapor can pass through PLA and the material is hydrophilic in itself, so it does not repel water. PLA is suitable for vases and decorative bowls that are cleaned wet.
However, a box that is supposed to protect other materials from humidity should not be made of PLA – because PLA is permeable to water vapor.
PLA Glue
Sometimes something breaks off – no question, even 3D prints need to be glued every now and then. PLA can be glued without any problems.
However, you don’t use the glue stick, wood glue or craft glue from school for this, but a real glue or super glue.
PLA Environmental Impact
PLA is generally considered to be very environmentally friendly and is advertised as being biodegradable. At the same time, the starch plastic is supposed to be extremely stable – that doesn’t go together. If something is biodegradable, that speaks for low stability and little chemical resistance. So what is true now?
With PLA both are true: the material is environmentally friendly, at least more environmentally friendly than most alternatives, and at the same time it is stable, at least stable enough for hobby applications.
PLA Biodegradable
Under certain conditions PLA is biodegradable. If you put printed pieces made from PLA on the windowsill, however, not much will happen in the next two years. Because the environmental conditions have to be right. Under normal environmental conditions and at room temperature, the material is stable almost indefinitely.
However, PLA is biodegradable according to EN 13432. This means that the material does decompose in industrial composting plants. Restrictions exist only with regard to the exact chemical composition and the admixture of copolymers.
PLA Recyclable
PLA is recyclable, but as with biodegradation, it depends. PLA has a lower melting point than other plastics, so it cannot be recycled together with PET and other plastics.
However, you can recycle your PLA yourself. The low melting temperature allows you to liquefy the material by heating it. If you now bring it into the right shape, you can reuse it as new filament.
PLA Food Safety
Due to its resistance to water, oils and fats, and alcohol, PLA is food safe. You should still keep in mind: PLA items are not dishwasher safe! Because at the usual temperatures of 60 °C to 70 °C in the machine, the material becomes soft and your dishes deform.
An important detail: Even though PLA is food safe, the object you print from it might not be. The reason for this could be small cracks and holes in which bacteria can accumulate.
So design objects made of PLA that are to be food-safe in such a way that bacteria cannot find shelter.
PLA Postprocessing
Your print piece didn’t come out of the printer perfectly? Then post-processing is called for. In the first step, you should remove the support structures and any raft that may be present. Then it’s about the surface: The individual layers are often visible, maybe you want to change the color.
Remove the support structures with a scalpel, tweezers, carpet knife or fine scissors (for example, nail scissors). Sometimes a side cutter can do a good job. PLA is relatively hard, so you should definitely use high-quality tools.
PLA Smoothing
You can achieve a smooth surface by finishing your print objects with sandpaper. You should use two to three different grit sizes and work your way from the coarser paper to the finer paper. The last step can be done with wet sandpaper, grits from 600 to 1000 are useful here.
Sometimes sandpaper is not enough. If you want the surface to be really smooth, you could also print with a very fine nozzle (diameter 0.2 mm). This also guarantees a smoother surface, but takes a relatively long time.
There are smoothing stations where you can steam your print model with isopropanol*. Prosa, for example, offers a PLA that is particularly suitable for such actions (link*).
PLA Varnish
Painting and varnishing is completely unproblematic with acrylic-based products for PLA. You simply apply paints and varnishes with a brush. Ensure a fine consistency and thin application, then the details of your print model are preserved.
Or the other way round: if you want to hide a surface that isn’t completely smooth, acrylic varnish works just as well!
PLA Painting
Watercolors, crayons and wax crayons do not hold well on PLA, they are not very effective. You should definitely paint your print models with acrylic-based paints. Plastic putty works well to hide small holes or imperfections before painting – and you get a uniformly primed surface.
This will make the paint application more uniform. An alternative is spray filler. On this filter paints and varnishes also hold well.
Acrylic paints are also available as pens (great for very fine lines) and for the airbrush gun. However, the handling is not quite easy and especially not everyone’s cup of tea.
PLA Direct vs. Bowden Extruder
PLA is not a flexible filament, and it does not expand excessively when heated. Therefore, you can safely print PLA with the Bowden extruder. If your machine only has a direct extruder, that’s no problem either – it works with PLA as well.
PLA can be printed with a Direct Drive Extruder as well as with a Bowden Extruder.
However, you should pay attention to the printing settings: They have to be adjusted to the extruder used. This is especially important for retraction!
Conclusion: PLA is inexpensive and perfect for beginners!
PLA is easier to process than most other filaments and therefore especially suitable for newcomers to 3D printing. The environmental friendliness, the price and the many available colors also speak for the material.
Disclosure: This website is the property of Martin Lütkemeyer and is operated by Martin Lütkemeyer. Martin Lütkemeyer is a member of the Amazon Services LLC and other Affiliate Programs. These are affiliate advertising programs designed to enable websites to earn advertising revenue through advertising and linking to Amazon.com and others. Links marked with * are affiliate links.
