
- Wet Filament: Prevention, Symptoms & Drying - July 18, 2024
- Sovol SV08 – Best PrusaSlicer Settings & Profile - June 26, 2024
- Sovol SV08 – Best Orca Slicer Settings & Profile - June 26, 2024
Disclosure: Links marked with * are Affiliate Links. I earn from qualifying purchases if you decide to make a purchase through these links – at no additional cost for you!
Infill has a very significant role in 3D printing. The density and pattern determine how strong, heavy and flexible the object will be in the end. There are many patterns that can be used to achieve different goals, but which density and which patterns are best for which objects?
Infill is the inner structure of a 3D printed object. Higher infill percentages result in stronger objects that require more filament and time to print. Decorative objects are printed with a density of 0-15%, standard objects with 15-50% and robust, functional parts with 50-100% infill density. There are many different patterns for different uses.
This article goes into detail about which density and pattern is best for your project.
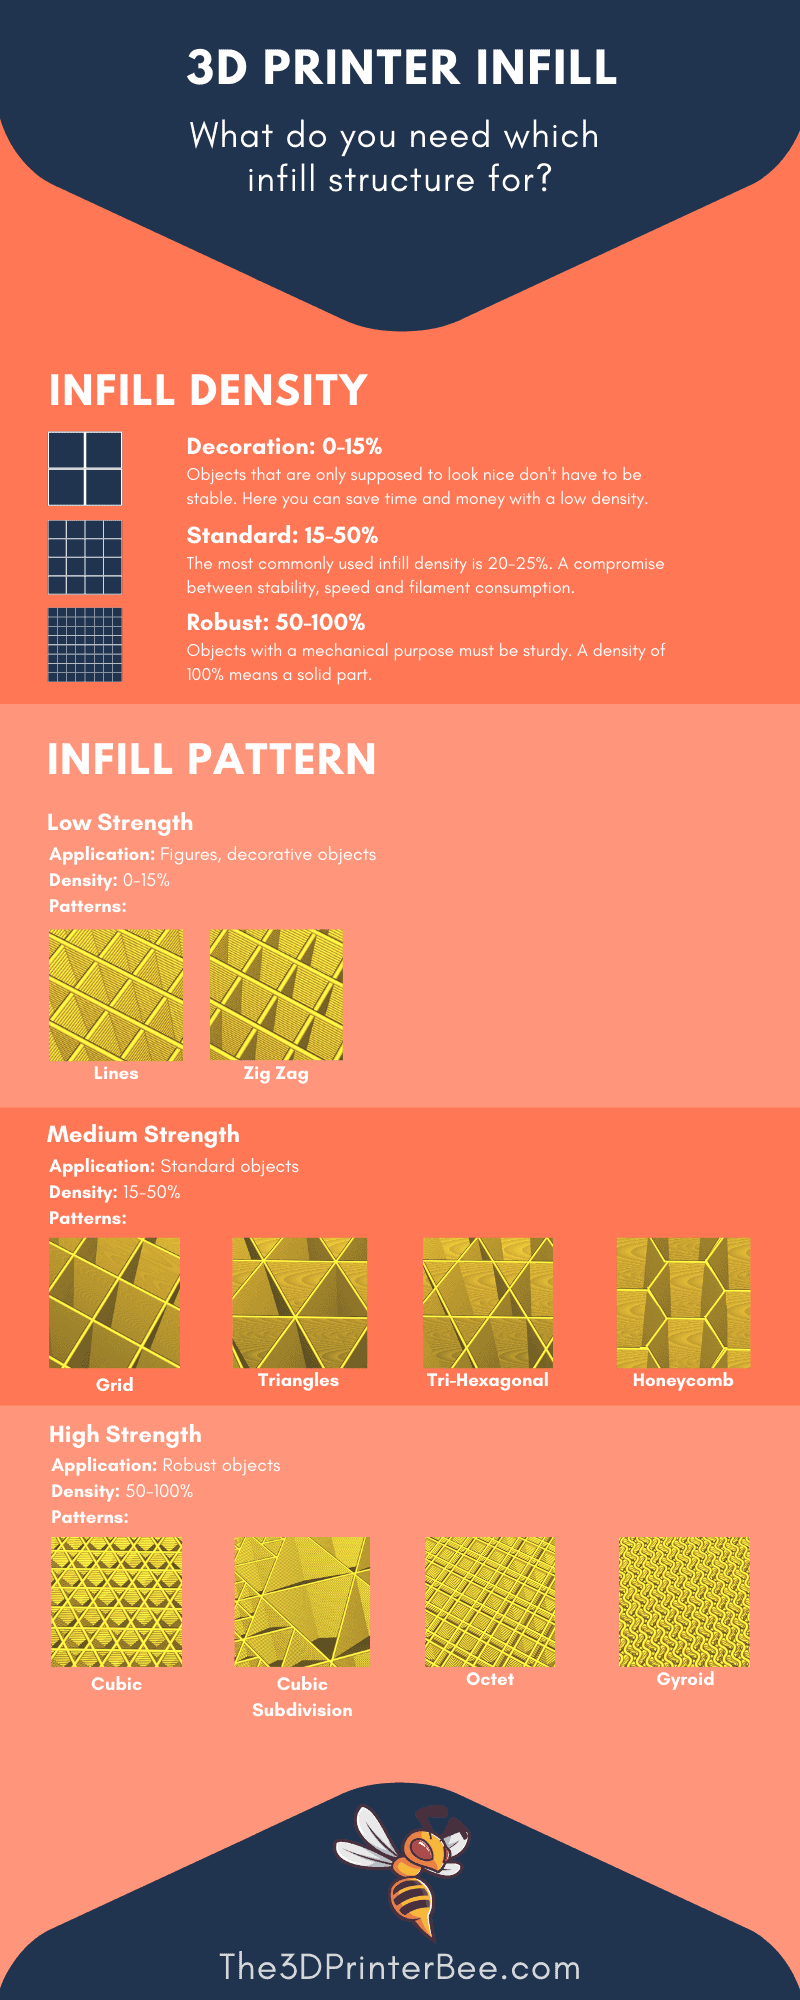
Table of Contents:
What Is Infill?
3D printed objects are only printed as solids in rare cases. The reason for this is that large quantities of filament are required for a solid object. Also, printing a solid object takes much longer.
Hollow objects have a thin outer shell, less material is needed, they are cheaper and the print does not take as much time.
For many applications, however, hollow 3D prints are unsuitable because they are not robust and break under stress.
The task of infill in 3D printing is to strengthen a hollow object as much as needed. The stronger the object has to be, the more infill you need.
An infill pattern is a structure that is repeated to fill a 3D object. For most 3D prints, this infill is not visible.
Along with the shell, the lower and upper layers, the infill is one of the four structural pillars of 3D printing. With slicers such as Cura and Simplify3D, you can select both the pattern and the density (percentage) of the infill.
Density
The infill density has a direct effect on the weight and stability of the 3D printed object. More infill means also longer print times and more filament consumption.
The higher the infill density, the stronger the 3D printed object will be.
For a successful print job, it is important to carefully consider the infill percentage. You always have to weigh the infill percentage against the intended use of your three-dimensional object. Take enough time for this, as infill is expensive and the printing duration increases.
More Strength = Longer Print Duration & Higher Filament Consumption
There are some guidelines for the right percentage for which use, but in principle, you should always try to minimize the infill density to save time and money. A decorative object for example does not need to be almost solid.

Infill Percentages
The infill percentage is the relation between filament and air inside the object. An infill density of 0% means that it is a hollow part, while 100% infill results in a solid part without any hollow spaces.
The ideal value of the infill percentage depends on the application of the object.
- 0-15%: Decoration
- 15-50%: Standard
- 50-100%: Robust
0-15%: Decoration
Decorative objects do not have to be very strong. You can save a lot of filament and printing time by reducing the infill density. These percentages are especially suitable for figurines and sculptures (10-15%), vases (0%) and other objects that you mainly look at and do not touch that much.
15-50%: Standard
The most commonly used percentages for infill are between 15 and 50%. These densities are a good balance between strength, print time, and filament cost. where you are in this range depends on the object. The larger the object gets and the more frequently it is used, the more infill you should use.
50-100%: Robust
Objects that are used very often or have to perform a specific mechanical task must be robust. Densities from 50 to 100% are used for such parts. 100% means a solid, completely filled object. With such percentages, however, you have to be prepared for very long printing times and high filament consumption.
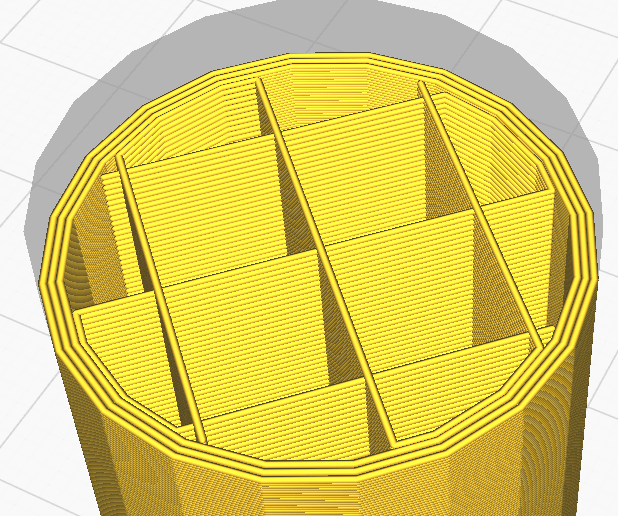
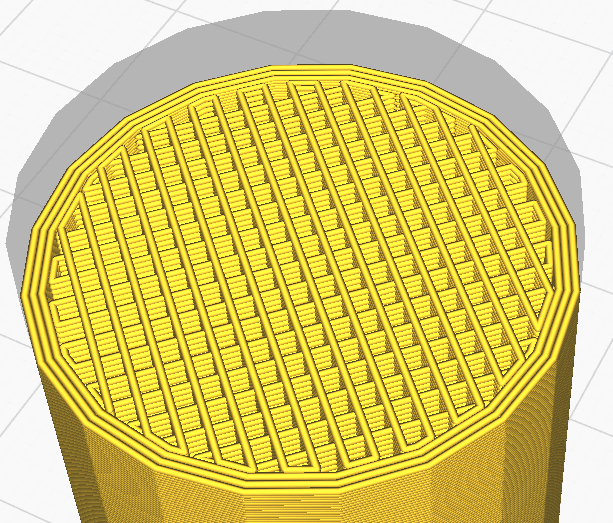
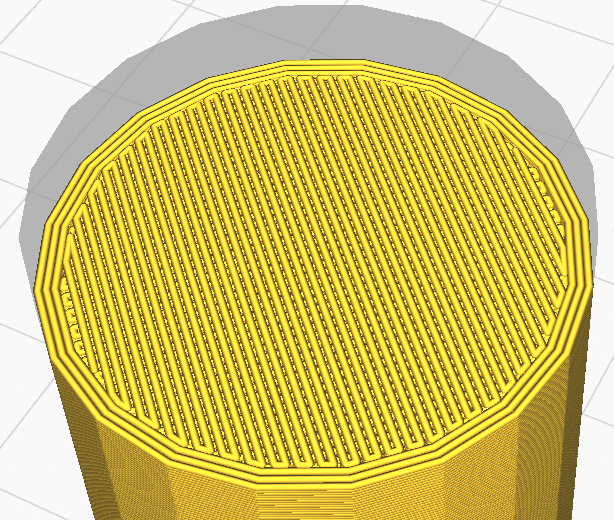
How much does infill density matter?
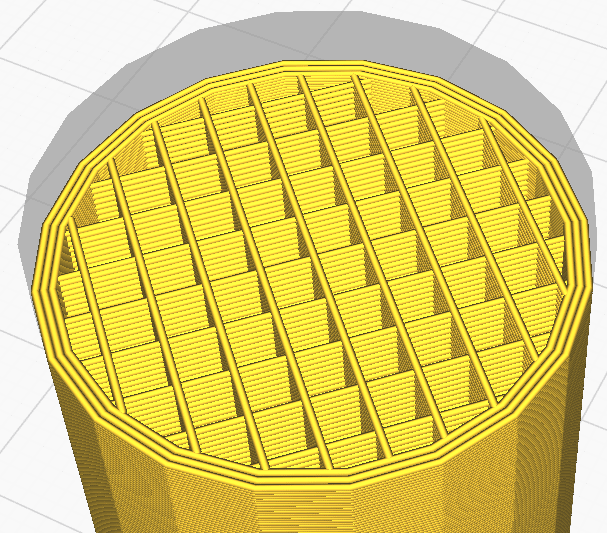
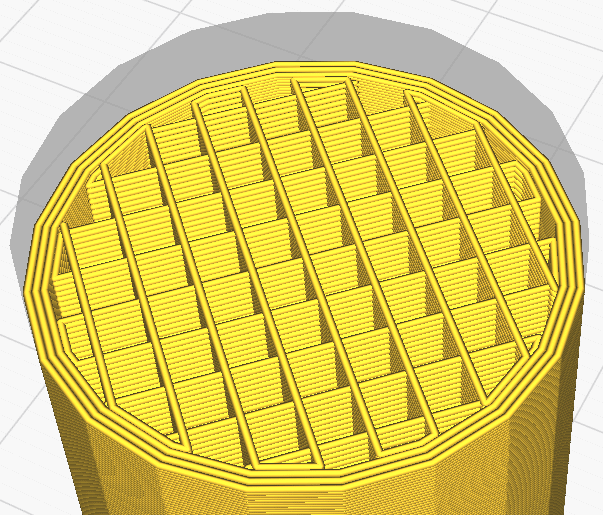
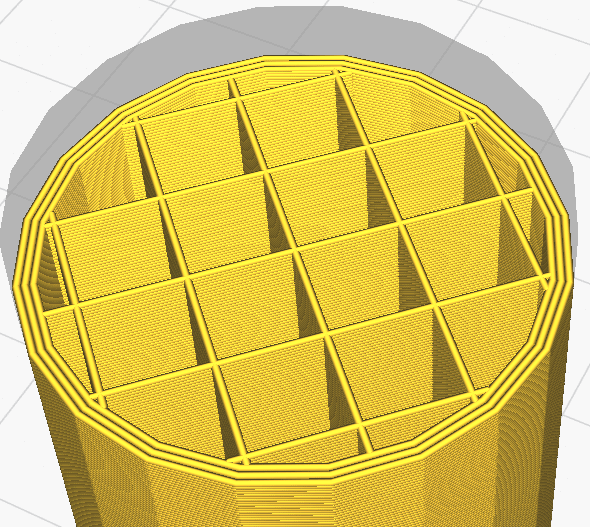
The infill density has far-reaching consequences for your 3D object. The best way to see this is to look at how much the internal structure changes when you change the infill density.
Also in Cura itself, the infill density tooltip shows a number of affected parameters. Among them are not only the top and bottom layers but also various infill settings.
Print times and filament consumption increase significantly the higher the infill density is.
I sliced a test object with different infill percentages to demonstrate this effect with a few numbers.
| Infill Percentage | Print Duration | Filament Consumption |
|---|---|---|
| 0% | 00:24:00 | 5 g |
| 5% | 00:28:00 | 6 g |
| 10% | 00:30:00 | 6 g |
| 20% | 00:35:00 | 8 g |
| 40% | 00:46:00 | 10 g |
| 60% | 00:56:00 | 13 g |
| 80% | 01:06:00 | 16 g |
| 100% | 02:27:00 | 19 g |
The situation is somewhat different with the strength.
Up to 50% in infill density, the strength increases extremely. And after that, the increase in strength is no longer quite that high.
Increasing the infill density has the following effects:
- higher structural strength
- more filament consumption
- more weight
- longer print times
- smoother top surfaces and less pillowing
For most objects a good balance between material consumption, printing time and strength is between 10 and 30%.
Only for exceptions such as purely decorative objects and parts that are used a lot, it is worthwhile to choose a different infill density. For decorative objects that are never touched, a very low density or even no infill is sufficient. For functional parts, on the other hand, it is important to increase the infill density so that they can withstand the mechanical stress.
Shell Thickness vs. Infill Density
The shell of your print consists of individual layers on the outside. In most designs, the shell is the first thing the 3D printer prints on each layer. The thickness of the shell is closely related to the infill density.
If you increase the shell thickness, the strength of your object will increase. Your 3D printed part becomes more stable and can better withstand mechanical stress without increasing the infill density.
This effect is most obvious when you print a vase. With a vase, you want to have 0% infill anyway, otherwise it’s not a vase. However, you can still increase the stability via the shell thickness.
Most slicers offer you the possibility to adjust the shell thickness.
Multiple Infill Densities
In Cura, it is possible to use different infill densities for different models. A different density within an object is not easily possible.
But there are a few tricks you can find here if you are interested.
Different infill densities within an object allow you to make certain areas stronger than others. With functional parts, it is often the case that not the complete object has to be extremely stable. So you could completely fill some areas and leave others unfilled to save filament.
Pattern
The infill pattern is the inner structural composition of your 3D print. Depending on the intended use, there are a lot of different infill patterns. Infill patterns affect not only the strength but also the flexibility, printing time and weight of a 3D print.
There are a lot of different infill patterns from simple lines to complicated gyroid structures. Some patterns are included in every slicer, some are not.
Which pattern you choose depends on the desired strength of the object. Lines are not as stable as a cubic pattern, for example. Because this can quickly become confusing, each pattern will be briefly explained.
Low Strength
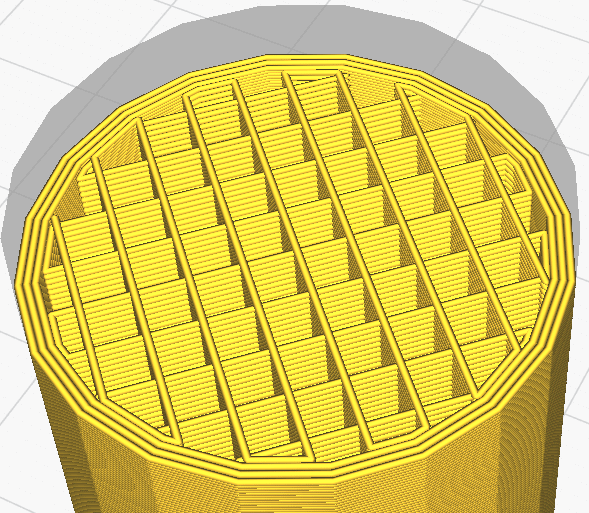
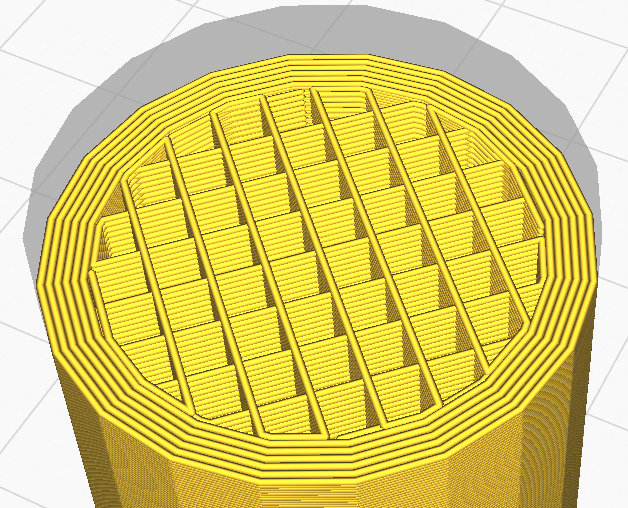
Lines
With this pattern, parallel lines are always printed in only one direction per layer. In the next layer, the lines are rotated by 90°. This pattern is suitable for decorative and standard objects that don’t have to be stable.
- This pattern results in smooth top surfaces.
- Low stability on the z-axis.
- Low stability on the x- and y-axis, except directly in the line directions.
Zigzag
This infill pattern is very similar to the lines pattern, but the lines are printed in one motion in zigzag moves. With the zigzag pattern, the flow is less interrupted and you’ll get a more smooth printing process.
This pattern is not very stable and is often used in support structures.
- The Zigzag pattern also creates smooth top surfaces.
- Low stability on the z-axis, because there are few bonds between the lines.
- Low stability on the x- and y-axis, except directly in the line directions.
- Bad shear resistance, due to the lack of bonds between the lines.
Medium Strength
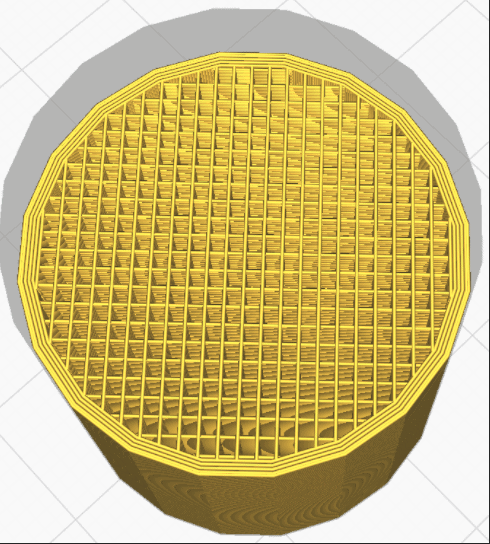
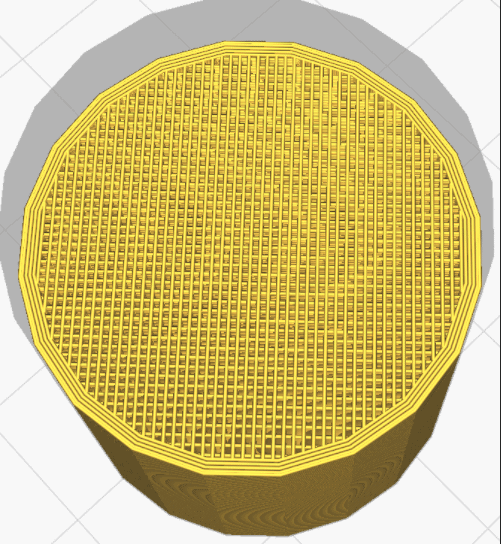
Grid
This pattern is very similar to the lines pattern. But it has not only one-dimensional lines per layer but two-dimensional lines, forming a grid of lines. This increases the strength, but it also requires a little more filament.
The main advantage of this 2D pattern is the average to short printing speed, as it is not a complex internal structure.
- High strength on the z-axis.
- High strength on the x- and y-axis if directly in the line directions.
- Low strength on the x- and y-axis if diagonaly to the line directions.
- Medium smooth top surfaces.
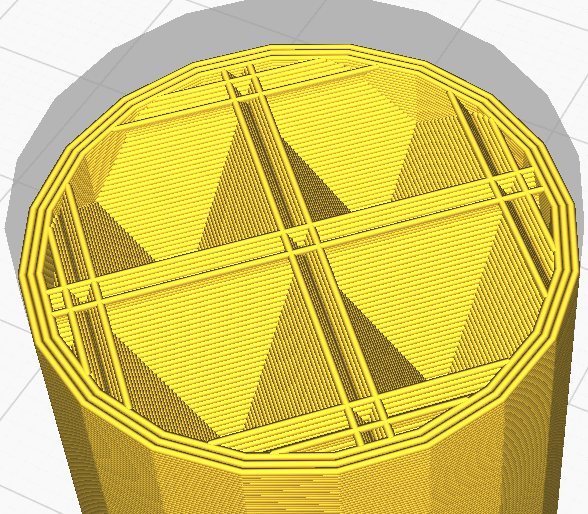
Triangles
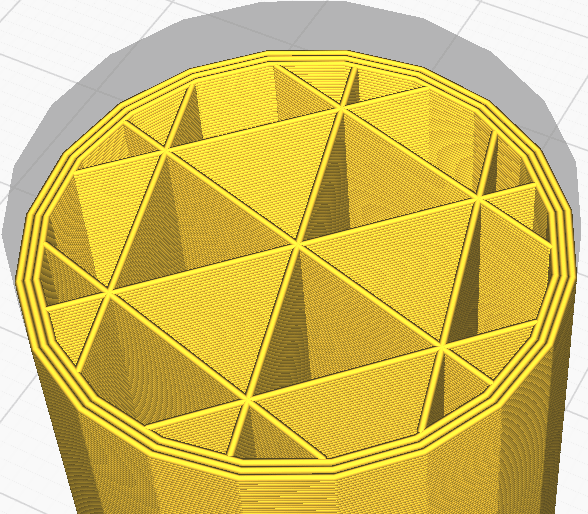
A two-dimensional mesh of triangles. An infill of triangles is also advisable if you are printing rectangular, thin components that might otherwise have a slight connection between the outer walls.
Triangular infills are often used for everyday objects where maximum resistance of the outer walls is required. The highest possible resistance towards the outer walls is based on the angle of 45 degrees of the lines forming the layer.
- Evenly distributed, high strength on the x- and y-axis.
- Good shear resistance.
Tri-Hexagonal
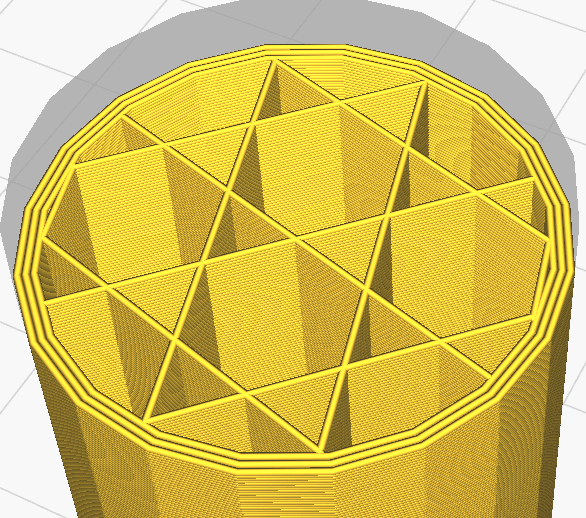
If you choose this infill pattern, a mix of hexagons and triangles are printed, which have a very efficient shape. Tri-hexagons provide a strong pattern with relatively low material consumption.
This pattern has shorter lines so that a connection to all sides is possible. You benefit from the fact that there are fewer problems when bending your print.
- Very high strength on the x- and y-axis, regardless of direction.
- Very good shear resistance.
- Produces only smooth surfaces with more top layer layers.
High Strength
Cubic
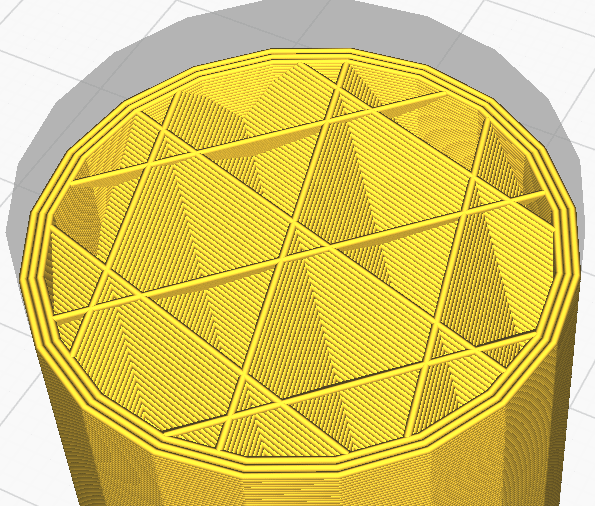
This 3D pattern consists of 45° tilted and stacked cubes. Because they are tilted, the pattern looks triangular on the horizontal plane. This infill pattern is very strong in all directions, but consumes a bit more filament and time than others.
- Very high strength in every direction.
- High shear resistance.
- Higher material consumption.
- Longer print durations.
Cubic Subdivision
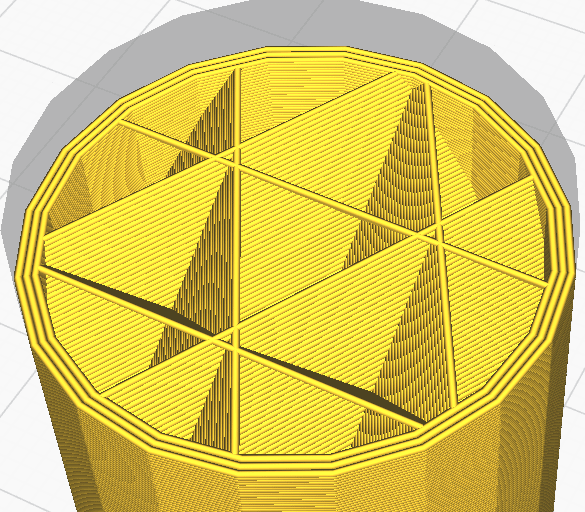
As an answer to the high filament consumption of the normal cubic infill pattern, the cubic subdivision pattern was invented. The difference is that the cubes are bigger in the center of the object. Every time a cube would hit the shell of the object, it gets divided into smaller cubes.
This way, the outer areas that should be stronger are denser than the middle areas. With this cubic infill variant, you need less filament for the inner structure.
- Best strength to weight ratio.
- Very strong in every direction.
- Lots of retractions – bad choice for flexible materials.
- Reduces pillowing.
Octet
The pattern is also known as tetrahedral infill stacks of pyramid shapes. This pattern creates very strong objects but is most suited for medium-sized parts.
- Many top layers are required for a smooth top surface.
- Reduces pillowing.
- Very strong, especially in the direction of the lines.
Flexible Patterns
If you want to print a flexible 3D object, you can choose between cross, cross 3D, concentric and gyroid infill patterns. Depending on how flexible the object should be, you can set an infill density between 0 and 100%.
For flexible prints, filaments like TPU are ideal.
Gyroid
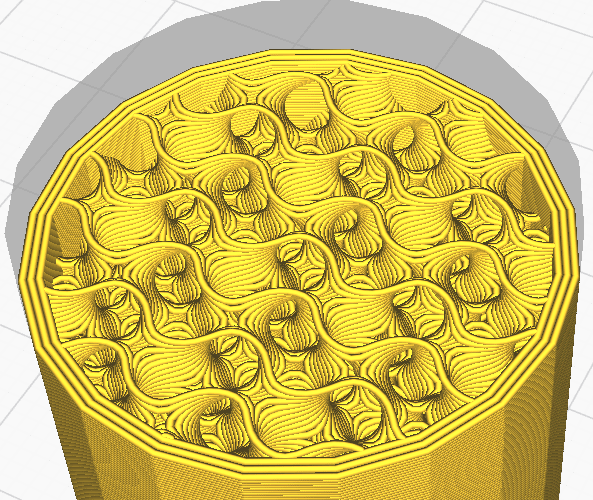
This is a really unique-looking infill pattern. This pattern consists of waves with alternating directions in each layer. Gyroid infills are characterized by an optimal balance of strength, material consumption and print duration.
- Strong in every direction.
- Good for flexible parts.
- Good shear resistance.
- Long slicing times.
Concentric
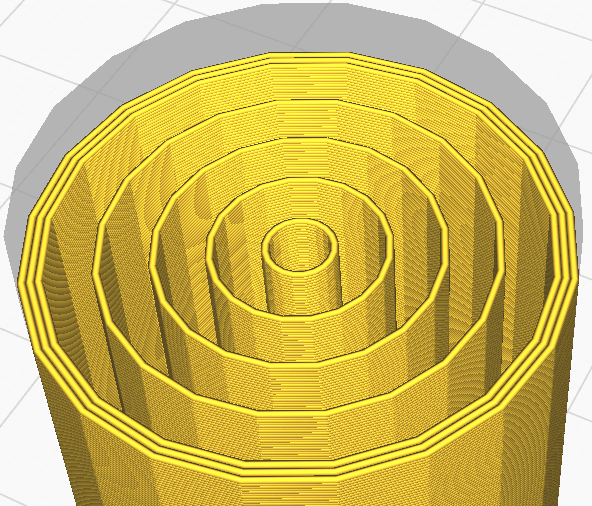
This is an infill pattern that creates parallel lines to the outer shell inside of your print.
- Strongest infill pattern at 100% density, due to no intersections.
- No strength in the x- and y-direction.
- Low strength in the z-direction.
- Very good for flexible prints, but you have to choose the stronger z-axis wisely.
- Very low material consumption.
- Fast print times.
Cross
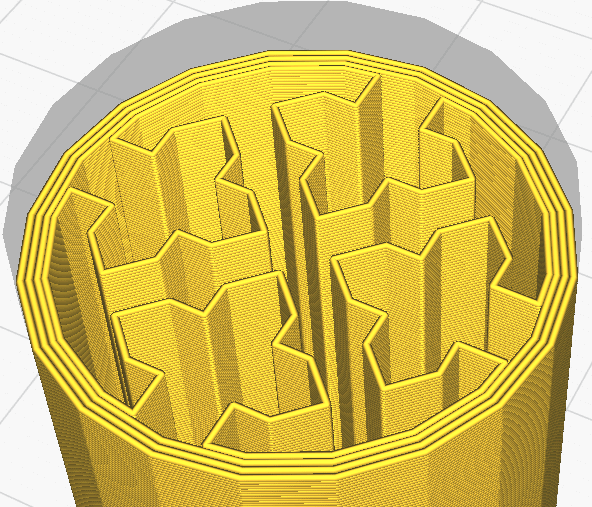
This infill pattern creates a labyrinthal structure inside the object that resembles cross-shaped lines. Because there are spaces between the grids and crosses, it is possible to twist and bend the object.
- Very good for flexible parts.
- Weak in horizontal axes.
- Stronger on the z-axis.
- Because the pattern consists of continuous lines, it is very suitable for flexible filaments.
Cross 3D

This pattern is very similar to the cross pattern but the pattern changes on the z-axis. The end result of cross 3D is a very flexible object.
- Best pattern for flexible objects.
- Very weak or squishy in all directions.
- Long slicing times.
- As with the normal cross pattern, the continuous lines are perfect for flexible filaments.
Disclosure: This website is the property of Martin Lütkemeyer and is operated by Martin Lütkemeyer. Martin Lütkemeyer is a member of the Amazon Services LLC and other Affiliate Programs. These are affiliate advertising programs designed to enable websites to earn advertising revenue through advertising and linking to Amazon.com and others. Links marked with * are affiliate links.
