
- Wet Filament: Prevention, Symptoms & Drying - July 18, 2024
- Sovol SV08 – Best PrusaSlicer Settings & Profile - June 26, 2024
- Sovol SV08 – Best Orca Slicer Settings & Profile - June 26, 2024
Disclosure: Links marked with * are Affiliate Links. I earn from qualifying purchases if you decide to make a purchase through these links – at no additional cost for you!
For successful 3D printing with TPU filament*, the right print settings and certain hardware requirements are fundamental.
In this article, you’ll find the best settings for TPU, a guide to calibrating them, and how to equip and optimize your 3D printer to process TPU.
Here are the most important TPU settings (compatible with Cura, PrusaSlicer, Creality Slicer and many other slicers):
| Setting | Value |
| Print temperature | 220 to 250 °C |
| Print bed temperature | 40 to 60 °C |
| Print speed | 20 to 30 mm/s |
| Retraction distance | 0.5 to 2 mm |
| Retraction speed | 20 to 40 mm/s |
| Extruder | Direct drive extruder |
| Layer height | 25 to 50% of the nozzle diameter (i.e. 0.1 to 0.2 mm with a 0.4 mm nozzle) |
| Line width | 80 to 100% of the nozzle diameter (i.e. 0.32 to 0.4 mm for a 0.4 mm nozzle) |
| Infill density | 20 to 30%. The higher the stiffer. |
| Infill pattern | Gyroid, concentric |
| Storage | Airtight (vacuum bag*, plastic box*) |
| Print bed | PEI* and isopropyl alcohol for loosening, blue tape, no raft. |
| Enclosure necessary? | No |
| Cooling | 0% (10 to 50% for overhangs) |
| Nozzle | Bigger is better with Bowden extruders |
Many problems with TPU printing come from poor quality products on the market. So if the settings and tips from this article don’t work for you, you should try using good TPU. Here are two types that I have had good experiences with:
Table of Contents:
Advantages & Disadvantages
PRO:
- Flexible
- Durable
- Abrasion resistant
- Shockproof
Properties
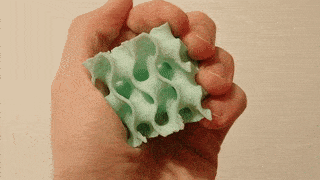
TPU is short for Thermoplastic Polyurethane and is a flexible filament. Flexible materials are suitable for numerous printing projects due to their elasticity.
Density: 1.10 to 1.25 g/cm³.
Hardness grade: 65 Shore A to 60 Shore D
Abrasion resistance: TPU is not only extremely flexible, but also abrasion resistant. This thermoplastic is also very popular in industrial manufacturing and is used for many manufacturing processes.
Durability: TPU printed parts are extremely durable and wear very slowly. Therefore, TPU printed parts are highly sought after in industries such as automotive.
Temperature resistance: TPU can withstand a maximum ambient temperature of 80 °C. This aspect is particularly advantageous for 3D printing.
Shock Resistance: Another plus point of TPU is that this filament can withstand shock and has excellent vibration damping. So your TPU objects won’t break immediately if the object accidentally falls to the floor – they’ll bounce more like a bouncy ball!
Chemical resistance: TPU is also characterized by its resistance to many chemicals. TPU is also resistant to oils.
Hardware Requirements
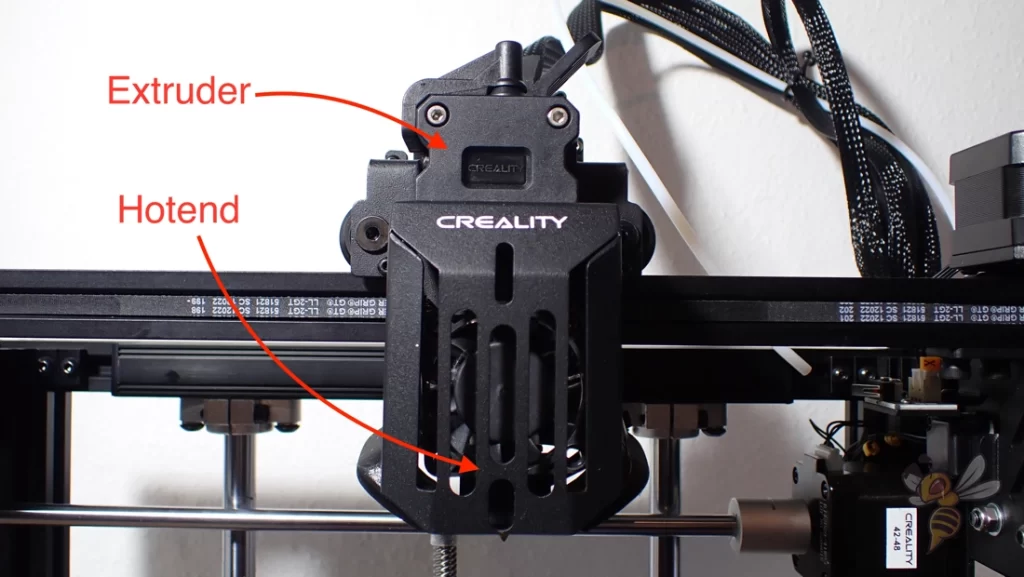
Direct Drive Extruder
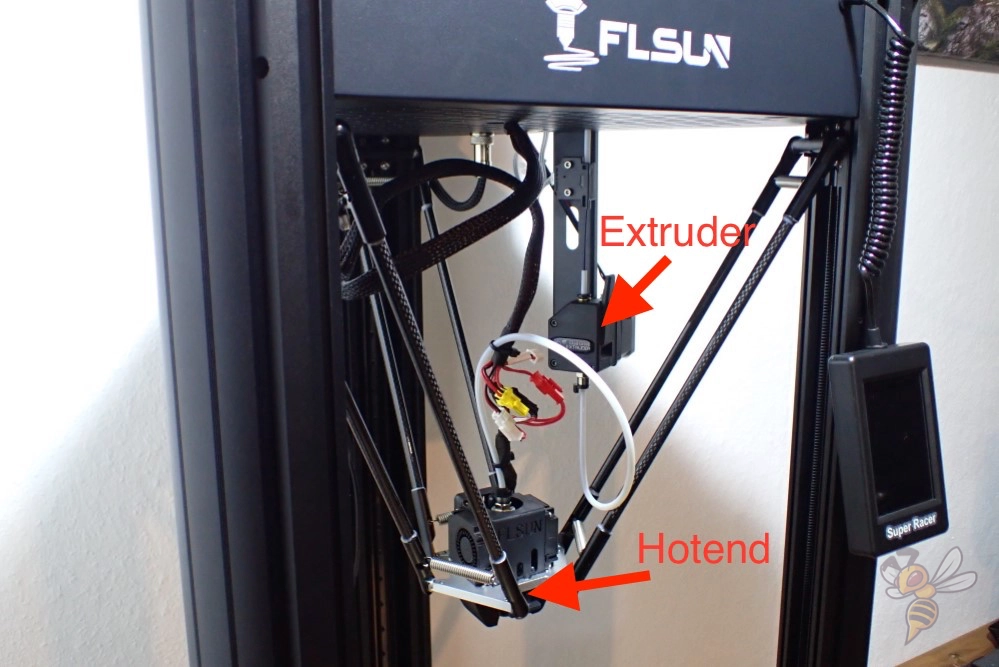
With FDM 3D printers, there are mainly either Bowden extruders or direct drive extruders. With a Bowden extruder, the extruder sits on the frame of the 3D printer and conveys the filament through a long PTFE tube to the print head and the hot end.
A direct drive extruder sits directly in the print head. The distance between the extruder and the hotend/nozzle is therefore minimal.
Since TPU is flexible, it can compensate a part of the movements of the extruder. The longer the distance between the extruder and the hot nozzle, the greater this effect becomes.
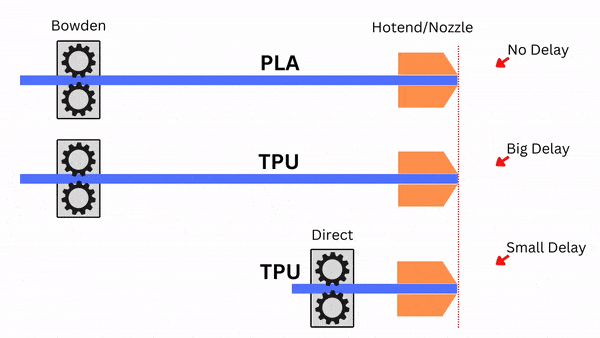
When the extruder pushes the filament to the nozzle, the flexible filament first compresses, then gives way and arrives at the hotend with a delay. This delay becomes longer the greater the distance between the extruder and the nozzle. This effect can lead to initial under-extrusion during extrusion.
However, this effect also occurs in the other direction, i.e. during retraction. During retraction, the filament is pulled back into the nozzle for a short distance so that it cannot escape uncontrollably during a movement without extrusion.
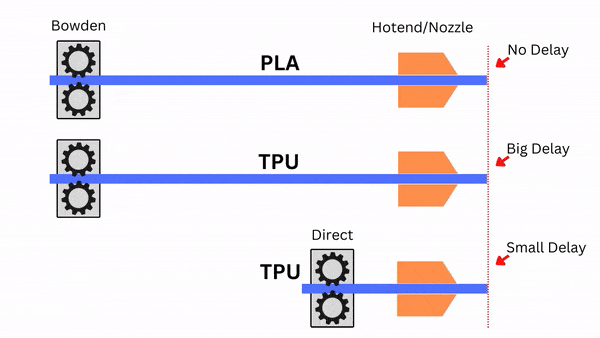
When the extruder pulls the flexible TPU back into the nozzle, this movement is delayed, causing the filament to take longer to be retracted. Because of this, it is nearly impossible to print TPU with a Bowden extruder without stringing or blobs.
With a direct drive extruder, these delays are so small that, with the right settings, it is possible to print flawlessly with flexible filament.
Position and Rolling Resistance of the Spool
Due to the flexible nature of TPU, it is also important where the coil is placed relative to the extruder and what the resistance is when the coil is unwound.
If the extruder has to pull too hard on the filament, either because the spool is placed under the extruder or the spool does not have good bearings, the filament will be drawn stretched in the extruders. This can lead to under-extrusion.
Many 3D printers have a rigid spool holder. Try replacing it with a holder that allows the spool to rotate easily.
Print Bed
TPU has extremely good print bed adhesion to PEI. PEI print bed surfaces are available in various designs. They are smooth or rough, flexible or inflexible.
Whether the print bed is flexible is not all that important with TPU, since the flexibility would be compensated for by TPU anyway and you wouldn’t be able to release the object any better by flexing the print plate.
TPU often adheres too well to PEI, so it can be difficult to remove the object from the print bed after printing. However, if you apply isopropyl alcohol generously to the base of the object, the TPU object will come off easily. Even large objects can be easily removed without leaving any residue.
Another option and to increase (or in the case of PEI slightly decrease) the print bed adhesion for TPU is to use Blue Tape. This tape has a roughened surface and provides good adhesion. The downside is that you’ll have to replace it after a few prints.
Nozzle Diameter

- Nozzle diameter: 0.8 mm for Bowden extruders.
If you are using a 3D printer with a Bowden extruder, a larger diameter nozzle could improve the print quality of flexible filaments such as TPU.
The inaccuracies caused by the flexibility of the filament in Bowden extruders can be prevented by the greater throughput of a larger nozzle.
For some 3D printers with Bowden extruders, using a larger nozzle can be just the measure needed to successfully print with TPU.
Print Settings
Print Temperature
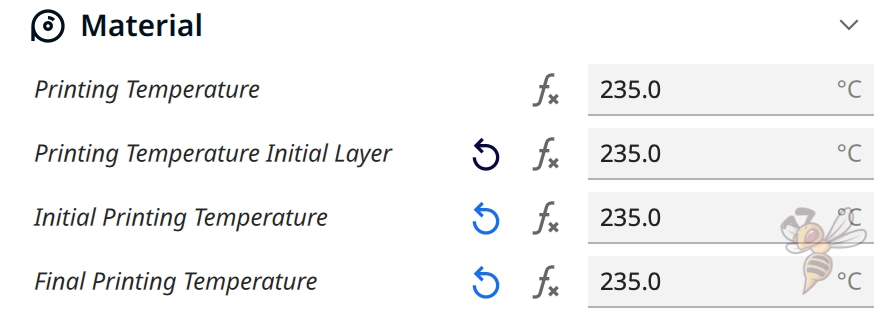
- Print temperature: 220 to 250 °C
The printing temperature is highly dependent on the TPU filament used. There are many types with different degrees of hardness. Therefore, the range of the perfect printing temperature is with 220 to 250 °C pretty wide.
If the print temperature is set too high, the filament becomes too liquid and is more likely to exit the nozzle in an uncontrolled manner. This can lead to various printing errors such as stringing.
However, if the printing temperature is set too low, under-extrusion, poor layer adhesion and/or poor print bed adhesion may result.
Especially with TPU, it is important to experiment with the settings to find the optimal value. This experimentation is also called calibration.
Calibration
To calibrate the printing temperature for TPU, you basically set different printing temperatures and observe at which printing temperature the result is best.
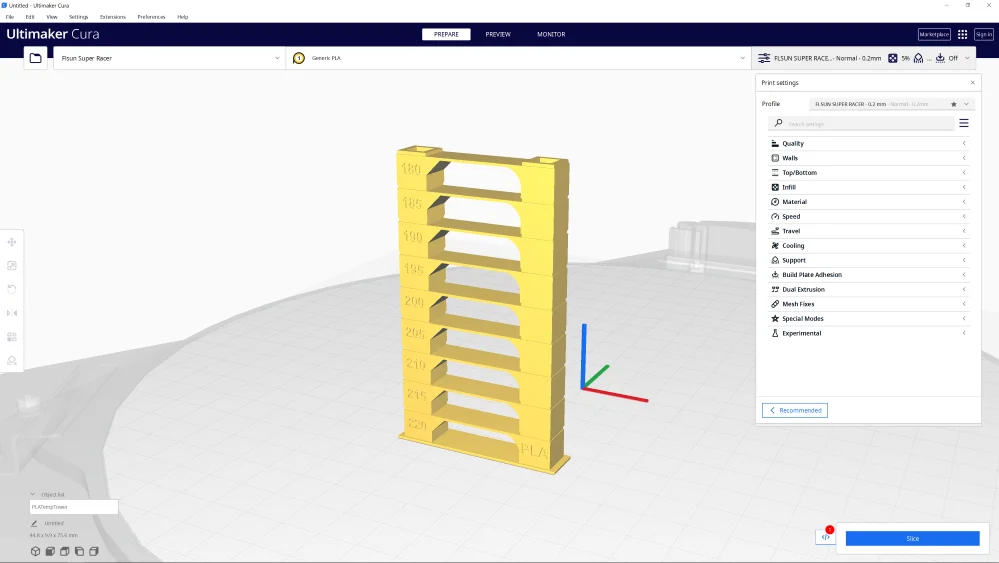
You can either do this one after the other with the same object, or you can use a so-called temperature tower.
With a temperature tower, you can calibrate the print temperature within one print. Such a tower consists of several levels. The individual levels are printed at different temperatures.
The levels are also designed to encourage printing errors. So, after printing, you can see at a glance at which printing temperature the least printing errors occurred.
Print Bed Temperature
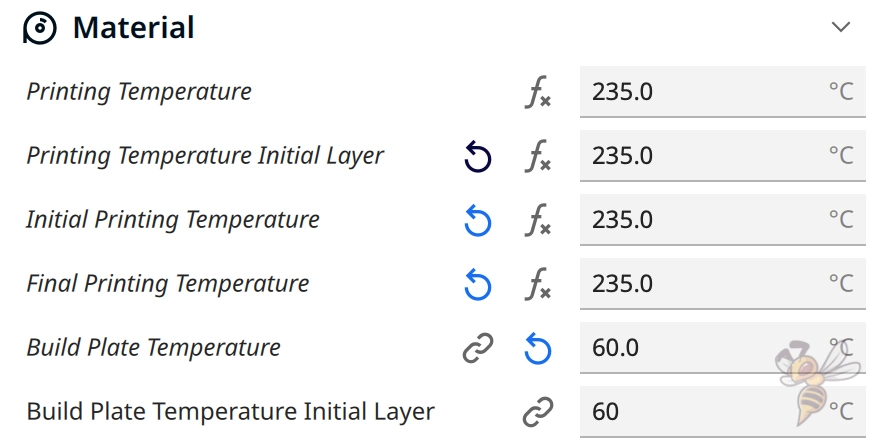
- Print bed temperature: 40 to 60 °C
With TPU, a heated print bed is not absolutely necessary. However, the best results are achieved between 40 and 60 °C.
The reason that this range is relatively large is that TPU is available in many degrees of hardness and each can react differently to a heated print bed surface.
If you notice an elephant foot, you need to reduce the print bed temperature. If the print bed adhesion is too poor, you can increase the print bed temperature until you see the first signs of an elephant foot.
So basically, you’re trying to set the print bed temperature high enough that you have good enough adhesion and it has not formed an elephant foot yet.
Depending on what kind of print bed surface you have, the temperature range in which these two criteria are given is large enough or non-existent. As described above, you can either upgrade your print bed with a PEI surface or use Blue Tape to increase this temperature range.
Retraction
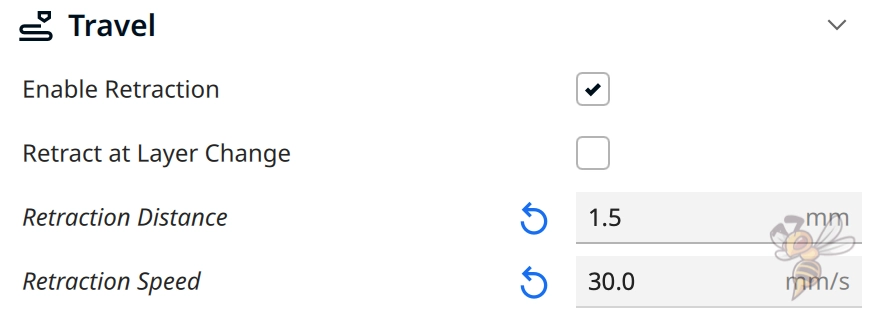
- Retraction distance: 0.5 to 2 mm
- Retraction speed: 20 to 40 mm/s
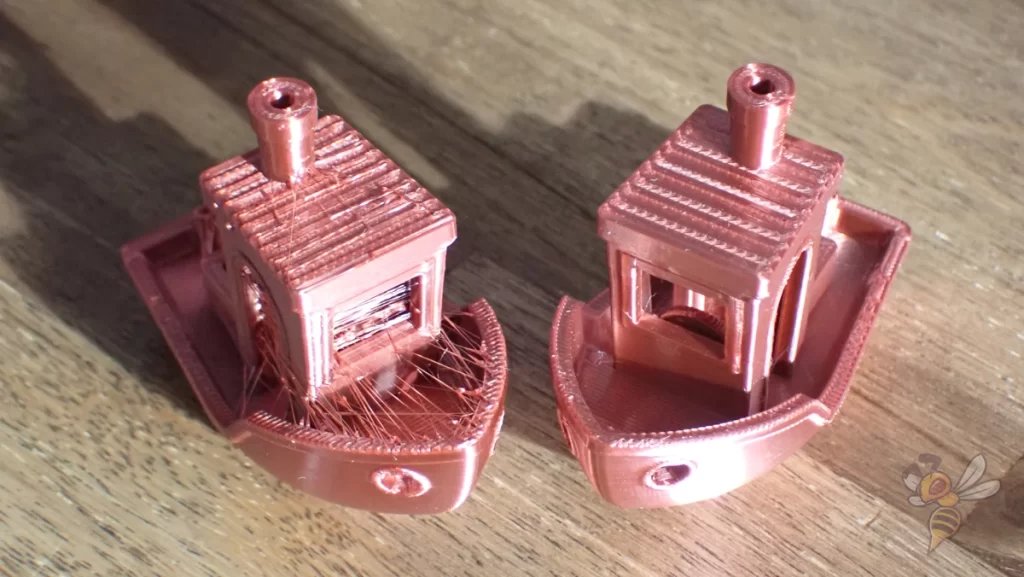
Retraction pulls the filament back into the nozzle for a short distance. When the print head moves from one location to another without extruding filament, this prevents uncontrolled leakage – at least in theory.
However, if the retraction settings are not matched to the filament and extruder, the filament will exit uncontrollably, causing stringing or blobs. Retraction can also be set too high, resulting in under-extrusion at the beginning of each new extrusion. This results in holes or fissures in the object, for example.
As mentioned above in explaining the behavior of TPU filament with the different types of extruders, the movement of the extruder is delayed somewhat with flexible filaments. Even though this delay is small with direct drive extruders, it can be more difficult to find the perfect retraction settings than with rigid filaments like PLA.
If you already have experience with PLA with your 3D printer, the retraction settings for PLA are a good starting point. The retraction is mainly divided into the retraction distance and the retraction speed.
With TPU, the retraction distance is usually between 1 and 2 times the distance of PLA. The speed is comparable to PLA, but also strongly dependent on the TPU used.
Calibration
Retraction is one of the settings that must be calibrated for TPU. With TPU, it has a great influence on certain printing errors, such as stringing.
To calibrate the retraction, you need a suitable calibration object. This object does not need to be very complex to show the effects of small changes in the retraction settings.
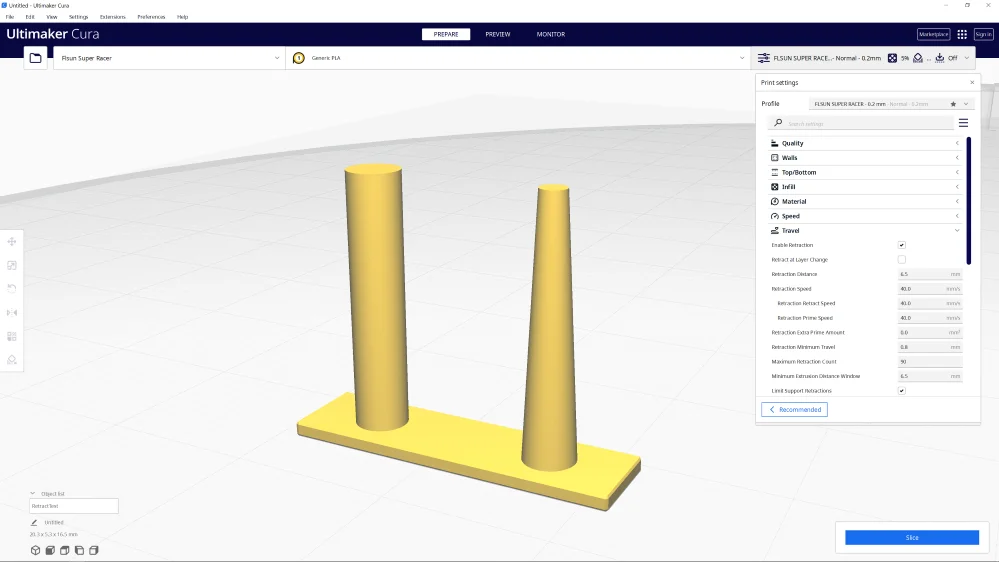
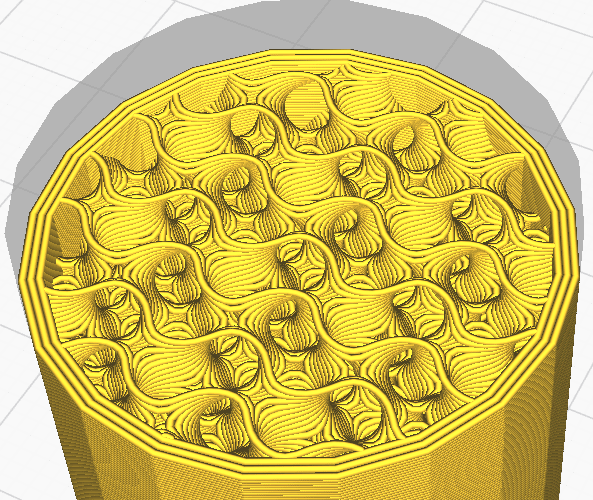
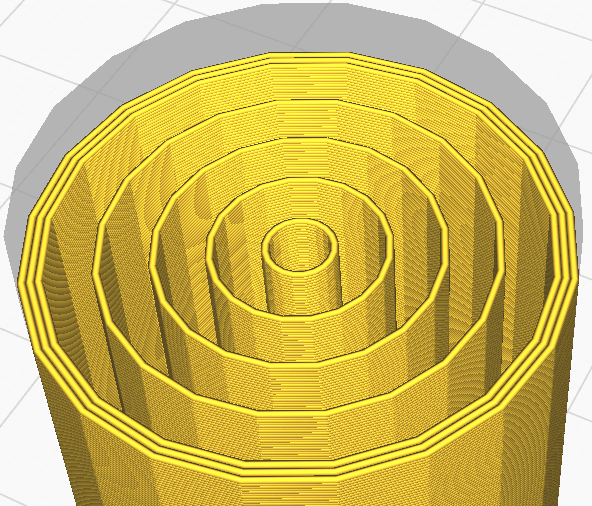
Small objects that consist of only a few parallel columns are best suited, as they are printed quickly and save filament. You can find such objects on portals like Thingiverse or in the Calibration Shapes plugin from Cura.
Change the retraction distance and the retraction speed in small steps, and observe the change. This way you can approach the perfect result in small steps.
Print Speed
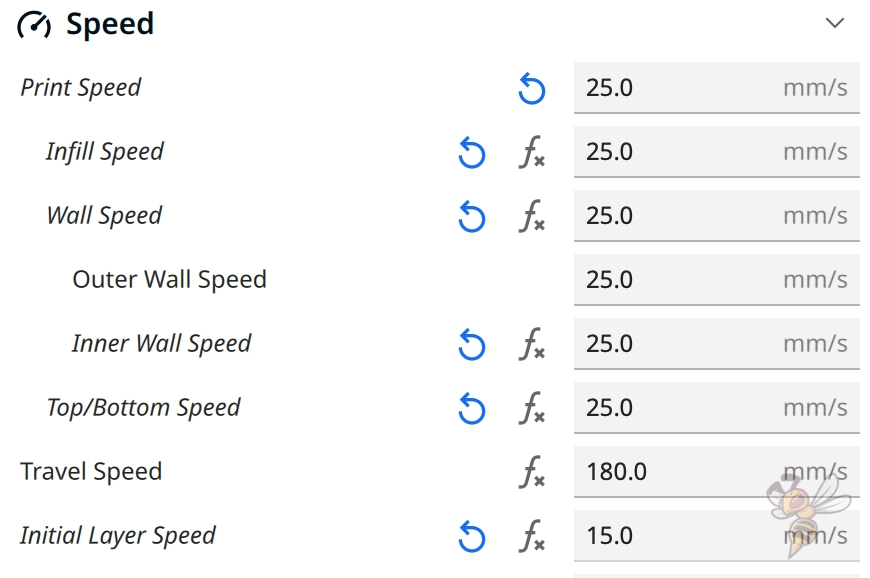
- Printing speed: 20 to 30 mm/s
Besides retraction and printing temperature, printing speed is probably one of the most important settings for TPU.
As described above in the explanation of the individual extruders, the flexible filament partially compensates for the extrusion movement. As you might imagine from other examples in everyday life, the faster this movement is, the more the flexible TPU filament compresses.
Therefore, with TPU, it is advisable to reduce the printing speed a lot. Even if you have a 3D printer like the Ender-5 S1 or FLSUN Super Racer, which achieve excellent quality with PLA or other rigid filaments even at 200 mm/s, you still need to reduce the TPU printing speed a lot.
The printing speed of TPU does not depend on the performance of the 3D printer, but on the flexibility of the filament.
Calibration
The print speed can be calibrated similarly to the retraction. Normally, you calibrate the print speed by setting it high enough so that no print errors are yet triggered by the vibrations of the print head. Ringing and ghosting are such print errors.
But with TPU this is not an option because you can’t reach such print speeds without getting massive stringing or similar print errors. Therefore, it is a good idea to use a retraction calibration object and print it at different print speeds.
The print speed at which you observe the fewest errors should be set for your entire object.
If you have problems with print bed adhesion, you can also set the print speed even lower for the first layer only. The lower the print speed for the first layer, the better the print bed adhesion. This is because the hot filament stays warm longer, allowing it to spread into the small pores and crevices of the print bed.
Travel Movements

Sometimes it is not possible to print TPU completely error-free and without stringing. Especially if you print TPU with a Bowden extruder, you should try to avoid travel movements (movements without extrusion) as far as possible or control them in a way that they cannot trigger stringing.
In most slicers, there is a setting that allows you to move the nozzle to the next point after a retraction through the already printed object. If some filament then comes out of the nozzle in an uncontrolled way, it will be deposited inside the object, where it will not be visible at the end.
This function is called for example in Cura “Combing Mode” and in Simplify3D “Avoid crossing outline for travel movement”. With these settings, you can significantly reduce stringing.
Layer Height & Line Width
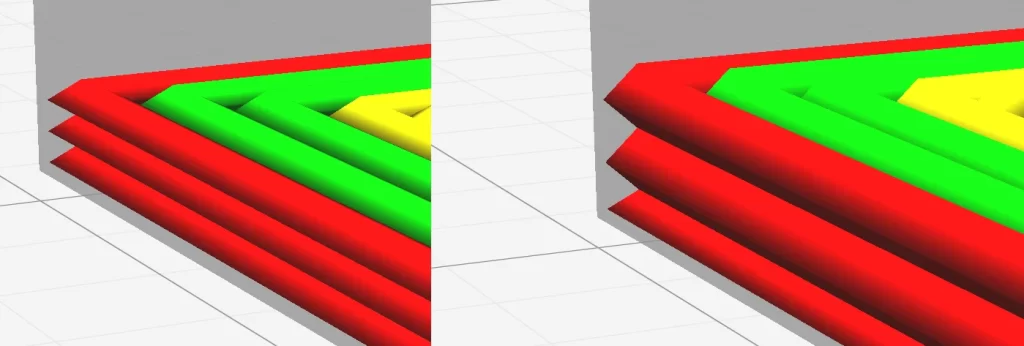
- Layer height: 25 to 50% of the nozzle diameter (i.e. 0.1 to 0.2 mm for a 0.4 mm nozzle)
- Line width: 80 to 100% of the nozzle diameter (i.e. 0.32 to 0.4 mm with a 0.4 mm nozzle)
As described several times in this article, the faster the movements of the extruder, the more flexible filament like TPU compensates.
The layer height and the line width also have an influence on how fast the filament is moved through the extruder. The thicker and higher the layers are, the more filament needs to be extruded per second at the same print speed.
It is therefore advisable to use small to medium layer heights and line widths for TPU.
Theoretically, the line width can be between 60 and 200% of the nozzle diameter. However, if you choose a line width that is too large, too much filament will be moved at once, which will also increase the delay due to the flexibility of the filament.
The same applies to the layer height. Normally, values between 25 to 75% of the nozzle diameter are possible. However, values above 50% lead to the same result as lines that are too wide.
If you still want to print objects with a coarse structure, you have to reduce the printing speed accordingly. However, since the total printing time remains about the same, there is hardly any argument for printing the object coarser, since smaller layer heights and line widths lead to a more stable object.
Infill
- Infill density: 20 to 30%. The higher the stiffer.
- Infill Pattern: Gyroid, Concentric
The interior of a 3D-printed object is called infill. The higher the infill density, the more stable and rigid a TPU printed object will be.
Depending on the effect you want to achieve, a lower or higher density could be optimal for you. However, 20 to 30% has proven to be the standard.
Through the infill pattern, you can influence the stiffness of the object in different directions. For example, the gyroid pattern is equally stable in all spatial directions, which also makes the finished TPU object evenly flexible.
If you want to make one axis of the object more stable than the other two, you can use the concentric infill pattern. It consists of circles formed around one axis. This gives a relatively low stability along the main axis and almost none along the other two.
Cooling
- Cooling: 0% (10 to 50% for overhangs)
Warping is rarely a problem with TPU. Therefore, it is not necessary to turn on the cooling. Only in the case of overhangs, a slight cooling can help to avoid sagging.
It is therefore generally advisable to first set the cooling to 0%. However, there are also TPU grades that can be printed slightly better with a light cooling.
Also, it depends on what 3D printer you have, as the cooling depends on the fan installed and the air supply line to the object.
Raft
- Raft: No
In most cases, the print bed adhesion of TPU is so good that a raft is not an option in the first place. And even if you still have issues with the print bed adhesion, you should not use a raft.
The combination of flexible filament and raft leads to various issues. On the one hand, rafts are usually printed with an increased flow rate, higher layers and wider lines, which can lead to printing errors as described above.
On the other hand, it is difficult to remove a raft from the TPU without leaving residue. Therefore, it is better to use other methods to improve the print bed adhesion first.
If you don’t want to use a PEI print bed and don’t have Blue Tape on hand, you can try using a regular glue stick or increasing the print bed temperature.
Also make sure that you have leveled your print bed properly and that the z-offset is set correctly. If the z-offset is too high, the filament will not be pressed hard enough onto the print bed and will not bond well enough.
If you need further information about print bed adhesion improvements, you can read this article: 3D Printing Doesn’t Stick to the Bed: I Tested Every Solution
Storage
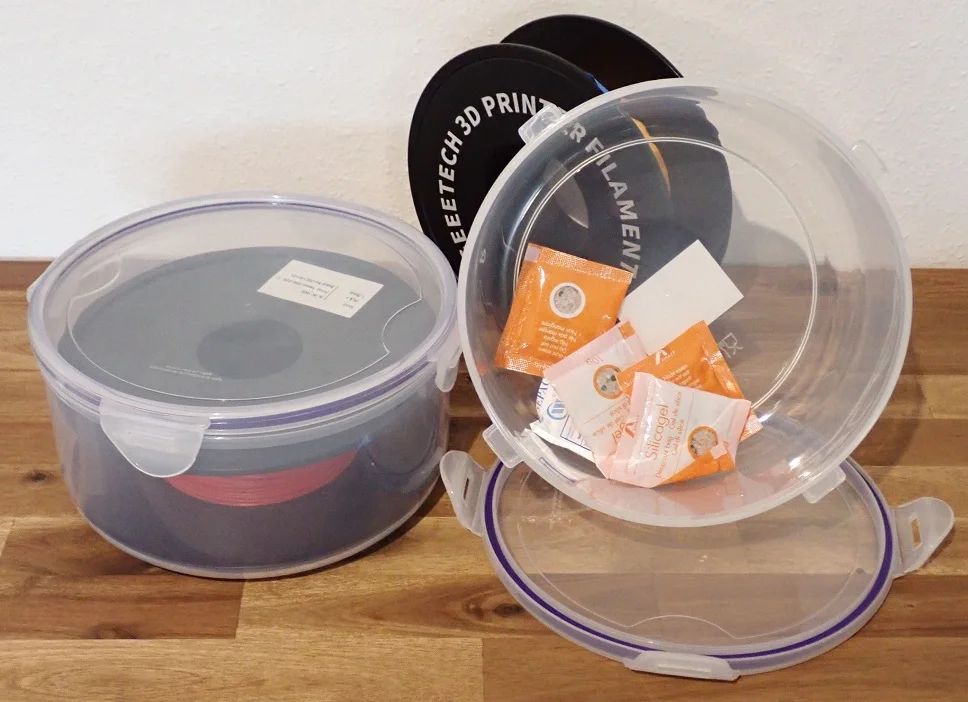
- Storage: Airtight (vacuum bag*, plastic box*)
TPU is hygroscopic, as are most filaments. If you store this filament in the open air, the TPU filament will absorb moisture from the air.
This promotes printing errors such as stringing and can even produce bubbles in extreme cases. Then there is so much moisture in the filament that it evaporates in the hotend and produces bubbles.
So, you should store TPU filament airtight. For example, you can use vacuum bags or you can choose an airtight container with a lid.
If your filament is already wet, you can dry it in these airtight packages with silica gel*. This will take a relatively long time. If you want to speed it up a bit, you can also use special filament dryers like the Sunlu FilaDryer S2.
Conclusion
TPU filament* is a filament with which you can achieve spectacular effects. Therefore, it is not only popular in the hobby 3D printing, it also finds many applications in the industry.
With the print settings from this article, you have a good starting point for further optimization. With TPU, always remember to reduce the speeds that affect the filament. Mainly, you should calibrate the print speed and retraction accurately to get good results with TPU.
Disclosure: This website is the property of Martin Lütkemeyer and is operated by Martin Lütkemeyer. Martin Lütkemeyer is a member of the Amazon Services LLC and other Affiliate Programs. These are affiliate advertising programs designed to enable websites to earn advertising revenue through advertising and linking to Amazon.com and others. Links marked with * are affiliate links.
