
- Wet Filament: Prevention, Symptoms & Drying - July 18, 2024
- Sovol SV08 – Best PrusaSlicer Settings & Profile - June 26, 2024
- Sovol SV08 – Best Orca Slicer Settings & Profile - June 26, 2024
Disclosure: Links marked with * are Affiliate Links. I earn from qualifying purchases if you decide to make a purchase through these links – at no additional cost for you!
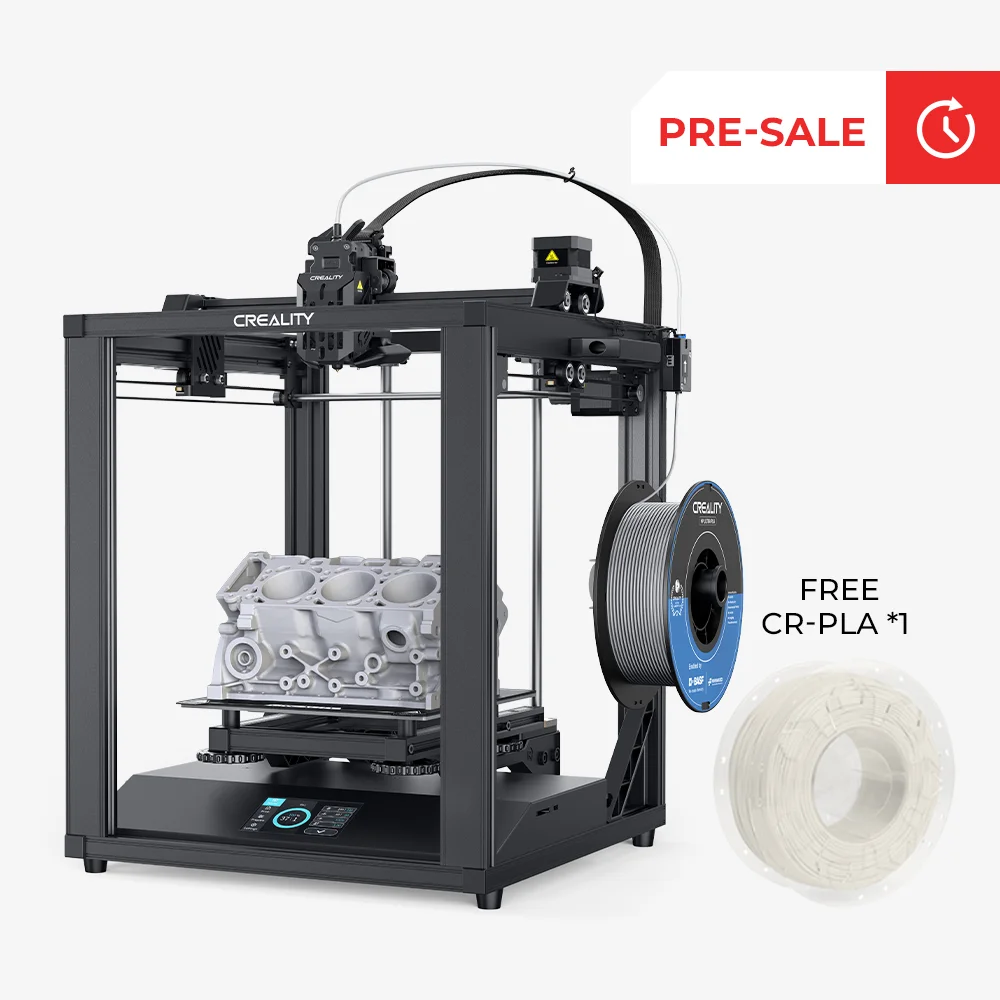
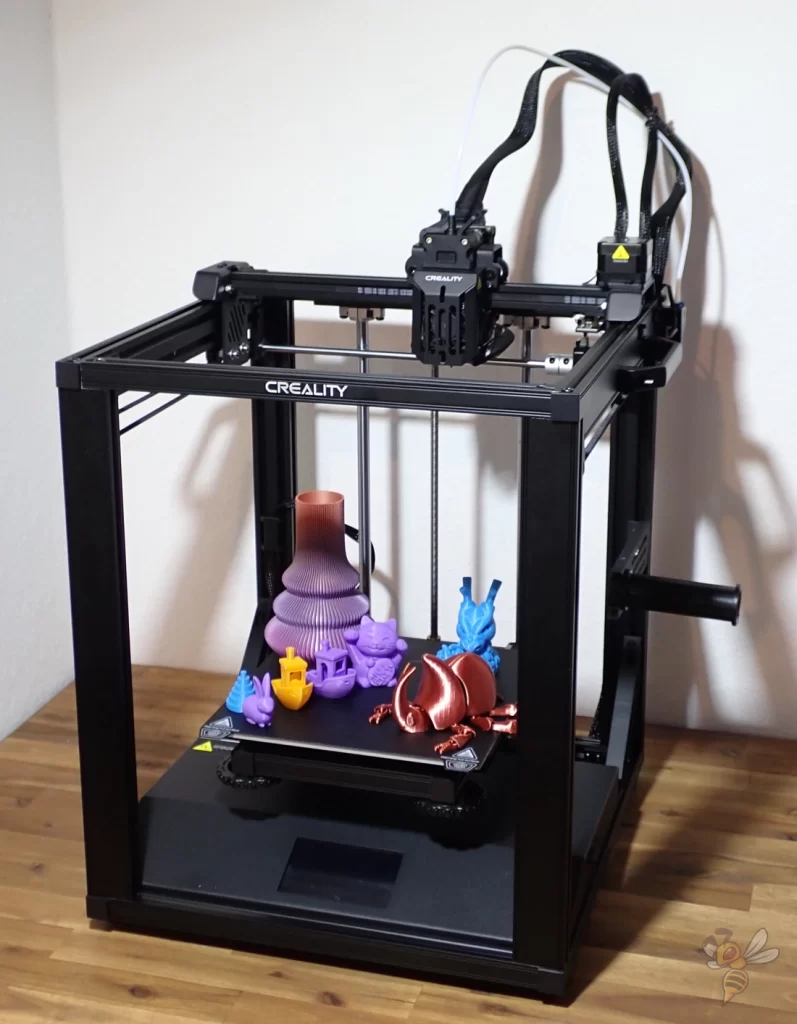
In this hands-on review, I will introduce you to the Ender-5 S1* in detail and demonstrate its print quality with practical examples. The Ender-5 S1 is the successor of the Ender-5 Pro and brings useful new upgrades.
The Ender-5 S1 features the accurate Sprite direct drive extruder, reaches a print temperature of 300 °C, automatically levels its print bed and has a PC-coated print bed. One of the most outstanding features, however, is the high printing speed of 100 to 250 mm/s.
How these features look in detail and what else the Ender-5 S1 can do, I show you in this practical review.
Check Price at:
Table of Contents:
- 1 Key Takeaways
- 2 Who Should Buy the Ender-5 S1?
- 3 Advantages & Disadvantages
- 4 Technical Specifications
- 5 Scope of Delivery
- 6 Setup
- 7 Features & Design
- 8 Heating Times
- 9 Noise Level
- 10 Power Consumption
- 11 Slicer
- 12 Print Quality – Practical Test
- 13 Ender-5 S1 vs. Ender-5 Pro
- 14 Ender-5 S1 vs. Ender-5 Plus
- 15 Is the Ender-5 S1 Worth It?
- 16 Similar 3D Printers
Key Takeaways
- Due to the stable construction and the precise stepper motors, printing speeds of 100 to 250 mm/s can be reached.
- With the Sprite direct drive extruder and the full metal hot end, printing temperatures of 300 °C and the processing of flexible filaments are possible.
- The print bed consists of a flexible spring steel that can be removed and bent through after printing. This makes the removal of printed objects very easy.
- The PC-coating on the print bed provides excellent print bed adhesion for most filaments, and is perfect for PLA.
- The CR-Touch allows the print bed to be automatically leveled.
- Although the Ender-5 S1 already has numerous upgrades built in, there are still more offered by Creality.
Who Should Buy the Ender-5 S1?
The Ender-5 S1 is interesting for anyone who wants to print high-quality objects in a short time. Its high user-friendliness and reproducible quality make it recommendable for beginners as well as for advanced users.
Advantages & Disadvantages
PRO:
- Can also process flexible and high-temperature filaments
- The print bed levels itself automatically
- Nearly perfect print bed adhesion
- Very fast
CON:
- No belt tensioner
Technical Specifications
DEVICE
- Technology: FDM
- Size: 425 × 460 × 570 mm
- Weight: 12.1 kg
- Mainboard: 32-Bit Silent Mainboard
- Operation: 4.3″ touch screen
PRINTING
- Extruder: “Sprite” dual gear, full metal, direct drive extruder
- Print temperature: max. 300 °C
- Print bed temperature: max. 110 °C
- Print volume: 220 × 220 × 280 mm
- Print bed material: PC coated spring steel, magnetic, flexible
- Print bed levelling: Automatic by a CR-Touch
- Print speed: Maximum 250 mm/s, standard 120 mm/s
- Nozzle: 1 × 0.4 mm
- Accuracy: ± 0.1 mm
- Layer height: 0.05 to 0.35 mm
- Filament: 1.75 mm PLA, ABS, PETG, TPU, PC, ASA, HIPS
- Filament Sensor: Yes
- Resume Print: Yes
SOFTWARE
- File transfer: SD card, USB-C
- File formats: STL, OBJ, AMF
- Slicer: Creality Slicer, Creality Print, Cura, Repetier-Host, Simplify3D
Check Price at:
Scope of Delivery
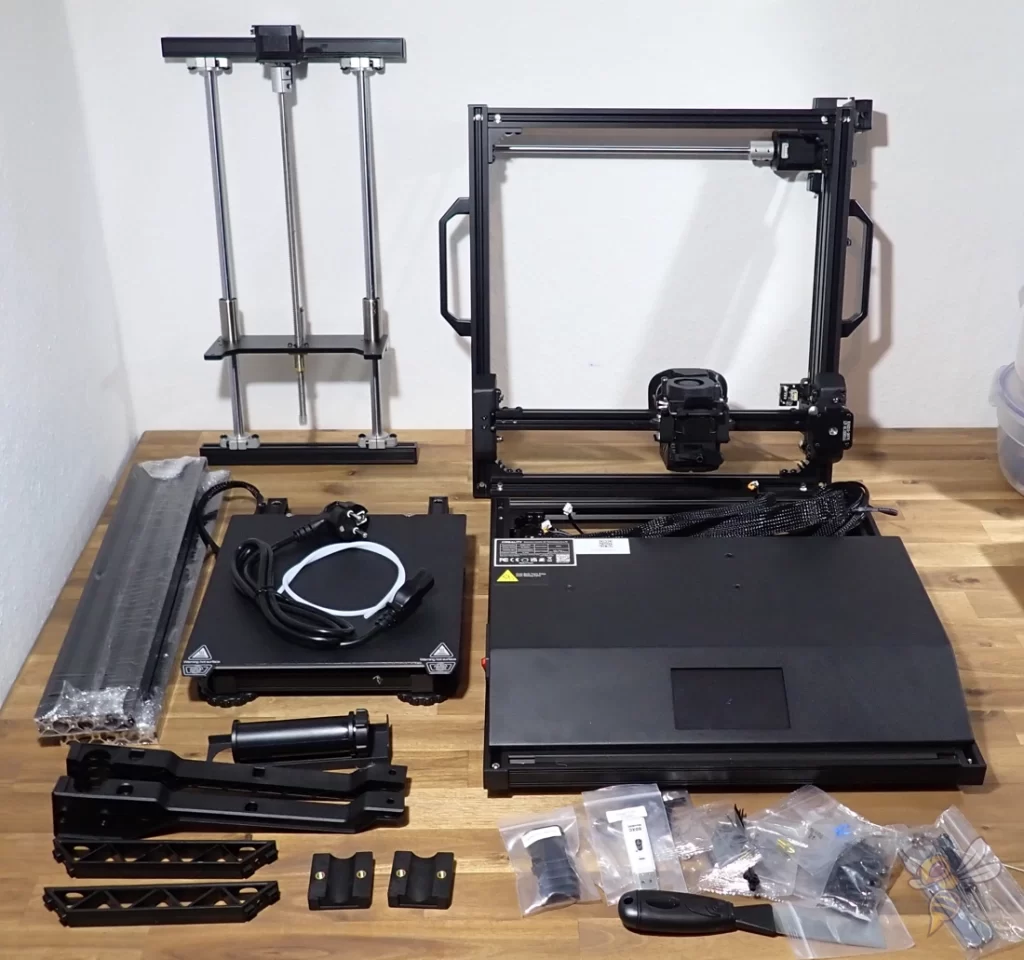
Although the Ender-5 S1 is relatively large, it comes in a compact package. All individual parts are well protected by matching foam parts. Everything is included and ready to start with the first test prints. The necessary tools for assembly are also included.
The following items are included with the Ender-5 S1:
- 3D printing base
- pre-assembled X/Y-axes including printhead
- print bed platform
- z-axis
- profiles for the frame
- support parts for the frame
- filament holder
- tools for assembly
- filament side cutter
- needle for cleaning the nozzle
- spatula for the print bed
- SD-USB adapter
- power cable
- cable ties
- spare parts
- 200 g PLA filament
- SD card with digital instructions and finished G-code files as test prints.
If you decide to buy the Ender-5 S1, I would definitely advise you to order more filament. For the beginning PLA is best, Creality also offers their own PLA filament*.
Otherwise, you can also process many other filament types with the Ender-5 S1. To print larger ABS objects, however, you need a suitable enclosure.
You can either use the large Creality tent or suitable acrylic panels that close off the print volume. This way ABS has the required homogeneous warm ambient temperature to avoid warping.
Setup
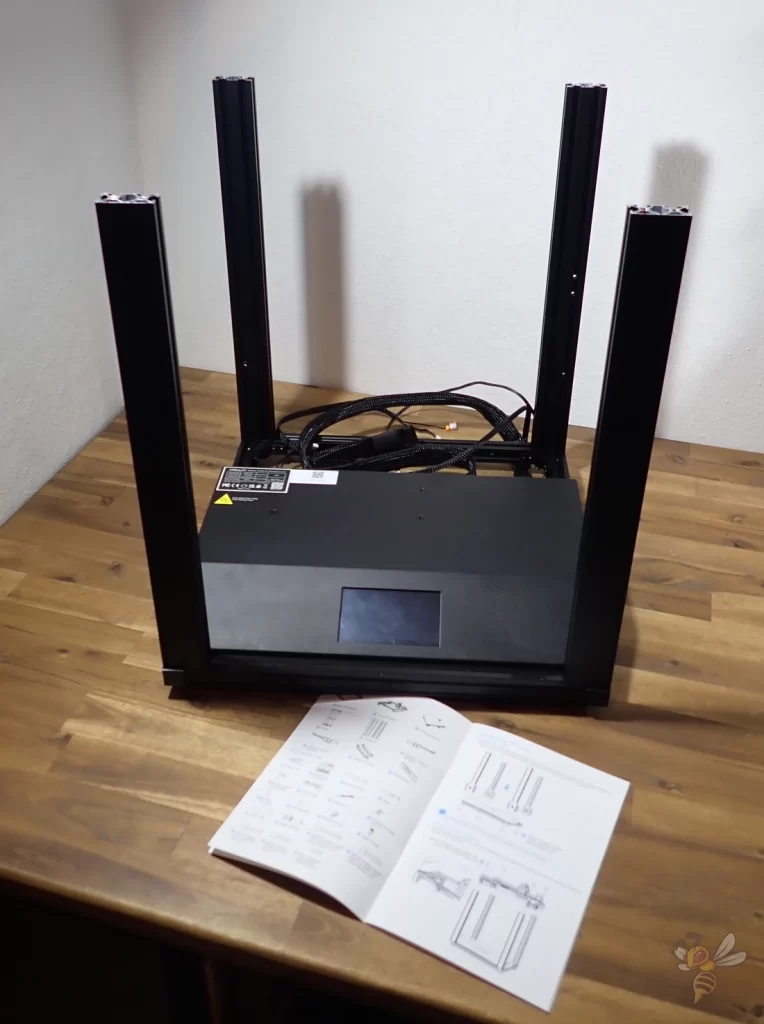
The Ender-5 S1 is delivered in individual parts and modules. Assembly takes between 20 and 40 minutes. The necessary tools are included in the scope of delivery.
Although it may look a little complicated when you first open the Ender-5 S1 package, assembly is relatively simple. The steps are well explained in the manual and demonstrated with large pictures. You will therefore hardly need the written instructions at all.
These are the steps to assemble the Ender-5 S1:
- Mount the 4 frame parts to the 3D printer base.
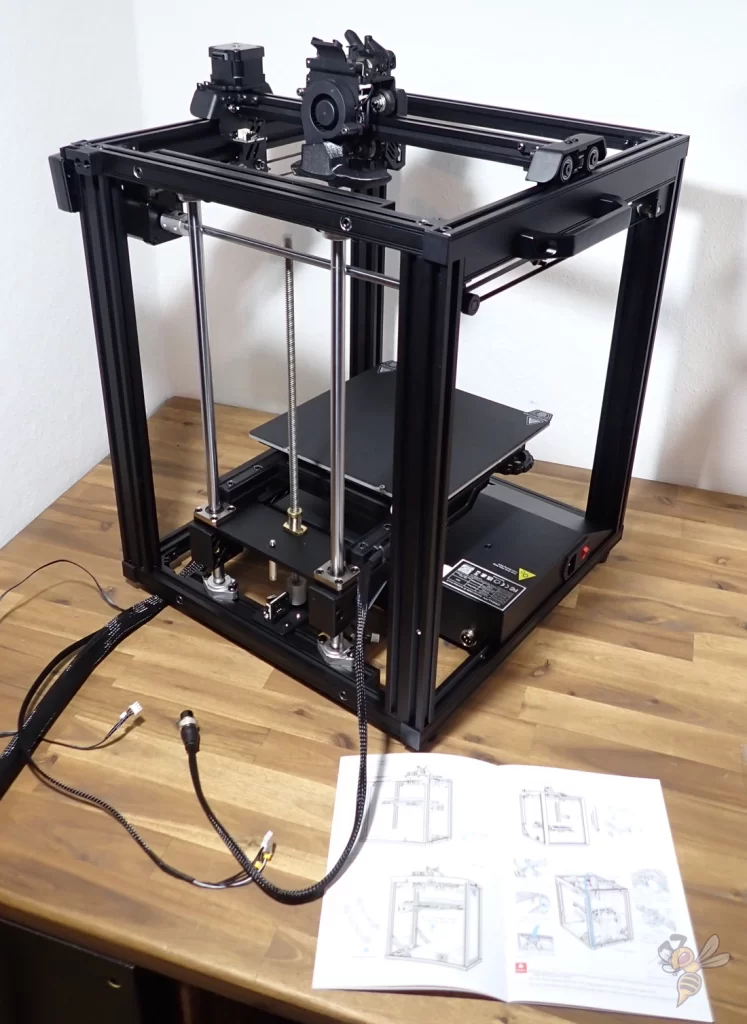
- Mount the top construction with pre-assembled axles and the printhead.
- Connect the Z-axis to the print bed and screw it to the frame.
- Improve stability with angled parts.
- Connect the cables.
- Level the print bed.
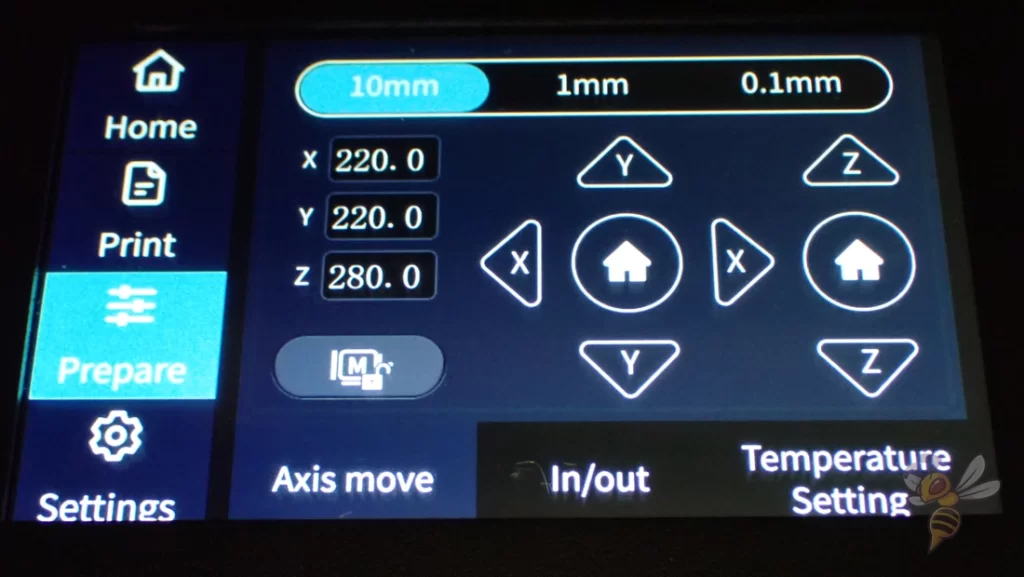
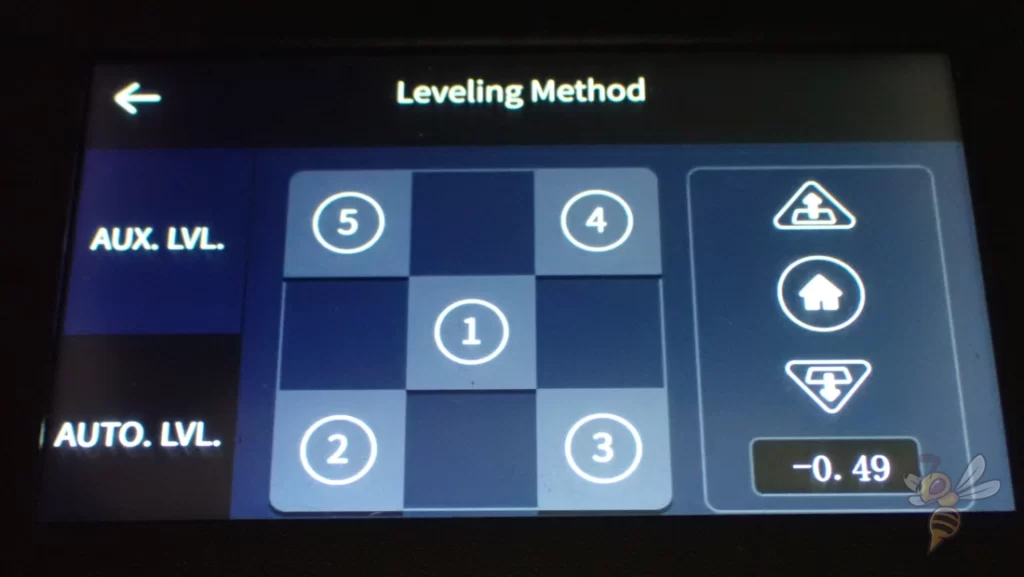
Print bed leveling is available in manual and automatic modes. In manual leveling, you use a piece of paper to adjust the distance between the nozzle and the print bed at 5 points on the print bed.
The goal of print bed leveling is to set the distance between the Nozzle and the print bed equal at these 5 locations so that the tilt can be compensated.
Once you have roughly leveled the print bed manually, you can also select automatic mode for future leveling. In this mode, the Ender-5 S1 uses a CR-Touch to automatically measure the distance between the nozzle and the print bed in many locations.
You will not get around the one-time manual levelling after mounting, even with the sensor. However, you will only need the manual levelling sporadically or not at all, as you can use the sensor instead.
Features & Design
The design of the Ender-5 S1 is typical for the Ender-5 series. Unlike most other Creality 3D printers, the print bed does not move on the y-axis, but on the z-axis. The print head, on the other hand, is fixed on the z-axis and moves on the x/y-plane.
This type of construction and the large cube-shaped frame give it a high level of stability. In addition to a high printing speed, this also offers, among other things, the possibility to seal the printing area with suitable acrylic panes.
But the Ender-5 S1 has many more features that enhance print quality and ease of use.
These are the main features of the Ender-5 S1:
- Sprite direct drive extruder: This extruder developed by Creality offers a constant extrusion force of 80 Newton. With it, the processing of flexible filaments is very well possible.
- Full metal hotend: The hotend can reach temperatures of up to 300 °C. This allows many types of filament to be processed.
- Automatic print bed levelling: A CR-Touch is installed in the print head, which can automatically measure the inclination of the print bed.
- PC coated print bed: The coating provides near perfect print bed adhesion for most filaments. It is also flexible, making release of the finished object very easy.
- Stable construction: The cube-shaped construction is very stable and prevents vibrations even at high printing speeds.
- High print speed: 100 mm/s is already about twice faster than most other FDM 3D printers. The maximum print speed is even 250 mm/s.
- Touchscreen: The touchscreen is not very large, but still offers a clear menu.
- Many connection options: You can transfer data via an SD card or a USB-C connection.
- Upgrades: While the features of the Ender-5 S1 are already numerous, there are a few useful upgrades that are officially offered by Creality.
Sprite Direct Drive Extruder
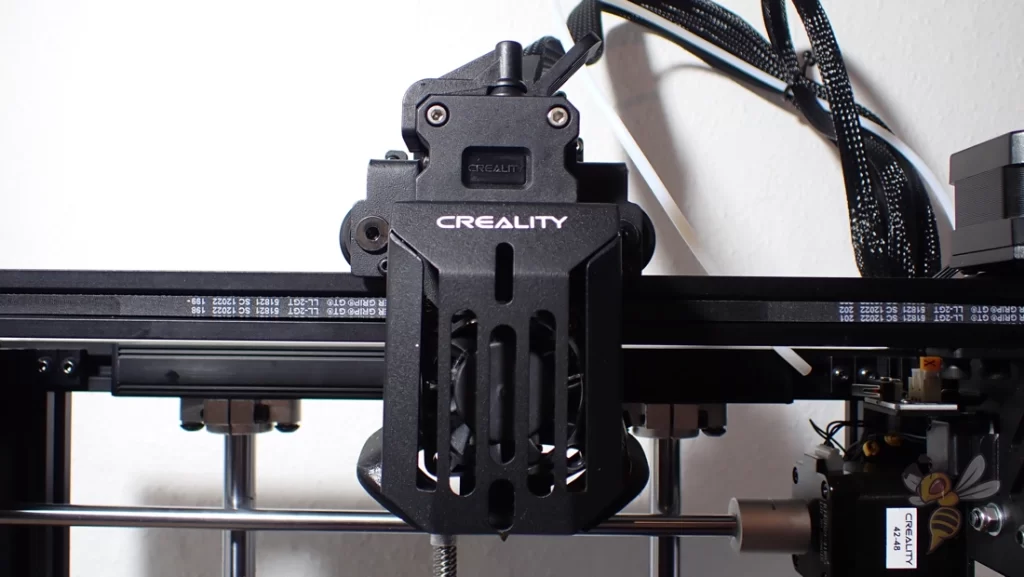
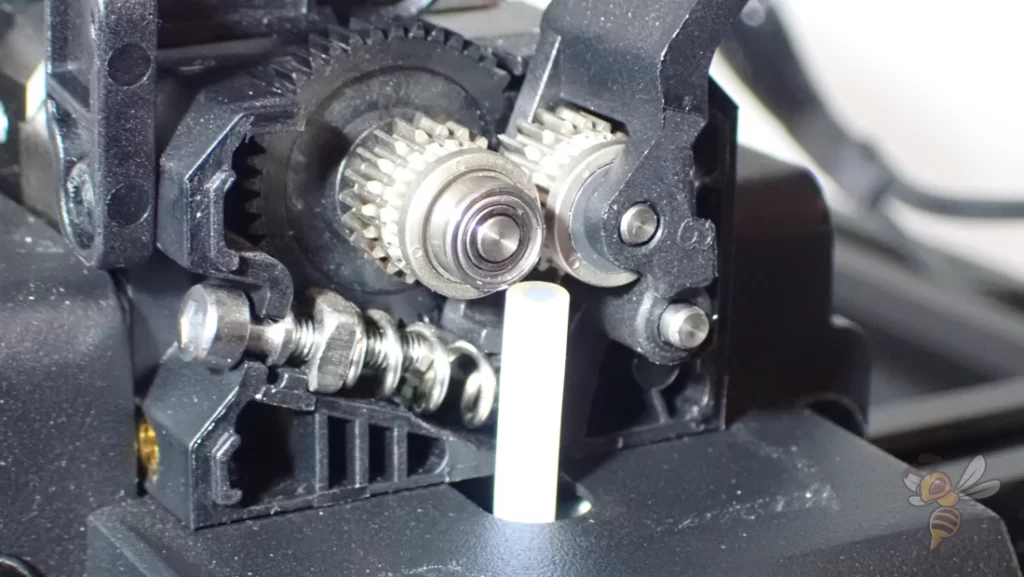
The “Sprite” direct drive extruder integrated in the print head is significantly larger in this variant than in the Ender 3 S1, for example. Nevertheless, it offers excellent extrusion accuracy and can also process flexible filaments.
With flexible filaments it is important that the distance between the extruder and the hot nozzle is as short as possible. Otherwise, the flexible filament can partially compensate for the movements of the extruder. This can lead to various printing errors, which with flexible filaments mainly occur with Bowden extruders.
What I noticed positively when using the extruder is the easy loading and unloading of filament. The lever to take the tension off the filament is ergonomically located directly at the top of the print head.
Full Metal Hotend

So that you can also process more demanding filaments, the hotend is completely made of metal. This means that printing temperatures of up to 300 °C can be reached.
In many beginner 3D printers, the heatbreak between the nozzle and the passive cooler is made of PTFE. Thus, the printing temperature is limited to a maximum of 240 °C with such hotends.
On the Ender-5 S1, this heatbreak is also made of metal, which means you don’t have to worry about replacing parts frequently or harmful fumes escaping while printing.
Automatic Print Bed Levelling

I have already had very good experiences with the CR-Touch. It is now installed as standard in most new models from Creality, but is also available separately as an upgrade for older models.
Compared to the very popular BL-Touch it has a comparable and sometimes even better accuracy. Especially the durability of the metallic tip and the optical sensor inside are clear advantages of Creality’s version.
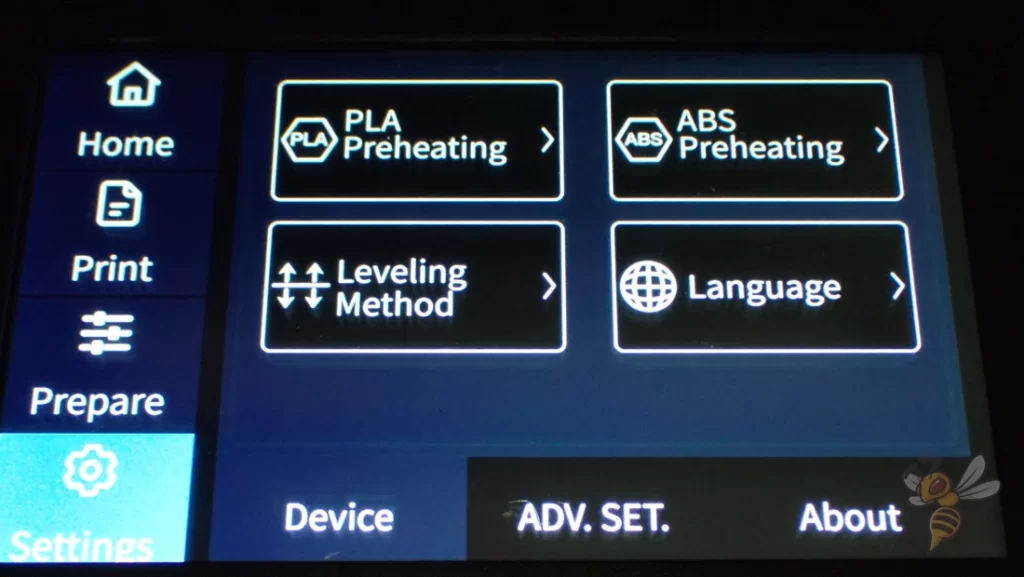
The Ender-5 S1 menu allows you to start automatic print bed leveling at the touch of a button. You only have to set the z-offset manual with a piece of paper.
You can also adjust the z-offset during printing in the first layers of an object. The firmware automatically saves the new value for the next prints. This way you don’t need the manual leveling at all and can rely on the CR-Touch alone.
PC-Coated Print Bed
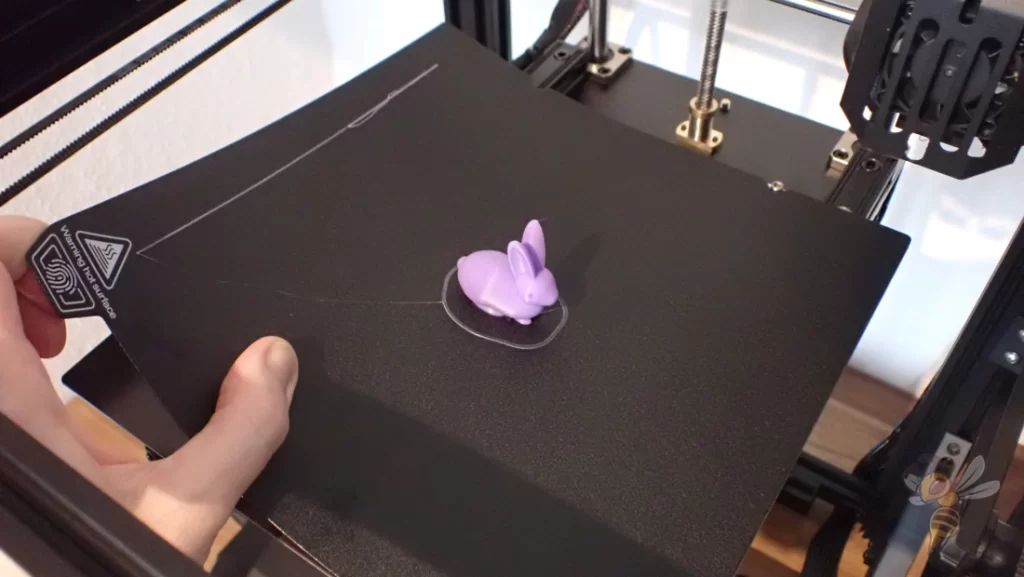
The print bed of the Ender-5 S1 is made of magnetic and flexible spring steel. It also features a PC coating that provides excellent print bed adhesion for most filaments. Especially for PLA the print bed adhesion is ideal.
Because the print bed is flexible and magnetic, you can easily remove it from the printing plate after printing and bend it. The object printed on it can then be easily removed without having to use a spatula.
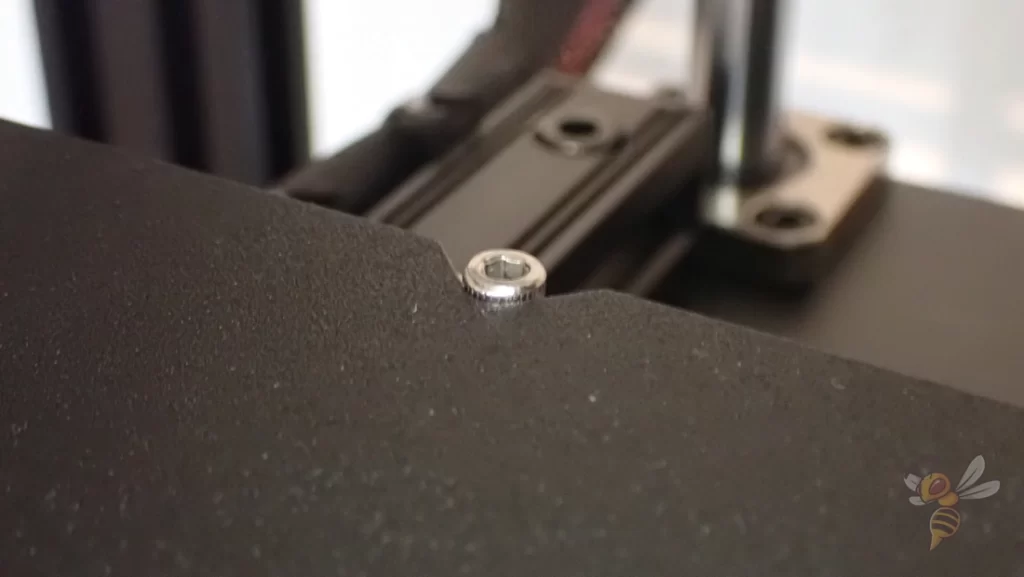
A small but very practical feature are two small screws at the rear end of the print bed, where the print bed can be locked in place. With magnetic printing plates it is often troublesome to align them correctly. These small screws lock the print bed in place and prevent it from slipping.
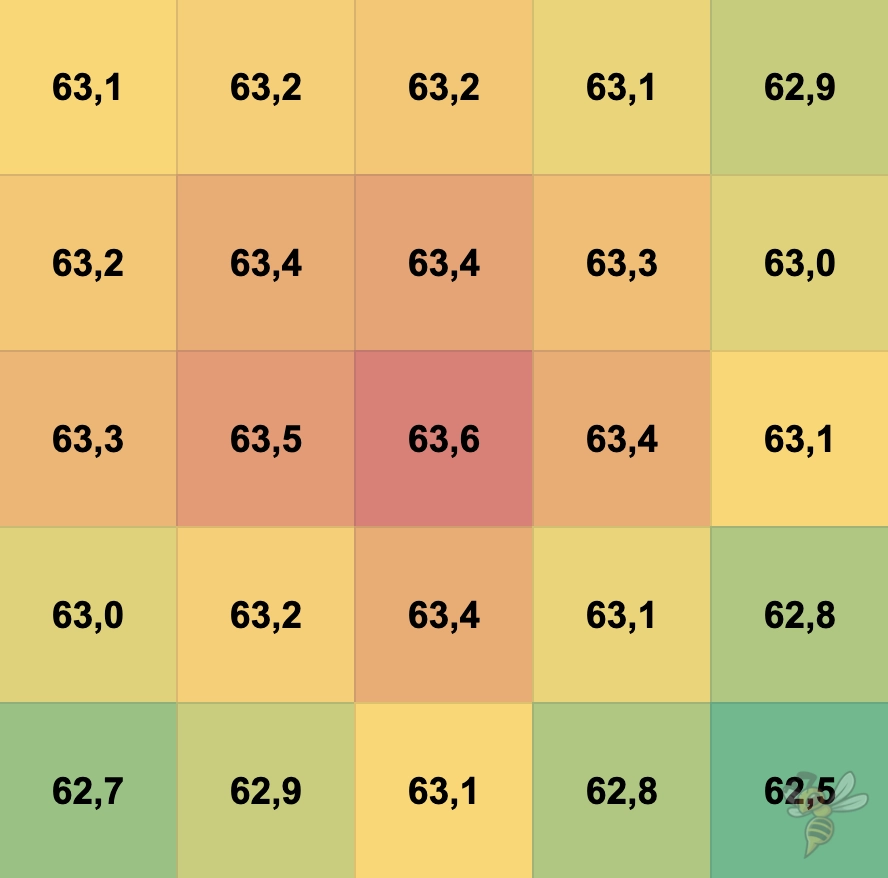
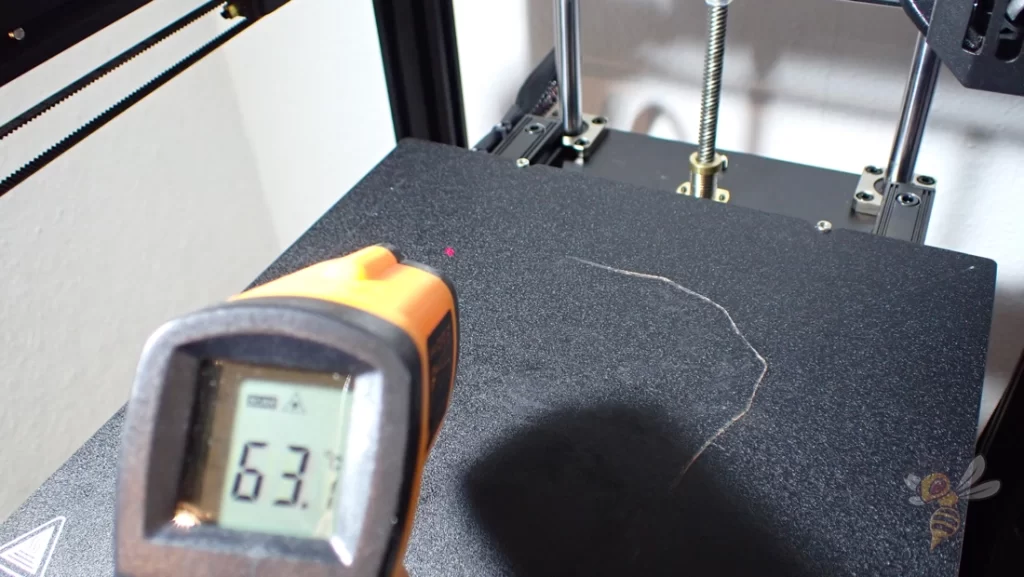
The temperature distribution on the print bed is homogeneous enough. With most filaments you will get along well here. However, the actual temperature deviates a few degrees upwards. At 60 °C it is about 3 °C too much. But more is better than less in most cases.
Stable Construction
A distinguishing feature of the Ender-5 series is the cube-shaped design. However, this rather clunky-looking design has the advantage of being very stable. This allows very high printing speeds without disturbing vibrations.
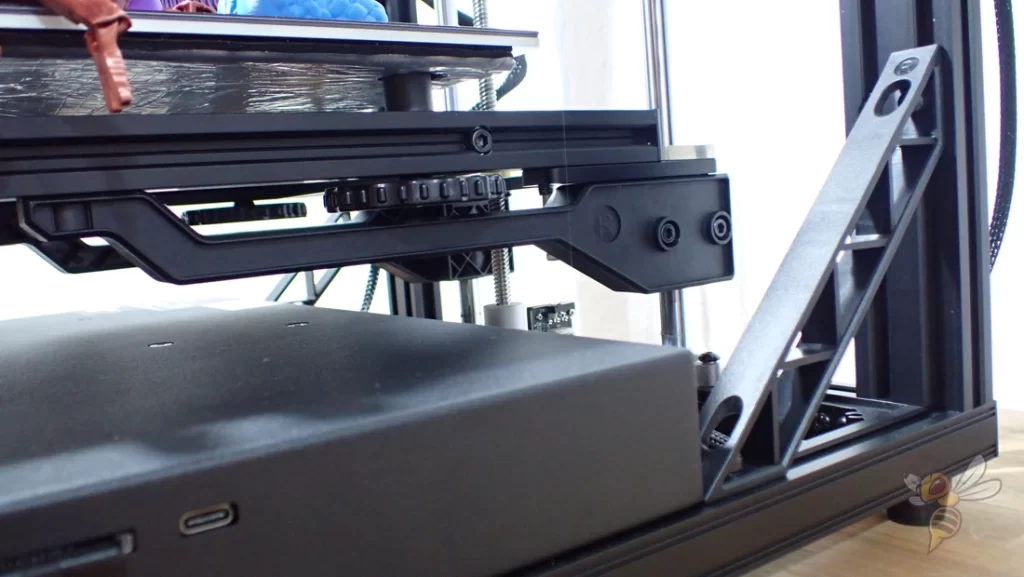
During assembly, I already noticed that there are several design features that further increase the stability in addition to the stable cube construction. On the one hand, cross braces are installed at the rear end of the base and the print plate has got supporting holders in addition to the aluminum profiles.
High Printing Speed

The Ender-5 S1 can reach print speeds of maximum 250 mm/s. However, 100 mm/s is more realistic. However, this is still extremely fast for an FDM 3D printer.
Normally, such printing speeds can only be achieved by delta 3D printers like the FLSUN Super Racer. That the Ender-5 S1 can achieve such print speeds is mainly due to its design, which supports very large lateral acceleration of 2000 mm/s².
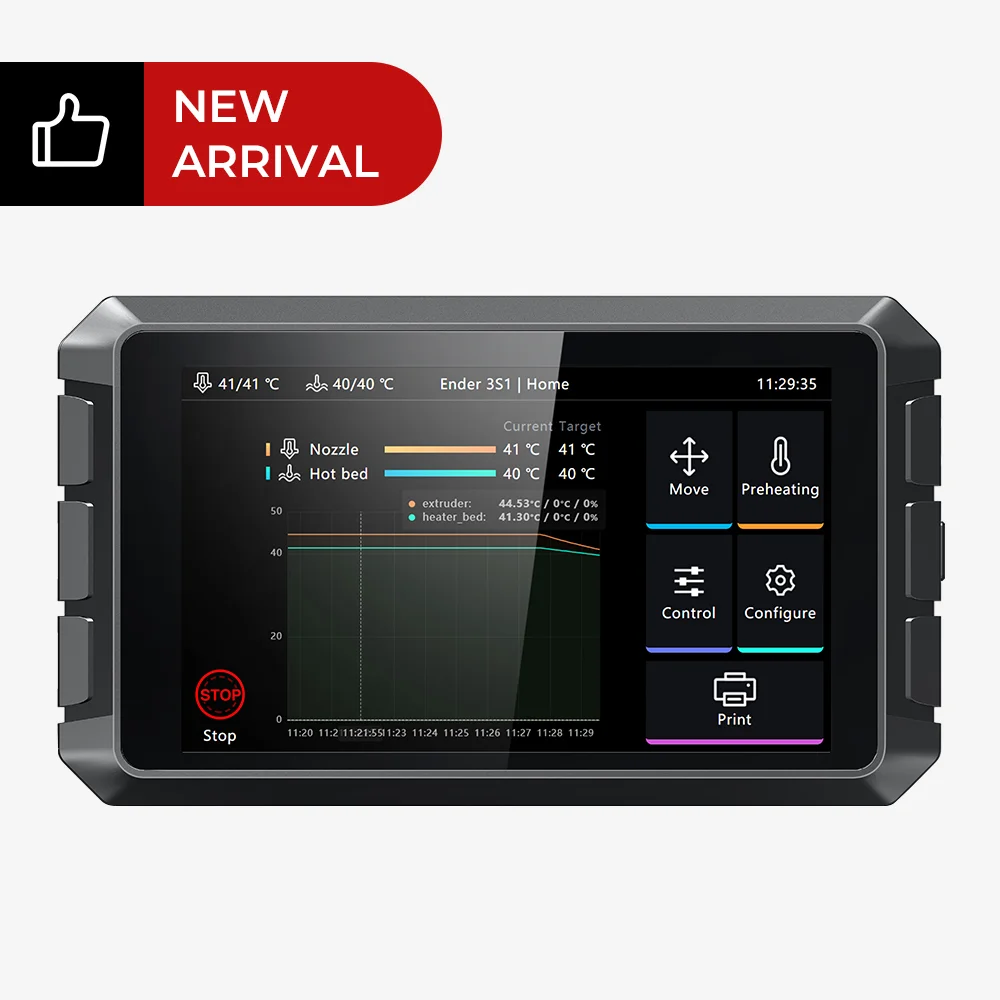
If you want to push the limits of printing speed, I would recommend the Creality Sonic Pad. You can use the included accelerometer to increase print speeds even more without creating vibrations.
Touchscreen
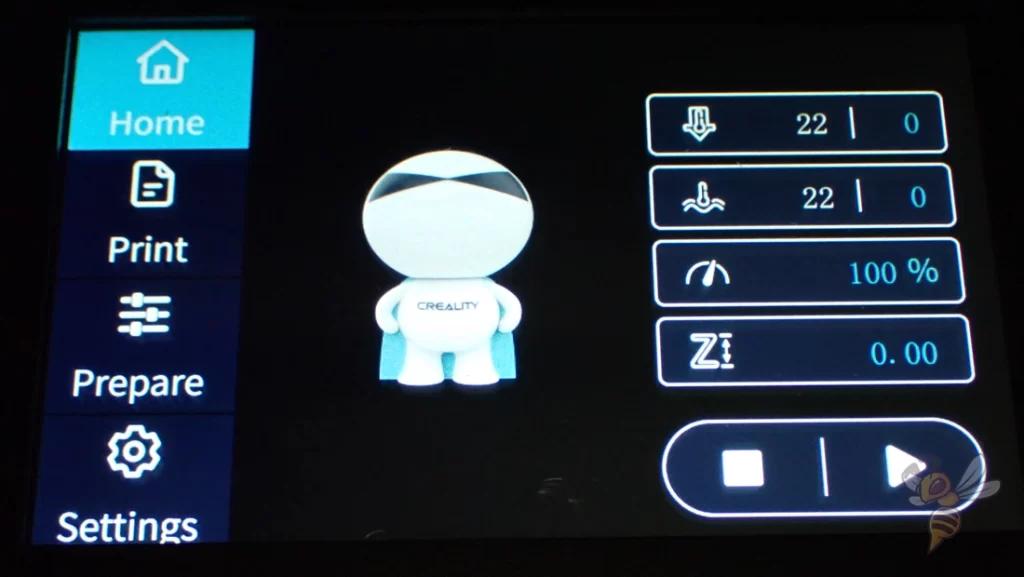
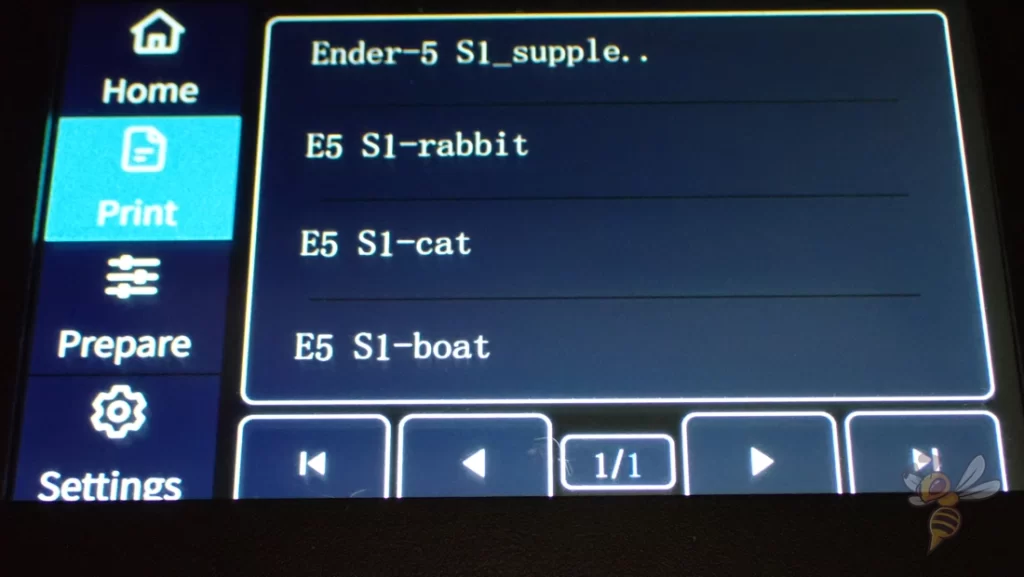

The 4.3″ touchscreen clearly displays all important settings and menus. It could be bigger, but it is absolutely sufficient to navigate through the clearly arranged menu.
One advantage is that it is integrated directly into the base and does not protrude to the left or right as with other 3D printers.
Many Connection Possibilities
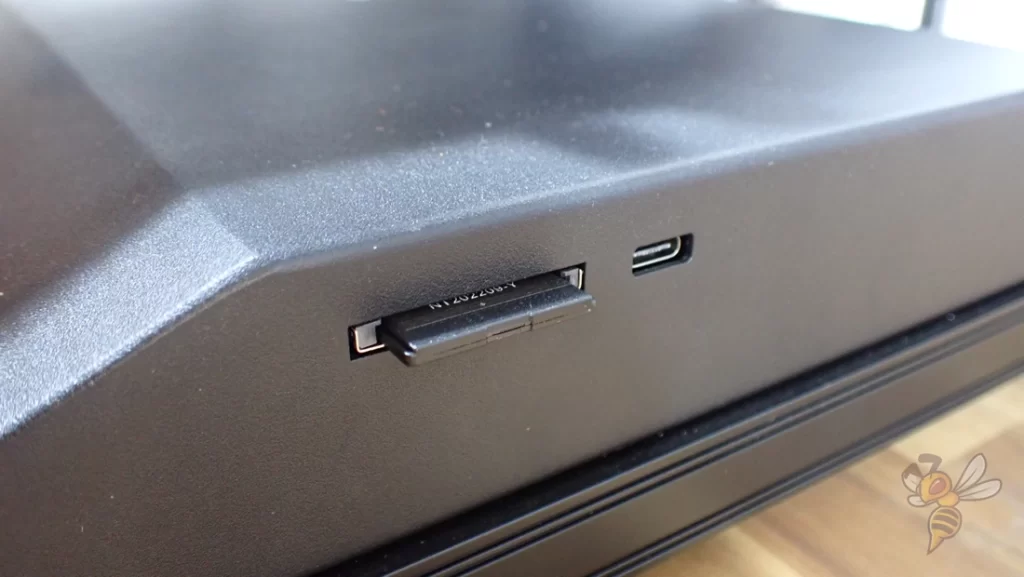
On the right side of the 3D printer base is a slot for an SD card and a USB-C slot. This allows you to connect the Ender-5 S1 to your PC or transfer files via the SD card.
If you connect the Creality Sonic Pad, you could also control the Ender-5 S1 via a web interface with Klipper.
Upgrades
Check Price at:
Sonic Pad (click here for the full review): With the Sonic Pad, you can equip the Ender-5 S1 with the Klipper firmware and attach an accelerometer to the print head. This allows even higher print speeds to be achieved, as the acceleration sensor prevents vibrations that would otherwise lead to print errors. In addition, the operation via the Sonic Pad or via Klipper is much more pleasant and also possible via a browser interface.
Check Price at:
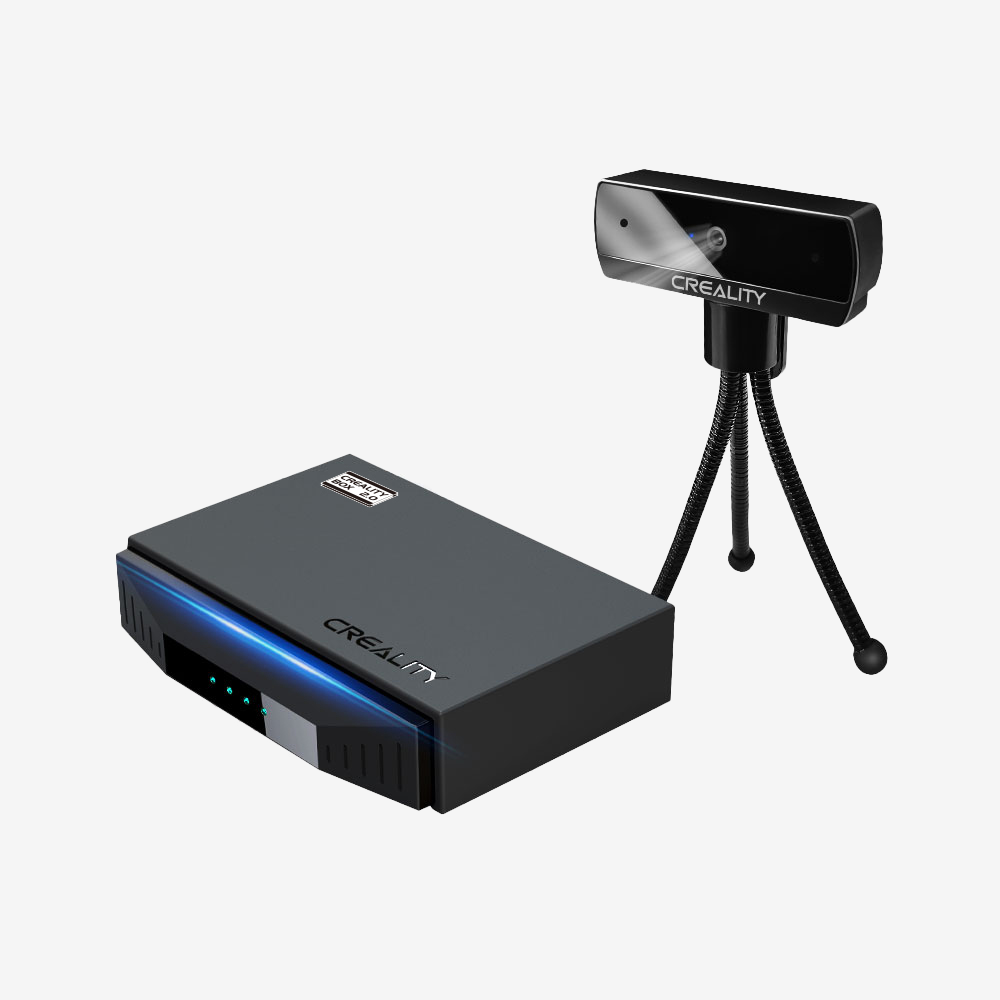
WiFi Box + Camera Kit: With this kit* you can make the Ender-5 S1 WiFi enabled and monitor it from anywhere via the camera. You can either access the camera with the Creality Cloud (also available as an app for your smartphone) or connect the camera with Klipper via the Sonic Pad.
Acrylic enclosure: Certain filaments such as ABS require a warm and homogeneous ambient temperature. Otherwise, they would warp too much as they cool. This can either lead to poor print bed adhesion or parts of the object warping so much that they are no longer usable. With this acrylic enclosure you can create such environmental conditions.
Heating Times

To reach the typical temperatures for PLA, the Ender-5 S1 needs about 3.5 minutes. This is relatively slow for the print bed size. However, the hotend is all the faster for that.
Noise Level
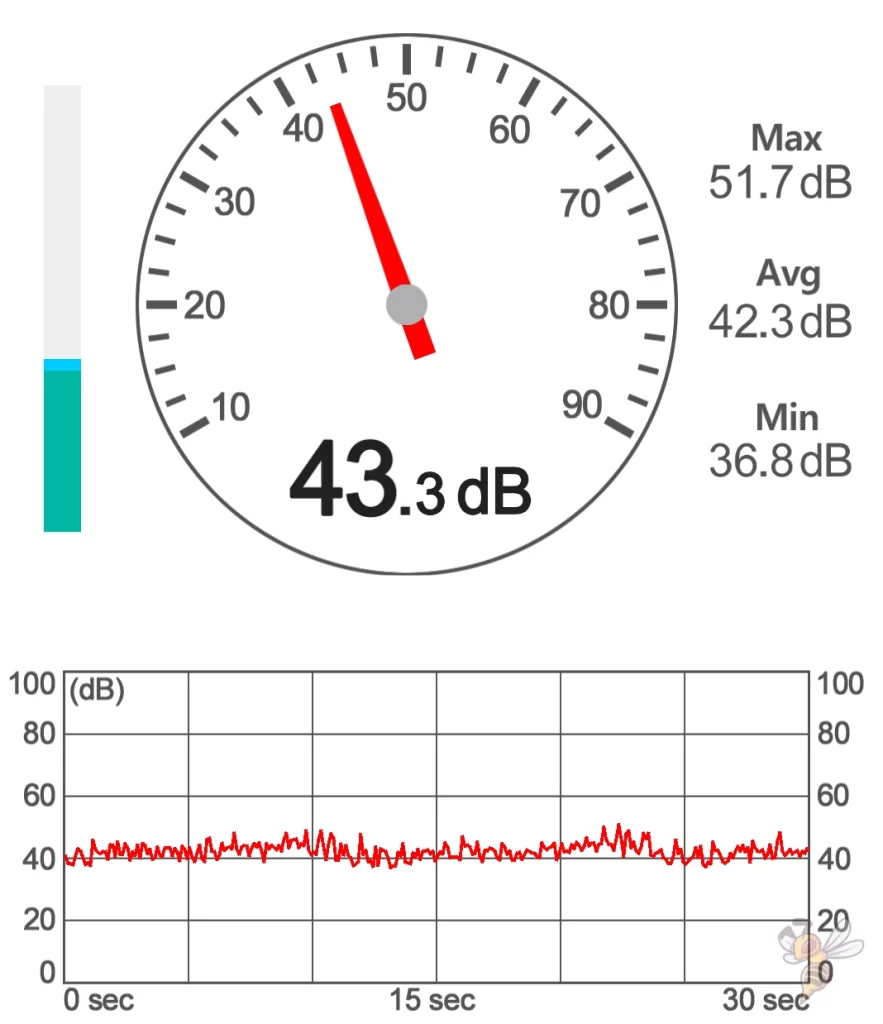
With an average noise level of 40 to 45 decibels, the Ender-5 S1 is relatively quiet. However, it can get a little noisy when you set the print speed very high.
The loudest thing about the 3D printer is the fan in the print head and the fast movements of the x and y axes. The drivers of the stepper motors, on the other hand, are noiseless due to the 32-bit silent mainboard.
Power Consumption
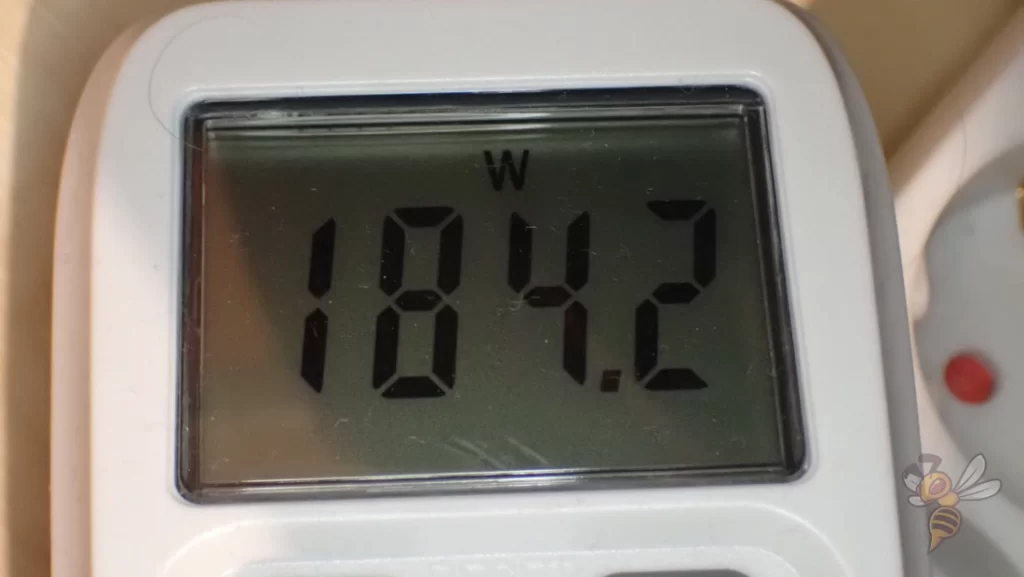
During printing, the Ender-5 S1 gets between 50 and 200 watts, depending on whether the hot end and print bed are currently being heated or not. Compared to other FDM 3D printers, this is relatively normal.
With some 3D printers like the BQ-Hurakan I have seen a feature where you can heat only a part of the print bed and not the rest. This saves significantly on electricity costs. However, with the Ender-5 S1, the entire print bed is heated, no matter how large the printed object is.
Slicer
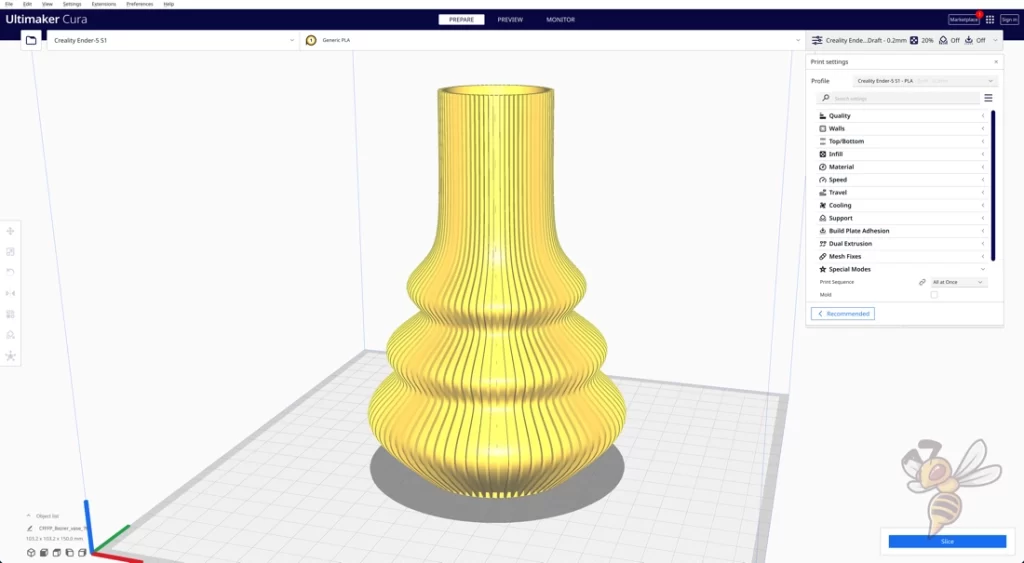
The Ender-5 S1 can be fed print files with Creality’s two slicers, Cura, Repetier-Host and Simplify3D. I used Cura for my test.
At the time of the review, there was no ready-made standard profile for the Ender-5 S1 in the respective slicers. However, by calibrating the most important settings and specifying the correct machine parameters, I was quickly able to achieve almost perfect results. In this article, you can get my settings.
Especially the accurate extrusion by the Sprite direct drive extruder made the calibration very easy, because every change is immediately visible.
Check Price at:
Print Quality – Practical Test
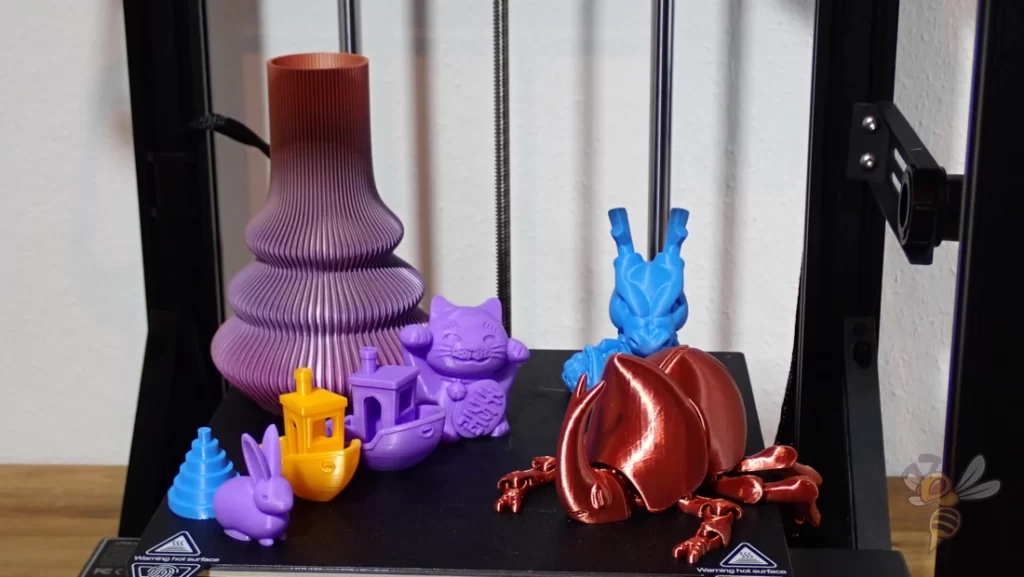
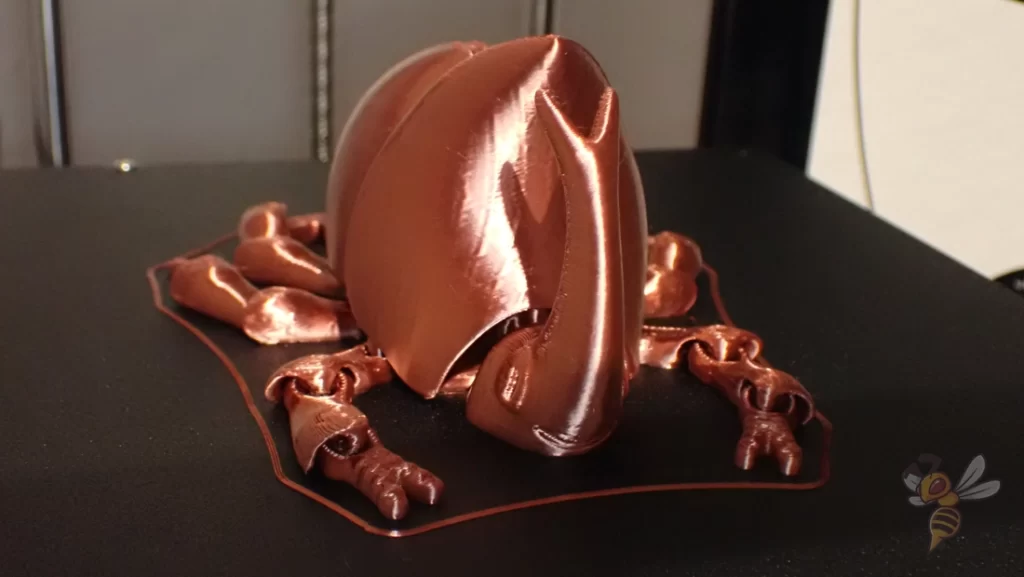
The print quality of the Ender-5 S1 is determined by several factors. In addition to the printing accuracy of ± 0.1 mm and a minimum layer thickness of 0.05 mm, the precise extrusion of the “Sprite” direct drive extruder contributes to an excellent print quality.
To test the quality myself, I printed various calibration objects as well as more complicated models. I was particularly impressed by the print quality of the print-in-place object with mechanical parts.
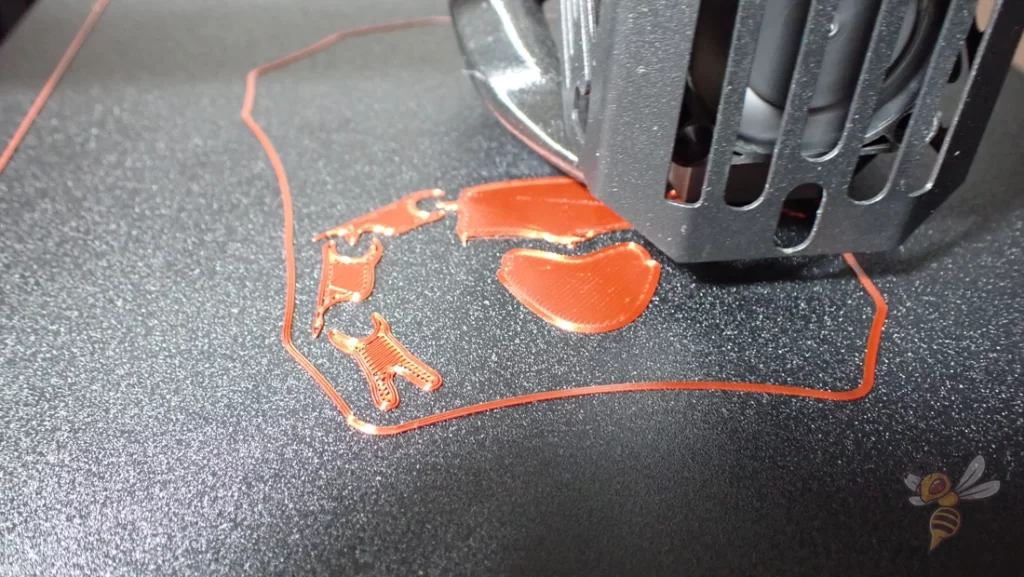
Also, the first layer of such objects is always very delicate, which is why good print bed adhesion is important. However, as long as the print bed is properly leveled, the PC-coated print bed creates perfect adhesion for PLA.
Ender-5 S1 vs. Ender-5 Pro

Check Price at:
The Ender-5 S1 differs from the Ender-5 Pro mainly in that it has automatic print bed leveling, a filament sensor, a touch screen, a higher print temperature, a lower print bed temperature, a higher print speed and a direct drive extruder.
| Ender-5 S1 | Ender-5 Pro | |
|---|---|---|
| Technology | FDM | FDM |
| Print volume | 220 × 220 × 280 mm | 220 × 220 × 300 mm |
| Printer size | 425 × 460 × 570 mm | 552 × 485 × 510 mm |
| Number of nozzles | 1 | 1 |
| Nozzle diameter | 0.4 mm | 0.4 mm |
| Extuder | Sprite direct drive | Bowden |
| Print bed levelling | Automatic | Manual |
| Print bed surface | Flexible, magnetic, PC coated spring steel | Flexible, magnetic, PC coated spring steel |
| Double z-axis | No | No |
| Resume print | Yes | Yes |
| Filament sensor | Yes | No |
| Touchscreen | Yes | No |
| File formats | STL, OBJ, AMF | STL, OBJ, AMF |
| Filament diameter | 1.75 mm | 1.75 mm |
| Accuracy | 0.1 mm | 0.1 mm |
| Max. extruder temperature | 300 °C | 260 °C |
| Max. print bed temperature | 110 °C | 135 °C |
| Recommended print speed | 100 mm/s | 60 mm/s |
| Slicer | Creality Slicer, Creality Print, Cura, Repetier-Host, Simplify3D | Creality Slicer, Creality Print, Cura, Repetier-Host, Simplify3D |
Automatic print bed leveling: You have to level the Ender-5 Pro completely manually. The Ender-5 S1 has a CR-Touch that allows you to perform regular leveling automatically. However, you will still need to manually level the print bed after assembly. In daily use, the Ender-5 S1 with its CR-Touch takes a lot of work off your hands.
Extruder: The Sprite direct drive extruder of the Ender-5 S1 can also process flexible filaments perfectly. Also, the positioning accuracy is very high. With the Bowden extruder of the Ender-5 Pro you will have difficulties to process flexible filaments.
Filament Sensor: The Ender-5 S1’s Filament Sensor pauses printing immediately when the filament runs out or breaks. With the Ender-5 Pro, you need to know if you have enough filament or not before printing. Otherwise you run the risk of having to reprint the entire object. With the Ender-5 S1, the pause feature allows you to simply load new filament and continue printing.
Touchscreen: The Ender-5 S1’s touch screen, integrated into the base, simplifies operation. The Ender-5 Pro is operated via a spartan screen with a rotary knob.
Print temperature: The Ender-5 S1 reaches higher print temperatures. You can also print exotic filaments up to 300 °C. With the Ender-5 Pro, however, only up to 260 °C.
Print bed temperature: The Ender-5 Pro is only slightly ahead in terms of print bed temperature. It reaches 135 °C instead of 110 °C. For most filaments, however, this is not really important.
Print speed: The Ender-5 Pro achieves print speeds of about 60 mm/s, which is typical for FDM 3D printers. The Ender-5 S1, on the other hand, reaches 100 mm/s as standard. This means it is almost twice as fast, with an even better print quality in most cases.
So if you had to choose between the Ender-5 S1 and the Ender-5 Pro, I would definitely recommend the newer Ender-5 S1. It has the better features and prints more accurately and much faster.
Ender-5 S1 vs. Ender-5 Plus

Check Price at:
The Ender-5 S1 differs from the Ender-5 Plus* mainly in that it has a smaller print volume, a higher print temperature, a higher print speed, a flexible print bed with better adhesion and a direct drive extruder.
| Ender-5 S1 | Ender 5 Plus | |
|---|---|---|
| Technology | FDM | FDM |
| Print volume | 220 × 220 × 280 mm | 350 × 350 × 400 mm |
| Printer size | 425 × 460 × 570 mm | 632 × 666 × 619 mm |
| Number of nozzles | 1 | 1 |
| Nozzle diameter | 0.4 mm | 0.4 mm |
| Extuder | Sprite direct drive | Bowden |
| Print bed levelling | Automatic | Automatic |
| Print bed surface | Flexible, magnetic, PC coated spring steel | Textured glass |
| Double z-axis | No | Yes |
| Resume print | Yes | Yes |
| Filament sensor | Yes | Yes |
| Touchscreen | Yes | Yes |
| File formats | STL, OBJ, AMF | STL, OBJ, AMF |
| Filament diameter | 1.75 mm | 1.75 mm |
| Accuracy | 0.1 mm | 0.1 mm |
| Max. extruder temperature | 300 °C | 260 °C |
| Max. print bed temperature | 110 °C | 110 °C |
| Recommended print speed | 100 mm/s | 60-80 mm/s |
| Slicer | Creality Slicer, Creality Print, Cura, Repetier-Host, Simplify3D | Cura, Repetier-Host, Simplify3D |
Print volume: The Ender-5 Plus is a lot bigger than the Ender-5 S1. It has a huge print volume of 350 × 350 × 400 mm, the Ender-5 S1 can only offer 220 × 220 × 280 mm. Because of the large print volume, the print bed is also stabilized by two Z-axes.
Print temperature: The Ender-5 S1 reaches print temperatures of 300 °C, the Ender-5 Plus only 260 °C. This means that you can also process exotic filaments perfectly with the Ender-5 S1.
Extruder: With the direct drive extruder of the Ender-5 S1 you can also process flexible filaments without any problems. With the Bowden extruder of the Ender-5 Plus this is difficult or even impossible.
Print speed: Although the print speed of the Ender-5 Plus is already very good, the Ender-5 S1 is even faster.
Print bed: The print bed of the Ender-5 Plus has a textured glass surface. Print bed adhesion is not as good as on the PC-coated print bed of the Ender-5 S1.
When deciding between the Ender-5 Plus and the Ender-5 S1, the main factor is the print volume. Do you want to print large objects in one piece on a regular basis? Then I would advise you to go for the Ender-5 Plus. Otherwise, the Ender-5 S1 is always preferable.
Check Price at:
Is the Ender-5 S1 Worth It?
The Ender-5 S1* is definitely worth it! It has many features that have already become established in other Creality 3D printers. Coupled with the stable construction, you get a high print speed with a high and reproducible print quality.
Similar 3D Printers
Check Price at:
Read the full review:
Ender 5 Pro | Hands-On Test & Review | Is It Worth It?
Check Price at:

Check Price at:
Read the full review:
Artillery Sidewinder X2 | Hands-On Review | Is It Worth It?
Disclosure: This website is the property of Martin Lütkemeyer and is operated by Martin Lütkemeyer. Martin Lütkemeyer is a member of the Amazon Services LLC and other Affiliate Programs. These are affiliate advertising programs designed to enable websites to earn advertising revenue through advertising and linking to Amazon.com and others. Links marked with * are affiliate links.
