
- Wet Filament: Prevention, Symptoms & Drying - July 18, 2024
- Sovol SV08 – Best PrusaSlicer Settings & Profile - June 26, 2024
- Sovol SV08 – Best Orca Slicer Settings & Profile - June 26, 2024
Disclosure: Links marked with * are Affiliate Links. I earn from qualifying purchases if you decide to make a purchase through these links – at no additional cost for you!
The CRTouch* is Creality’s answer to the very popular BLTouch. However, Creality is taking a completely new approach to the sensor technology.
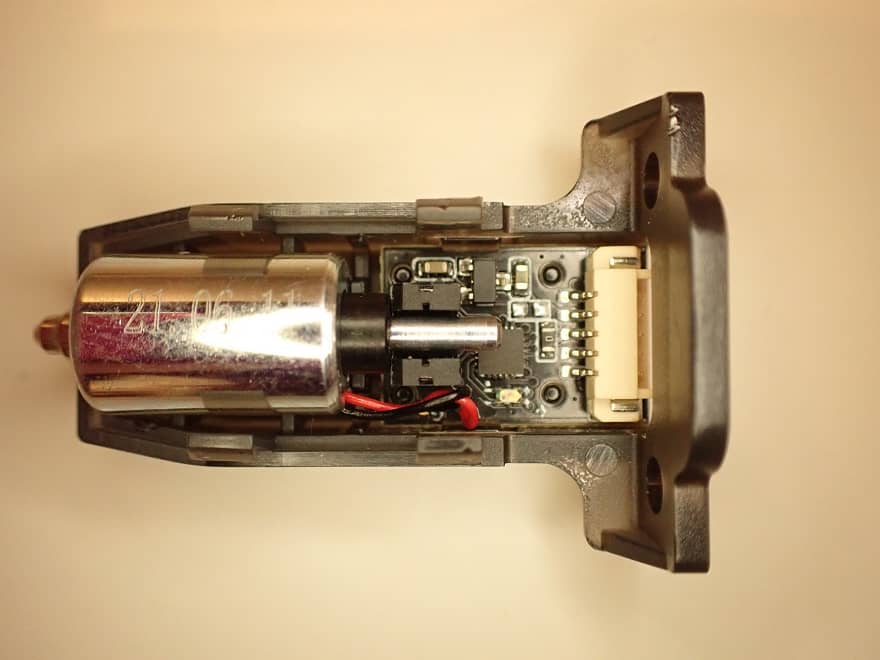
The BLTouch is based on a Hall sensor, the CRTouch uses an optical sensor. The optical sensor has the advantage that it is not as susceptible to electromagnetic interference and can measure the distance more reliably.
In this hands-on test and review, the CRTouch absolutely convinced me and is now permanently installed in my Ender 3 V2.
How to install the individual components on your 3D printer and how to adjust the firmware, you will learn in the step-by-step guide with the Ender 3 V2 as an example.
Check Price at:
Table of Contents:
Key Takeaways
- Upgrade for automatic print bed leveling
- NOT a copied BLTouch – an optical sensor is installed instead of a Hall sensor
- Compatible with Ender 3 (Pro/V2), Ender 3 MAX, Ender 5, Ender 5 Pro, CR-10
- 32-bit 4.2.2/4.2.7 motherboard required
Who Should Buy the CRTouch?
The CRTouch is for anyone who has a compatible Creality printer and wants to upgrade to automatic print bed leveling. It has a few advantages over the BLTouch (optical sensor, metal tip, better design) and is very easy to install. So if you want to upgrade your 3D printer and save yourself the hassle of manual leveling, the CRTouch is a very good choice!
Pros & Cons
– CRTouch
PRO:
- enables automatic print bed leveling
- optical sensor instead of Hall sensor (not so sensitive to electromagnetic radiation)
- metal tip
- appealing design
- good manual
- easy Setup
CON:
- not yet compatible with every Creality printer
Check Price at:
Scope of Delivery
– CRTouch
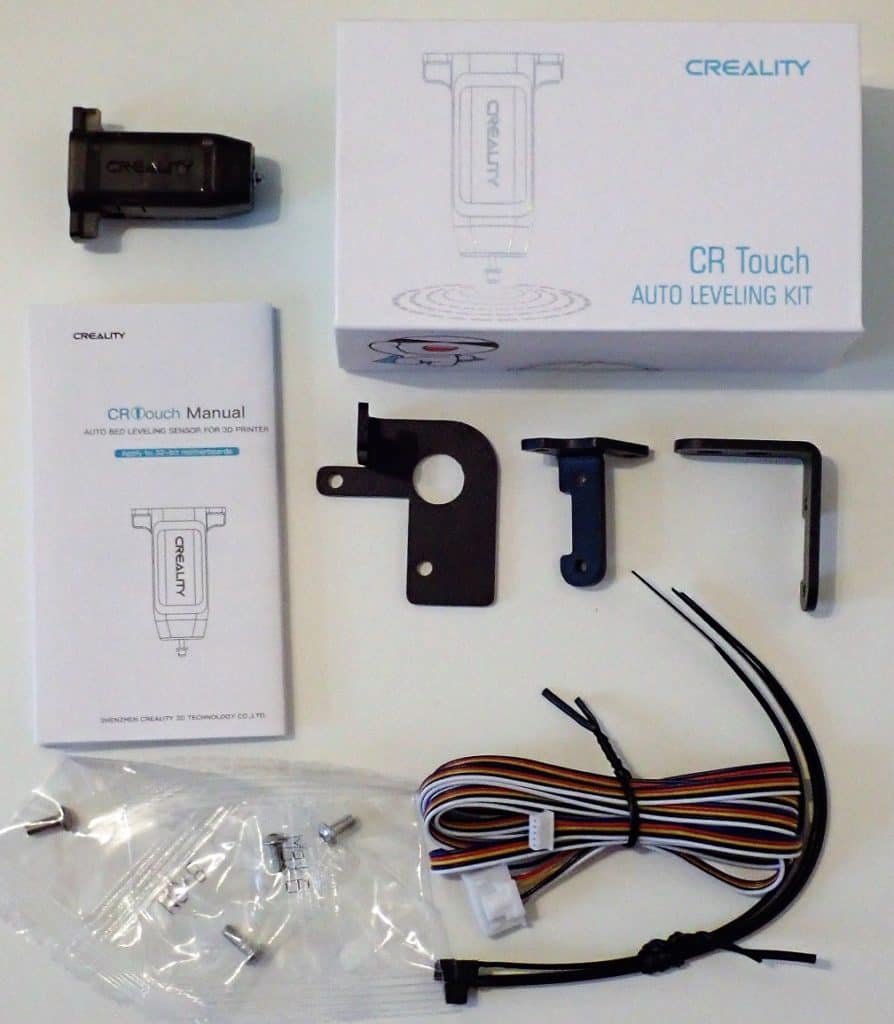
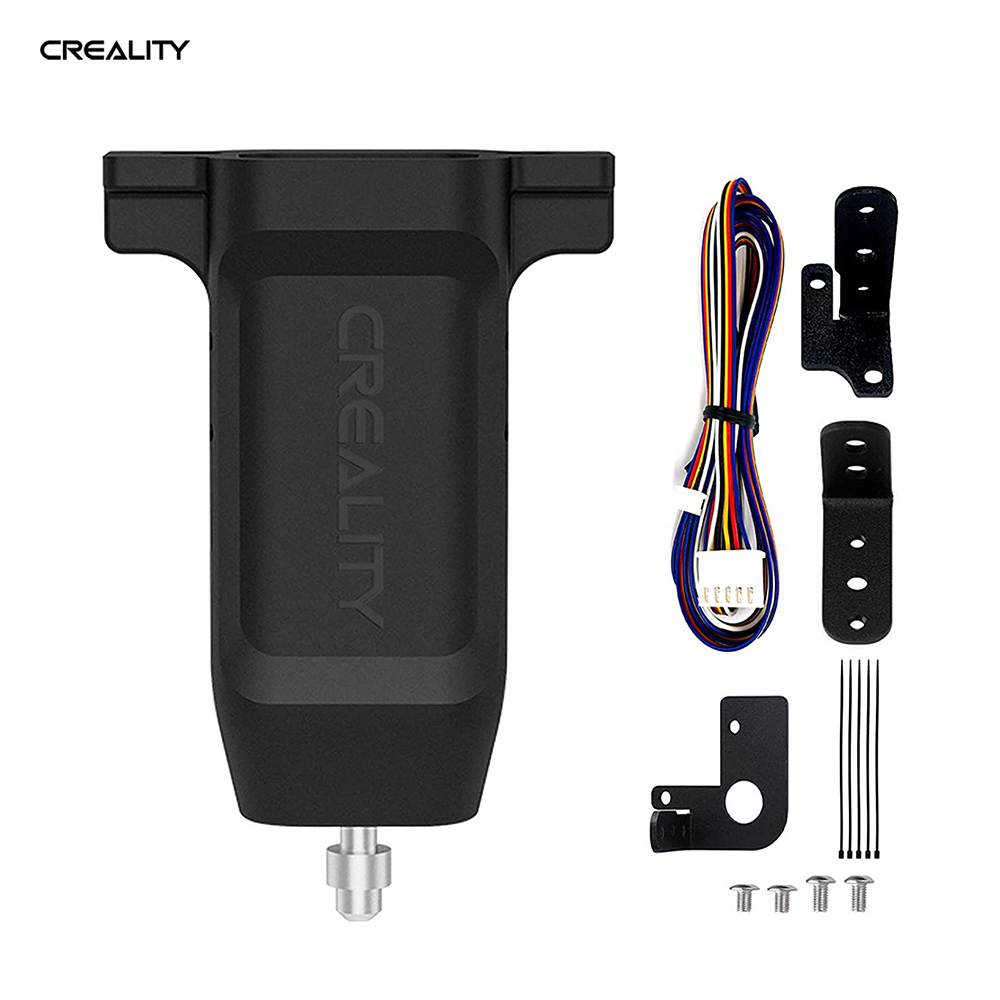
The CRTouch* arrives in a very compact package. The following things are included:
- CRTouch
- 3 different mounts
- Extension cable
- Suitable screws
- Cable ties
- Instructions
The included manual describes the assembly in short sentences and small pictures. Actually, everything is understandable – but it could be a bit more detailed here and there.
CRTouch vs. BLTouch
When directly comparing the CRTouch* with the BLTouch, the comparison must be made on two levels:
- The exterior incl. the mechanics
- The performance
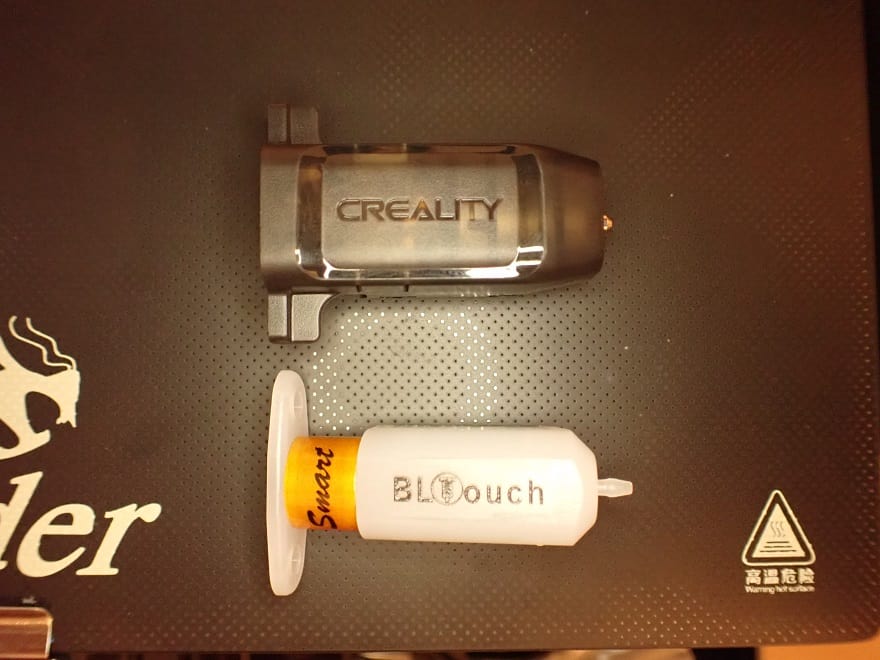
The biggest differences are in the exterior and the mechanics.
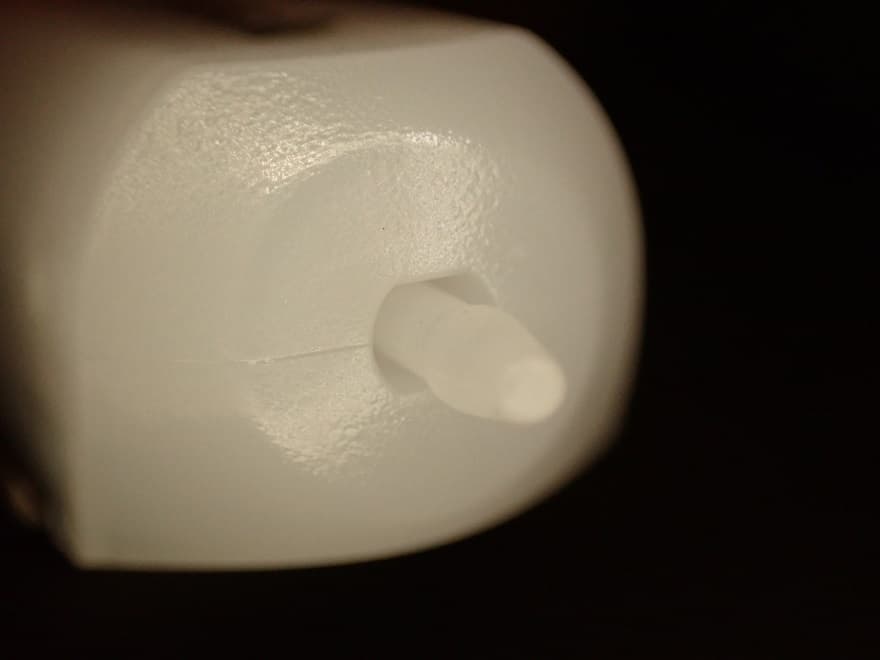
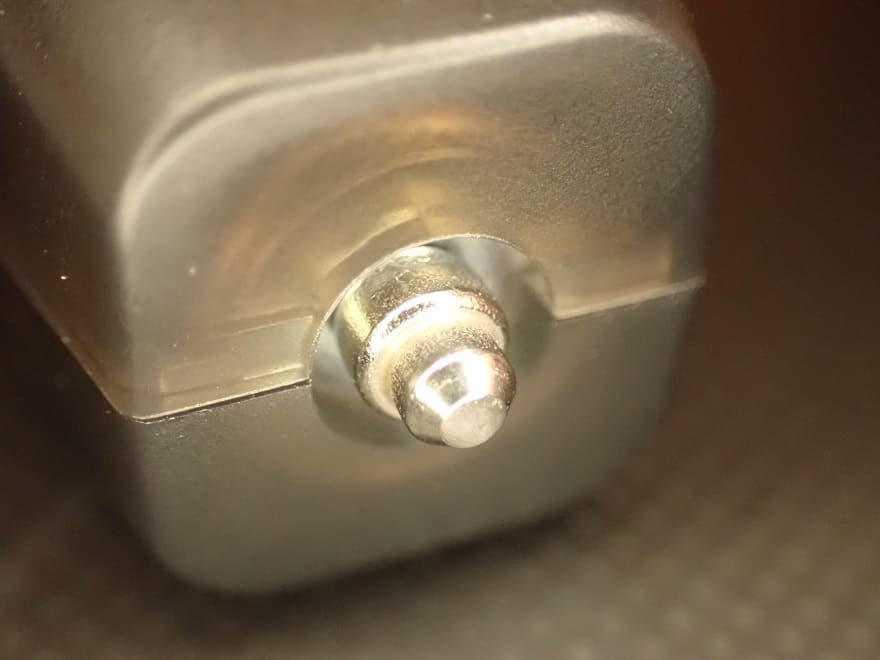
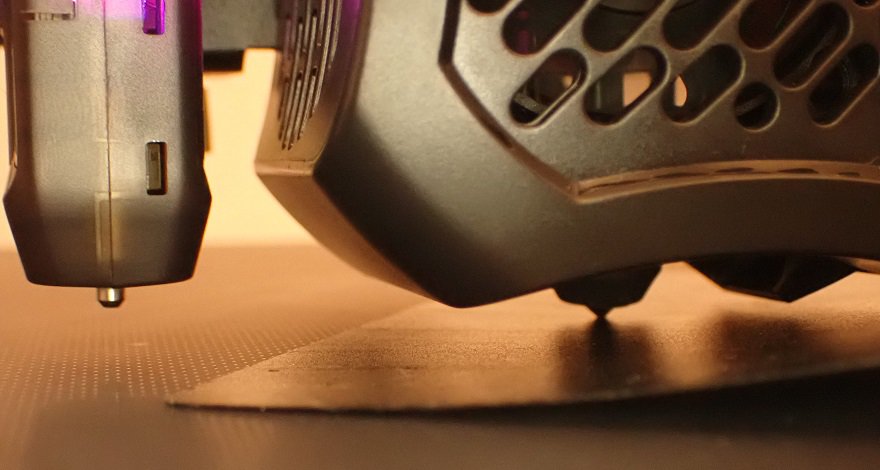
The CRTouch has a much more attractive design, has a metal tip that does not wear out or break off quickly and measures via an optical sensor.
The BLTouch doesn’t look quite as high quality, has a plastic tip (which actually broke off once for me), and has a Hall sensor that can be affected by external electromagnetic fields.
As far as performance is concerned, i.e. how well the two sensors level the print bed, I could not detect any differences.
I leveled the print bed several times in succession with both sensors and compared the results. I also performed various test prints where an incorrectly leveled print bed can be detected very quickly. Here, too, I was able to detect only minimal differences.
So if you’re only concerned with pure performance, there’s no difference between the CRTouch and the BLTouch.
CRTouch – Step by Step Installation
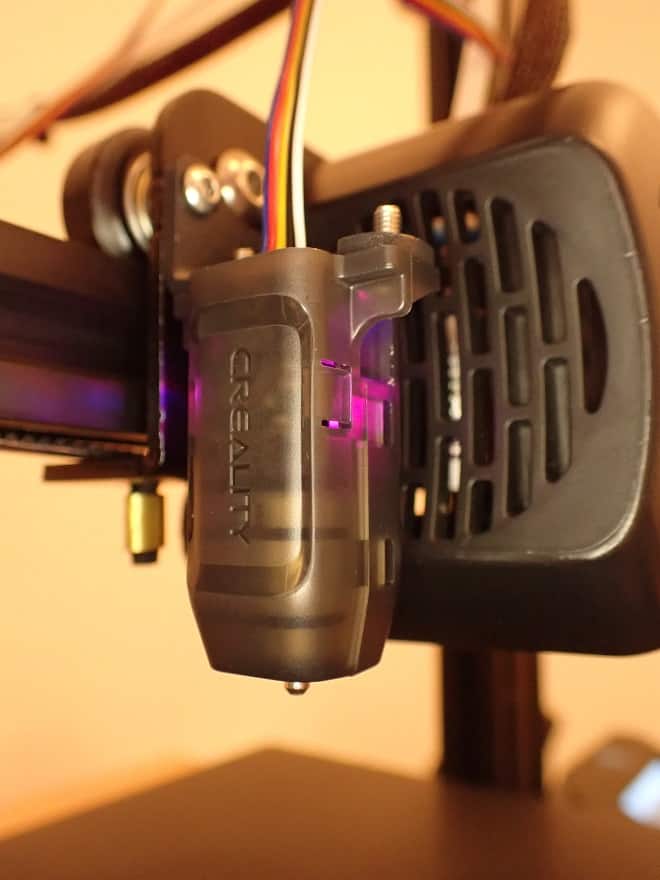
Step 1: Mount the CRTouch
The first step is to mount the CRTouch to the printhead. To do this, use one of the supplied mounts. The instructions will tell you which one is compatible with which printer.
Now you can mount the CRTouch to the printhead as follows:
- Plug the cable into the CRTouch.
- Screw the CRTouch onto the mount.
- Screw the mount together with the CRTouch onto the printhead.
- Route the cable from the print head to the mainboard and fix it sensibly (best along the other cable routing).
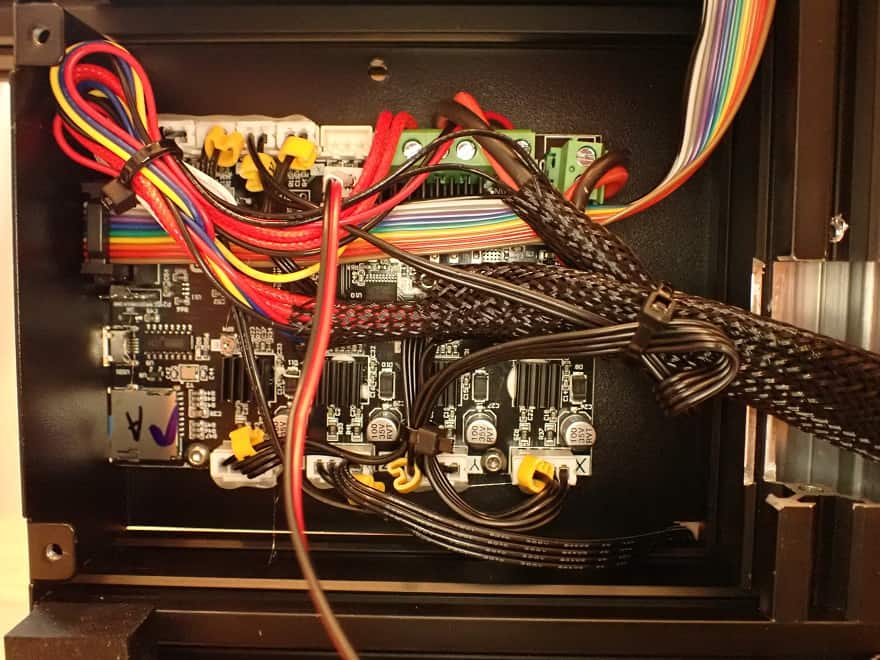
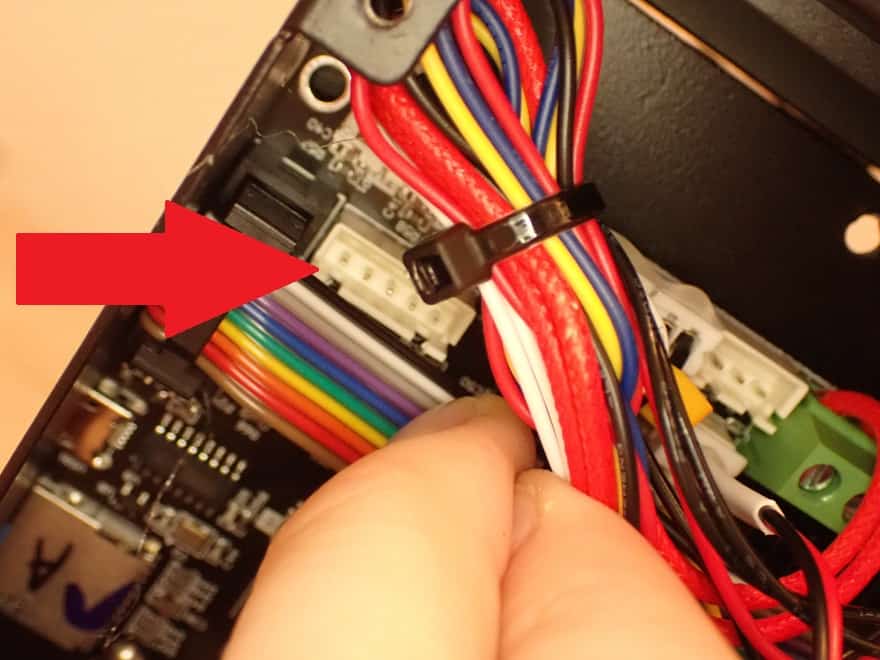
Step 2: Connect the Cable to the Mainboard
Next, you have to connect the cable to the mainboard:
- Open the mainboard housing. Depending on the model, you may have to turn the 3D printer over and loosen various screws.
- Plug the cable into the mainboard slot for Z-sensors. Below you can see how it looks like on the Ender 3 V2.
Step 3: Update the Firmware
To use the CRTouch, you need a firmware that supports Z-sensors. Depending on which version you have on your 3D printer, you may need to download and flash the latest one.
This is done via USB, MicroSD, or SD card:
- First, you need to download the right software. On Creality’s official site you can find the latest firmware for all models (Link1, Link2).
- Next, save the new firmware to the storage device (the .bin file).
- Then, when you plug it into the 3D printer and turn on the machine, the firmware is automatically installed.
Step 4: Set Z-Offset
After you have installed the new firmware, the nozzle will probably no longer have the correct Z-Home position. Since this is now no longer approached with the Z-end stop, but with the CRTouch, you must set the Z-offset correctly.
You can do this easily via the menu. The principle is the same as for manual leveling of the print bed. You adjust the Z-Home position with the Z-Offset so that a piece of paper just fits between the nozzle and the print bed. When you move it, there should be a little friction.
Step 5: Leveling the Print Bed
If you haven’t done it before, you should now manually level your print bed again. You are probably wondering why this is necessary now that you have a leveling sensor installed.
This is because you need to make sure that the print bed is not too tilted. Even the CRTouch can’t handle severe tilting.
It is also advisable to repeat the manual print bed leveling from time to time. Depending on how brutally you handle the print bed, you may adjust it more or less (e.g. when removing a print object). At the latest when you encounter printing errors, you should perform the leveling manually once.
After you have done this, you can start the automatic print bed leveling for the first time. To do this, you will find a new button in the menu labeled “Leveling”.
What is behind this button depends on the current firmware. However, the menus are usually clear and intuitively understandable. So it should not be a problem for you to operate everything else. Sometimes the leveling starts automatically, but sometimes you can also set the number of points at which the sensor should measure the inclination of the print bed.

In the official video from Creality, you can see the whole installation process.
Step 6 (optional): Customize Cura
With a small addition in the G-Code, you can command your 3D printer to automatically level the print bed before each print.
You can do this conveniently via Cura with the following command:
G29 ; ‘Comment’
The G29 command causes the 3D printer to start automatic print bed leveling. It makes the most sense directly after moving to the home position (G-Code command G28) and is also recommended by Creality.
The text after the semicolon is a comment. There you can write everything that makes sense to you. I wrote “Autolevel before each print“. So I know later why I entered this code.
Conclusion: Is it worth it?
For me, the CRTouch* is an absolute no-brainer when it comes to upgrading a compatible Creality 3D printer!
It has convinced me completely, whether it is about its design, its performance or its operation. An overall recommendation!
Check Price at:
Disclosure: This website is the property of Martin Lütkemeyer and is operated by Martin Lütkemeyer. Martin Lütkemeyer is a member of the Amazon Services LLC and other Affiliate Programs. These are affiliate advertising programs designed to enable websites to earn advertising revenue through advertising and linking to Amazon.com and others. Links marked with * are affiliate links.
