
- Wet Filament: Prevention, Symptoms & Drying - July 18, 2024
- Sovol SV08 – Best PrusaSlicer Settings & Profile - June 26, 2024
- Sovol SV08 – Best Orca Slicer Settings & Profile - June 26, 2024
Disclosure: Links marked with * are Affiliate Links. I earn from qualifying purchases if you decide to make a purchase through these links – at no additional cost for you!
The Ender 3 V2* sets new standards for low-budget 3D printers. It is based on the extremely successful first version and brings many practical upgrades and improvements to the hard- and software.
Where the original version of the Ender 3 required a lot of tinkering, the Ender 3 V2 is a 3D printer that you can start right away. Of course, you can tinker just as much with the new version, but it’s no longer mandatory! The Ender 3 V2 comes with many upgrades that were often installed by users in the first version.
The quality, reliability and accuracy of this workhorse are outstandingly good for this price range. The Ender 3 V2 is especially recommended for beginners who do not want to invest directly in a model of the next price range such as the CR-6 SE (which has many more practical features!).

Check Price at:
Table of Contents:
- 1 Key Takeaways
- 2 Who Should Buy the Ender 3 V2?
- 3 Pros & Cons – Ender 3 V2
- 4 Scope of Delivery – Ender 3 V2
- 5 Assembly – Ender 3 V2
- 6 Print Quality – Ender 3 V2
- 7 Features – Ender 3 V2
- 7.1 Carborundum Glass Plate
- 7.2 Fast Heat Up
- 7.3 Easy Setup
- 7.4 V-Slot
- 7.5 Tool drawer
- 7.6 Relatively Low Noise
- 7.7 Resume Print
- 7.8 Easy Belt Tension
- 7.9 Clear Menu
- 7.10 Color 4.3 inch LCD Display with Rotary Knob
- 7.11 Meanwell Power Supply
- 7.12 Extruder Knob
- 7.13 Silicone Protection for Printhead
- 7.14 Proven Technology
- 8 Upgrades – Ender 3 V2
- 9 Technical Specifications – Ender 3 V2
- 10 Similar 3D Printers
- 11 Ender 3 vs. Ender 3 V2
Key Takeaways
- Outstanding price-performance ratio
- Improved version of the popular first version
- Perfect for beginners
- Good accuracy (0.1 mm)
- Fast heat up (nozzle 1-2 min to 200 °C, print bed 2-3 min to 60 °C)
- Many useful upgrades
- Not suitable for exotic filaments
Who Should Buy the Ender 3 V2?
The Ender 3 V2 is the ideal entry into 3D printing for little money. It has a large community and there are many buyable and printable upgrades. But it is also well suited for advanced users to reliably and cheaply print objects from standard filaments.
Pros & Cons
– Ender 3 V2
PRO:
- Heated carborundum glass plate
- Low noise
- X- & Y-axis belt tensioner
- Color LCD display
- Resume Print Function
- Toolbox
CON:
- No filament sensor
- Manual print bed leveling
- Filament loading sometimes frustrating
Check Price at:
Scope of Delivery
– Ender 3 V2
Since the Ender 3 V2* is only partially pre-assembled, the package it comes in is also surprisingly small. All parts are well protected wrapped in matching foam. Even if the package is dropped or thrown once or twice during transport, nothing should happen here.
Since the 3D printer is designed for beginners, everything is included for a quick start. All the tools you need, some filament for the first test prints and a USB adapter with a MicroSD card on which test objects and other files are stored.
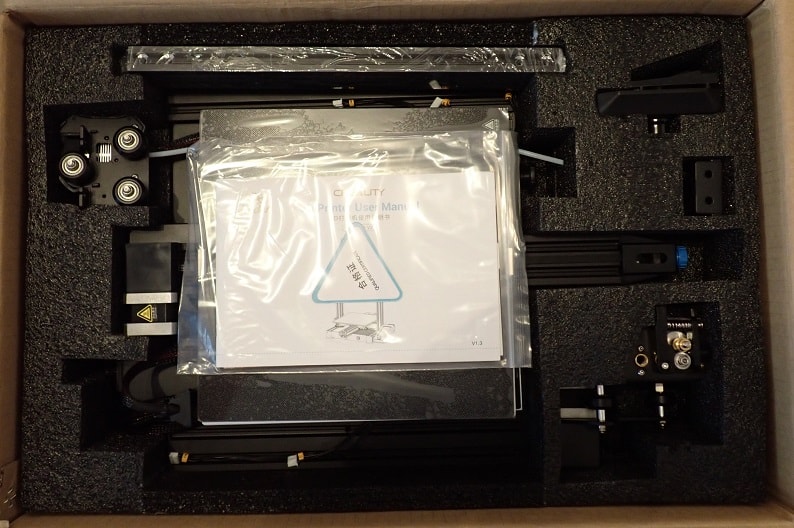
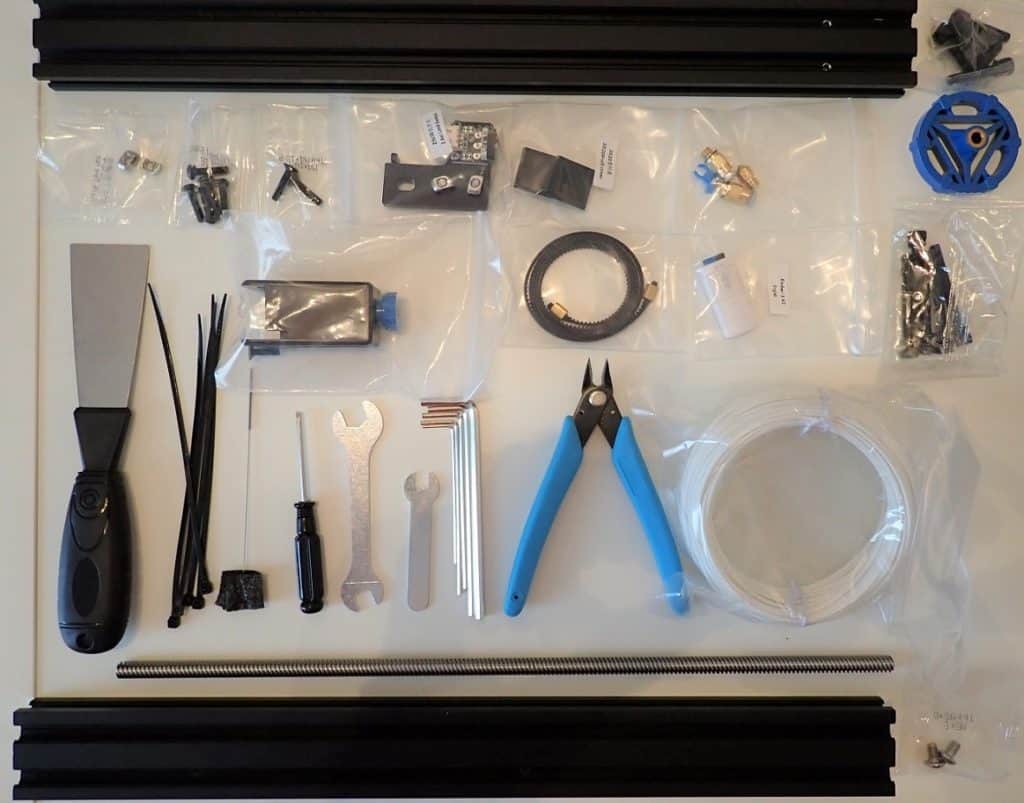
The scope of delivery includes the following things:
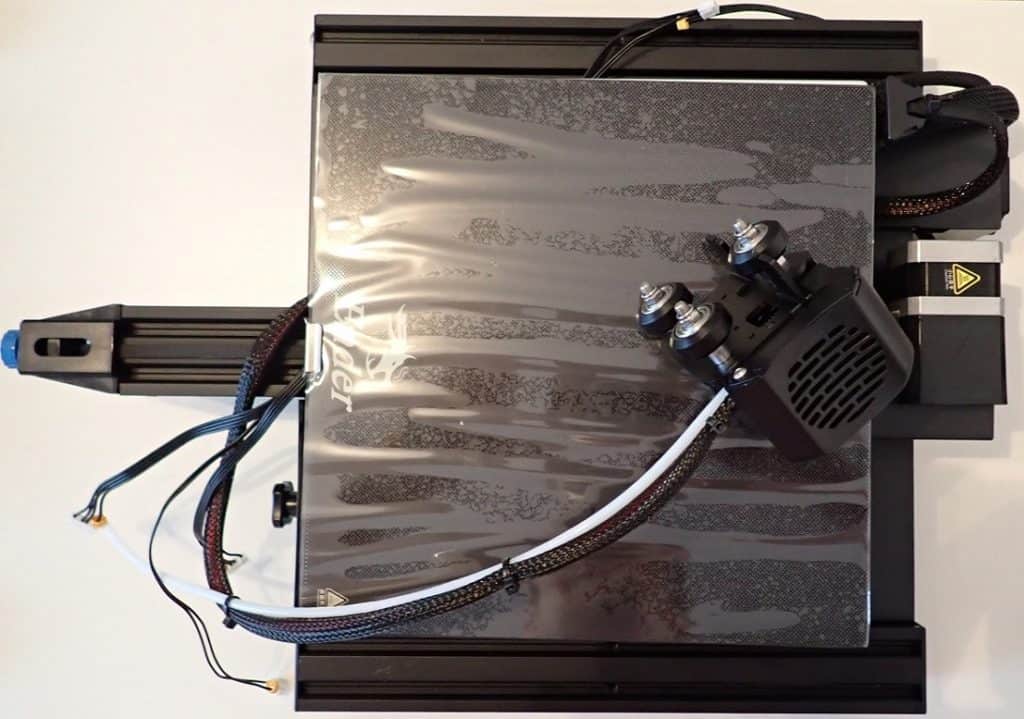
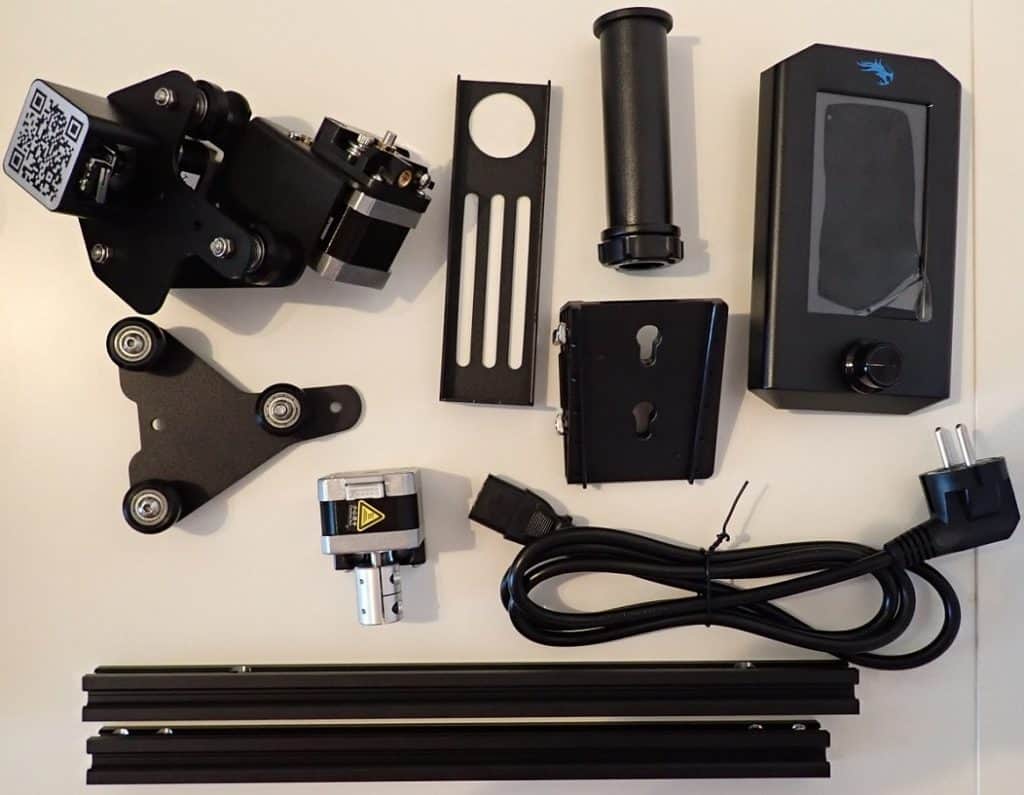
- 3D Printer Parts:
- 3D printer base with print bed
- Display
- Printhead with nozzle
- X and Z axes (profiles, toothed belts, screw rod, stepper motors, etc.)
- Extruder
- Filament holder
- Profile covers
- Screws
- Filament (a small sample roll of PLA)
- Tool:
- Spatula
- Side cutter
- Cable tie
- Needle for cleaning the nozzle
- Screwdriver
- Wrench
- Allen key
- Replacement Nozzle
- USB/MicroSD Adapter
- MicroSD card:
- Manual
- Slicer and Driver
- Troubleshooting Guide
- 3D Models
- Video for operation
Assembly
– Ender 3 V2
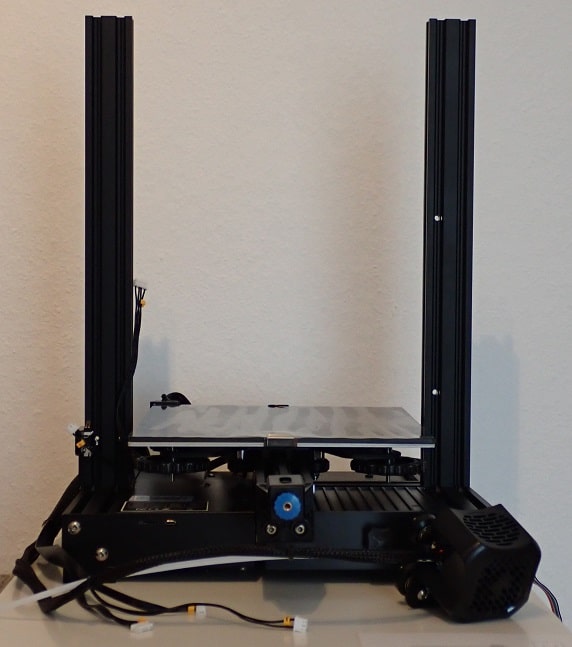
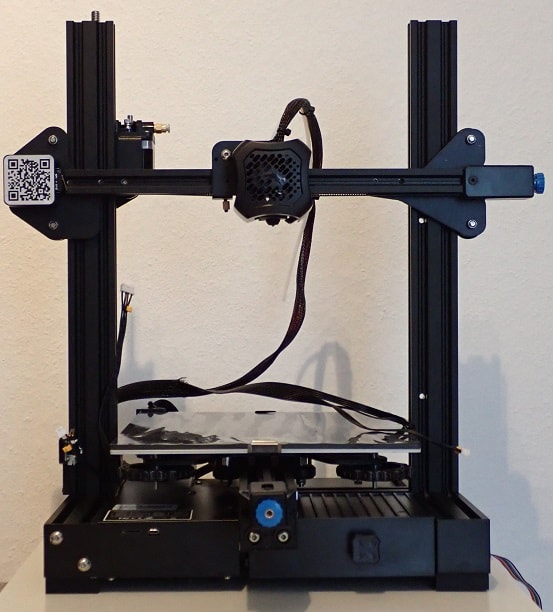
Some parts of the Ender 3 V2 are pre-assembled. From my point of view, a good balance between pre-assembled and self-assembly has been found here. If too much is pre-assembled, the package gets bigger and also the price increases, because the assembly takes time.
With this 3D printer, the most complicated parts such as the print head, the extruder or the complete 3D printer base with print bed are pre-assembled. The rest you only have to screw together.
After you unpack the 3D printer, it takes about 30 to 40 minutes until you are ready for your first print.
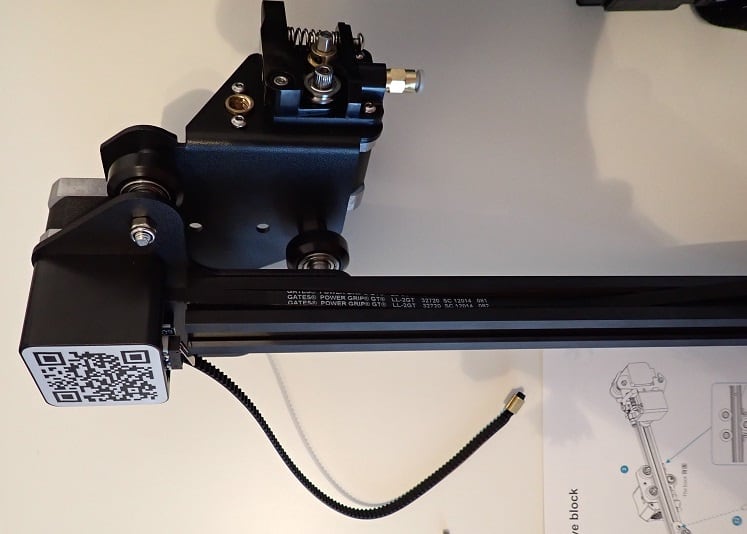
The most complicated part of the assembly is to mount and tension the toothed belt correctly. With some other 3D printers, the X-axis is already pre-assembled and you only have to tension the toothed belt correctly. But even that is not a problem, because the instructions explain the assembly very well in words and pictures.
You need to assemble the following components one by one:
- Z-axis with limit switch
- Z-axis stepper motor with spindle
- X-axis with extruder, toothed belt and printhead
- Toothed belt tensioner of the X-axis
- X-axis to Z-axis
- Upper frame
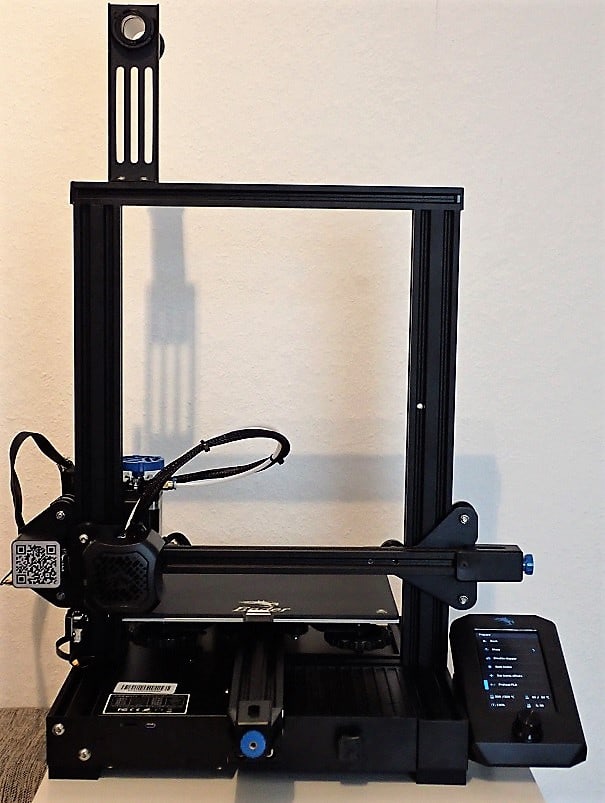
- Display
- Filament holder
- Connect cables (the cables are all marked, which eliminates the possibility of incorrect connection).

Before you turn on the 3D printer, make sure that the switch on the back of the device is set to the correct supply voltage. You can choose between 115 and 230 V, depending on which power supply you have. If you have selected the wrong voltage, the printer will smoke when you switch it on and will not work!
Print Bed Leveling
The print bed leveling of the Ender 3 V2 is done quite classically with the paper method. You adjust the distance between the nozzle and the print bed so that a normal piece of paper (with a thickness of approx. 0.1 mm) just fits between the nozzle and the print bed. If there is some friction when the paper moves, the distance is set correctly.
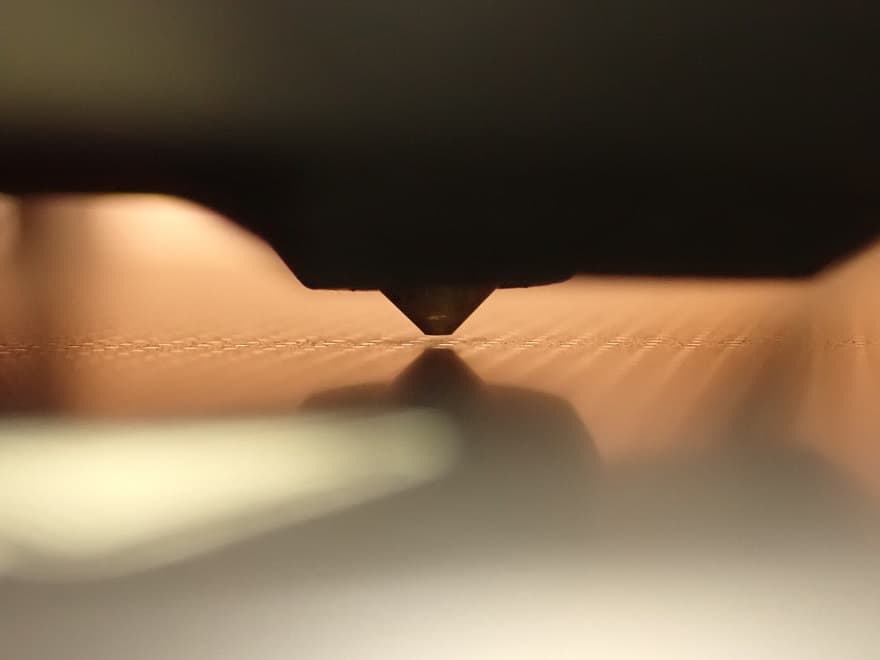
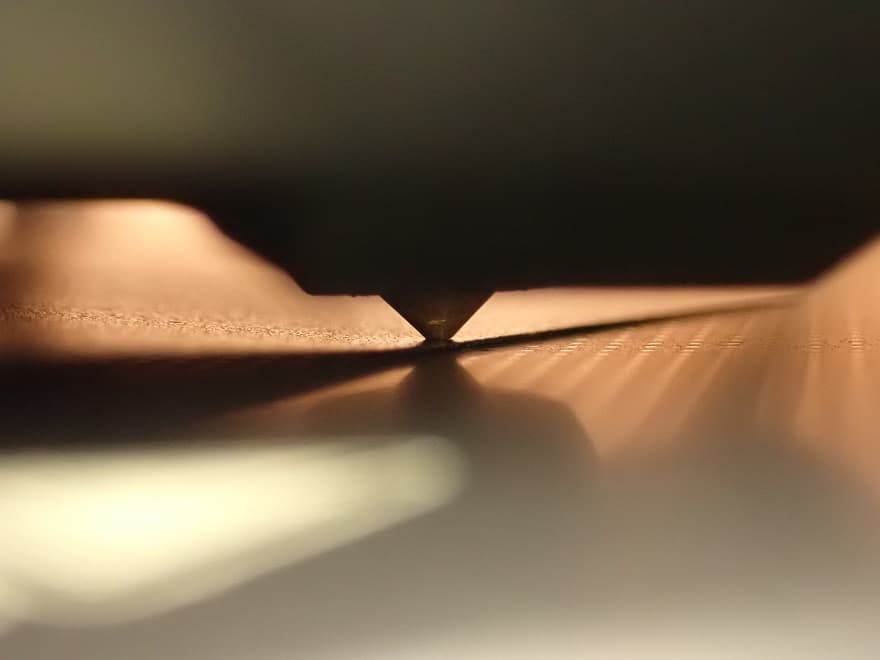
In this way, you set the spacing correctly in several places on the print bed. Normally you do this at the four corners of the print bed, approximately above the turn screws.
Depending on how much the print bed is misaligned, you will have to repeat this process two or three times until the correct distance is set everywhere. At the end, you can check everything again.
So much for the theory. In practice, however, you must first bring the 3D printer into its home position and then deactivate its motors.
After that, you can do the leveling as described above.
The process of print bed leveling can be quite frustrating at first, as it can take a while to find the right setting. But don’t worry, it’s all a matter of practice!
If you don’t want to bother with manual print bed leveling at all, however, you can retrofit automatic leveling. You can do this with either the BLTouch or the CRTouch. These are touch sensors that automatically detect the print bed tilt. If you want to know more about these upgrades, you can either follow the links or read the short introduction below in the Upgrade chapter.
Filament Loading
Filament loading is the biggest minus point in the operation of the Ender 3 V2! Without some practice, it is very difficult to feed the filament through the extruder to the Bowden tube.
Often, the filament goes out the side of the extruder as it misses the opening at the end of the extruder and is then deflected.
But with a little trick you can avoid this problem:
- Cut the filament sharply
- Orient the pointed side of the filament toward the back of the 3D printer.
- Carefully insert the filament while opening the extruder completely.
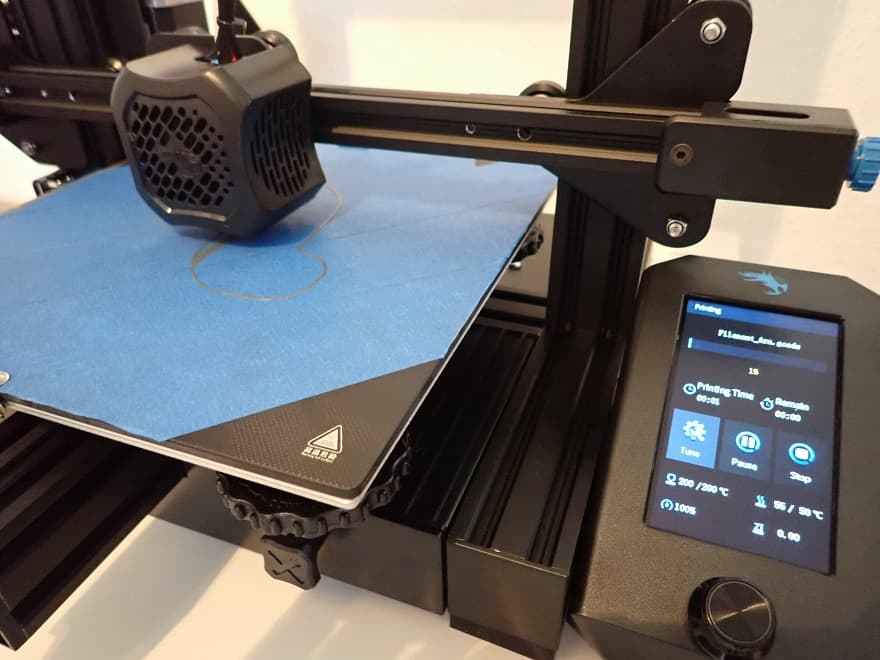
You can preheat the 3D printer in two different modes. One for PLA (nozzle 200 °C, print bed 60 °C) and one for ABS (nozzle 240 °C, print bed 70 °C). Alternatively, you can also set the temperature manually.
Print Quality
– Ender 3 V2
The print quality of the Ender 3 V2* is good for its price range and comparable to many other hobby 3D printers. Even if you compare it to more expensive 3D printers like the Creality CR-6 SE, you can hardly see any differences in the print image.
The print quality of the Ender 3 V2 is very good with an accuracy of 0.1 mm. The layer thickness is between 0.1 and 0.4 mm. With this accuracy, not only decorative objects can be printed, but also mechanical parts.
To test the print quality in practice, I printed various test objects and also things that I actually need. For this test, I let the printer print almost continuously for a week. This allowed me to form a comprehensive picture of its capabilities.
Test prints
In my test prints, in addition to standard test objects like Benchy, I also want to try special things like different filaments and vase mode.
I have used Cura as a slicer. There is a profile there for the Ender 3 V2. For all test prints, I used the most accurate setting.
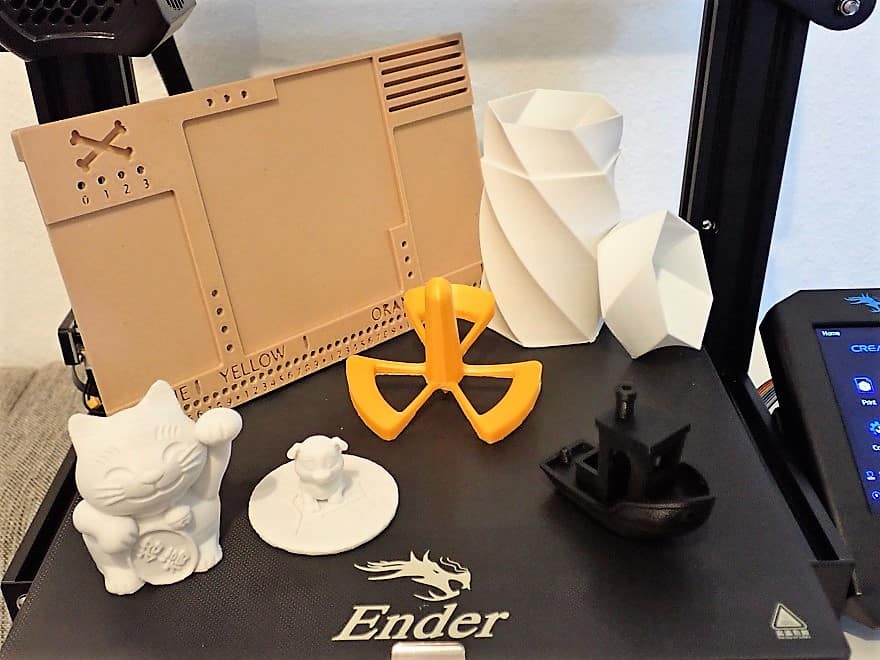
I have printed the following objects:
- Test objects “cat” and “dog” on MicroSD card made of PLA.
- Benchy made of ABS with enclosure for thermal enclosure of the printer
- PLA storage box
- PETG spinning top
- Boardgame material from wood filament*.
- Tool and filament holder out of PETG
Besides the test prints from the MicroSD Card, you can find every model on Thingiverse.
Cat & Dog

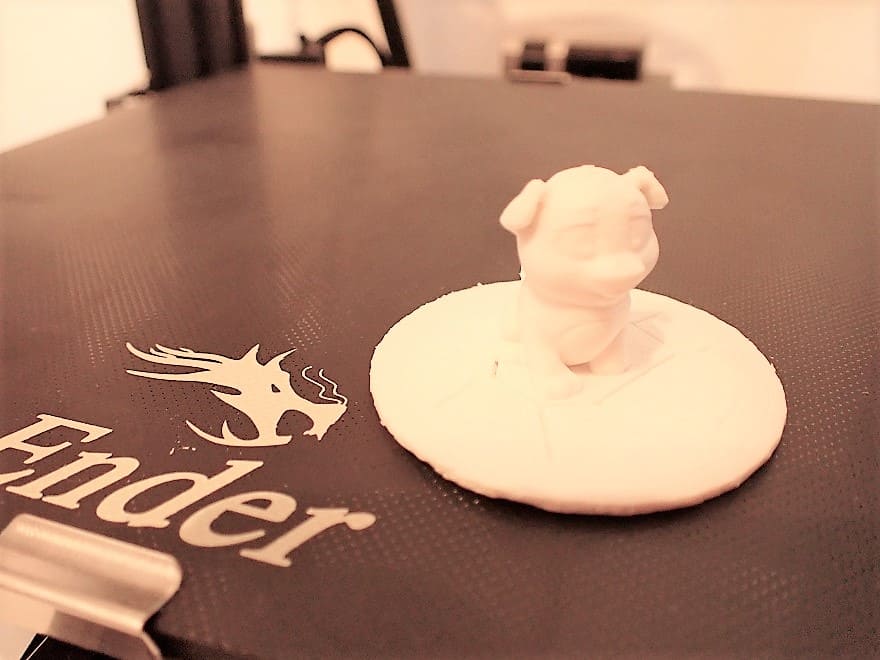
After assembling the 3D printer, the first thing I did was print the included test objects from the micro SD card. The cat printed flawlessly and the support structures were also no problem.
With the dog, I noticed that the 3D printer quickly reaches its accuracy limits with small details. But that is normal with an accuracy of 0.1 mm.
ABS Benchy
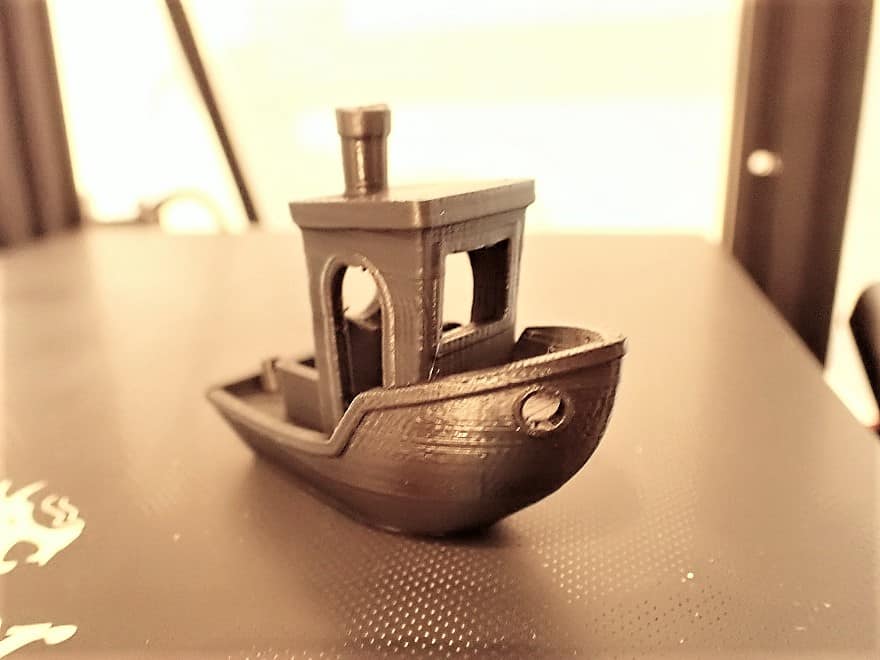
The Ender 3 V2 can also print ABS. The nozzle and the print bed can be heated to the high temperatures required for ABS.
ABS is often difficult to print because it requires a homogeneous temperature. Otherwise, warping and other printing errors occur very quickly. To get around this, I used the Creality enclosure. After that, printing with ABS was no longer a problem.
More about the enclosure below or at the link.
PLA Storage Box
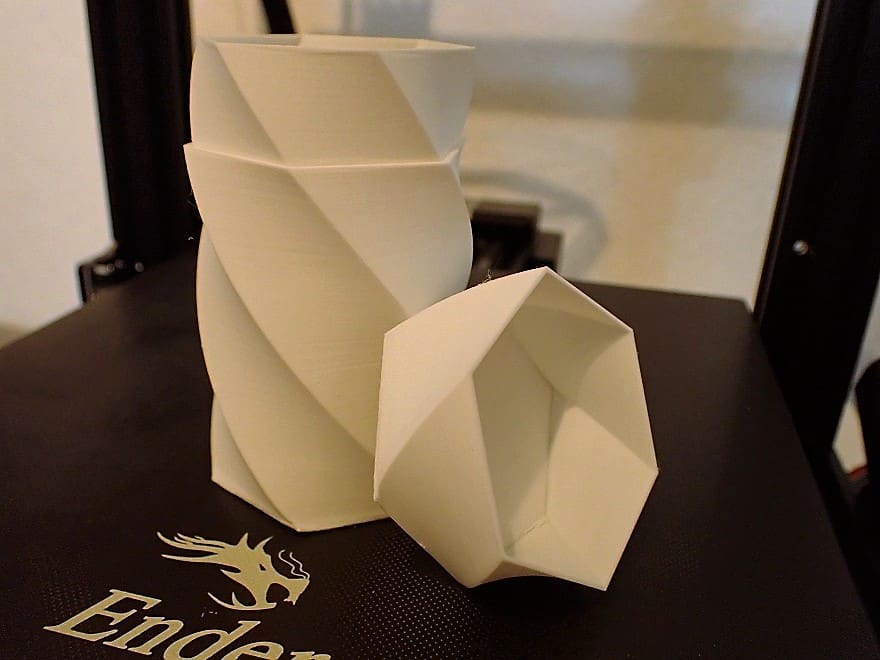
To use up the leftovers of the PLA supplied, I printed this storage box. With this object, I wanted to check if the vase mode works properly and if there are layer shifting or ringing/ghosting.
None of this occurred. Only some stringing, but this could be removed with fingers.
PETG Spinning Top
PETG is also one of the filaments that the Ender 3 V2 can handle. I was able to prove this with this little toy.
Boardgame Material from Wood Filament
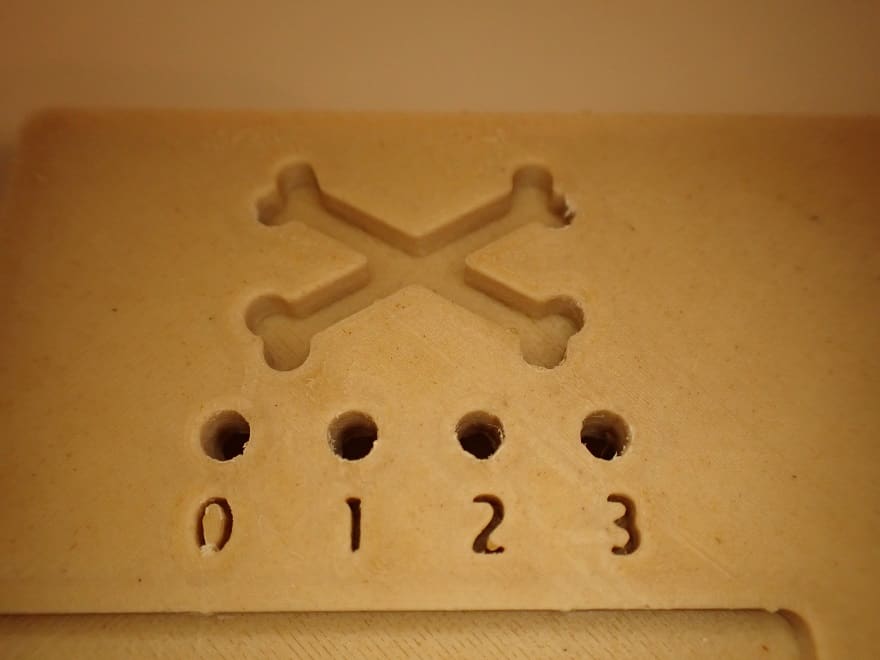
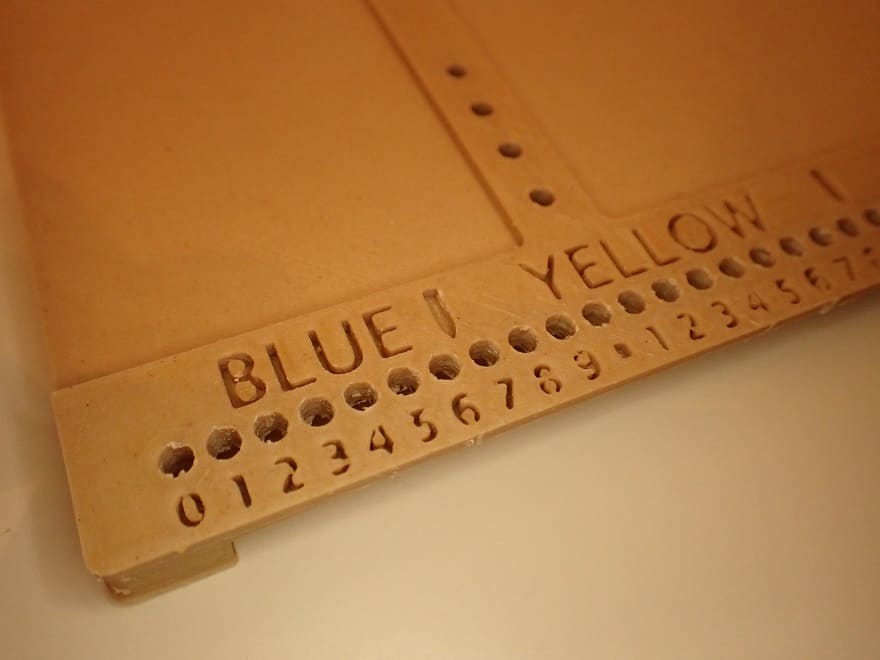
Filaments with additives can lead to problems with some 3D printers. For example, the nozzle may become clogged or the print bed adhesion may be suboptimal.
The printed object is quite large and has filled almost the entire width of the print bed. On the bottom side, there is quite a lot of space between the four feet which I filled with tree supports. The top side I made smooth with Cura Ironing.
The complete print went through smoothly and delivered a very impressive result!
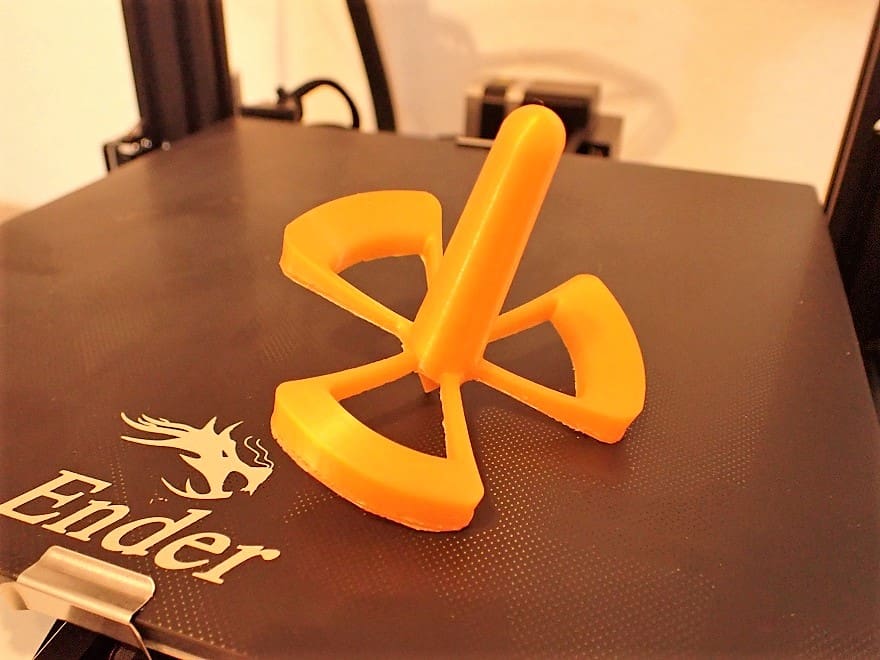
Tool and Filament Holder out of PETG
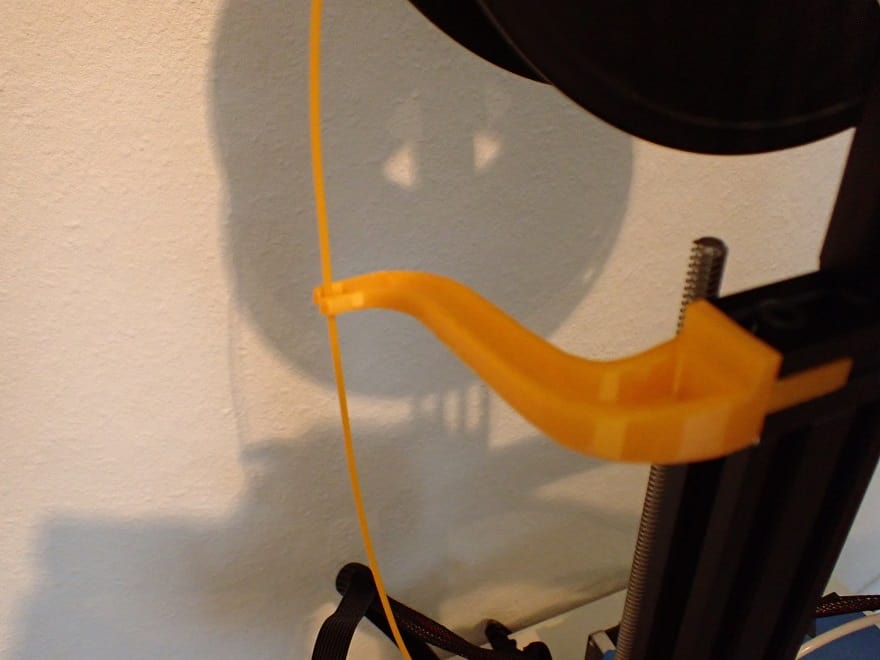
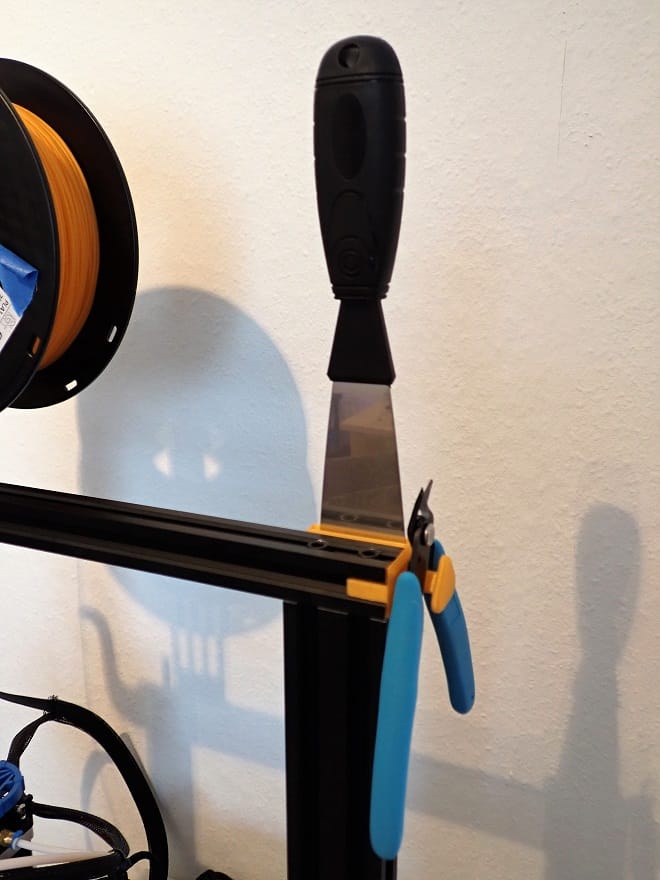
Finally, I printed two small self-printed upgrades. A filament holder so that the filament can’t get tangled in the Z-spindle and a tool holder for spatula and side cutter.
For the tool drawer, these two parts are a bit bulky or too big and make more sense outside of the 3D printer anyway, since you’ll need them frequently.
Check Price at:
Features
– Ender 3 V2
The Ender 3 V2* is the successor of the legendary Ender 3*. The first version revolutionized the hobby 3D printer market and is still one of the most popular low-budget 3D printers.
Creality has listened to the community with the second version of the popular 3D printer and added various practical features/upgrades.
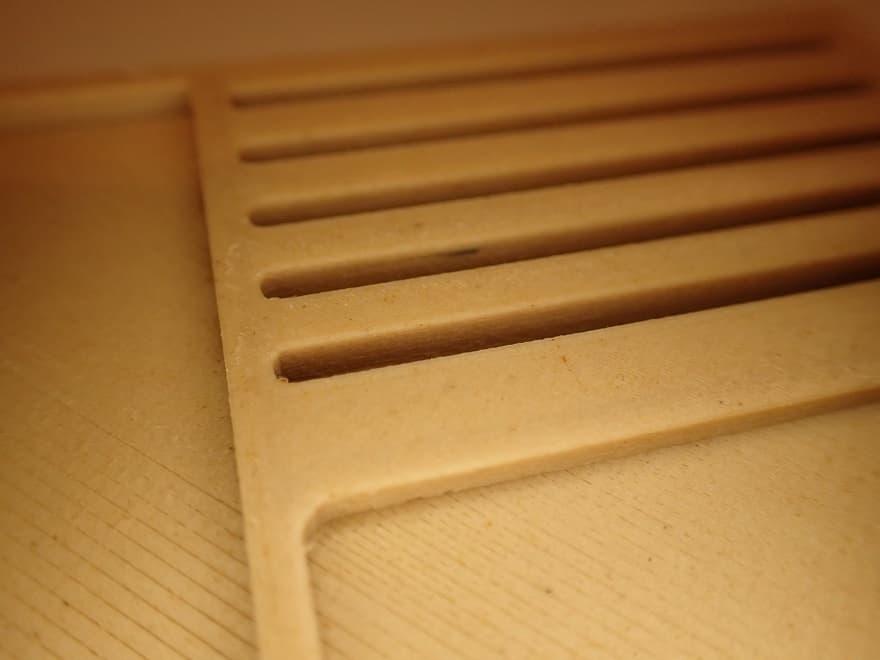
Carborundum Glass Plate

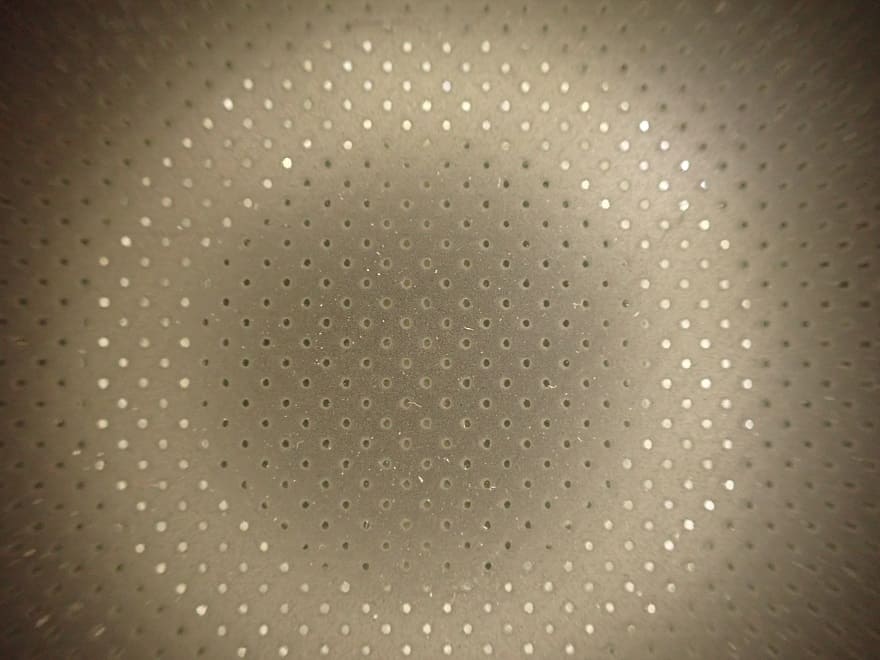
One of those upgrades that was very popular on the Ender 3, and is now standard on the Ender 3 V2, is the Carborundum Glass Print Bed.
This glass plate heats up quickly and provides better adhesion. Another bonus of glass plates as a print bed is also the smooth first layer of the print object. In addition, the glass plate looks simply better!
The adhesion is quite good, but in my tests I often noticed that I had to use Blue Tape for certain objects.
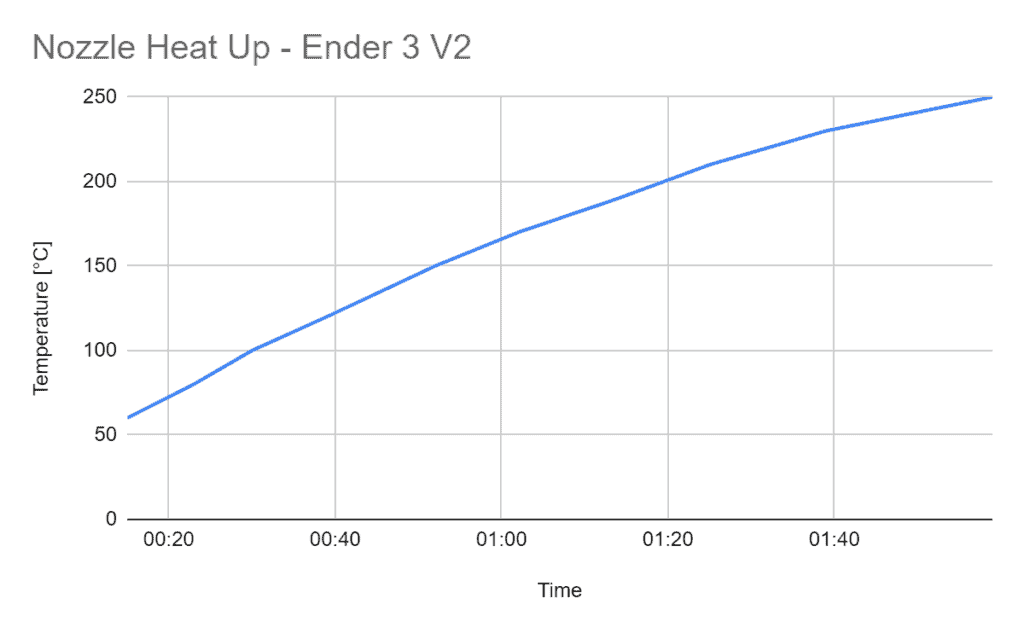
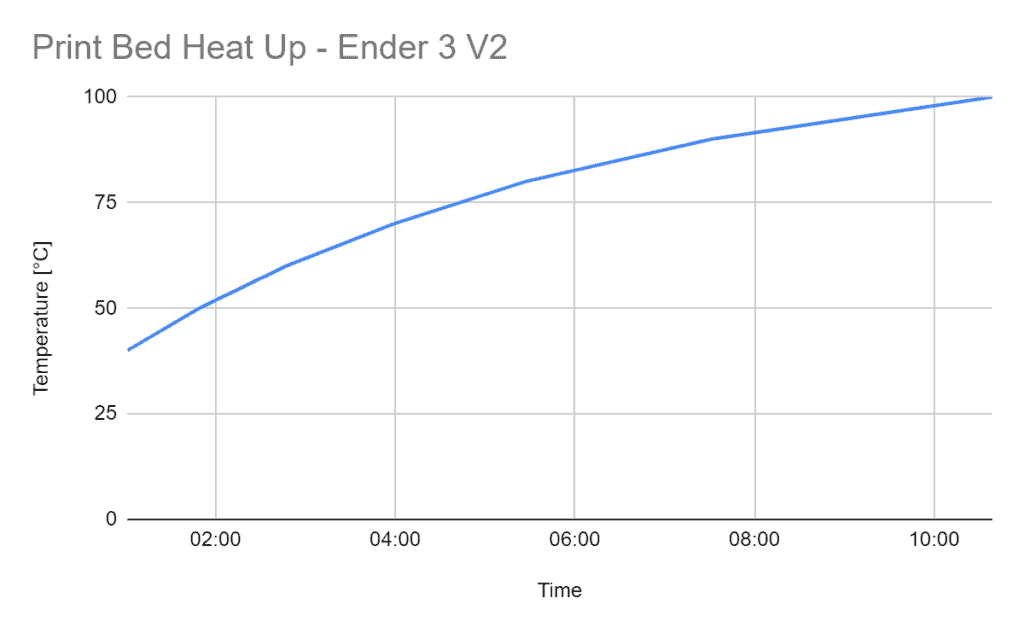
Fast Heat Up
The removable glass print bed is heated by the metal plate underneath. Compared to other 3D printers, the heating rate is in the upper midfield.
For a good comparison and to give you an idea of how long something like this takes, I timed it for the different temperatures.
| Nozzle Heat Up Time | Temperature [°C] |
|---|---|
| 00:15 | 60 |
| 00:23 | 80 |
| 00:30 | 100 |
| 00:39 | 120 |
| 00:52 | 150 |
| 01:02 | 170 |
| 01:14 | 190 |
| 01:25 | 210 |
| 01:39 | 230 |
| 01:59 | 250 |
| Print Bed Heat Up Time | Temperature [°C] |
|---|---|
| 01:01 | 40 |
| 01:49 | 50 |
| 02:47 | 60 |
| 03:59 | 70 |
| 05:27 | 80 |
| 07:31 | 90 |
| 10:39 | 100 |
Easy Setup
Some 3D printers come completely assembled to your home. Some can be described more as a kit where you have to assemble everything. The Ender 3 V2 is somewhere in between.
Its base with power supply, mainboard, print bed and co. is already completely pre-assembled. You have to install the display, the filament holder, the Z-axes, the X-axis with extruder/printhead and the cabling yourself. You also have to install and tension the toothed belt of the X-axis yourself.
However, this all sounds more difficult than it actually is. The included instructions explain the assembly with easy-to-understand pictures and sometimes grammatically not quite perfect English.
If you’ve never assembled a 3D printer before and don’t consider yourself a tech expert, you’ll still get there quickly.
V-Slot
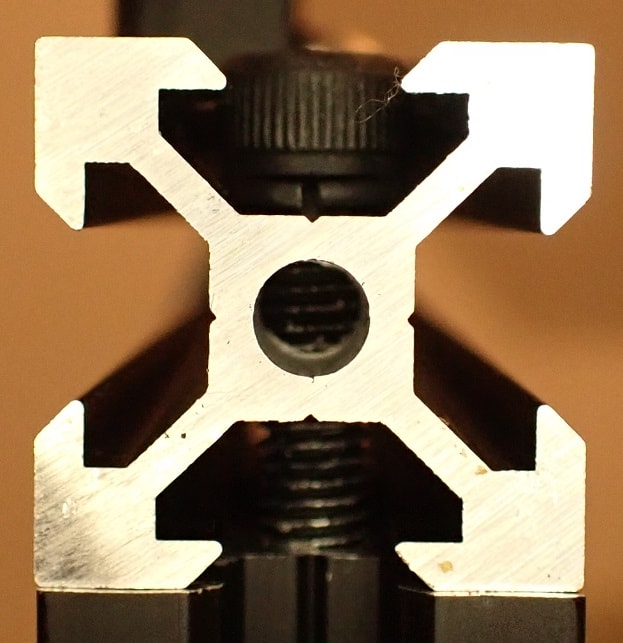
The metal profiles of the Ender 3 V2 have a V-slot shape. This increases stability, reduces wear and provides smoother movements.
Tool drawer
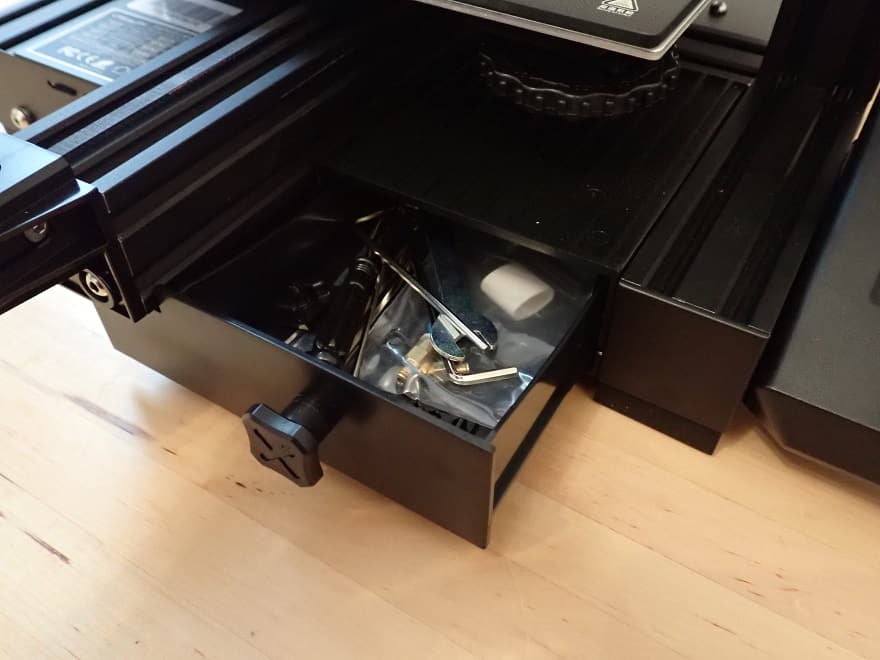
Under the printing plate and to the left of the display is a practical tool drawer. Actually, everything has room there – only the spatula and the side cutter are a bit too bulky or large for this drawer.
But since you’re going to need these two tools all the time anyway, it’s more convenient to either put them next to the 3D printer or hang them on a tool holder you printed yourself. Such small gadgets are also the perfect tests to optimize the settings.
Relatively Low Noise
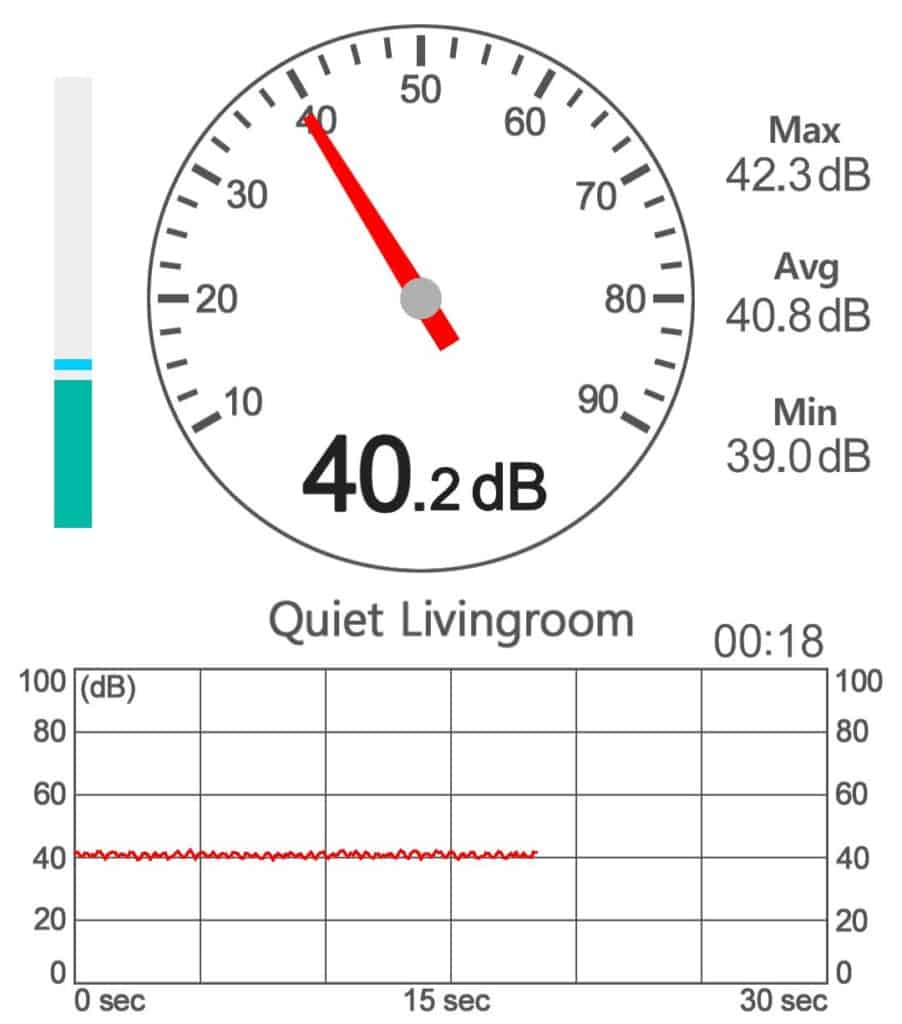
The installed TMC2208 stepper drivers were also a must-have upgrade on the Ender 3. These stepper motor drivers are not only much quieter than the original drivers of the Ender 3, they also guarantee a smoother movement of the motors.
However, the built-in fans are not the best and the 3D printer reaches a total of approx. 41 dB during the printing of a PLA object (comparable to a quiet conversation).
Resume Print
Meanwhile, the resume print function is a standard feature of modern hobby 3D printers. This function saves the current print progress in case of an unexpected power failure.
Until the power returns, the Ender 3 V2 continues its operation exactly where it left off.
In some regions, this can be very valuable – especially with large objects. It’s very frustrating when you have a 10-hour print and the power goes out near the end and you have to start over. With this feature, this is not so bad anymore.
Easy Belt Tension
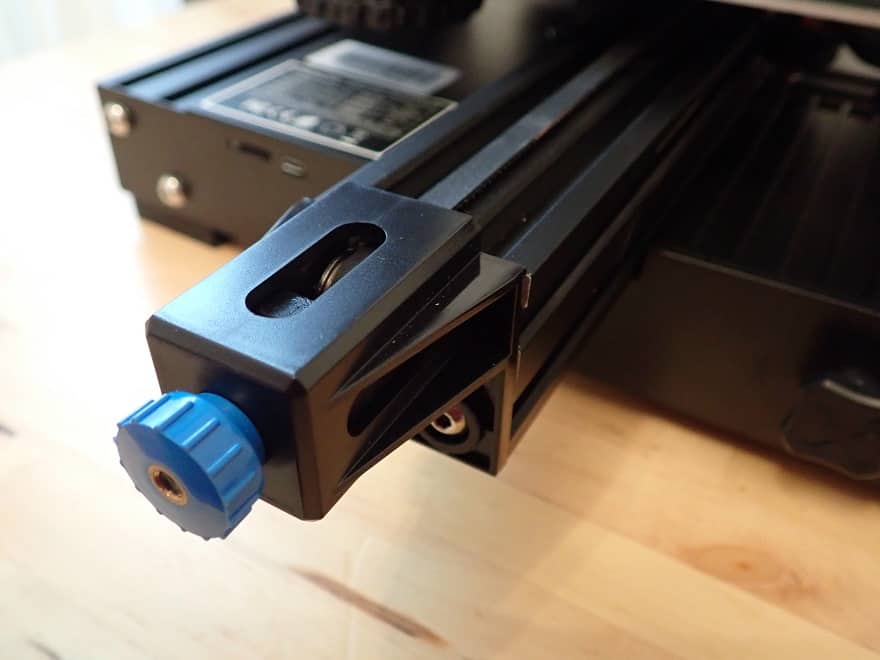
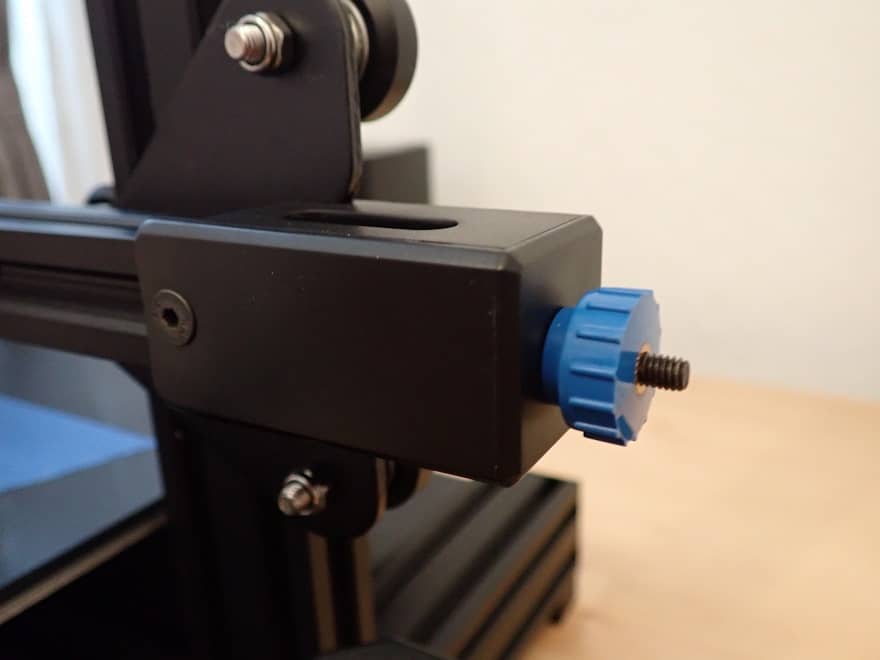
The X and Y toothed belts can be conveniently tensioned and released using a rotary wheel.
So you don’t have to take half the printer apart to tension the belts properly.
If you have to deal with ghosting or ringing, for example, you will have to adjust the belt tension here and there. When assembling the 3D printer, the instructions explain in detail how to set the belt tension correctly. Since you have to install the timing belt yourself, this is important.
The timing belt is properly tensioned when it makes a medium-low sound when you pull it.
Clear Menu
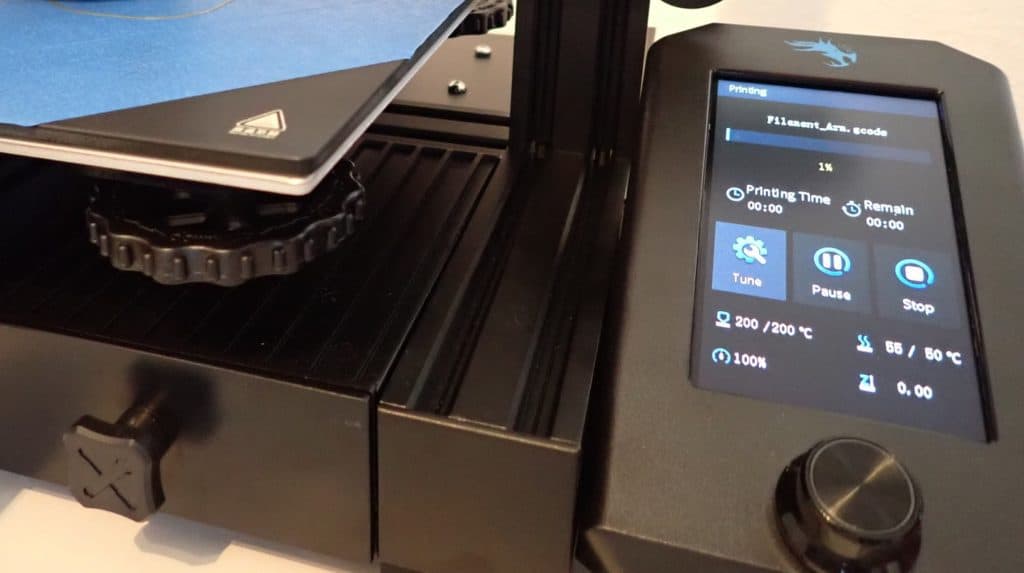
The menu of the Ender 3 V2 has also been revised and is now very similar to those of the other newer 3D printers from Creality. The menu is very intuitive, so you can quickly find everything with just a few clicks.
You can also make final settings in the print menu before you print. These include, for example, the temperatures of the nozzle and print bed, the print speed, the fan speed and the Z offset.
Color 4.3 inch LCD Display with Rotary Knob
The color 4.3 inch LCD display of the Ender 3 V2 guides you quickly to the settings you need with intuitive menu navigation. Unfortunately, it is not a touchscreen and is operated with a rotary knob.
However, that is not a big deal since the operation via the rotary knob is almost as fast as with the finger on a touchscreen. The display’s quality and size are absolutely sufficient.
Meanwell Power Supply
The installed power supply is a high-quality Meanwell power supply.
In addition, the power supply is now installed inside the 3D printer. This increases the user safety and the optics.
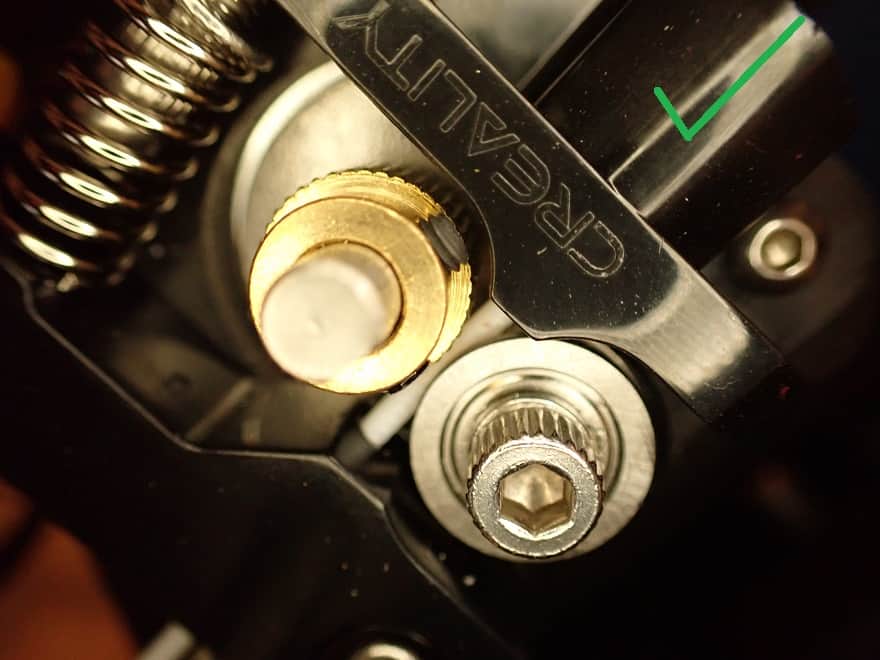
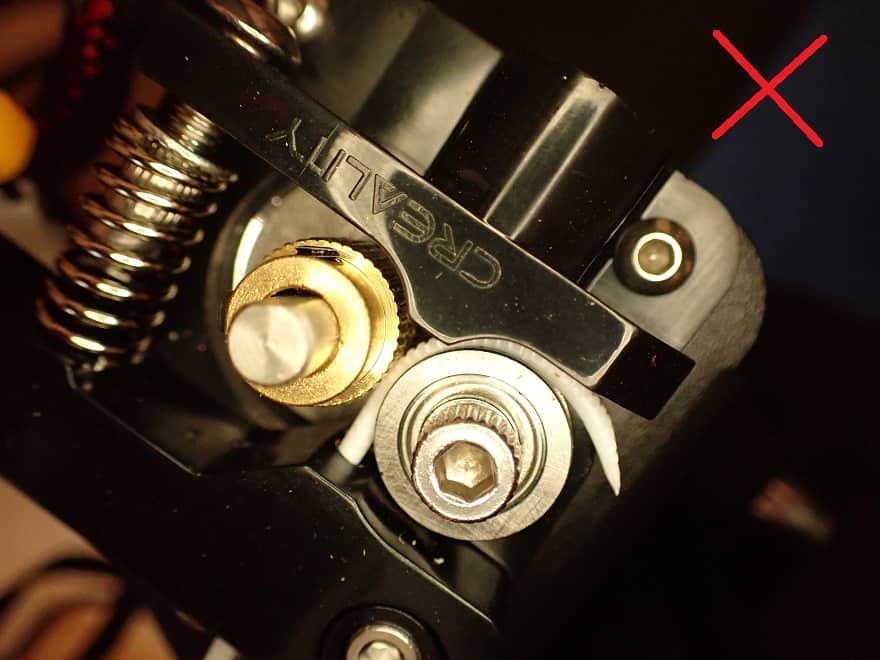
Extruder Knob
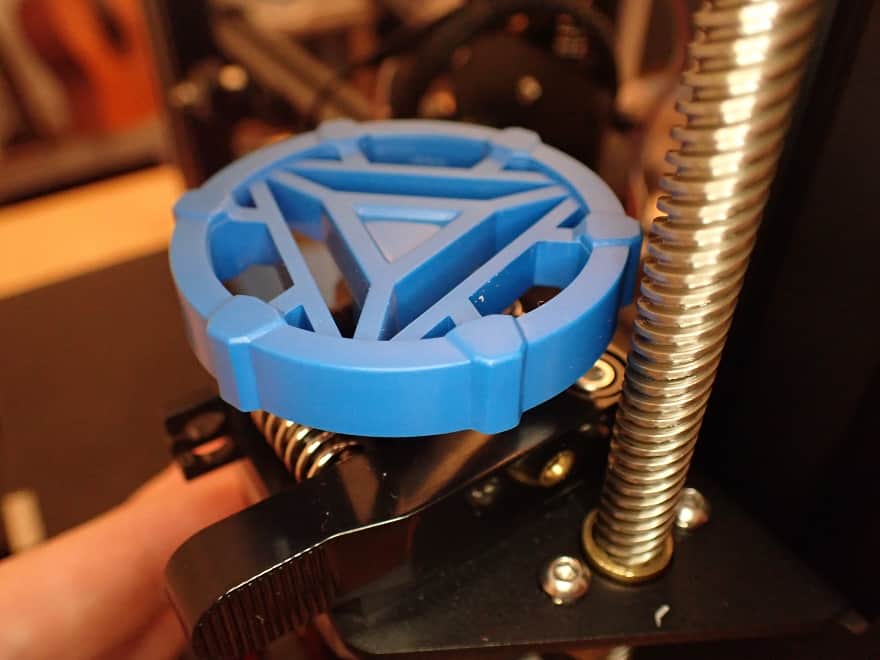
To manually push the filament through the extruder, there is a knob on the extruder. With this knob, you can push the filament either in or out (“manual feeding”). This allows you to move the filament back and forth much more sensitively than pushing it through by hand.
However, the extruder itself is quite impractical in its handling. When loading the filament, the filament is guided over a rotary wheel and should actually arrive at the opening to the Bowden tube. However, if the filament is not perfectly straight and pointed, it is simply fed out of the extruder past the rotary wheel…
With the Direct Drive Extruder Upgrade, this is of course much better solved.
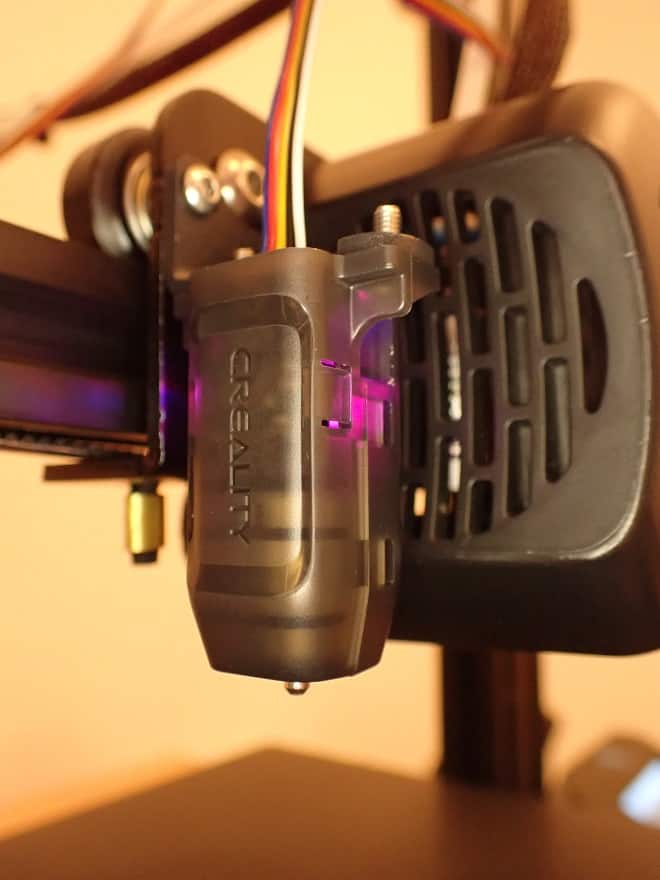
Silicone Protection for Printhead
There is a silicone protector around the nozzle. This is quite handy when some filament gets tangled, as it then does not stick to the hot print head or the nozzle.
Proven Technology
A major advantage of the Ender 3 V2 over other low-budget 3D printers is the fact that it has already proven itself countless times.
Its predecessor alone is one of the best-selling 3D printers in the world. You can do very little wrong here and are unlikely to encounter any major difficulties.
Check Price at:
Upgrades
– Ender 3 V2
Even though the Ender 3 V2 already has many upgrades built-in as standard in contrast to its predecessor, there are still upgrades that can definitely make sense.
Enclosure – Ender 3 V2
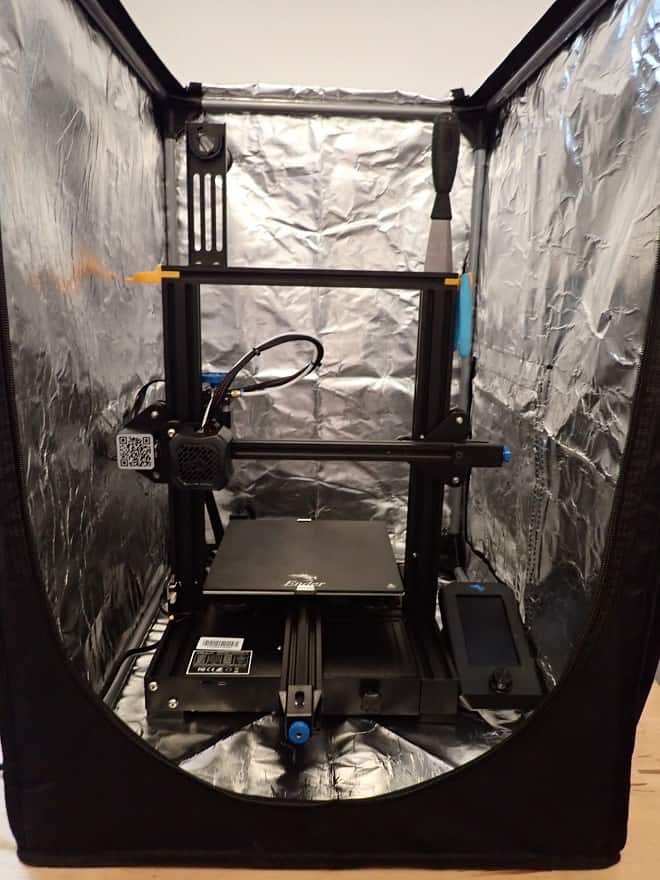
If you want to use more exotic filaments that need a constant temperature (e.g. to avoid warping), a closed build space is important.
With this enclosure or “tent”, you can ensure just that for your Ender 3 V2.

Check Price at:
The enclosure has a layer of the aluminum inside to retain heat in the 3D printer. Another plus of this layer is that it is flame-retardant and smothers fires rather than spreading them further.
It is available in two sizes and is suitable for many 3D printers. It has several openings to operate the 3D printer and a large opening to open the complete front and top. Through the transparent front window, you can see what is happening inside.

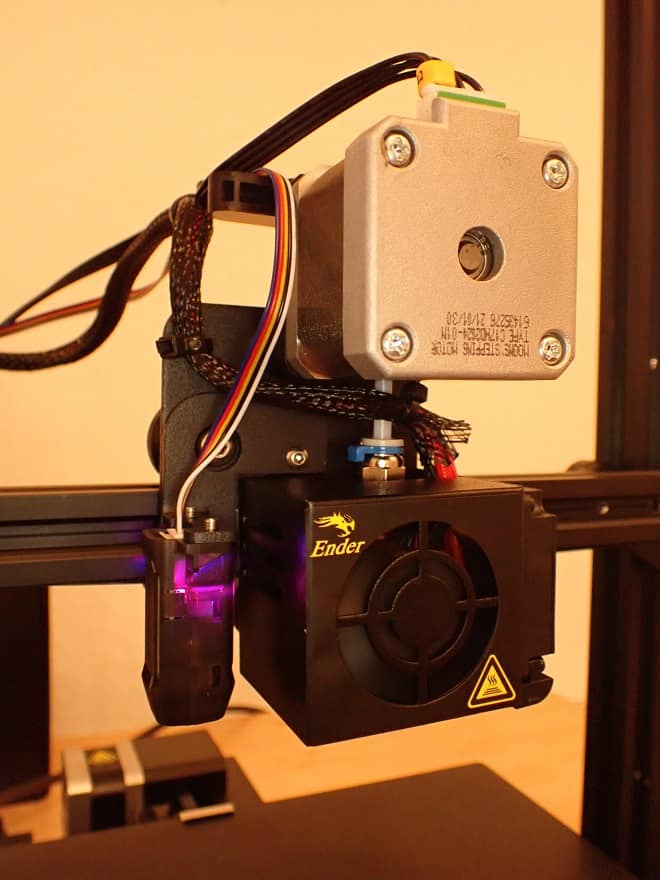
BLTouch – Ender 3 V2
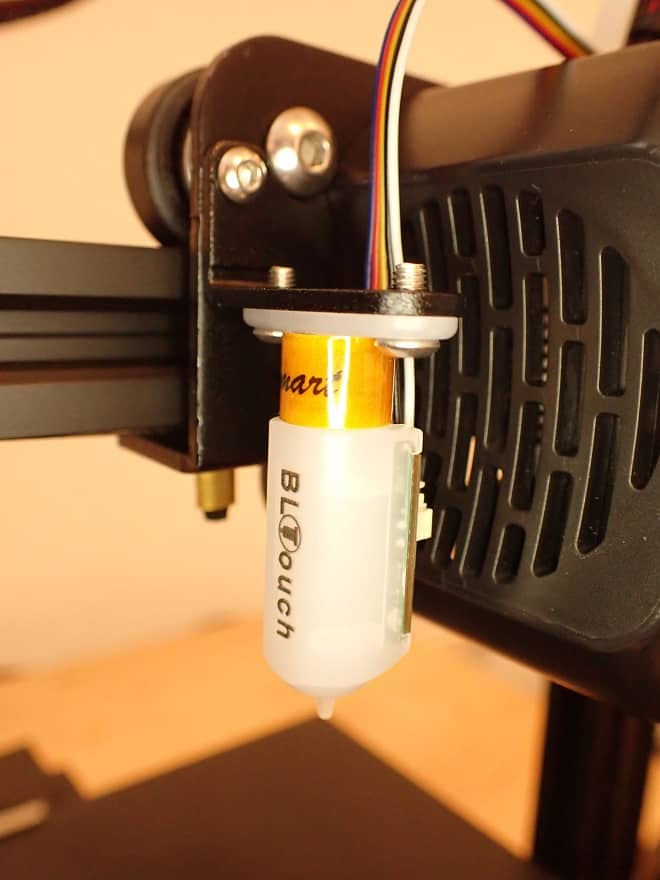
The BLTouch is a sensor that takes over the manual print bed leveling. With this upgrade, the leveling is done automatically. If you find manual leveling annoying, this upgrade is for you!

Check Price at:
Most mid-range and high-end hobby 3D printers come with automatic print bed leveling as standard.
A touch sensor is installed at the tip of the BLTouch, which automatically detects when it is touching the print bed. With this sensor, the print head moves to several points on the print bed, usually 9, to determine the inclination over the entire surface.
The installation is done quite easily: You just have to mount it to the print head with the included mount and plug the cable to the correct slot on the mainboard. After you have tucked the cables away and flashed the correct firmware, you’re ready to go!
For More Info:
Ender 3 V2 + BLTouch | Step-by-Step Instructions & Guide
CRTouch – Ender 3 V2
The CRTouch* is Creality’s variant of the BLTouch. It is perfectly compatible with the Ender 3 V2.
The touch sensor is made of metal and not plastic. This makes its service life much longer than with the BLTouch.
In addition, the CRTouch does not work with a Hall sensor like the BLTouch, but with an optical sensor. This makes it much less sensitive to external electromagnetic fields. Faulty measurements are virtually impossible here.
You can see from the sensors alone that Creality did not simply copy the BLTouch, but created its very own variant. The entire design is more appealing and the device makes a high-quality impression overall.
In terms of accuracy and reliability, the CRTouch is on par with the BLTouch. If you have a compatible Creality printer, the CRTouch is definitely a recommendation!

The Test for This Sensor:
CRTouch | Hands-On Review & Step-by-Step Guide
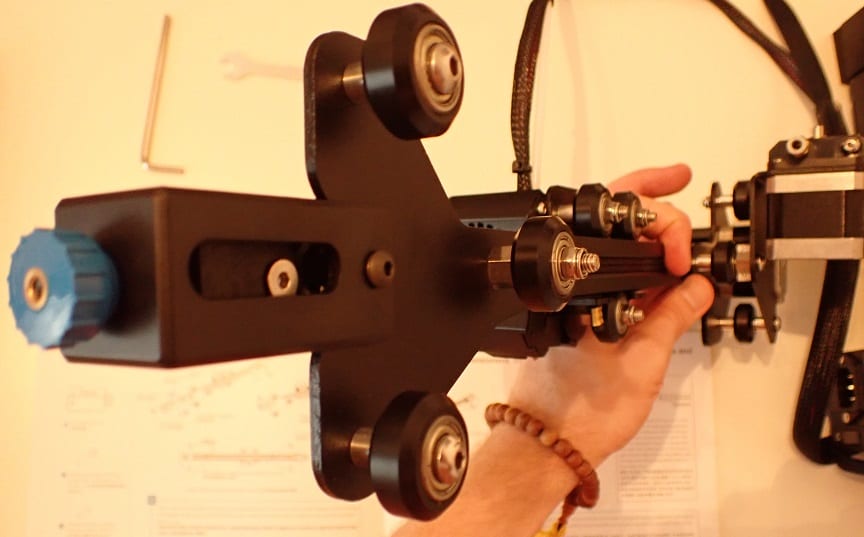
Direct Drive – Ender 3 V2
The Bowden extruder of the Ender 3 V2 does not handle flexible filaments like TPU very well. During printing, flexible filaments often get tangled in the extruder or on the long way to the nozzle.
With a direct drive system, you eliminate this problem because the extruder is installed directly above the print head with the nozzle.
There are many ways you can equip the Ender 3 V2 with a Direct Drive System. One of them is a DIY solution where you print certain parts yourself and then place the stepper motor, the extruder and the print head as a direct drive system.
However, there are also purchasable solutions that are less error-prone. These include various third-party constructions (example on Amazon*) or the official kit from Creality*.
The official kit contains the completely pre-assembled Direct Drive system and the necessary tools. The assembly is quite simple: in principle, you only need to replace the old extruder with the new one. This includes the disassembly of the X-axis including the toothed belt, and the rewiring of the extruder.
You can see how it all works in detail in my guide and practical test.
Related Article:
Ender 3 (V2/Pro) Direct Drive Kit from Creality | Review
Cmagnet Print Bed – Ender 3 V2
The magnetic printing bed* can be removed and bent. The bending makes it very easy to remove the finished print object. In addition, the surface is created so that most filaments adhere well to it.
PEI Print Bed Film – Ender 3 V2
The flexible PEI film* guarantees excellent adhesion for various filaments. You won’t need Blue Tape or glue sticks anymore.
Tungsten Nozzle – Ender 3 V2
A tungsten nozzle* is much more durable than a normal hardened steel nozzle. It lasts much longer and you rarely have to replace it.
Especially if you use filaments with additives such as wood* or metal*, such a tungsten nozzle is particularly worthwhile.
Touchscreen – Ender 3 V2
The touchscreen* is especially worthwhile for the original Ender 3. For the Ender 3 V2, this is only a slight improvement. But if you prefer to work with a touchscreen rather than a knob, this upgrade is still worth it.
Note that you have to update the mainboard with the correct firmware before you can use the printer again.
Z-axis extension – Ender 3 V2
If the print volume in the Z-axis is a bit too small for you, you can increase it with this upgrade*. It replaces the old Z profiles and extends the print volume in the Z-axis by 100 mm.
LED Strip – Ender 3 V2
With this upgrade*, you can completely illuminate the printing area of the Ender 3 V2. The installed LEDs are white (6500 K) and consume a maximum of 5 watts.
The installation takes less than 5 minutes and the price is also very small. So if you don’t have perfect lighting in the room or use the enclosure where the 3D printer is located, this upgrade is a no-brainer.
Technical Specifications
– Ender 3 V2
DEVICE
- Technology: FDM
- Size: 475 x 470 x 620 mm
- Weight: 7.8 kg (17.2 lbs)
- Display: color 4.3 inch LCD display with rotary knob
- Structure: partially pre-assembled
- Power supply/voltage: 115V / 230V
- Print volume: 220 x 220 x 250 mm
- Extruder type: Bowden (upgrade to Direct Drive available)
- Print bed leveling: Manual
- Accuracy: 0.1 mm
- Layer thickness: 0.1 mm
- Nozzle quantity: 1
- Nozzle diameter: 0.4 mm
- Filament diameter: 1.75 mm
- Max. Print bed temperature: 100 °C
- Max. Nozzle temperature: 255 °C
- Print speed: 30-60 mm/s (max. 180 mm/s)
- Supported filaments: PLA, ABS, PETG, TPU
- Resume Print: Yes
SOFTWARE
- Slicer: Cura, Simplify3D
- Connectivity: MicroSD, USB
- File formats: OBJ, STL
Check Price at:
Similar 3D Printers
Creality Ender 3 Pro
The Ender 3 Pro* is the actual predecessor of the Ender 3 V2. The printing results are more or less identical but it lacks one or two practical upgrades of the second version of the Ender 3.

Check Price at:
Creality CR-6 SE
The CR-6 SE* is packed with useful upgrades. There are hardly any difficulties encountered during printing and its many upgrades make life easier. One highlight is definitely the automatic leveling print bed.

Check Price at:
Creality Ender 3 Max
Based on the first version of the Ender 3, the Ender 3 Max* has a large build volume of 300 x 300 x 340 mm, a filament sensor and a glass print bed. Otherwise, it offers you the same accuracy and reliability of the Ender 3 series.

Check Price at:
Artillery Genius
The Artillery Genius* is slightly more expensive than the Ender 3 V2. But it offers a touchscreen and a direct drive extruder system.

Check Price at:
Ender 3 vs. Ender 3 V2
In developing the Ender 3 V2*, Creality listened carefully to the community and incorporated the most important upgrades into the new version. However, to make the price as attractive as possible for beginners, more advanced upgrades such as automatic bed leveling or a direct drive extruder have not been included in the new version.
Nevertheless, the price is lower than if you get an Ender 3 V2 than an Ender 3 V1* with all the upgrades built into the second version. Creality has optimized their manufacturing processes to reduce the price, in addition to installing the most important upgrades.
Overall, the new version is a strong improvement and recommended to every beginner!
I would only recommend the original Ender 3 if you love to tinker. If you want to install every single upgrade yourself and tinkering is your main focus and not printing, then the first version of the Ender 3 is well worth it.
Check Price at:
Disclosure: This website is the property of Martin Lütkemeyer and is operated by Martin Lütkemeyer. Martin Lütkemeyer is a member of the Amazon Services LLC and other Affiliate Programs. These are affiliate advertising programs designed to enable websites to earn advertising revenue through advertising and linking to Amazon.com and others. Links marked with * are affiliate links.
