
- Wet Filament: Prevention, Symptoms & Drying - July 18, 2024
- Sovol SV08 – Best PrusaSlicer Settings & Profile - June 26, 2024
- Sovol SV08 – Best Orca Slicer Settings & Profile - June 26, 2024
Disclosure: Links marked with * are Affiliate Links. I earn from qualifying purchases if you decide to make a purchase through these links – at no additional cost for you!
Perfecting 3D prints is often a matter of mastering the small, intricate details, one of which is effectively using support structures. Among these, Cura tree supports stand out as a remarkable tool, significantly enhancing print quality and ease of post-processing.
Tree supports in Cura are support structures, minimizing material use and post-print cleanup. Ideal for complex models with overhangs, they branch out to provide targeted support, reducing contact with the model.
I’ve designed this guide to demystify the process of integrating tree supports in Cura, focusing on practical, actionable steps.
So, this guide isn’t just theory; it’s about proven steps and refined settings that make a real difference in your 3D printing process. We’ll go through the essentials to optimize Cura tree supports, ensuring your models are not just well-supported but also easier to clean and finish.
Table of Contents:
What are Tree Supports in 3D Printing?


Tree supports are a type of support structure in 3D printing, named for their branching structure that resembles a tree. These supports ‘grow’ from the build plate towards the model, creating a network of tree branches that provide targeted support to overhangs and intricate details.
Tree supports excel in scenarios where the model has complex geometry or several overhangs, as they effectively manage these challenging aspects without compromising the final print quality.
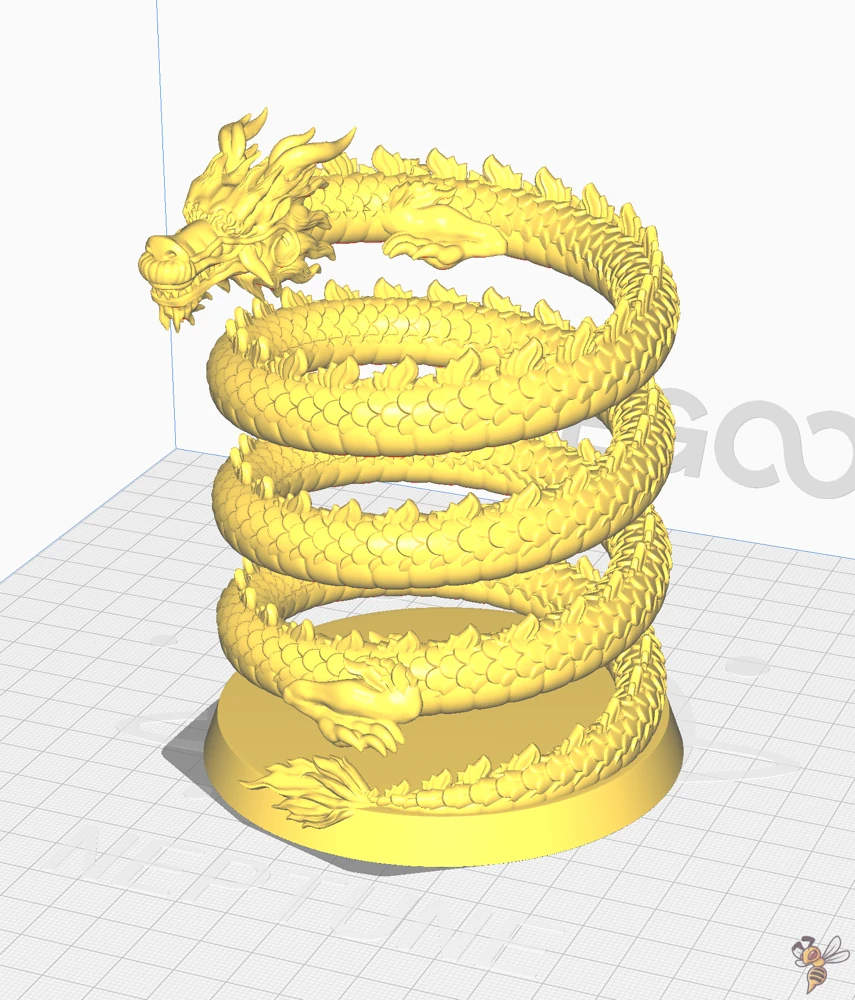
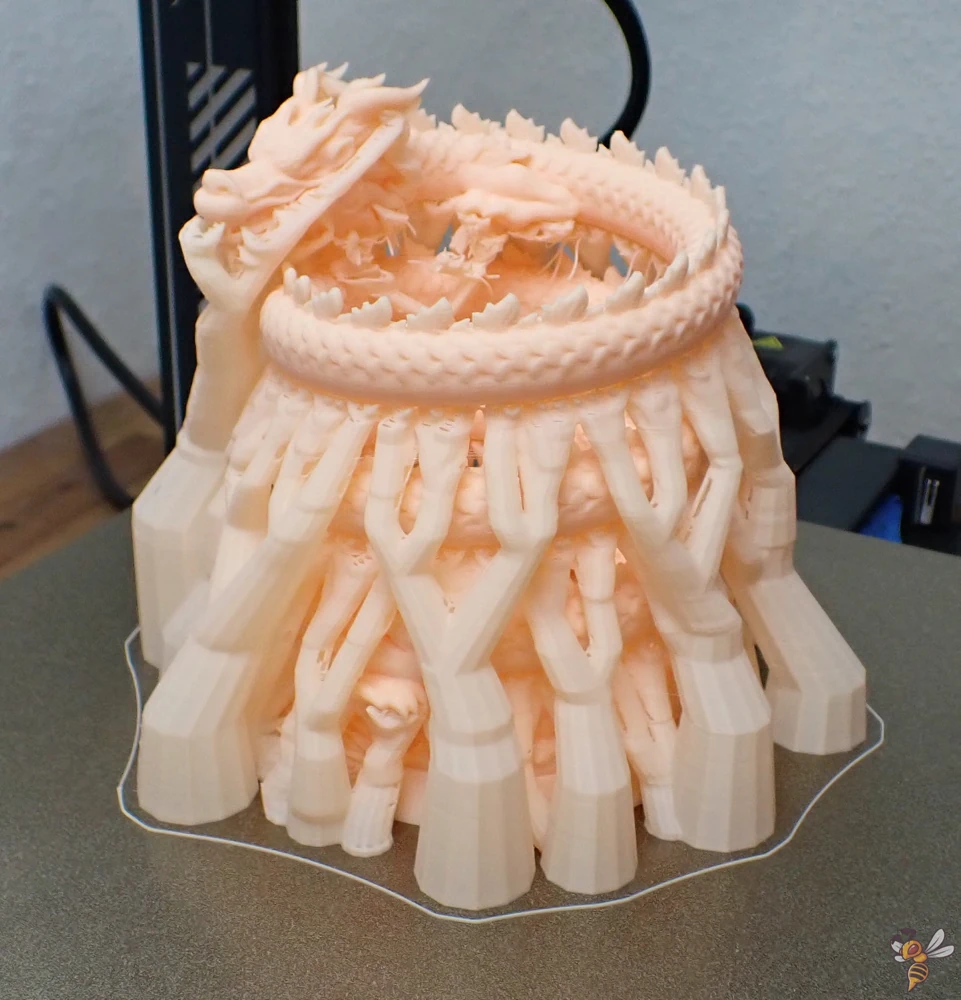
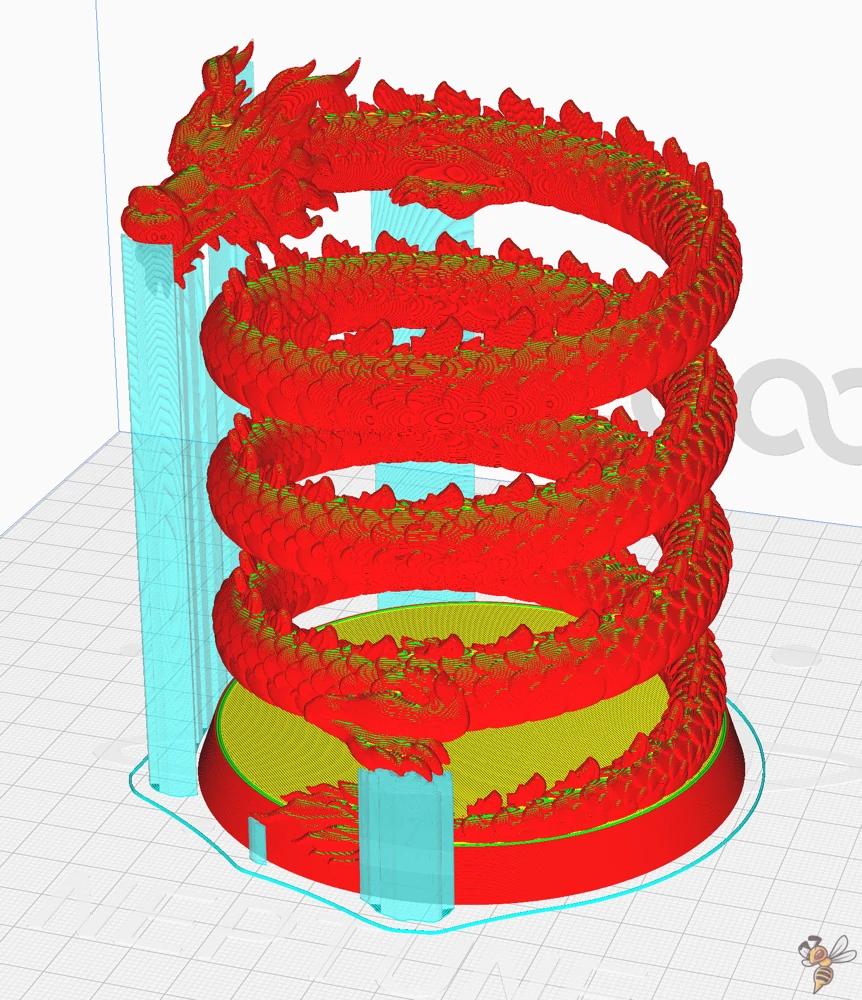
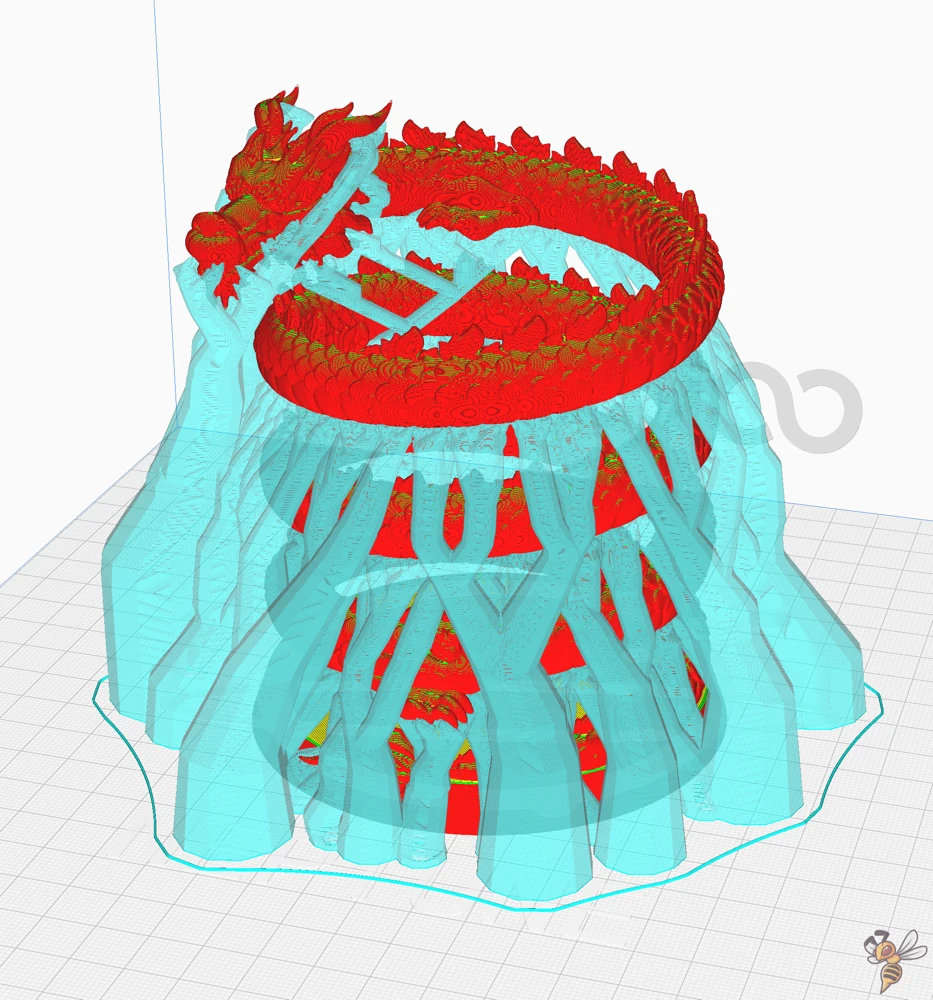
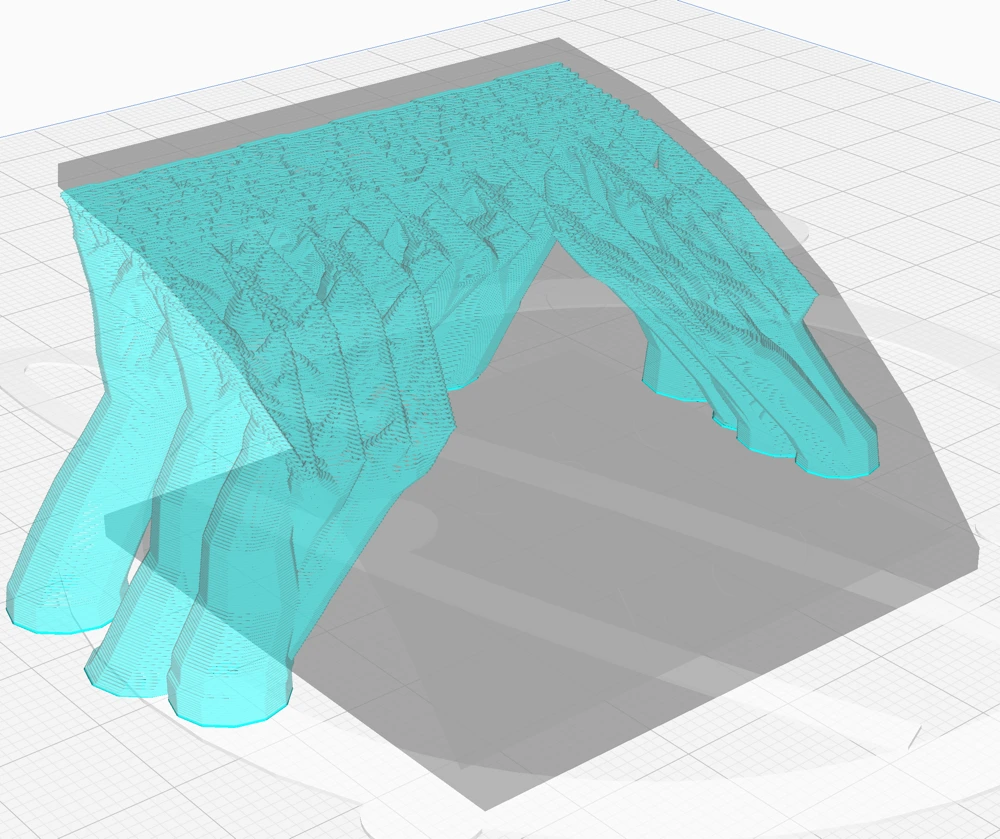
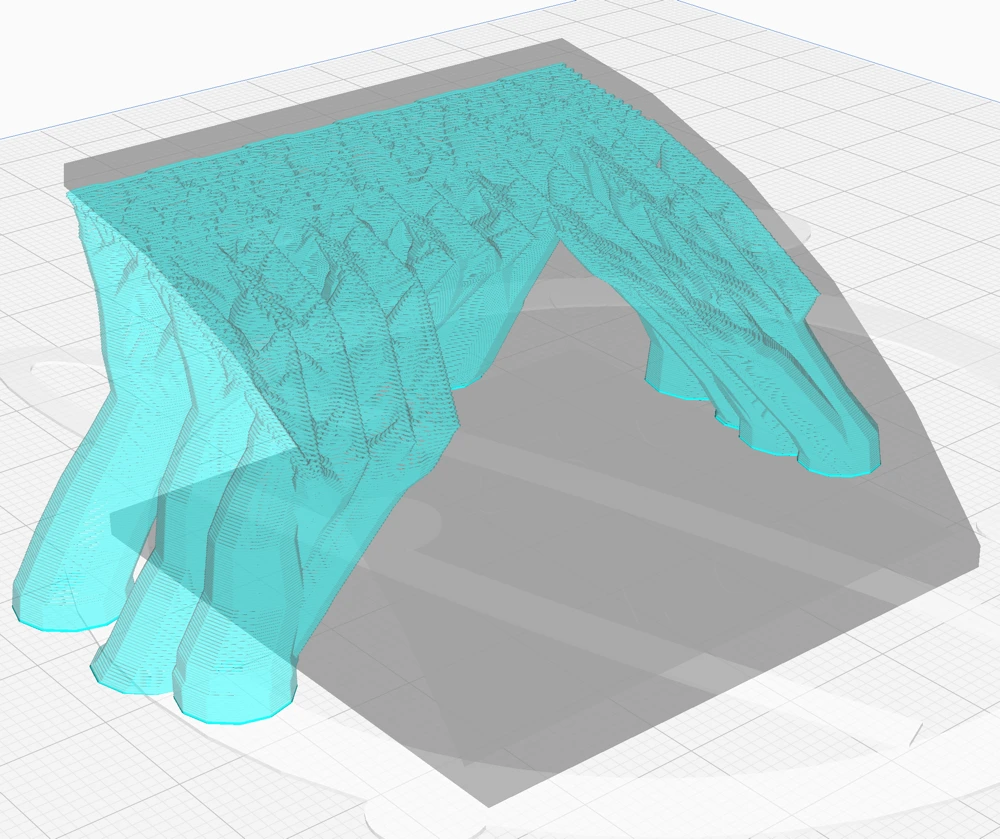
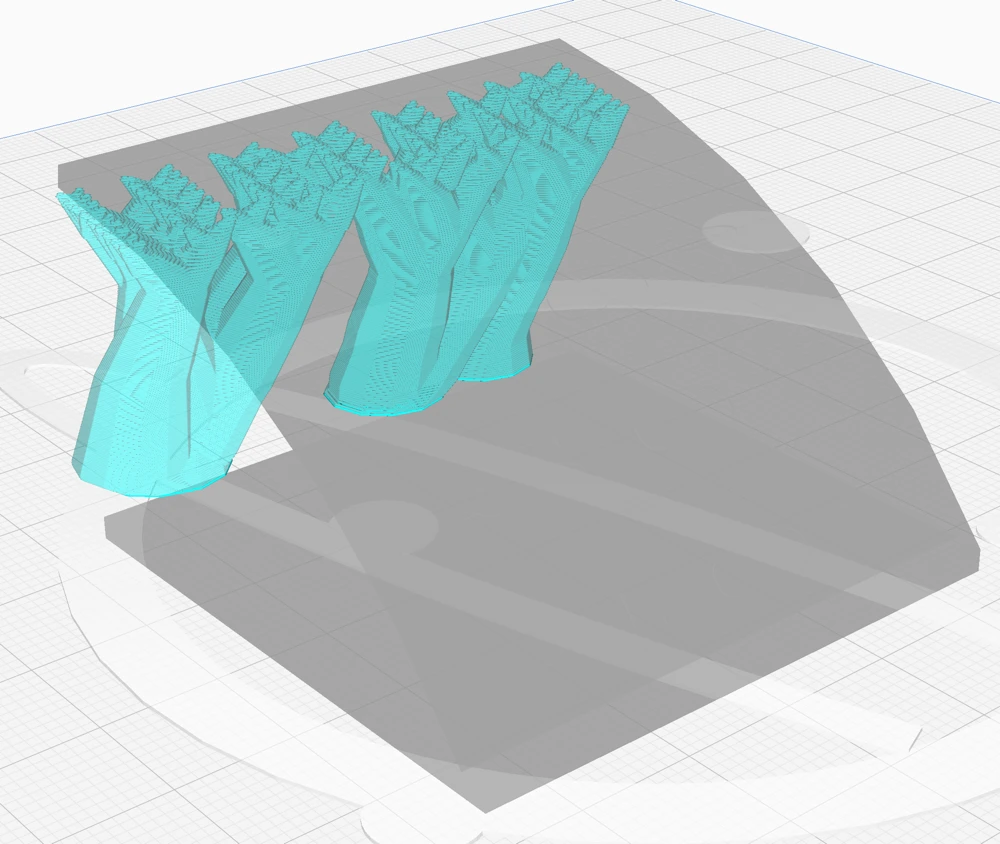
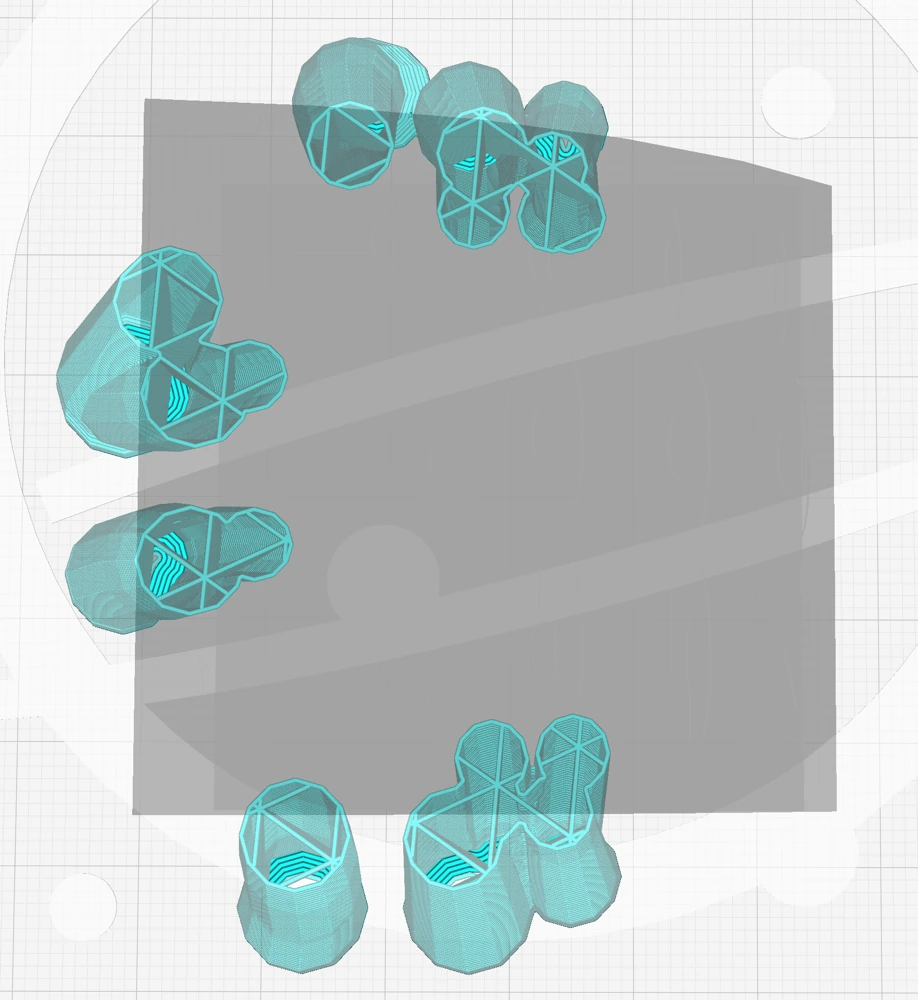
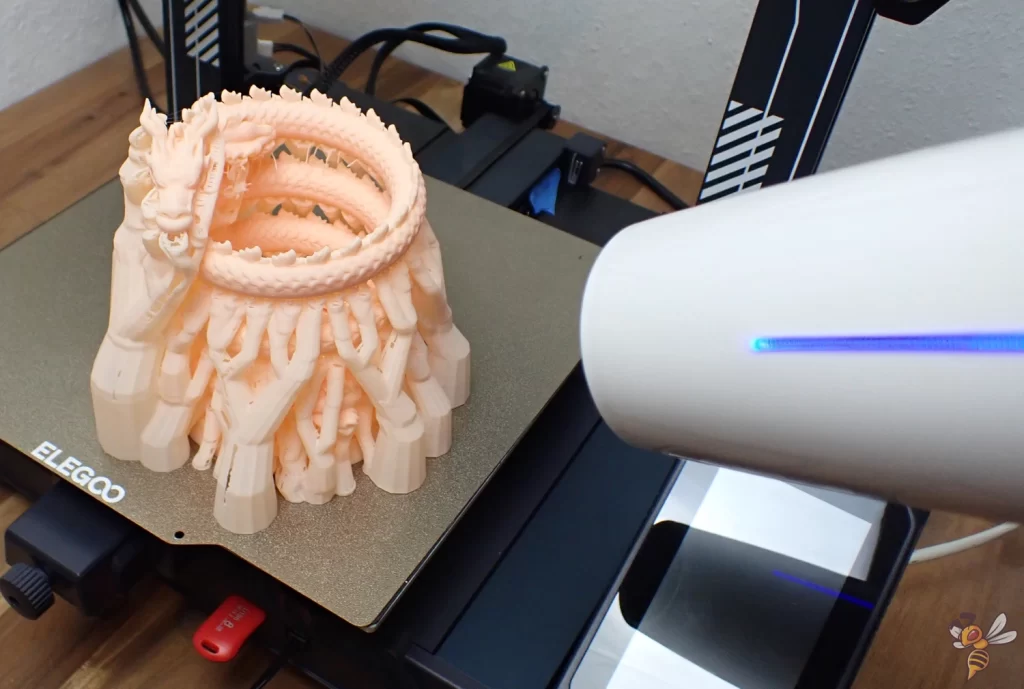
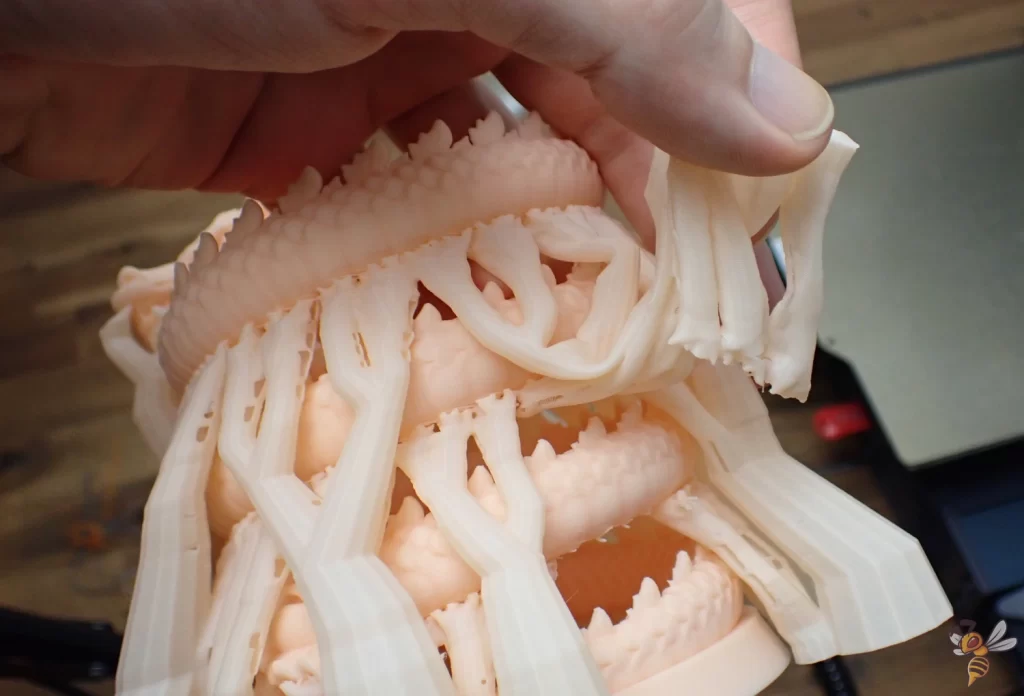
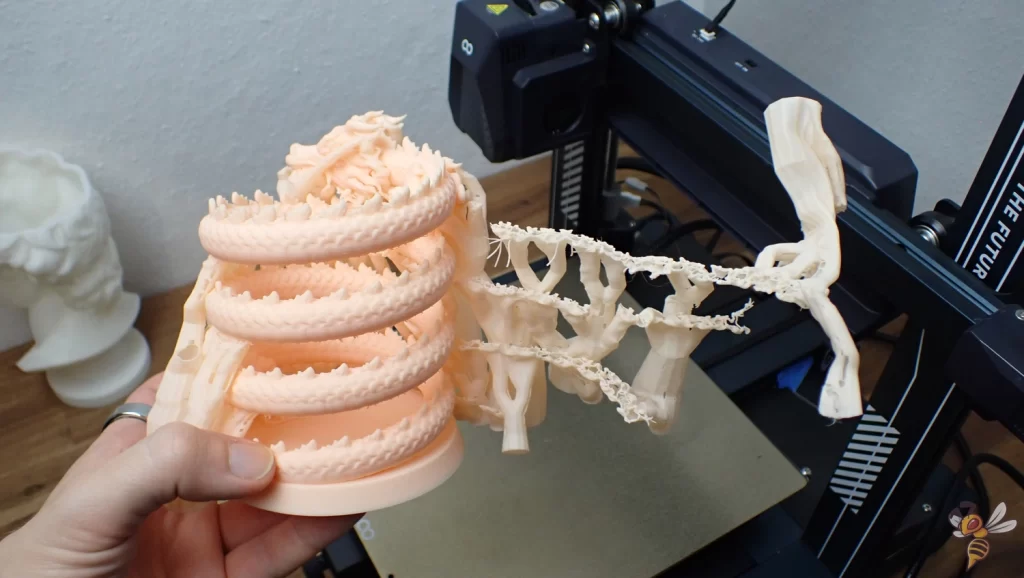
This is why I chose this dragon pencil cup, as depicted in the images, to showcase the practical application of tree supports.
Tree Supports vs. Standard (Linear) Supports
Cura tree supports offer several unique benefits compared to traditional supports in 3D printing:
- Efficient Material Use: Standard supports, which often take a pillar-like structure, can consume more material. Unlike regular supports, tree supports need less support material, making them a cost-effective choice.
- Ease of Removal: Traditional supports can be challenging to remove and may leave unwanted marks or blemishes on the print. Cura tree supports, due to fewer contact points, are generally easier to remove, leading to cleaner prints and fewer marks on the surface.
- Improved Access to Overhangs: Normal supports might not reach complex overhangs effectively. Tree supports, with their branching structure, can provide better access and support to intricate overhangs and details.
- Reduced Print Time: Given their efficient design, tree supports can sometimes reduce the overall print time when compared to traditional supports, contributing to faster project completion. Tree supports tend to be printed faster than regular supports.
While tree supports offer advantages in certain scenarios, traditional supports in 3D printing also have their own unique benefits.
Regular supports are particularly effective when dealing with simple geometric models with minimal overhangs, as their pillar-like structure provides robust stability. Moreover, they are a suitable choice when the print’s surface smoothness is not a priority, or if the print area is easily accessible for post-print finishing and cleaning.
How to Activate Tree Supports in Cura
Cura has two modes for configuring the print settings: “Recommended” and “Custom”. In both modes, you can activate the tree supports. In the Custom mode, you can optimize the settings and I highly recommend using it.
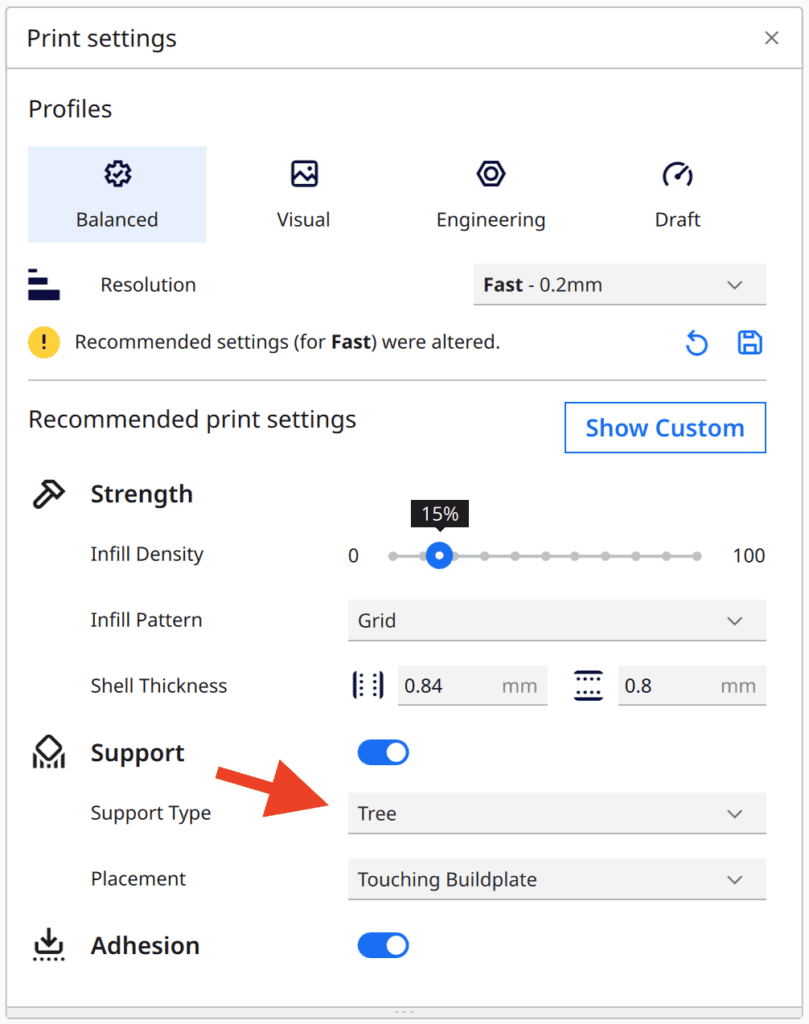
Here’s how to enable tree supports in Cura’s recommended print settings mode:
- Activate “Support”.
- Under the “Support Type” section, select “Tree”.
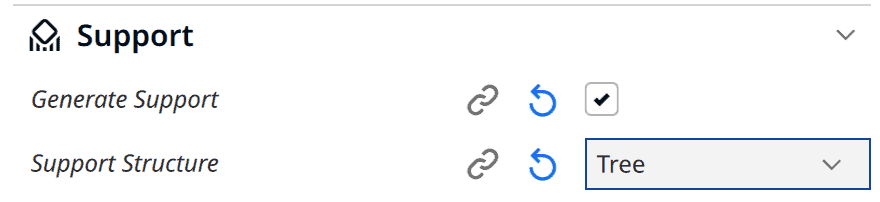
And here’s how to enable tree supports in Cura’s custom settings mode:
- Select “Custom” as your settings mode.
- In the menu bar, go to “Support” and click on it.
- Activate “Generate Support”.
- Under the “Support Structure” section, select “Tree”.
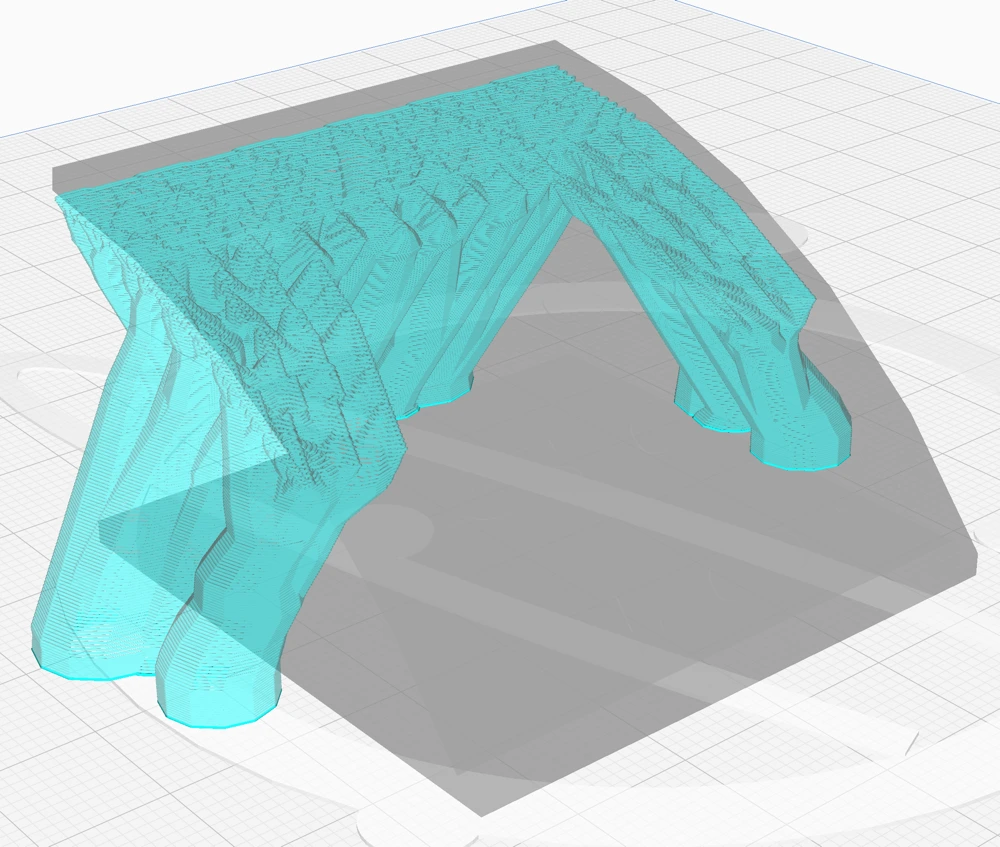
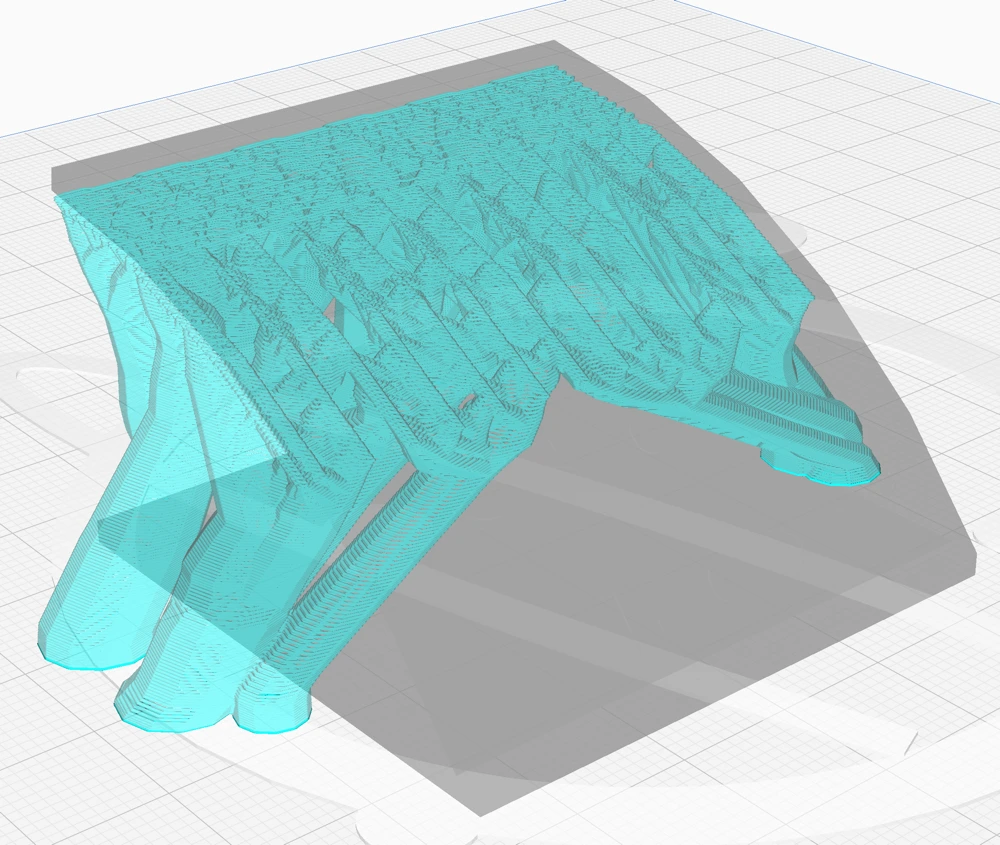
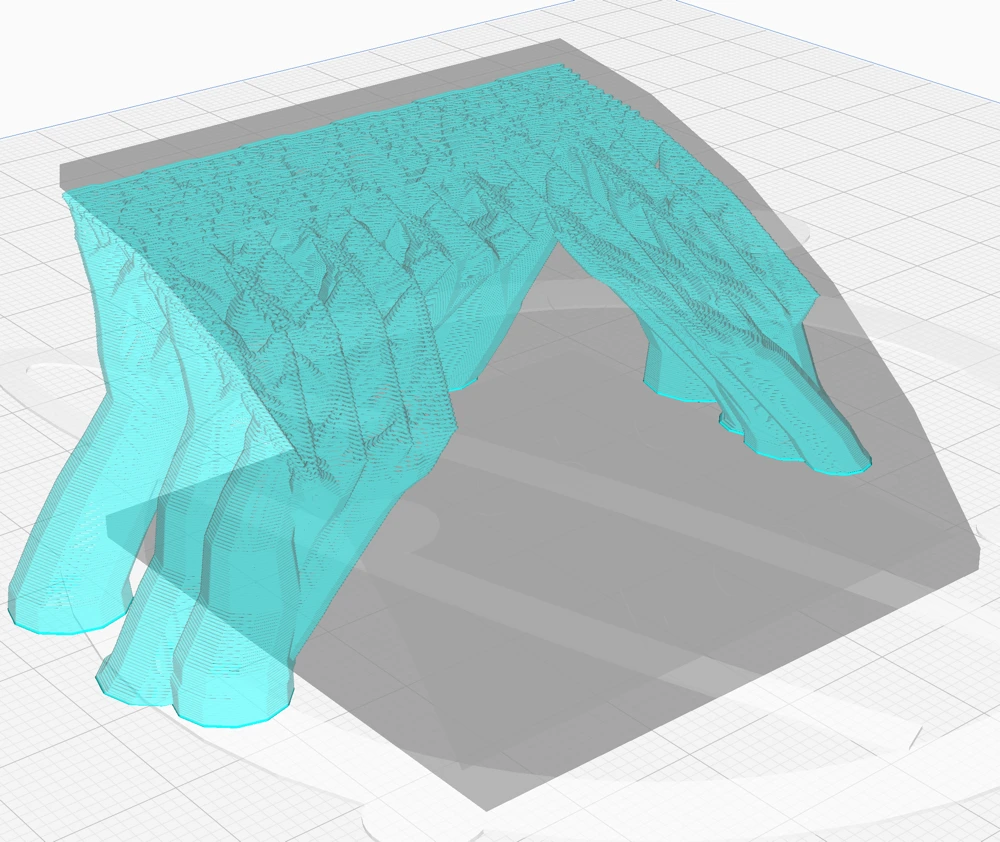
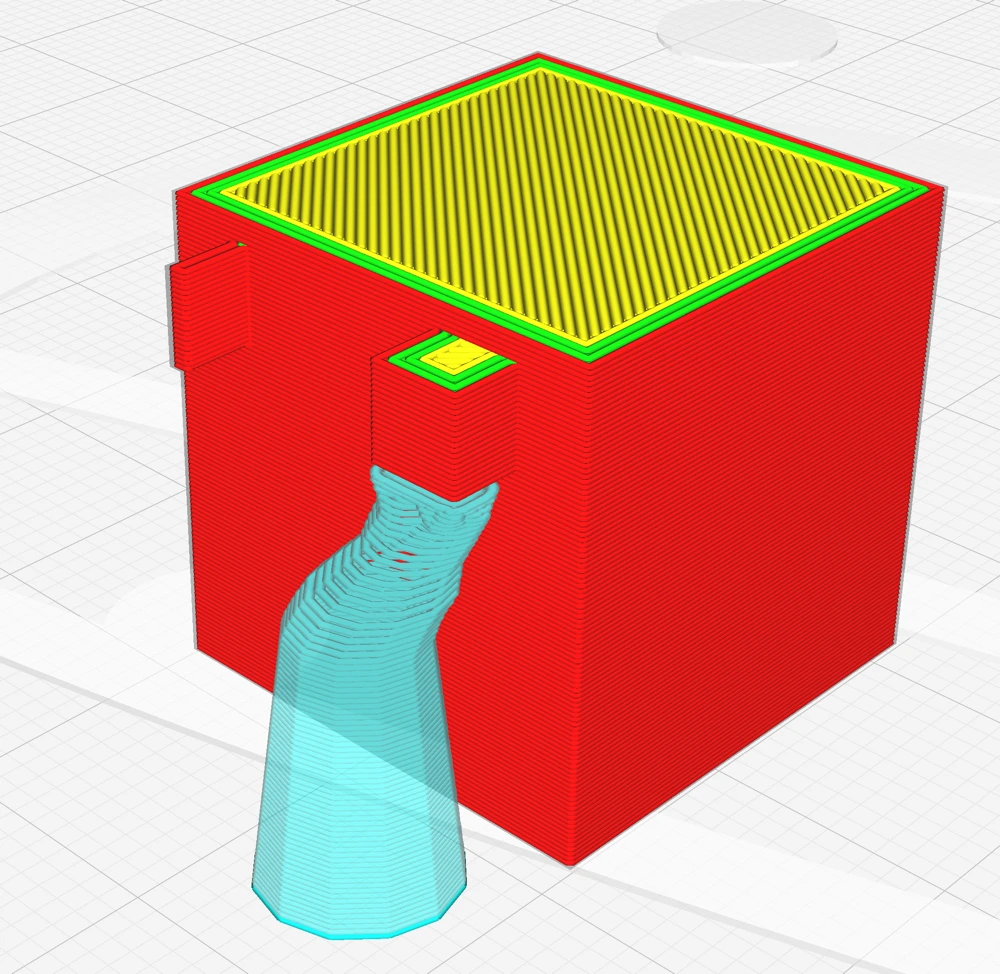
Cura Tree Support Settings

In the screenshot above, you can see my tree support settings for the Dragon Pencil Cup. These settings resulted in an almost perfectly clean print, with minimal support marks on the surface and easy to remove supports (further down, you’ll find a trick on how to remove supports easily).
You could just copy my default settings and try your luck. These settings are a good starting point for most complex models that need supports. But if you understand how each setting works, you could optimize the settings for your particular model and your 3D printer.
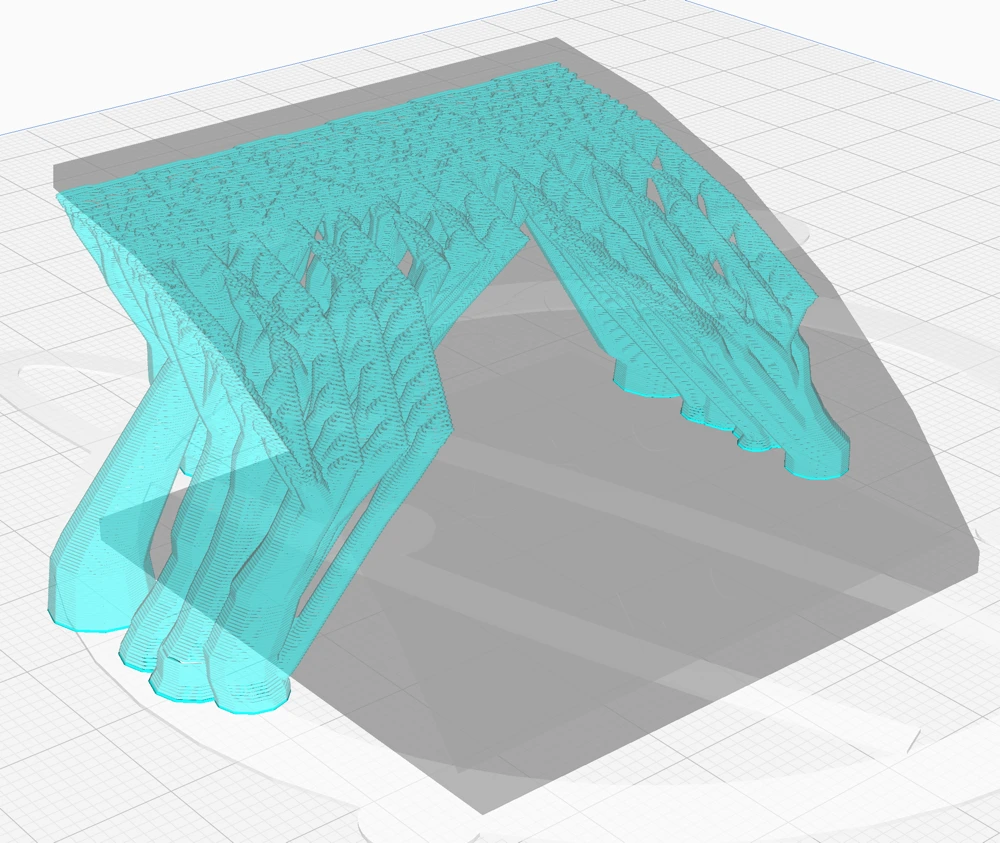
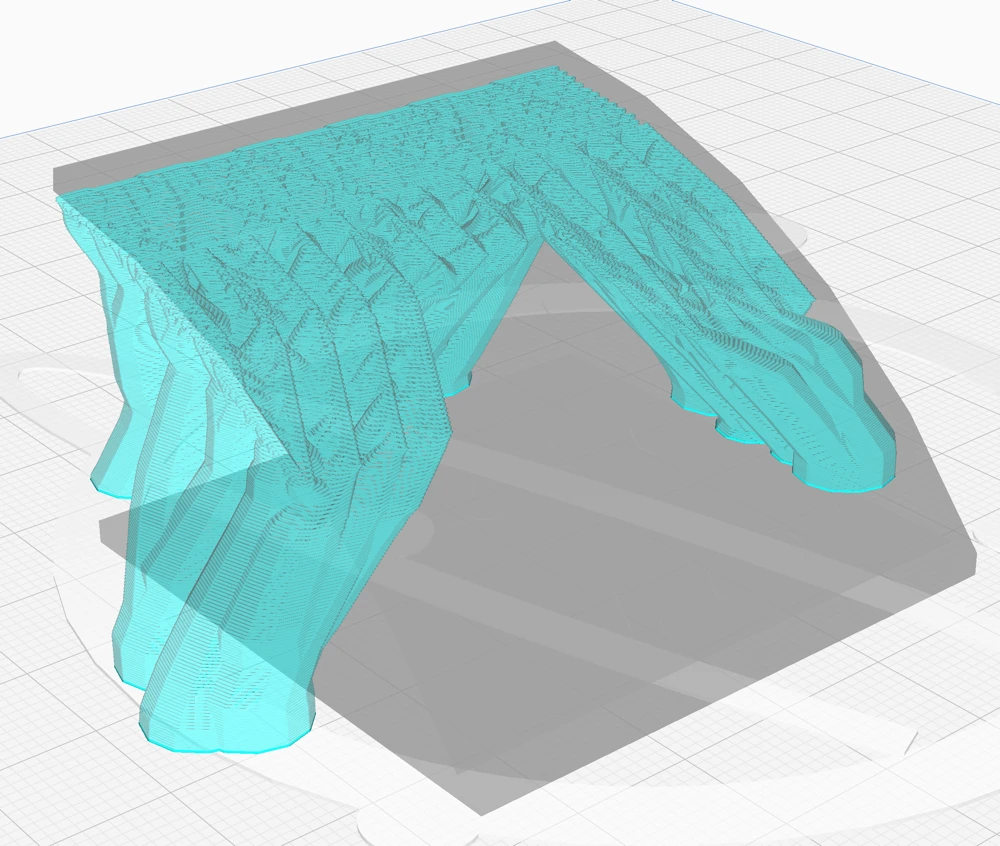
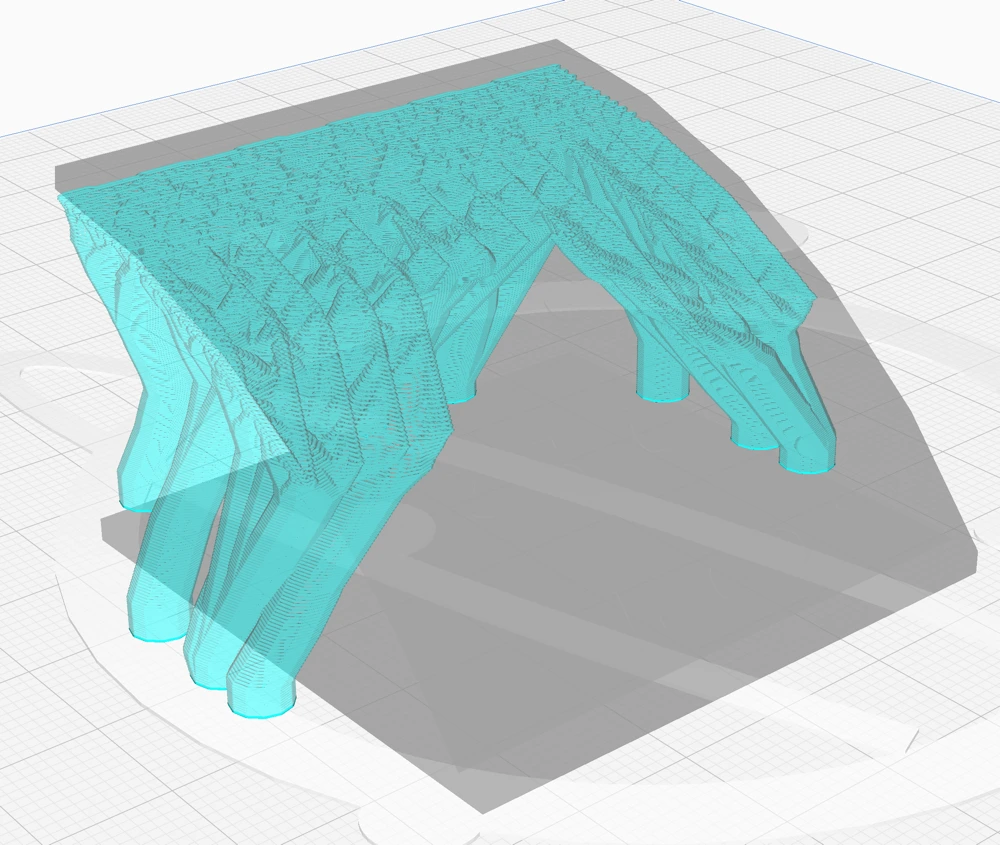
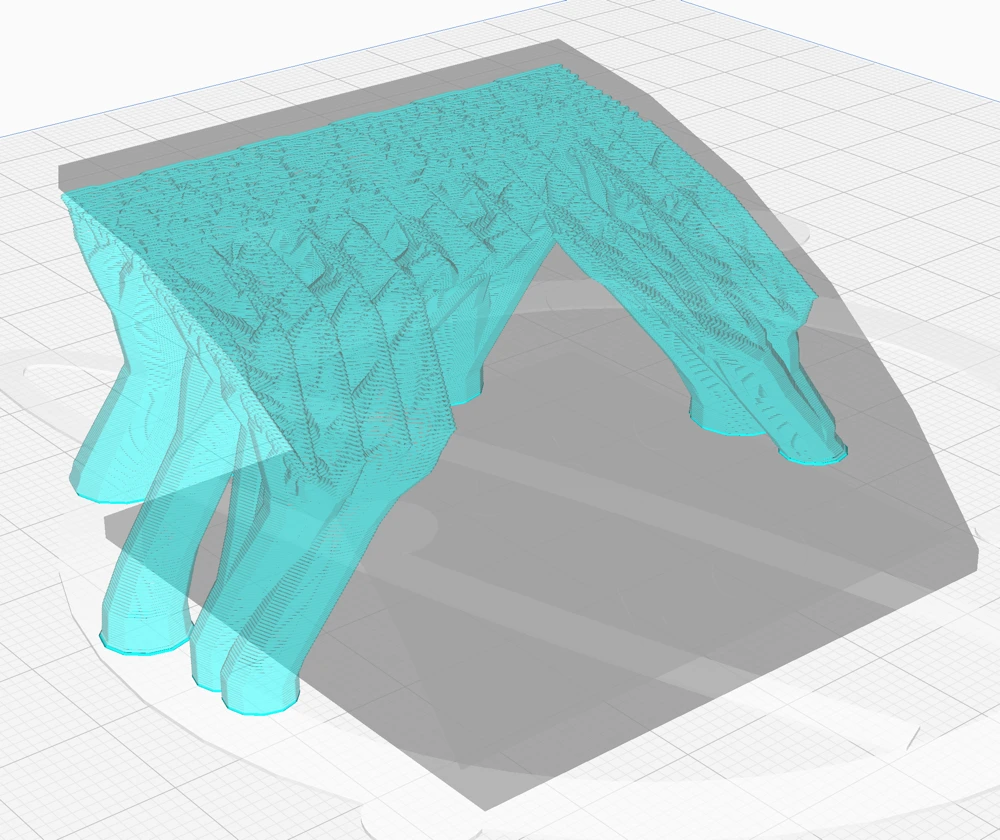
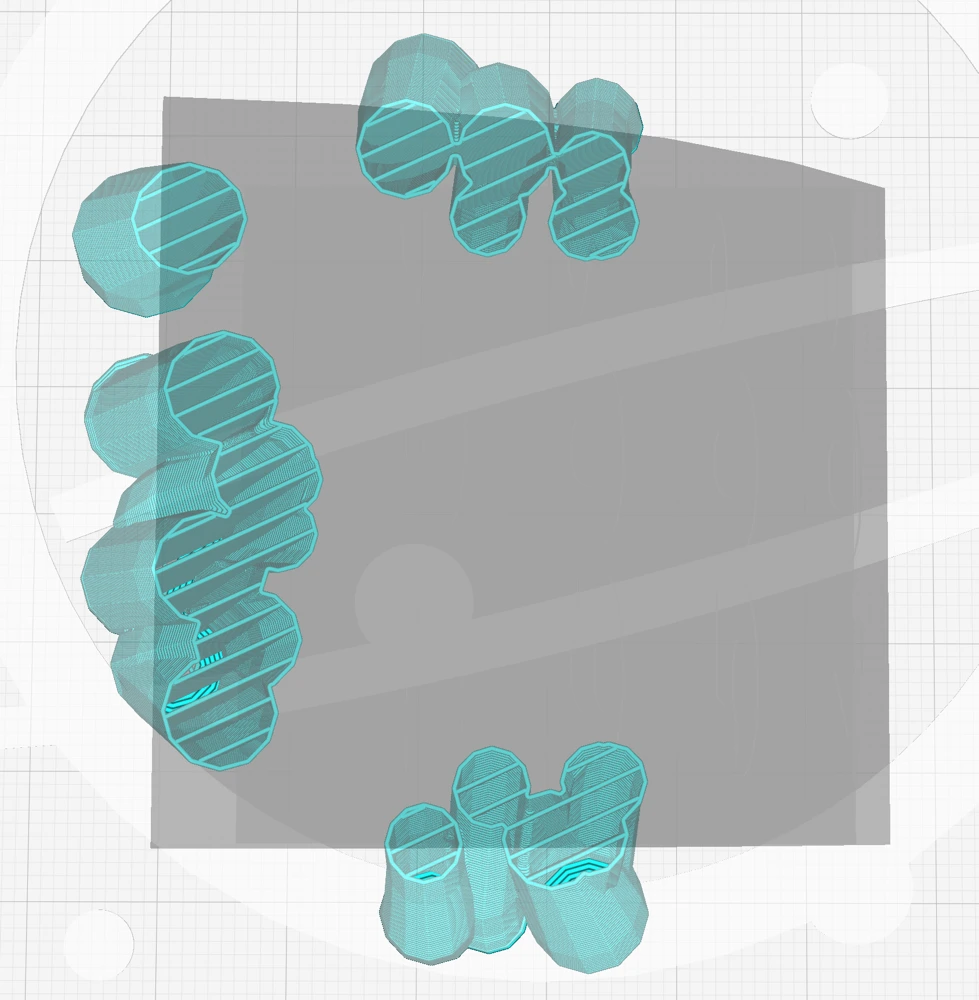
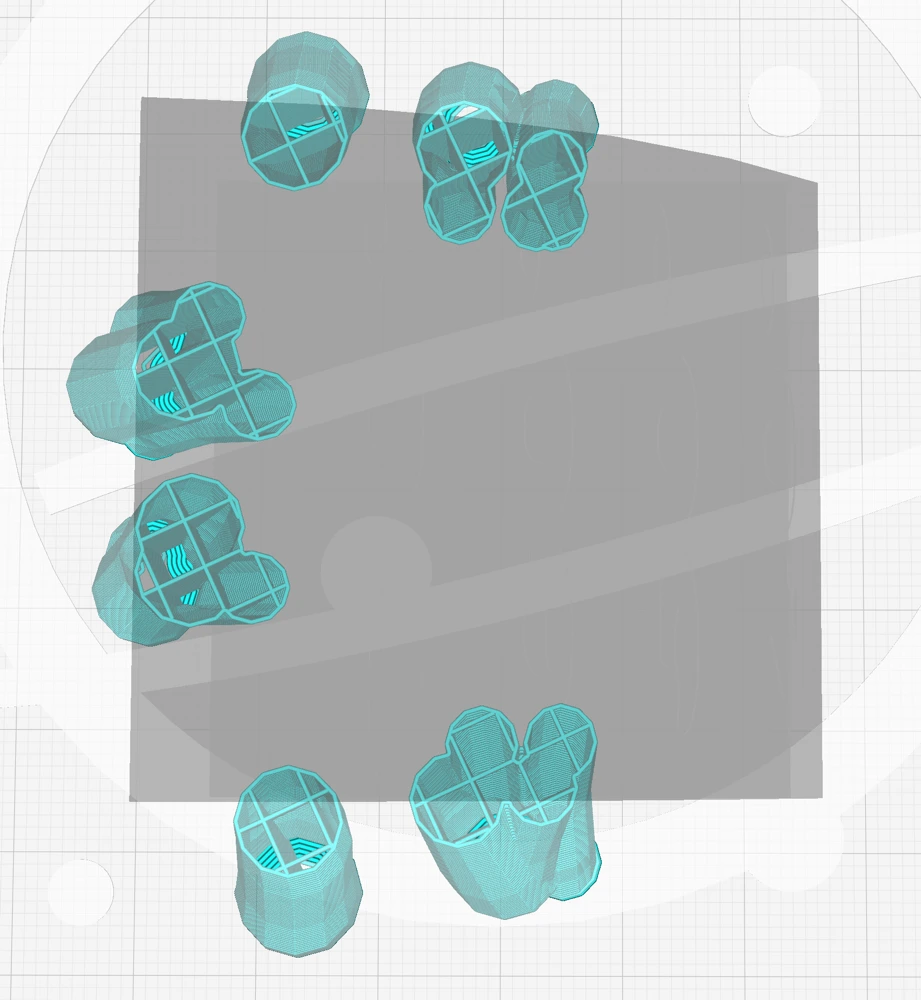
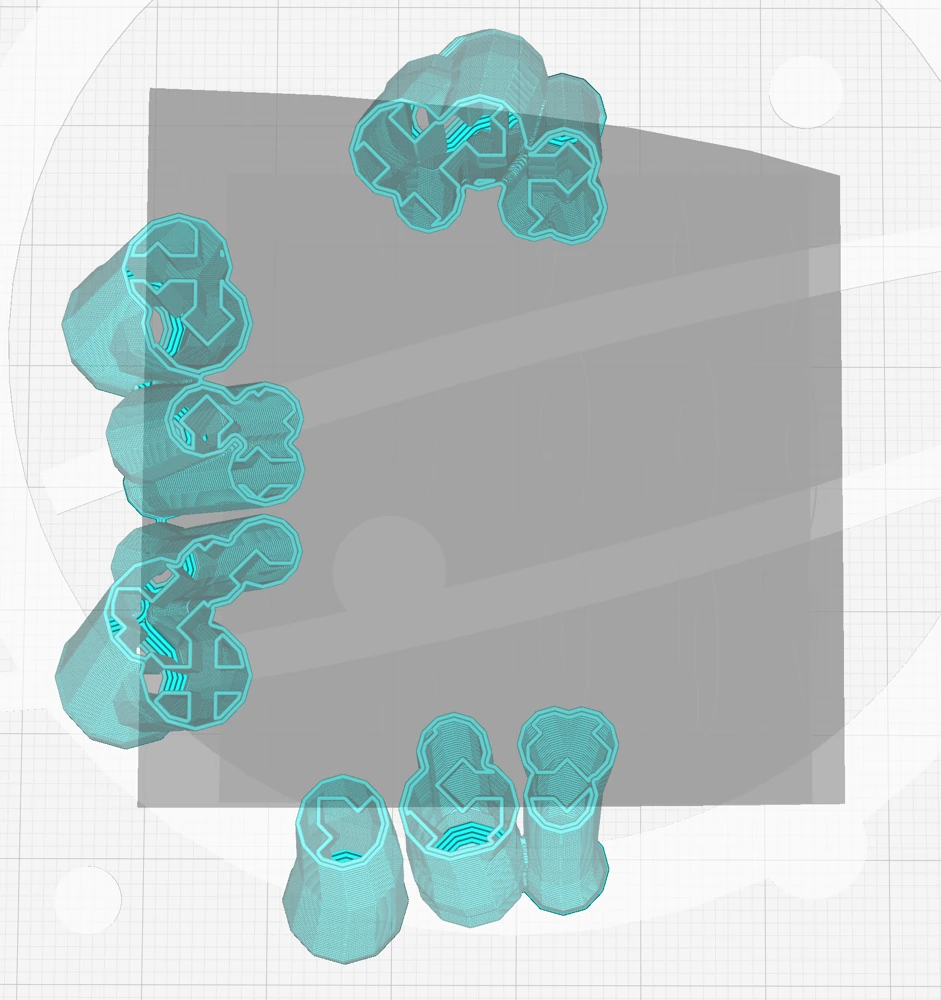
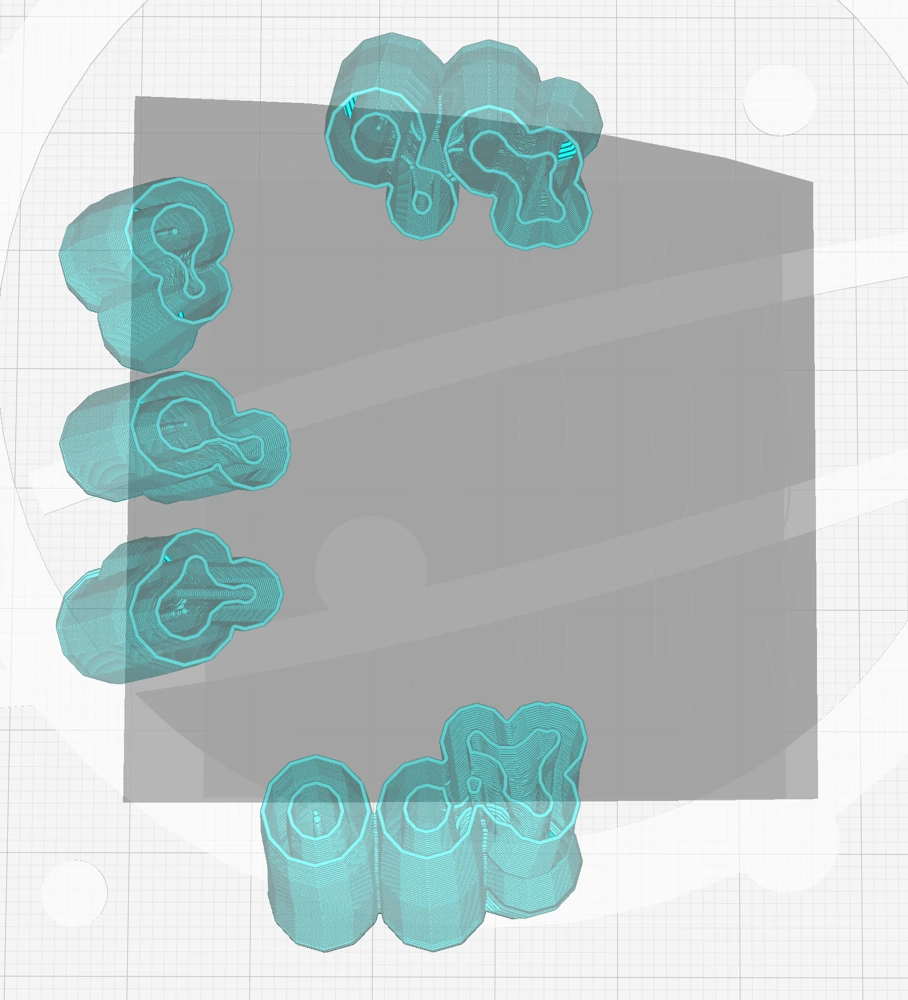
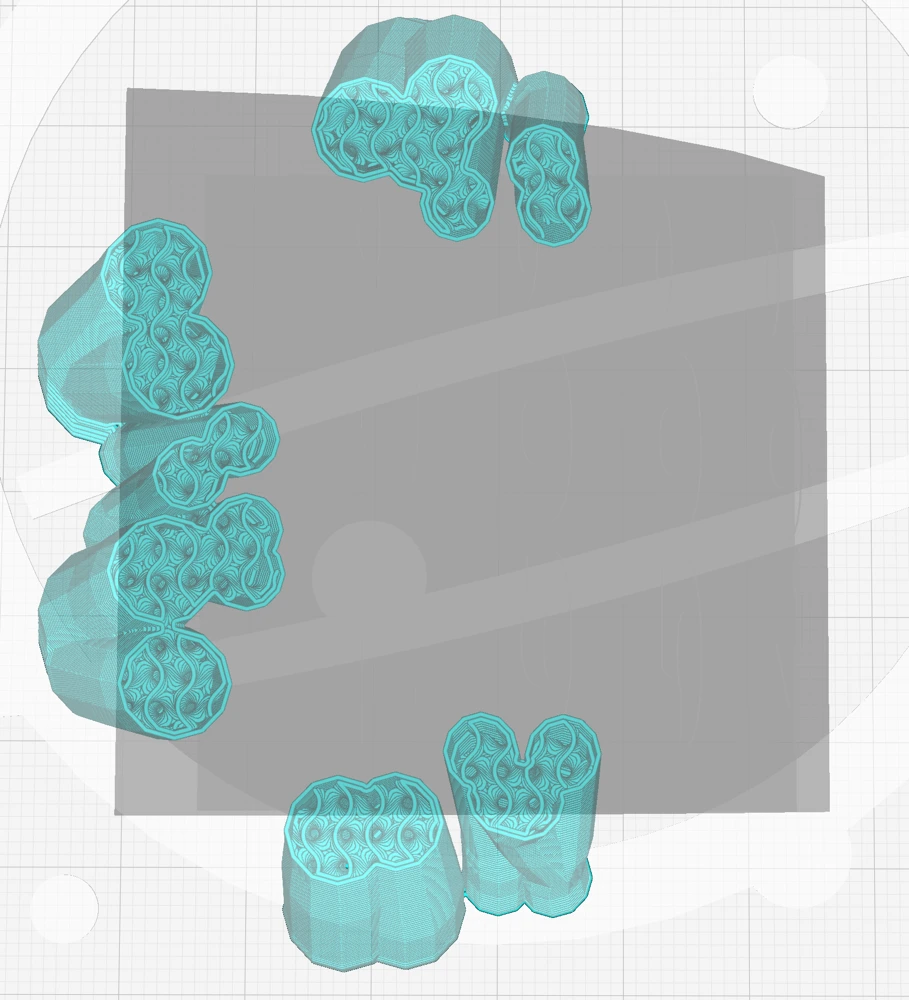
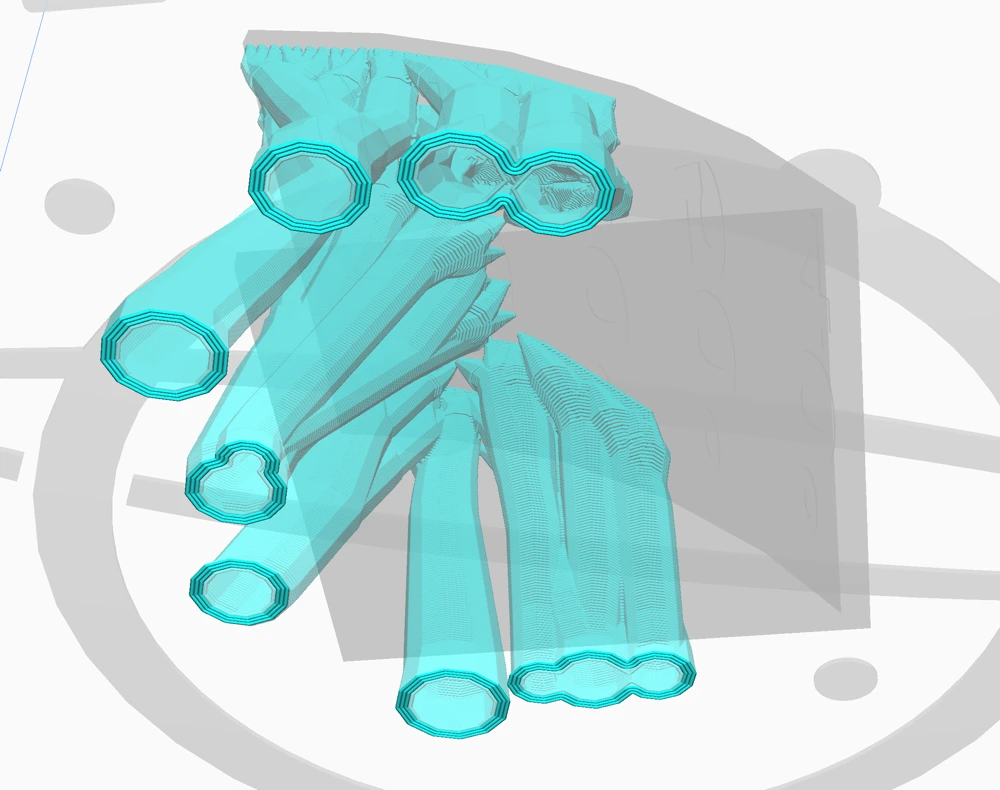
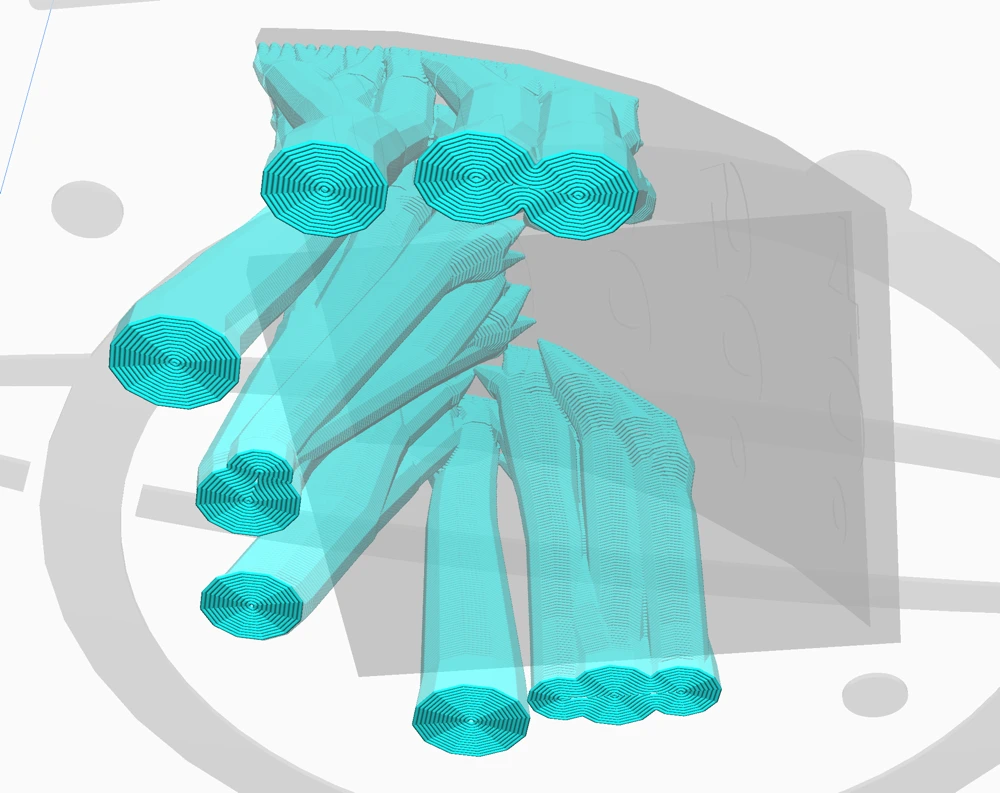
This is why I used an overhang calibration model and sliced it with variations in only one of these settings to show you the impact of each setting on the final print.
If you feel overwhelmed by the long list of settings, concentrate on these key settings in the beginning:
- Maximum Branch Angle
- Support Placement
- Tip Diameter
- Support Brim
- Support Z Distance
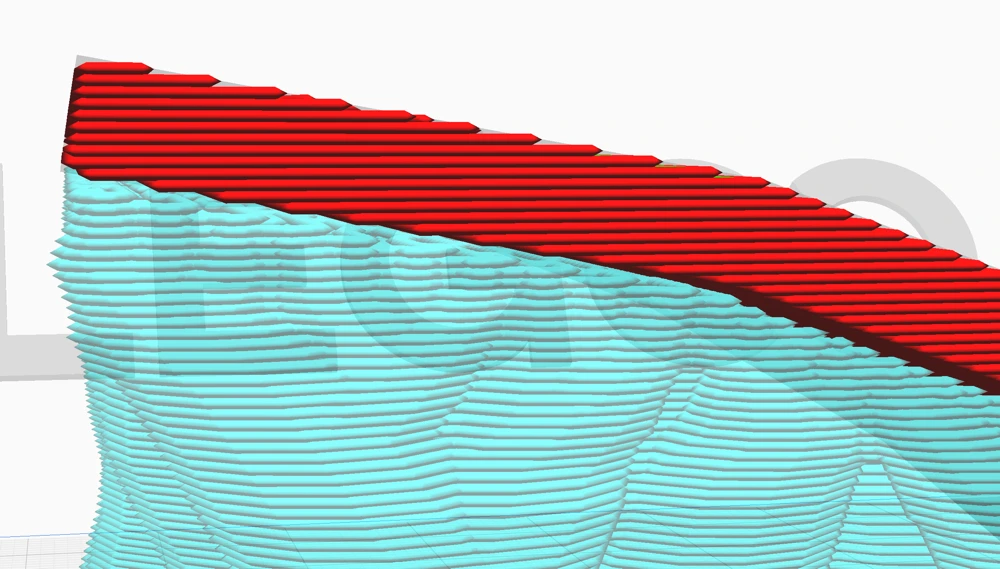
In most of the screenshots, I disabled the visibility of the model itself to provide better visibility of the supports. The model itself appears in transparent gray.
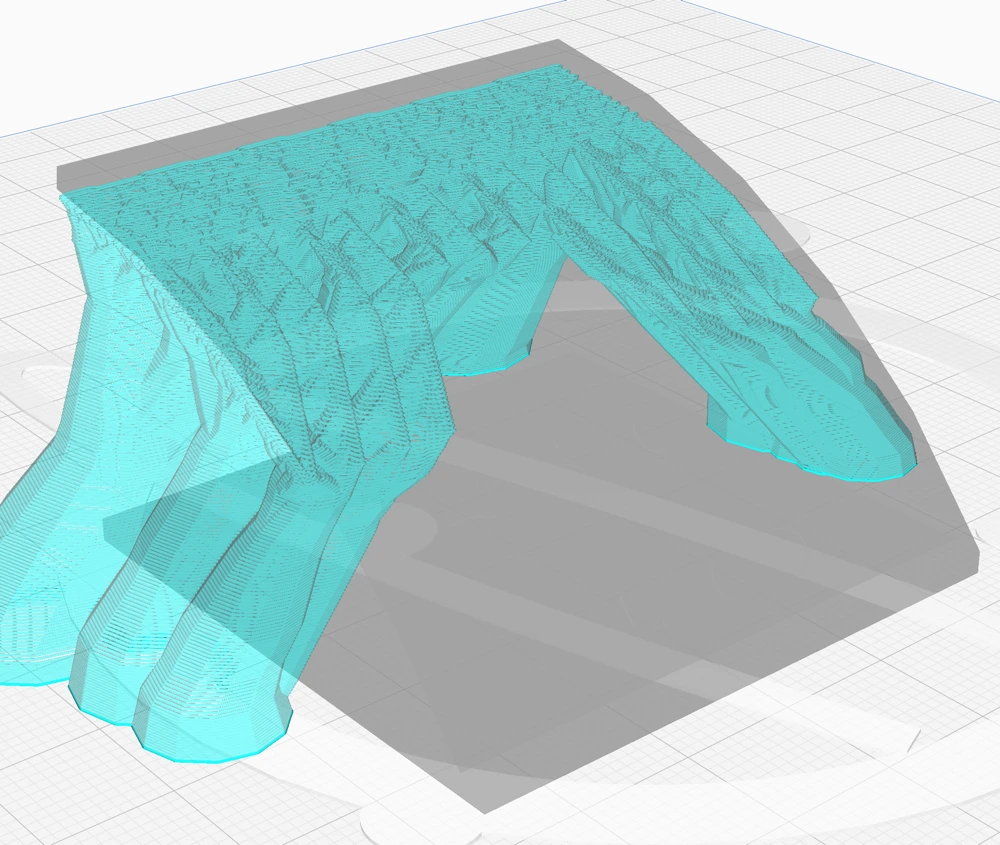
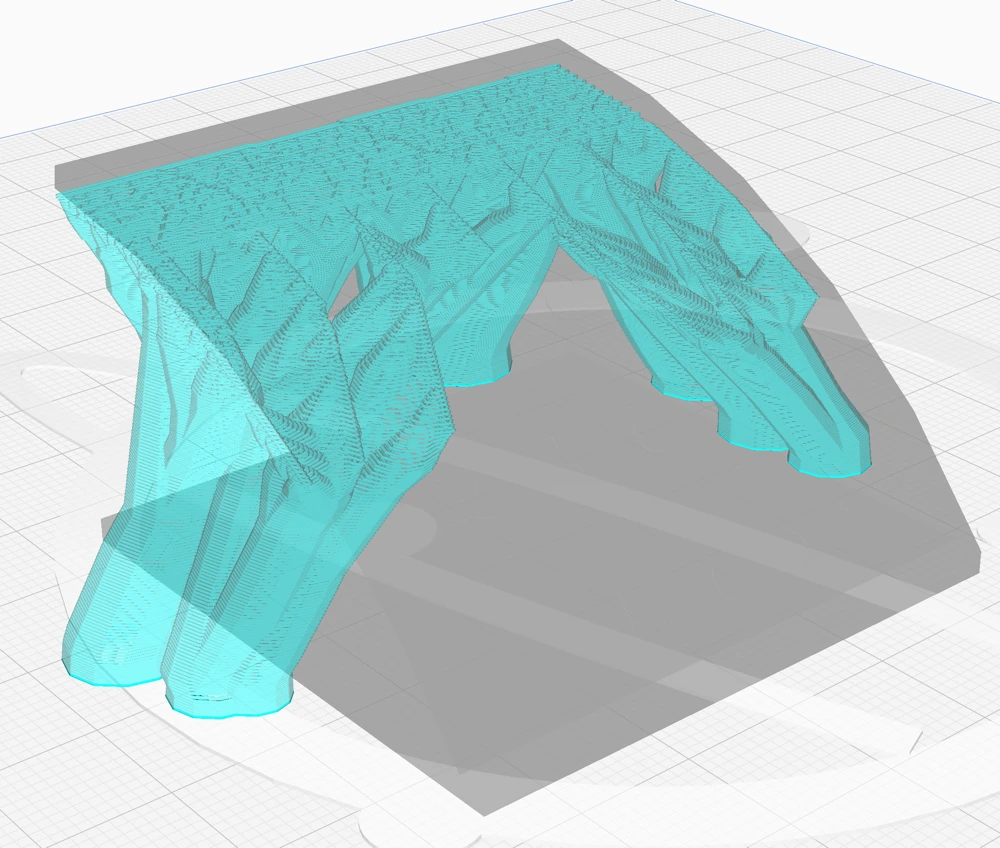
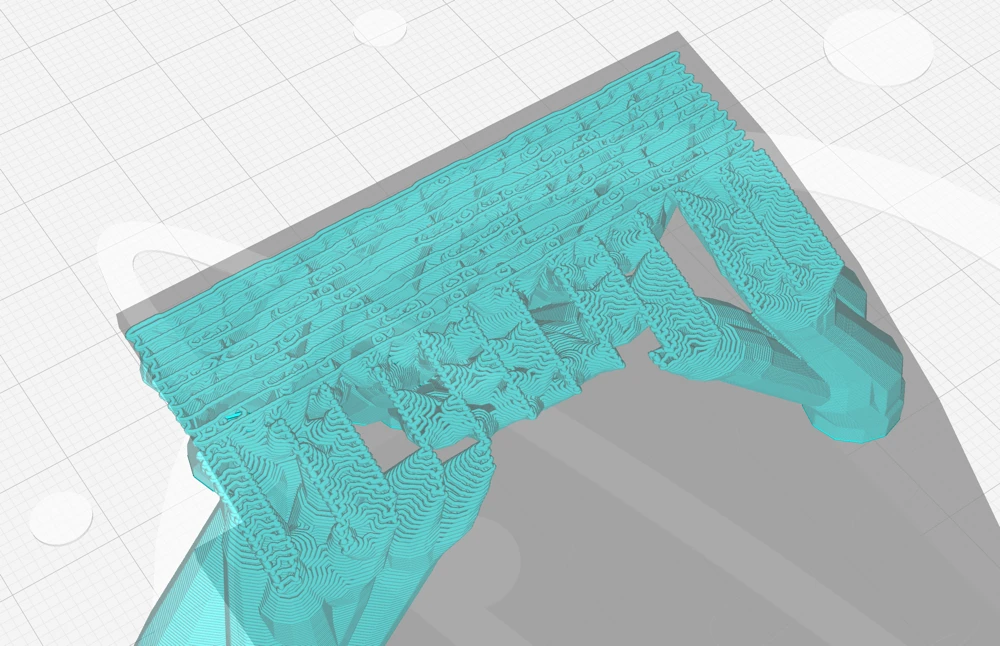
Maximum Branch Angle:
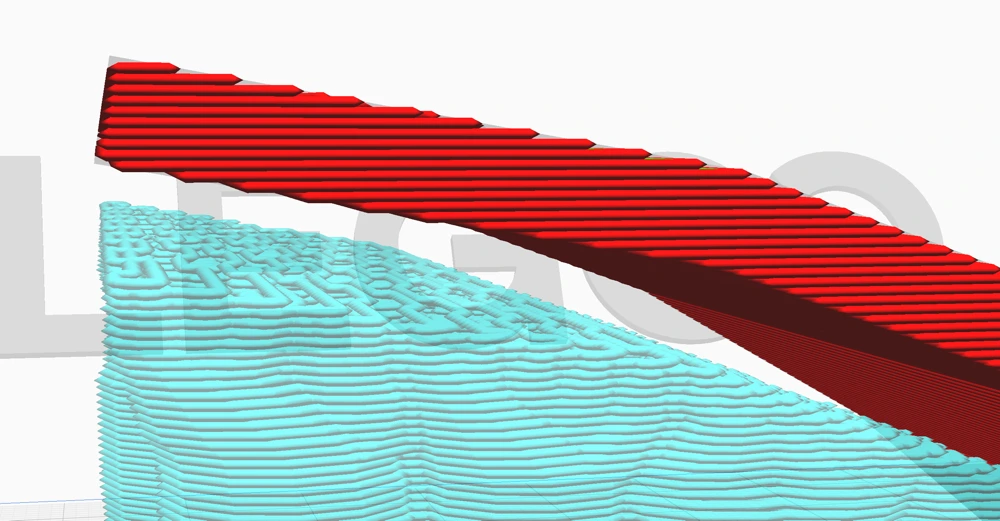
The “Maximum Branch Angle” setting in Cura’s tree supports adjusts the overhang angle of the branches, influencing their horizontal reach.
A higher angle allows branches to extend further, potentially supporting more of the model from the build plate instead of resting on the model itself.
This adjustment can lead to reduced scarring and support material use, as supports are only generated where necessary, and can split off at higher points. However, increasing the branch angle too much can compromise the support’s strength and reliability, risking breakage or failure during 3D printing.
Branch Diameter:
The “Branch Diameter” setting in Cura adjusts the width of the tree support’s branches, impacting stability and material use. Wider or thicker branches increase stability, reducing knock-over risks during the nozzle’s movement, and merge quicker, saving support material.
However, they may compromise support effectiveness, potentially causing more scarring on the model post-support removal, as they navigate harder around the model and may rest more on the model itself. The setting requires careful adjustment to balance stability and print quality.
Trunk Diameter:

The “Trunk Diameter” setting controls the maximum width of the base of the Cura tree supports branches, balancing stability and space efficiency. Wider trunks offer more stability, aiding in counteracting forces during printing, but they also consume more build plate area and might not fit through tight spaces in the model.
While a smaller trunk diameter saves space and may be beneficial for larger objects, it potentially compromises the support structure’s reliability.
Branch Diameter Angle:
The “Branch Diameter Angle” setting in Cura’s tree supports controls how quickly supports widen from the top down. A larger angle results in a broader base, enhancing stability but using more material and printing time.
However, too wide an angle complicates navigation around the model, potentially increasing scarring and slicing time. It may also reduce support sturdiness. The setting must be balanced to ensure the tree support is stable without being overly broad or wobbly.
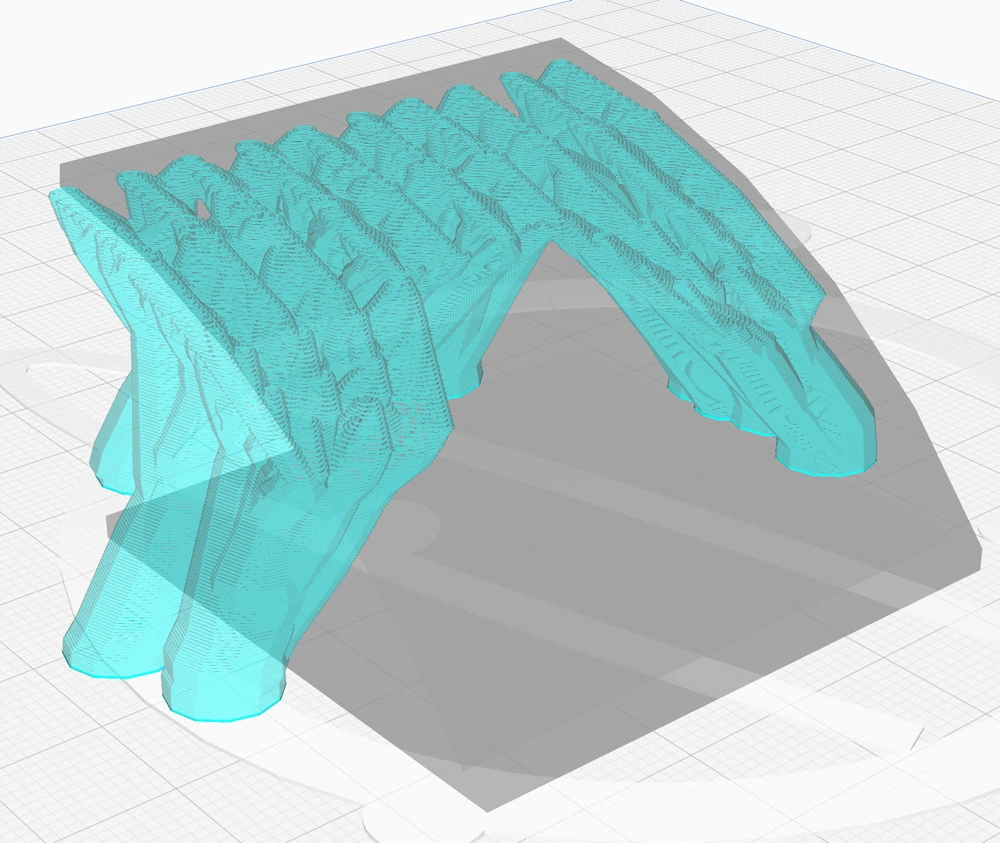
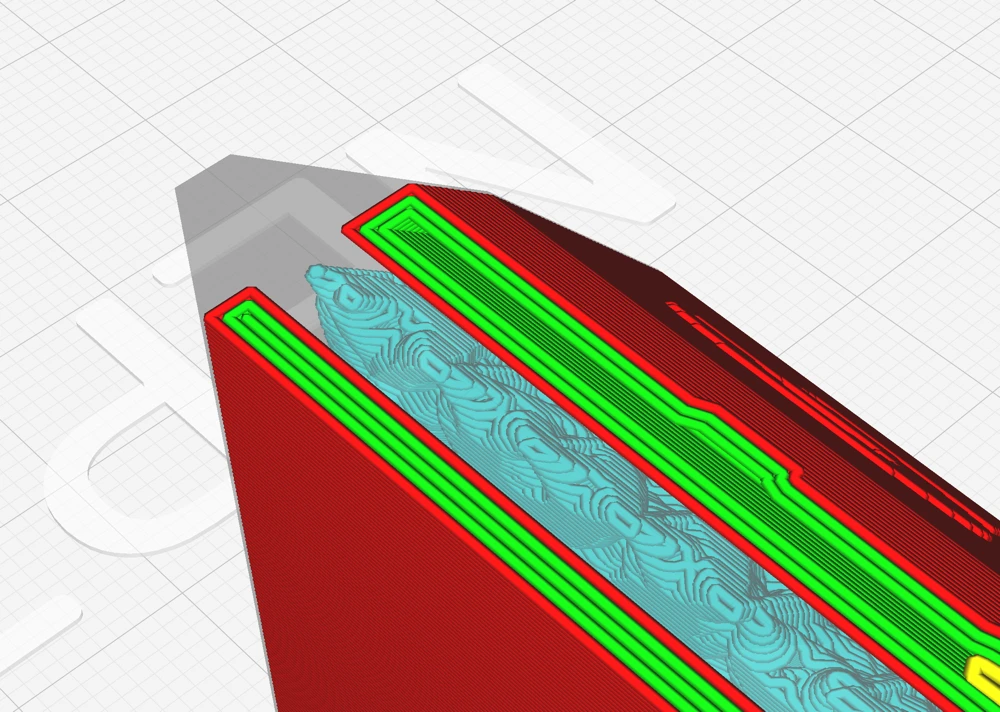
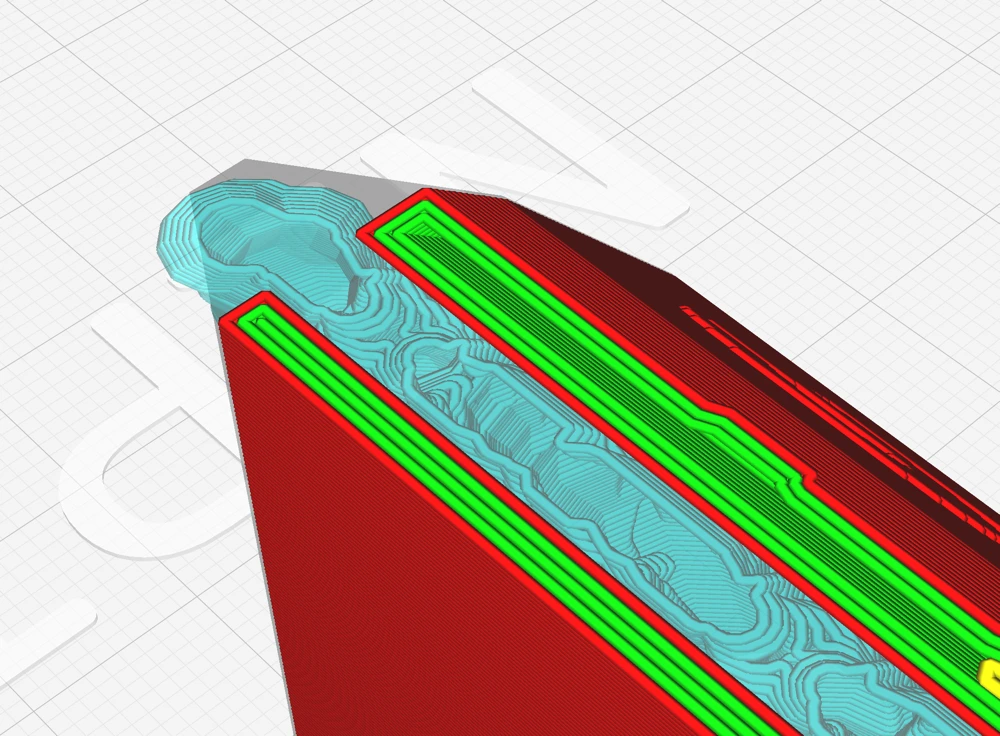
Support Placement:
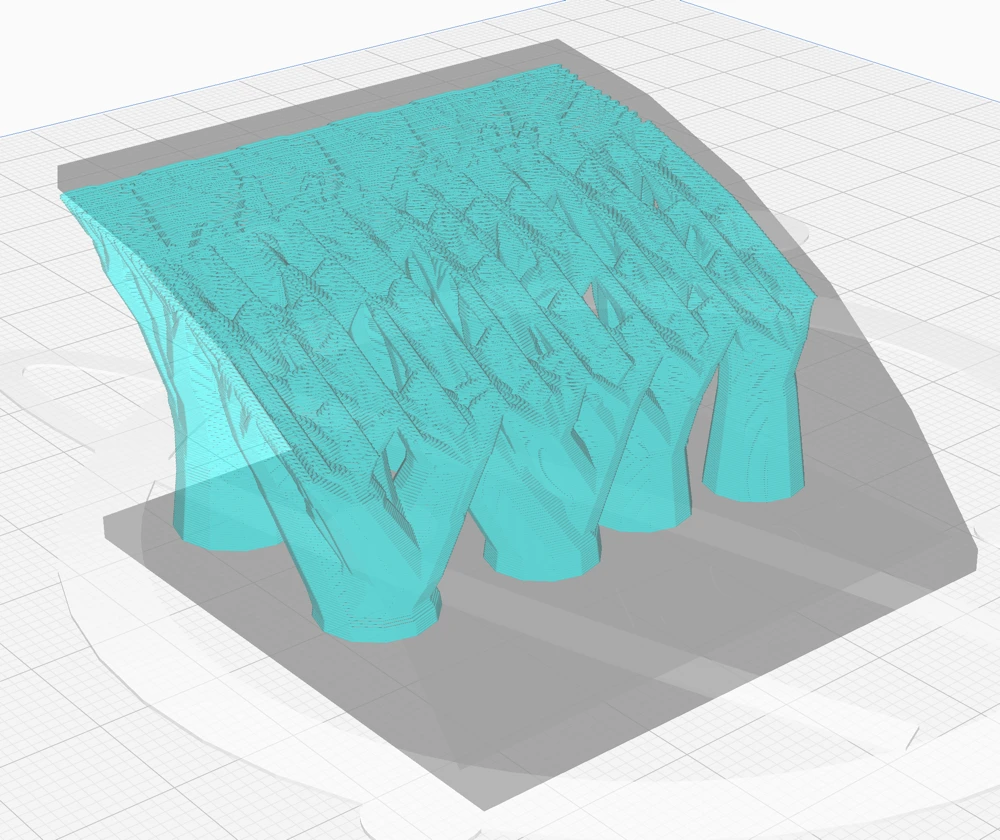

The “Support Placement” setting in Cura adjusts where supports are added. Choosing “Everywhere” ensures stability but can leave scars on the model. “Touching Buildplate” avoids scars but might miss supporting some parts.
For decorative objects it is better to only generate supports on the buildplate. If you don’t care about the surface quality of your 3D-printed object, you can generate them everywhere.
Preferred Branch Angle:

The “Preferred Branch Angle” setting adjusts the tree supports’ branch angles for stability or quick merging. Lower angles yield more vertical, stable branches, while higher angles allow branches to converge sooner.
Initial Layer Diameter:

“Initial Layer Diameter” adjusts the branch base’s width. A wider base results in better print bed adhesion.
Branch Density:
The “Branch Density” setting in Cura tree supports controls how closely packed the branches at the top of the support structure are. Increasing this value improves the support for overhangs, making the printed object more stable and ensuring better print quality. However, denser supports can be more difficult to remove from the final product.
If you opt for a very high branch density, it’s advisable to use a “Support Roof,” which creates a solid layer between the support and the model, making the support easier to detach in one piece. Alternatively, keeping the overall support density high, especially near the top, can also aid in a cleaner removal process. This balance is crucial for maintaining print integrity while ensuring post-printing procedures are manageable.
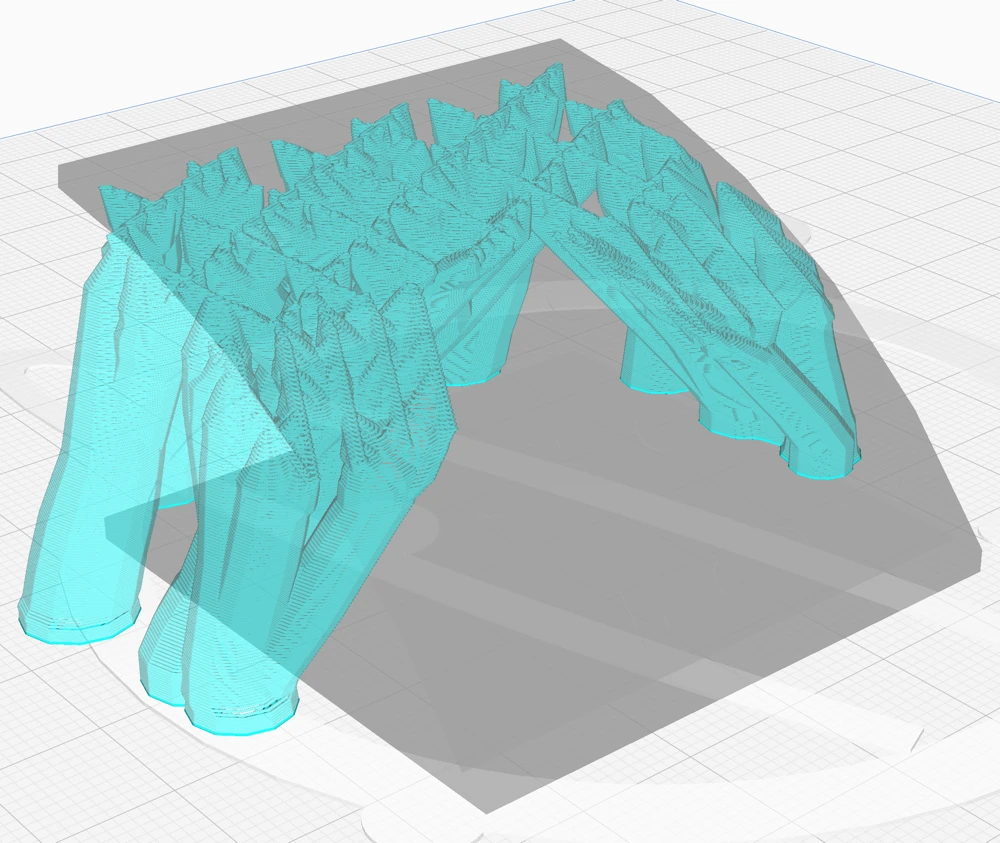
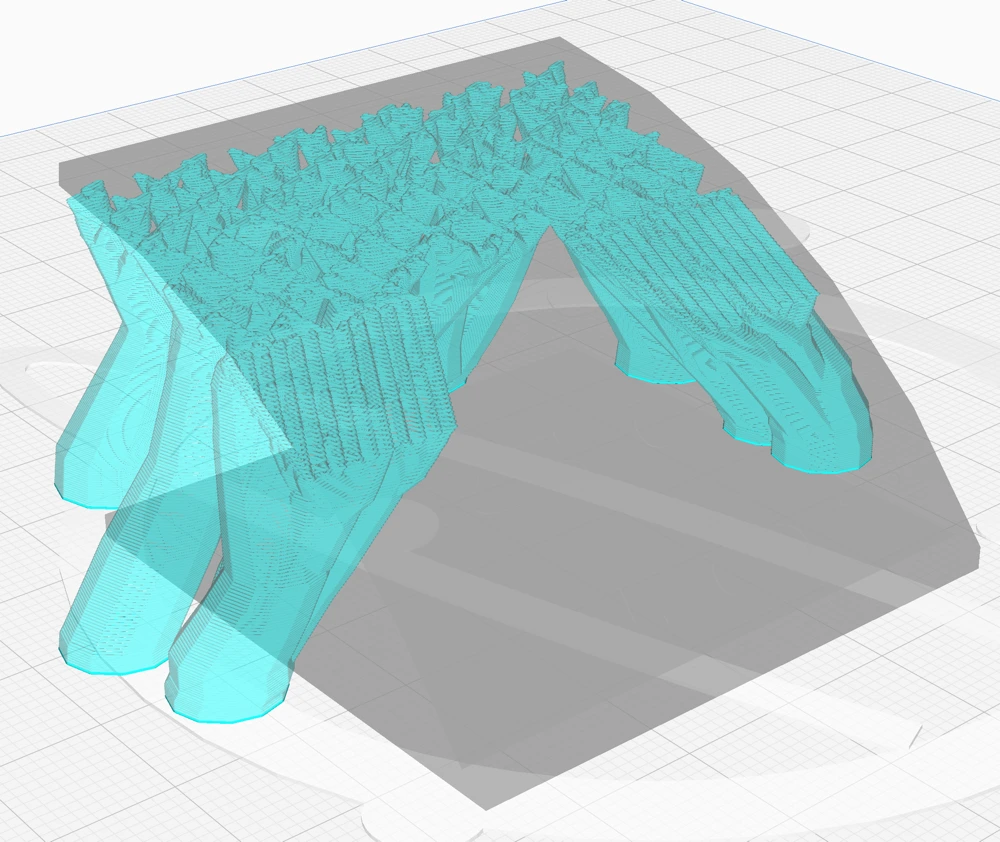
Tip Diameter:

The “Tip Diameter” setting in Cura refers to the width of the end points of the tree support branches. It controls how thick the tips are, directly impacting the contact size between the support and the model.
A smaller diameter means less surface contact, making the supports easier to remove, while a larger one can provide more stability for the print but might be harder to detach.
Limit Branch Reach & Optimal Branch Range:
The “Limit Branch Reach” and “Optimal Branch Range” settings in Cura’s tree supports control the distance a branch can extend from its origin point to support the model. By limiting the reach, the supports become more robust, preventing the model’s delicate parts from collapsing during the print.
However, this sturdiness comes at a cost: it increases the number of branches, which consequently raises the material usage and extends the printing time.
In simpler terms, these settings help you balance between the strength of the support and the efficiency of your print. If you want a more durable support structure, especially for intricate designs, you’d decrease the ‘Optimal Branch Range,’ understanding that it will require more material and time. This is because the printer will add extra branches to ensure each part is adequately supported, compensating for the shorter reach of each branch.
Conversely, allowing a longer branch reach can speed up the print and save material but might compromise the support’s integrity for more complex models.
Support Overhang Angle:
The “Support Overhang Angle” in Cura’s tree support settings determines the angle at which the program begins to add supports beneath overhangs. A lower angle setting means the software will add supports even under steeper surfaces, which might not necessarily require support. While this can sometimes be necessary to prevent excessive sagging of the material and improve the print’s overall quality and dimensional accuracy, it can also lead to downsides.
Reducing the overhang angle can result in an increase in print time and material usage because the program will generate more supports. Additionally, it may lead to scarring on the parts of the print where the supports attach, affecting the final appearance and possibly requiring more post-processing work.
It’s essential to strike a balance with this setting. By using the Preview stage in Cura, you can inspect where the supports will be placed, helping to adjust the support overhang angle effectively. This step ensures that supports are generated only where necessary, optimizing material use, print time, and the final quality of the printed object.
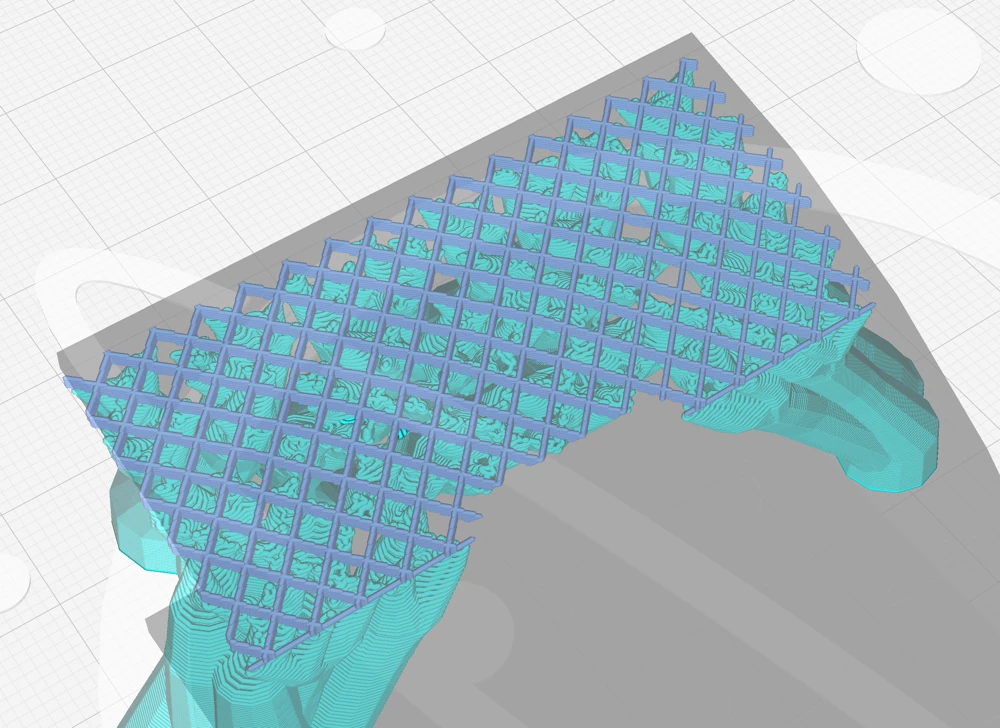
Support Pattern:

Usually, tree supports do not need infill. But if you want to make them very sturdy, you can set a “Support Density” greater than zero and select a suitable pattern for the support infill here.
However, I recommend starting by increasing the number of wall lines. If that doesn’t sufficiently enhance the stability of the tree supports, then consider using support infill as an additional measure.
The individual patterns have different characteristics. Here is a quick overview:
- Lines: This pattern, characterized by its straight lines, is ideal for easily removable supports, especially useful for models with overhangs close to the build plate. While it offers high-quality support for overhangs, its weakness lies in its instability, as the structure is prone to toppling.
- Grid: Comprising two perpendicular lines creating squares, this pattern is sturdy, enhancing the print’s reliability. However, its rigidity makes it difficult to remove, and it provides only average support for overhangs due to the wider spacing between lines.
- Triangles: Known for its strength, this pattern uses lines forming equilateral triangles, making it the most robust among the options. Its downside is the poor overhang support and difficulty in removal because the structure lacks flexibility.
- Concentric: This pattern features evenly spaced concentric rings, offering decent overhang support and sturdiness. It’s easier to remove due to its flexibility but sometimes fails to support certain walls, compromising overhang quality.
- Zigzag: Similar to the lines but with connected ends, this pattern balances sturdiness, quality of support, and ease of removal. It’s particularly effective as it supports overhangs well and can be removed in strips.
- Cross: Unique for its ease of bending, the cross pattern lacks long straight lines, enhancing its flexibility. This feature makes it less stable but potentially easier to remove.
- Gyroid: Notable for its wavy lines and varying curves, this pattern is sturdy and efficient, especially when using soluble supports, as it allows the solvent to penetrate easily, quickening the dissolution process. It provides even support, contributing to better overhang quality.
Support Wall Line Count:
Adjusting the number of perimeter walls around the tree support structure in Cura directly affects its stability, effectiveness, and post-printing processing. Increasing the number of walls strengthens the supports, reducing the risk of toppling during 3D printing, especially for models with sharp corners or overhangs.
However, more walls result in longer printing times, increased material usage, and more difficult support removal, especially when using soluble supports.
Enable Support Brim:
When you activate the support brim, it adds an additional brim to the support’s initial layer. This extra brim improves the support’s adhesion to the build plate. Unlike the standard brim, this internal brim expands inward, providing stability around the edges of the support area. This effectively prevents warping.
The “Support Brim Width” setting modifies the width of the support brim. By increasing the width, the printer creates more layers within the support base, enhancing its adhesion to the build plate.
This improvement in adhesion helps in reducing the chances of warping, ensuring the support remains stable and, by extension, increases the overall reliability of the printing process.
You have the option to specify the brim’s size either through a direct measurement in millimeters (width) or by setting the preferred number of lines (line count). I prefer the latter.
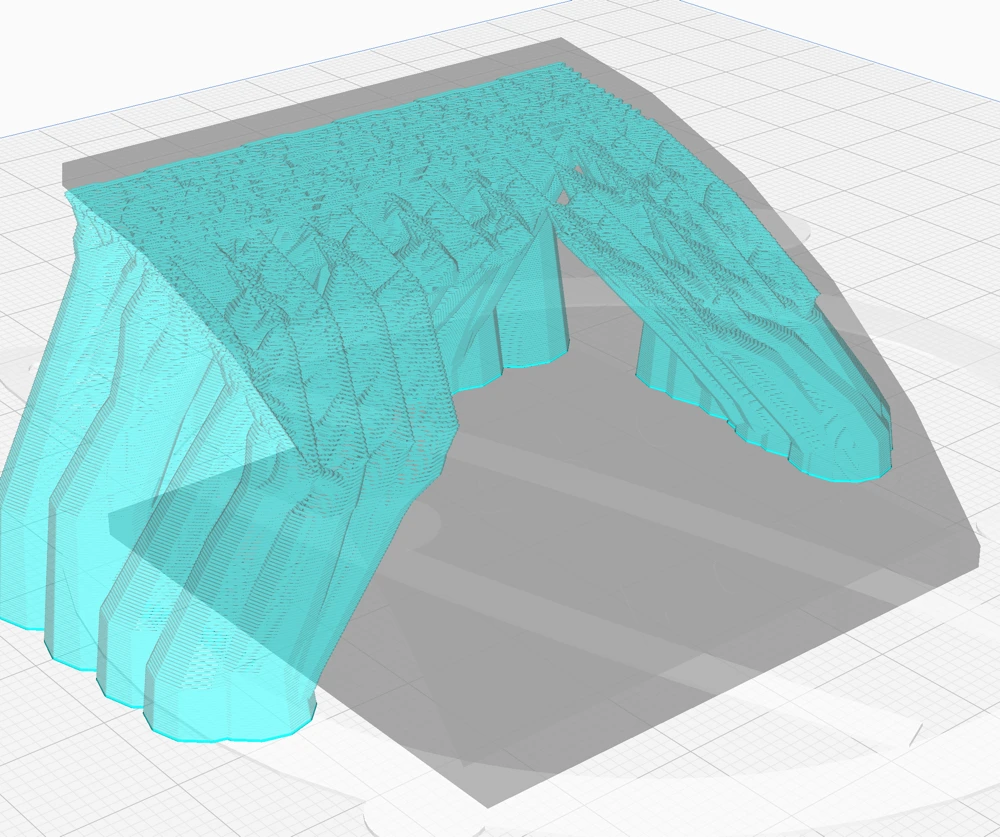
Support Z/Top Distance:
This setting in Cura adjusts the vertical gap between support structures and the model, influencing print quality and post-process ease. A smaller distance enhances support stability and print precision, vital for complex designs.
However, a larger gap simplifies support removal, reducing post-print cleanup, though it may compromise print integrity. Material choice also impacts the optimal distance, as different materials bond with varying intensities.
Support X/Y Distance:
This refers to the horizontal separation between supports and the model, preventing surface imperfections while ensuring sufficient support for overhangs.
The key is finding a balance with the Z distance to maintain print quality. The “Support Distance Priority” resolves conflicts between these distances, prioritizing either horizontal space or vertical separation, affecting support efficacy and the final print’s appearance.
Minimum Support Area:
This setting defines the smallest size allowable for tree support segments. If the support’s cross-sectional area on a layer is smaller than this set value, that support section is omitted to avoid the creation of unstable thin pillars that are prone to falling over and potentially ruining the print with blobs.
Usually, these small areas can be printed without supports. But finding the threshold is an art in itself.
Enable Support Interface:
A support interface for tree supports introduces a dense intermediary layer between the support and the model, improving the model’s overhang surfaces. While this makes the support slightly harder to remove on organic surfaces, the supports can be easier to remove on flat surfaces.
Fan Speed Override:
“Fan Speed Override” in Cura is a feature that adjusts the print head fans’ speed to improve print quality. It helps regulate material temperature, preventing sagging and improving precision for overhangs. It’s especially useful for printing complex structures with unsupported overhangs.
Troubleshooting Cura Tree Support Printing Issues
Using tree supports in 3D printing, while beneficial, can sometimes lead to specific issues, especially if not configured properly. Here are some common problems you might encounter and their solutions.
Difficult Removal
One of the primary issues with tree supports, much like with normal supports, is that they can sometimes be challenging to remove, potentially damaging the model during the post-processing stage.
Here is my favorite method of removing tree supports (and regular supports) and some settings you can adjust:
- Hot Air Gun: Use a hot air gun to gently heat and soften the support structures, making them more pliable. Apply heat evenly to avoid warping or damage, then carefully remove the supports, enhancing the smoothness of the process and reducing potential damage to the model.
- Z Distance: Adjust the “Z Distance” to minimize the contact points between the supports and the model, making support removal easier without compromising print stability.
- Support Density: Modify “Support Density” to optimize the balance between sufficient model stability and ease of support removal. Lower density can make supports less rigid and easier to detach.
- Support Interface: Activate the support interface to create a defined layer between the model and its supports, preventing them from fusing too firmly and simplifying the detachment process, often enabling the supports to come off in one piece. On complex surfaces this might not work.
Insufficient Support
If tree supports are not dense enough or inadequately placed, this can lead to areas of the model not receiving the necessary support, resulting in printing defects or failures, especially in models with intricate overhangs or complex geometries.
Some solutions to this problem include:
- Increase Support Density: By increasing the density of the supports, you can provide more stability and ensure that all areas of the model are adequately supported.
- Modify Support Angle: Adjusting the support angle can help distribute support structures more evenly, providing better coverage for intricate features and overhangs.
- Increase the Line Count: Increasing the number of lines in the support structure can also improve stability and prevent insufficient support. However, be aware that this increases the printing time and material usage.
Adhesion Problems
Sometimes, tree supports may not adhere well to the print bed or the model itself, leading to stability issues during printing. This lack of adhesion could cause the model or supports to dislodge.
To address adhesion problems, consider these solutions:
- Enable Support Brim: Enabling the support brim function creates an additional layer of material around the base of the supports, increasing adhesion and stability.
- Reduce First Layer Print Speed: By reducing the speed of the first layer, you can increase adhesion between the print bed and model. The hot filament has more time to bond with the bed surface.
- Increase Bed Temperature: Increasing the bed temperature can also improve adhesion, as it increases the time the liquid filament has to bond with the surface before it solidifies.
There are several other methods to increase general print bed adhesion. I explain them in detail in this post and in this video on my YouTube channel.
Conclusion
While many are familiar with using normal supports, utilizing tree supports in Cura can significantly improve your 3D printing results. While they come with their set of challenges, the settings highlighted in this guide have brought me considerable success.
It’s essential, however, to remember that every model or project may have unique requirements. Feel free to adjust and experiment with the settings to best suit your needs, and approach each print with the knowledge and confidence you’ve gained from this post. Happy printing!
Disclosure: This website is the property of Martin Lütkemeyer and is operated by Martin Lütkemeyer. Martin Lütkemeyer is a member of the Amazon Services LLC and other Affiliate Programs. These are affiliate advertising programs designed to enable websites to earn advertising revenue through advertising and linking to Amazon.com and others. Links marked with * are affiliate links.
