
- Wet Filament: Prevention, Symptoms & Drying - July 18, 2024
- Sovol SV08 – Best PrusaSlicer Settings & Profile - June 26, 2024
- Sovol SV08 – Best Orca Slicer Settings & Profile - June 26, 2024
Disclosure: Links marked with * are Affiliate Links. I earn from qualifying purchases if you decide to make a purchase through these links – at no additional cost for you!
The Ender 3 V2 has been upgraded a lot compared to the original Ender 3. However, to keep the price down, a few more advanced upgrades are not included. The automatic leveling of the print bed for example.
However, the new mainboard supports various sensors for automatic print bed leveling. There is a slot for Z-sensors.
To equip an Ender 3 V2 with a BLTouch, there are basically two options: You can either get a BLTouch kit with all the necessary materials, or you can buy a single BLTouch with an extension cable and print a suitable mount.
- BLTouch Kit: Creality*, Amazon*
- Single BLTouch: Amazon* or 3DJake BLTouch* + 3DJake Extension Cable*
- Self-printed mount: Thingiverse
- M3 screws: Amazon*
How to install the individual components on your Ender 3 V2 and how to adjust the firmware, you will learn in this step-by-step guide.
Automatic Print Bed Leveling on the Ender 3 V2
Upgrading with an automatic printing bed leveling sensor is much easier with the Ender 3 V2 than with the original Ender 3.
The newer version already has a designated slot on the mainboard. With the original Ender 3 you had to install a new mainboard first to be able to install a Z-sensor at all.
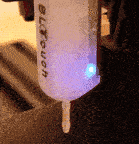
A Z-sensor automatically measures the print bed and stores the inclination so that it can be compensated for during printing. The sensor moves to several points, usually 9, on the print bed and measures the height of the print bed or the distance between the nozzle and the print bed.
You can also set it up so that the 3D printer automatically levels the print bed before each print. All you have to do is add a small line in the G-code. You can find out how to do this in the step-by-step instructions below.
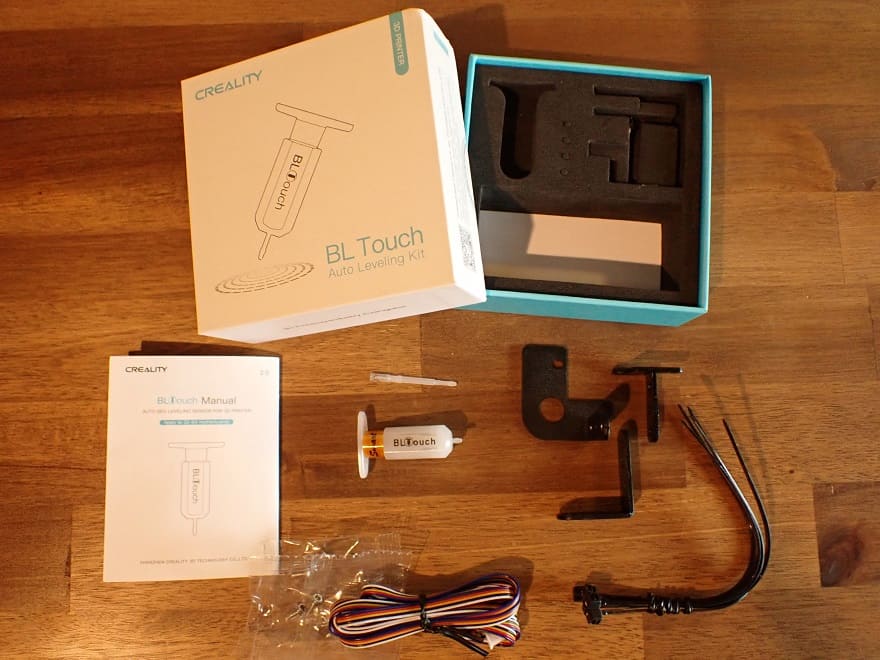
Step 1: Materials Needed
There are 2 different ways how you can equip your Ender 3 V2 with a BLTouch:
- BLTouch Kit compatible with Ender 3 V2 (Creality*) (Amazon*)
- DIY solution:
- Single BLTouch: Amazon* or 3DJake BLTouch* + 3DJake Extension Cable*
- Self-printed mount: Thingiverse
- M3 screws: Amazon*
BLTouch Kit
I decided to use the kit from Creality. The kit includes the BLTouch itself, the matching extension cable, a few cable ties, the various mounts for the compatible 3D printers and matching screws.
In addition, an easy-to-understand guide is included that explains each step.
DIY Solution
To familiarize me with the DIY solution, I also reproduced it. For this, I printed the matching mount from Thingiverse out of PLA+ filament*. The mount is printed quickly, requires no supports and fits right away.
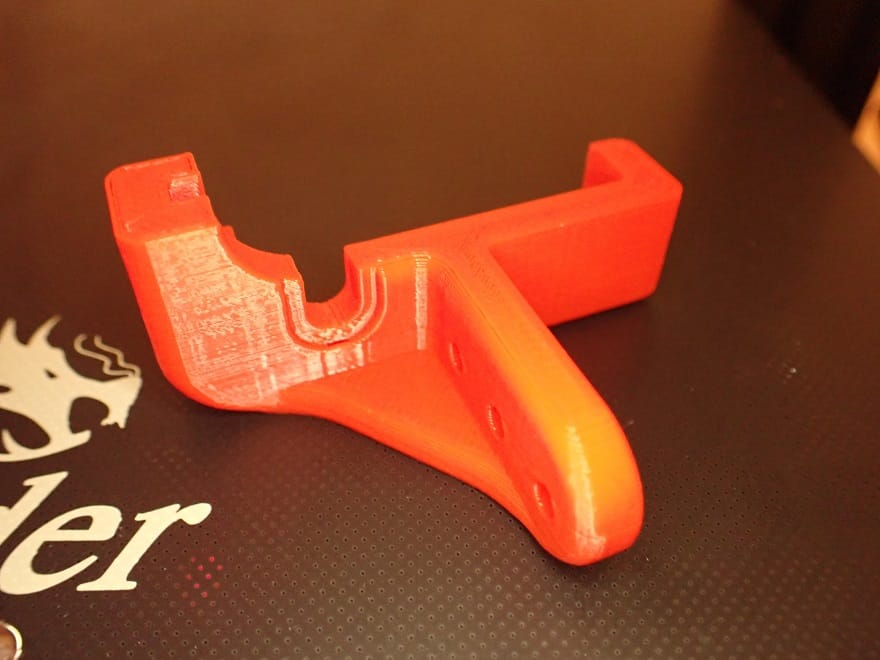
For mounting, you will then need the appropriate M3 screws* to screw the BLTouch to the mount and the mount to the Ender 3 V2.
Most extension cables for the BLTouch are slightly different from the extension cable that came with the kit from Creality. The end that plugs into the mainboard is usually split in two to be compatible with other mainboards. But that’s not bad at all, you just have to make sure that the colors of the cables are plugged in at the right places.
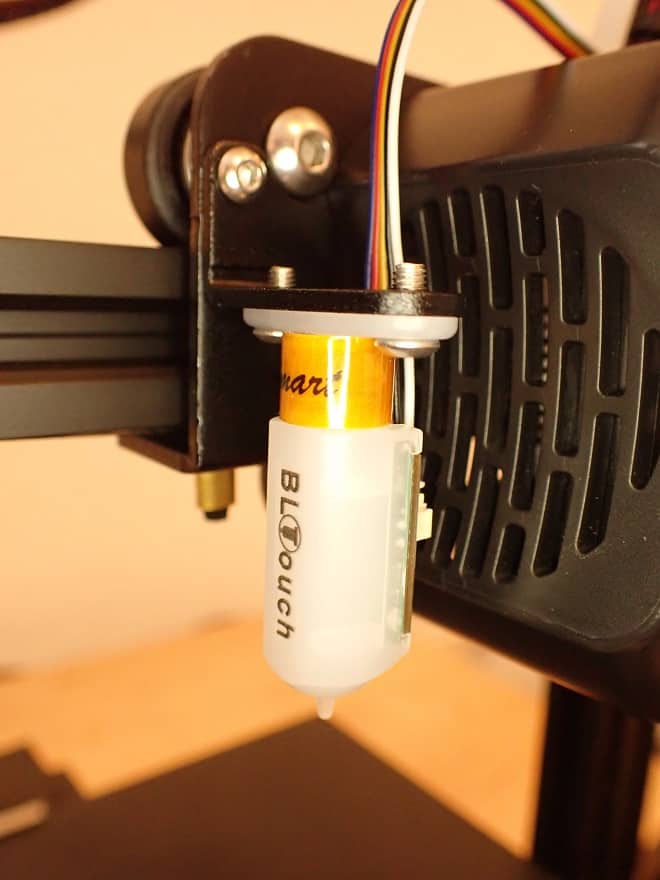
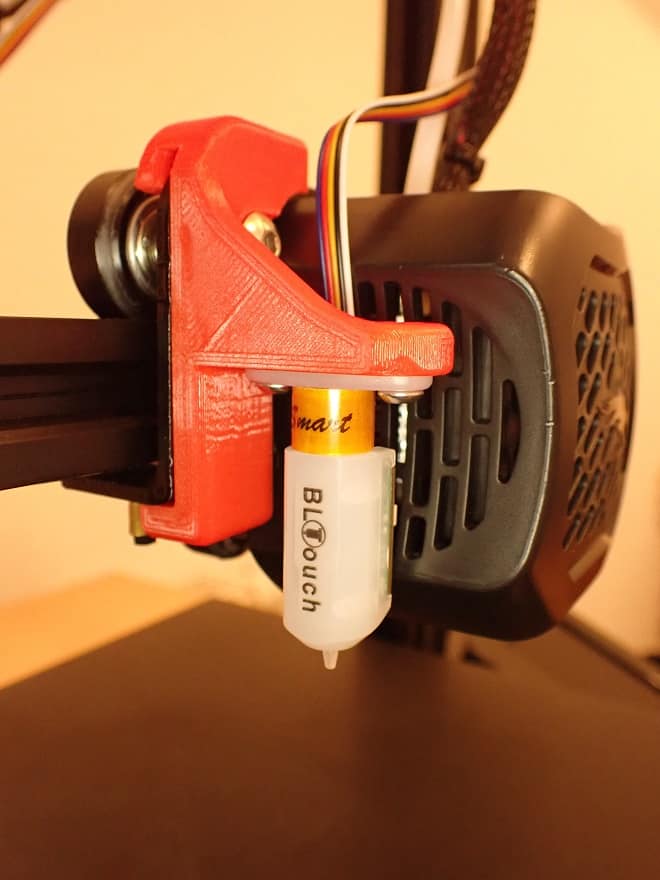
Step 2: Mount the BLTouch
When you have all the necessary materials together, you can start the installation. The installation is divided into two steps: mount the BLTouch itself to the print head and then connect the cable to the mainboard.
The mounting of the BLTouch to the printhead is done by the following steps:
- Plug the cable into the BLTouch.
- Screw the BLTouch onto the mount.
- Screw the mount to the printhead.
- Fix the cable up to the mainboard sensibly with cable ties.
Make sure that you tighten all screws tight enough. Loose screws will cause the BLTouch to not work properly and you will get inaccurate results.
Step 3: Connect the Cable to the Mainboard
Now you have to connect the cable to the mainboard. For this you have to make it accessible first:
- Put the 3D printer on its side and open the mainboard housing. To do this, you need to unscrew three screws on the bottom and one under the print bed.
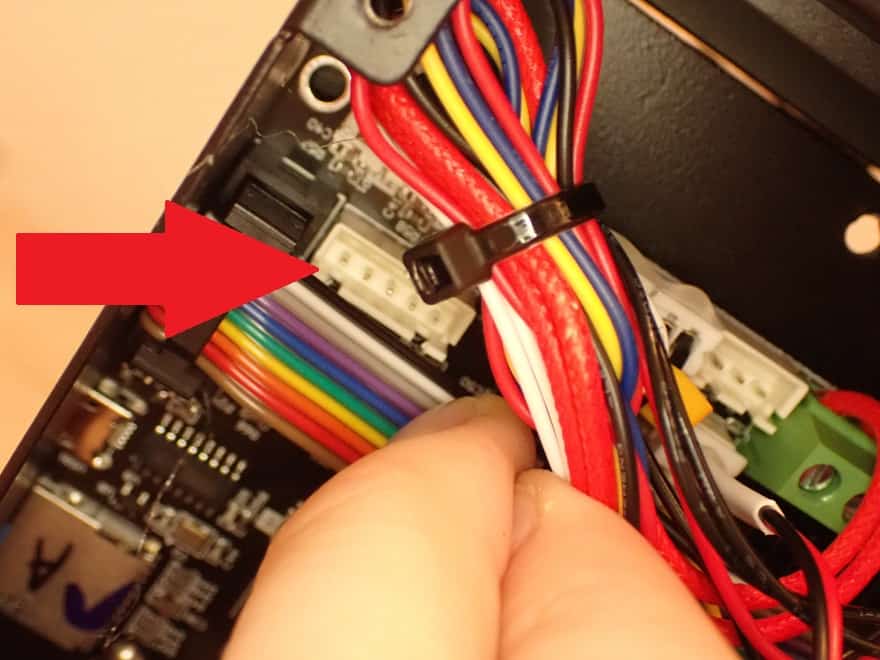
- Plug the cable into the designated space for Z-sensors in the motherboard. Depending on which extension cable you use, it is either one connector or two that you have to plug in. The result is the same: the colored cables must be in the same place (see picture).
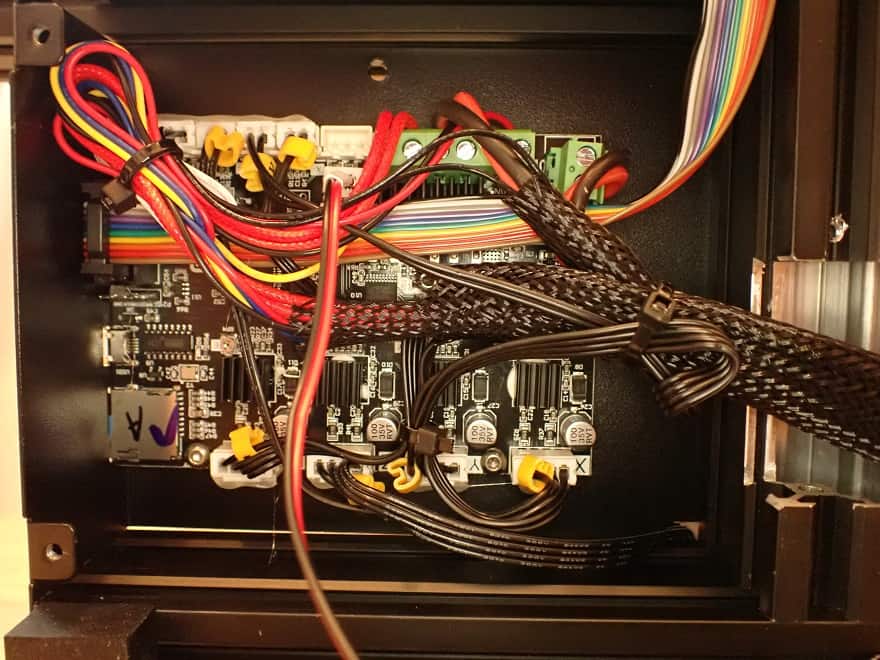
It may be that it is quite tight above the slot, as there are a lot of cables connected there, making it difficult to access the slot. I was able to just push all the cables to the side and then plug it in.
But it is also not bad if you pull out the plugs around it and put them back in afterwards.
Step 4: Firmware
Probably the firmware installed on your Ender 3 V2 is not compatible with a BLTouch – unless you have flashed it to the latest version before.
To install the new firmware on the Ender 3 V2 you have to install it via the Micro SD card.
These are the steps to install the new firmware on the Ender 3 V2:
- First, you need to download the right software. The best way to do this is to visit the official Creality site (link1, link2).
- Next, format the MicroSD card and save only the new firmware on it (the .bin file).
- When you then insert the card into the 3D printer and turn it on, the firmware is automatically installed.
Step 5: Set Z-Offset
When you approach the Z-Home position, it could be that the nozzle is somewhere way off. In this case, the Z offset is probably set incorrectly. You can adjust it via the menu.
The best way to do this is to move the print head to the center of the print bed and then adjust the distance between the nozzle and the print bed as you would for manual leveling. A piece of paper should just fit in between with some friction when moving.
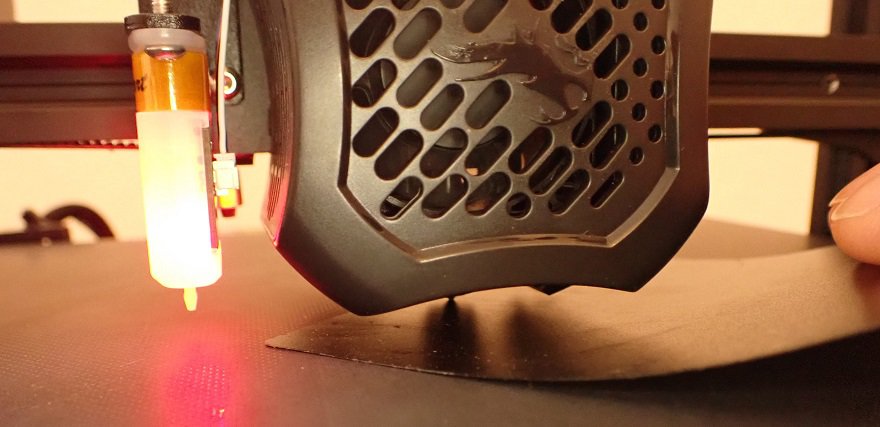
Step 6: Leveling the Print Bed
Before you start the automatic print bed leveling, you should level the print bed again manually. If the print bed is tilted too much, even the BLTouch cannot work properly.
Now that the correct firmware is installed, you have set the Z-Offset and everything is mounted correctly, you can start the automatic print bed leveling. With the new firmware, you will find a new “Leveling” button in the menu.
Depending on the firmware version, the submenu may look different. With some you can set how many points it should probe, sometimes it starts automatically.
However, the menus are generally designed to be intuitively understandable.
Tip: Over time, the print bed can become somewhat misaligned. For example, by removing print objects too roughly or loosening of the spring tension of the print bed bearing. If the inclination of the print bed is too big, even the BLTouch can no longer do anything. However, this is actually only the case in extreme cases. Therefore, you should always level the print bed manually if you encounter printing errors.
Step 6 (optional): Customize Cura
If you want the Ender 3 V2 to automatically level the print bed each time you start a new print, you can set this in Cura.
The G-code required for this looks like this:
G29 ; ‘commentation’
The G29 command causes the 3D printer to start automatic print bed leveling. It is best to do this immediately after it has moved to the home position (G-code command G28).
Everything you write after the semicolon is up to you. It acts as a comment and should be chosen useful. I wrote “Autolevel before each print” so that I still know later what I did there.
Disclosure: This website is the property of Martin Lütkemeyer and is operated by Martin Lütkemeyer. Martin Lütkemeyer is a member of the Amazon Services LLC and other Affiliate Programs. These are affiliate advertising programs designed to enable websites to earn advertising revenue through advertising and linking to Amazon.com and others. Links marked with * are affiliate links.
