
- Wet Filament: Prevention, Symptoms & Drying - July 18, 2024
- Sovol SV08 – Best PrusaSlicer Settings & Profile - June 26, 2024
- Sovol SV08 – Best Orca Slicer Settings & Profile - June 26, 2024
Disclosure: Links marked with * are Affiliate Links. I earn from qualifying purchases if you decide to make a purchase through these links – at no additional cost for you!
The Ender 3*, Ender 3 Pro*, and Ender 3 V2 all have a Bowden extruder. This allows you to print many standard filaments and also more difficult filaments such as ABS. It only gets difficult with flexible filaments.
Here, a direct drive extruder is much more suitable. The distance between the extruder and the nozzle is much shorter and offers less room for the filament to get tangled. This is why the DIY Direct Drive upgrade is very popular with the Ender 3 series.
But now there is a complete kit from Creality* to upgrade the Ender 3 series with a Direct Drive Extruder. In this hands-on test and review, I grabbed my Ender 3 V2 and equipped it with this upgrade.

Check Price at:
Table of Contents:
- 1 Key Takeaways
- 2 Who Should Buy the Direct Drive Upgrade?
- 3 Why Direct Drive?
- 4 Scope of Delivery – Creality Ender 3 (V2/Pro) Direct Drive Upgrade
- 5 Compatibility with BLTouch and CRTouch
- 6 Step-by-Step Installation – Creality Ender 3 (V2/Pro) Direct Drive Upgrade
- 7 Conclusion: Is the Direct Drive upgrade from Creality worth it?
Key Takeaways
- enables better printing of flexible filaments
- compatible with the Ender 3, Ender 3 Pro and Ender 3 V2
- compatible with BLTouch & CRTouch
- installed within approx. 30 minutes
- less error-prone than DIY solution
- (of course also compatible with standard filaments)
Who Should Buy the Direct Drive Upgrade?
The Direct Drive Upgrade from Creality for the Ender 3 series is worthwhile for anyone who wants to upgrade their 3D printer from this series for flexible filaments. It is inexpensive, quick to install and offers great added value.
Why Direct Drive?
As mentioned at the beginning, a direct drive extruder is much better suited for flexible filaments. I have had some problems with TPU or Ninjaflex* in connection with a Bowden extruder. Even if it had double gears.
The problem with a Bowden extruder is the long path between the extruder and the print head. The flexible filament can get tangled on this path as it is pushed from the extruder to the nozzle. It is not as stiff as PLA or ABS.
Especially if the speed of the extrusion changes frequently, it can lead to clogging. Therefore my tip if you still work with a Bowden extruder: Set all speeds to 30 mm/s to generate as little acceleration/deceleration of the extrusion as possible.
With a direct drive extruder, the distance between the extruder and the nozzle is shortened as much as possible. In addition, the distance is a straight line and no longer leads through a bent tube.
This greatly minimizes the risk of the flexible filament becoming tangled or jammed.
So if you plan to print flexible filaments with your Ender 3 (Pro/V2), I highly recommend this upgrade!
Scope of Delivery
– Creality Ender 3 (V2/Pro) Direct Drive Upgrade
The scope of delivery includes the direct drive extruder itself including the stepper motor and nozzle, the required tools, the cable for the stepper motor and a view of the mainboard connections that are required for the Ender 3.
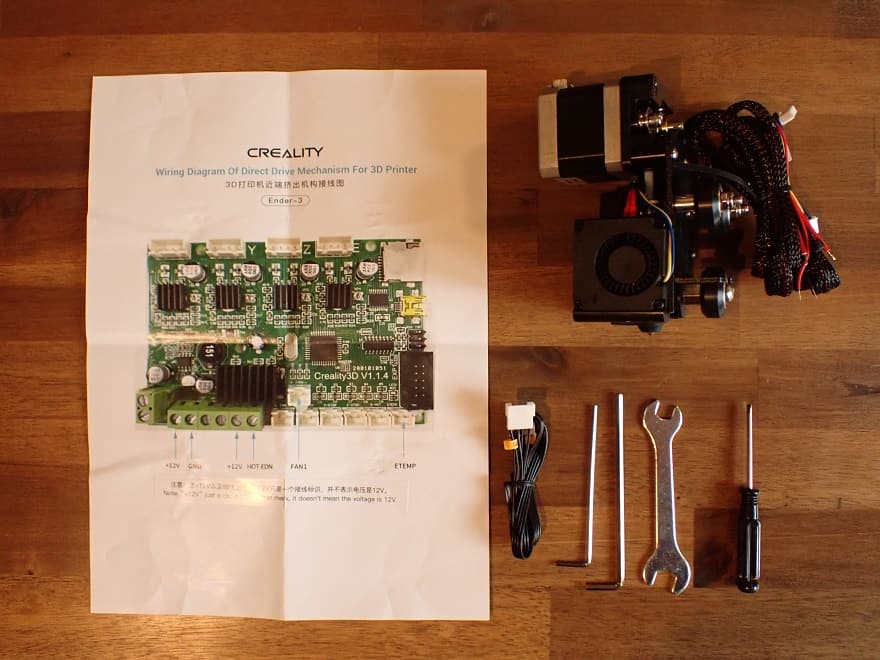
For the other two printers from the Ender 3 series, the Ender 3 V2 and the Ender 3 Pro, such a view was not included. But in principle, it’s superfluous because the cables of the new extruder are exactly the same as those of the old. So you just have to plug the new cables in where the old ones were plugged in.
What you also need are new cable ties to store the cables neatly.
Compatibility with BLTouch and CRTouch
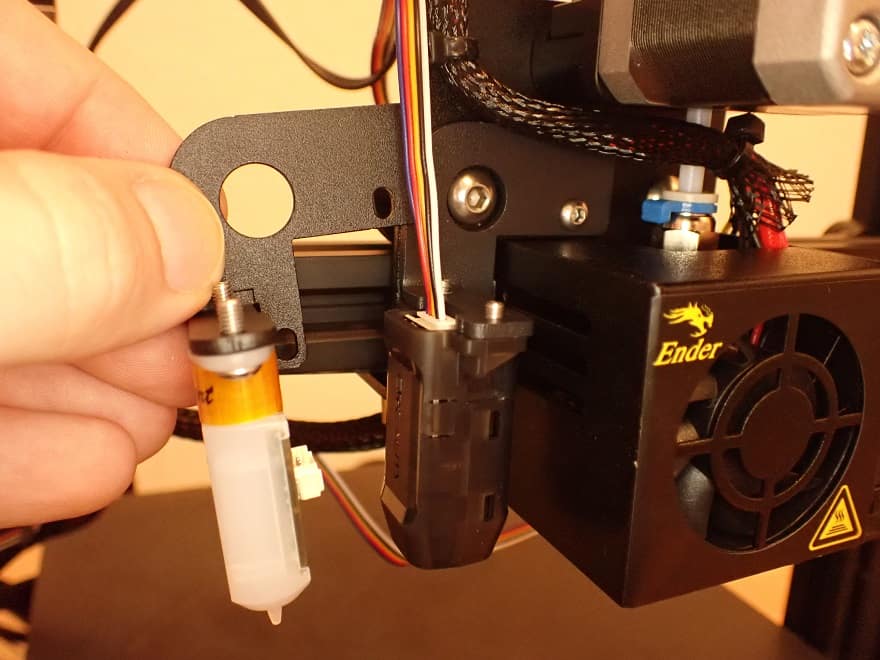
Since I use a CRTouch for automatic print bed leveling on my Ender 3 V2, I also wanted to know if the Direct Drive extruder is compatible with such leveling sensors.
The result is that it is compatible with both the BLTouch and the CRTouch when using the mount for the Ender 3 and Ender 3 Pro from their respective kits.
If you’re interested in the BLTouch, you can find it here* on Amazon and read my hands-on review here. For the CRTouch, you can find my review here and the product here* on Creality’s site. (Spoiler: both sensors are awesome! )
Step-by-Step Installation
– Creality Ender 3 (V2/Pro) Direct Drive Upgrade
The replacement of the old Bowden extruder with the new direct drive extruder is done in the following steps:
- Disassemble old extruder from X-axis
- Mount new extruder on X-axis
- Replace cables on mainboard
- Lay and fix cables neatly
- Setting the Z offset & leveling the print bed
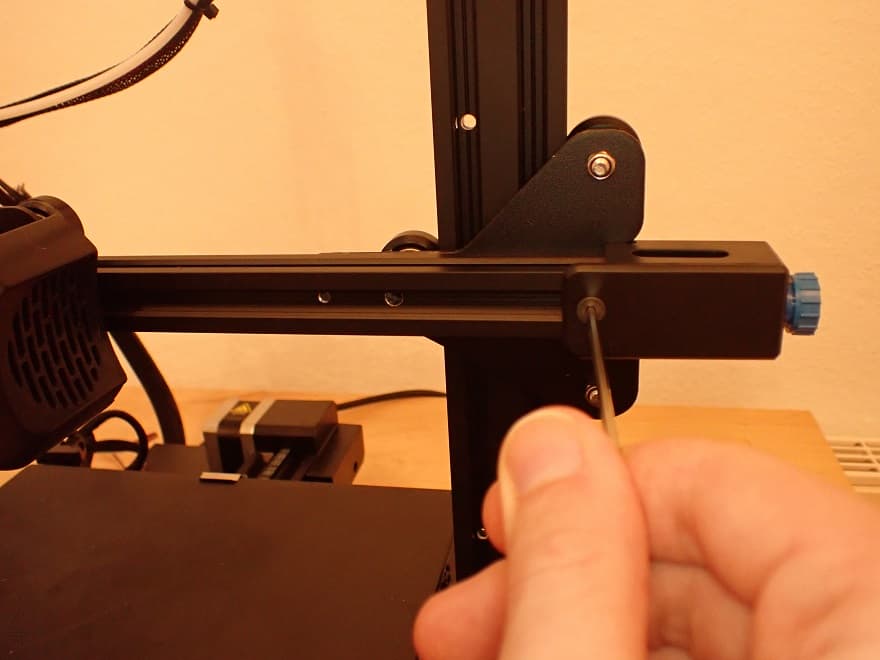
Step 1: Disassemble old extruder from X-axis
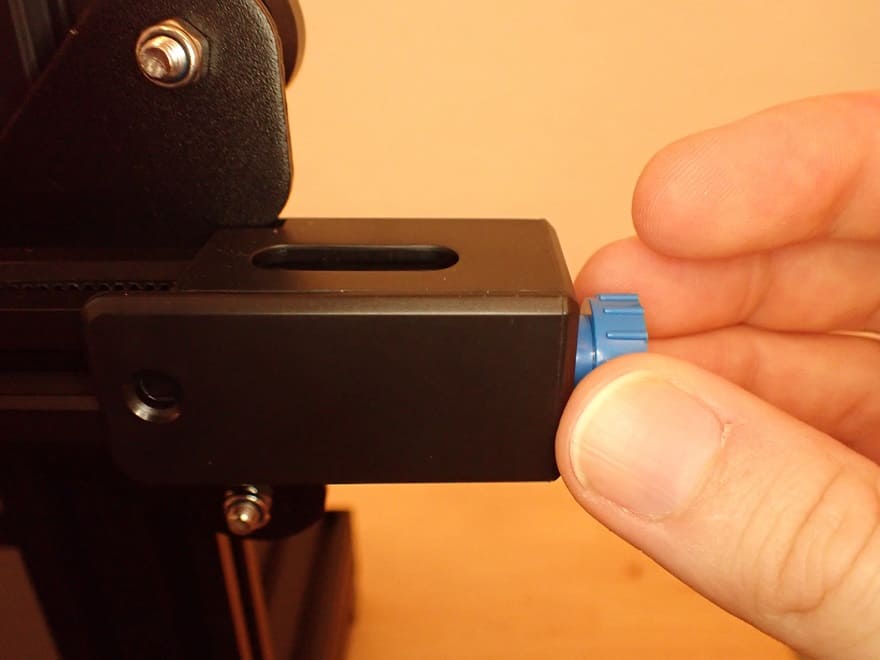
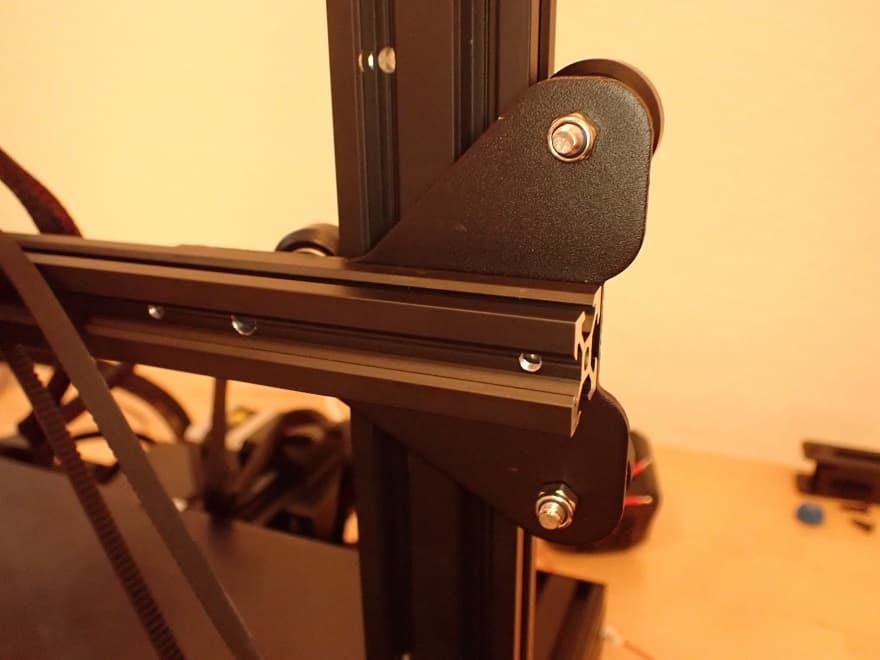
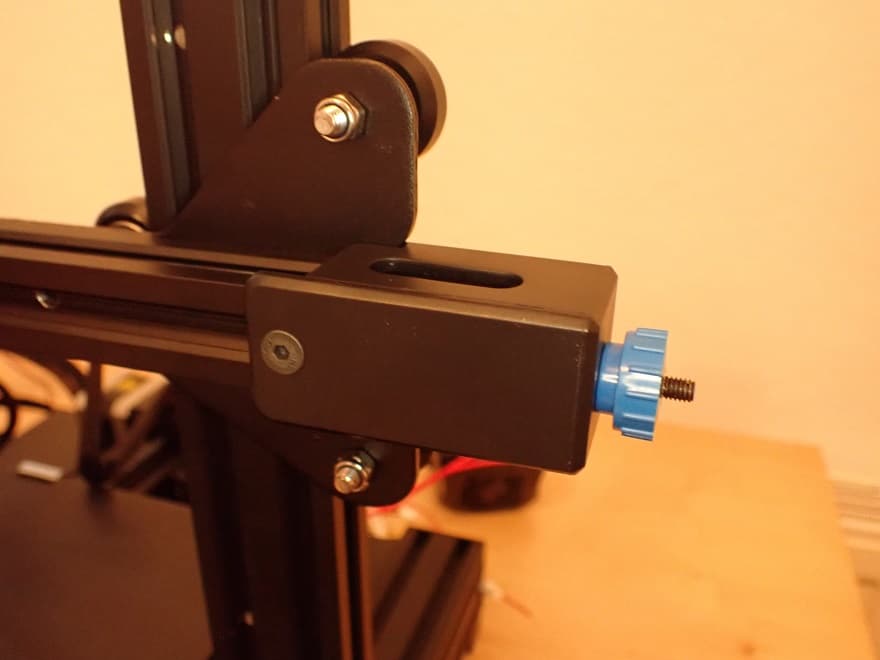
To disassemble the old extruder from the X-axis, you must first remove the toothed belt tensioner on the right side.
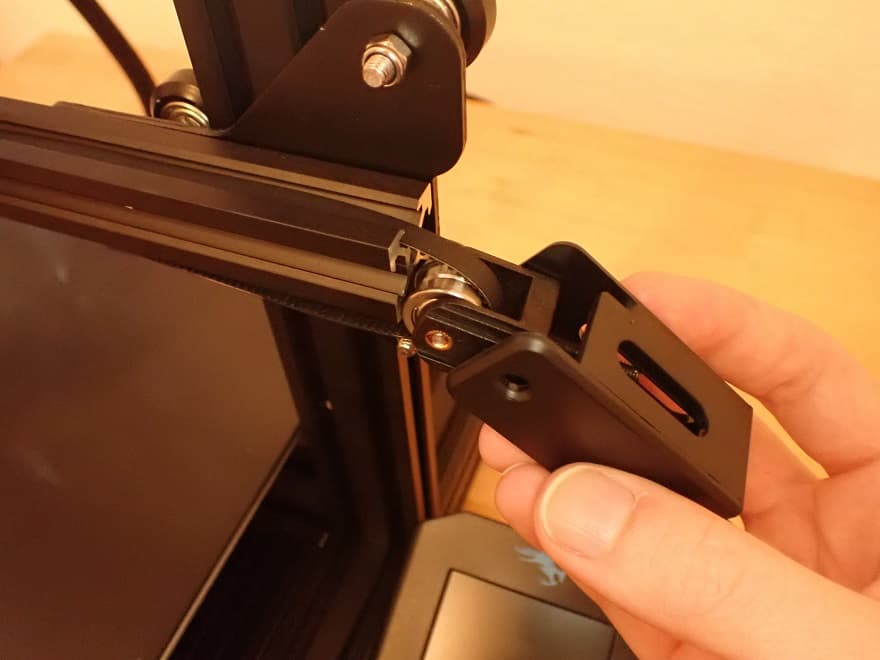
Then you can detach the toothed belt from the extruder.
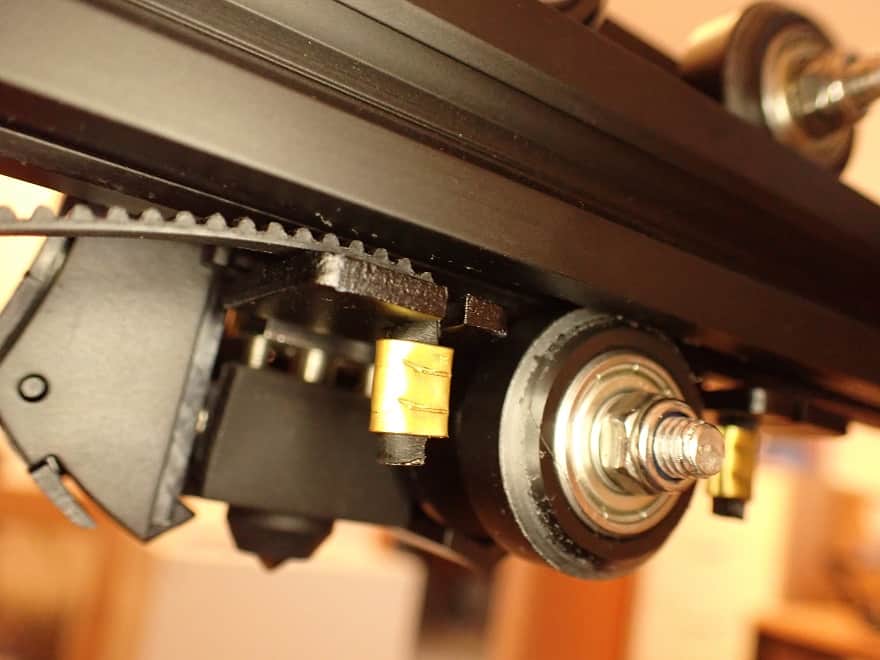
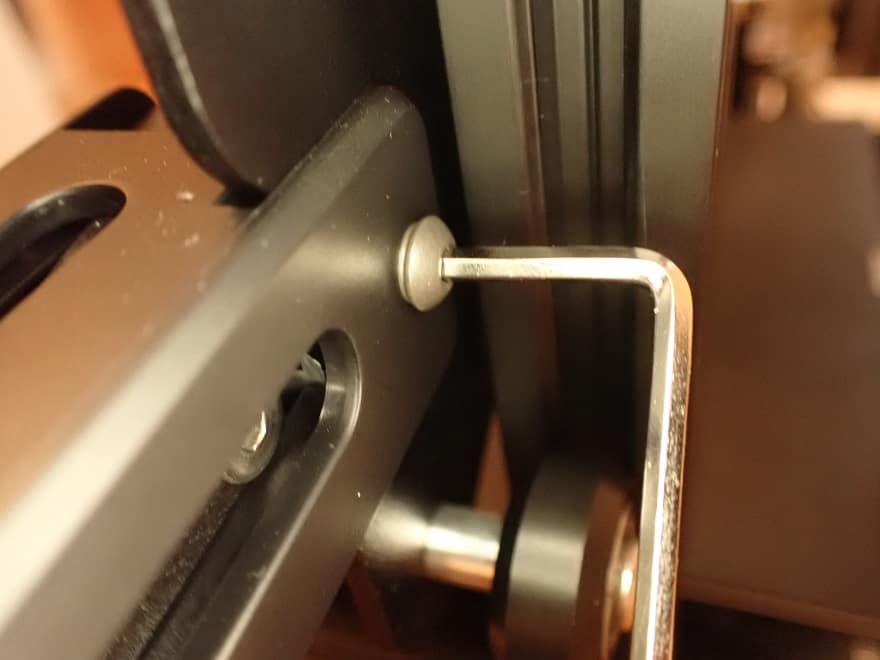
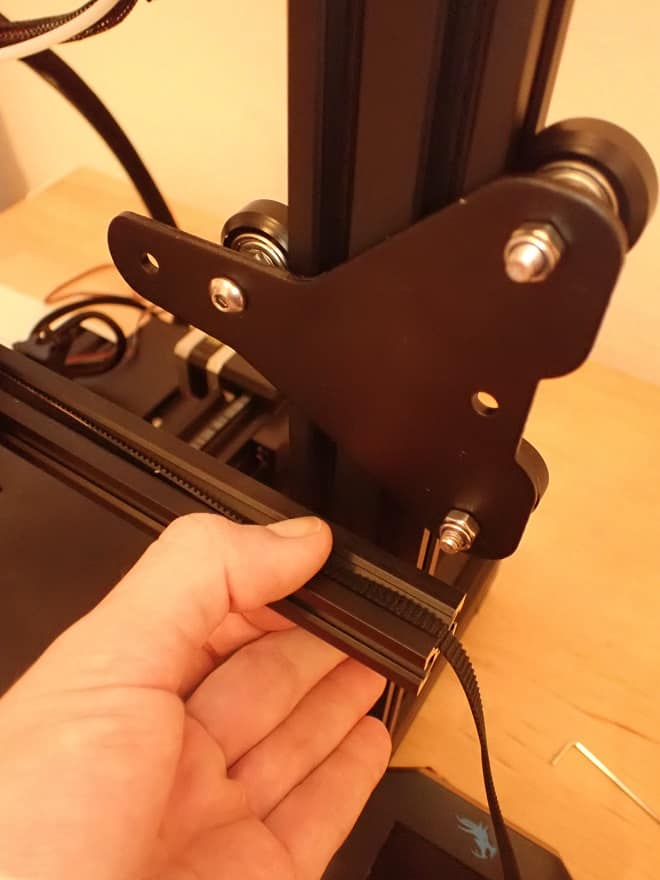
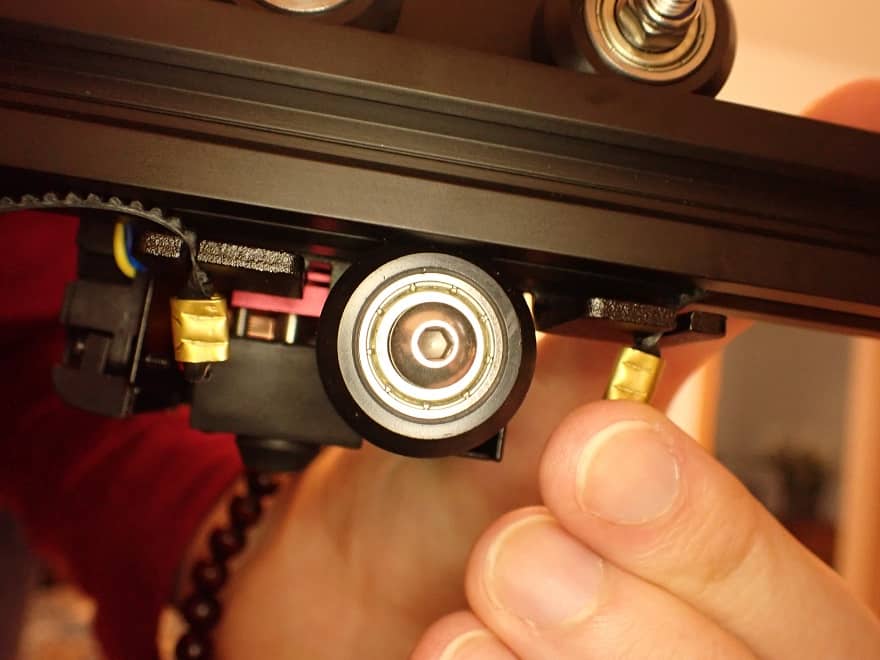
The X-axis is fixed to the Z-axis by the rolling device on the right side. To move the extruder down from the X-axis, you must detach the X-axis from this roller and move it up or down. Then you can slide the extruder off the X-axis.
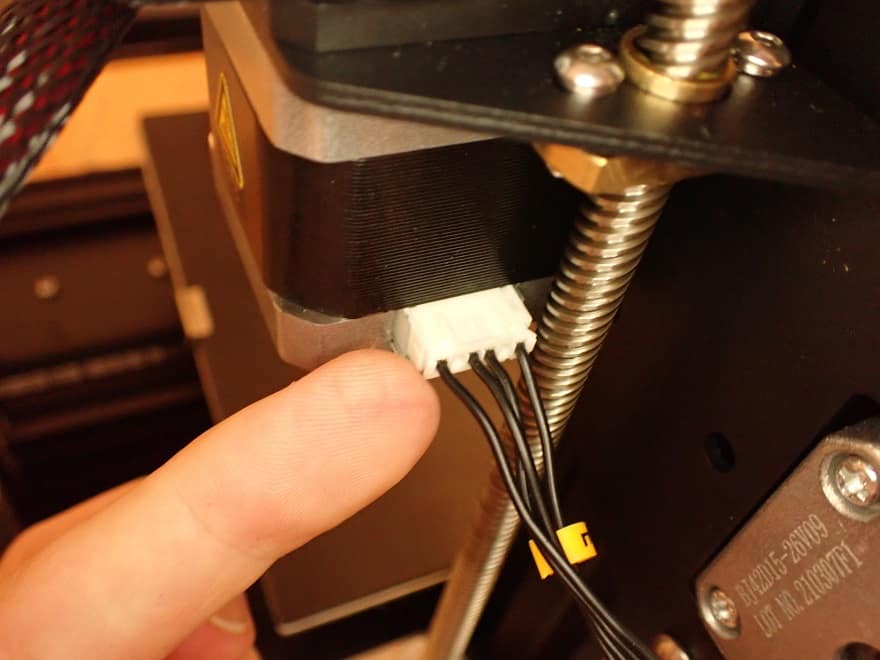
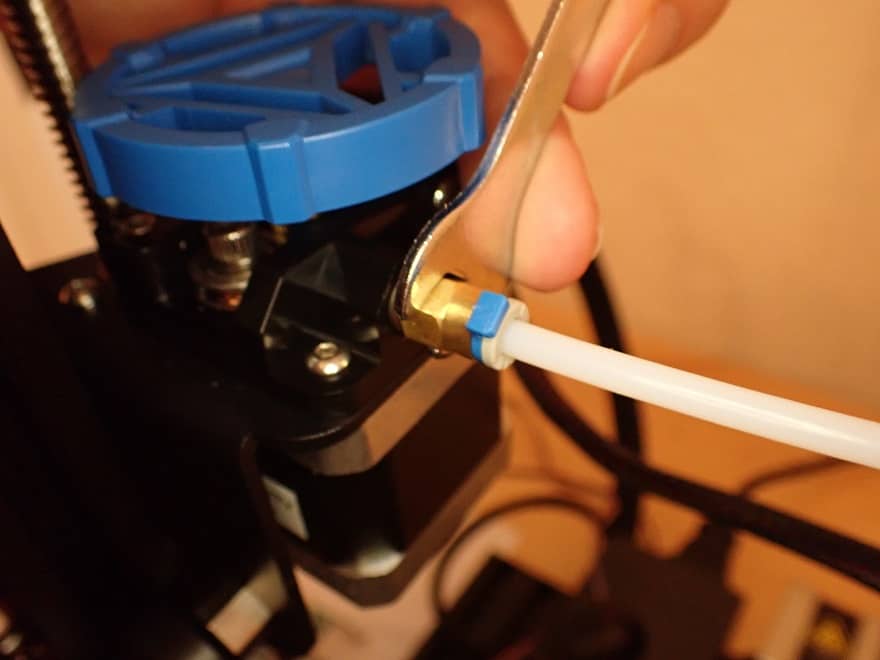
Now you just have to disconnect the cable from the stepper motor and the Bowden Tube from the extruder.
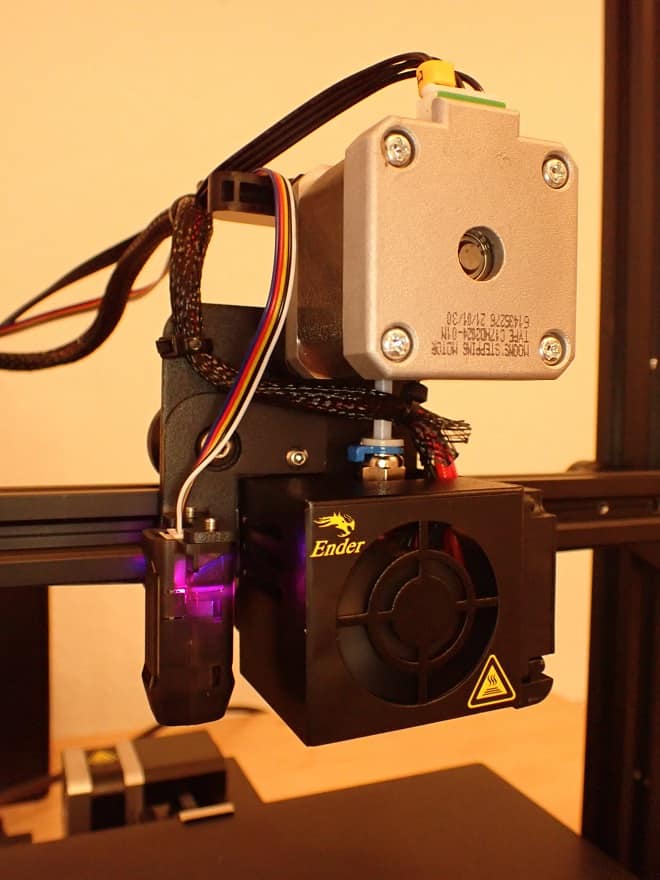
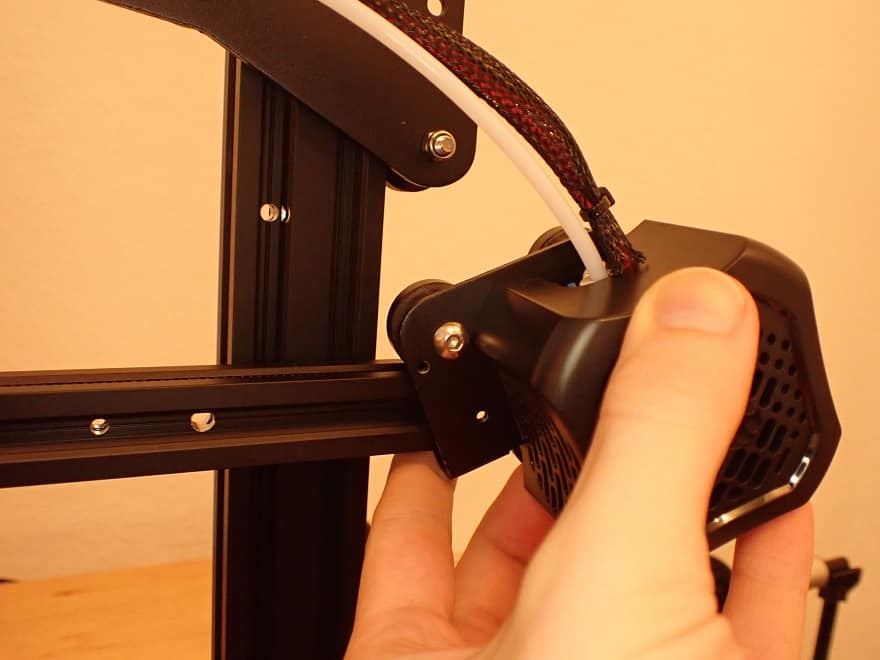
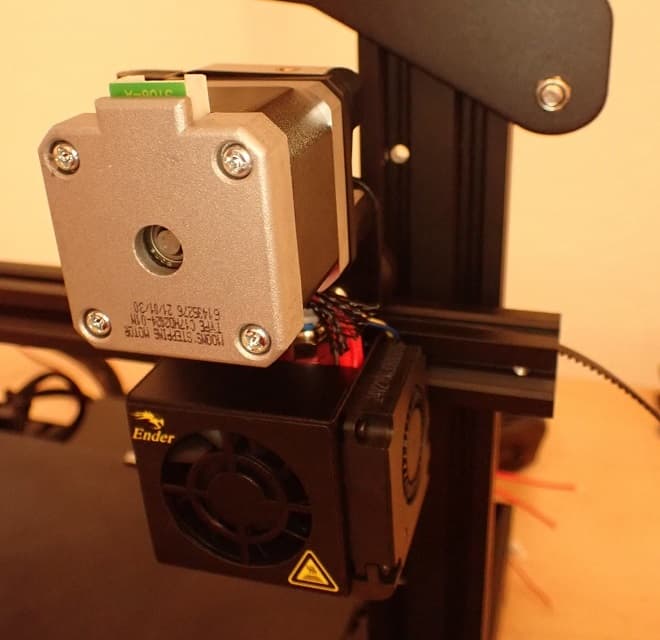
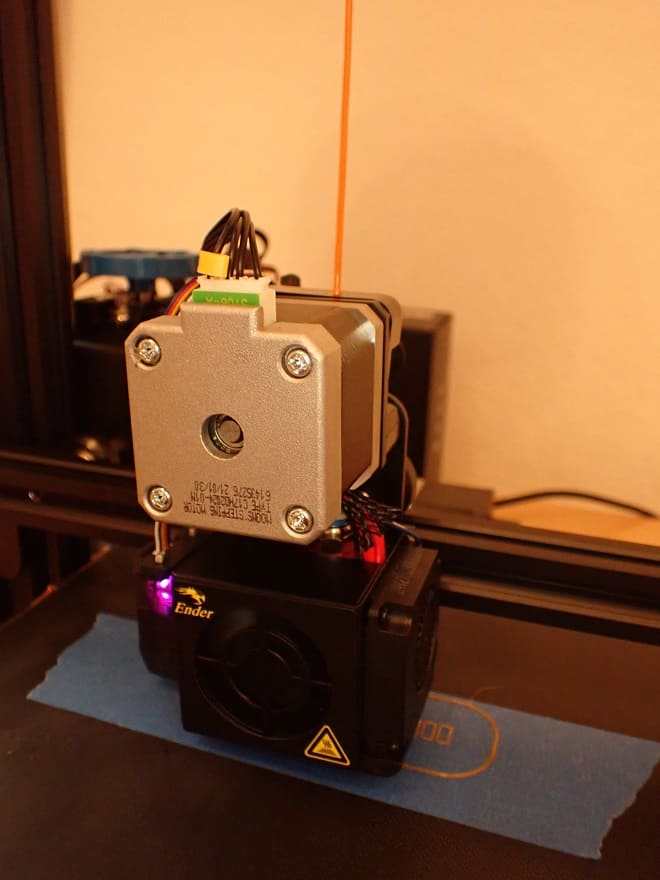
Step 2: Mount new extruder on X-axis
In principle, this step is the same as step 1, but the other way around. You push the direct drive extruder onto the X-axis, fix the X-axis to the Z-axis again and retension the toothed belt.
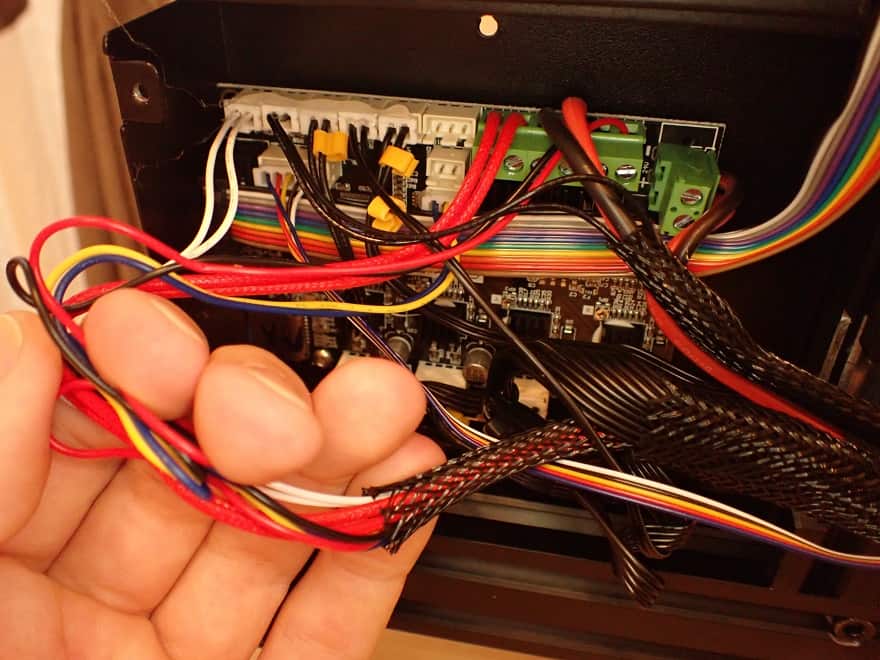
Step 3: Replace cables on the mainboard
Now comes the part that many fear: Electronics is a horror for many. But in this case, it doesn’t have to be, because you can do little wrong here.
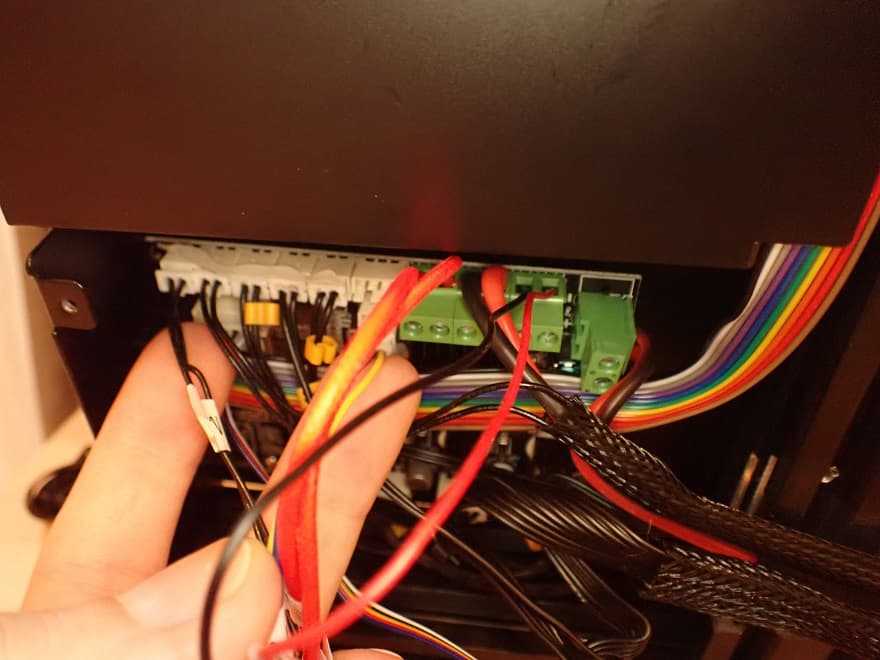
The cables of the new Direct Drive Extruder are all marked and you only have to exchange the old cables with the new ones.
Depending on which model of the Ender 3 series you have, the mainboard can be reached from the bottom or the top of the 3D printer. In my case, with the Ender 3 V2, I had to access the motherboard from the bottom.
There I replaced the cables one after the other and finally closed the case again.
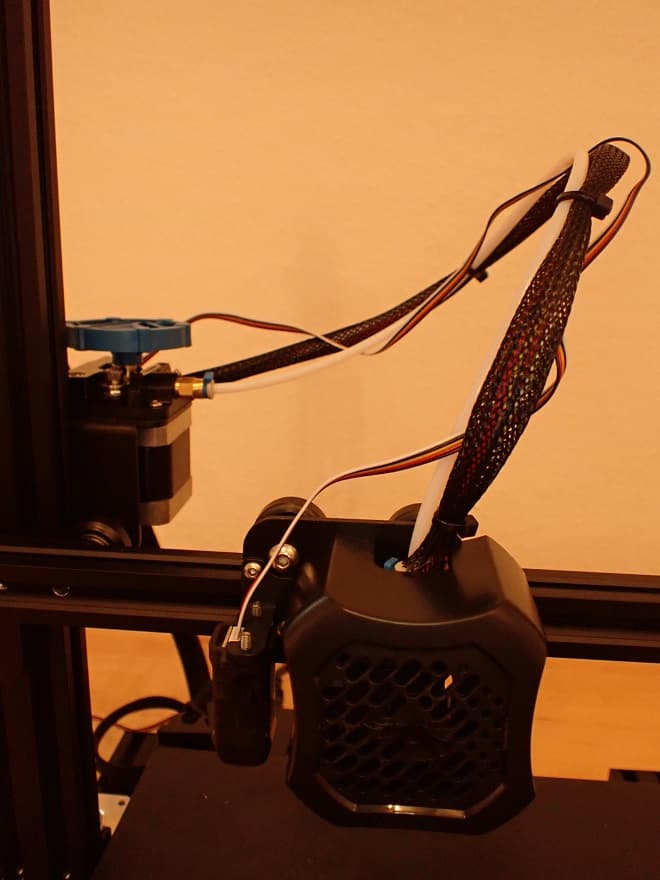
Step 4: Lay and fix cables neatly
Depending on how great your sense of order is, you can still lay and fix the cables sensibly with cable ties. In any case, I recommend that you make sure that the cables cannot get onto the print bed or near the nozzle.
This can not only endanger your printed objects, but also cause damage.
When fixing, make sure that the length of the cable is also sufficient when the printhead is at the right end position on the X-axis.
Step 5: Set Z-Offset & Level Print Bed
Due to the new extruder, your Z-offset will have changed. Therefore, you must manually level the print bed once before your first print with the new extruder.
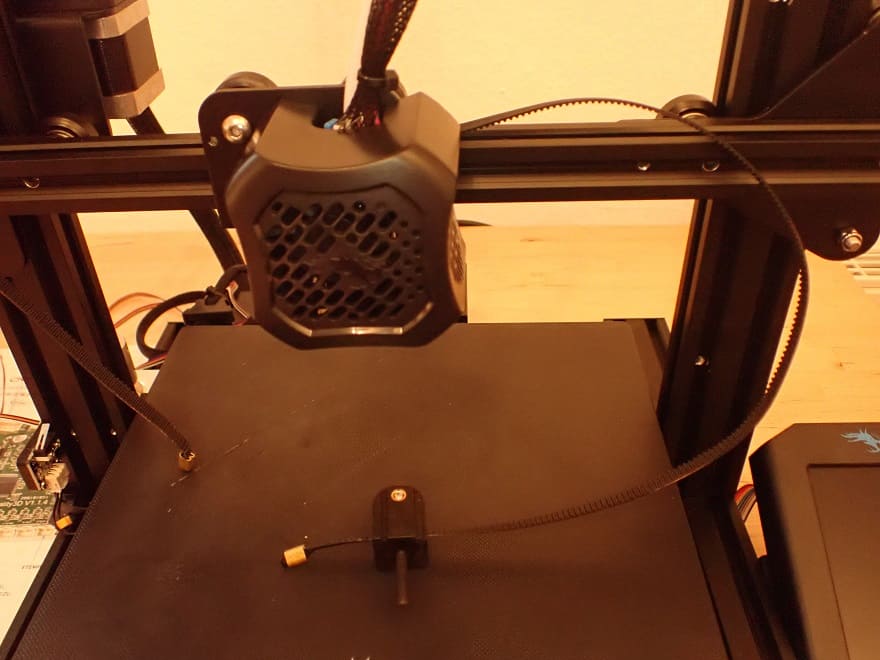
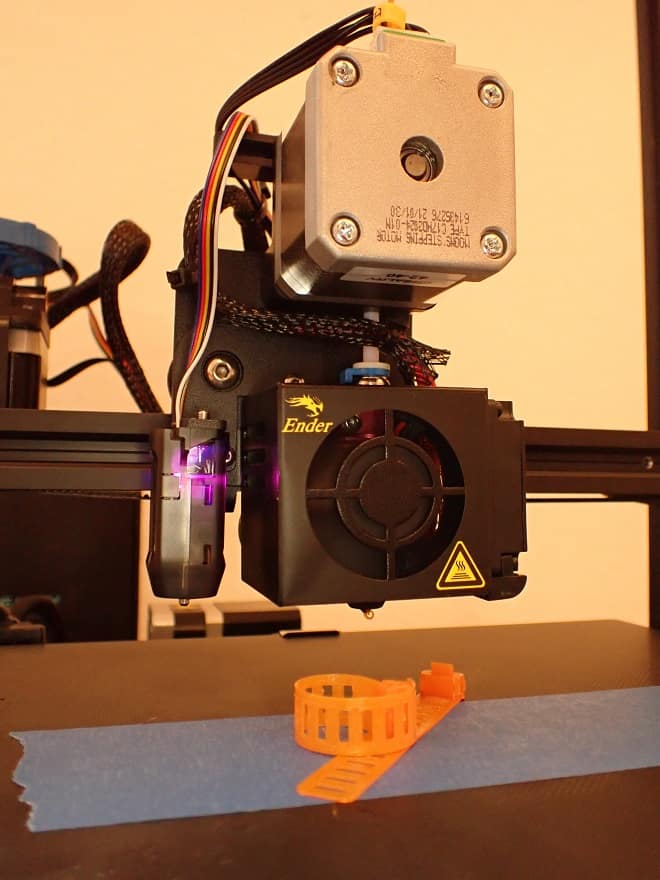
If you’ve done everything right, you can now get started with new 3D printing projects for flexible filaments! My first project was flexible cable clips. (I used Blue Tape for print bed adhesion)
Conclusion: Is the Direct Drive upgrade from Creality worth it?
The Direct Drive Upgrade Kit from Creality* is definitely worth it! The installation is easy and the results with flexible filaments are simply awesome. If you want to equip your Ender 3, Ender 3 Pro or Ender 3 V2 with a Direct Drive system, this kit is perfect!
Check Price at:
Disclosure: This website is the property of Martin Lütkemeyer and is operated by Martin Lütkemeyer. Martin Lütkemeyer is a member of the Amazon Services LLC and other Affiliate Programs. These are affiliate advertising programs designed to enable websites to earn advertising revenue through advertising and linking to Amazon.com and others. Links marked with * are affiliate links.
