
- Wet Filament: Prevention, Symptoms & Drying - July 18, 2024
- Sovol SV08 – Best PrusaSlicer Settings & Profile - June 26, 2024
- Sovol SV08 – Best Orca Slicer Settings & Profile - June 26, 2024
Disclosure: Links marked with * are Affiliate Links. I earn from qualifying purchases if you decide to make a purchase through these links – at no additional cost for you!
PETG is a very popular filament for 3D printing. This filament is very resilient and yet does not have such high requirements for the 3D printer as some other filaments. It is therefore often compared to PLA and ABS and considered a combination of them.
PETG is very robust, UV resistant, food safe and perfect for outdoor and practical applications. However, it has a strong tendency to stringing, making calibration of essential print settings very important.
As long as you have a 3D printer that meets the requirements for PETG (see key takeaways) and take care of a few other things, you will have a lot of success and fun with this filament. What these things are, what complications you might encounter and how you can solve them, you will learn in this PETG filament guide.
Table of Contents:
- 1 Key Takeaways
- 2 Advantages & Disadvantages of PETG
- 3 What is PETG Filament Used For?
- 4 Can PETG be Printed with any 3D Printer?
- 5 The Best PETG Print Settings
- 5.1 What Printing Temperature Does PETG Require?
- 5.2 How Hot Should the Print Bed be for PETG?
- 5.3 Which Retraction Settings are Good for PETG?
- 5.4 How High Can the Printing Speed be for PETG?
- 5.5 What Cooling does PETG Need?
- 5.6 The Best Settings for the First Layer with PETG
- 5.7 How to Calibrate a 3D Printer for PETG?
- 6 The Best Print Bed Adhesion for PETG
- 7 How Do You Have to Store PETG?
- 8 Common Problems When Printing with PETG
- 9 PETG Strength and Durability
- 10 PETG Environmental Compatibility
- 11 PETG Post-Processing
- 12 Conclusion
Key Takeaways
- Extremely robust, somewhat flexible, perfect for outdoor or mechanical applications
- Printing temperature: 240 ± 10 °C
- Print bed temperature: 80 ± 10 °C
- Retraction: 5-7 mm (Bowden) or 1-3 mm (Direct) at 20-40 mm/s
- Printing speed: 40-50 mm/s
- Print bed: PEI (perfect), glass (sometimes too good adhesion), Blue Tape, Magigoo
- Enclosure: not necessary
- Cooling: 0-50%
Advantages & Disadvantages of PETG
PRO:
- Strong
- Bends before it breaks
- Food safe
- Environmentally friendly
- High weather resistance
- Odorless
- Available in many colors
- Transparent options
- Hardly shrinks and does not warp at all when cooling down
CON:
- Strongly inclined to stringing
- Colored filaments are not 100 percent UV-resistant (discoloration may occur, but mechanical properties usually remain unchanged)
- Susceptible to scratch marks on smooth surfaces
What is PETG Filament Used For?
PETG plastic is a type of polyethylene terephthalate (PET) that has been modified with glycol. PETG is used for a variety of applications, including food packaging, water bottles and medical devices.
PETG is strong and durable, making it ideal for everyday objects. However, as it is slightly more difficult to print than PLA, it is therefore less suitable for decorative purposes.
PETG combines the strength of ABS and the ease of use of PLA, making it an ideal material for 3D printing. It is also available in many colors.
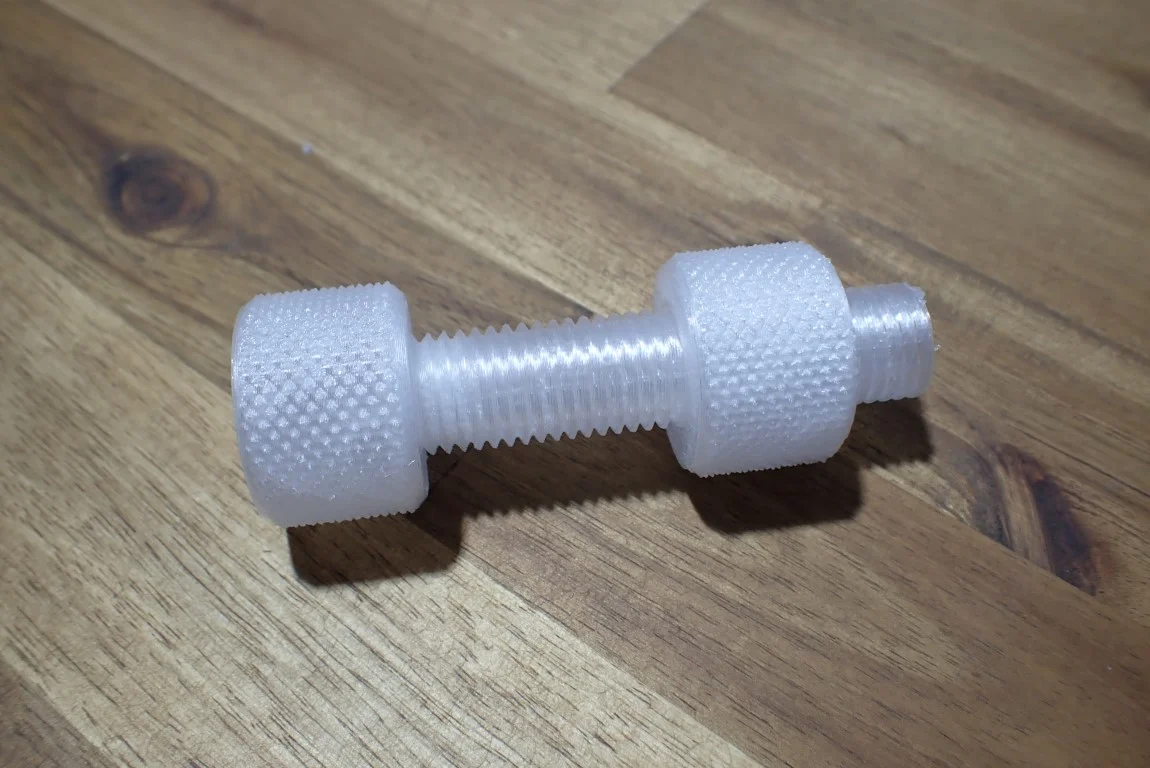
Another advantage of PETG is that it yields slightly before it breaks. In contrast, PLA breaks immediately when it reaches its maximum load capacity. That’s why PETG is so well suited for commodities or parts that need to withstand a high load. Before PETG breaks, it warns you with a slight deformation.
For example, if you want to hang a potted plant under the ceiling and print a snap hook for it, with PETG you will see ahead of time whether the hook can bear the weight or not. With PLA there is no warning – once the maximum load is exceeded the hook will suddenly break and the potted plant will fall to the floor.
Can PETG be Printed with any 3D Printer?
PETG filament is a great material for 3D printing, but you need to make sure your printer can use it. Not all 3D printers can reach the required temperature or provide a good print bed surface.
Do You Need a Metal Hotend for PETG?
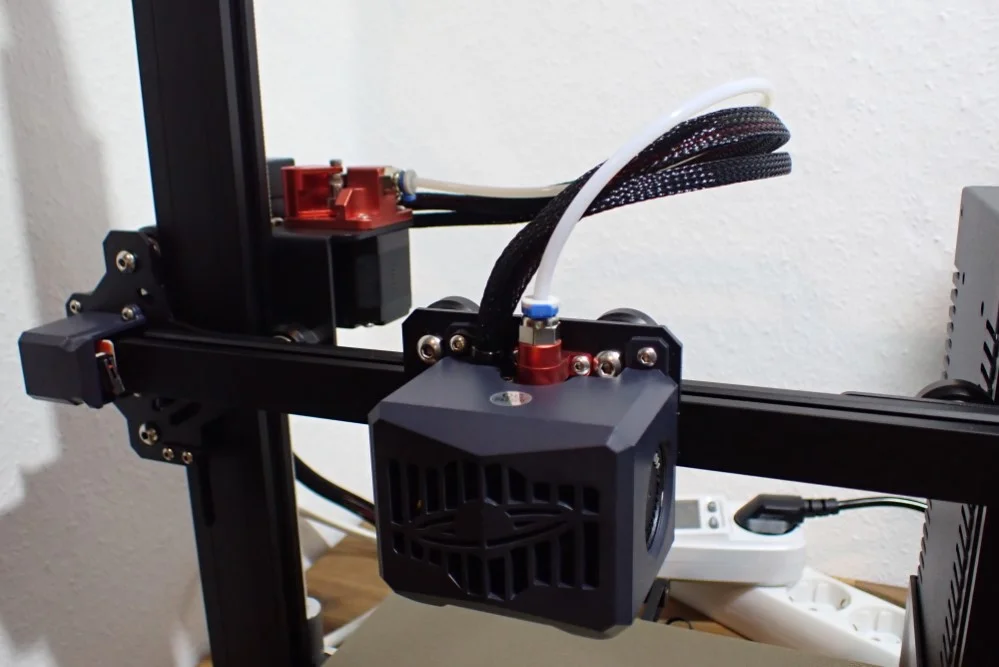
The hotend is a component in the print head of any filament 3D printer. It is responsible for heating the filament to its melting point so that it can be extruded through the nozzle to create the desired object. An all-metal hotend is necessary for printing many PETG filaments, as this material has a higher melting point than other standard filaments such as PLA.
PETG is printed at a temperature of 240 ± 10 °C. If the hotend is not completely made of metal, the connection between the nozzle and the heat sink is usually made of PTFE (Teflon). PTFE begins to dissolve at 240 °C.
If you print frequently at 240°C or higher with a PTFE heat break, the part will wear out over time and will need to be replaced regularly. In addition, toxic gases are released. The only chance you have of printing PETG with an extruder with a PTFE compound is to print at only 230 to 235 °C, replace the part frequently and keep the room in which the printer is located well ventilated. However, this temperature is not the optimal printing temperature for many PETG filaments.
Most low-budget 3D printers have a PTFE part installed. However, you can usually replace it with a metal part without having to replace the entire print head or extruder.
Do You Need a Direct Drive Extruder for PETG?
PETG is not a flexible filament like TPU and therefore does not require a direct drive extruder for precise extrusion.
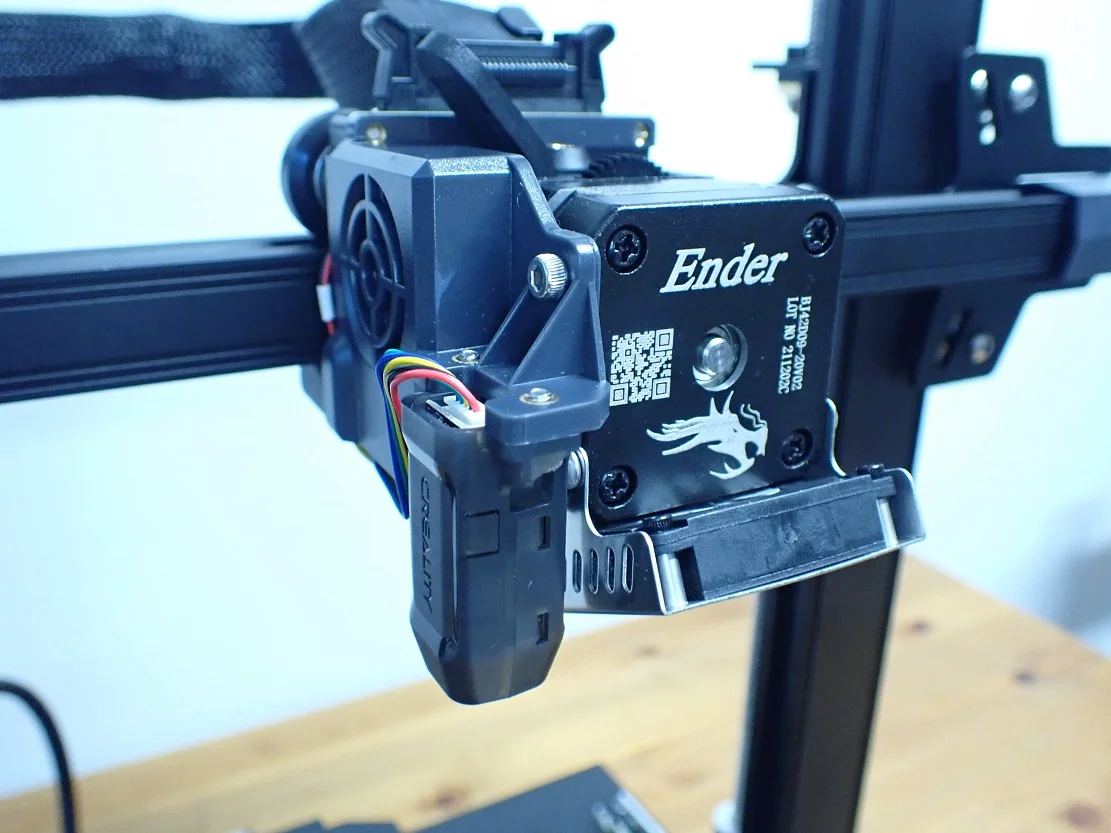
A direct drive extruder is located directly above the hotend in the printhead, giving it better control over the filament. A Bowden extruder is further away from the printhead and uses a tube to feed the filament to the hotend. Printheads without integrated direct drive extruders are typically lighter and more compact than direct drive extruders.
Most 3D printers that print with flexible filament use a direct drive extruder. The reason for this is that direct drive extruders are better suited for printing flexible filament because the distance the filament has to travel from the extruder to the nozzle is much shorter. This greatly reduces the likelihood of the flexible filament getting tangled in the Bowden tube along the way. In addition, the control over the flexible filament is much better with a direct drive extruder.
PETG is not flexible and therefore does not benefit as much from a direct drive extruder as flexible filaments. While the direct drive extruder is also a close second in terms of filament control and extrusion precision, you can also print PETG with a Bowden Extruder!
Do You Need an Abrasion-Resistant Nozzle for PETG?

Normal PETG is not abrasive. Therefore you do not need a special nozzle. However, as soon as certain additives are contained in the filament, a hardened nozzle is worthwhile.
With these filament additives, it pays to have an abrasive-resistant nozzle:
- Carbon
- Wood
- Stone
A hardened nozzle is important for 3D printers that print with filaments that contain abrasive additives. A hardened nozzle helps resist wear from the abrasive particles in the filament and improves the overall quality of the print.
A worn nozzle can cause a number of problems in a 3D printer. A worn nozzle can increase the likelihood of stringing between prints and affect the quality of the final print – especially with PETG, which is already prone to stringing, this is more than suboptimal. Also, a worn Nozzle can cause clogging of the Nozzle, which can be difficult to unclog.
If you plan to print with PETG filaments with such additives, a hardened nozzle is worthwhile. Here you can find the nozzle I like to use for such filaments*.
Does a 3D Printer Need an Enclosure for PETG?
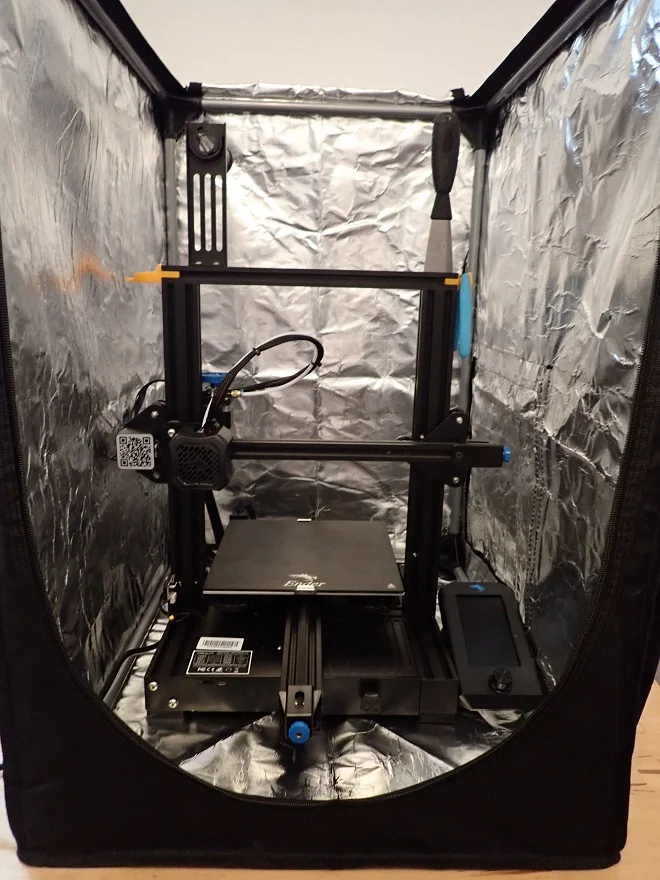
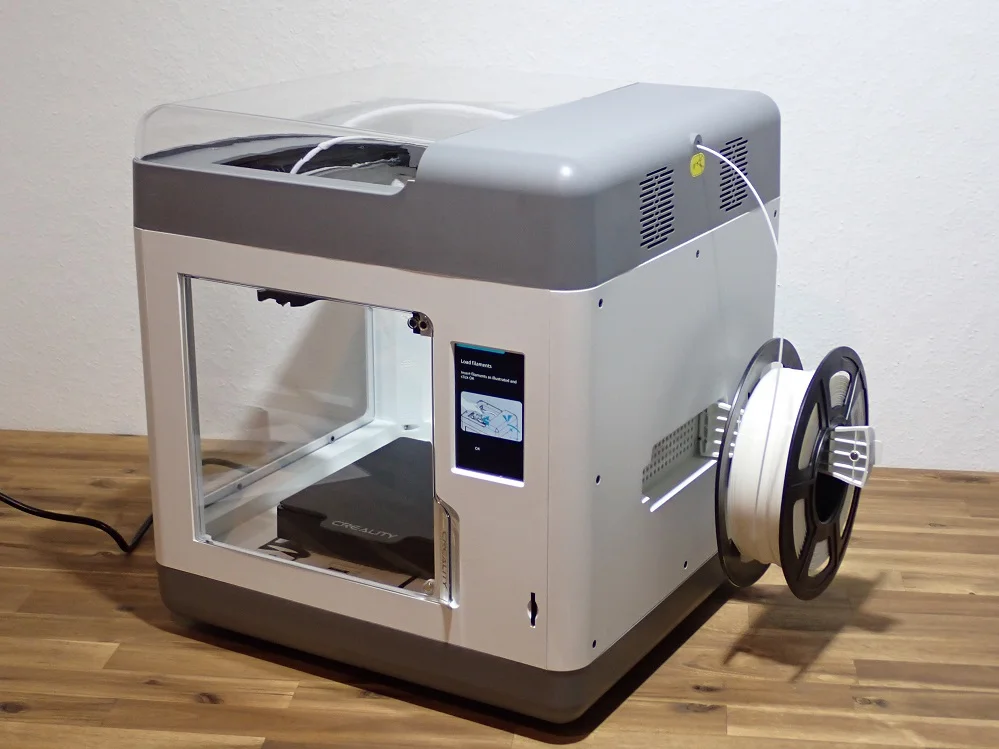
PETG filament does not require a 3D printer enclosure. ABS, on the other hand, absolutely requires a suitable 3D printer housing. PETG, unlike ABS, warps very little during cooling, which rarely results in severe warping or cracking.
Although it is better to deactivate cooling in the case of PETG so that cracks or delamination cannot occur at all, a high and homogeneous ambient temperature is not necessary.
If your 3D printer has an enclosure, such as the Creality Sermoon V1 Pro, you should open it as much as possible and disable the cooling.
The Best PETG Print Settings
Now that you know what properties PETG has and what your printer needs to be able to process it, let’s move on to the correct print settings.
What Printing Temperature Does PETG Require?

PETG is an excellent filament for 3D printing, but if the wrong printing temperature is used, it can greatly affect the quality of the print. If the temperature is too high, the likelihood of stringing increases. If the temperature is too low, the filament may not adhere to the print bed.
The correct printing temperature for PETG is 240 ± 10 °C. The various PETG filaments differ slightly in their properties, resulting in this temperature range.
It is best to start at 240°C and then adjust up or down in 3-5°C increments until you find the perfect temperature.
If the temperature is too high: Stringing can become a problem if the temperature is too high. This is because the molten filament becomes more fluid and sticky. This causes it to stick to the endpoint of the last extrusion and pull strings between different parts of the print.
If you have stored your PETG correctly and it is dry, you can be sure that the temperature is set too high or the retraction settings are not correct. Try lowering the temperature and if that doesn’t work calibrate the retraction. You’ll learn how to do that later in this article.
If the temperature is too low: If the temperature is too low, the adhesion of PETG is reduced. This leads to a number of problems, including poor print bed adhesion and the risk that the individual layers will not adhere well to each other. This can either cause cracking or create low strength in the finished object.
If you notice any of these phenomena, you should raise the temperature. A sure sign that the temperature is way too low is when there is under-extrusion. This is when too little filament is extruded and holes or cracks appear that are not due to mechanical stress, but simply because too little filament was extruded.
So the best strategy to find the right printing temperature for PETG is to set the temperature as high as possible without stringing. Then you guarantee a good adhesion to the print bed and between the individual layers and get a clean print without annoying threads.
How Hot Should the Print Bed be for PETG?

One of the most common problems with 3D printing PETG is print bed adhesion. It is important to use a heated bed when printing with PETG to ensure good adhesion. Also, the print temperature and the print bed temperature must be set correctly, otherwise PETG will not adhere properly.
The correct print bed temperature for PETG is in the range of 80 ± 10 °C.
Depending on where the perfect print bed temperature is for your PETG filament in this range also depends on what print bed surface you are using. Some surfaces have a much stronger adhesion with PETG than others.
However, before you think about adhesives or getting another print bed, you should try to optimize the print bed temperature. The hotter PETG gets, the stickier it becomes. Therefore you can try to increase the print bed temperature in small steps of 5 °C.
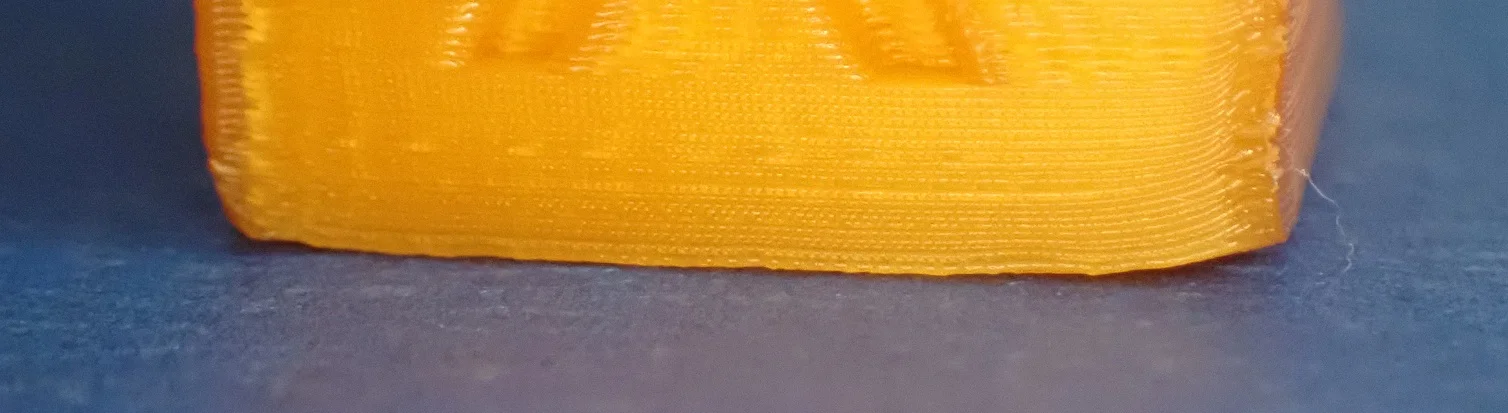
Even though the recommended temperature range for the print bed for PETG stops at 90 °C, you can still try to go a little higher. However, this increases the risk of an elephant foot, i.e. the melting of the lower layers, which leads to their widening.
Which Retraction Settings are Good for PETG?
Retraction refers to the process of pulling the filament back into the nozzle when it is not in use – after each extrusion or before each non-extrusion movement. This helps prevent stringing and keeps your prints looking clean. Different filaments require different retraction settings. Retraction also depends on the extruder you are using.
Since PETG has a strong tendency to stringing, the correct retraction settings are particularly important with this filament.
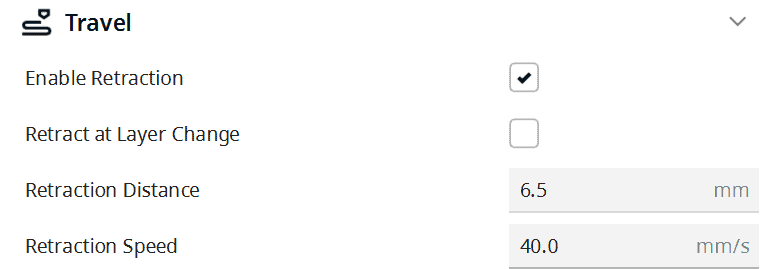
The retraction settings are essentially split into these two parameters:
- Retraction Distance: this is the distance the filament is pulled back into the nozzle.
- Retraction Speed: this is the speed at which the filament is retracted into the Nozzle.
To find the right settings for both parameters, you need a good starting point and some trial and error. The starting point for the retraction settings is sometimes different for Bowden extruders and direct drive extruders:
- Bowden: 5-7 mm at 20-40 mm/s
- Direct: 1-3 mm at 20-40 mm/s
The retraction speed of PETG is a bit slower than that of other filaments such as PLA or ABS. It is also much more important with PETG than the retraction distance. Therefore, you should start with small changes in speed to optimize your printing results.
If you continue to observe stringing, you can further reduce the retraction speed in small steps. This is the most common way to avoid stringing.
The retraction distance for your extruder may be very different from the values given here. There are a few newer extruders, such as the Sprite Direct Drive Extruder, which manage with very little retraction distance. Here 0.8 to 1 mm can be just right.
How High Can the Printing Speed be for PETG?

If you don’t pay attention to print speed when printing with PETG, you can cause a number of problems with your prints. If the speed is too fast, you will get poor print quality with poor layer adhesion and under extrusion with holes and gaps.
If the print speed is too slow, the liquid filament may flow out of the nozzle in an uncontrolled manner, resulting in oozing and stringing.
The correct printing speed for PETG is in the range of 40-50 mm/s.
If you can see the problems described above, you should adjust the speed in small steps of 5 mm/s and check the result. But first, concentrate on the print temperature and the retraction before you optimize the print speed.
Most of the time, you can influence the print quality of PETG best via the print temperature and the retraction. You can then increase the print speed until you encounter problems again. This way you can save printing time and still achieve high-quality results.
What Cooling does PETG Need?
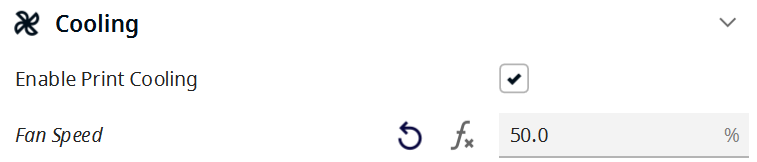
The hotter PETG gets, the better the layer adhesion becomes and the longer the filament stays hot, the better it can form. Therefore, it is better to use as little cooling as possible with PETG.
For most models, you can turn off the cooling completely. Only for models with a lot of details, you should set a moderate cooling of about 50%. However, for objects with many bridges or overhangs, it is important to turn on the cooling, otherwise the filament may sag.
Cold drafts can also be detrimental to a PETG 3D print because the filament then cools too quickly and the layer adhesion deteriorates. This can lead to cracks in the finished product and potentially ruin the print. Therefore, it is important to protect the object from drafts to prevent the drafts from affecting the quality of the print.
Still, it’s best not to use an enclosure. Sometimes a draft shield is just the thing to protect the first layers or the entire print from drafts.
The Best Settings for the First Layer with PETG

PETG filament is a great material for 3D printing, but it is important that you get the first layer right to ensure a successful print. The settings you use for the first layer will depend mostly on your print bed.
By default, for the first layer of PETG, cooling is disabled and the extrusion width and layer height are set to the default values (i.e. 100%).
If you are having problems with print bed adhesion, you can increase the extrusion width and/or layer height to increase adhesion. This is because more material is applied at once, resulting in a stronger bond between the print bed and the filament. The longer the filament stays hot and fluid, the longer it can form a good bond with the print bed. And thicker and/or wider lines result in more thermal mass that becomes more sluggish the more voluminous it becomes.
If you still have problems with your first layer with these settings, you should level the print bed again. Also, make sure the distance between the nozzle and the print bed (the Z-Offset) is set correctly so that the nozzle is not too far away from the print bed.
How to Calibrate a 3D Printer for PETG?
For PETG, at least the printing temperature, the retraction and the flow rate should be calibrated. Sometimes it is necessary to calibrate these settings several times in a row, because they can influence each other.
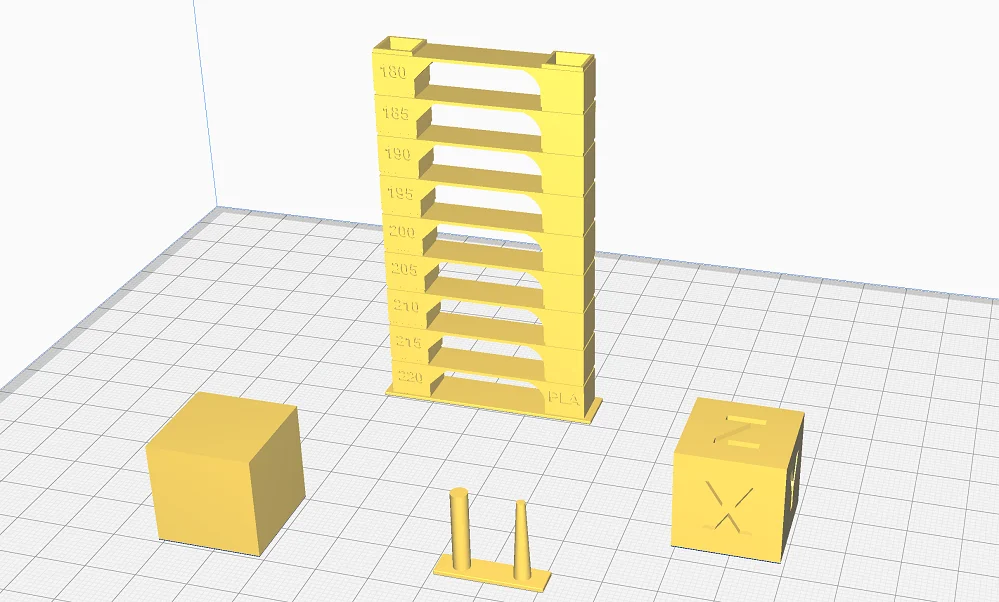
Printing temperature: The best way to calibrate the print temperature is with a so-called temperature tower. This test object consists of several layers that are printed at different temperatures. Normally the temperature is increased by 5 °C per layer. After the print is done, you can immediately see which temperature worked best. The layer with the fewest print errors obviously shows you this.
Retraction: For retraction, there are numerous test objects you can use to provoke stringing. Since calibrating retraction settings often requires multiple passes, I prefer to use the calibration object from the Calibration Shapes plugin in Cura. It prints in a few minutes, so the multiple passes you’ll need won’t take too long.
Flow rate: The flow rate can be calibrated relatively easily with a calibration cube. You have to print the cube without infill, i.e. hollow, and without upper layers. This way you can easily measure the wall thickness with a caliper after printing. If the measured wall thickness matches the theoretical wall thickness from the slicer, the flow rate is set correctly. If the measured wall thickness is greater, you must reduce the flow rate – and vice versa.
Another tip: If you get lost with one of these settings and can’t find the right values, you should deal with the next one first. These three settings are partially dependent on each other. Therefore, it is sometimes necessary to calibrate the three settings several times in succession to find the perfect values.
The Best Print Bed Adhesion for PETG
PETG generally adheres quite well to most surfaces. However, some coatings are less suitable and can be improved by certain additives. There are also print bed surfaces, such as glass, which can lead to excessive print bed adhesion.
Which Print Bed Surface is Best for PETG?
If you can’t improve adhesion by adjusting the print bed temperature and printing speed for the first layer, you should consider using a different print bed surface or adhesives.
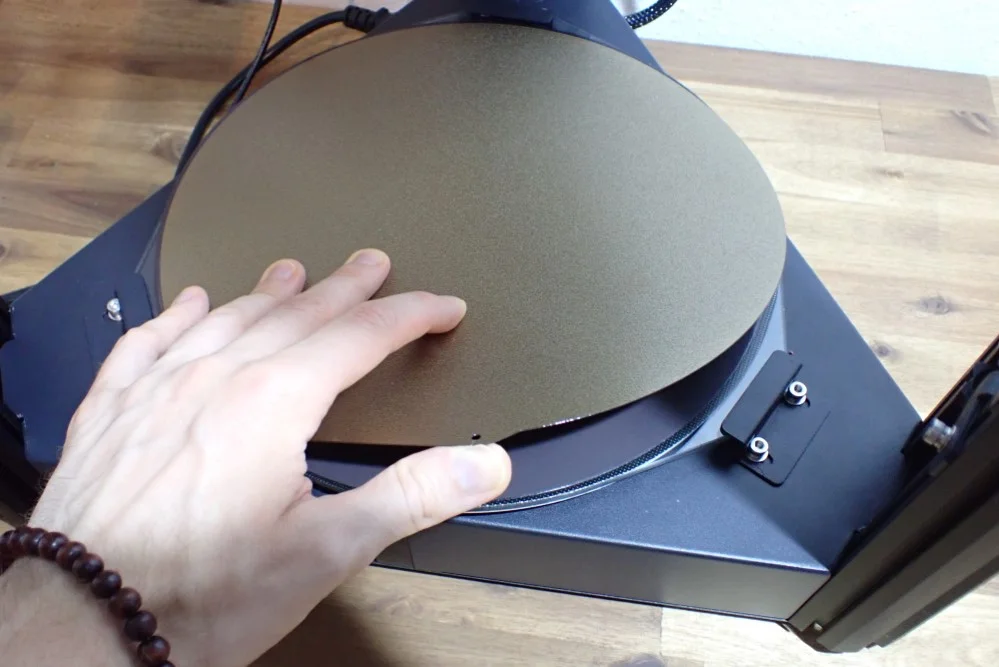
Print bed surfaces that work well with PETG include those made from PEI (polyetherimide).
These surfaces are usually found on mid-range or high-end 3D printers. However, there are also inexpensive upgrades in many sizes (I’ve had good experiences with PETG using this PEI print bed*).
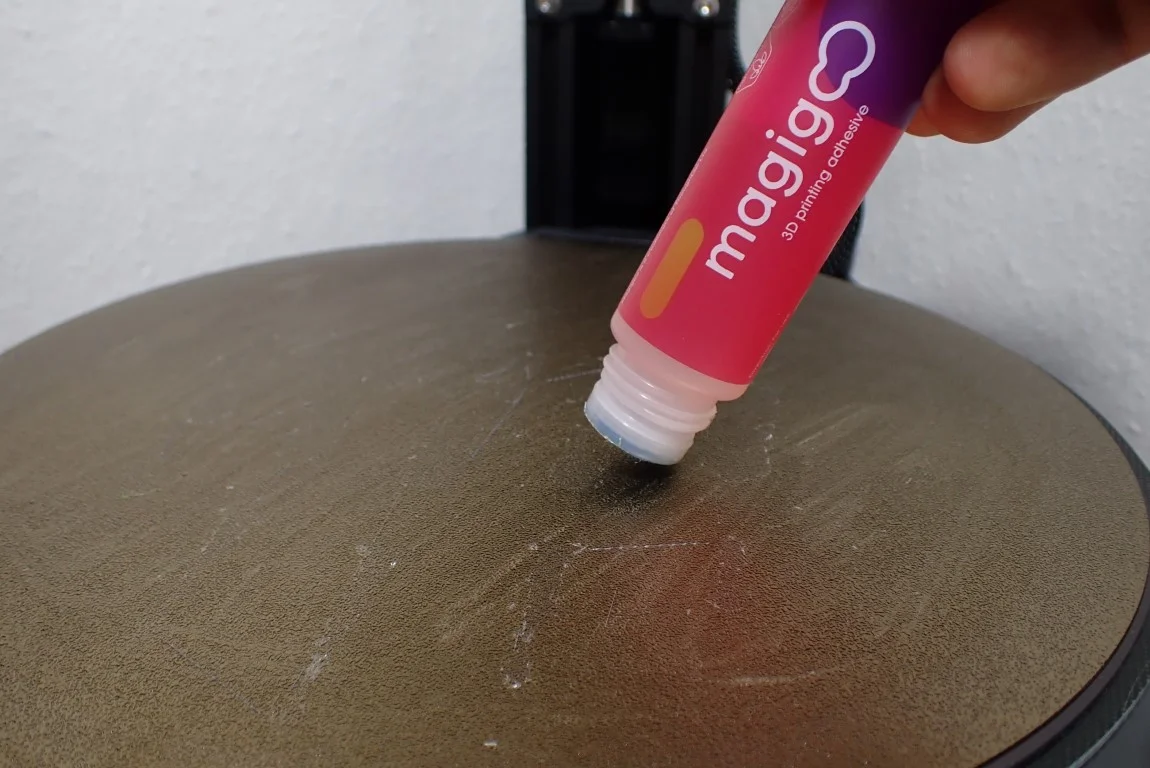
If your printer does not have a PEI surface, you can still use PETG by applying a layer of adhesive. Magigoo is an excellent adhesive for PETG to increase print bed adhesion.
It can be used on many different types of surfaces and is very easy to apply. Simply clean the print bed and then apply a thin layer of Magigoo to the area where you want your print to adhere. Let it dry for a few minutes and then you’re ready to print. I was a little put off by the price before I bought it, but I’ve had it for a few months now, print daily and it’s only half empty.
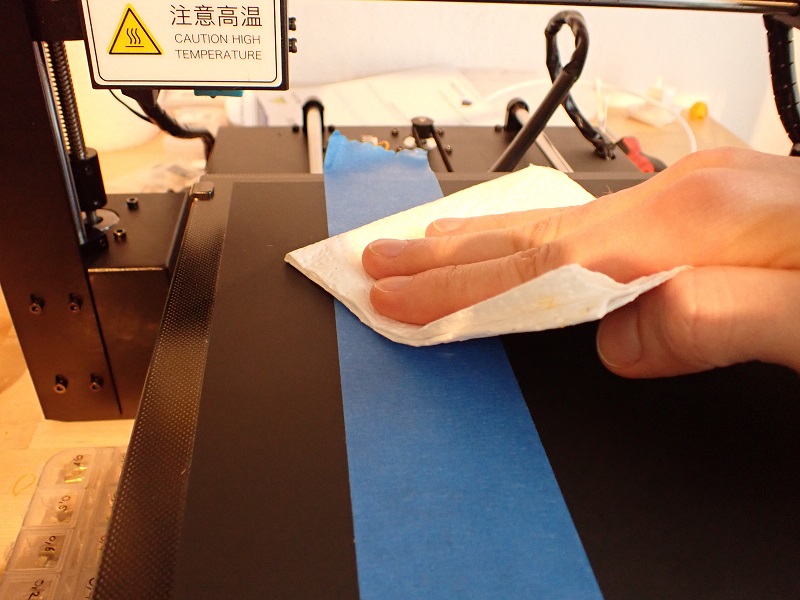
With a glass print bed, it can even be that the adhesion is too big and you can’t remove the object from it. Then Blue Tape is a good choice if you don’t want to invest in a PEI print bed. The adhesion on Blue Tape is quite good and protects the glass print bed from damage.
Does PETG Require Adhesive for Good Print Bed Adhesion?
PETG filament does not normally require an adhesive to adhere well to the print bed. If you have set the temperatures for the print bed and the nozzle correctly, print bed adhesion should normally not be a problem. However, for some print bed surfaces, even the correct temperature may not help.
So if you’re having trouble getting your prints to stick to the bed, you can try using a small amount of glue.
Often normal glue stick or hairspray is recommended. However, I have had only limited good experience with them. With PLA a glue stick helps quite well on a glass print bed. The best glue I have used so far with PETG is Magigoo. In this article I compared it against a normal glue stick.
If you don’t want to use glue, you should consider getting a PEI print bed. PETG adheres very well to it and can be easily removed after printing.
Another possibility is Blue Tape. With this, you can both increase and decrease the print bed adhesion. On very poorly adhering surfaces it increases the adhesion for PETG and on extremely well-adhering surfaces like glass you can decrease it to protect the print bed and the print object from damage.
How Do You Have to Store PETG?
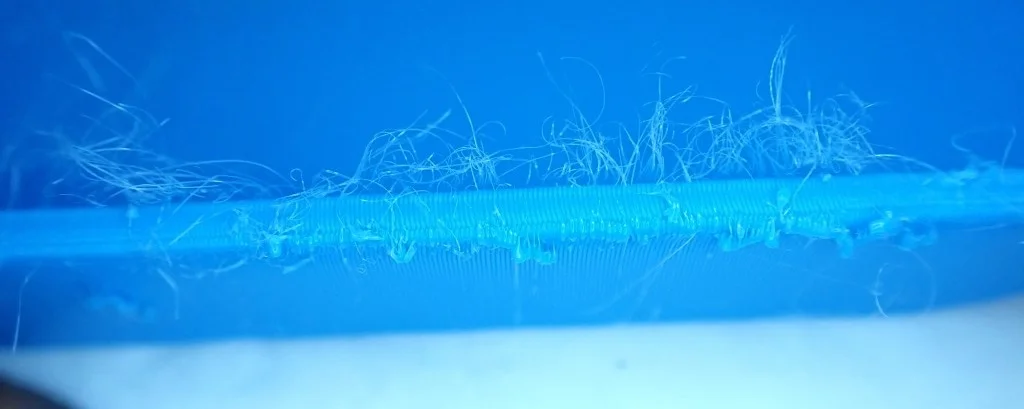
PETG filament must be stored in a cool, dry place. If it is exposed to moisture, it will be difficult to print. PETG is hygroscopic and will absorb more and more moisture from the surrounding air over time.
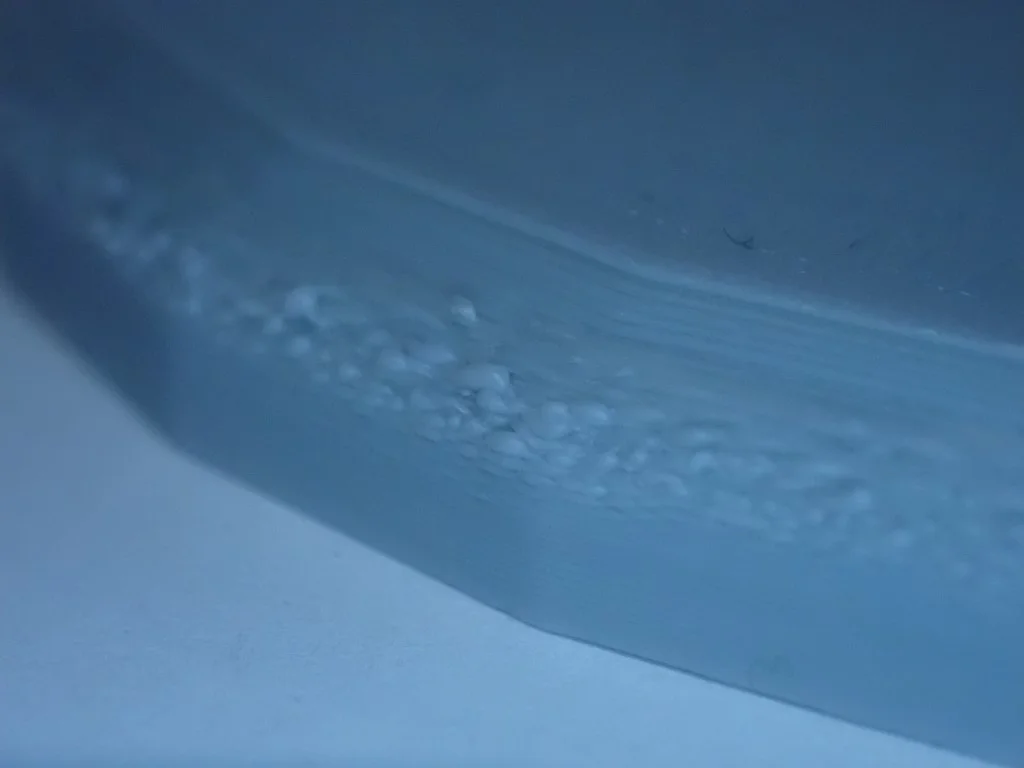
When PETG filament is wet, the temperature in the Nozzle causes it to expand due to moisture, making it difficult to extrude evenly. This can cause the filament to throw bubbles or tend to string more. Especially the latter is fatal with PETG, since it is already prone to stringing anyway.
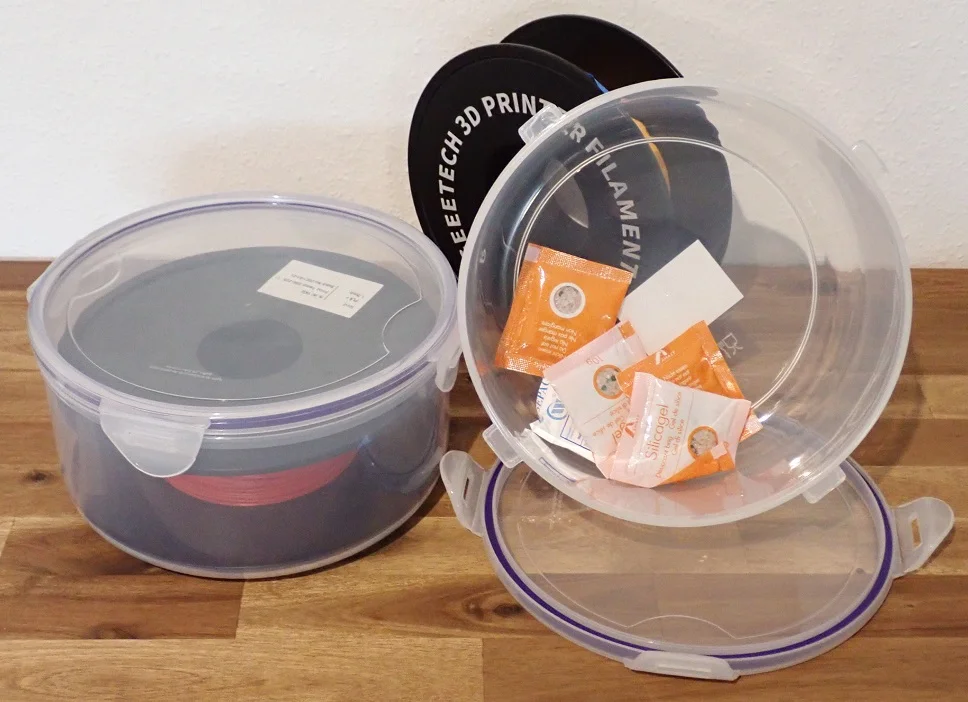
When storing PETG filament, it is best to use an airtight bag or container with a desiccant. The inside of a zip-lock bag with the air squeezed out of it works well in a pinch. You can also buy special filament storage bags* that have a vacuum valve to remove all the air from the container.
I myself use for storage suitable plastic containers in which exactly one spool with some desiccant fits inside. These can be stacked well and I quickly get to the filament. You should store the filament dry immediately after each use so that it can not absorb unnecessary moisture.
If the filament is already saturated with moisture, you can dry it again without permanent damage to the filament. To do this, you can simply leave it in the oven at 60 °C. If you don’t trust your oven’s temperature gauge, it’s better to keep it 5°C below that to prevent the filament from softening and sticking together.
Common Problems When Printing with PETG
PETG is relatively easy to print but still more difficult than PLA. So if you’ve been printing mainly with PLA, the transition to PETG can be a bit bumpy. To make the transition as smooth as possible, here are the most common mistakes and their solutions when printing with PETG.
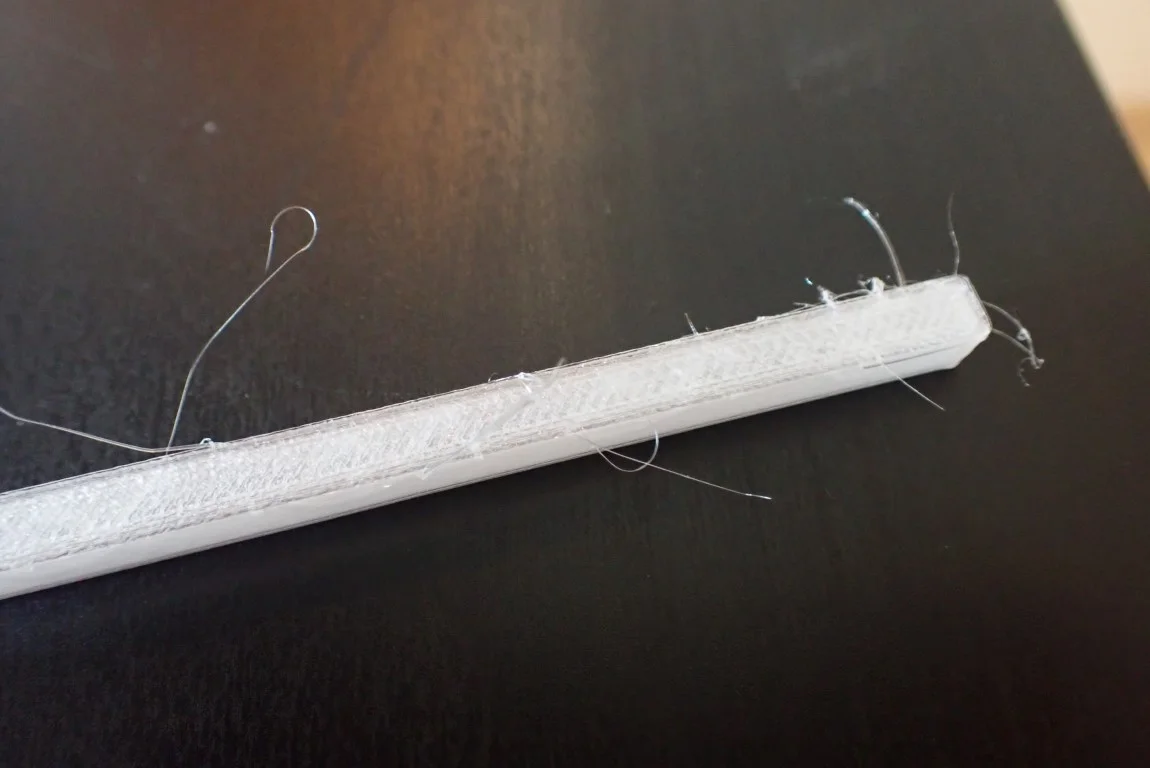
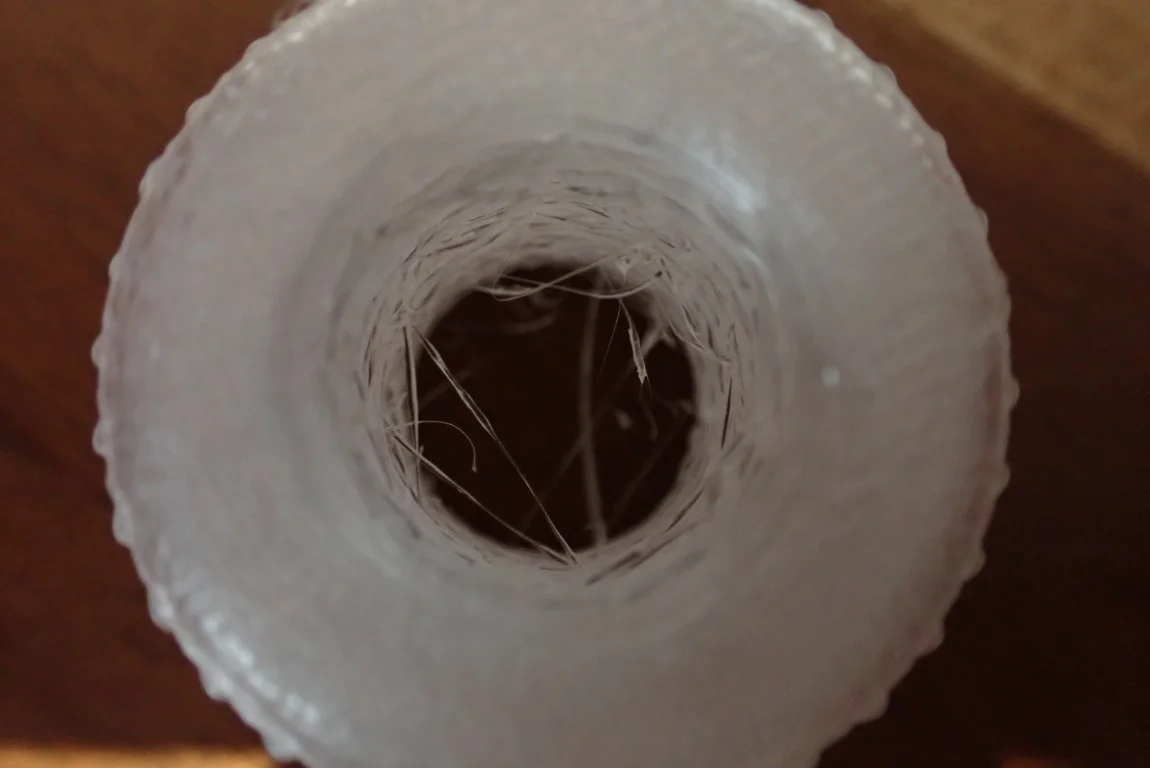
How to Avoid Stringing with PETG?


PETG is known to be very susceptible to stringing. This can have several causes – but there are simple solutions for each of them.
PETG stringing is mainly caused by incorrect retraction settings, excessively long travel distances, incorrect temperature settings or wet filament.
Increase the retraction: A longer and faster retraction pulls the PETG filament further into the nozzle, which prevents it from leaking out uncontrollably and creating stringing during a movement.
Minimize the travel distance: The fewer travel movements (i.e. the distance the nozzle travels between two extrusions without extruding filament), the less stringing can occur. Since stringing can only occur during such travel movements, this effectively reduces the print error.
Reduce the print temperature: The lower the print temperature, the less liquid the filament becomes. And the more liquid the filament is, the easier it is for it to escape uncontrollably from the nozzle. So with a lower print temperature, you can reduce stringing or even avoid it altogether.
Increase the travel speed: To give PETG even less chance for stringing, you can increase the movement speed (i.e. the movements without extrusion). This reduces the time in which stringing can occur, the filament has less time to run out of the nozzle.
Use dry filament: Damp PETG filament is a common problem. PETG attracts moisture from the air almost magically. This moisture can cause bubbles and stringing during extrusion. But even if no bubbles are thrown, the moisture can cause stringing because it changes the extrusion properties of the filament.
PETG Not Sticking to the Print Bed
On some print bed surfaces, the print bed adhesion for PETG can be very poor. No matter what kind of print bed surface you use, there is a solution.
Poor print bed adhesion with PETG is most often caused by an improperly leveled print bed, wet filament, or the wrong print settings such as print bed temperature or cooling of the first layer.
Correct leveling: The first approach to solving problems with print bed adhesion is always to re-level the print bed. Even slight differences in incline can lead to poor adhesion.
With PETG it is also very important to adjust the distance between the nozzle and the print bed. With most filaments, it is advantageous if the filament is pressed slightly onto the surface. With PETG this is not the case. Increase the distance a bit and test the effects.
Wet filament: Moist PETG filament can not only lead to various printing errors, but it can also be responsible for poor print bed adhesion. Always make sure that you store your PETG filament dry and that you pack it airtight and dry again immediately after printing. If it’s already wet, there are a few methods to dry it again.
Incorrect print bed temperature: As with other filaments, the print bed temperature is critical to how well it adheres to the surface. Use the default settings for PETG (80 ± 10 °C) and the manufacturer’s instructions. From there you can try to increase the temperature.
Cooling of the first layer: In most cases the slicer is preset to deactivate the cooling of the first layer. This is very important to give the hot filament enough time to cool down. The longer it stays hot, the longer it has time to bond with the print bed and create a good print bed bond.
Other tips for better print bed adhesion with PETG:
- Use an adhesive like Magigoo.
- Make sure the print bed is clean. If in doubt, clean it.
- Reduce the printing speed of the first layer to 5-10 mm/s.
- Use only high-quality PETG filament.
PETG Adheres Too Much to the Print Bed
However, on certain print bed surfaces, such as glass, the print bed adhesion of PETG can be too high.
When 3D printing PETG onto a glass print bed, the print bed adhesion should be reduced to avoid damage to the object or the print bed. This can be achieved with Blue Tape. Otherwise, a PEI print bed would be a useful upgrade.
Normally in 3D printing, you want to increase the print bed adhesion. However, with certain combinations of filament and print bed surface, there is the rare case that the print bed adhesion is so good that either the object or the print bed is damaged when you remove the finished object from the print bed.
Especially with the combination of glass and PETG such damages can occur. If you don’t want to upgrade to a PEI print bed*, Blue Tape would be a good choice. If you want to print with PETG more often, I would definitely recommend a PEI print bed, because you can easily remove the objects from this flexible print bed and the print bed adhesion is still optimal.
Blobs & Zits on the Surface of a PETG Print
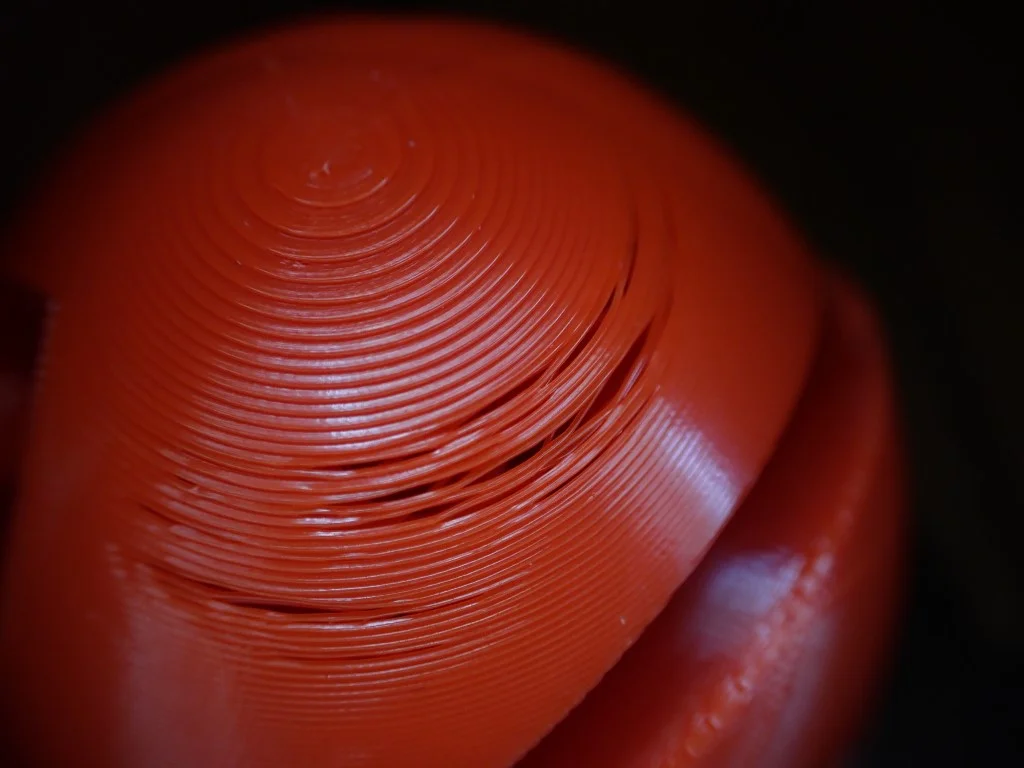
Ugly blobs on your 3D print can ruin it. Unfortunately, this printing error can also occur with PETG. However, there are a few ways you can prevent this.
Blobs and zits on the surface of a PETG print are usually caused by incorrectly adjusted retraction, wet filament, remote printing or bad filament.
Calibrate the retraction: A badly adjusted retraction does not only lead to stringing. In some cases, it can also cause ugly blobs when the nozzle moves to the next layer and unloads the filament drop as a blob. You can calibrate the retraction relatively easy. There are several test objects on sites like Thingiverse or in the Calibration Shapes plugin in Cura. In this article you can see the best of them. Change the individual settings in small steps and inch your way to the optimal value.
Use dry filament: Moist filament can cause the filament to bubble or string heavily when extruded. This can result in oozing, although dry storage is especially important with PETG.
Printing via data medium: Sometimes it can happen that printing remotely via a PC can lead to blobs. This is usually because the data rate to the printer is too slow. Make sure that your PC has enough power to supply the 3D printer with data as fast as necessary or use a mobile data carrier for printing like an SD card.
Use high-quality filament: Filament with a low quality can lead to blobs. This is usually due to certain additives that worsen the printing properties. When buying PETG filament, make sure it comes from a reputable manufacturer and is already proven in the market. At the beginning of this article, you will find two of my favorite PETG filaments, with which I have had the fewest problems.
PETG Supports Stick to the Printed Object
PETG has an enormous layer adhesion with the right print settings. It therefore adheres extremely well to itself. However, this also makes it difficult to remove supports.
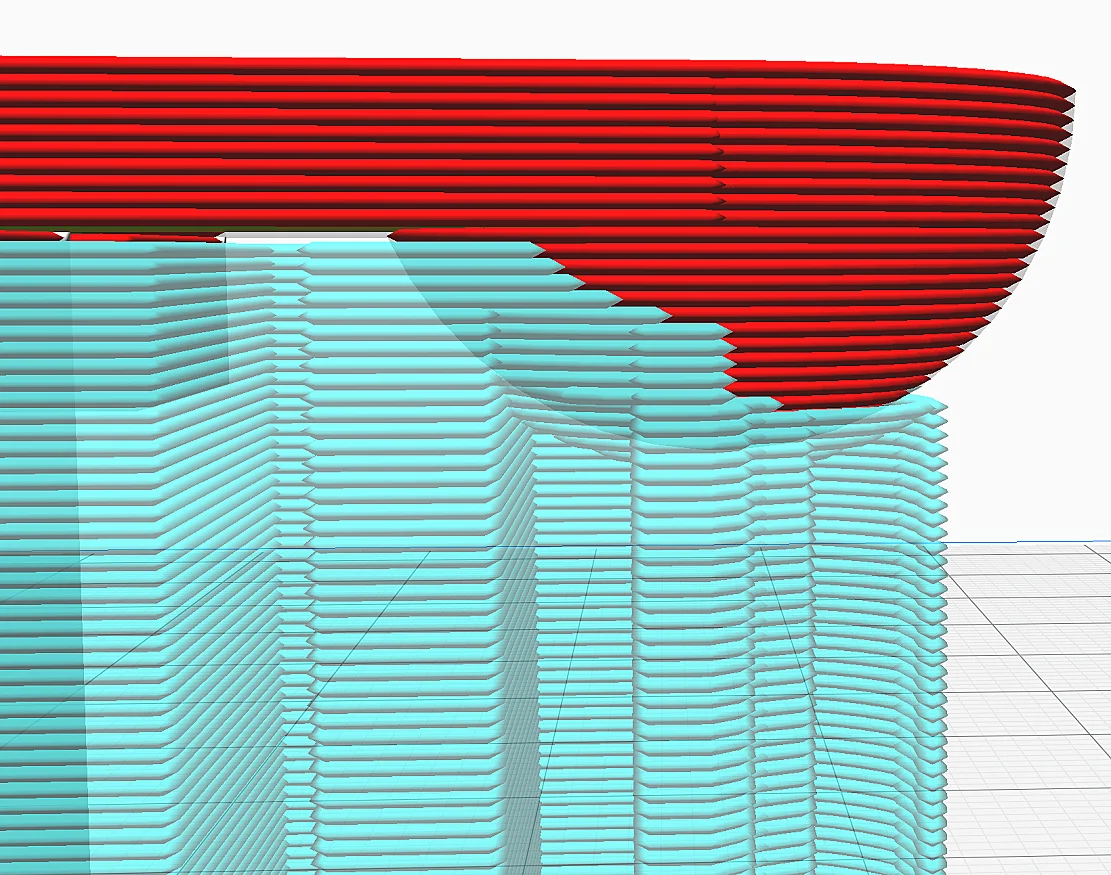
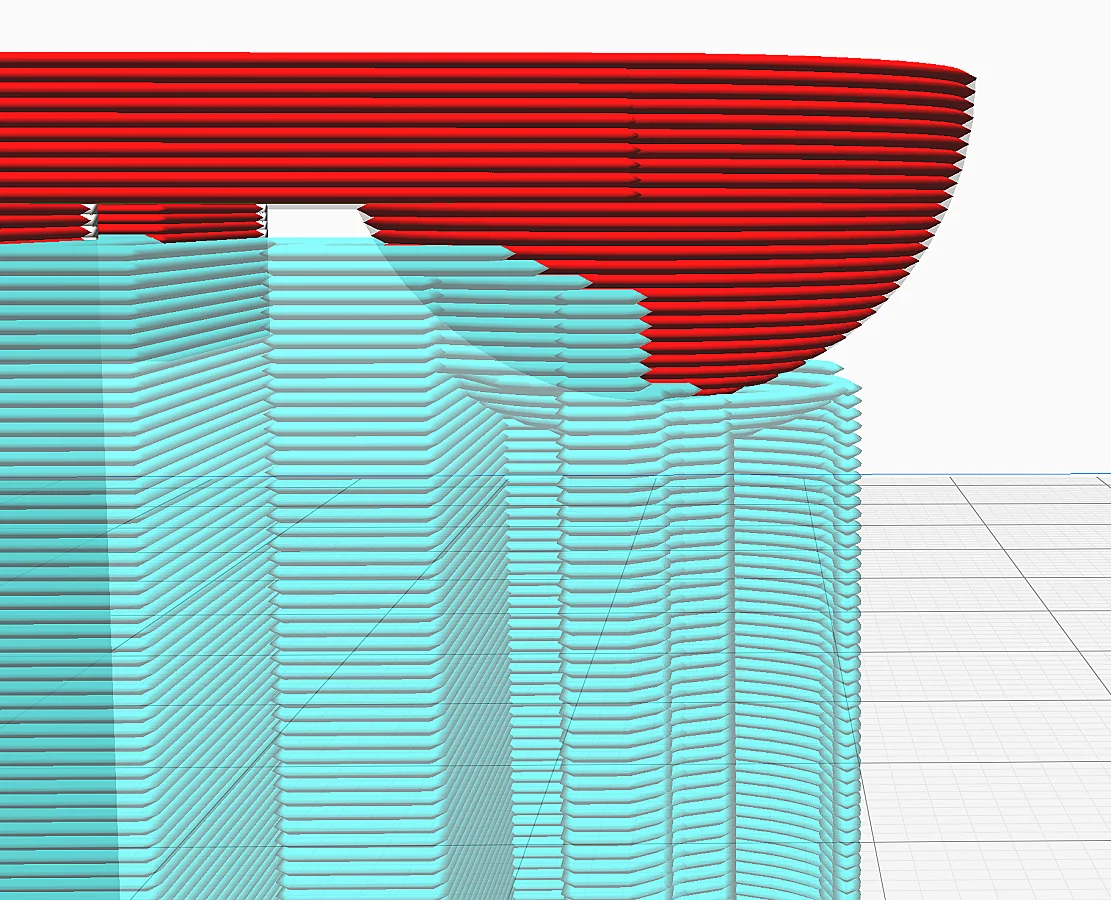
When 3D printing an object with PETG filament that requires supports, it is important to set the distance between the supports and the object large enough. This reduces the adhesion between the supports and the object, making them easier to release.
In Cura, this option is called “Support Z Distance”. Be careful not to set this too high, or the supports will lose their effect. Experiment with a small test object to save filament.
If you want to know more about this topic, check out this guide: PETG Supports Hard to Remove – Best Methods & Settings
How to Avoid Cracks in PETG?
Cracks can destroy a 3D print and be very frustrating. Especially with PETG this error often occurs if you have previously printed mainly with PLA and have not yet become accustomed to the new print settings.
To avoid cracks in PETG 3D printing, the cooling should be reduced or switched off. This gives the hot filament more time to bond with the underlying layer. With PETG, the dimensional accuracy and bridging behavior does not suffer.
Especially with larger objects, incorrectly set cooling rates can have a negative effect and cause cracks. For smaller objects, the cooling rate setting hardly makes a difference.
Wet PETG Filament Leads to Poor Prints
PETG is hygroscopic. This means that it absorbs humidity from the air. This causes the printing properties to deteriorate more and more over time.
It is therefore important that you store your PETG filament dry and protect it from humidity. This is best done in suitable plastic boxes and silica bags. Read more about filament storage in this article.
If your filament is already wet, you can dry it in an oven at about 60°C for several hours. For other methods of drying filament, check out this article.
PETG Strength and Durability
PETG is known for being a middle ground between PLA and ABS. It is relatively easy to print, does not require a closed print volume, and is still very strong and durable.
How Durable is PETG?

PETG is very durable, elastic, tough, weather-resistant and break-proof.
So it’s no wonder that many everyday items that either come into contact with food, have a mechanical purpose or are used outdoors are made from PETG.
Is PETG UV-Resistant?
PETG filament is UV resistant. However, certain additives in some PETG filaments may not be UV resistant.
If you use pure PETG, you won’t see any degradation of the mechanical properties even after years of outdoor use. For some PETG filaments with certain additives, this may not be the case. Especially colors can fade with time.
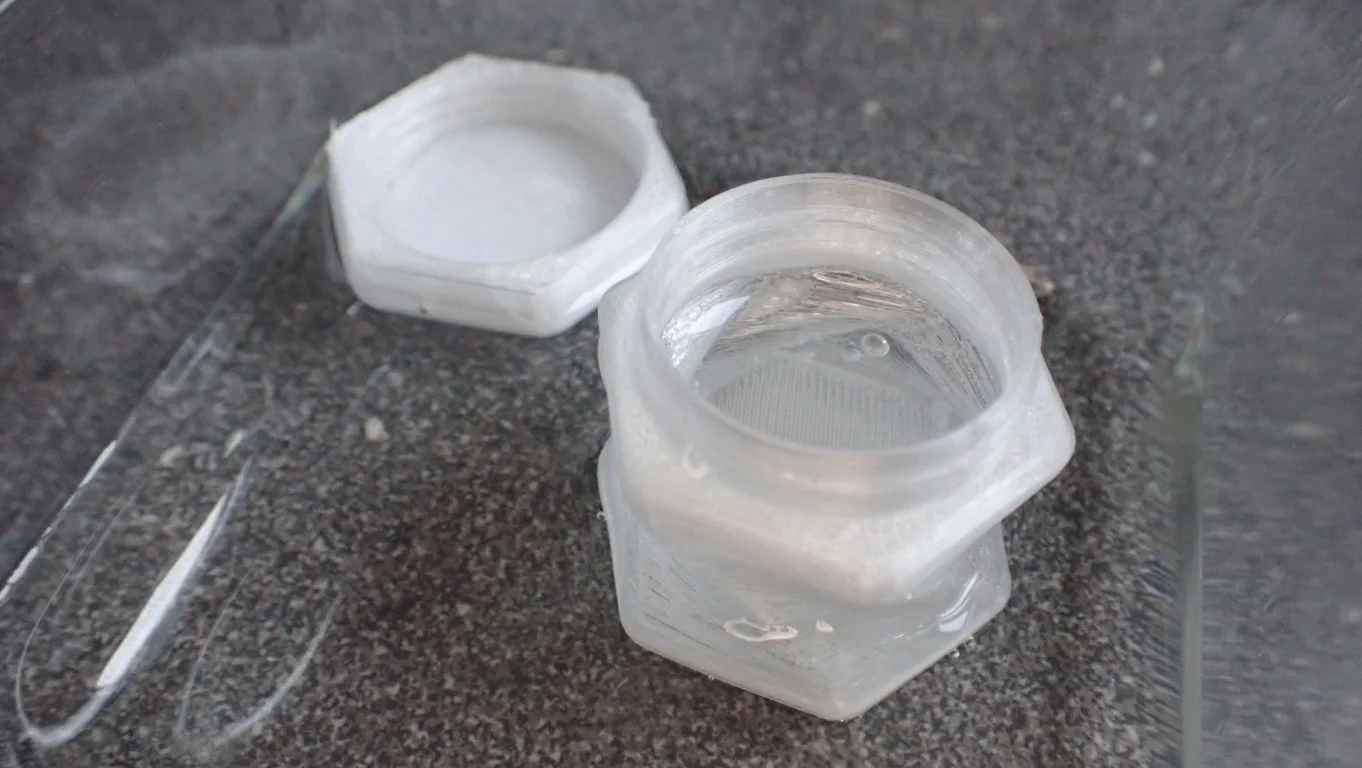
Is PETG Chemically Resistant?
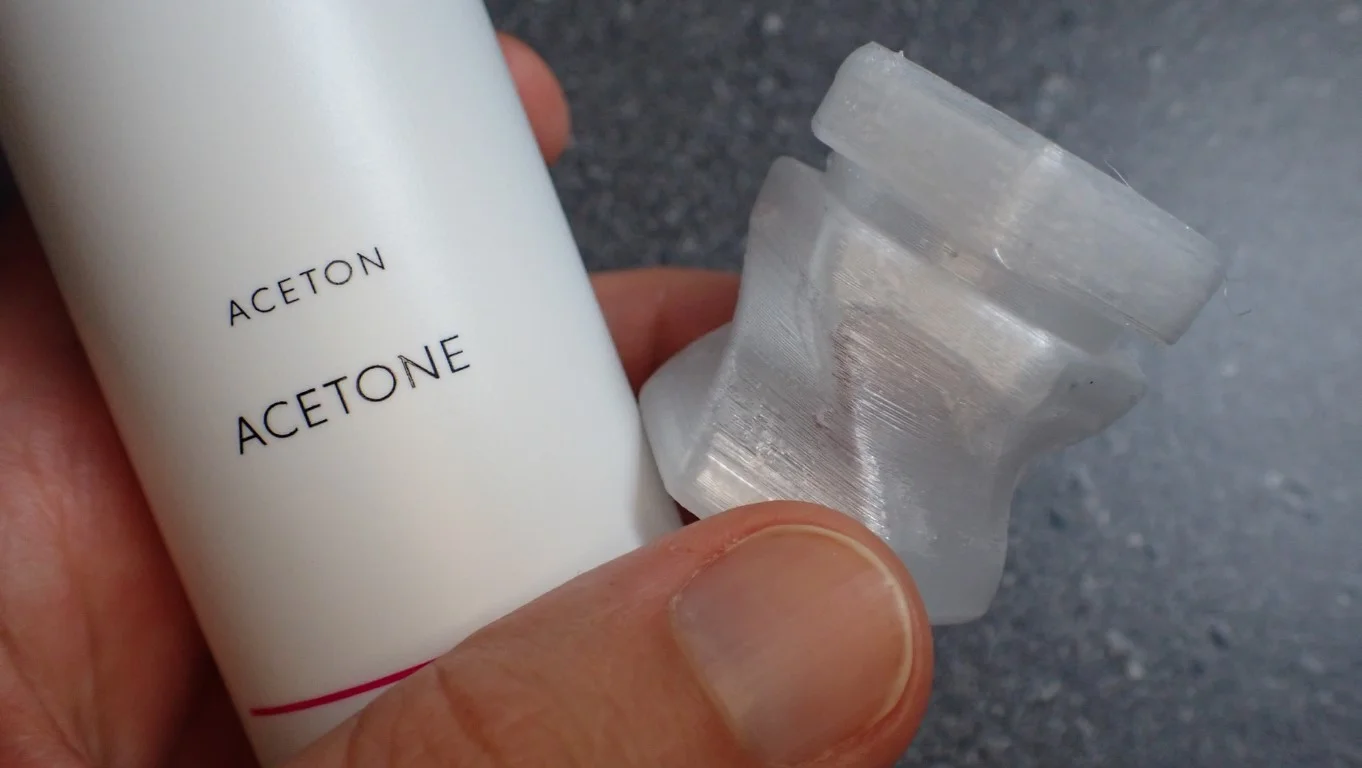
PETG filament is resistant to chemicals. However, certain additives in some PETG filaments may not be chemically resistant.
There is often some confusion about the chemical resistance of PETG. A popular smoothing method for PLA filament is to steam smooth the finished object with acetone. With some PETG filaments, this also works. But this should not be the case, because PETG is chemical resistant…
However, this is due to the fact that certain additives (color pigments, etc.) make the filament vulnerable to certain chemicals. This effect is mostly homogeneous, but sometimes it varies at certain points. This means that with this acetone smoothing method you could smooth the finished PETG object evenly, but with some filaments only unevenly.
Does PETG Dissolve in Water?
PETG does not dissolve in water. It is widely used for food packaging and other containers that need to be waterproof.
The benefits of PETG for food packaging include its durability, which helps keep food fresh and intact, and its sterilization ability. In addition, PETG is a clear plastic that allows for easy identification of the contents.
Is PETG Dishwasher Safe?
Since PETG only softens at temperatures higher than those encountered in a dishwasher and is generally very hard-wearing and durable, 3D printed objects are also suitable for the dishwasher.
You can use PETG to print food packagings such as bottles or other containers and put them in the dishwasher. However, when using 3D printed objects and food, be careful to create smooth surfaces that provide as few crevices for bacteria to form as possible.
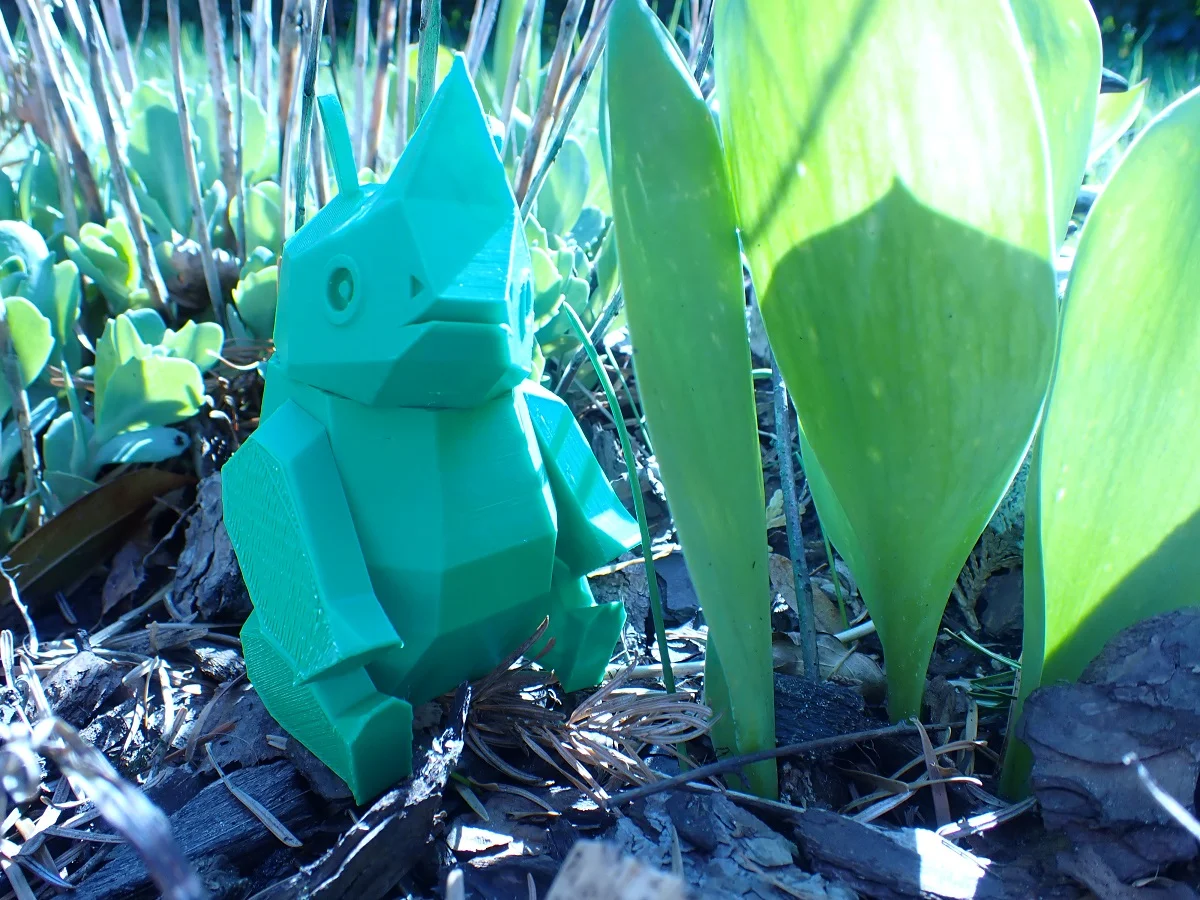
Is PETG Suitable for Outdoor Use?
Since PETG filament is very durable and weatherproof, it is very suitable for outdoor use. The only thing that can happen with PETG filament outdoors is a discoloration of the color pigments by the sun. However, the PETG itself is UV resistant and does not change its properties.
These properties make PETG ideal in the garden and even for very wet applications such as in a bed. I myself use it to label the individual herbs in our raised bed and use it for solutions of all kinds for minor problems outdoors.
Related Post:
Using PETG Filament Outdoors | Practical Guide
PETG Environmental Compatibility
When manufacturing plastic parts, environmental sustainability is very important. To prevent our oceans and the rest of our environment from being further polluted by plastic, it is important to understand how to handle PETG filaments and the products made with them.
Is PETG Biodegradable?
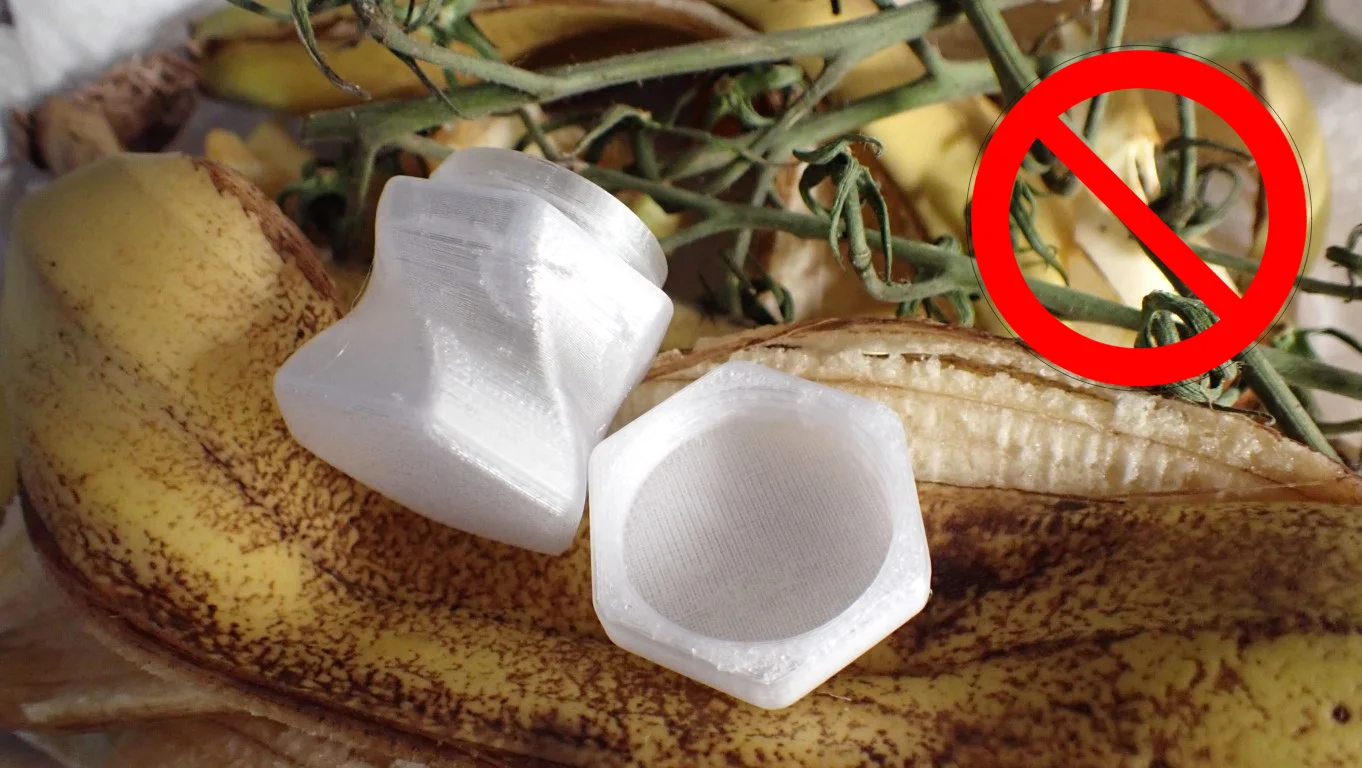
PETG filament is made from oil-based ingredients. It is therefore a plastic that is not biodegradable like PLA filament for example which is made from natural products.
On the one hand, this has the advantage that PETG is very suitable for outdoor use and even remains stable in a compost heap. The downside, however, is that it is just as durable when you throw it into the environment. It can take several hundred years for it to dissolve there!
Can PETG be Recycled?
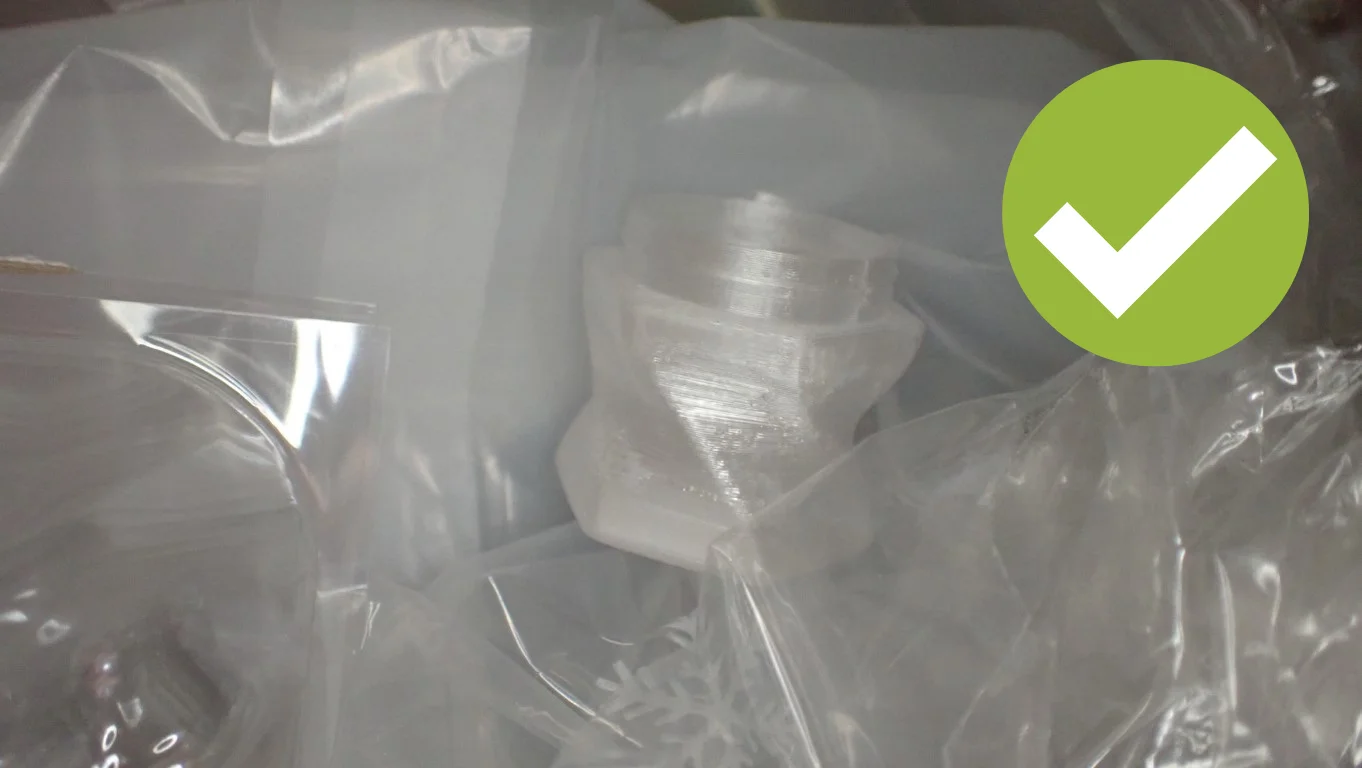
Properly disposed of, PETG can be completely recycled. Even though it is not biodegradable, this negative effect can be circumvented by recycling.
PETG can be recycled relatively well, even if it is reused for filament, the properties are not negatively affected.
Is PETG Food Safe?

PET is a versatile plastic that can be used for a variety of applications, including food packaging, bottles and other containers. PETG filament is made of PET with glycol, making it food safe.
It is made from polyethylene terephthalate glycol, a type of plastic commonly used for food packaging. However, it is important to note that PETG should not be used in contact with very hot foods or beverages as it can leach chemicals into the food.
When it comes to food safety, PETG is a good choice. It is made of food-safe materials and can even be cleaned in the dishwasher or microwave. However, it is important that the surface of the object is as smooth as possible to prevent bacteria nests from forming.
The only catch could be additives or dyes in the PETG – these could negatively affect food safety. So if you want to be on the safe side, you should either use neutral PETG or coat your object with a food-safe coating afterward.
Food-safe epoxy resins and silicones would be particularly suitable for use as coatings.
PETG Post-Processing
If your PETG 3D print is successful, you may need to post-process it a bit. But how do you glue and smooth a PETG object?
Can PETG be Glued?
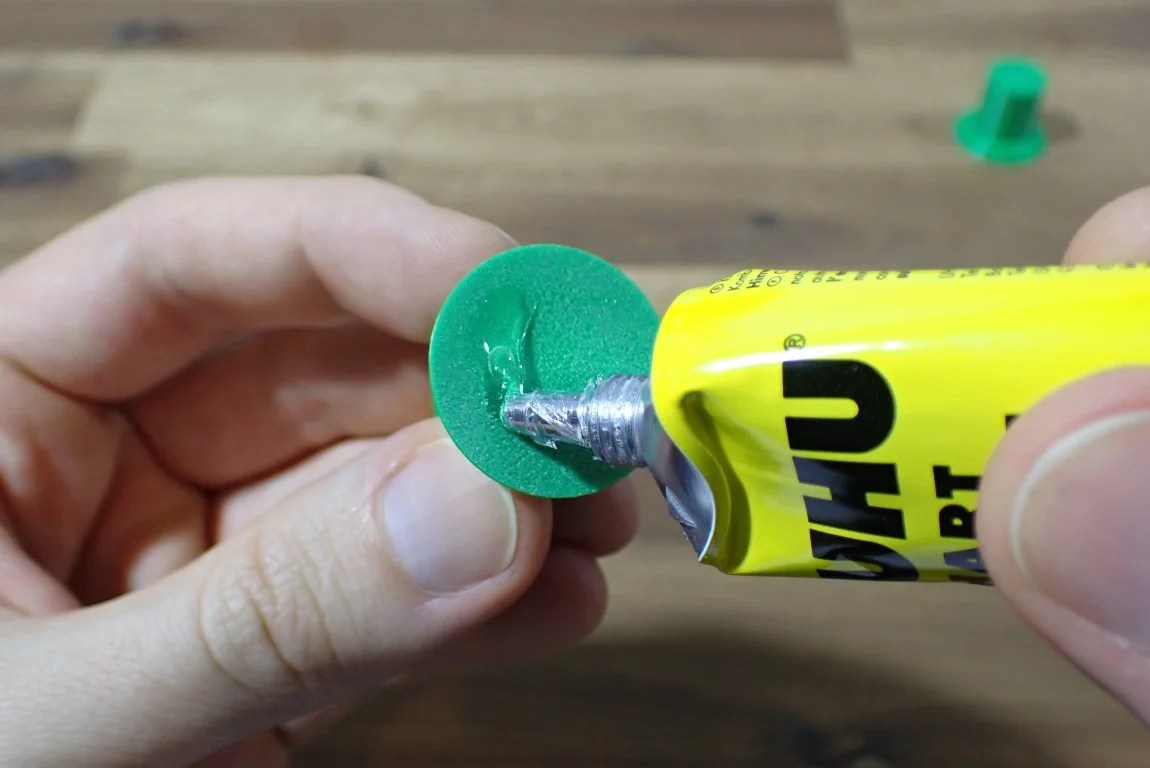
PETG can be bonded with a wide variety of adhesives. Plastic adhesives are suitable for small parts, epoxy adhesives for very strong bonds and hot glue for fast gluing of larger parts.
However, some adhesives can discolor or attack the plastic surface. With PETG this is 99% not the case, but some additives or color pigments in the filament can still be attacked. Therefore, it is best to test the adhesive on a small sample before you apply it to your painstakingly produced object.
What is the Best Way to Smooth PETG?
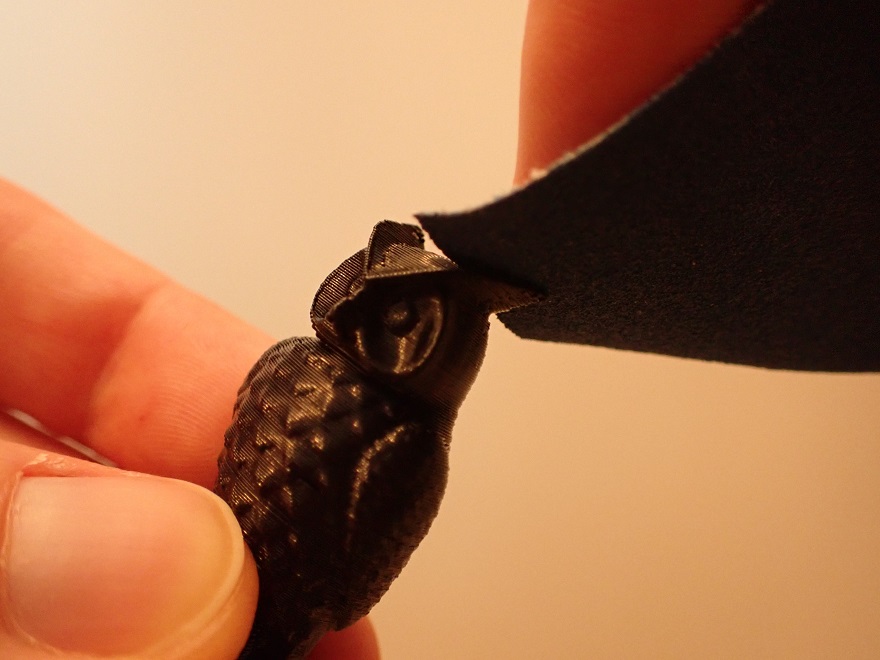
PETG tends to string and in extreme cases also to form blobs on the surface. Such spots can be easily removed with pliers, smoothed with sandpaper and polished. The surface can also be smoothed with synthetic resins or paint.
However, if you coat your PETG object with a layer of paint or other material, you should always remember the slight flexibility of PETG. Either you also use a flexible coating or you must not bend the object too much, otherwise cracks in the coating can occur.
Conclusion
PETG is ideal for 3D printing. It is easier to print than ABS and much more durable and resilient than PLA. With the right print settings, PETG is the best filament for practical purposes.
Due to its weather resistance and resilience, it is also ideal for outdoor use. It is available in many different colors and also transparent, so you don’t have to compromise between mechanical strength and your creativity.
Disclosure: This website is the property of Martin Lütkemeyer and is operated by Martin Lütkemeyer. Martin Lütkemeyer is a member of the Amazon Services LLC and other Affiliate Programs. These are affiliate advertising programs designed to enable websites to earn advertising revenue through advertising and linking to Amazon.com and others. Links marked with * are affiliate links.
