
- Wet Filament: Prevention, Symptoms & Drying - July 18, 2024
- Sovol SV08 – Best PrusaSlicer Settings & Profile - June 26, 2024
- Sovol SV08 – Best Orca Slicer Settings & Profile - June 26, 2024
Disclosure: Links marked with * are Affiliate Links. I earn from qualifying purchases if you decide to make a purchase through these links – at no additional cost for you!
If your 3D printer frustrates you because the filament drips out of the nozzle before printing, you should read our guide.
In our guide, you will learn the causes of this problem. Only if you understand the cause of the problem, can you take the appropriate precautions and settings.
We present you effective measures to avoid filament to drip out before printing in the future.
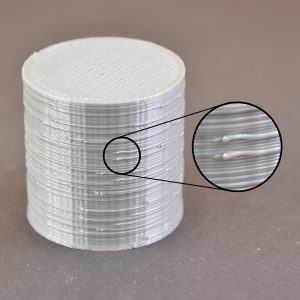
We speak of overextrusion when the 3D printer supplies more filament than necessary. The superfluous material often accumulates on the outside of the three-dimensional object and leads to unsightly print results.
Before we go into detail, these are the most important tips on how to prevent your 3D printer from dripping before printing:
- Set the retraction speed correctly
- Minimize time in the air
- The diameter of the printer nozzle and filament must be correct
- Clean your printer nozzle
- Replacement of worn nozzles
- Minimize pressure in the extruder nozzle by correct coasting settings
- Use only dry filament

You can test and perfect your new print settings on the below mentioned “Blob and Oozing Test tower”.
It was designed to give a worst-case object to test if you still have oozing problems.
Freeze Before Printing
If you bring your 3D printer up to temperature and the print head is not in the ideal position, the filament may leak.
Solution:
Today, innovative generators are on the market that ensure a perfect position of the print head before the heat is ramped up.
We recommend the majority of Gcode generators.
However, if you manually preheat at the beginning of the printing process and have no filament left, you can easily prime the hot end by manually extruding a little material. Press the extrusion button a few times until the filament flow is even.
Remove the excess filament and start 3D printing immediately.
Covering or Wetting
A common misprint is stringing. If your objects have unsightly filament hairs, the material will seep out of the nozzle. The filament leaks out unintentionally and drastically reduces the quality of your three-dimensional object.
The stringing problem usually occurs when the extruder moves from one place to another.
Solution:
If you are working with Simplify3D, you can solve this problem by using the appropriate settings.
Most often, the setting of the retraction can combat excessive stringing.
If you activate retraction and your extruder has printed a section of the object, this countermeasure takes effect. The filament is pulled back into the nozzle. Only when it is time to start printing again, the material is pushed back into the nozzle and extruded from the tip.
You activate the setting of withdrawal by clicking on “Edit process settings”. This will take you to the Extruder tab.
Full articles:
- PLA Stringing Guide: 12 Solutions to Avoid Hairs on your Object
- TPU Stringing Prevent – Try these settings
Extraction Removal
The most important retraction setting is the retraction distance. The retraction distance determines how much filament is pulled out of the nozzle. The more material the nozzle pulls back, the less chance there is of filament unintentionally leaking out of the nozzle while the print head is moving.
The majority of direct drive extruders require a retraction distance between 0.5 and 2.0 mm.
If you have a Bowden extruder, you have to choose a larger retraction distance.
Since the distance between the heated nozzle and the extruder drive wheel is longer, a value of up to 15 mm may be required.
Should the stringing problem occur, it is advisable to increase the retraction distance step by step by one millimeter.
Retraction Speed
Another important retraction setting is the retraction speed.
This value determines whether the filament is pulled back quickly or slowly.
If the selected retraction speed is too slow, there is a risk that the liquid plastic will slowly seep through the nozzle. The filament therefore leaves the nozzle before the extruder has reached its new destination.
If you set the retraction speed too fast, there is a high risk that the 3D filament in the nozzle will come off the hot plastic. There is also a risk that parts of your filament will be sanded off if the drive wheel moves too fast.
Usually the retraction works best when the retraction speed reaches the so-called sweet spot. This is between 1200 and 6000 millimeters per minute, i.e. at 20 to 100 millimeters per second.
Fortunately, the slicer software Simplify3D has already provided numerous pre-configured profiles that can serve as a starting point for the ideal retraction speed. However, the perfect value varies depending on the filament used. So you will have to experiment to find out at which retraction speed the filament will not come out of the nozzle unintentionally.
Temperature Adjustment
After you have checked the settings regarding the retraction, you should turn your attention to the temperature of the extruder. Too high extruder temperature is the second most common cause of the problem of excessive stringing.
If the temperature is too high, the filament in the nozzle suffers from too low a viscosity and can therefore exit the nozzle more easily.
If the filament is heated too much, the fan will not be able to cool the 3D material accordingly. As a result, the liquid filament runs out of control.
First reduce the extruder temperature by five degrees Celsius and see if the stringing problem improves. If there is no improvement, minimize the temperature by another five degrees Celsius. Even minimal changes can significantly affect the final quality of your three-dimensional object.
Adjust the setting by clicking on “Edit processor settings”.
Select the “Temperature” setting on the tab and select your extruder from the list on the left, double-click on it and edit the temperature setpoint. Reduce the extruder temperature only in small steps of five degrees Celsius!
Movements Over Free Surfaces
As already explained, the stringing problem occurs when your extruder moves from A to B and when liquid plastic seeps out of the nozzle during this movement.
The length of the movement over the free surfaces has a great influence on the thread pulling.
Make sure that the movements of the print head over the open areas are as short as possible. The reason for this is that with short movements there is less time for the filament to seep out of the nozzle. The probability of stringing problems is greater with long movements.
Fortunately, the Simplify3D slicer software has useful functions that help you reduce the length of these movements. The smart software can automatically adjust the so-called travel distance, thus ensuring that the distance the nozzle travels over the free space is extremely short.
In many cases, Simplify3D is even able to find a driveway without crossing an open space. This way you can prevent the filament that exits before printing from leading to the stringing since the print head is never outside.
Activate this function by clicking on “Tab advanced”. Select the setting “Avoid outlines for travel movements”.
Speed
Speed plays a decisive role. If you increase the speed of your 3D printer, the time it takes your extruder to move will be reduced. As a result, the filament has less time to exit the nozzle.
Check the movement speed of your 3D printer by going to the process settings. Click on the Speeds tab.
The speed of movement of the two axes indicates the speed from one side to the other. In most cases there is a direct correlation between the speed of movement of the X and Y axes and the time the extruder is above the free surface.
If your 3D printer is capable of moving the print head faster, you should increase the speed gradually.
Filament and Nozzle Diameter
Be sure to match the diameter of the filament with the diameter of the nozzle. Excellent printing results are only possible if the values given correspond to the parameters.
The respective diameter is indicated on the filament packaging. Most materials have a diameter of 2.85 or 1.75 millimeters.
If you are working with an older version of Slicer, you have to enter both parameters manually.
Flow Rate
The flow rate has a decisive influence on the printing result. Check the flow rate and make sure that it is 100 percent. This value is ideal for most 3D printers.
However, some printers require a flow rate that can vary slightly. In this case, you should reduce the flow rate by a few percents.
Line Width
Some users report that the print result is improved if they reduce the line width slightly. In general, the diameter of the nozzle should match the width of the line, but even slight changes can improve the print result.
Material Extruder
Only if the appropriate amount of filament is extruded, the basis for an excellent print result is created. Therefore you should calibrate the material extruder. Only then can you ensure that the appropriate amount of filament is delivered.
For this, you have to check steps per millimeter and readjust them if necessary.
Replacing the Nozzle
Nozzles are components that show signs of wear after frequent use. Especially if you use an abrasive filament, brass nozzles suffer and the diameter increases.
An increased diameter of the nozzle bears the risk of more liquid filament escaping and causing unwanted dripping before printing. For this reason, you should replace worn nozzles with new ones.
Cleaning the Nozzle
Only if the nozzle is free of filament residues and clean, you can ensure a regular material flow.
Full article: Cleaning a 3D Printer Nozzle | All Methods Step by Step
Coasting
If too much pressure builds up in the extruder nozzle, filament can unintentionally come out of the nozzle as it is pressed out.
If drops form at the end of a layer, you should activate the Coasting setting. Only in this way is it possible to relieve the pressure built up in the extruder, as the extrusion switches off shortly before the end of printing. Increase the value gradually until no more drops are visible.
Starting Point
You can avoid unsightly drops on your object by manually selecting the starting point. Choose a starting point that is on the inside of your object. Should a drop of filament escape, it will not reach the outside.
Filament
Only use dry filament, as wet filament supports printing errors. The absorbed moisture is transformed into steam in the nozzle and the resulting pressure can only be released at the nozzle outlet. In most cases, the pressure reduction leads to filament dripping out of the nozzle.
Always pack your filament roll airtight after use, as 3D material tends to absorb water molecules. Use vacuum pouches for this purpose, as they offer ideal protection against moisture and air.
In addition, you should only remove your filament from the original packaging when a print job needs to be completed.
Full article: Drying Filaments: PLA, ABS, Nylon and Co.
Conclusion
If you want to prevent the unwanted dripping of filament before printing, you can use our 16 tips. Check your chosen slicer settings, make only minor changes and work through one point at a time!
Disclosure: This website is the property of Martin Lütkemeyer and is operated by Martin Lütkemeyer. Martin Lütkemeyer is a member of the Amazon Services LLC and other Affiliate Programs. These are affiliate advertising programs designed to enable websites to earn advertising revenue through advertising and linking to Amazon.com and others. Links marked with * are affiliate links.
