
- Wet Filament: Prevention, Symptoms & Drying - July 18, 2024
- Sovol SV08 – Best PrusaSlicer Settings & Profile - June 26, 2024
- Sovol SV08 – Best Orca Slicer Settings & Profile - June 26, 2024
Disclosure: Links marked with * are Affiliate Links. I earn from qualifying purchases if you decide to make a purchase through these links – at no additional cost for you!
Stringing is a frequently occurring problem with 3D printing, which can be observed with various filaments.
When the printer nozzle moves from one position to another without extruding material, it is possible for molten plastic to escape anyway. This material solidifies and produces the strings between the already printed parts. The result is thin hairs of molten plastic that wrap around the 3D printed model.
Normally, the printer nozzle should not extrude plastic while moving without printing, but molten plastic often escapes even in places where it is not desired and coats the 3D-printed object with the aforementioned strings.
Most often, the reasons for stringing are wrong retraction settings and too high a temperature at the hot end. For example, PETG* requires relatively high melting temperatures and is therefore particularly susceptible to stringing. However, the problem also occurs with filaments such as PLA* and ABS*.
In the following article, we will show you some 3D printer test models that you can use to calibrate your 3D printer so that you will no longer have a problem with the notorious strings on your 3D printed objects in the future. You’ll also learn what preventative measures you can take to keep your device calibrated and avoid faulty prints from now on.

Read the full calibration guide:
3D Printer Calibration: Step-by-Step to Perfect Results
Table of Contents:
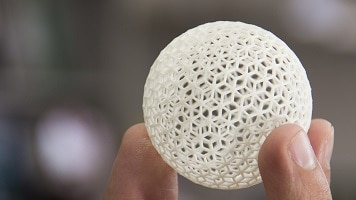
Calibration Cube for Optimizing Printer Settings
Calibration cubes are simple geometric shapes that allow you to optimize the settings of your 3D printer. They ensure that you can produce your prints with maximum precision and accuracy.
Usually, semi-mounted 3D printer kits and lower-end devices are not calibrated at the factory, so calibration cubes are especially handy for such printers to adjust their settings after setup and subsequently produce high-quality prints.
There are different ways to use calibration cubes. However, before you can start, you should calibrate the extruder of your 3D printer. This will ensure that the defects you have are purely mechanical and not caused by inaccuracies in the extrusion process.
Once your extruder is calibrated, you have the following options with the calibration cubes:
Adjusting the step/millimeter settings
The step/millimeter settings are responsible for telling your printer how much to rotate each motor to complete a millimeter step. If you are not familiar with your 3D printer’s motion system, you can also set these settings using a calibration cube.
Adjusting the material settings
If you already know how your 3D printer’s motion system works, you can use Prusa Research’s step/millimeter calculator to determine the exact settings. This eliminates all other sources of error besides the printer material. If your printouts show bulging layers or gaps, this indicates insufficient calibration of your extruder and you should recalibrate it immediately.
If your 3D printed models are generally printed too small, it is most likely due to material shrinkage. To correct this error, adjust the “Shrinkage percentage” setting in your slicer. To determine the starting value, divide the existing deviation by the desired dimension.
Testing the printing precision
With a calibration cube, you can test and optimize the precision of your 3D printer. This allows you to achieve tighter clearances when 3D printing mechanical components.
As you can see, there are different applications for calibration cubes. Below you will find an overview of the most popular designs in the 3D printing community:
The Best Stringing Test Objects
The Classic Calibration Cube
The classic calibration cube is a cube with a dimension of 20 millimeters and the areas X, Y and Z. Its simplicity and ease of use make it particularly popular.
When you print this cube, you should pay special attention to the fact that every single dimension is exactly 20 millimeters. The classic calibration cube was developed by the well-known manufacturer iDig3Dprinting, who also shared the design on Thingiverse.
The dimensional accuracy test
The dimensional accuracy test is a reinforced version of the classic calibration cube. This cube comprises four individual cubes of 25 millimeters, 20 millimeters, 15 millimeters and 10 millimeters.
It also has a notch on the front to indicate alignment. The dimensional accuracy test is particularly useful for identifying any material shrinkage that may be present. If the dimensions for each layer vary, you should adjust the shrinkage settings in your slicer software as described above. The dimensional accuracy test was designed by Make Magazine and is available for you on YouMagine.
Cali Cat – the calibration cat
The Cali Cat is a calibration cube, which has the shape of a cat and can therefore be used as a decorative piece even after the calibration test has been completed.
The head and the tail of the Cali Cat are different sizes, so you can use this model to determine the material shrinkage, just like the dimensional accuracy test described before. The Cali Cat was designed by Dezign and you can download it from Thingiverse.
As you can see, a calibration cube doesn’t have to be cube-shaped. However, they are great for optimizing your 3D printer’s settings to produce more accurate mechanical prints in the future. With a calibration cube, you can test and improve the tolerances of your device to create interlocking components.
In addition to the calibration cubes, there are many other designs that you can use as stringing tests or to calibrate your 3D print:
Other Popular Test Objects to Calibrate Your 3D Printer
3D-Benchy
3D-Benchy is probably the best-known calibration design that allows you to test your printer all around. 3D-Benchy helps you identify overhangs or under- or over-extrusion and determine the exact settings you need to make to produce perfect prints in the future.
This calibration design was created by CreativeTools and has now been printed by hundreds of 3D printers using a wide variety of materials. You can find 3D-Benchy on Thingiverse for download.
Mascot Phil A. Ment
The calibration design Phil A. Ment is the mascot of the manufacturer MatterHackers. With the help of this design, you can test your printer for overhangs, small embossed details, vertical and horizontal cylinders or bridges, for example. Phil A. Ment has now been printed using a wide variety of printers and materials and with a record size of 1397 millimeters. The design is available on Thingiverse.
Smart Compact Temperature Calibration Tower
This tower is a calibration design that can test overhangs, bridges, strings, and even the individual functions of your 3D printer for printing curved shapes. With the Temperature Calibration Tower, as its name suggests, you can easily optimize the temperature settings of your printer. This design was created by user Zolee Gaa and is available on Thingiverse.
All-In-One 3D Printer Test
As the name suggests, the All-In-One 3D Printer Test is a universal test for your 3D printer that can not only identify overhangs, bridges and stringing but also detect faulty extrusion, incorrectly set temperature or belt tension. If you want to give your 3D printer an all-around test, you should opt for the All-In-One 3D Printer Test. It was designed by user majda107 and is now available on Thingiverse.
PolyPearl Tower
With the PolyPearl Tower, you can test your 3D printer for bridges, curves, overhangs and stringing, for example, and thus calibrate the printer settings as well as the settings for your filament. The PolyPearl Tower was designed by Polymaker_3D and is available on Thingiverse. The community of Thingiverse has already tested the tower on different printer models and with different filaments.
Open source printer evaluation
Designed in a collaboration between Kickstarter and Autodesk, this open-source model gives you a standard test to evaluate your 3D printer’s performance. With this calibration design, you can test your device for bridges, overhangs, and fine details to achieve higher accuracy, resolution, and better alignment. You can find this open-source model on Github.
Calibration test object for leveling the print bed
Especially the correct alignment of your print bed can be the most difficult part of the printer calibration. However, with the right calibration test object, you can easily level your print bed and ensure a flawless first layer of your print objects in the future. This design was created by user pgreenland and is available on Thingiverse.
The ultra-fast and economical stringing test
With this calibration design, you can test the temperature, cooling as well as the retraction function of your 3D printer in no time. It was designed by a user who simply calls himself alaorath and has already been used by numerous Thingiverse users to free their printouts from strings. You can also find it for download on Thingiverse.
Effective Measures for the Prevention of Stringing
As with any other mechanically operated device with moving parts, calibration plays an important role in ensuring consistent quality in a 3D printer. A 3D printer can only produce error-free and accurate prints if it is calibrated regularly.
In the following, you will learn step by step which aspects of your device should be checked regularly so that printing errors such as stringing can be avoided in the future.
Related Post:
PLA Stringing Guide: 12 Solutions to Avoid Hairs
Activating the retract function
In particular, activating the retract function ensures that cobwebs and unsightly stringing cannot occur in the first place. The retract function is responsible for ensuring that the extruder does not lose liquid filament when it travels without printing, which in turn could make the hairs stretching over your 3D-printed object.
If you activate the retract function, the molten plastic is prevented from running after the print head when it is moved, as the filament is retracted into the extruder. Once the nozzle is at the next target position, the printing can continue and new filament es extruded. Most slicer programs have the retract function enabled by default, but you should always double-check this setting.
If the retract function is enabled, but you still detect stringing on your print models, the following two options are still available:
Retraction distance
The retraction distance is the most important retract setting. It defines how far the filament should move. If the filament is retracted further into the nozzle, the likelihood of stringing still occurring decreases. However, if the material is pulled in too far, it may not be available at the hot end once printing is to continue.
The optimum retraction distance varies between extruders. Experience shows that a Bowden extruder requires a bigger retraction distance. This is because the nozzle and the drive wheel are farther apart. To get the perfect value for the retraction distance, you should make some test prints. You can find suitable designs for this on Thingiverse.
Retraction speed
The retraction speed defines how fast the material should be retracted into the nozzle. A higher retraction speed reduces the risk of stringing. When the filament is retracted so fast that it cannot begin to leak over a void onto the build plate and thus onto the print model.
However, if you set the retraction speed too high, the filament could separate inside the nozzle; in the worst case, too rapid movements will cause the material to be ground up and the nozzle to become blocked. It is also possible that areas are created where the liquid plastic is not extruded at all.
It is therefore important that you find the optimum retraction speed. This can change with the used print material, so you should make some test prints for this purpose. However, you can also find good tips on the optimal retraction speed in various 3D printing communities. There are already preconfigured profiles that you can use as a starting point.
The best retraction settings also depend on the extruder you are using and the filament you have chosen. For example, ABS and PLA are suitable for a speed of 40 to 60 millimeters per second and a pullback distance of 0.5 to 1.0 millimeters when printed with a 3D printer that has a direct drive extruder. Bowden extruders, however, normally need a speed of 30 to 50 millimeters per second with a retract distance of approximately 2.0 millimeters. These values are variable and depend on many different variables.
If you define the optimal retraction settings, you will no longer have to deal with the stringing problem!
Related Post:
How to Prevent TPU Stringing – Try these Settings!
The correct temperature settings
If the temperature of your 3D printer rises, the print material will liquefy and probably begin to drip out of the nozzle. Setting the temperature lower will reduce this likelihood, but too low a temperature can cause the filament to not melt sufficiently. The result will be problems during extrusion.
The optimal print temperature varies between filaments and other print settings. In general, however, you should reduce the temperature immediately if a string is present. It is best to do this in steps of 5 to 10 degrees Celsius. In general, you should avoid reducing the temperature beneath the minimum specifications of the manufacturer.
The generally recommended temperatures for the more popular filaments are:
- PLA: 180 to 220 degrees Celsius
- ABS 200 to 250 degrees Celsius (the print bed is heated to 90 to 100 degrees Celsius)
- PET: 215 to 235 degrees Celsius
- TPE: 210 to 240 degrees Celsius (the print bed is heated to 20 to 70 degrees Celsius)
- PVA: 160 to 190 degrees Celsius (the print bed is heated to 60 degrees Celsius)
The Smart Compact temperature calibration tower mentioned earlier is a convenient way to determine the perfect temperature for any filament.

Adjusting the print speed
The printing speed also influences the stringing behaviour of 3D printers. If the nozzle takes too long to move between two points, the liquid filament just drips further out of the nozzle. This, in turn, can lead to stringing. However, if the extruder moves faster, this does not give the filament enough time to seep out.
If you increase the speed of your nozzle while it is not printing, you can avoid stringing. However, if you set the temperature too low and the print speed too high, extrusion can occur because the filament has too little time to ooze. For most print materials, a speed between 190 to 200 millimeters per second is recommended. MatterHackers, however, has found that a speed of 150 millimeters per second works better for most devices.
Before you make any adjustments, you should check what speed your 3D printer is currently using. The speed of movement of the X and Y axes is the speed of travel from on site to another. This speed influences how long it takes the nozzle to move across an empty space. Certain slicer programs give you the option of using a specific function to ensure that the travel distance is short enough to reduce filament leakage, even if this means avoiding empty spaces altogether. Another setting allows you to accelerate the nozzle while it is not actively printing.

Related Post:
PLA Print Speed: Finding Optimal Settings
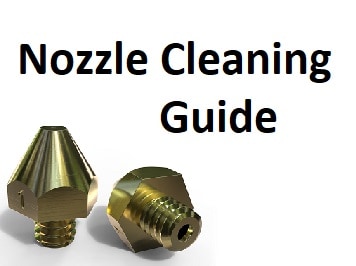
Cleaning the nozzle before printing
If you use your 3D printer for a longer period of time, it is possible that the filament leaves a thin layer in the nozzle. This is especially true if you are using a single filament such as PETG*. This residual layer can cause stringing to occur on your 3D printed objects, as the resulting filament strands can stick to the surface of your models. To prevent this, it is therefore important to clean the nozzle thoroughly before each printing process to remove any residue from previously used filaments.
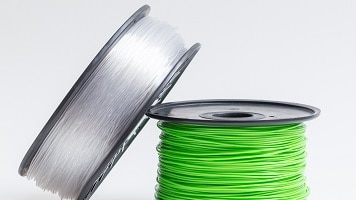
Correct storage of the filaments
PLA filament in particular tends to absorb moisture. Once moisture is present in the print material, it tends to turn into moisture when the plastic is heated.
This vapor in turn mixes with the liquid plastic and this increases the likelihood of filament leaking out of the nozzle if it is traveling across an empty space. For this reason, it is important that you store your print material in dry place such as a plastic box.
Disclosure: This website is the property of Martin Lütkemeyer and is operated by Martin Lütkemeyer. Martin Lütkemeyer is a member of the Amazon Services LLC and other Affiliate Programs. These are affiliate advertising programs designed to enable websites to earn advertising revenue through advertising and linking to Amazon.com and others. Links marked with * are affiliate links.
