
- Wet Filament: Prevention, Symptoms & Drying - July 18, 2024
- Sovol SV08 – Best PrusaSlicer Settings & Profile - June 26, 2024
- Sovol SV08 – Best Orca Slicer Settings & Profile - June 26, 2024
Disclosure: Links marked with * are Affiliate Links. I earn from qualifying purchases if you decide to make a purchase through these links – at no additional cost for you!
The elephant foot is one of the most common printing errors. It can have many causes and is therefore often difficult to fix. However, there is a solution for each of these causes!
With an elephant foot, either only the first layer or several layers are wider than they should be. It is often caused by a badly leveled print bed, a too small Z-offset or a too high print bed temperature.
Besides these causes, there are also a few other triggers for an elephant foot on your 3D print. In this article, you will learn all the methods with which you can fix these causes.
If you can’t find the cause or an elephant foot can’t be avoided because of the heavy weight of the object, there are also some emergency solutions with which you can compensate the elephant foot.
Table of Contents:
Key Takeaways
- Solutions: Print bed leveling; optimize first layer settings; reduce print bed temperature
- Workarounds: Set a negative horizontal expansion for the first layer; chamfers on the underside; use a raft.
- With particularly large/heavy objects, the weight of the object itself can squish the lowest layers as they are warmer and therefore softer due to the warm print bed. Besides a reduction of the print bed temperature, only the workarounds for compensation can help.
What is an Elephant Foot in 3D Printing?
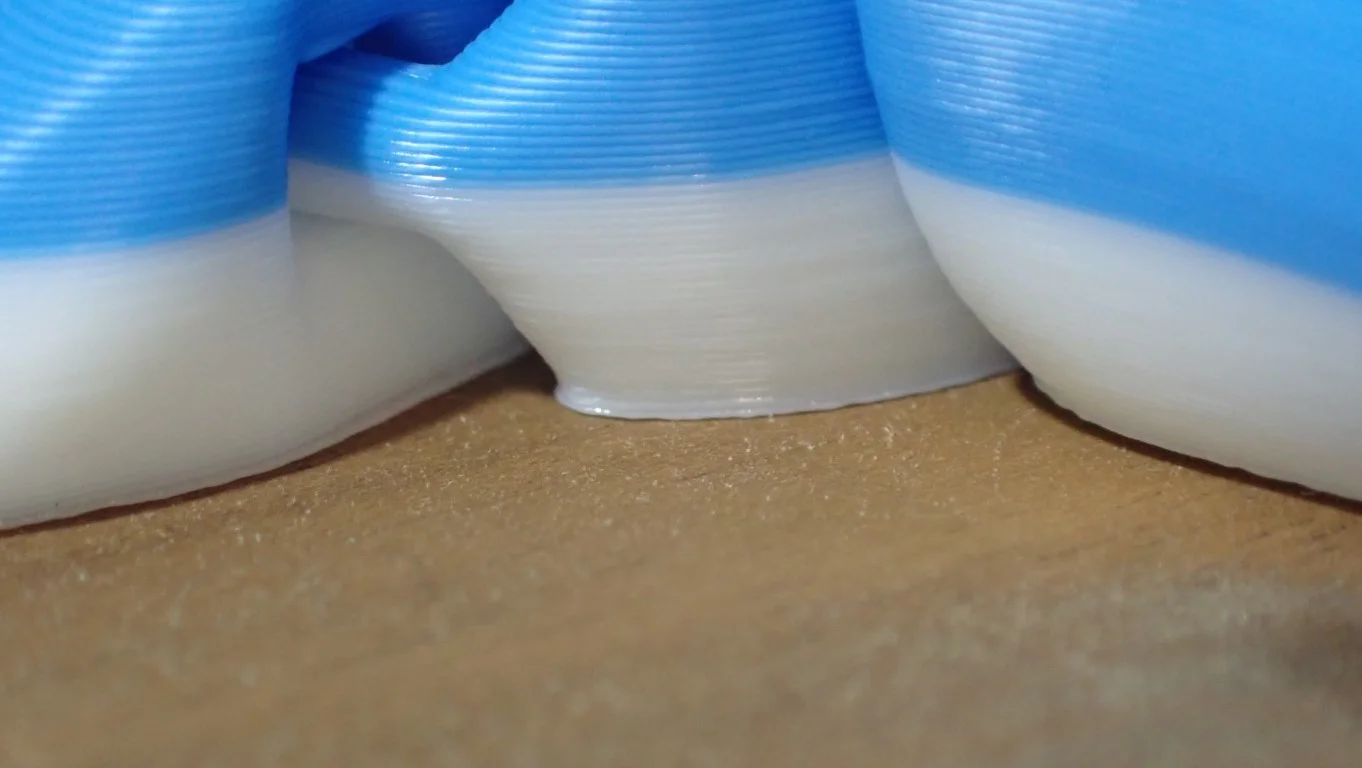
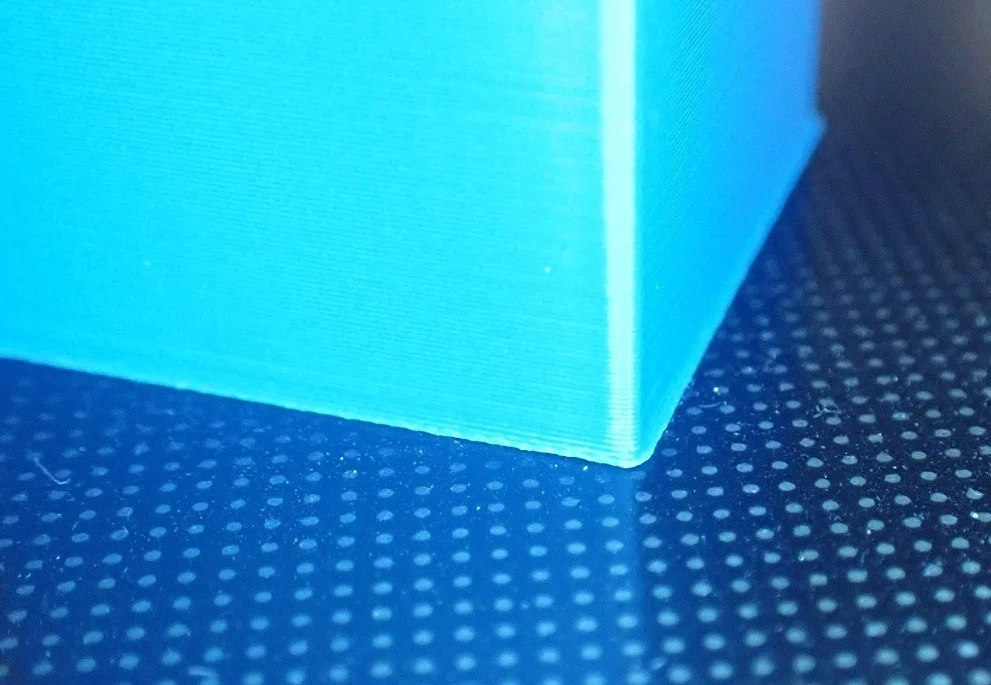
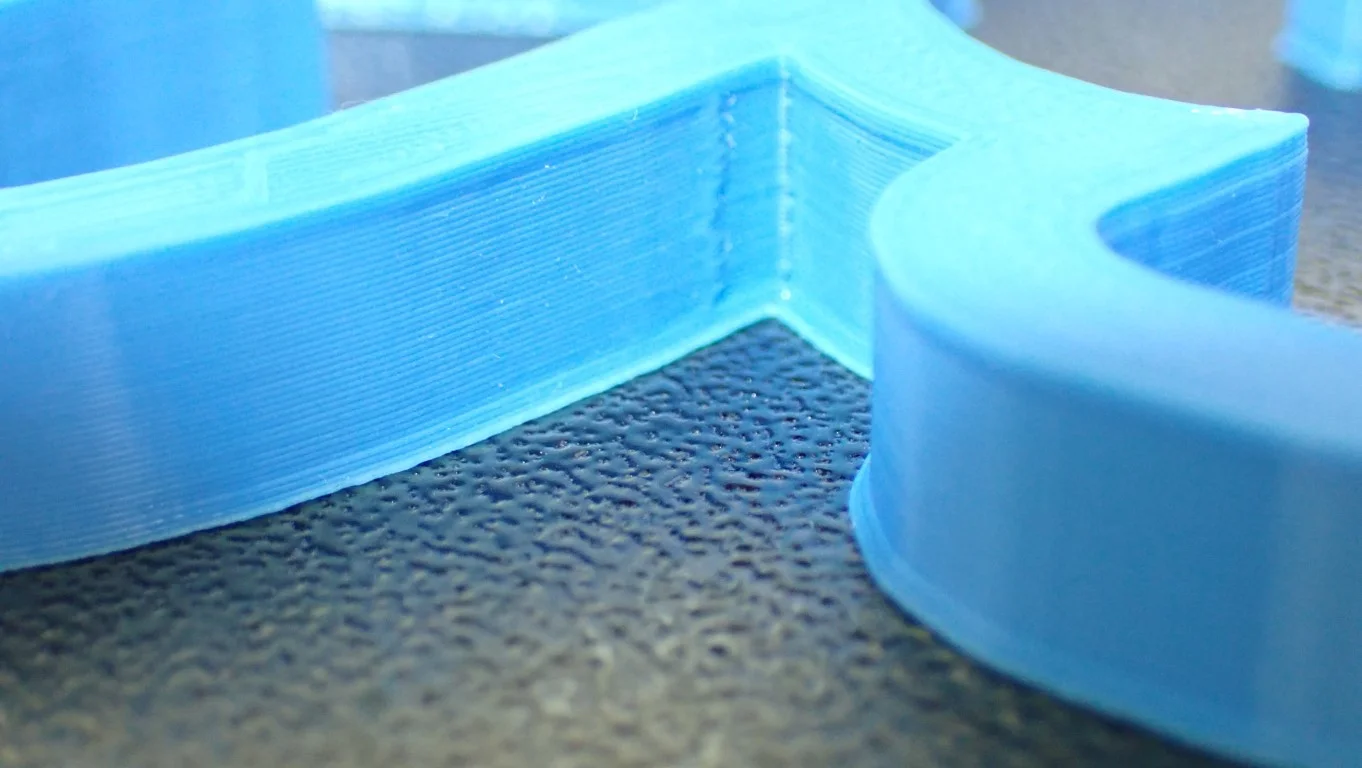
In 3D printing, an elephant foot describes the phenomenon where the bottom of the object is wider than it should be. In the case of a cylinder, the effect would look like an elephant’s foot.
The first layer of a 3D print is by far the most important. It determines how well the object adheres to the print bed. However, if the first layer is not properly formed and has, for example, the dreaded elephant foot, it can also create other problems. For example, it makes it difficult to join mechanical parts together and forces you to smooth the first layers.
But also the optics suffer from an elephant foot. Especially if it is very pronounced, it often destroys the overall appearance of the object. With many filaments, it is also difficult to rework an elephant foot so that it is no longer noticeable.
In the rest of the article, we’ll go over all the solutions you can use to prevent the causes of an elephant’s foot, and if that doesn’t work, there are some emergency solutions as well.
How to Avoid Elephant’s Foot in 3D Printing
To prevent or eliminate an elephant’s foot on your 3D print, there are 4 solutions that can fix the cause and 3 emergency solutions that can eliminate the symptoms. All these solutions are highlighted in detail in this article. The list determines the order in which they should be applied:
- Level the print bed & calibrate the Z-offset
- Optimize the settings of the first layer
- Reduce the print bed temperature
- Check the eccentric nut of the Z-axis
- [Workaround] enable horizontal expansion for the first layer
- [Workaround] use chamfers
- [Workaround] use a raft
To test whether the solutions work, you should use a test print where an elephant’s foot is clearly visible. Classically, an XYZ calibration cube is used for this, where you can compare the width of the lower layers with the width of the upper layers using a caliper gauge. With strong elephant feet, your eye is of course also sufficient.
Level the Print Bed & Calibrate the Z-Offset
An elephant’s foot can be caused by a poorly leveled print bed or a too low Z-offset. As with many other print errors, the first step is always to re-level the print bed and set the Z-offset correctly.
Usually, the layer height of the first layer is set higher than the rest of the model. This is not only to increase print bed adhesion but also to compensate for minor unevenness on the print bed. However, if the print bed is very uneven, only one side of the object may have an elephant foot and the other side may not. This is a very clear sign that you need to re-level the print bed.
Here is a detailed guide on how to level the print bed of your 3D printer: 3D Printer Bed Leveling | Manual & Automatic
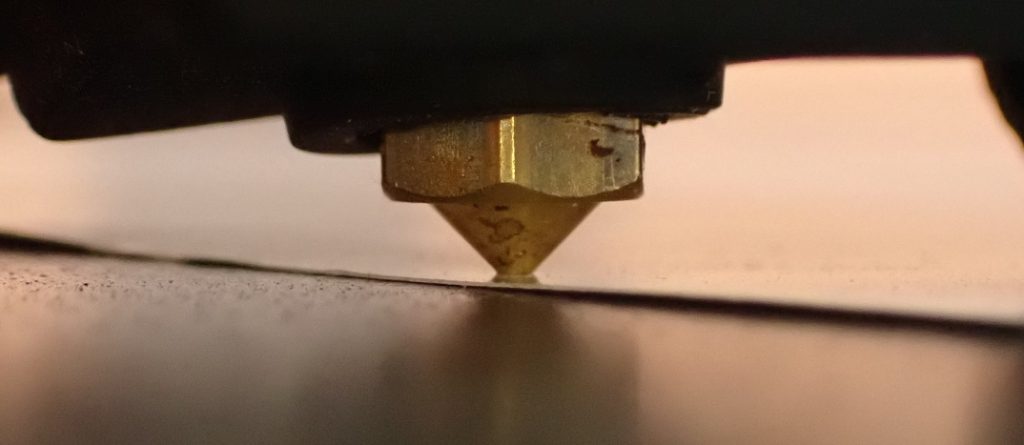
3D printers with manual print bed leveling are mostly leveled by the paper method. But even with a semi-automatic or automatic print bed leveling, the Z-offset must be adjusted with a sheet of paper at the end. The distance between the nozzle and the print bed is adjusted so that the piece of paper can be moved with some friction in between.
One mistake that many beginners make with Z-offset calibration is that this distance is set too low. The motivation is to increase the print bed adhesion, which is definitely true, but then the first layer is squeezed too much and an elephant foot is created. However, the nozzle can’t be too far away either, otherwise, the filament is only loosely placed on the print bed and no adhesion can develop.
Important to know: A common misconception about the first layer is that it starts at Z0. If you level the print bed with a piece of paper and adjust the Z offset so that you can still move the paper between the nozzle and the print bed with some friction, the first layer will not be as high as this distance either.
To that distance you have set with the paper, the layer height of the first layer from the slicer is added. If the slicer shows a layer height of the first layer of 0.2 mm, you will end up with an actual layer height for the first layer of 0.2 mm + 0.1 mm = 0.3 mm, since the thickness of the paper is usually about 0.1 mm.
So after correct print bed leveling and setting the Z-offset, the settings for the first layer are important to avoid an elephant foot and at the same time ensure good print bed adhesion.
Optimize the First Layer Settings

In many slicers, the default settings for the first layer are set so that the 3D printer extrudes more filament than for the other layers. While this results in improved print bed adhesion, it can also result in an elephant foot.
In most slicers, the first layer is by default printed thicker, wider, and/or at a higher flow rate to increase print bed adhesion. The too much extruded filament for the first layer has to go somewhere. However, since the Z-axis or the layer height is usually not proportionally higher, the layer expands in the XY direction, which can result in an elephant foot.
The actual layer height of the first layer is the value from the slicer plus the Z-offset. Therefore it is correct that the first layer needs a little more material than the following layers, but this value must be set exactly so that I have too much or too little material and an elephant foot forms.
Among the most important slicer settings of the first layer that can avoid an elephant foot are the following:
- Layer height of the first layer
- Line width of the first layer
- Flow rate of the first layer
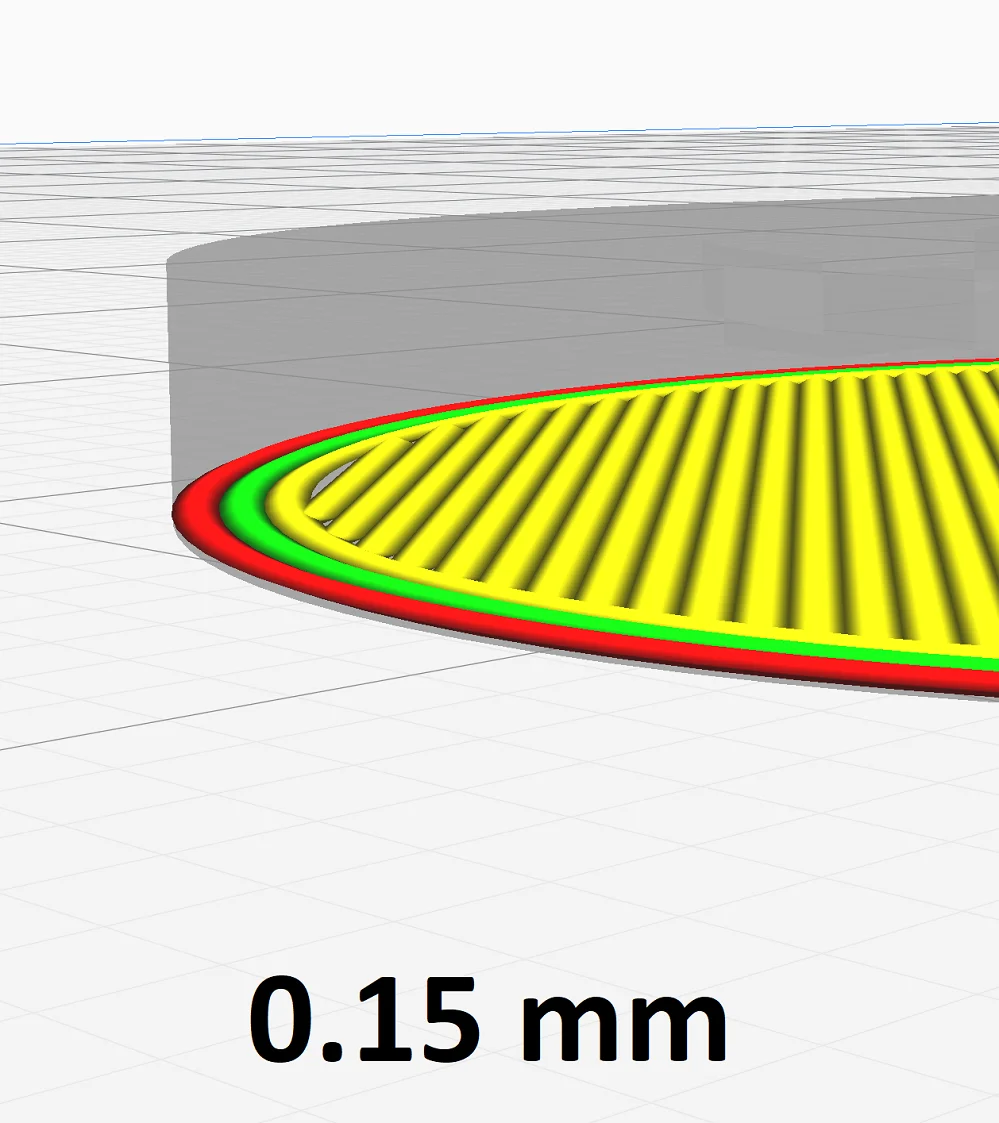
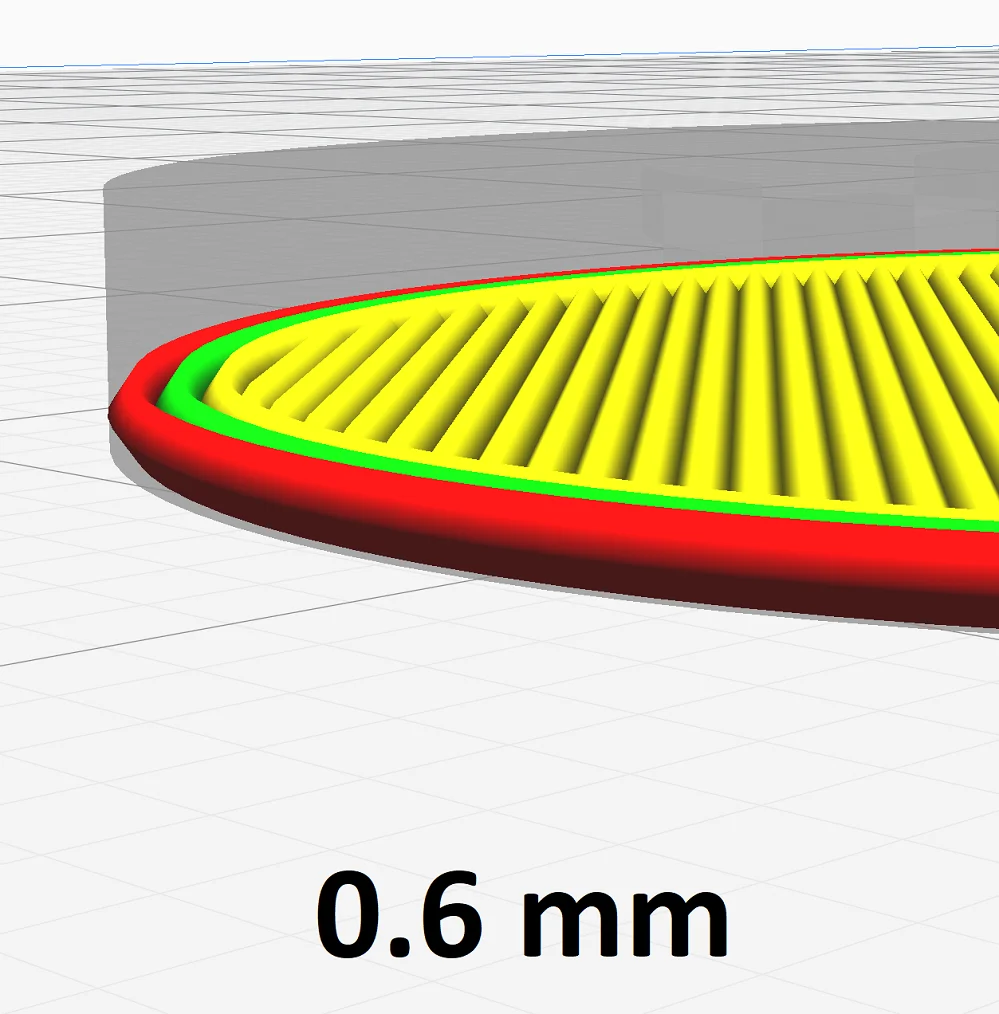
Layer height of the first layer: The layer height for the first layer is usually higher than the value for the remaining layers. This increases the print bed adhesion. The filament is pressed onto the print bed with greater force and can thus penetrate into the smallest cracks and pores.
It also has a larger diameter overall, which means it cools more slowly and forms a better bond with the print bed. The slower cooling also results in less internal mechanical stress.
However, if the first layer is printed too thick, the excess filament will escape to the sides, creating an elephant foot. This setting is strongly related to the Z-Offset and may need to be recalibrated after a major change in Z-Offset.

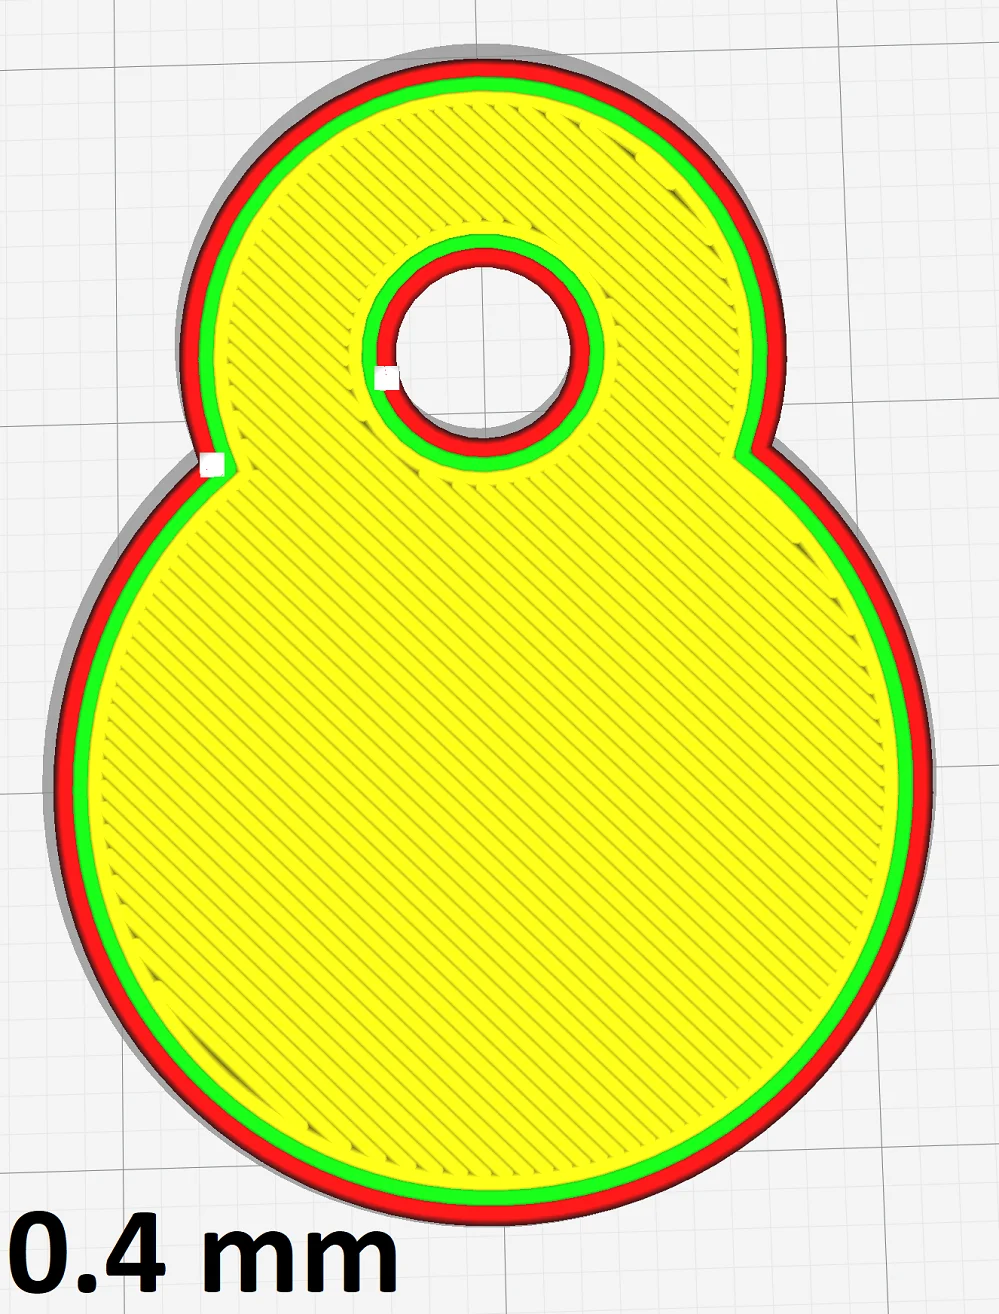
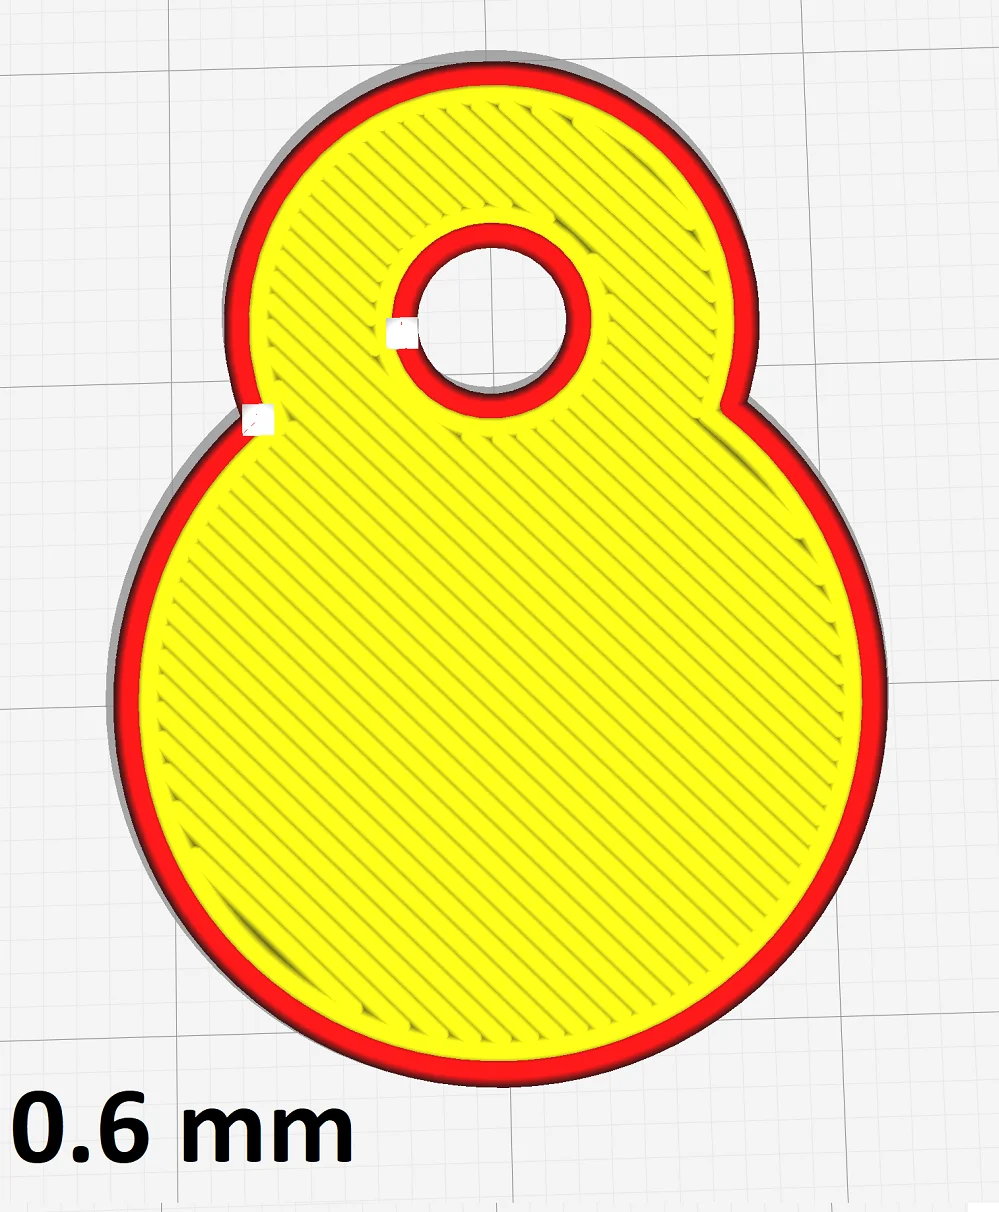
Line width of the first layer: The line width of the first layer is 100% by default in most slicers and is therefore as wide as the rest of the model. However, for better print bed adhesion, the line width of the first layer can be increased. Normally this will not result in an elephant foot, as the distance between the individual lines in the first layer is also increased.
However, a very large line width can also increase the effect of other causes of an elephant foot. For example, if the print bed temperature is too high, a wider line would flow away to the side even more.
First layer flow rate: The flow rate of the first layer has a greater influence than the line width of the first layer on the formation of an elephant foot. The flow rate can be slightly increased for the first layer to increase the print bed adhesion. However, unlike the line width, this does not increase the distance between the lines. Thus, more filament is extruded overall.
If the flow rate for the first layer is set too high, you will automatically get an elephant foot. The other way round you can also reduce an elephant foot. However, there is a high risk of creating an under-extrusion.
Reduce the Print Bed Temperature
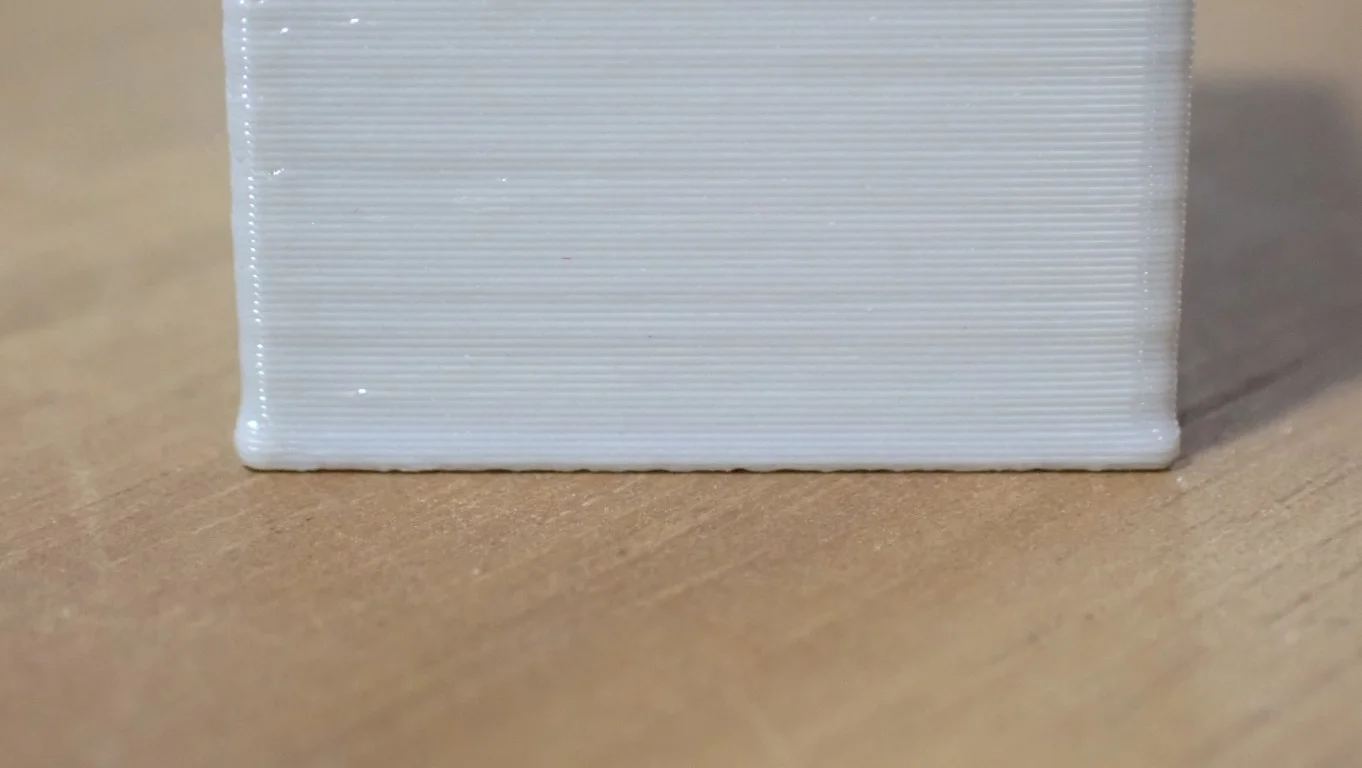
If the print bed temperature is too high, the lower layers of the object become too warm and can be squished under the load of the layers above. The resulting elephant foot in many cases widens not only the first layer but also several layers above it.
If not only the first layer is affected by the elephant foot but also a few layers above, this is often a sign that the print bed temperature is set too high. Then you should try this solution directly after the new leveling of the print bed.
You can find good guidelines for each filament type either in this guide and most of the time, manufacturers provide recommendations for print temperature and print bed temperature either on their product page or on the filament spool. In general, however, these are the recommended temperatures for the most common standard filaments:
- PLA: 55 ± 10 °C
- ABS: 90 ± 10 °C
- PETG: 80 ± 10 °C
- TPU: 50 ± 10 °C
Try adjusting the temperature at the lower end of these ranges and test the result. If the elephant foot is reduced by this measure, but you get a worse print bed adhesion, it makes sense to think about another print bed surface or adhesives.
As far as adhesives are concerned, I can highly recommend Magigoo at the moment. Its price is quite high, but you get along with a bottle for very long.
A flexible PEI coated spring steel print bed surface is suitable for most filaments. This coupled with a slow print speed of the first layer usually creates such a good adhesion that you don’t have to worry about adhesives or other measures to increase the print bed adhesion.
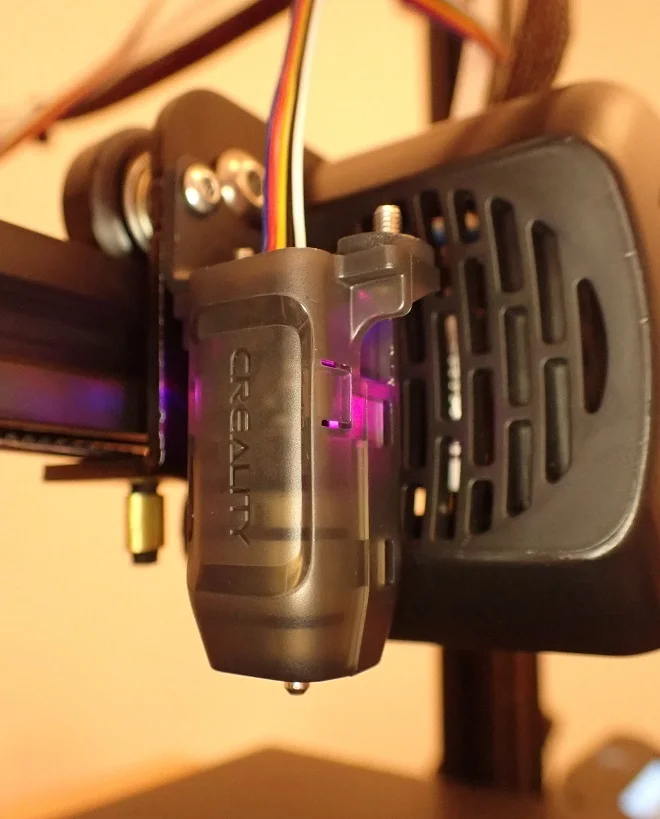
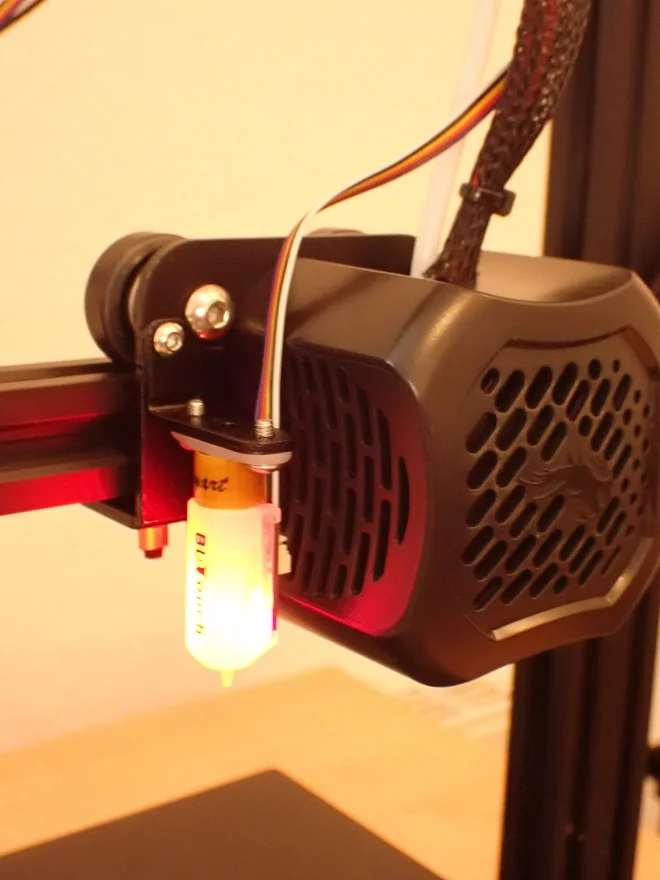
Check the Eccentric Nut of the Z-Axis
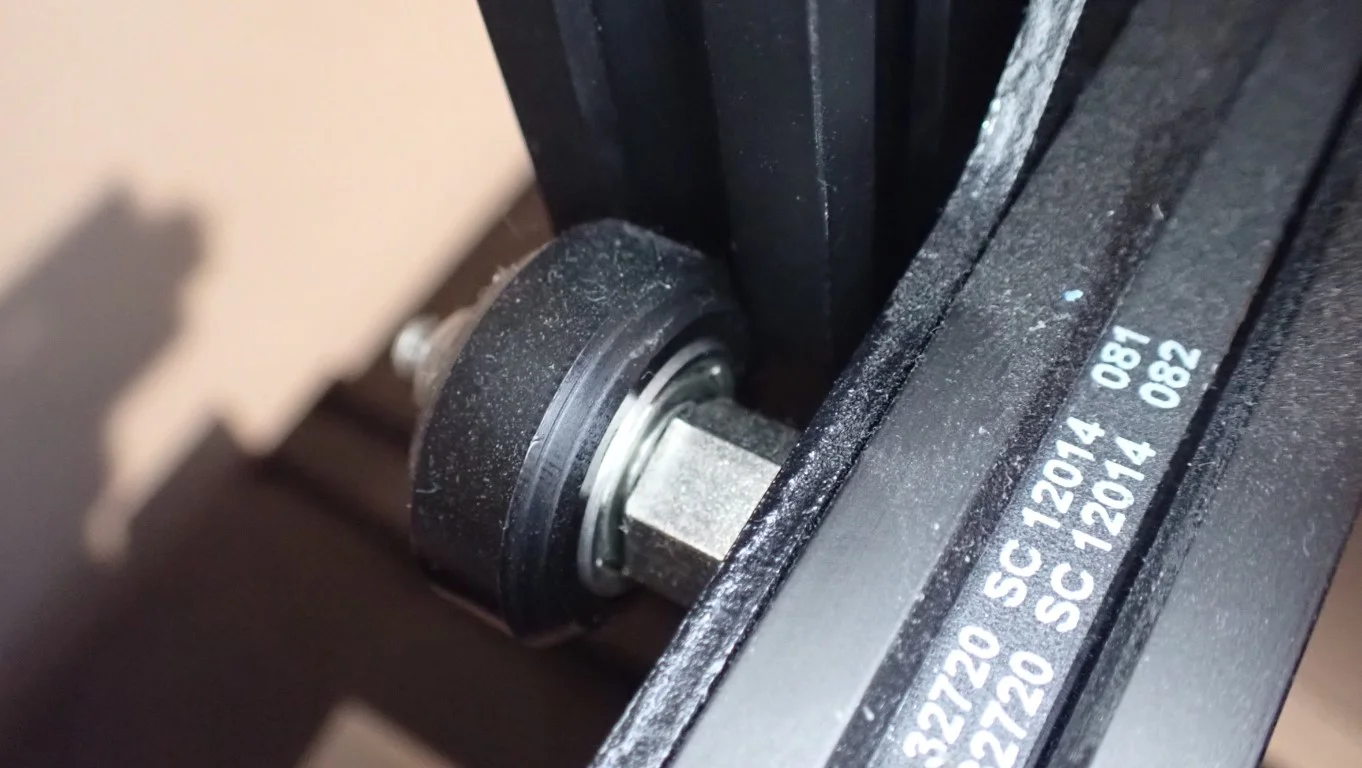
On 3D printers with only one driven Z-axis, an over-tightened eccentric nut can cause an elephant foot. The non-driven side then lags slightly behind at the beginning and generates or amplifies the elephant foot on this side.
This cause is relatively rare, but can sometimes be the only solution to eliminate an elephant foot. Especially with inexpensive 3D printer models, this can occur, since a double Z-axis is usually only installed in 3D printers of the middle or higher price range.
On the other side of the Z-axis, the stepper motor moves up in small steps. If the pressure of the wheels on the frame on the other side is too high, this side does not move through these small movements. Only when the tractive force becomes higher, the other side moves upwards.
If you loosen the nut a bit, this side can move up and down easier. This allows it to follow the movements of the stepper motor better and eliminates the elephant foot.
But of course, the nut must not be too loose, otherwise, the side can hang down. This can also create an elephant foot and also negatively affect the rest of the model.
Enable the Horizontal Expansion
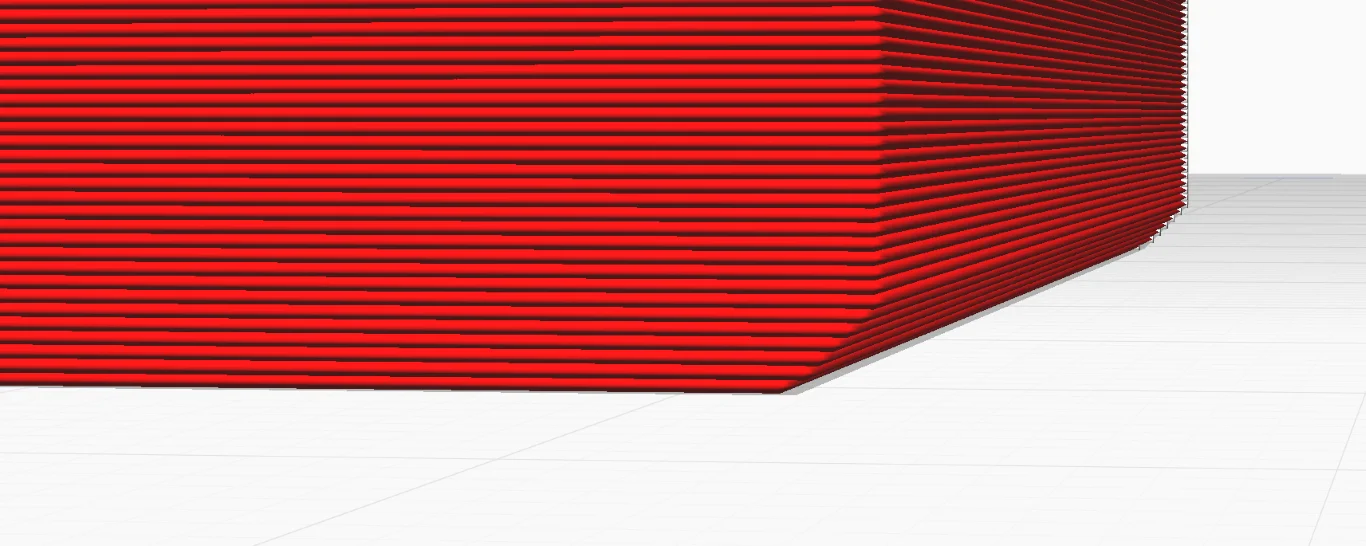
If only the first layer is affected by an elephant foot, it can be compensated in Cura by a negative horizontal expansion for the first layer. This makes the first layer narrower.
Often an elephant foot is limited to the first layer only. Then the horizontal expansion in Cura for the first layer can be exactly the right solution to fix this printing error. However, you will have to experiment with this until you find the right value.
It is best if you can measure the width of the elephant’s foot. Then you can enter the value as a negative value for the horizontal expansion of the first layer. This will certainly not give you a perfectly straight object, but it is a good step in the right direction.
If you have trouble with the elephant foot mainly for holes, you can also set the horizontal expansion for holes only.
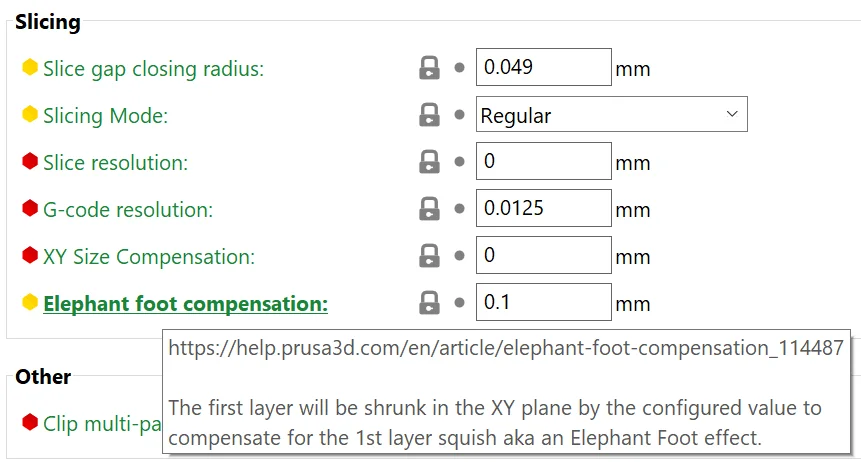
In PrusaSlicer the horizontal expansion for the first layer is also available. Here it is even appropriately called “elephant foot compensation” and works just like a negative horizontal expansion for the first layer in Cura.
With this solution, however, be aware that with horizontal expansion or other slicer compensation you are only fighting the symptom and not the cause. However, if you have not made any progress with the other solutions, this method can be a good way to see any progress at all in the fight against elephant foot.
Complete Guide:
Horizontal Expansion in Cura – Easy Guide
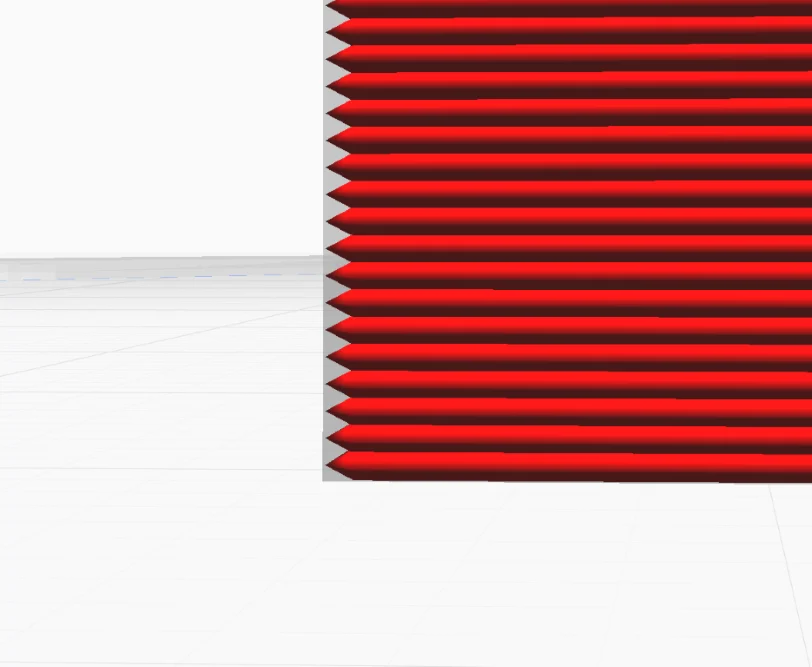
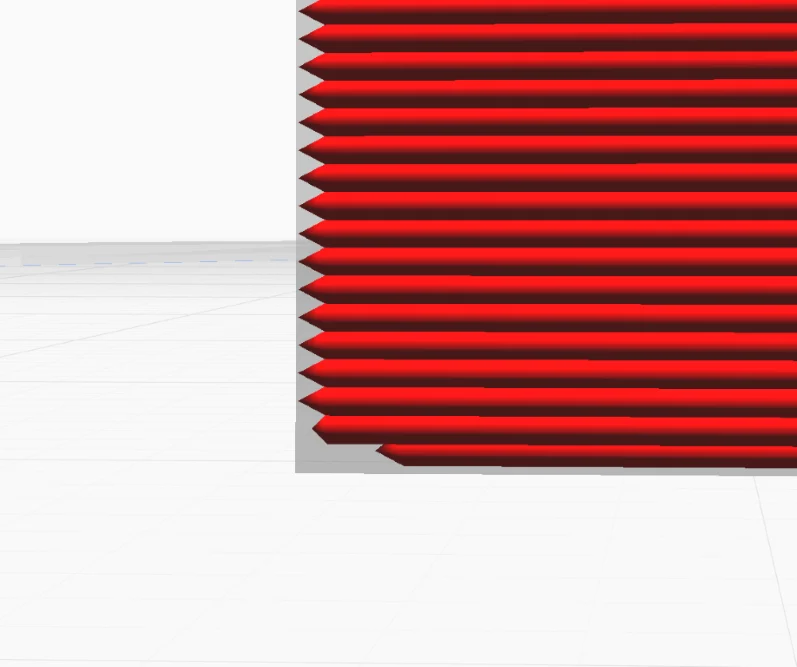
Use Chamfers
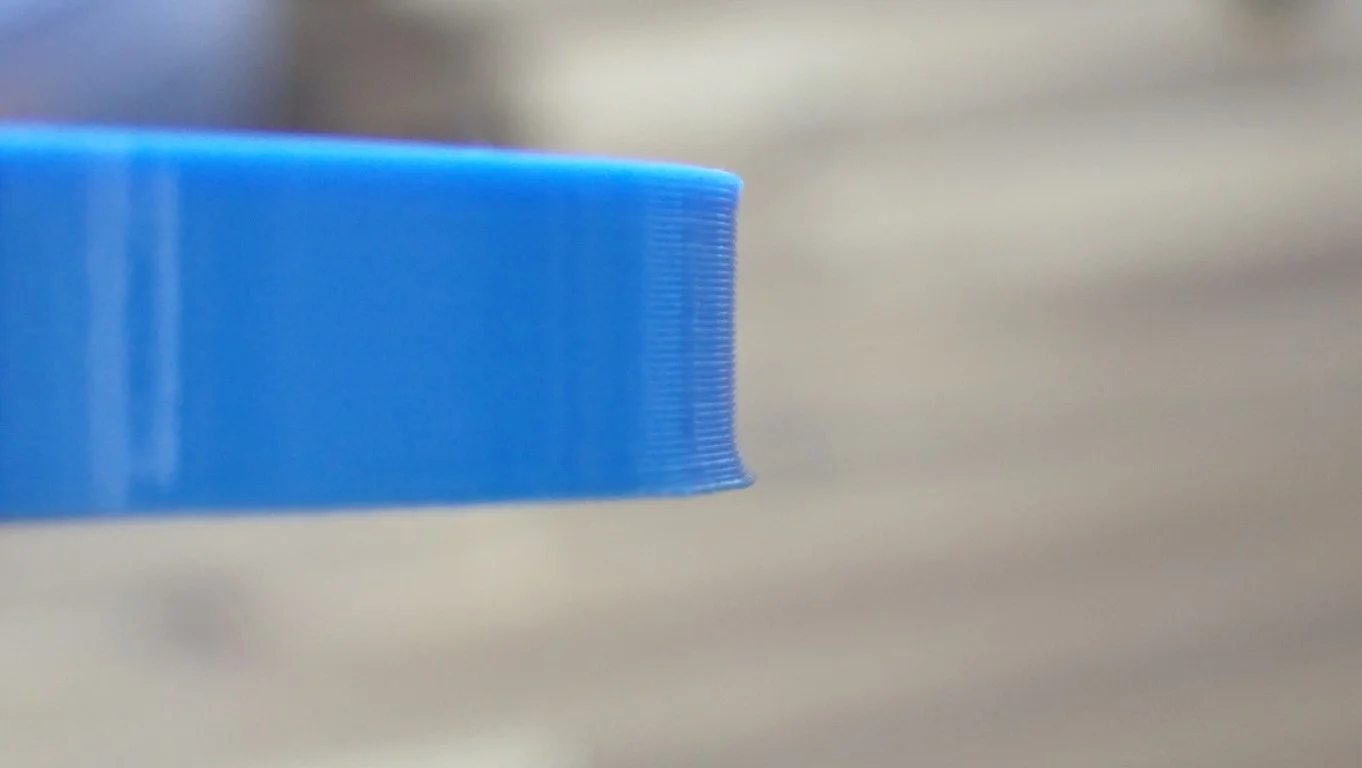
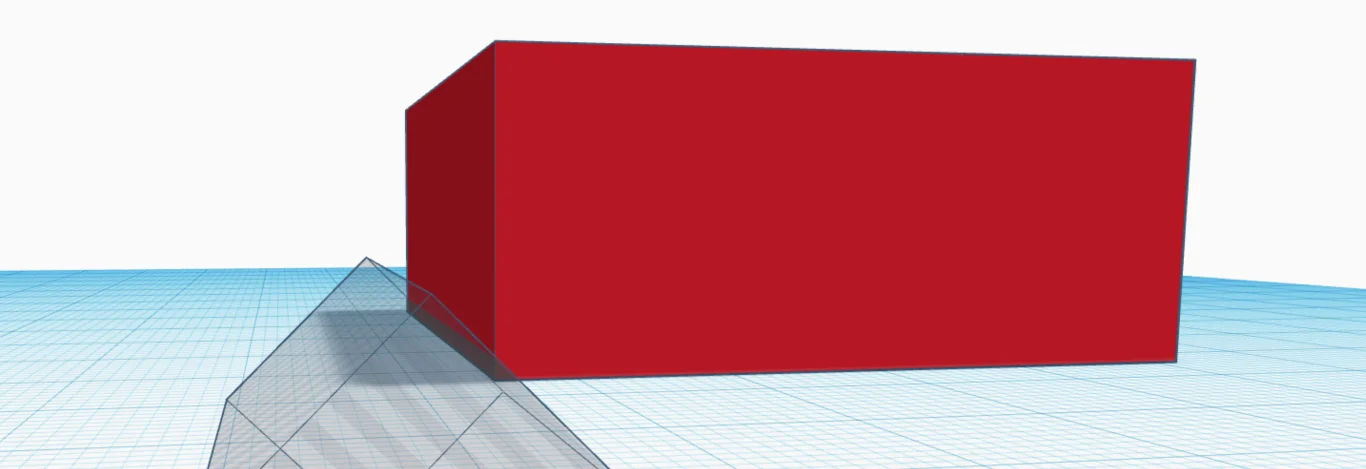
If the elephant foot affects multiple layers and cannot be corrected by moving to a lower print bed temperature, a chamfer on the bottom of the object can prevent an elephant’s foot.
Just as with horizontal expansion, this is only a workaround that combats the symptom and not the cause. Sometimes, however, an elephant foot cannot be avoided by conventional solutions. Especially with large and heavy models, it may be that an elephant foot can hardly be prevented because the lower warm layers are crushed by the weight of the object.
If you have not designed the object you want to print yourself, it is sometimes difficult to put chamfers on the bottom of the object. You can of course use CAD programs for this, but sometimes Tinkercad is also sufficient.
Especially with objects that have a mechanical function, it is important that there is no too strong elephant foot that could hinder these mechanical movements. Since the optics of such objects usually only play a secondary role, the chamfer can be quite generous here. If you want to compensate for the elephant foot on a decorative object, it will probably take several iterations to get the chamfers right.
Use a Raft
With a raft, the object is printed on several previously printed layers. An elephant foot then only affects the raft and not the object.
This workaround is probably the fastest of all. In most slicers, it’s just a checkbox you need to click to print a raft. However, rafts are generally not very popular because they cost filament and print time. Also, the bottom of the object with a raft is not as smooth as without. Sometimes it is also difficult to remove a raft without leaving a residue if the distance between the raft and the object is too small.
A raft can not only help you with print bed adhesion, but it can also help you avoid an elephant foot. If the bottom layers of the object are still a little wider than they should be, you can increase the number of layers printed as a raft.
Conclusion: You Can Prevent an Elephant’s Foot!
An elephant foot can be prevented by several methods. If you approach the solutions in order, you will most likely be able to eliminate this printing error!
But even if you ended up having to resort to one of the workarounds, know that you’re not alone in this. The elephant’s foot is a very common misprint and the cause is sometimes difficult to identify.
Disclosure: This website is the property of Martin Lütkemeyer and is operated by Martin Lütkemeyer. Martin Lütkemeyer is a member of the Amazon Services LLC and other Affiliate Programs. These are affiliate advertising programs designed to enable websites to earn advertising revenue through advertising and linking to Amazon.com and others. Links marked with * are affiliate links.
