
- Wet Filament: Prevention, Symptoms & Drying - July 18, 2024
- Sovol SV08 – Best PrusaSlicer Settings & Profile - June 26, 2024
- Sovol SV08 – Best Orca Slicer Settings & Profile - June 26, 2024
Disclosure: Links marked with * are Affiliate Links. I earn from qualifying purchases if you decide to make a purchase through these links – at no additional cost for you!
Print bed leveling is one of the most important things in 3D printing. Without a properly leveled print bed, print errors and frustration will result. Especially manual print bed leveling is often a bit intimidating for beginners.
To save you that frustration, this article will teach you step-by-step how to manually level your 3D printer and what options you have for automatic leveling. First, a quick overview.
Steps of manual print bed leveling:
- Clean the nozzle and the print bed
- Adjust the distance between the nozzle and the print bed with a piece of paper (about 0.1 mm thick) at all 4 corners and in the center so that there is some friction when you move the paper in between.
- Check the leveling with a test print
Why Level the Print Bed?

Print bed leveling is used in 3D printing to ensure a homogeneous first layer. The distance from the nozzle to the print bed is adjusted at several points so that their distance is the same everywhere. A well-leveled print bed prevents a whole series of printing errors.
In principle, the print bed leveling is divided into two different parts:
- The inclination of the print bed
- The distance between nozzle and print bed
Adjusting the tilt of the print bed is the actual leveling. Adjusting the distance between the nozzle and the print bed, also called z-offset, is in principle something else, but is done at the same time as print bed leveling. Therefore, there is not much distinction between these two things in this article.
If the distance between the nozzle and the print bed is not the same everywhere, the first layers of the object will not be printed evenly.
The tilt of the print bed must therefore be adjusted so that the print bed is as parallel as possible to the surface that the nozzle describes when it moves on the XY plane.
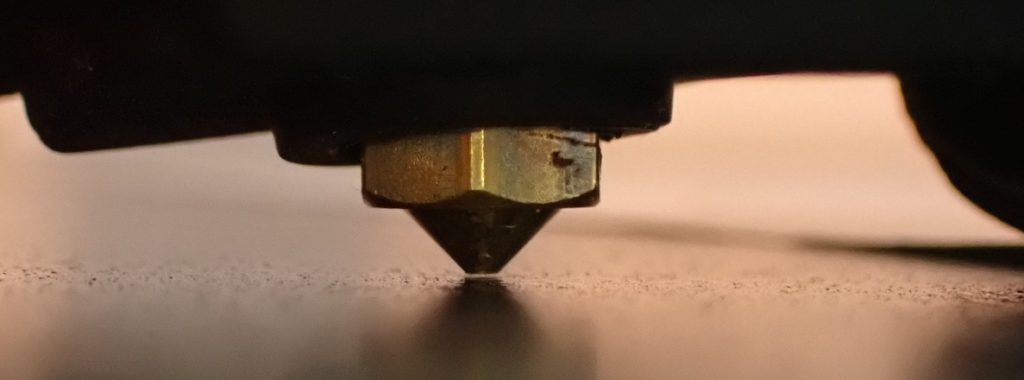
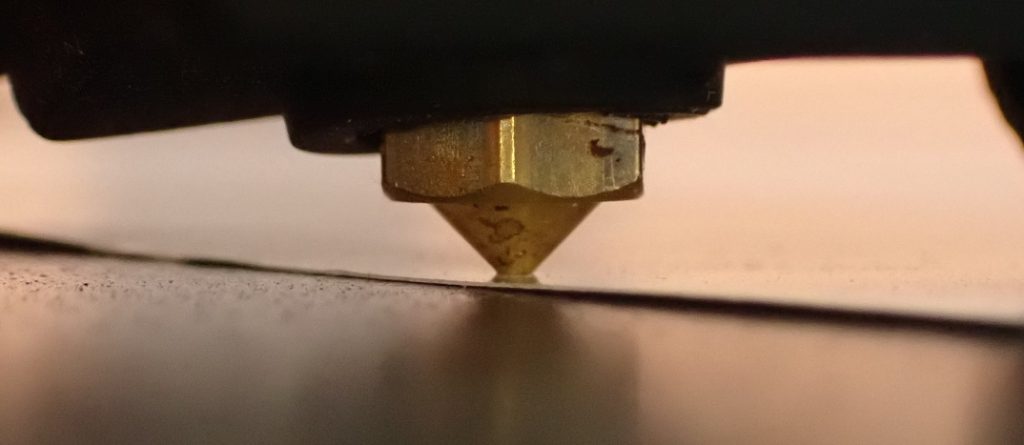
In places where the distance between the nozzle and the print bed is too large, the filament is virtually only placed on the print bed and not pressed onto it by the nozzle. This means that the filament cannot form a good bond with the print bed and quickly becomes detached. Warping or a generally poor print bed adhesion would be the consequences.
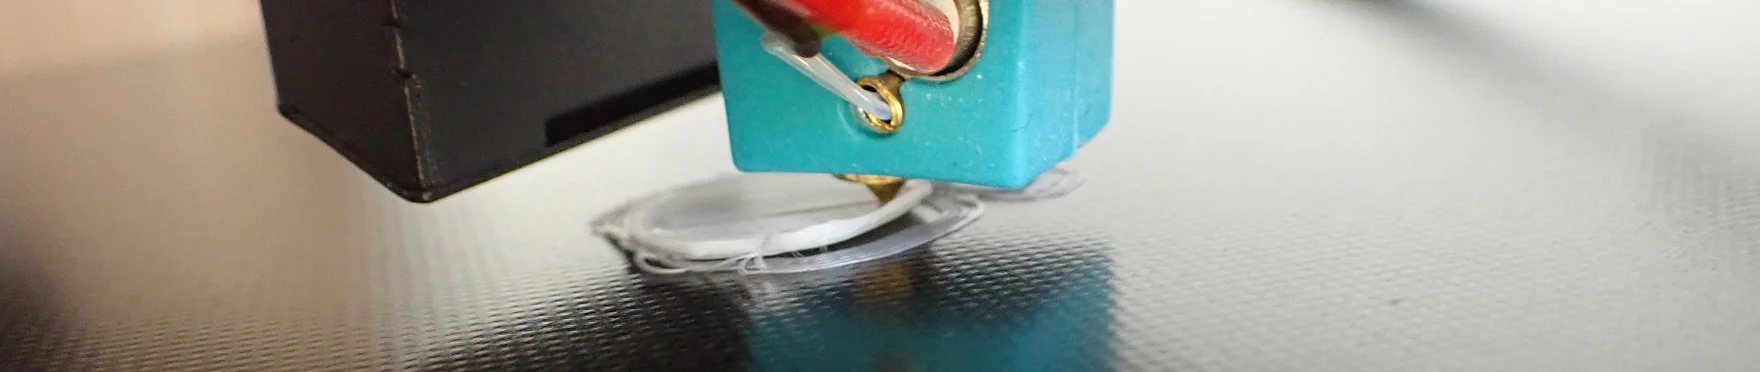
If the distance is too small, the first layer will be much too thin and the filament will be pushed outwards by the nozzle. This creates an unsightly first layer and excess material can collect on the nozzle.
Conclusion: Why level the print bed?
- Uniform first layer
- Good print bed adhesion
- Avoid printing errors
When to Level the Print Bed?
A print bed should be leveled at regular intervals and at the latest when warping, poor print bed adhesion or other print defects occur. For many print defects, print bed leveling is the first approach to solving the problem.
The frequency with which you should level your print bed basically depends on how stable the print plate of your 3D printer is mounted and how you handle the print bed.
I have tested 3D printers that have such a stable print bed that I have worked hundreds of hours with only one print bed leveling. Other 3D printers, however, need a new leveling after 5 or 10 prints, because the springs have changed a bit or something has moved when removing the object from the printing plate.
At the latest, if you notice print defects or poor print bed adhesion, you should re-level the print bed (and the associated or z-offset adjustment).
Conclusion: When should a print bed be leveled?
- Poor print bed adhesion or warping
- Uneven first layer (spacing, height or width of lines is different along the print bed)
- Distance between nozzle and print bed is so small that no filament is extruded
Print Bed Cleaning Before Print Bed Leveling

For a good print bed leveling a clean print bed is a requirement. If there is dirt, dust or filament residue on the print plate, this changes the distance between the print bed and the nozzle. The print bed can then not be correctly leveled.
The print bed surface should not have any foreign substances on it. This includes not only filament residue or dust, but also grease from your fingers or old glue residue. If you don’t care about print bed adhesion and are only concerned with leveling, you can also just concentrate on removing larger foreign objects from your print bed. Anything that can affect the distance between the nozzle and the print bed must be removed.
If you work with glue, you should clean the print bed more often (if you are looking for a good glue stick, I can highly recommend Magigoo).
If you have a print bed surface with good adhesion, it is usually sufficient to remove coarse filament residue and keep the surface dust-free. If you then avoid touching the print bed with bare fingers, nothing should stand in the way of good print bed leveling and good print bed adhesion.
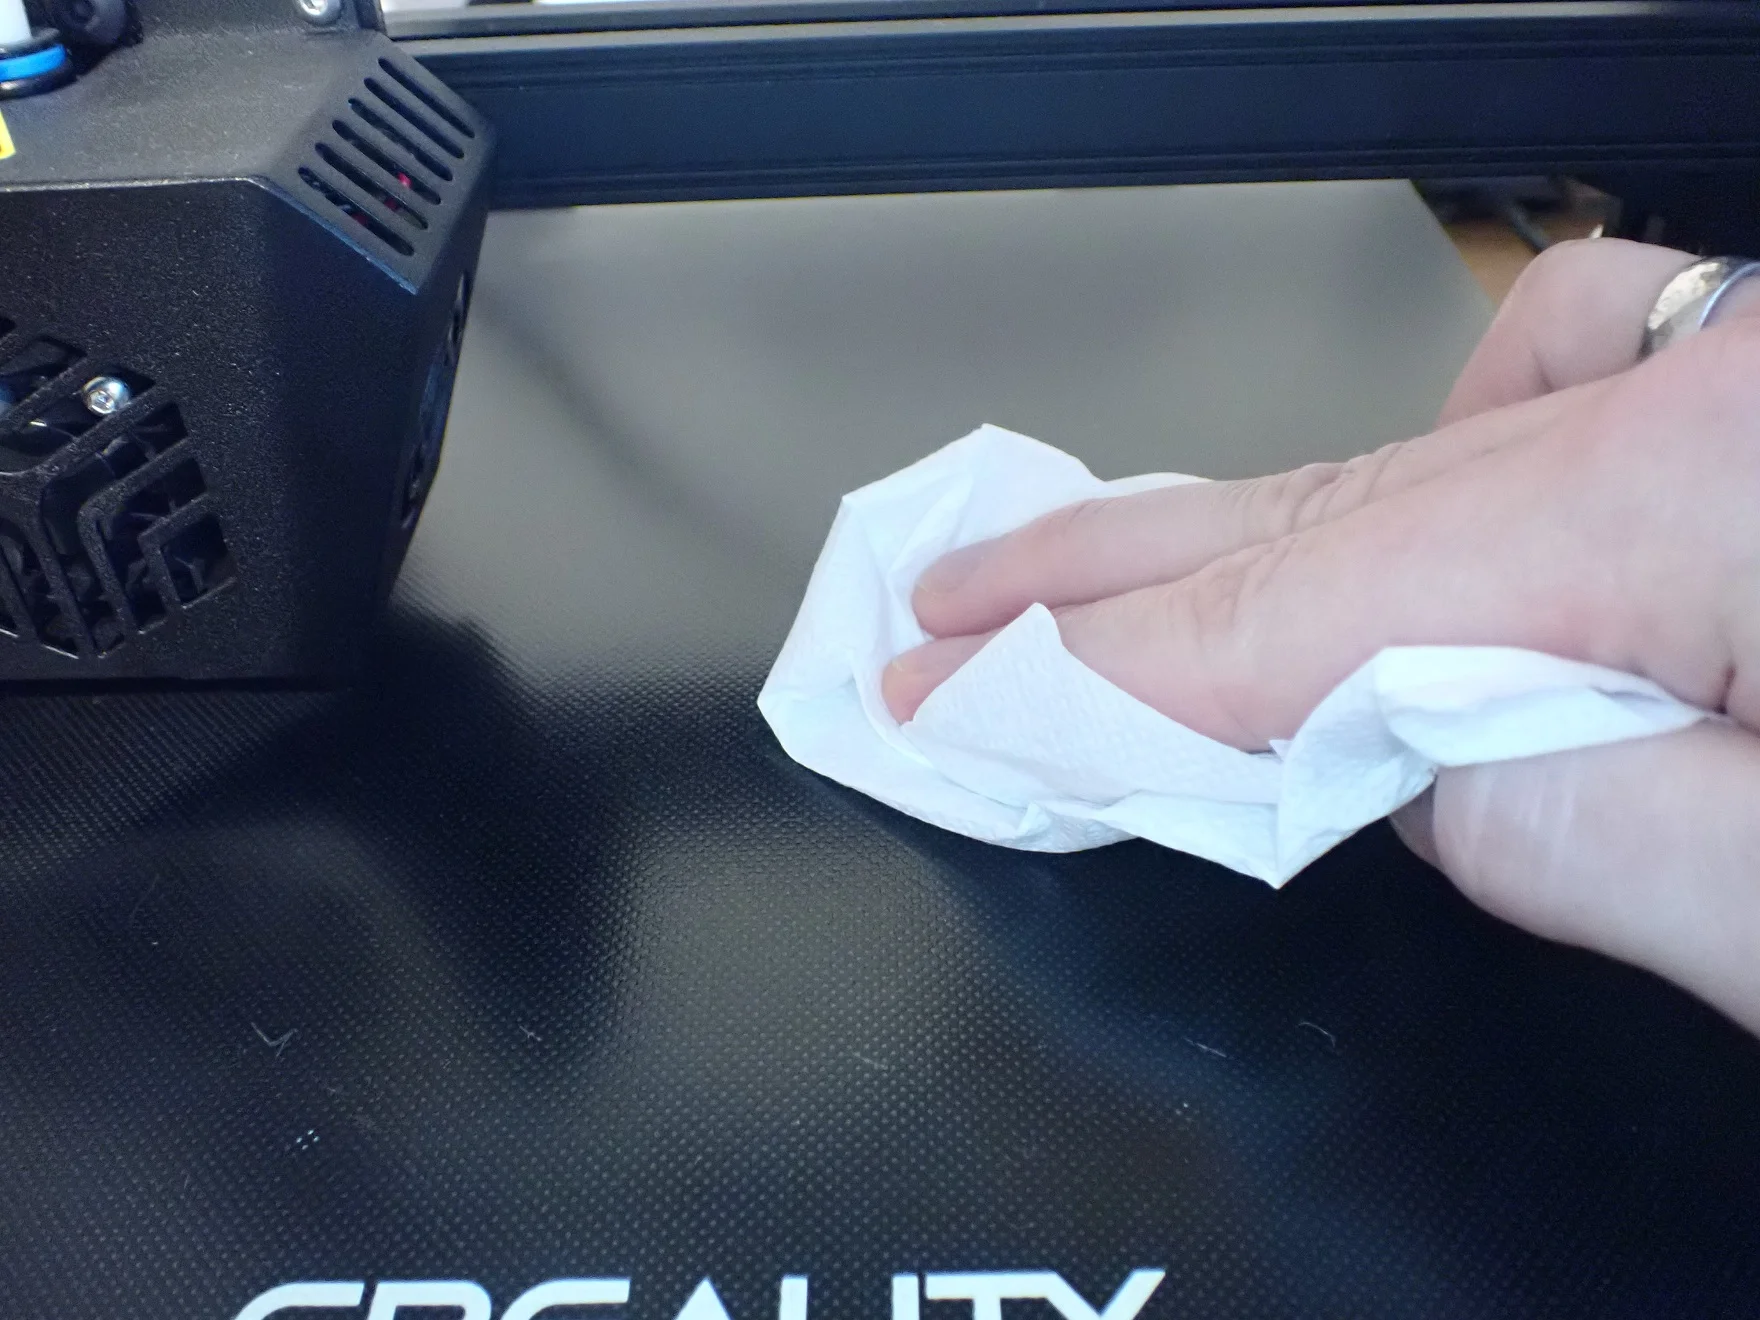
For regular print bed cleaning, all you need is a spatula, warm water and dishwashing liquid. If you have a fixed print bed, water and dishwashing liquid are sometimes a bit impractical. In that case, isopropyl alcohol* is more practical, as it evaporates by itself.
Be careful with spatulas or knives when cleaning the print bed, however, as scratches or dents in the print bed can be just as bad for print bed leveling or adhesion as foreign objects.
Conclusion: Why clean the print bed before leveling?
- Foreign objects change the distance between the nozzle and the print bed.
- Avoid damage by spatulas and knives.
- Isopropyl alcohol or dishwashing liquid with warm water against adhesives or oils/greases.
Nozzle Cleaning Before Print Bed Leveling
Before leveling the print bed, the nozzle must be free of filament residues. Filament residues change the distance between the nozzle and the print bed. This will cause the distance to be set too large, resulting in a poorly leveled print bed and poor print bed adhesion.
With most 3D printers, there is still a bit of filament hanging out of the nozzle at the end of the print. When this piece of filament has cooled and solidified, it is impossible to level the print bed well.
The easiest and also my favorite method is to clean the hot nozzle with a paper towel and pull the filament out a few millimeters to prevent it from leaking again.
Be careful with your fingers though, as it’s no fun touching a 200°C hot nozzle! If your reflexes are good enough, not much will happen to you except for a small burn that will be gone after an hour. Otherwise, you should protect yourself with suitable gloves.
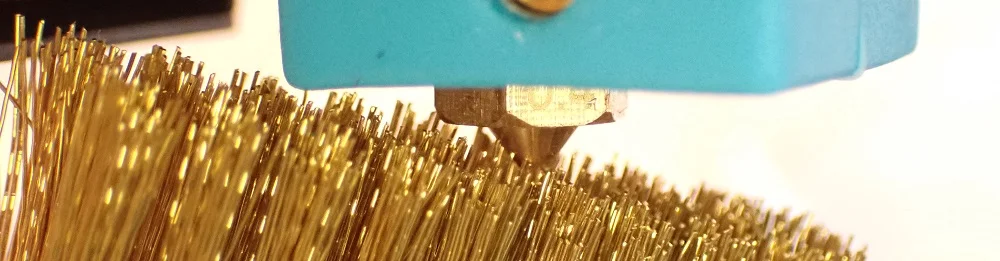
For stubborn, burnt-in filament residues, sometimes a paper towel won’t help. For such cases, there are special wire brushes (this one worked fine for me*). However, be careful with these brushes, as they could lead to abrasion of the nozzle if used too much.
Even if your nozzle isn’t completely clogged, filament residue can still protrude from the inside and negatively affect print bed leveling. If you can’t get rid of this residue with a paper towel or wire brush, you can use nozzle cleaning kits (my favorite*). Such kits contain thin needles with which you can carefully loosen the burnt filament residues inside the nozzle.
If this happens to you frequently, it is advisable to use cleaning filament regularly to keep the nozzle clean (this one is perfect if you use 1.75 mm filament*). These filaments are not used for printing but are extruded to get out the remains of old material in the nozzle.
If you want to learn more about cleaning 3D printer nozzles, feel free to check out this article: Clogged 3D Printer Nozzle Cleaning | Needle, Acetone & Co.
Conclusion: Why clean the nozzle before leveling?
- Filament residues on the nozzle change the distance between the nozzle and the print bed.
- Cleaning methods:
- Wipe the nozzle with a paper towel at printing temperature (after/before each print)
- Wire brush* for outer burnt filament residues
- Nozzle cleaning kit* for internal burnt filament residues
- Cleaning filament* for regular cleaning
Manual Print Bed Leveling
For many, manual print bed leveling is a horror. But it doesn’t have to be! Once you understand the principle, a good print bed leveling is done in a few minutes.
Admittedly, in the beginning, it took me a while to understand the principle, but at that time there were no good tutorials and the instructions of the manufacturers were either non-existent or extremely vague.
So in the next few lines, you’ll learn how to easily level your print bed using the paper method, how to test the leveling, and what homemade tools you can use to make things even easier.
The Paper Method for Print Bed Leveling
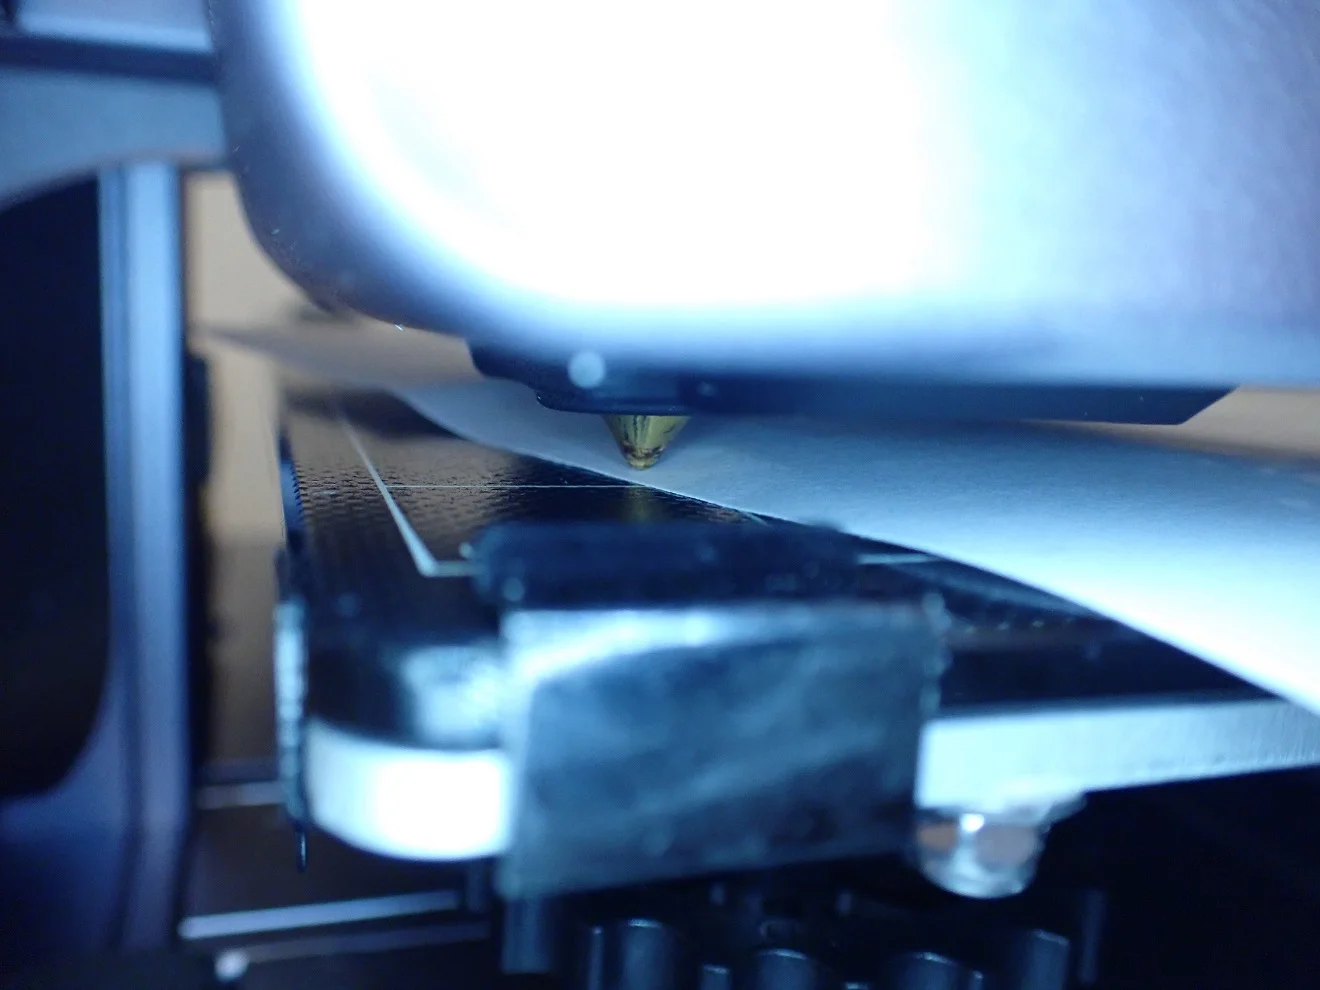
With the paper method, the distance between the nozzle and the print bed is adjusted with a piece of paper. The distance is adjusted correctly when a 0.1 mm thick paper can be moved with some friction between the nozzle and the print bed. This method is a widely used standard.
Leveling with the paper method is so common that many 3D printer manufacturers ship a suitable piece of paper or plastic card with the correct thickness with their 3D printers.
The principle is always the same: you adjust the distance between the nozzle and the print bed at several points on the print bed so that you can move the paper back and forth with a little friction. If you feel too little friction, the distance is too high, if you can hardly move the paper, the nozzle is too close to the print bed.
This all sounds a bit imprecise because it is. Unfortunately, this takes some practice, but the margin for error is not too great. Once you’ve used this method two or three times, you’ll get a feel for how strong the friction needs to be.
The genius of the method is that you can do it with standard paper. Most paper has a thickness of 0.1 mm, which is just right for the paper method.
Step-by-Step Print Bed Leveling
Step 1: Lower the Print Bed
(This step is only necessary for the first leveling after assembling the printer or after a heavy crash).
To prevent the nozzle from accidentally running into the print bed, you should turn the print bed down slightly.
If you only want to re-level your print bed once in a while, you can skip this step, as the Z-offset should be roughly correct.
Step 2: Go to Z-Home
To move the printhead to its Z0 position, you can use the menu to move to the Z-Home position. At this height, the distance between the nozzle and the print bed should be set.
Step 3: Deactivate Stepper Motors
In order to move the print head and the print bed freely, you have to deactivate the stepper motors via the menu of the 3D printer. Otherwise, you would not be able to move either of them easily.
Step 4: Adjust Distance Between Nozzle and Print Bed (Paper Method)
This step is the most important of all. In this step, you adjust the distance between the nozzle and the print bed in several places on the print bed.
Adjust the distance between the nozzle and the print bed at the 4 corners so that you can move the piece of paper with some friction between the nozzle and the print bed.
The first time you level the print bed and do step 1, you will have to adjust the 4 corners several times.
After you have adjusted the 4 corners correctly, check the result in the middle and if necessary at the 4 corners again.
Tip on friction: As soon as the nozzle touches the paper, the correct range of friction begins. From the moment the paper makes waves when you push it forward under the nozzle, the correct range of friction ends and the distance becomes too small.
The important thing is that you set the friction the same everywhere. How strong the friction actually has to be, you will notice in your tests (more about this later).
Step 5: Check the Leveling
Even if you have already checked the result at all 4 corners and in the middle several times, it makes sense to check it with a suitable test print.
Test Prints to Check the Print Bed Leveling
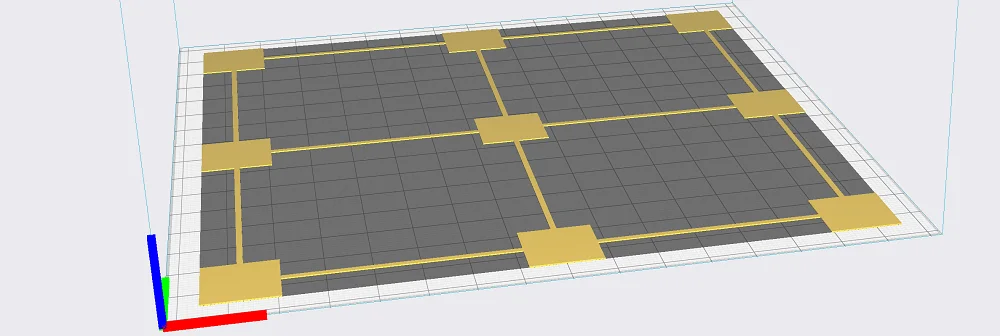
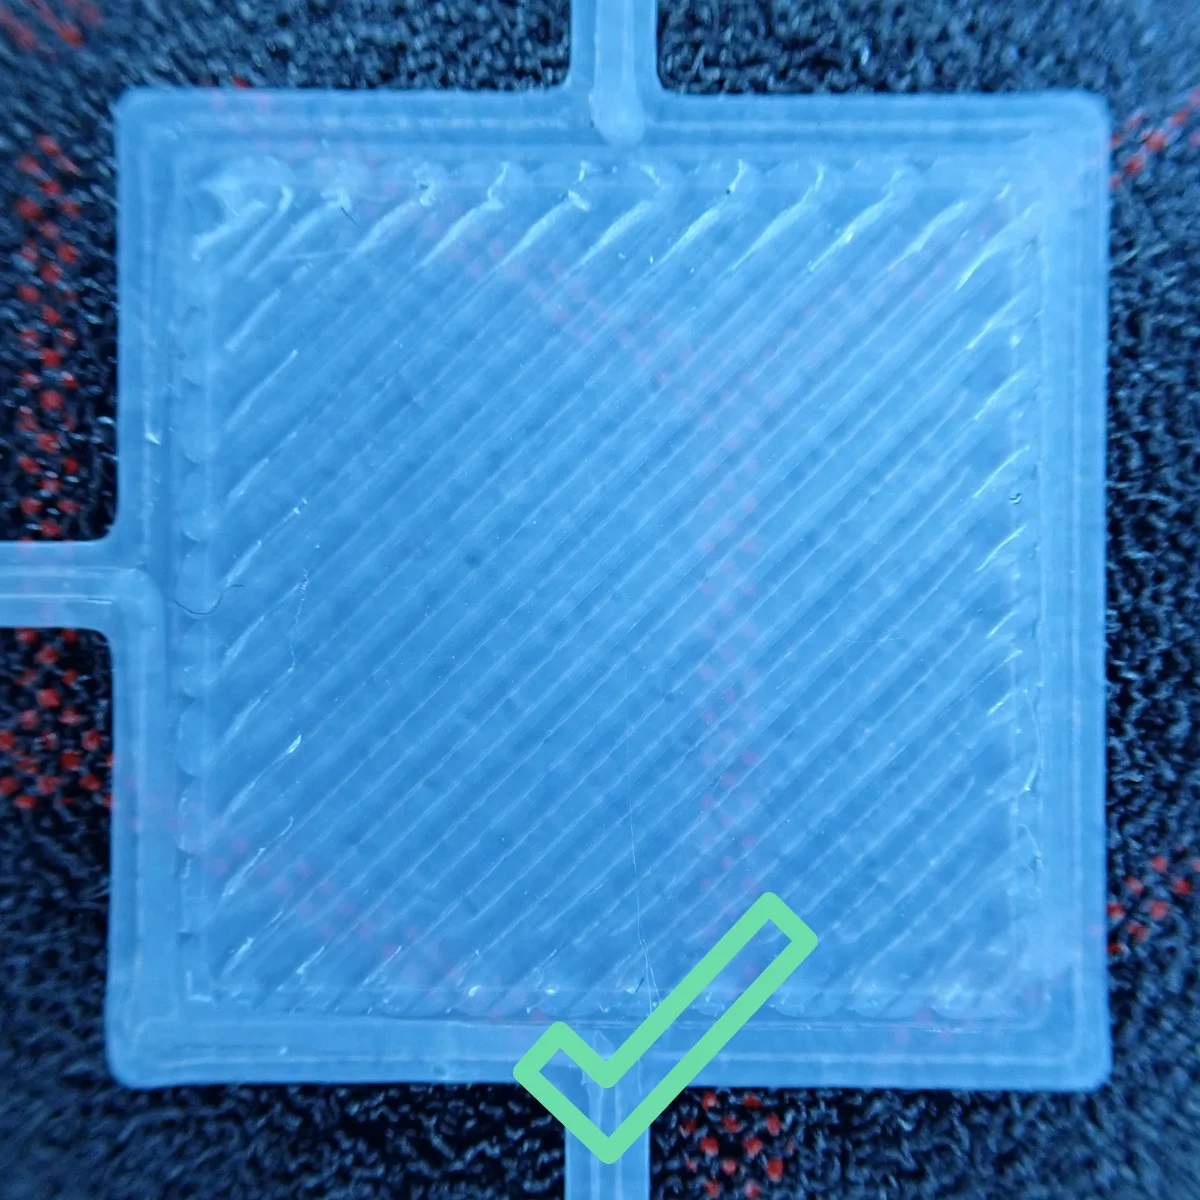
To check the print bed leveling, a test print can be done. For this purpose, squares of one layer are printed at certain points on the print bed. The thickness of the layer, the distance and the adhesion of the print lines are an indicator for the quality of the leveling.
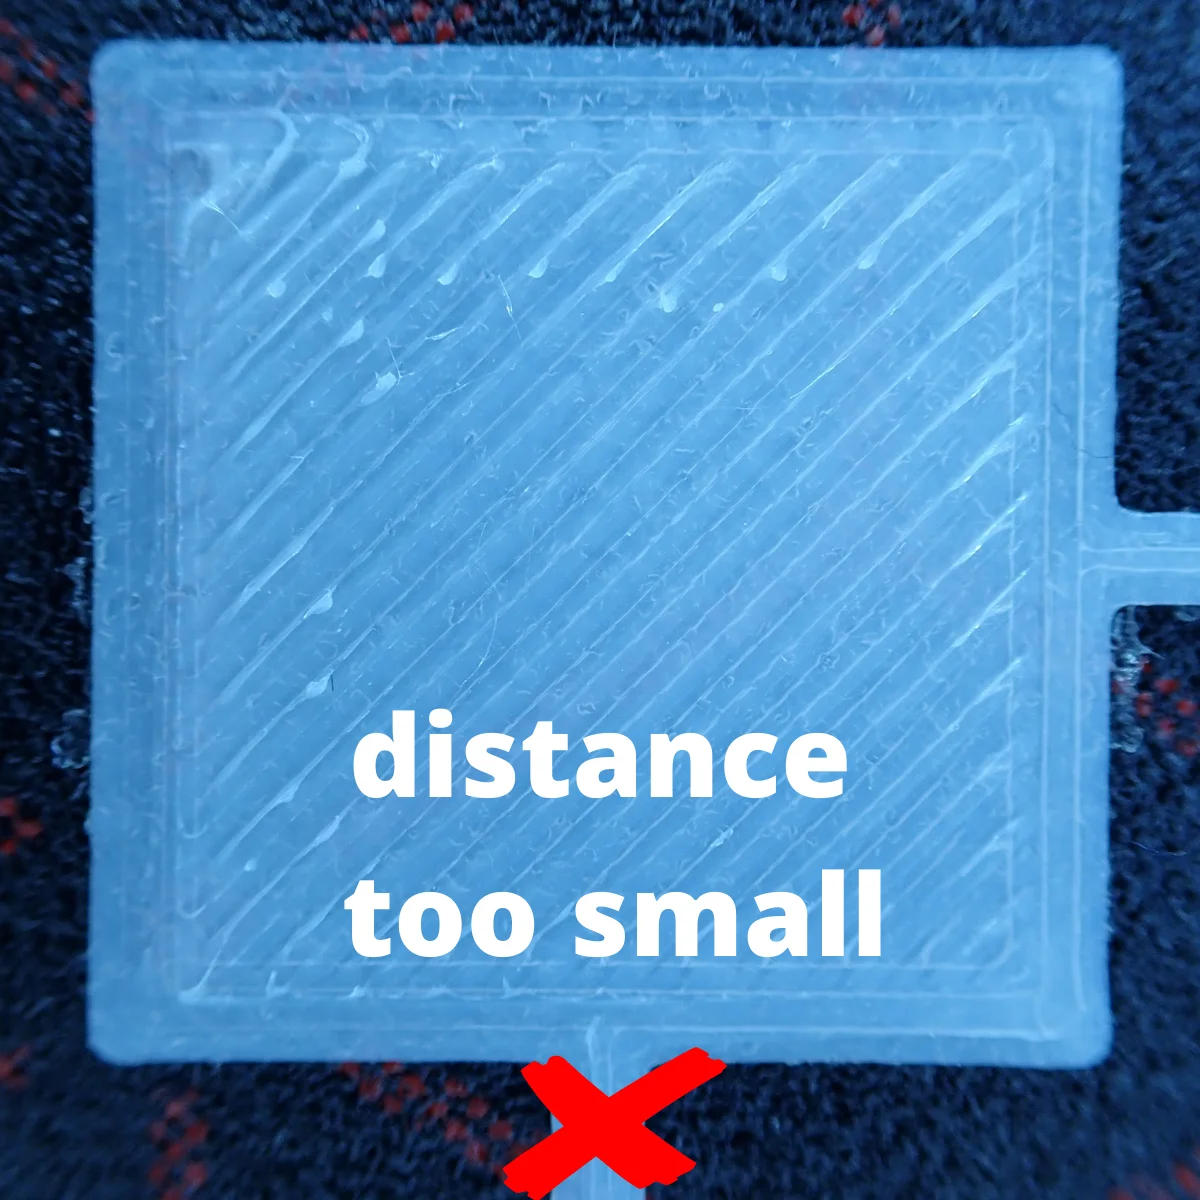
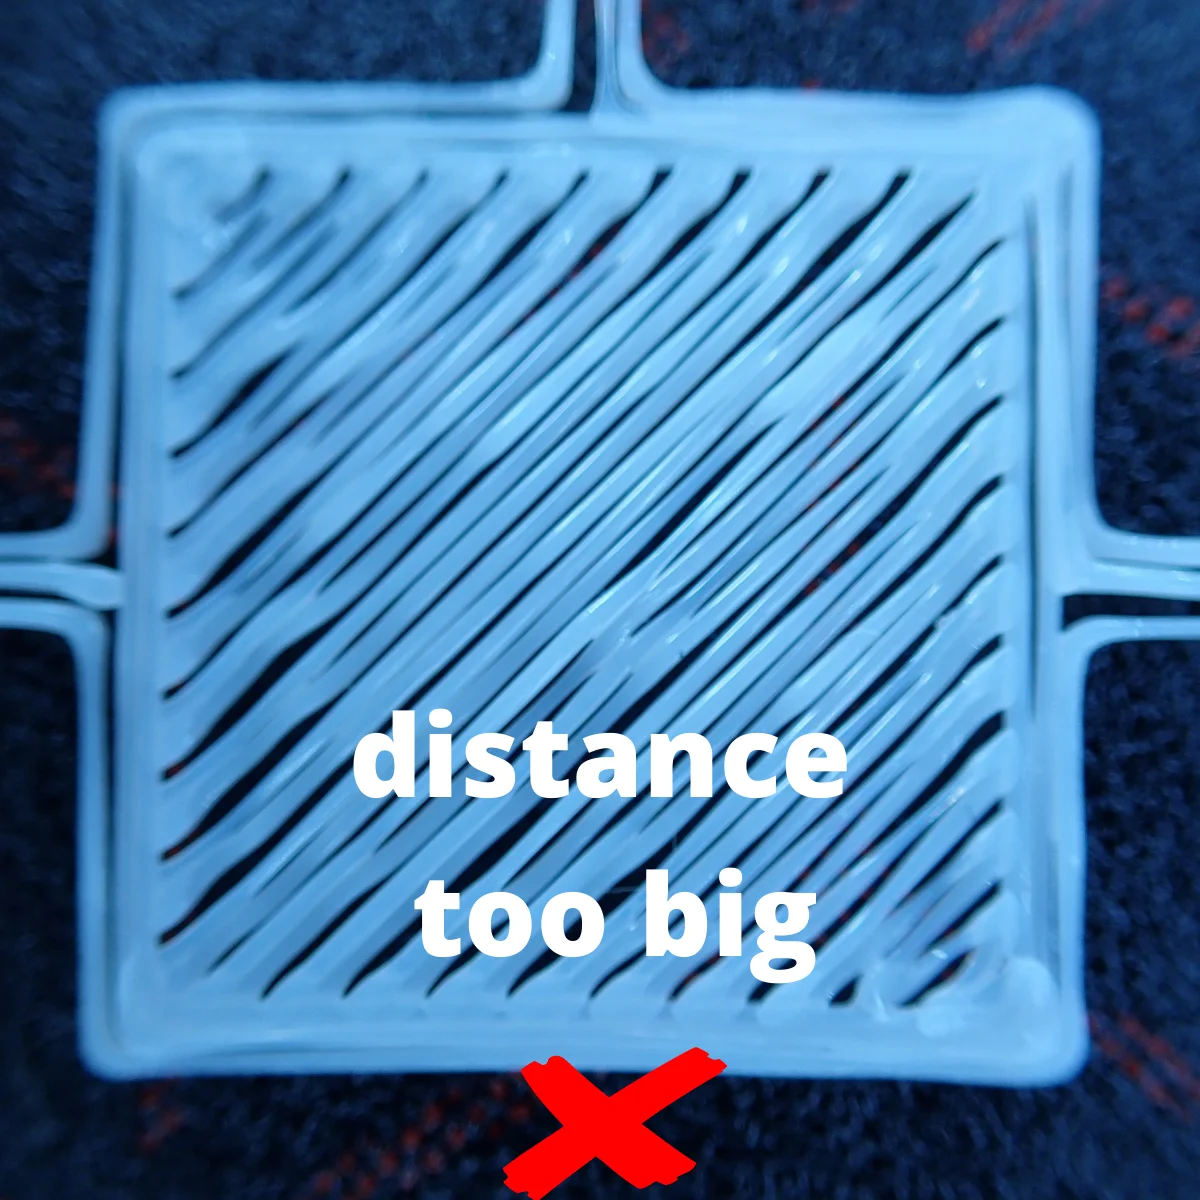
A sure sign that the distance between the nozzle and the print bed is too large is when the print lines partially do not touch or even detach from the print bed. If the distance is too small, the nozzle will push the material in front of it, the layer will become too thin and in extreme cases, no filament will come out at all.
There are a lot of variations of these test prints for print bed leveling. There are numerous objects for this on Thingiverse. I like to use the Calibration Shapes plugin in Cura for this. In the plugin there are not only temperature towers, calibration cubes or a retraction test, there is also a very good test for the print bed leveling.
All of these tests print a square of one layer at certain points on the print bed. I used the test print from the Cura plugin and printed it on my Ender 2 Pro. Before that, I intentionally moved the print bed to demonstrate the result of a nozzle that was too close and too far away.
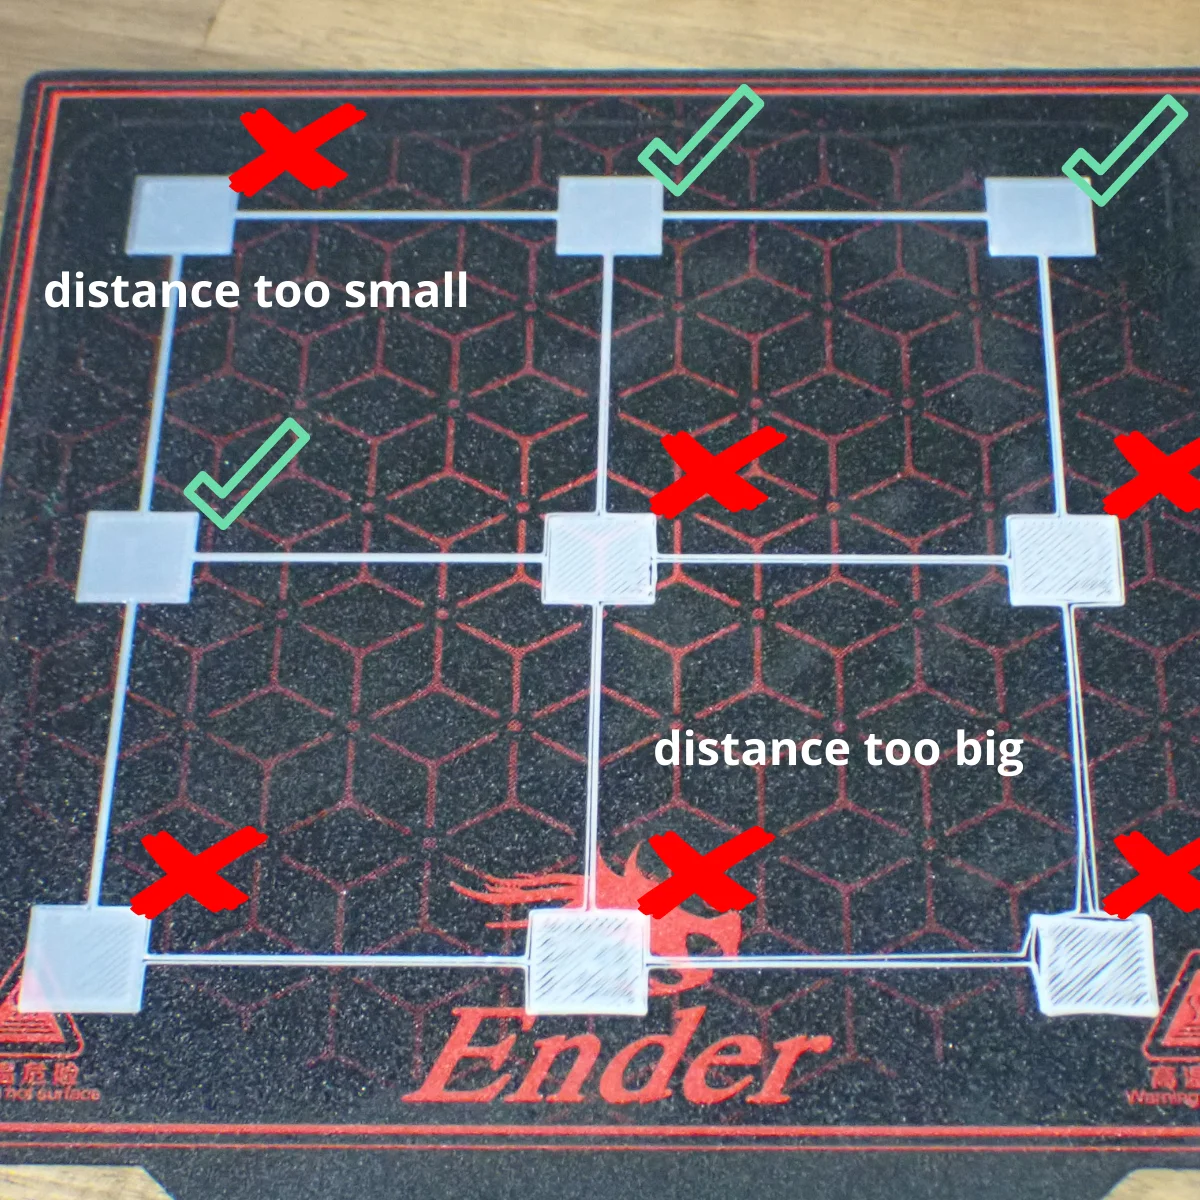
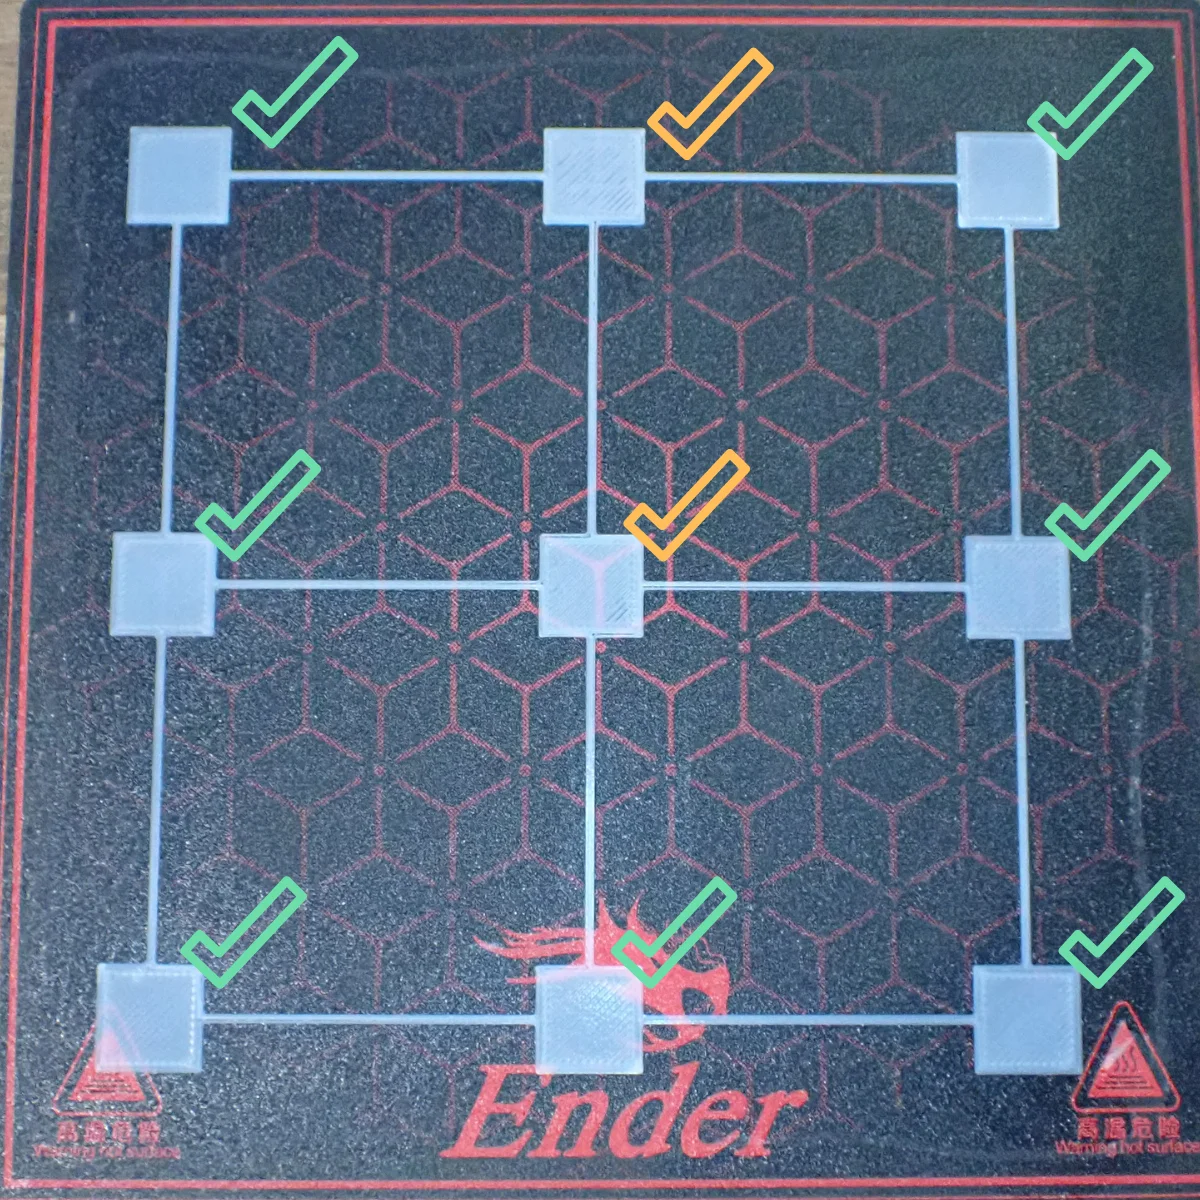
The test print contains 9 squares each connected by lines. With the poor leveling, 3 of the nine squares were good and the rest were either too close or too far away.
After doing the manual print bed leveling following the steps above, I was able to level the print bed so accurately that all squares had the same layer thickness. I measured this with a caliper gauge.
As you can see, the paper method can level the print bed very effectively. If you want to try a different method, the following tools may be of interest to you.
Tools for Print Bed Leveling
There are many buyable and printable tools for print bed leveling. Each of these tools measures in one way or another the distance between the nozzle and the print bed, or between another reference point on the X-axis to the print bed. They are mainly intended to facilitate the work of leveling and increase accuracy.
Print Bed Leveling Tool from Ukansan
This leveling tool is a clever design that uses leverage to indicate small changes in the distance between the nozzle and the print bed (link). You can print this tool yourself, but you will need a rubber band, a suitable screw and a pen for marking.
Print Bed Leveling Tool from DESIGNS 31
/https://files.cults3d.com/uploaders/14397474/illustration-file/262b3ac5-9bcb-49a0-abd3-4b4437795972/Bed-leveling-GIF.gif)
This tool also makes use of the leverage effect and displays the smallest distances on a clearly visible scale (Link). The tool is attached to the X-axis and needs a few matching nuts and bolts for mounting.
Feeler Gauge, Caliper & Dial Gauge for Print Bed Leveling
If you want to measure the distance between the print head or nozzle and the print bed in a more professional way, you can do this with a feeler gauge*, a caliper* or a dial gauge*.
All these measuring devices are suitable for reproducible and reliable indication of the smallest distances. In the case of the feeler gauge, a 0.1 mm thick feeler gauge virtually replaces the paper.
Menu-Supported Print Bed Leveling
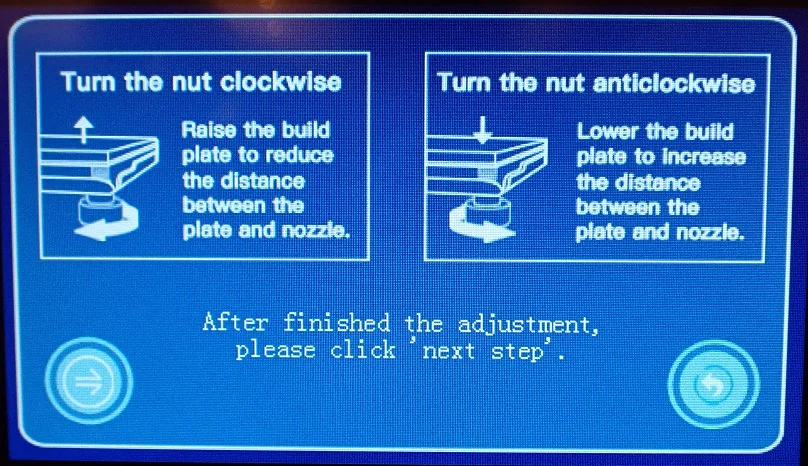
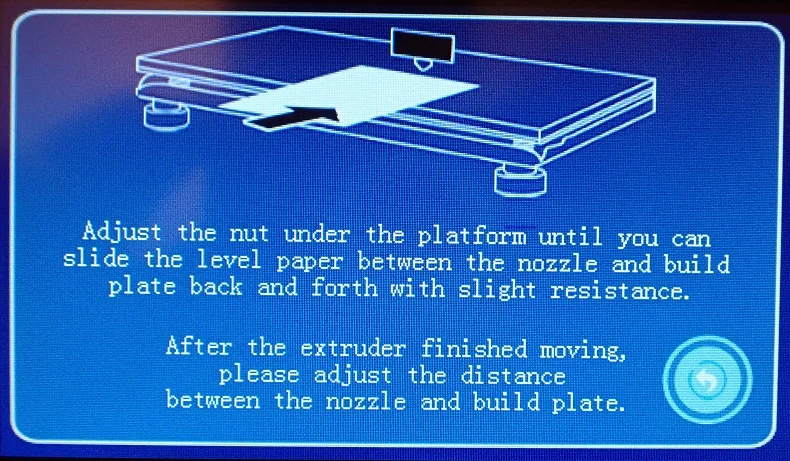
With many modern 3D printers, print bed leveling is supported by the 3D printer. This is not an automatic print bed leveling (more on this later in the article), but it helps you with the leveling and can save you a lot of time and improve the result.
Mostly this support is expressed in the fact that the print head automatically moves to different places on the print bed. The menu then tells you when to adjust the distance with the paper method. When you are done, it will move to the next point on its own until the leveling is complete.
This saves you from deactivating the stepper motors and moving the printhead manually. In addition, you get reproducible results, because the print head always moves to the same places. This may not sound too exciting, but in my eyes, it is a comfortable feature.
Replacing the Print Bed Knobs and Springs
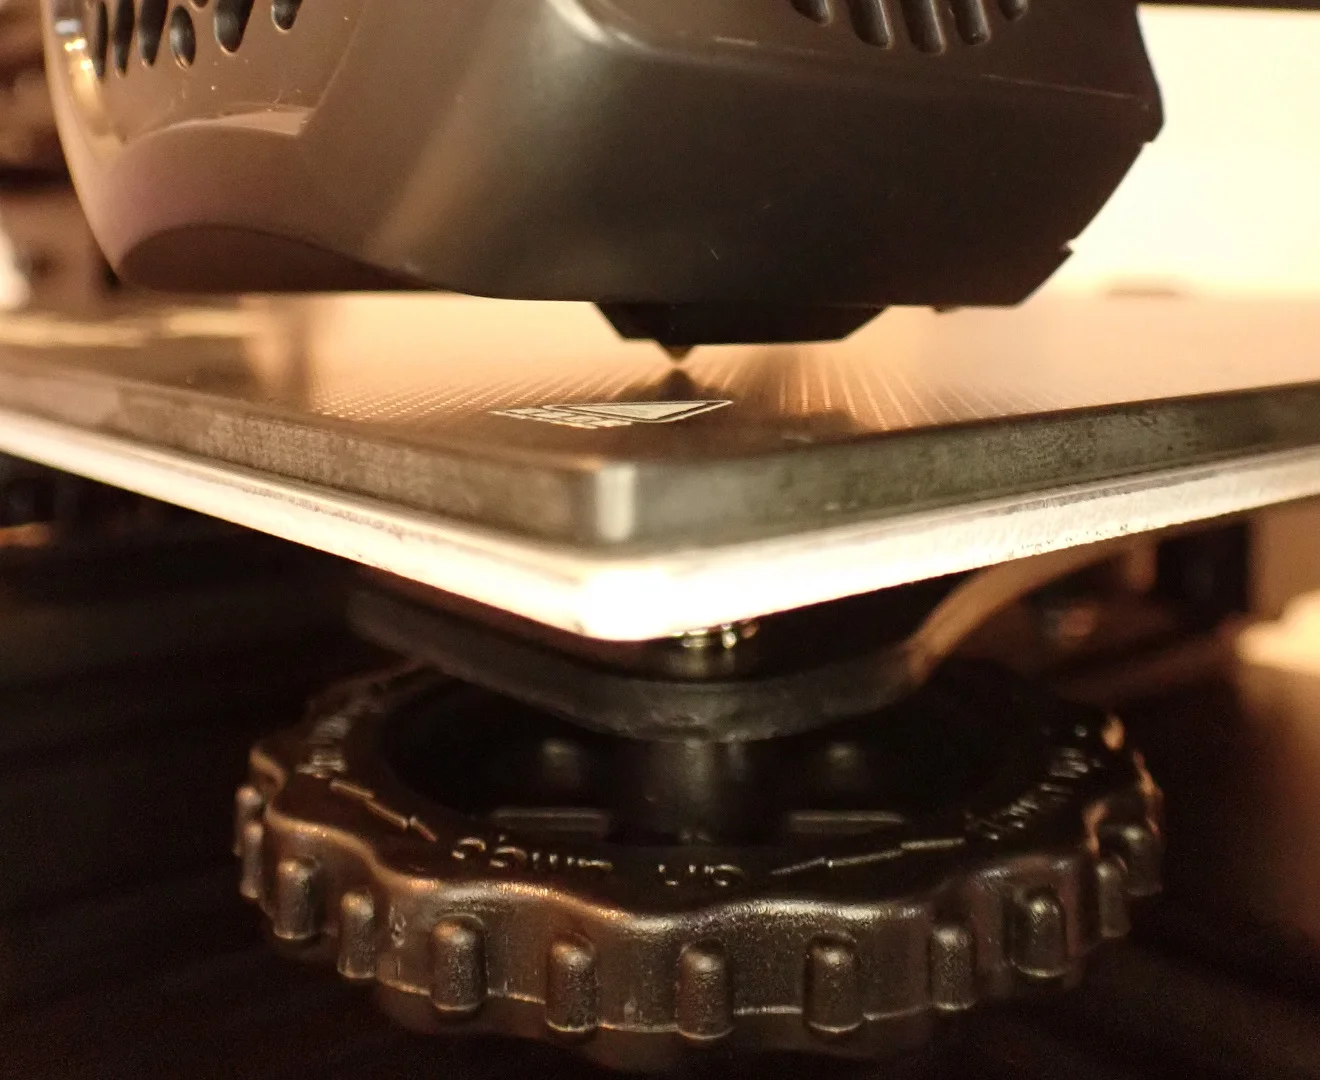
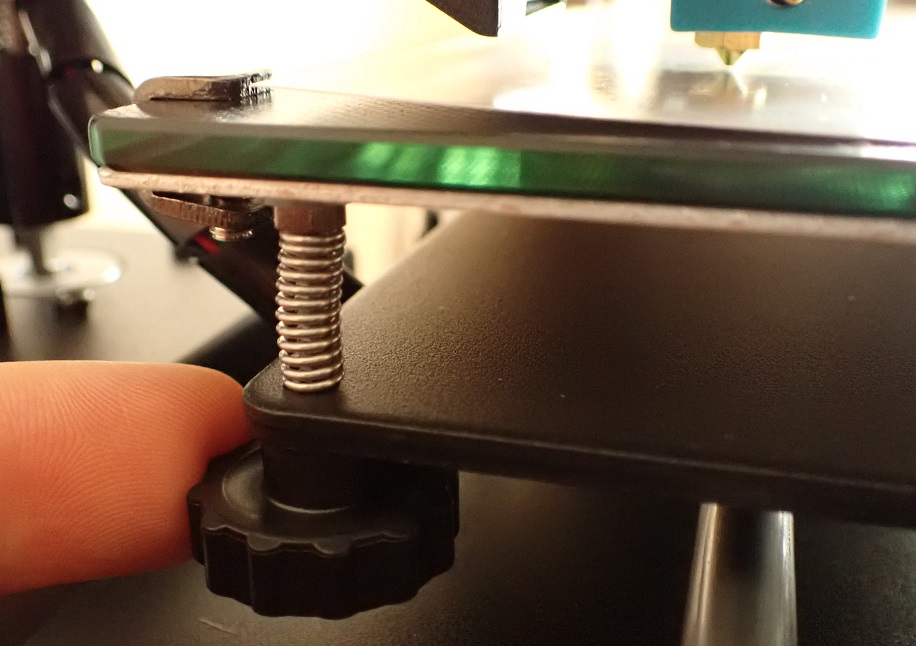
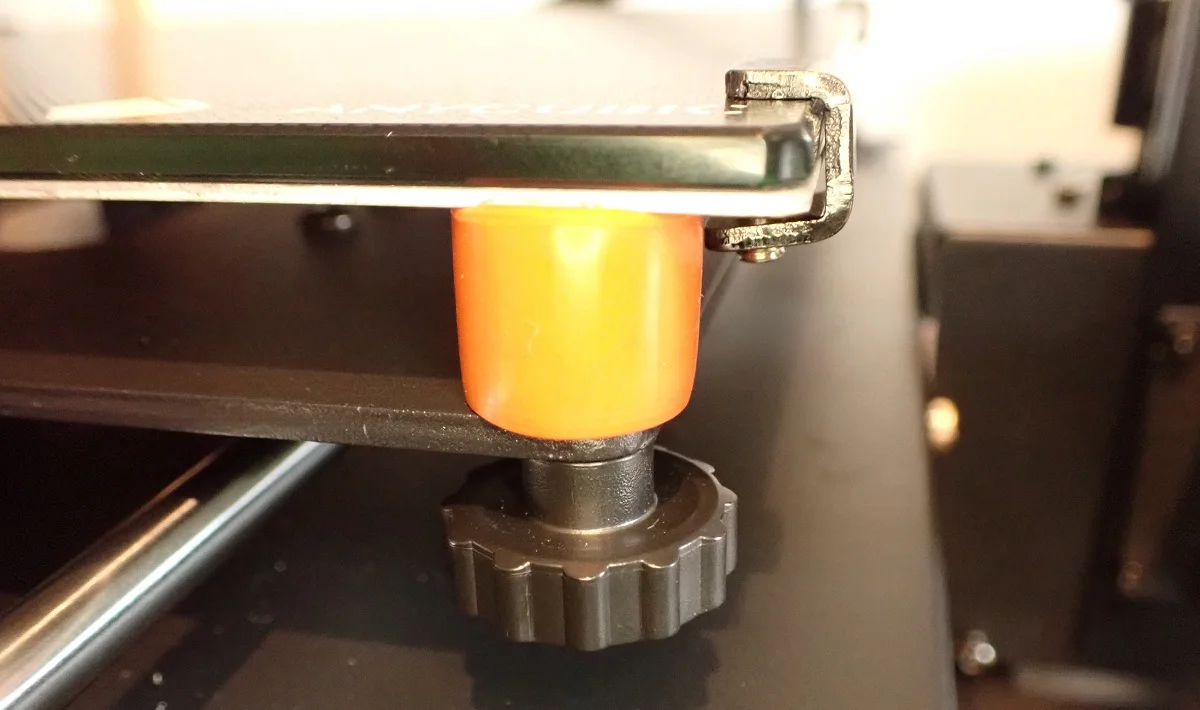
Unfortunately, low-budget 3D printers sometimes have very small and stiff rotary screws (or knobs) for the print bed. Performing print bed leveling with them is sometimes difficult and frustrating.
Since the print bed leveling depends on millimeter fractions, it is important that you can adjust the distance between the nozzle and the print bed very finely with the rotary screws. Small, stiff knobs are very poorly suited for this purpose.
But there are larger turning screws that you can buy* or print yourself. For many 3D printer models, there are suitable models for download on platforms such as Thingiverse.
Also, the springs under the print bed are sometimes of poor quality. Either they lose their tension over time, causing the leveling to constantly change, or they are simply too short. There are buyable upgrades* or silicone dampers* for this as well.
Automatic Print Bed Leveling
If you don’t want the hassle of manual print bed leveling, you can have your print bed leveled automatically. 3D printers with manual print bed leveling can be upgraded with leveling sensors.
But there are also 3D printers with built-in automatic leveling. Whether sensor or directly installed, in the end, you have a print bed leveling at the touch of a button.
Print Bed Leveling Sensors
Check Price at:
Many low-budget and entry-level 3D printers can be upgraded with leveling sensors. They can then perform automatic print bed leveling either through the slicer or through the printers own menu. There are several such sensors, the most popular being the BLTouch, CRTouch and the 3DTouch.
These three sensors look very similar but differ in part strongly in their sensor technology. What they all have in common is that they mechanically sense the print bed with a sensor rod.
This rod is mounted in such a way that it can be pushed forward and quickly snaps back into the housing on contact and triggers the sensor. This allows the 3D printer to virtually feel where the print bed is located.
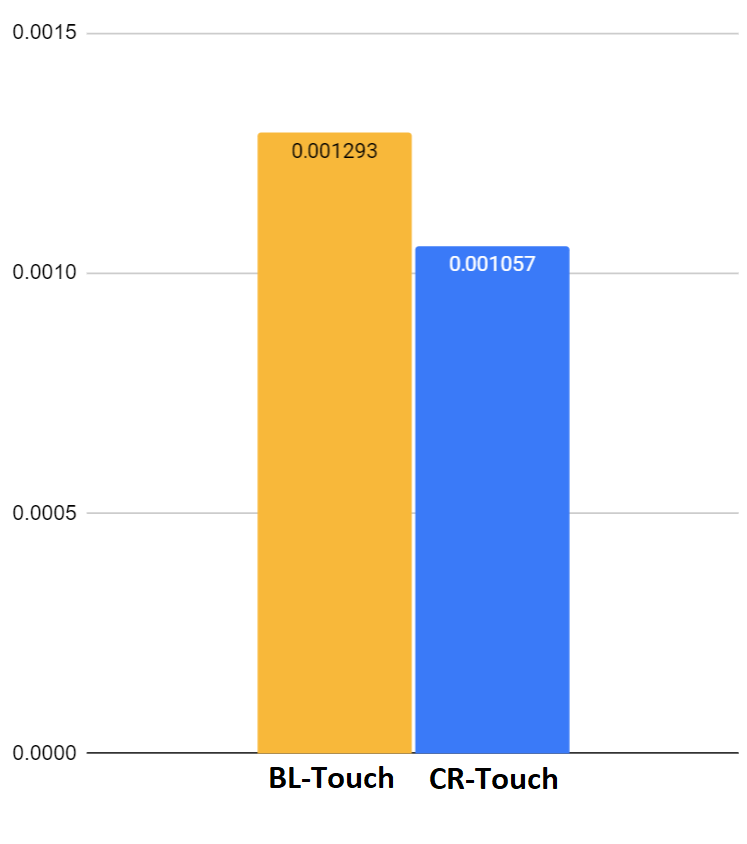
The BLTouch has a Hall sensor inside that can detect the magnetic end of the probe. The sensor is very sensitive and therefore offers high accuracy.
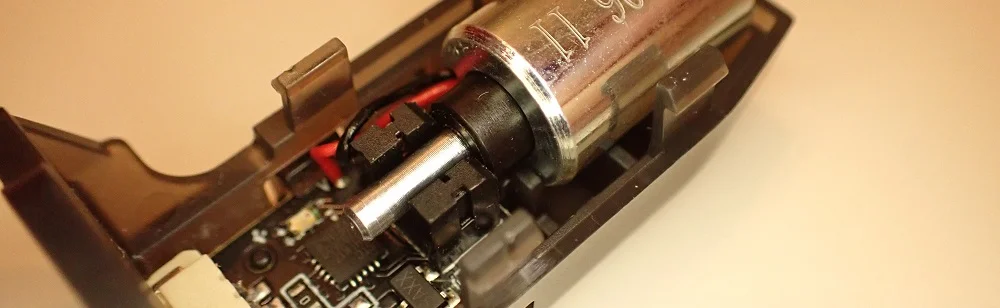
The CRTouch, on the other hand, has a metal pin and an extremely accurate optical sensor inside. This makes the CRTouch not only more stable, but also slightly more accurate than the BLTouch. I have tested and compared these two sensors in detail for automatic print bed leveling. You can read through the comparison in this article: BL-Touch vs. CR-Touch | Comparison & Accuracy Test.
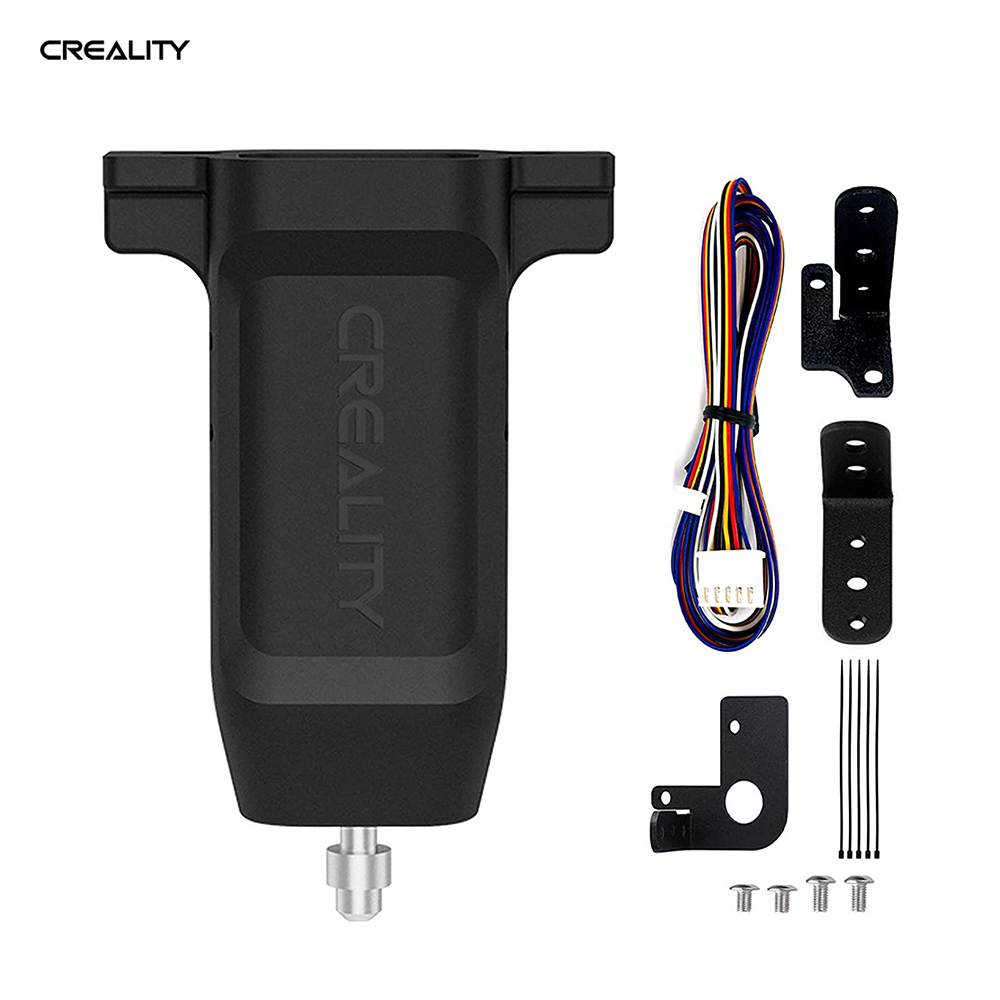
The mounting of these three sensors is in principle identical. They are attached to the printhead with suitable brackets and connected to the motherboard at the slot for Z-probes.
If you buy one of these sensors separately and not as a bundle, you should definitely buy an extension cable. Most of the time the included cables are too short. An exception to this is the CRTouch – it is perfectly matched to Creality 3D printers and the bundle includes everything you need for mounting.
Among these three sensors, you have a wide range of compatible 3D printers. There are also many DIY mounts that you can download from sites like Thingiverse.
It is important that the sensors are mounted stably and cannot wobble. As you can imagine, it is very important that the sensor reproducibly senses the same spot. The mount you printed yourself should therefore be firmly mounted on the print head with suitable screws.
In this article you can see how to mount the BLTouch to an Ender 3 V2.
The good results of these mechanical print bed sensors have led to them being installed as standard in many mid-range 3D printers. For example, the Bluer Plus has a 3DTouch that levels the print bed at the touch of a button.
omatic print bed leveling. However, if you’re like me and already very proficient at manually leveling a print bed, these advantages diminish. However, I still prefer a 3D printer with automatic leveling.
Disclosure: This website is the property of Martin Lütkemeyer and is operated by Martin Lütkemeyer. Martin Lütkemeyer is a member of the Amazon Services LLC and other Affiliate Programs. These are affiliate advertising programs designed to enable websites to earn advertising revenue through advertising and linking to Amazon.com and others. Links marked with * are affiliate links.
