
- Wet Filament: Prevention, Symptoms & Drying - July 18, 2024
- Sovol SV08 – Best PrusaSlicer Settings & Profile - June 26, 2024
- Sovol SV08 – Best Orca Slicer Settings & Profile - June 26, 2024
Disclosure: Links marked with * are Affiliate Links. I earn from qualifying purchases if you decide to make a purchase through these links – at no additional cost for you!
The Qidi Tech X-Max* is a large 3D printer with a sealed build volume. It can also print more demanding materials such as Nylon or PC. ABS is also no problem thanks to the constant temperature inside.
In this hands-on test, the 3D printer impressed me with its reliability, accuracy and ability to process a wide range of materials. The many premium features, such as the flexible, removable print bed with excellent adhesion, also left a good impression.
Printing is the main focus of this device. The complete design was made for easy operation and smooth printing. Tinkering or time-consuming leveling does not exist with this 3D printer!
I also tested its successor, the X-Max 3. Here is the review: QIDI Tech X-Max 3 Review: Huge Prints at 600 mm/s – Tested
Check Price at:
Table of Contents:
- 1 Key Takeaways
- 2 Who Should Buy the Qidi Tech X-Max?
- 3 Pros & Cons– Qidi Tech X-Max
- 4 Scope of Delivery– Qidi Tech X-Max
- 5 Setup & Assembly– Qidi Tech X-Max
- 6 Print Quality– Qidi Tech X-Max
- 7 Features– Qidi Tech X-Max
- 7.1 Large Print Volume
- 7.2 Enclosure
- 7.3 Stable Construction
- 7.4 Heated Print Bed
- 7.5 Good Print Bed Adhesion
- 7.6 Removable, Flexible & Magnetic Print Bed
- 7.7 Double Z-Axis
- 7.8 Stable X and Y Axes
- 7.9 Wide Range of Materials
- 7.10 Replaceable Extruder
- 7.11 Supported Manual Print Bed Leveling
- 7.12 Air Filter
- 7.13 Relatively Quiet Operation
- 7.14 Two Filament Holders (Inside & Outside)
- 7.15 Two Different Filament Ways
- 7.16 Good Connectivity
- 7.17 Color 5-inch Touchscreen & Intuitive Menu
- 7.18 Simple Assembly
- 7.19 Good PLA Filament and Tools Included
- 7.20 Resume Print Function
- 7.21 Automatic Shutdown After Printing
- 7.22 Detailed Instructions
- 7.23 QIDI Slicer
- 7.24 Very Good Customer Service
- 8 Technical Specifications– Qidi Tech X-Max
Key Takeaways
- large print volume of 300 x 250 x 300 mm
- closed build volume
- large filament selection (PLA, ABS, TPU, PETG, PC, Nylon, Carbon)
- completely preassembled
- easy operation
- very reliable
- very stable
Who Should Buy the Qidi Tech X-Max?
Compared to other hobby 3D printers, the Qidi Tech X-Max is a bit expensive at first glance. However, its reproducible accuracy, wide range of filaments, large build volume and reliability make the price very fair and justified.
The Qidi Tech X-Max is best suited for people who want to print without a lot of tinkering. This includes hobby makers with high demands, small businesses, schools and universities.
Pros & Cons
– Qidi Tech X-Max
PRO:
- fully assembled
- large filament selection
- closed build volume
- good for exotic filaments
- flexible, removable, heated print bed
- supported manual print bed leveling
- reliable
- air filter
- stable construction
- simple operation
- quiet (approx. 50 dB)
- large print volume
- additional replaceable extruder for high temperatures
CON:
- large and heavy
- no automatic print bed leveling
- only one extruder at a time (no dual extrusion)
- no filament run-out sensor
Scope of Delivery
– Qidi Tech X-Max
Since the printer is quite large and comes almost fully assembled, it also comes in a large box. The packing dimensions are 655 x 610 x 720 mm.
The box is also quite heavy, so it’s best to carry it with two people. For smaller distances, you can lift it alone, but as soon as you have to climb stairs or cover longer distances, the help of a second person is quite handy.
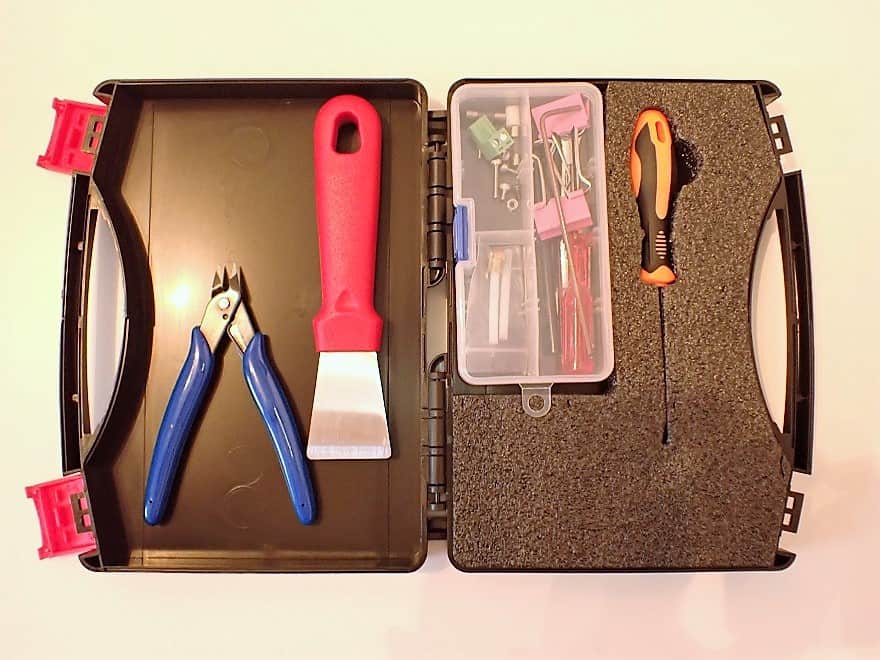
As usual, the scope of delivery also includes some tools that will help you with the assembly and operation of the 3D printer.
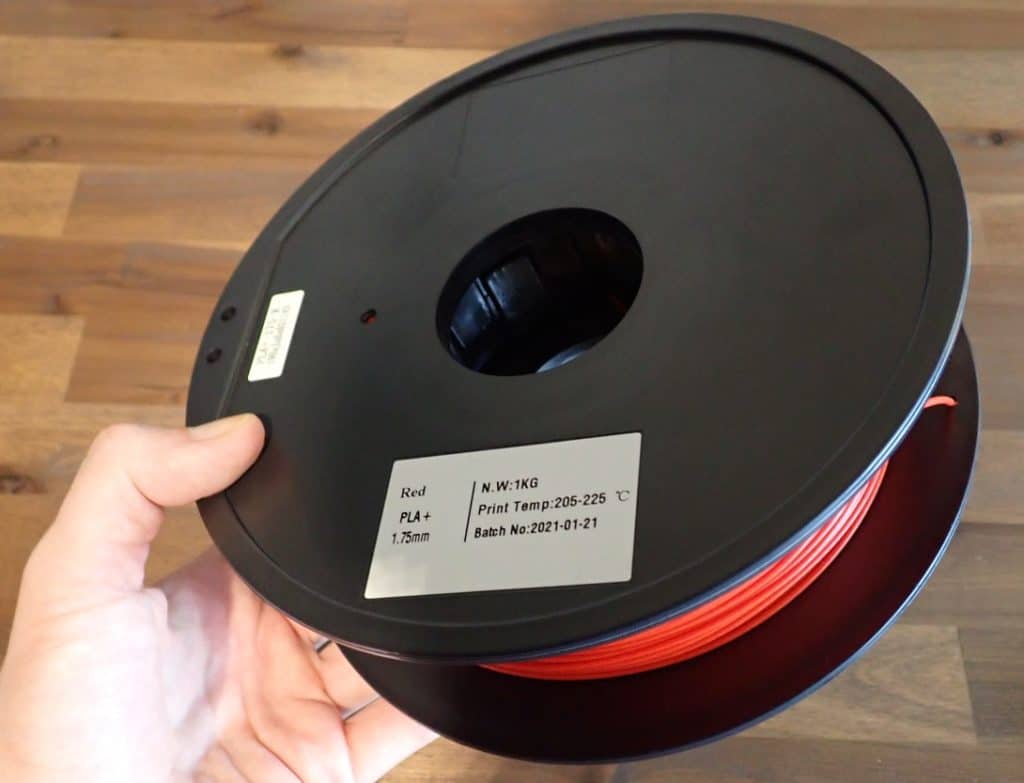
I was pleasantly surprised by the 1 kg spool of red PLA+ filament*. With most 3D printers, the supplied filament is just enough for 1-2 tests.
In total, the following things are included in the scope of delivery of the Qidi Tech X-Max:
- pre-assembled 3D printer
- acrylic hood (to close the housing for e.g. ABS)
- outside filament holder
- inside filament holder
- magnetic printing plate
- power cable
- LAN cable
- glue stick
- replacement extruder
- leveling aid
- screwdriver
- spatula
- allen key
- various spare parts
- practical case for tools and spare parts
- USB stick with test object, instructions and videos
Setup & Assembly
– Qidi Tech X-Max
Since the Qidi Tech X-Max* is delivered already pre-assembled for the most part, assembly basically only consists of mounting the filament holder and removing packaging material and transport locks.
The printhead is secured to the axles with cable ties and the toothed belts are secured with paper clips for safety.
In addition, the interior is completely filled with styrofoam so that nothing can wobble back and forth during its journey to your home. You can only remove this styrofoam inside when you turn on the 3D printer and move the print head and the print bed by pressing a button.
All in all, this process only takes a few minutes and you can start leveling the print bed and loading filament right away!
Print Bed Leveling
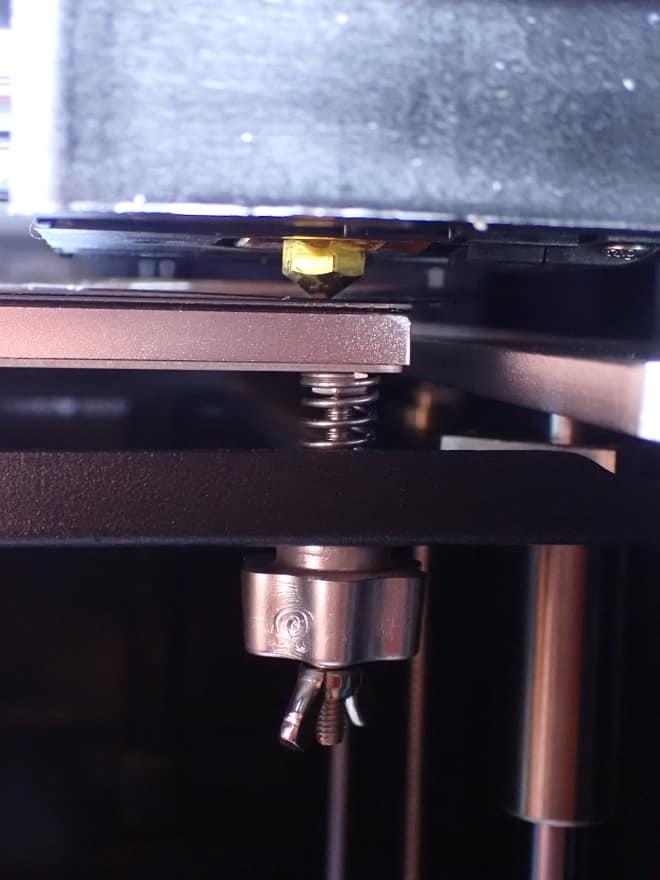
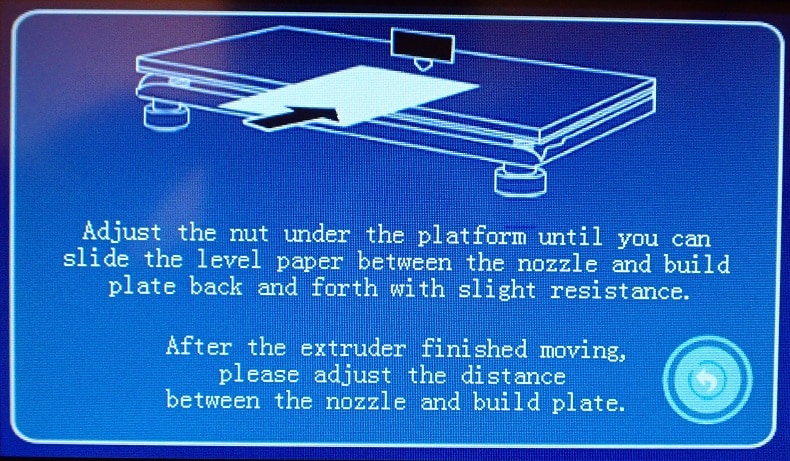
Print bed leveling is manual on the Qidi Tech X-Max, but supported by the menu.
The design of the 3D printer is so stable and accurate that leveling at one point on the printing bed is enough!
Another plus of the stable construction is that you very rarely have to repeat the print bed leveling. It stays in place for a very long time and really only needs to be replaced if you encounter printing errors or other problems. During my entire test, I only had to level the print bed once.
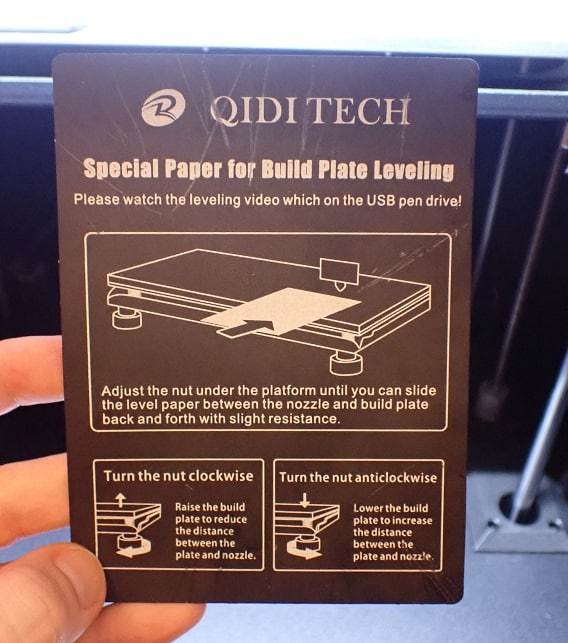
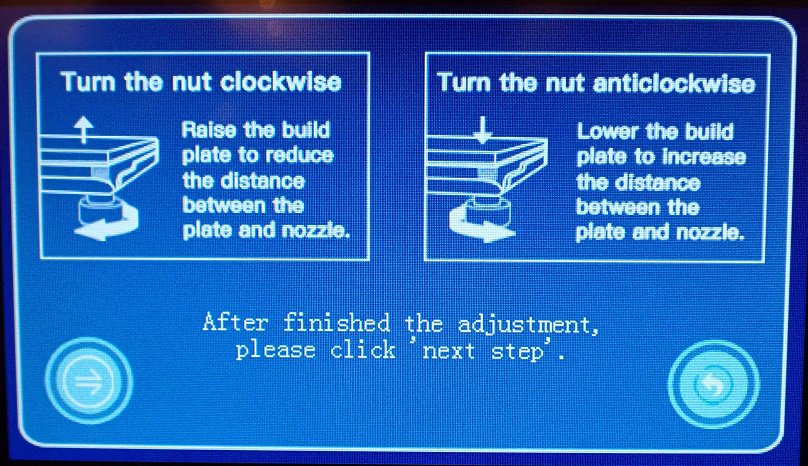
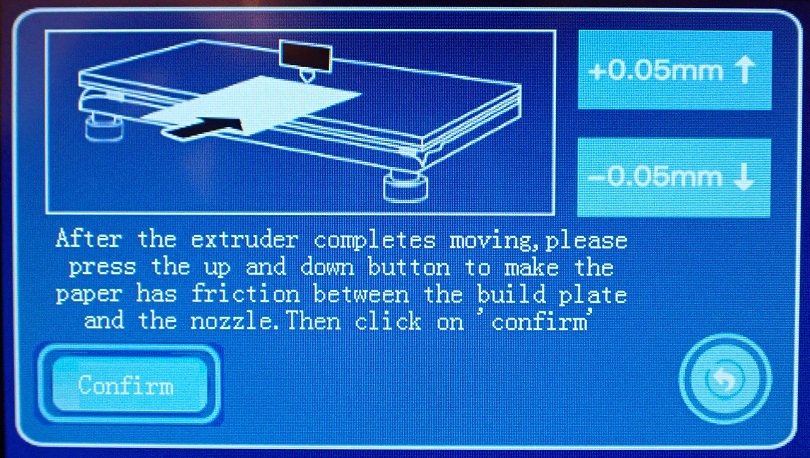
The menu shows you exactly what you have to do during leveling. The included leveling aid (a piece of sturdy plastic foil) must be placed between the nozzle and the print bed during leveling. As with all manual print bed leveling using the paper method, you must adjust the height of the print bed so that there is some friction as the paper moves between the nozzle and the print bed.
With the Qidi Tech X-Max, the leveling is quite reliable, but I would still recommend you repeat this process 1-2 times – better safe than sorry (an improperly leveled print bed can cause a whole host of print errors!).
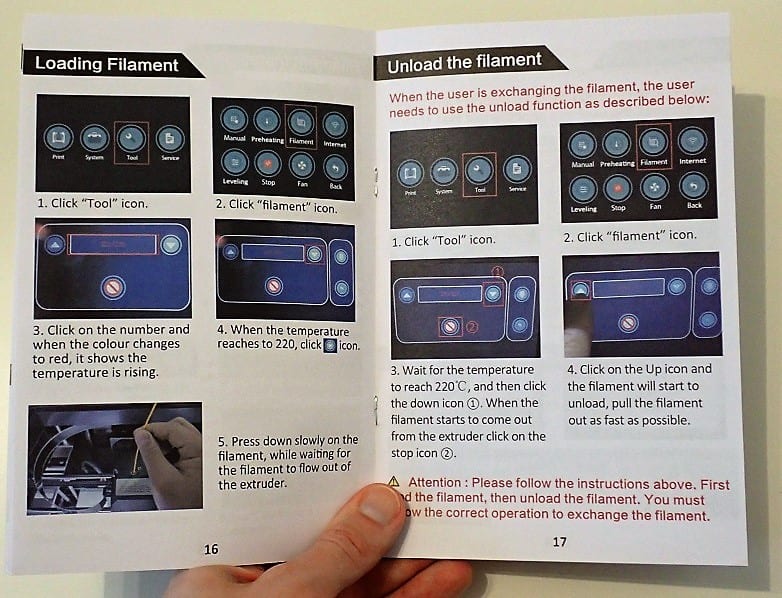
Filament Loading
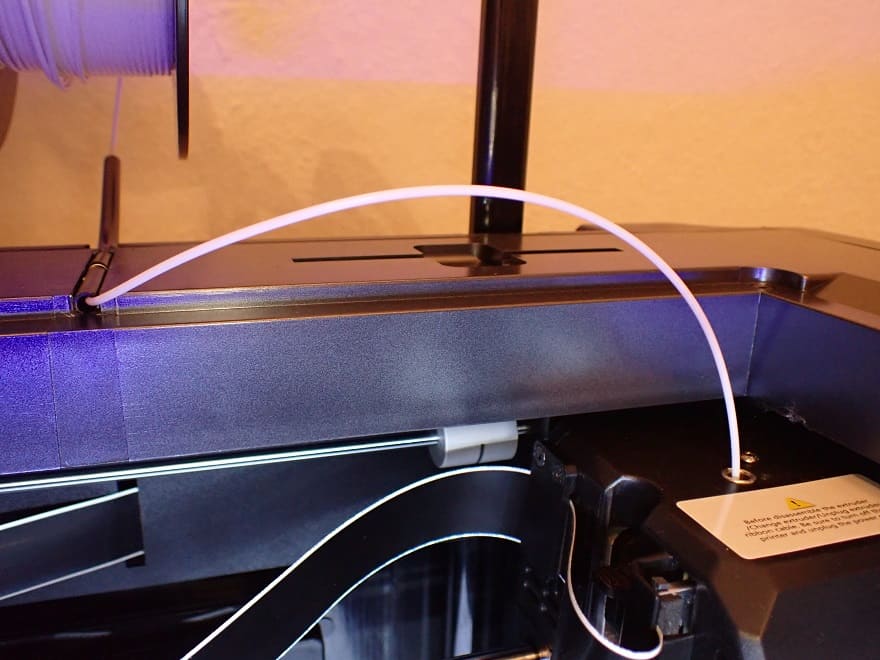
To load the filament, you have to mount the roll on one of the two filament holders and then feed the filament to the extruder.
For this purpose, there are special guide tubes through which you push the filament and then insert it into the extruder. If you use TPU or other flexible filaments, you should guide the filament directly into the extruder. Otherwise, the filament could easily get tangled.
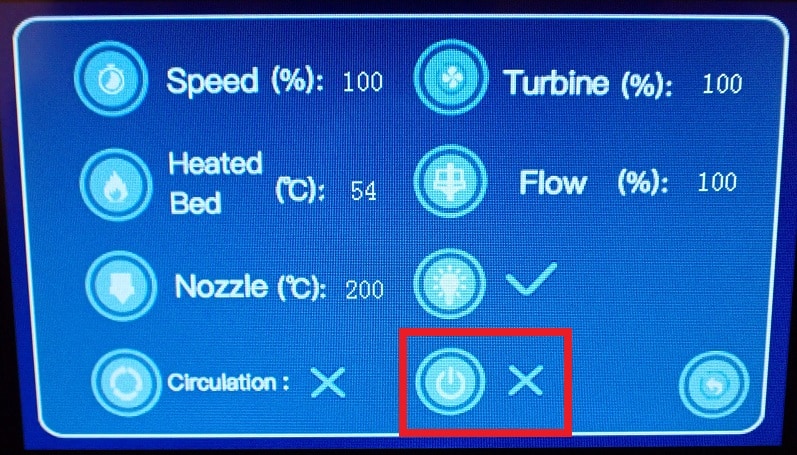
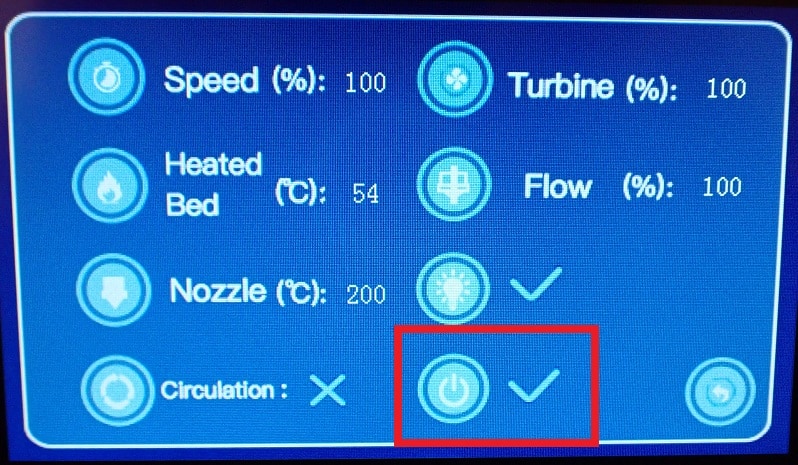
To then load the filament and extrude it through the extruder, you need to go to the appropriate submenu (Main Menu > Tool > Filament).
The 3D printer loads and unloads the filament at 220 °C by default. When you press the temperature in the menu, the temperature starts to rise. Once the temperature is reached, you can press the arrows to move the extruder in either one direction or the other. The down arrow means that the filament will be pushed through the extruder to the nozzle and gets extruded.
Print Quality
– Qidi Tech X-Max
The print quality of the Qidi Tech X-Max is very good with 0.05 to 0.4 mm layer thickness. The XY accuracy of 0.011 mm in particular guarantees reproducibly accurate results. The good quality of the nozzles also contributes positively to the print quality.
Test Prints
To test the 3D printer, I have printed various models. Among them is the popular test object 3DBenchy (link to the model).
With these test prints, I tested various aspects of print performance:
- Accuracy
- Reproducibility
- Operability
- Different materials
For my first test print with PLA I used my default settings (Nozzle 200 °C and print bed 60 °C). The result was a 3DBenchy with some warping and a lot of stringing.
On my second attempt, I followed the manufacturer’s recommendation for the printing bed temperature of 50-55 °C. This solved the problem with the elephant foot.
I also reduced the nozzle temperature a bit and was able to almost completely fix the stringing, and the overhangs also got much better.
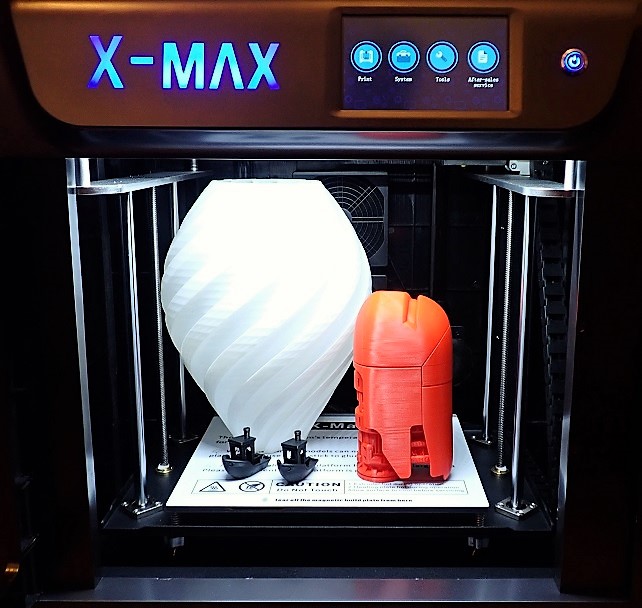
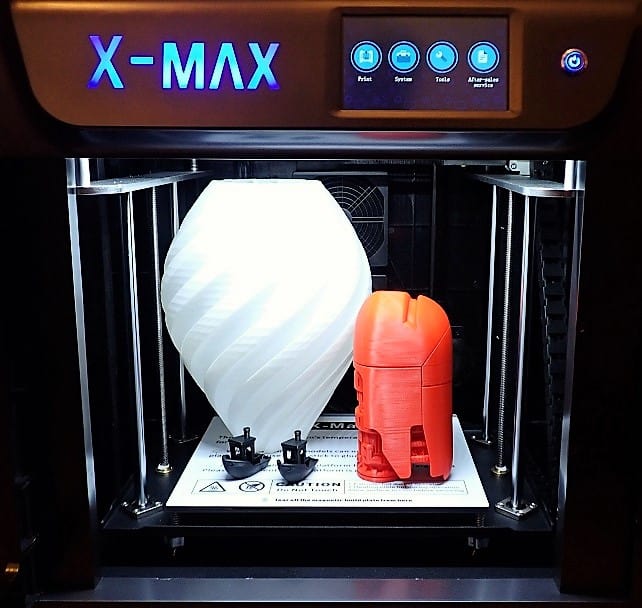
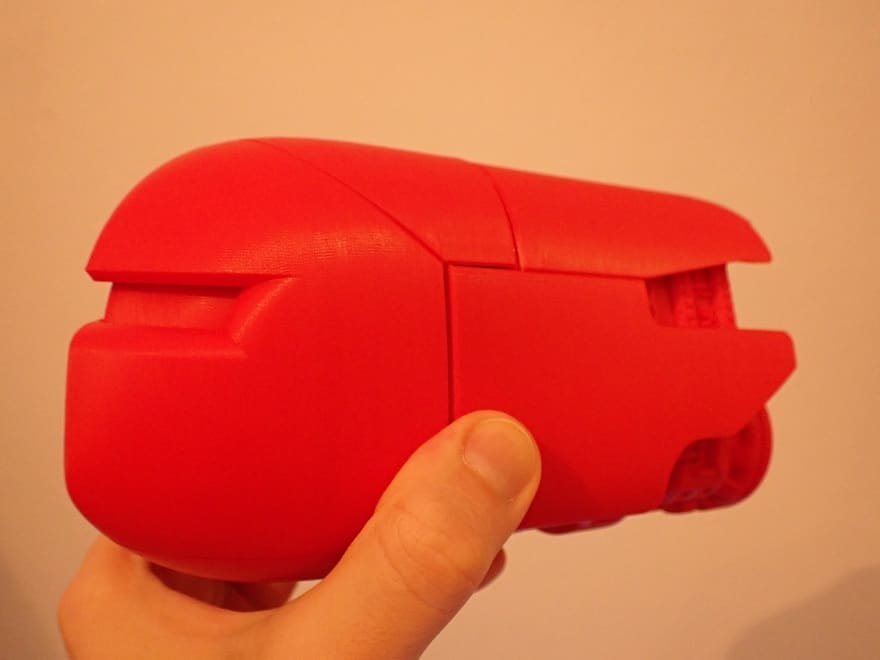
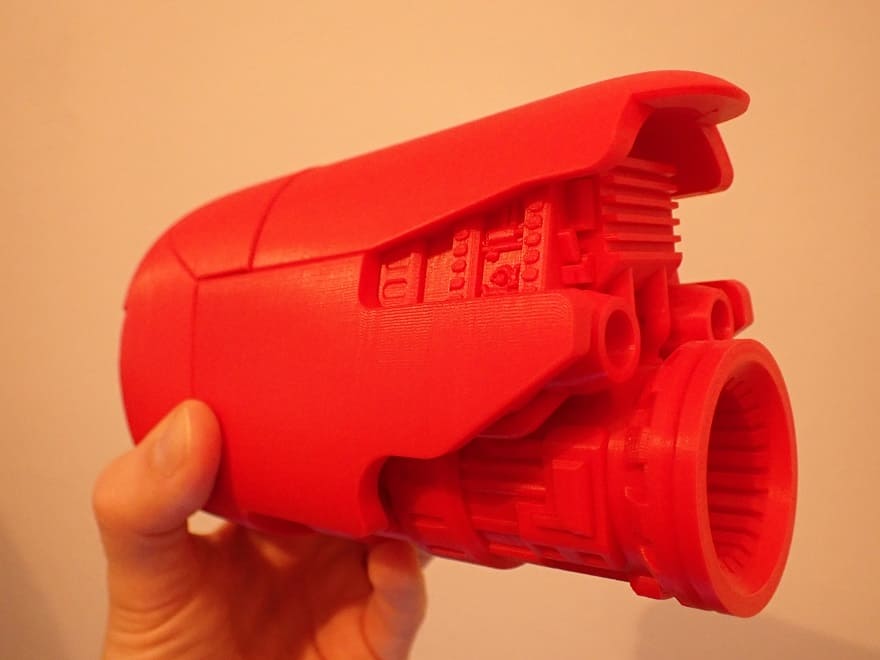
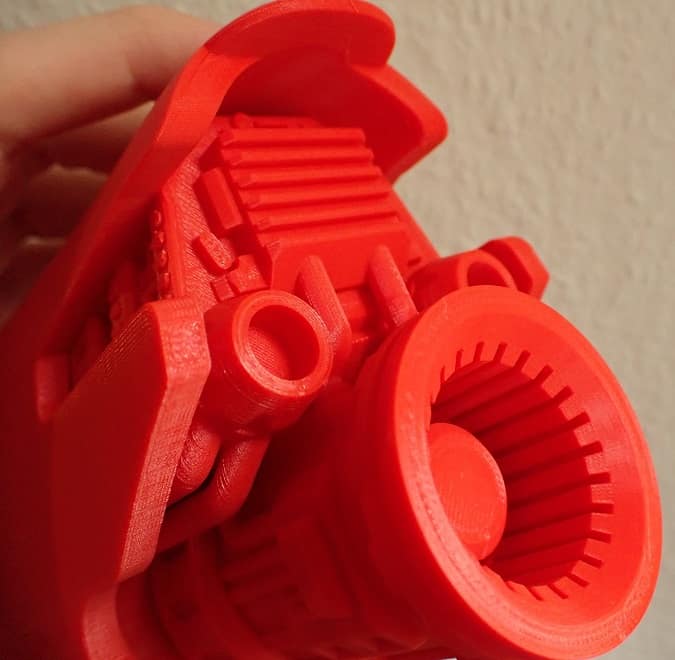
Then I printed a medium-sized, two-part object with lots of details: “space shippy” by Bart van der Westerlaken (link to model). The print took a total of 2 days and one night because I used the most accurate setting.
The result is something to be proud of! The bright red of the PLA+ filament is ideal for the outer hull of the spaceship. Now I just have to paint the windshield and the machine parts and the thrusters to match.
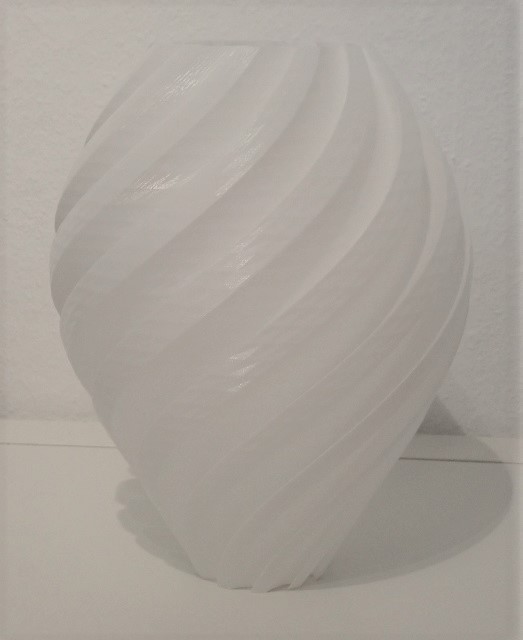
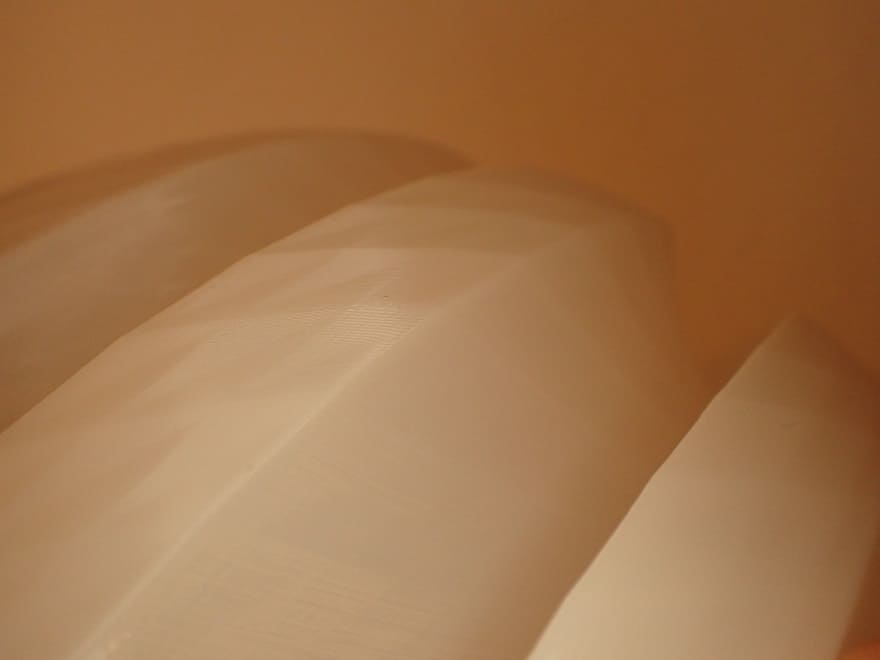
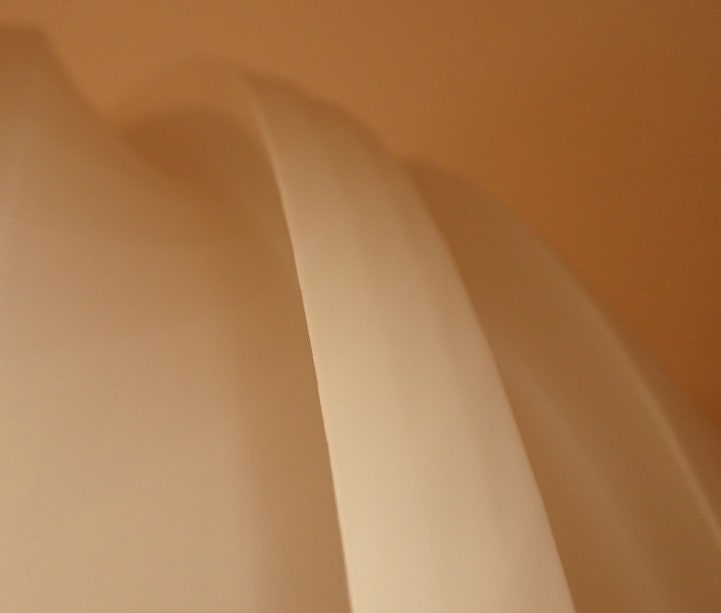
Finally, I printed a filigree vase, which turned out perfectly (link to the model from Clockspring). With this, I wanted to use the complete build volume. In X/Y-direction there would have been some space left, but in Z-direction I used the height completely.
In the picture, you can therefore roughly see the order of magnitude of the possible models with the X-Max.
Features
– Qidi Tech X-Max
The Qidi Tech X-Max* is packed with useful features. Considering its price, this is to be expected.
Not only does it have a very sturdy construction and easy operation, it also has many features that increase the accuracy of printing and improve reproducibility.
Large Print Volume
As the name suggests, the X-Max has quite a large print volume compared to other hobbyist 3D printers.
With its large print volume of 300 x 250 x 300 mm, you can print medium to large objects in one piece. There are larger 3D printers in the hobby sector, but it is difficult to get a suitable enclosure for larger print volumes to be able to print filaments such as ABS.
For most applications, this print volume is perfectly adequate. And if you do want to print a larger object, you can divide it into a few pieces and glue them.
Enclosure
For filaments such as ABS or Nylon*, it is important that the ambient temperature remains stable and warm. This is possible with the closed printing chamber of the Qidi Tech X-Max.
The casing looks modern and sophisticated from the outside. However, it is only made of simple, light plastic – which is not bad at all since it is only supposed to keep the heat inside.
To close off the top of the housing, there is a transparent acrylic hood. This is only used for filaments that require a closed build volume. The only drawback here is that this hood has a small opening to pass the filament. However, this did not have a negative effect on my test!
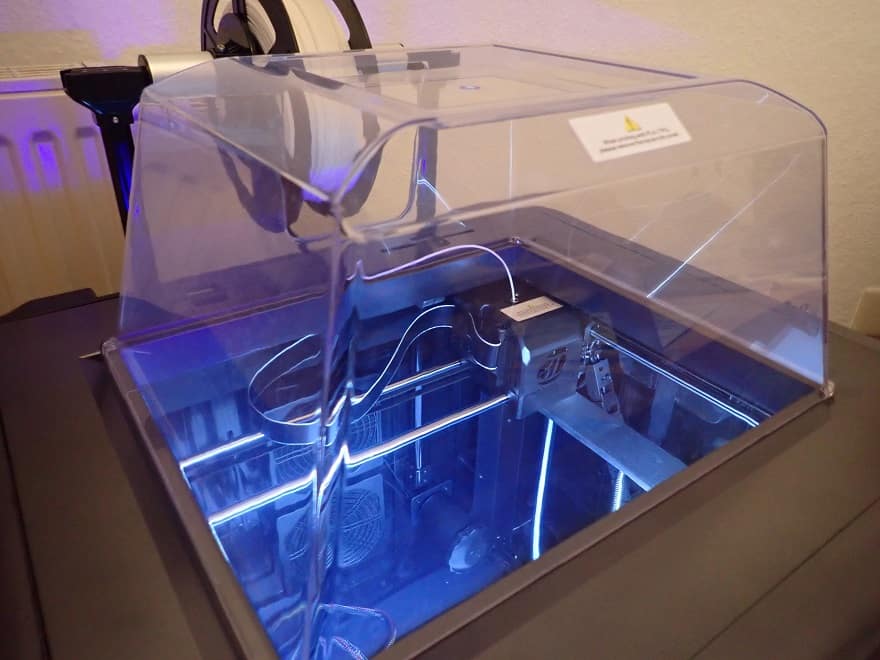
Another advantage of the closed housing is that operation becomes safer and no foreign objects or small children’s hands can get into the printer during printing. It also reduces maintenance somewhat, as dust is less likely to accumulate in the housing.
Stable Construction
At first glance, it is clear that the X-Max is very sturdily constructed. Not only through its housing, but also through the internal construction, the entire structure becomes very stable.
There are virtually no vibrations and the leveling of the printing bed lasts a very long time until you have to repeat it.
Heated Print Bed
The print bed can be heated up to 100 °C. This gives you the possibility to work with many different filaments.
The special print bed conducts the temperature extremely well. For this reason, you must always set the temperature of the print bed about 5 °C lower than is normally recommended for the filament.
As you may have read above, I used a default value of 60 °C for PLA in my very first test print. The result was a classic elephant foot! The temperature was just too high… At 55 °C I then got a perfect result.
It is also positive that the print bed heats up very quickly. Thanks to the excellent heat conduction, the warm-up times are really very good compared to other 3D printers.
Good Print Bed Adhesion
The adhesion of the magnetic print bed is extremely good – especially for PLA!
With PLA, it is actually the case that it is difficult to remove the object from the print bed. The larger the object, the easier it becomes. The print bed is flexible, so you can just lever the object off. And that gets easier and easier the bigger the object is.
If you use a skirt like I do and print with PLA, it is really hard to remove it from the print bed. My tip is to carefully cut through the skirt at one point with a side cutter and carefully lift it up. Once you have one spot loose, the rest is easy.
If you have difficulty getting good print bed adhesion with other materials, a glue stick is also included. In addition, Blue Tape is perfect for certain filaments to improve print bed adhesion or to avoid too strong adhesion.
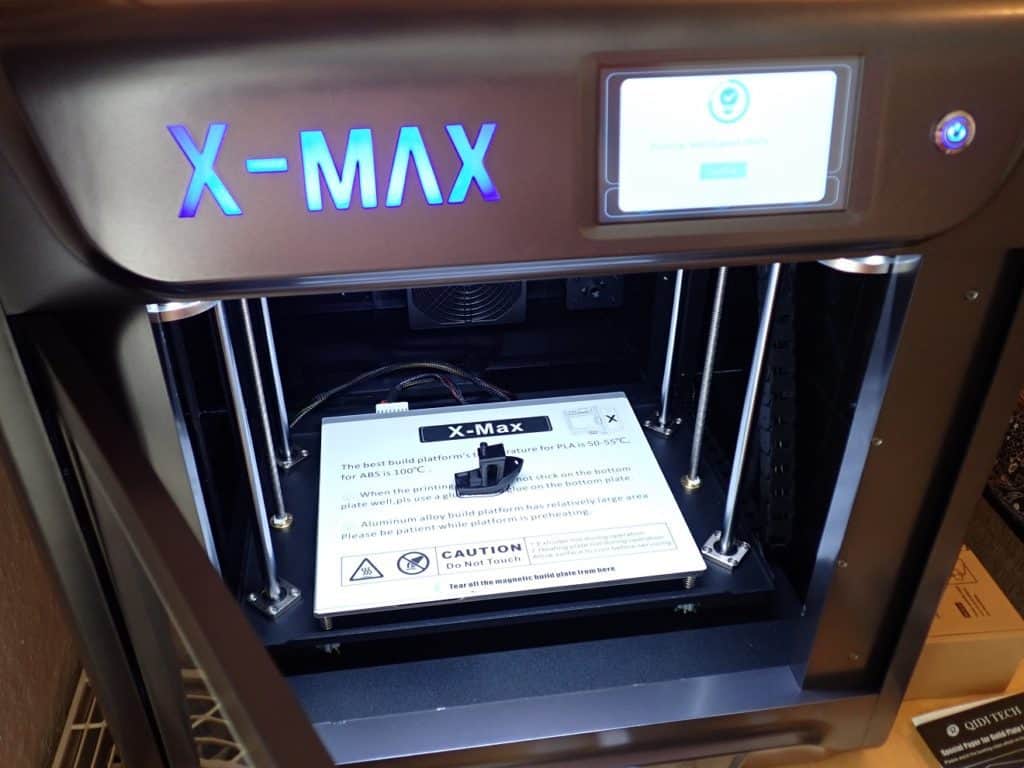
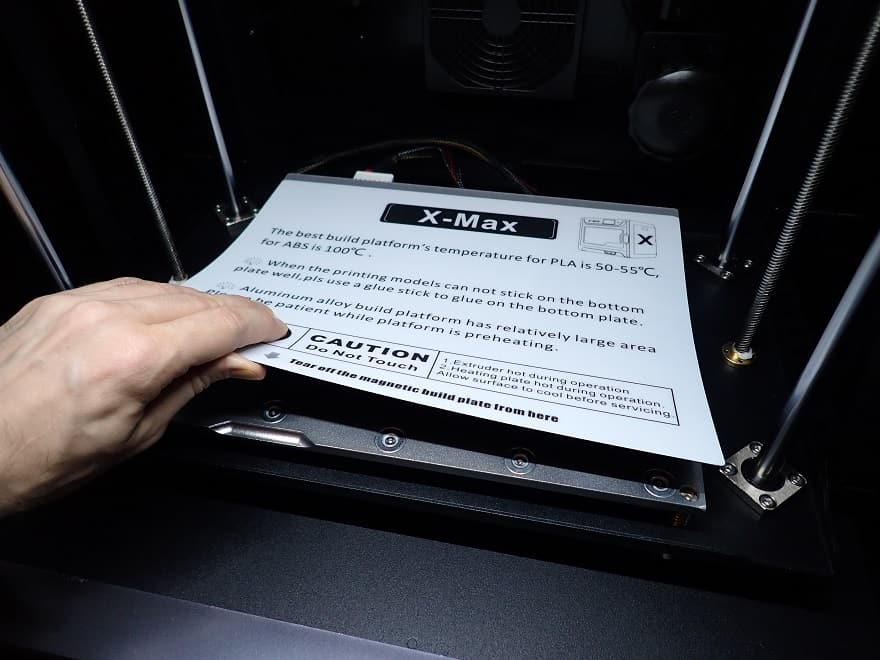
Removable, Flexible & Magnetic Print Bed
There is a flexible, removable and magnetic print bed on the heated printing plate. You can already tell from the many adjectives in the last sentence how practical this feature is.
After a print, you can simply remove and bend the print bed to make it easier to remove the print object. The part is also magnetic and adheres extremely well to the strongly magnetized printing plate. The adhesion must also be strong enough to allow good temperature transfer.
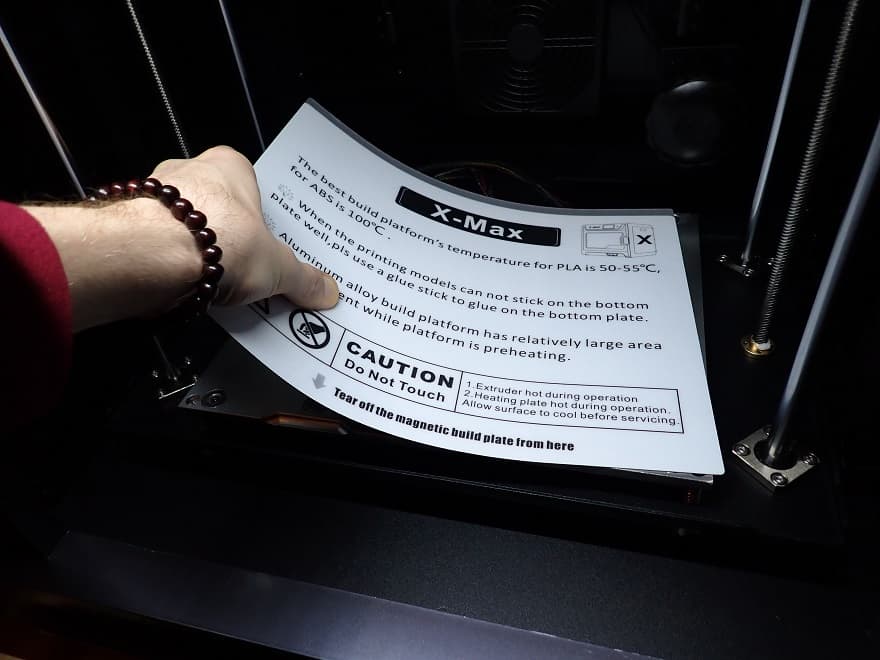
The plate is quite stiff but still flexible. However, you cannot bend it as far as you like. With smaller objects, this can make it difficult to remove them from the print bed. The larger the object, the easier it will be to remove it from the print bed.
Besides the sealed housing and the double Z-axis, the print bed is my favorite feature of the X-Max! You can see the high build quality here and benefit from a very user-oriented operation.
Double Z-Axis
The Qidi Tech X-Max has two Z-axes with a diameter of 12 mm. These are also stabilized by two guide rods each. This further stabilizes the already stable aluminum construction!
The double Z-axis contributes enormously to the stability, accuracy and reproducibility of the 3D printer. It also guarantees vibration-free prints even with large objects and allows you to achieve high accuracy in the complete print volume.
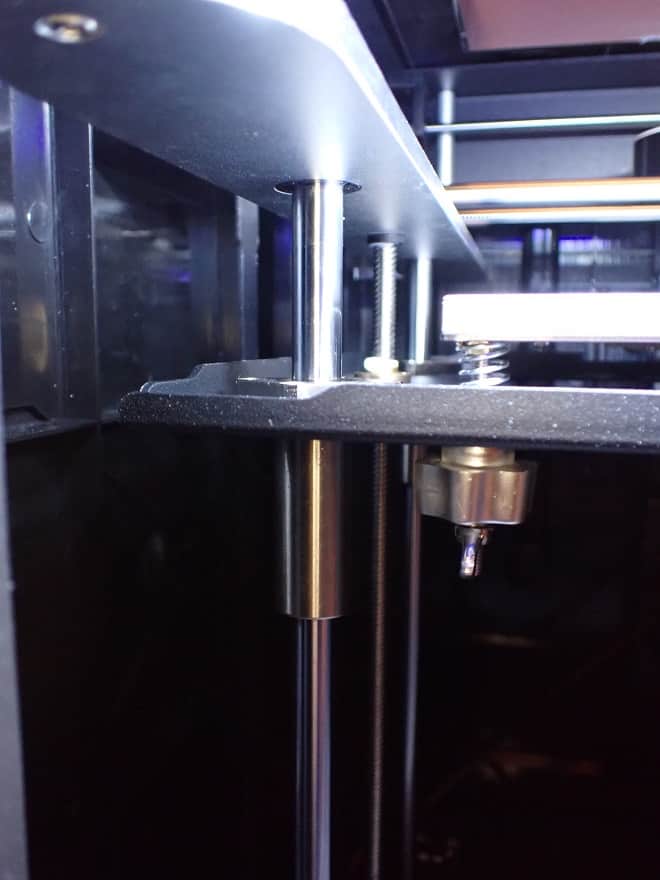
This stable construction also makes it easy to level the print bed. For fast leveling, you therefore only need to approach one point. In addition, leveling lasts a very long time because the print bed does not adjust so easily.
In my practical test, I also tried to create vibrations. Normally, this is not so difficult by increasing the printing speed strongly and incorporating abrupt changes of direction in the slicer (e.g. with complex infill pattern and small objects).
I did not succeed in generating vibrations on the M-Max, or only with great difficulty. Printing errors like ghosting or ringing did not occur at all.
Stable X and Y Axes
The X and Y axes are also very stable in design. The printhead is guided by two rods in the X-direction. The X-axis with the printhead is also guided by two rods. The stepper motors are strategically positioned and transmit their torque via toothed belts as usual.
Wide Range of Materials
The print bed can be heated up to 100 °C and the nozzle up to 300 °C.
This (and the enclosure) makes it possible to print a wide variety of filaments:
In my test, I printed PLA, ABS, TPU and Nylon. Except for the small initial difficulties with the too high temperature of the print bed, PLA was, as expected, very easy to print.
I was very surprised that ABS was also so easy to print! Normally ABS is always a bit more difficult but with the closed case and air circulation inside, printing with ABS is just as easy as with PLA.
I only had minor difficulties with TPU at the beginning. The filament always got tangled on its way to the extruder. After I changed the filament feed and fed the filament directly into the extruder, this problem was also solved.
The closed case also helped me to prevent warping with Nylon. The very first print worked!
If you’re looking for a 3D printer that can reliably handle exotic materials, the X-Max is perfect.
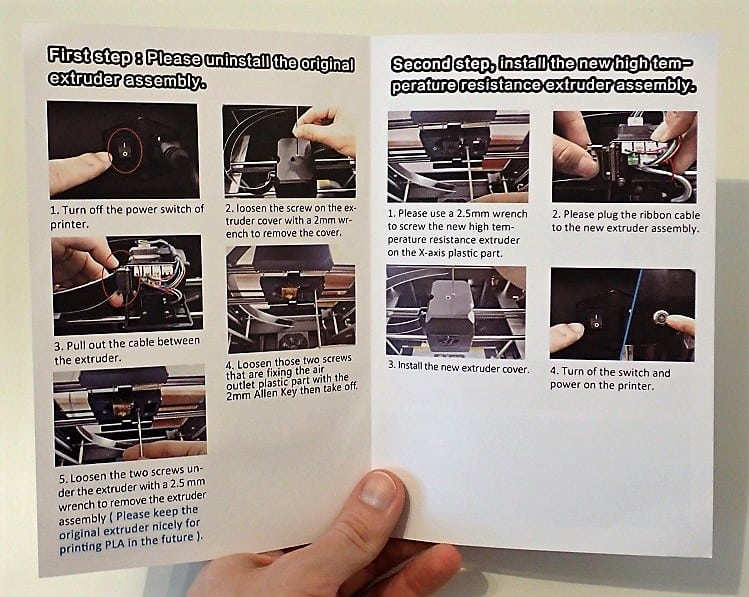
Replaceable Extruder
The Qidi Tech X-Max has a second extruder included. The already installed extruder is for low melting point filaments like PLA, ABS and PETG.
The second extruder is for filaments with a higher melting point. These include Nylon, PC, TPU and filaments with carbon fibers.
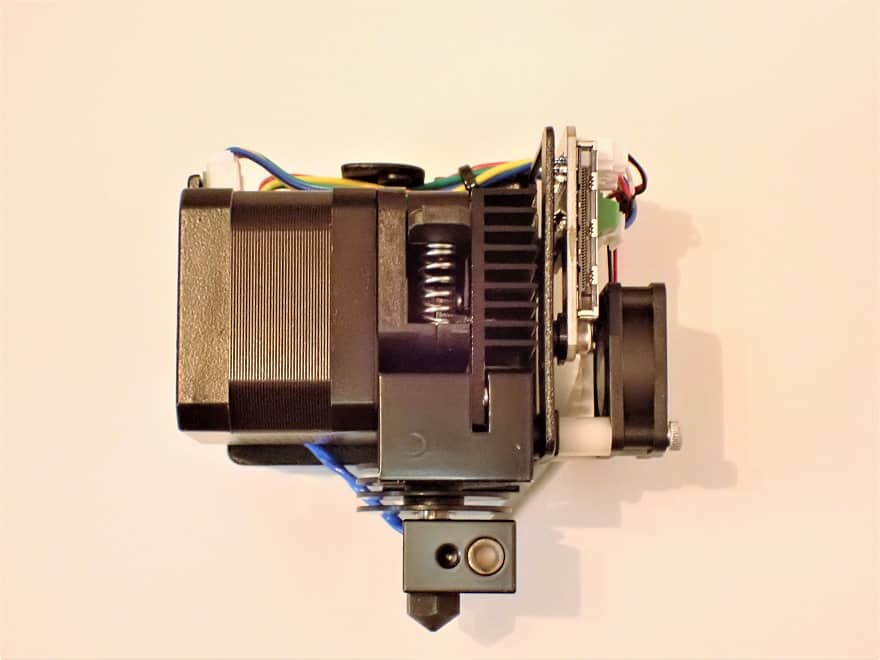
Therefore, in principle, the 3D printer has two modes:
- Standard low melting point filaments with extruder A and open housing.
- Advanced filaments with a higher melting point with extruder B and closed housing.
This 3D printer is really great for printing exotic filaments. Its whole design is actually geared towards that.
The fact that the 3D printer has 2 extruders does not mean that it can handle dual extrusion. Only one extruder can be operated at a time.
Supported Manual Print Bed Leveling
As already mentioned above in the setup, the printing bed leveling is supported by the software. Many people are initially put off by manual leveling, but with the X-Max it is virtually semi-automatic!
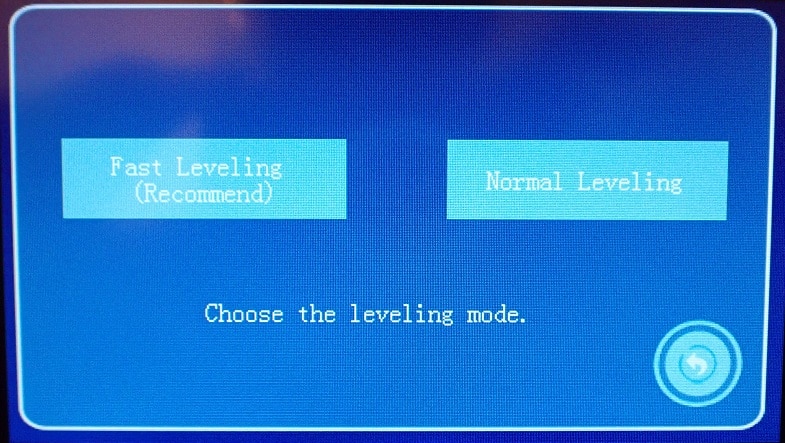
There are two leveling modes:
- Normal leveling: Here, the print bed is leveled normally, as with other 3D printers. The included leveling aid (a stiff plastic film with the correct thickness) is pushed between the nozzle and the print bed at various points. Once the distance is such that there is a slight friction, the next point can be approached. The entire process is accompanied by instructions on the display.
- Quick leveling: Fast leveling is used later to quickly set the correct distance. Due to the stable construction, you only need to perform normal leveling very rarely. Fast leveling is recommended for delicate materials where good print bed adhesion is difficult.
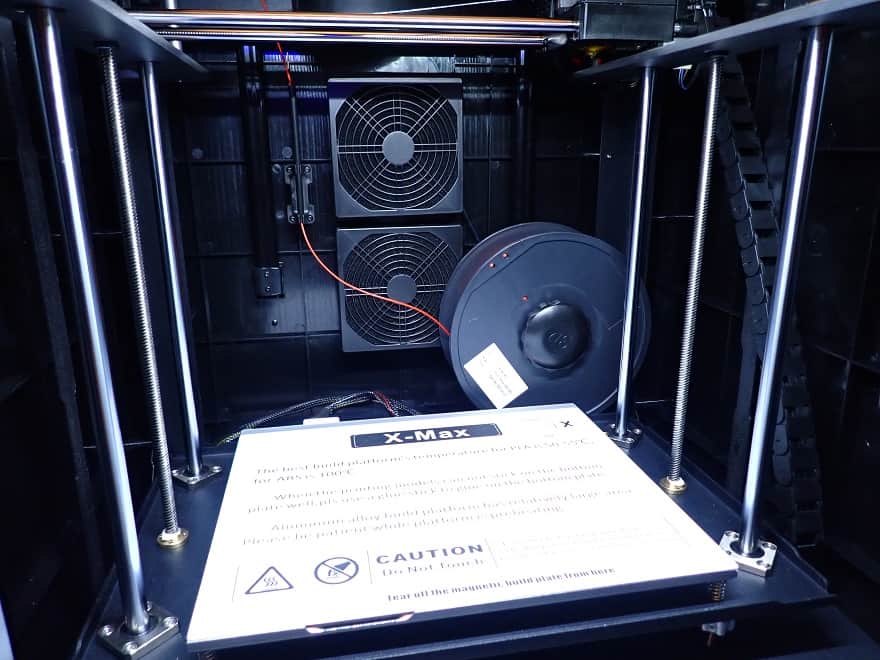
Air Filter
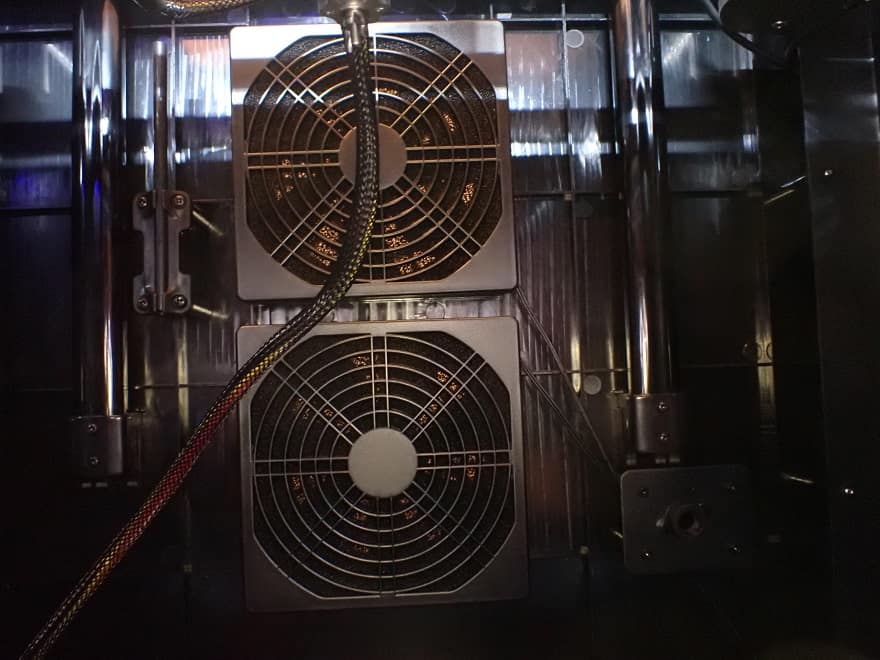
The built-in case fans can optionally be switched on. They have a layer of foam that allows the smallest particles and vapors to pass through, but not larger foreign objects or dust particles.
If you are printing with a closed build space, you can turn on these case fans to evenly distribute the temperature inside the 3D printer. The foam filters ensure that no dust from outside gets into the 3D printer and settles on the warm filament.
This is another feature that shows that the X-Max was designed to print exotic filaments. The closed housing, the second extruder for high temperatures and the even air circulation inside all contribute to the fact that you can print such filaments without difficulties.
Relatively Quiet Operation
There are undoubtedly quieter 3D printers than the X-Max – especially when you add a few upgrades like new fans. But compared to other 3D printers that can process a similar range of filaments, it’s still pretty quiet at 50 decibels.
Nevertheless, it should not stand right next to you while you work (but it shouldn’t anyway as soon as you work with filaments like ABS).
I measured the volume in operation while turning on all fans and leaving the acrylic hood and door open. This allowed me to measure the highest reading at an average of just under 50 decibels.
For comparison, 50 decibels is about as loud as a quiet conversation, soft radio music, or birds chirping.
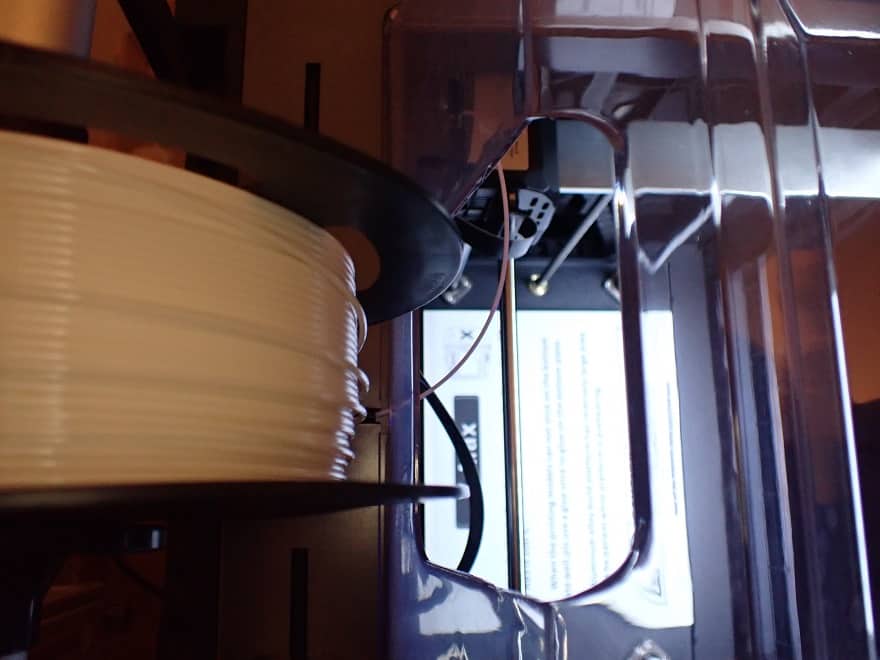
Two Filament Holders (Inside & Outside)
The X-Max has two filament holders:
- Outer: The outer filament holder can hold up to 3 filament spools and is used for standard filaments such as PLA, TPU and PETG.
- Inner: The inner filament holder can only hold one spool and is used for filaments that require a constant temperature and are very sensitive to moisture. These include, for example, Nylon, PC and filaments with carbon fibers.
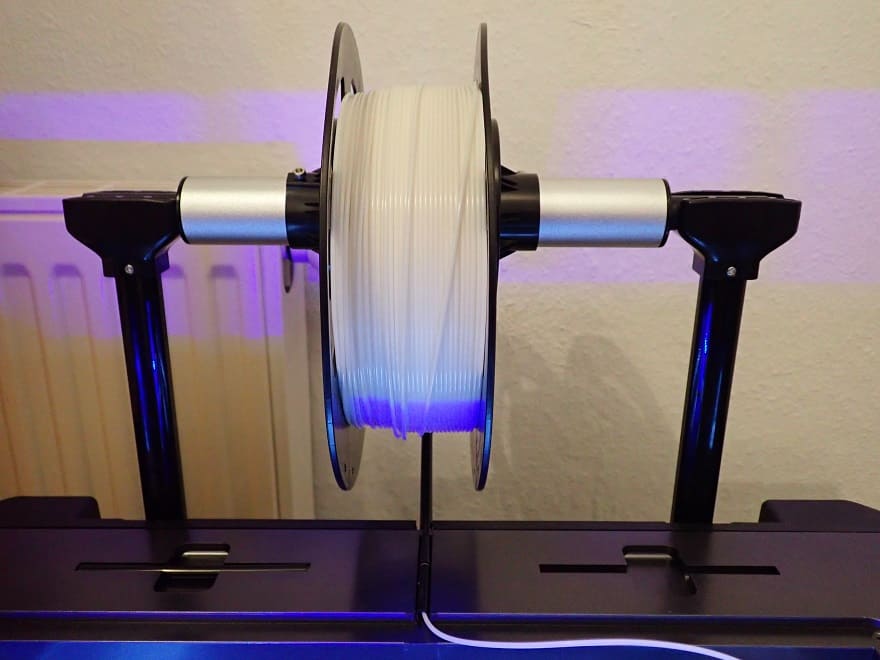
The use of the inner filament holder is not explained in the included instructions. After setting up the 3D printer, it was a mystery to me where the last part is needed.
Only after I had a look at the content of the USB stick I noticed that a video for the installation of the inner filament holder is stored there.
For a 3D printer that specializes so much in more advanced materials, I would explain this feature in a prominent place like the printed manual.
Two Different Filament Ways
With both filament holders, you have the choice between two filament guides. You can either guide the filament through the existing tubes and then into the extruder or directly from the filament spool into the extruder. The latter is best for flexible filaments like TPU, which tend to get tangled.
Good Connectivity
The Qidi Tech X-Max has 3 different connection options:
- USB
- Ethernet cable (LAN)
- WLAN / WiFi
Via the network connections, you can send your sliced objects directly from your PC to the 3D printer. No more carrying USB sticks back and forth!
Color 5-inch Touchscreen & Intuitive Menu
The 5-inch color touchscreen does exactly what it should: It displays all menu functions flawlessly and is easy to use.
The menu itself is very intuitive and leads you to the desired setting with just a few touches.
Simple Assembly
The assembly consists mainly of removing the transport locks from the housing. After that, you only need to install the filament holders and, if necessary, extruder B for high temperatures, if you want to work directly with such filaments.
This means that the 3D printer comes almost completely assembled to your home. Within a few minutes, it is ready for use!
Good PLA Filament and Tools Included
Most 3D printers come with some filament so you can start right away and don’t have to buy more filament. Most of the time, however, the filament supplied is so sparsely dimensioned that you can just make a test print with it.
The X-Max comes with a complete 1 kg roll of PLA+. This is quite unusual and has surprised me positively!
Resume Print Function
With this function, you do not need to worry if the power fails in between. The 3D printer remembers the point at which it no longer had power and starts again exactly there as soon as the power is back.
Especially with very large objects, this function is more likely to be used, as the printing time is simply longer.
You can also pause and resume at any time, for example to change the filament. This feature is also handy if you do not want to leave the 3D printer unattended.
Automatic Shutdown After Printing
You can set the X-Max to turn off automatically after it has finished printing. This can save you some electricity costs.
Detailed Instructions
Except for the problem with the inner filament holder mentioned above, the included instructions are very detailed and describe the setup and operation with easy-to-understand pictures and instructions.
On the enclosed USB stick there are also many videos demonstrating various assembly steps or troubleshooting. For example, there are videos on how to replace the extruder, how to mount the filament holders, and how to use the glue stick.
QIDI Slicer
The included USB stick also contains the Qidi Slicer. It is available for Windows and MacOS.
The included explanations for the slicer are quite rough, but that’s not too bad since the software is quite intuitive to use. If you know something about slicers, like Cura, the operation will be no problem for you.
Qidi Slicer also has modes for beginners and advanced users.
Very Good Customer Service
Qidi’s after-sales service is excellent. If you have a problem with the 3D printer, the Qidi Tech people will respond within a few hours. Most of the time, they also link to a video that you can use to solve the problem.
Technical Specifications
– Qidi Tech X-Max
DEVICE
- Technology: FDM
- Size: 600 x 550 x 600 mm
- Weight: 27.9 kg (61.5 lbs)
- Touchscreen: 5-inch color touchscreen
- Setup: almost completely pre-assembled
- Power supply/voltage: 115V / 230V
- Print volume: 300 x 250 x 300 mm
- Extruder type: Direct Drive
- Print bed leveling: Manual (supported)
- Accuracy: 0.05 mm
- Layer thickness: 0.05 – 0.4 mm
- Nozzle quantity: 1
- Nozzle diameter: 0.4 mm
- Filament diameter: 1.75 mm
- Max. Print bed temperature: 100 °C
- Max. Nozzle temperature: 300 °C
- Printing speed: 30-150 mm/s
- Supported filaments: PLA, ABS, PETG, TPU, Nylon, Carbon, PC
SOFTWARE
- Slicer: Qidi Slicer, Cura, Simplify3D
- Connectivity: USB, LAN, WLAN/WiFi
Check Price at:
Disclosure: This website is the property of Martin Lütkemeyer and is operated by Martin Lütkemeyer. Martin Lütkemeyer is a member of the Amazon Services LLC and other Affiliate Programs. These are affiliate advertising programs designed to enable websites to earn advertising revenue through advertising and linking to Amazon.com and others. Links marked with * are affiliate links.
