
- Wet Filament: Prevention, Symptoms & Drying - July 18, 2024
- Sovol SV08 – Best PrusaSlicer Settings & Profile - June 26, 2024
- Sovol SV08 – Best Orca Slicer Settings & Profile - June 26, 2024
Disclosure: Links marked with * are Affiliate Links. I earn from qualifying purchases if you decide to make a purchase through these links – at no additional cost for you!
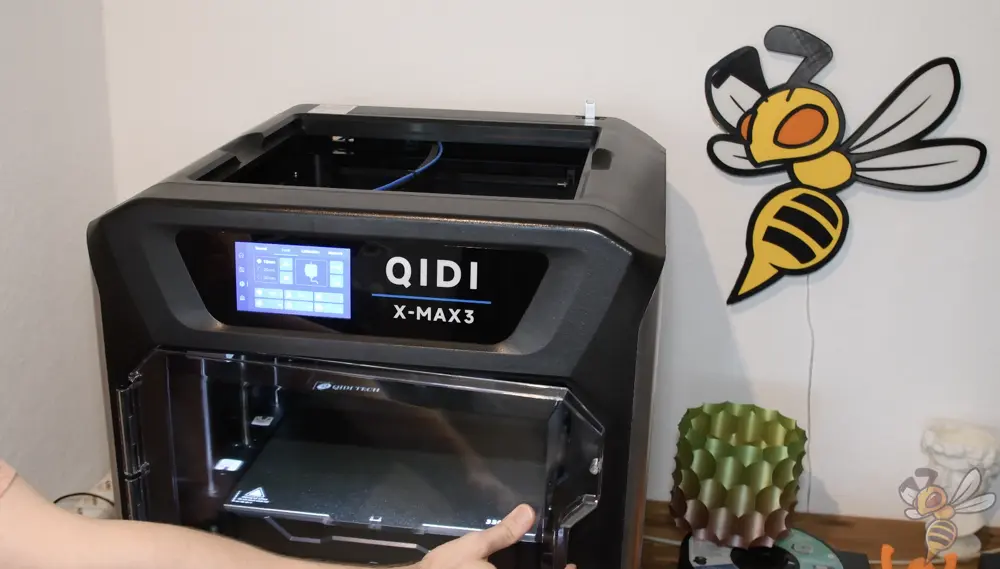
The QIDI Tech X-Max 3* is a huge CoreXY 3D printer with amazing filament compatibility and great print quality.
I had pretty high expectations for this 3D printer, since I also tested its predecessor. All expectations were indeed met and in some cases exceeded. But even though I already have some experience, I tried to look at the X-Max 3 from a newbie’s eyes in this review.
In this detailed hands-on review, I’ll show you what features the X-Max 3 brings to the table, how it gets to such high print speeds, and what print quality you can expect.
Who should buy the QIDI Tech X-Max 3?
If you want to produce flawless large prints as quickly as possible and without much effort, the X-Max 3 is for you! But also if you want to print not only with standard filaments, but also with more exotic materials that require special high temperatures and a closed heated print volume, the X-Max 3 is ideal.

The QIDI Tech X-Max 3 is a huge CoreXY 3D printer that reaches a reliable 600 mm/s with Klipper. Even very large objects are printed quickly and without errors.
Build Volume: 325 × 325 × 315 mm
Speed: ≤ 600 mm/s
Extruder: 1 x direct drive
Print Bed: PEI, magnetic, flexible
Leveling: Automatic
Firmware: Klipper
Nozzle Temp.: ≤ 350 °C
Bed Temp.: ≤ 120 °C
Connectivity: WiFi, LAN, USB
Pros:
✓ High printing speed
✓ High accuracy
✓ Great filament compatibility
✓ Huge enclosed & heatable print volume
Cons:
× Filament holder at the back can be inconvenient
Table of Contents:
- 1 A Brief Overview of the X-Max 3
- 2 Packaging and Scope of Delivery
- 3 How to Assemble the X-Max 3
- 4 Print Bed and Leveling
- 5 Self-Calibration with Klipper
- 6 Print Volume
- 7 Heated Print Chamber
- 8 Filament Dry Box
- 9 The CoreXY Structure of the X-Max 3
- 10 Compatible with A LOT of Filaments
- 11 The QIDI Slicer
- 12 Test Prints and Calibration of the X-Max 3
- 13 Noise Levels of the X-Max 3
- 14 Printing Speed of the X-Max 3
- 15 Print Quality of the X-Max 3 (Images of 3D-Print Objects)
- 16 Is the X-Max 3 the Right 3D Printer for You?
- 17 Important Accessories for a FDM 3D Printer
A Brief Overview of the X-Max 3

What the X-Max 3* can do, it does very well. And it can do a lot! Basically, the only real downside to it is that it only has one extruder. But getting a dual extruder 3D printer with the features of the X-Max 3 is difficult and impossible at this price.
The most obvious feature of the X-Max 3 is, of course, its large print volume. This becomes clear right out of the box, as the package it comes in is appropriately huge. After assembly, which basically only consists of unpacking, you also directly see the second important feature: the closed and heatable print volume.
Together with the high-temperature nozzle, the high temperatures of the hotend and the print bed, you can process just about all filaments with this heated print volume. If you’re just working with regular filaments like PLA or TPU, you can just leave the hood and door open to provide enough air circulation and cooling.
Finally, comes one of the main selling points for the X-Max 3: its high printing speed. There has been a recent trend for many manufacturers to switch to Klipper as firmware. With Klipper, various (automatic) calibrations can be made that greatly increase print speed (like vibration compensation – more on that later).
However, all these features together are useless if the final print quality is not good enough and the printer is difficult to use. I have experienced this several times now. On paper, printers always sound excellent and offer revolutionary new features, but rarely the printer lives up to that hype. Fortunately, the X-Max 3 is one of these positive cases!
The biggest positive surprise for me while testing the X-Max 3 was that it was really easy to use and delivered perfect results right out of the box without much calibration effort.
If printing results are your main focus and not tinkering with the 3D printer and calibrating forever, you will be very happy with the X-Max 3!
Of course, there are a few minor things that bothered me, but I have yet to find a 3D printer that is 100% perfect.
My take on the X-Max 3 from QIDI Tech* is that it’s certain to be successful, and that it’s going to be very popular not only in the hobby, but also in the professional context.
So, now let’s take a look at the 3D printer in detail!
Packaging and Scope of Delivery

The X-Max 3 comes fully pre-assembled in an appropriately sized package. It is best to carry the package and the printer itself with the help of another person.
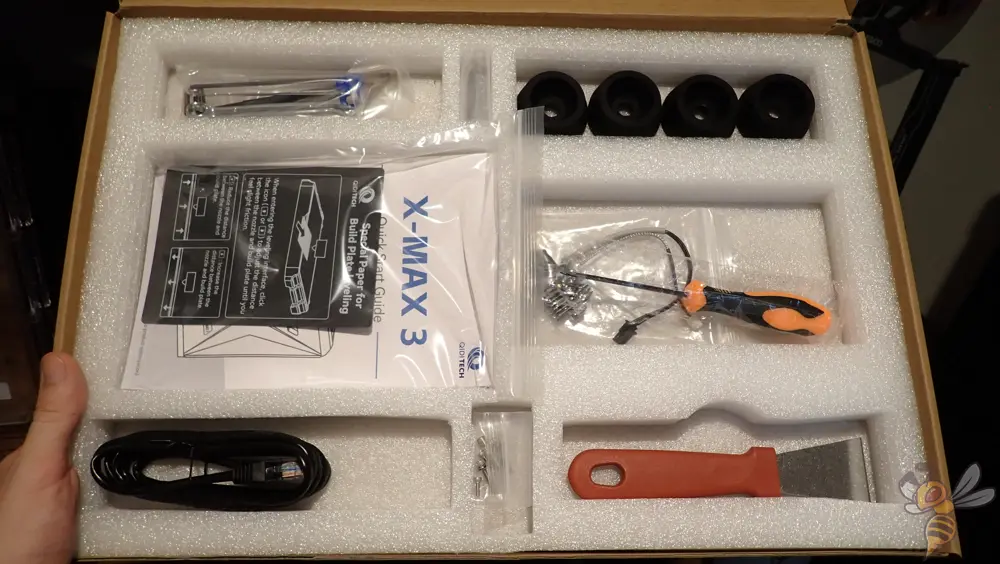
Besides the pre-assembled printer, the package also contains all the tools you need for operation. Also included are four rubber feet to prevent vibrations, a network cable, the user manual, a paper for leveling and a spatula.

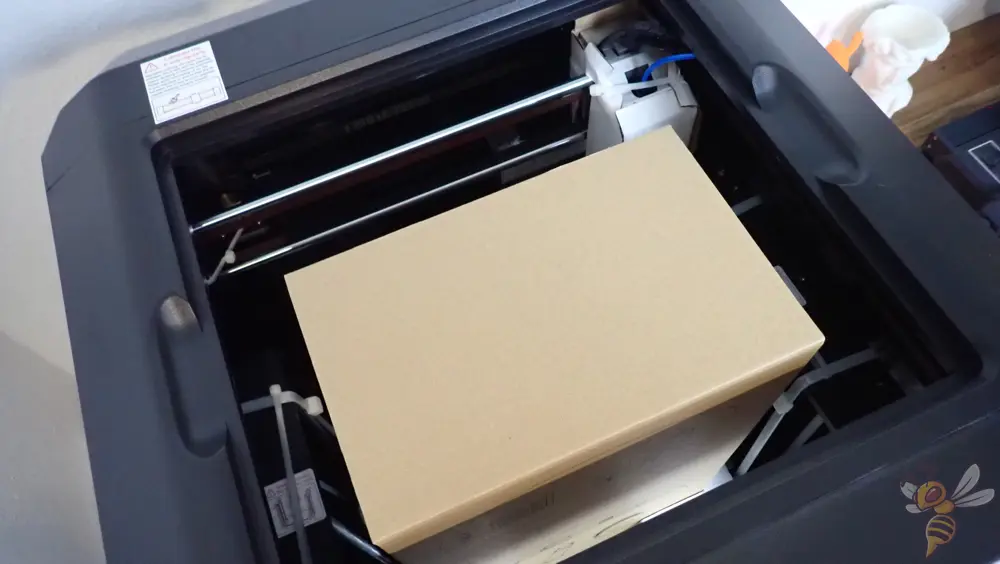
What really surprised me when I unpacked the printer was the second package inside the printer, which contains the power cord, some filament, and a drying box for special filaments. In this box, the filament can be stored at the back of the printer and filled directly into the extruder. This way you can print even very susceptible filaments to moisture flawlessly – but more on that later.
How to Assemble the X-Max 3

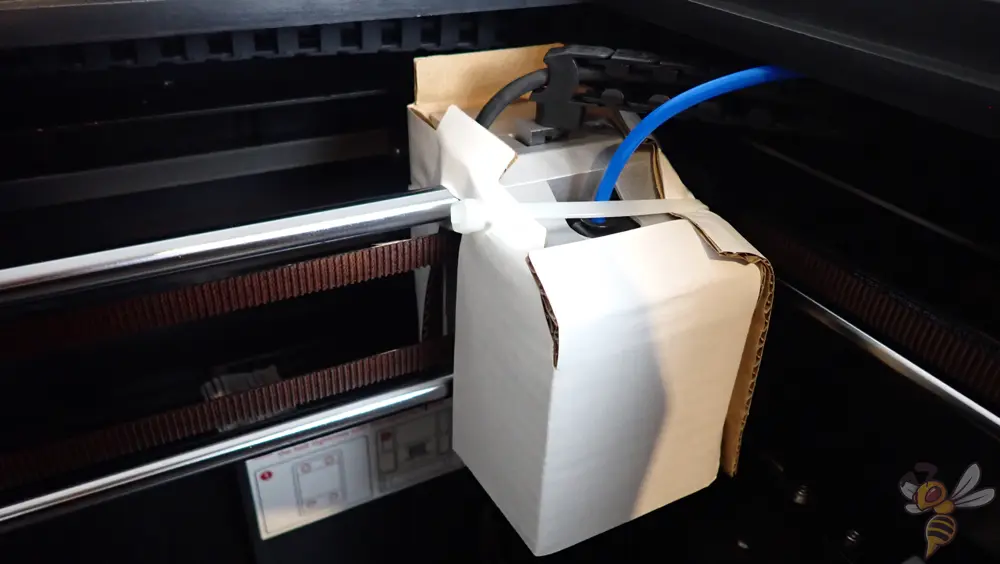
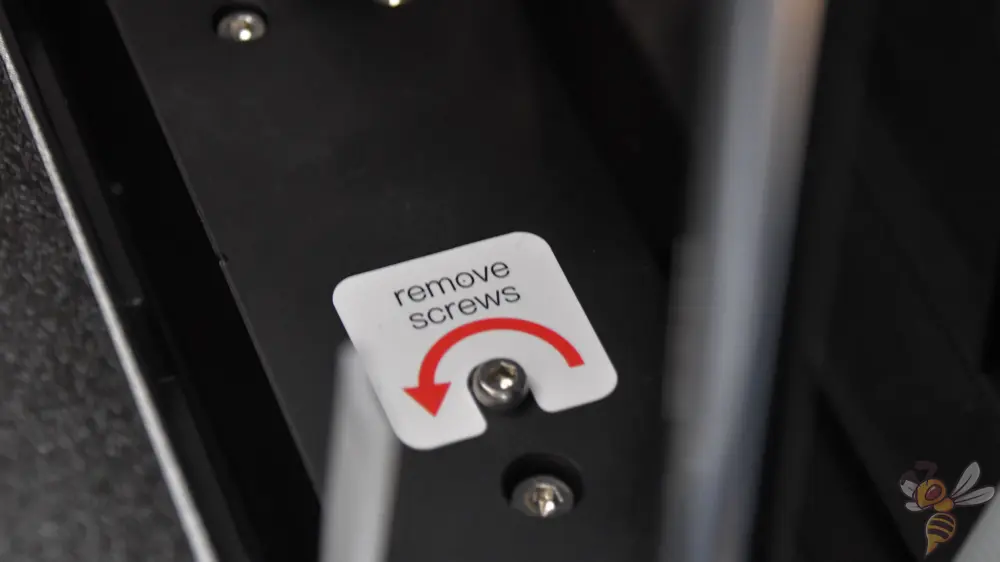
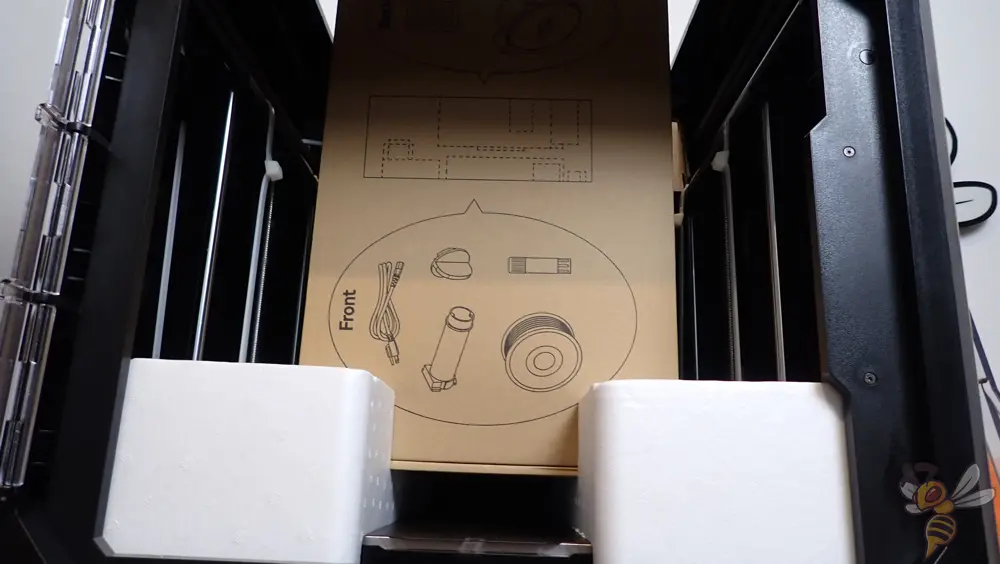
Since the X-Max 3 comes completely pre-assembled, assembly basically only consists of removing the transport locks and the rest of the supplies from inside the printer. All moving parts of the printer are tightly protected inside with cable ties from uncontrolled movement.

Even unpacking and assembly is supported by the X-Max 3 itself via its screen with illustrations and instructions.
You can easily remove the cable ties with side cutters and proceed directly to leveling and self-calibrating the printer. The X-Max 3 also guides you through these steps with simple instructions on its screen.
Print Bed and Leveling

The X-Max 3 features an HF print bed with a special coating that creates good print bed adhesion for most filaments. The print bed has two sides, each of which is identical.
Very convenient is that you can remove the print bed and bend it. Once the print object has cooled down completely, you can remove it without any effort or a spatula. In my opinion, the spatula included in the delivery is absolutely useless.

Such flexible print beds are magnetic and are only held in place by the magnets in the printing plate. The problem with this is that it is often difficult to position the print bed accurately. Therefore, I always find it very convenient to have small guide rails mounted on the printing plate where the print bed can simply snap into place. While this is not a spectacular feature, it makes daily use of the printer easier!

Of course, the X-Max 3 also has automatic print bed leveling. A sensor is built into the print head that measures the distance between the nozzle and the print bed at several points. The values obtained in this way compensate for the inclination of the print bed during printing.
One advantage, probably resulting from the stable CoreXY structure, is the lack of adjusting screws on the print bed. So you don’t have to manually level the print bed via such knobs as you do with most other 3D printers! The only thing you have to do manually is to adjust the z-offset.
To adjust the z-offset, a small plastic card is included. This is moved between the nozzle and the print bed during the adjustment. The z-offset is adjusted so that you still feel some friction when you move this little card back and forth between the nozzle and the print bed.
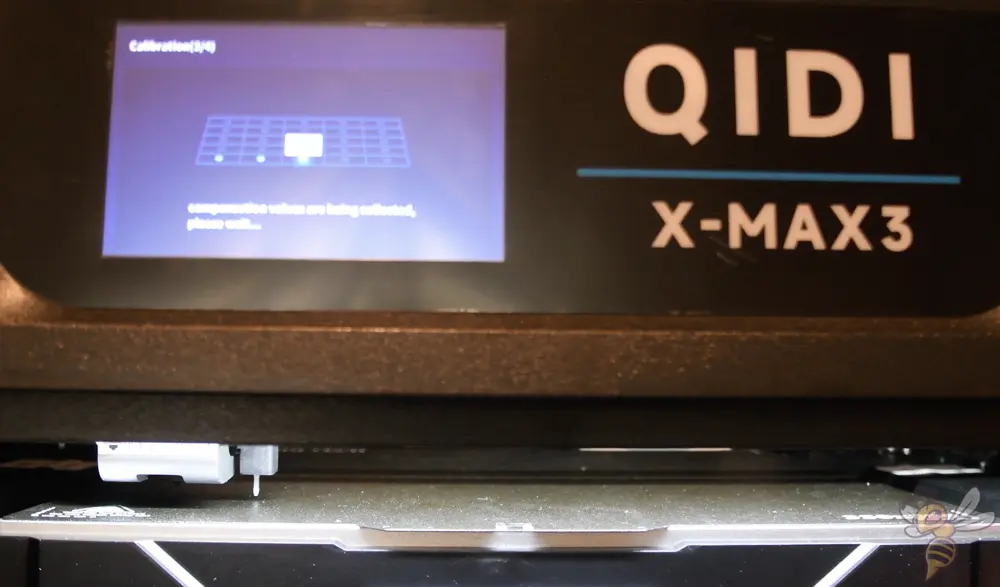
Except for the (easy) z-offset adjustment, the print bed leveling of the X-Max 3 is completely automatic. Each step is accompanied by simple instructions and pictograms via the menu.
Self-Calibration with Klipper
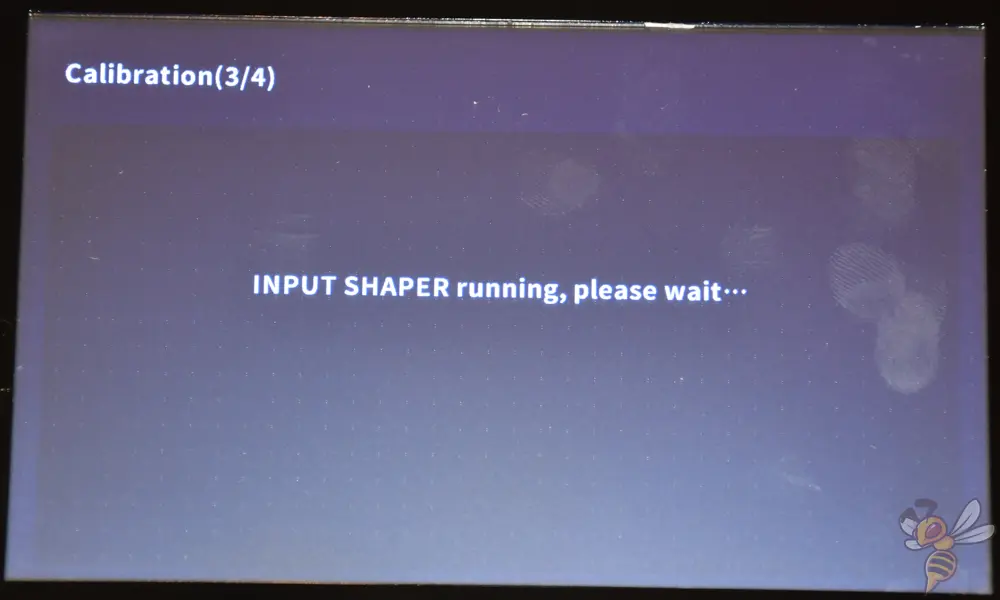
Once the print bed has been leveled, the menu guides you through the remaining self-calibrations. First up is the Input Shaper. This generates vibrations in the print head that occur at high print speeds. The data is analyzed so that these vibrations can be avoided or compensated.
With the Input Shaper, much higher print speeds are possible without the typical print errors like ringing or ghosting that would normally occur at such high print speeds.
These are the main calibrations that the X-Max 3 performs on its own to significantly improve its print quality and print speed:
- Resonance Compensation (Input Shaper)
- Pressure Advance
- Adaptive-Meshing-Purging
As you’ll see later, these very software features are critical to print quality and print speed. I hope that in the future, all FDM 3D printers that hit the market will have these features!
Print Volume

The print volume of the X-Max 3 is 325 × 325 × 315 mm, which is about 33 liters, or 8.7 gallons if you use made-up units 😉
With this print volume, you can print large objects in one piece.
While there are FDM 3D printers with an even larger print volume, finding one that also has a closed and heated print volume is nearly impossible – at least not at this price.
Heated Print Chamber
One of the big plus points of the X-Max 3 is its great filament compatibility. However, in order to print exotic filaments flawlessly, a closed print volume is required, and some even need a heated print volume.
The heating manages up to 65 °C and at the same time filters harmful gases out of the air with an activated carbon filter. If you are as careful as I am to have as little contact as possible with such gases, the filter in particular is a very welcome feature.
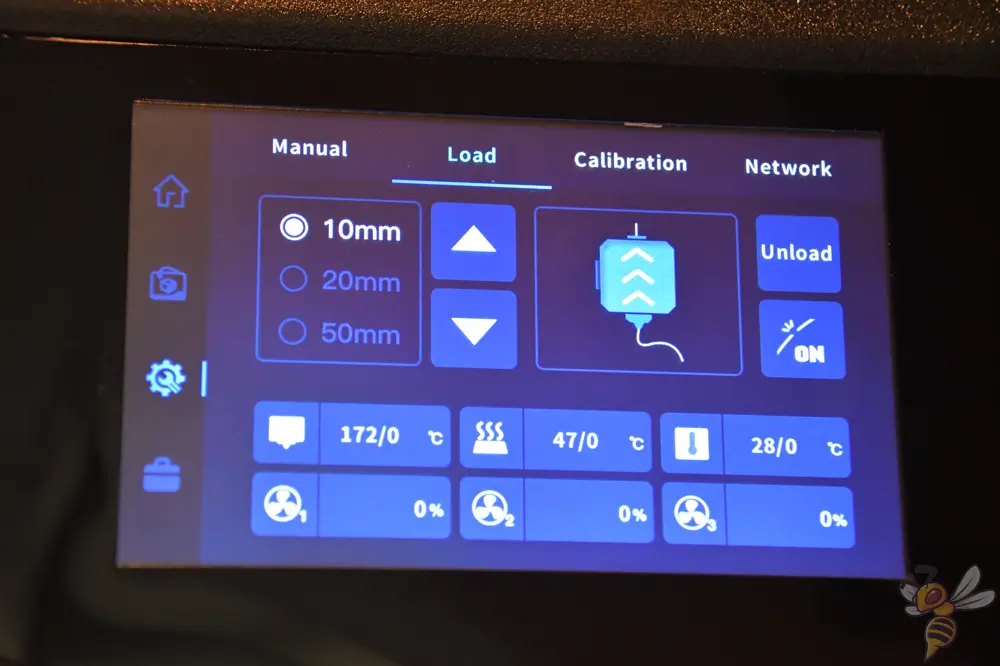
Besides the setting in the slicer, the temperature of the housing can of course also be set directly via the menu (and that even while printing).

And to make sure that the warm air stays inside the print volume, it can be almost hermetically sealed. For this purpose, there is a hood on the top and of course, the door with magnets.
Filament Dry Box


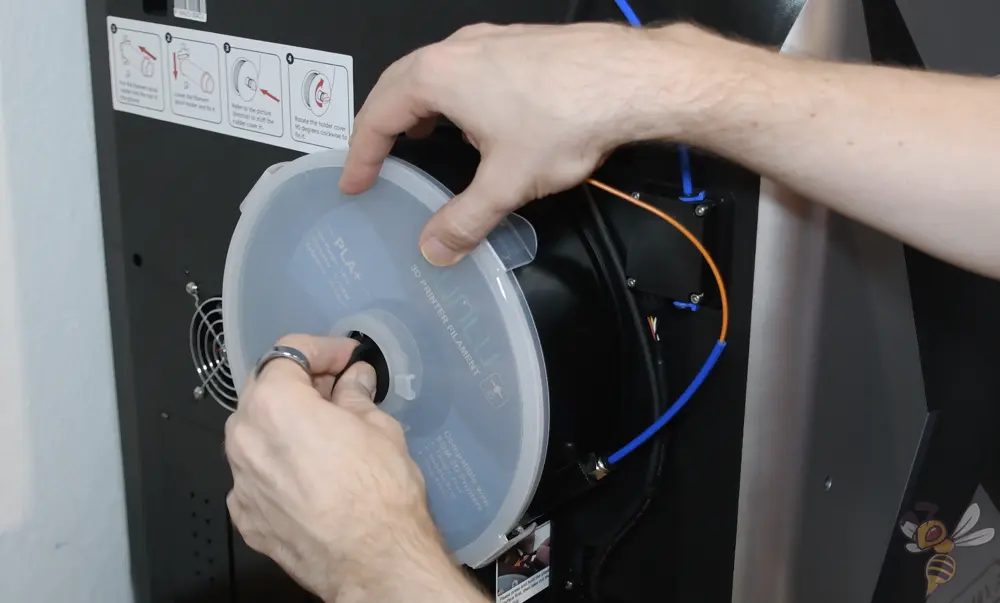

The included drying box for filaments actually surprised me when I unpacked it. I had looked into the printer a bit beforehand, but I must have overlooked this ingenious feature!
There are filaments that are so hygroscopic that they soak up moisture from the air really fast. Certain types, such as nylon, do this in a very short time, depending on the prevailing humidity, of course. It can therefore happen that the print quality changes during a print due to the absorbed moisture.
For this, I have always used a filament dryer to dry the filament and feed it directly from the filament dryer into the printer.
The filament dry box is a brilliant idea to really make the printer compatible with most filaments. You don’t have to worry about damp filament here anymore!
It is a bit complicated to use the first time, but every step is explained on the back of the drying box. It’s also great that it’s really hermetically sealed from the outside world all the way to the extruder. The dry box has a lid with a rubber seal and the filament is fed through a PTFE tube that plugs directly into the filament sensor.
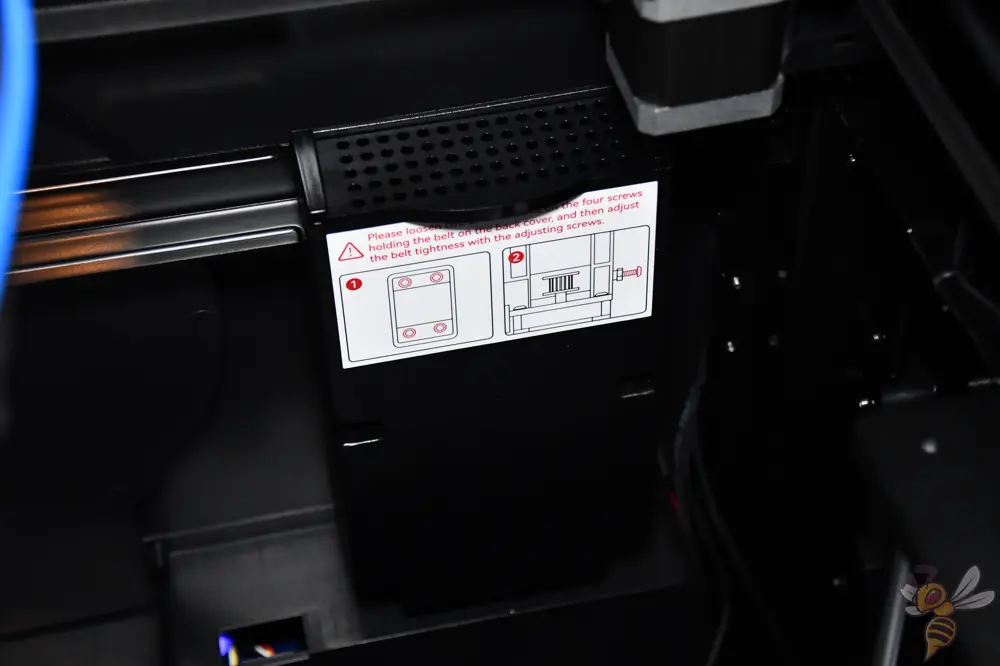
The CoreXY Structure of the X-Max 3

For high print speeds and excellent and print quality, it is important that the 3D printer is stable and has as little vibration as possible. This is why the CoreXY design is popular for such 3D printers.
In this frame structure, the print bed moves on the z-axis and the print head moves on the xy-plane. The print head is moved via a clever system of belts.
In general, I actually prefer CoreXY 3D printers because the mechanical advantages are just about always better than regular Cartesian 3D printers. The only downside is that this frame structure requires more material, which leads to higher costs. However, in my opinion, this extra cost is definitely worth it!
To develop a 3D printer with closed print volumes without a CoreXY system would simply be absurd. Since the closed print volume requires a stable design anyway, the use of the CoreXY system is only obvious.
Compatible with A LOT of Filaments

The feature that makes the X-Max 3 an absolute jack of all trades is the wide variety of filaments it can handle.
If you want to print objects for cosplay, model making or special mechanical projects, the X-Max 3 offers a very high flexibility. This is a big plus for professional users in particular, as special materials are used for commercial products or industrial tools.
These features make the X-Max 3 compatible with a lot of filaments:
- Max. 350 ℃ printing temperature
- Max.120 ℃ print bed temperature
- Max. 65 °C heated print chamber
- Drying box for filament
- Nozzle made of copper alloy for standard filaments such as PLA, ABS, PETG and TPU
- Hardened steel nozzle for exotic and abrasive filaments such as PA12-CF, PET-CF, Glow in the Dark, etc.
The QIDI Slicer

By default, the X-Max 3 is operated with the QIDI Slicer, a PrusaSlicer clone. However, it is of course compatible with all other popular slicers such as Cura, Simplify3D, PrusaSlicer, etc.
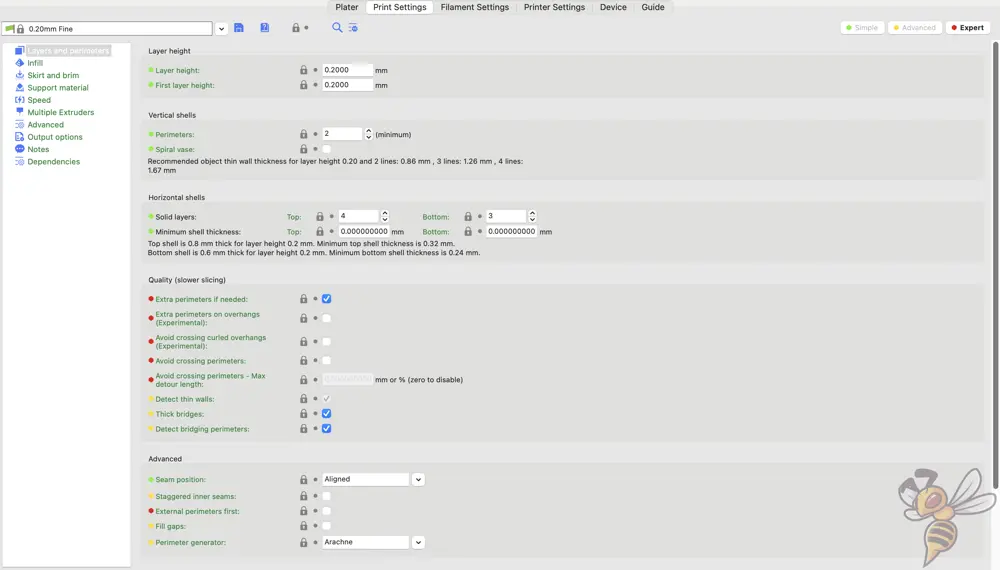
In my opinion, the only advantage to the QIDI slicer is the existing default profile for the X-Max 3. The parameters stored here work ideally and produce excellent print results.
To benefit from the latest features of the original slicer (PrusaSlicer), I would export these parameters and insert them into the normal PrusaSlicer.
The parameters for the printer can of course also be inserted into the other slicers, like Cura. In this article I’ll show you the best settings in Cura for the X-Max 3 and how to create a profile for it: QIDI Tech X-Max 3 | Best Cura Settings & Profile (+ List)
Test Prints and Calibration of the X-Max 3

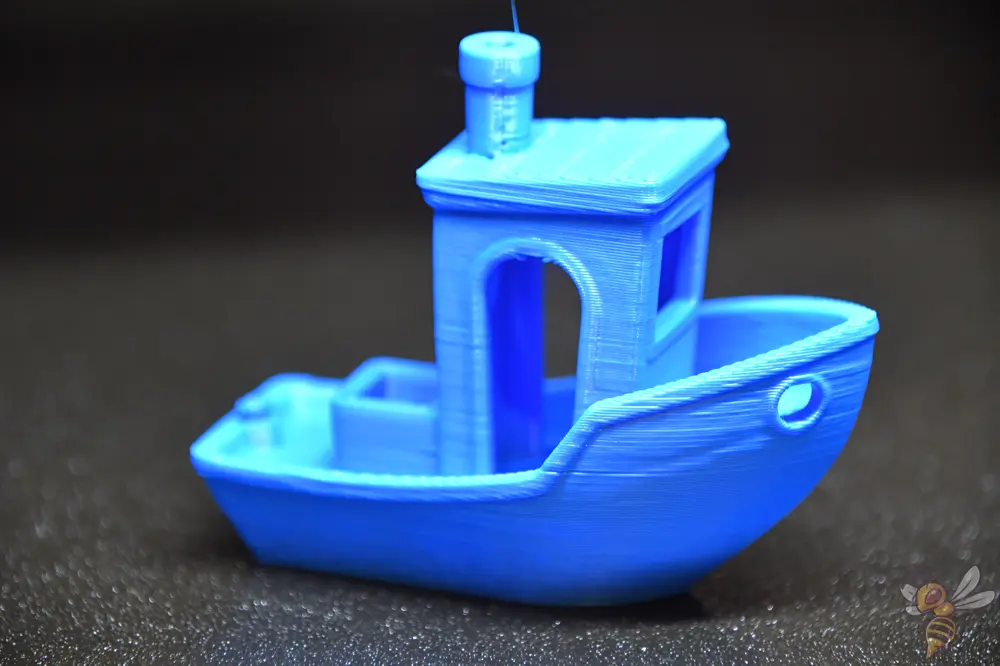
After setup and leveling, the first thing on the schedule was, of course, a test print – and what better way to do that than with good old 3DBenchy? As illustrated by the pictures above, the print quality is not bad at all without any adjustments.
Considering the high print speed of 600 mm/s, I’m already happy with the result of the test print (the Benchy only took about 14 minutes!). To get perfect results, however, I calibrated the X-Max 3 a bit more. The main focus was the retraction, the print temperature and the PID tuning.
The calibration didn’t take long and was definitely worth it, as you’ll see below!
Small note: All other objects printed in this review were printed at a print speed of 300 mm/s. The speed of the outer walls was 270 mm/s.
Noise Levels of the X-Max 3
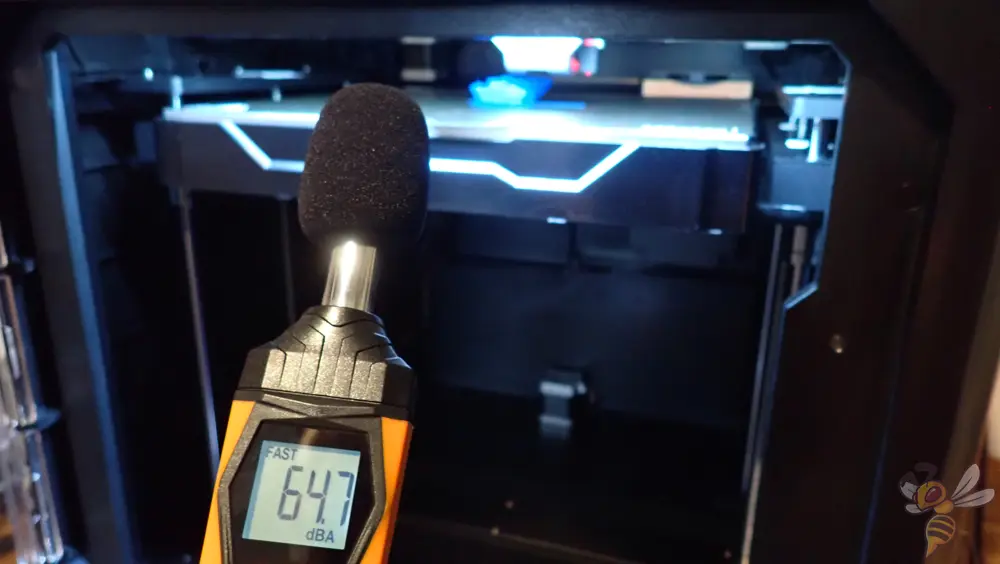
The volume of the X-Max 3 is relatively normal for such a printer. It is around 65 decibels during printing when the enclosure is open and at a distance of only 30 cm.
65 decibels is the upper limit of what one would call “quiet”. This volume is comparable to passing cars if you are in a house with the windows closed.
With the chamber closed, or just the door closed, the noise level is much lower.
Printing Speed of the X-Max 3

A 3D printer should produce parts as accurately as possible and as quickly as possible. The X-Max 3 meets both of these requirements. But how does it manage to print flawless surfaces, even at up to 600 mm/s? There are three main features for this:
- Klipper
- Stable CoreXY structure
- Extruder with high and stable flow rate
Klipper: With Klipper as firmware, the X-Max 3 has several features that can compensate for the disadvantages of high printing speeds. At the forefront of this is vibration compensation. This enables it to produce high print quality even at print speeds of up to 600 mm/s and accelerations of up to 20000 mm/s².
Stable CoreXY structure: While Klipper is quite powerful in terms of vibration avoidance or compensation, it is not all-powerful either. The more stable the frame and structure, the less vibration will occur. Even without Klipper, a stable CoreXY structure results in better print quality compared to other designs.
Extruder with high and stable flow rate: With a high printing speed, the filament must also be pressed out of the nozzle at an increased speed. The extruder of the X-Max 3 manages a flow rate of up to 35 mm³/s. To ensure that the filament is still extruded evenly and without defects at this high rate, the filament is melted quickly in the X-Max 3’s hot end and conveyed evenly and precisely thanks to the gear ratio of 9.5:1.
Print Quality of the X-Max 3 (Images of 3D-Print Objects)

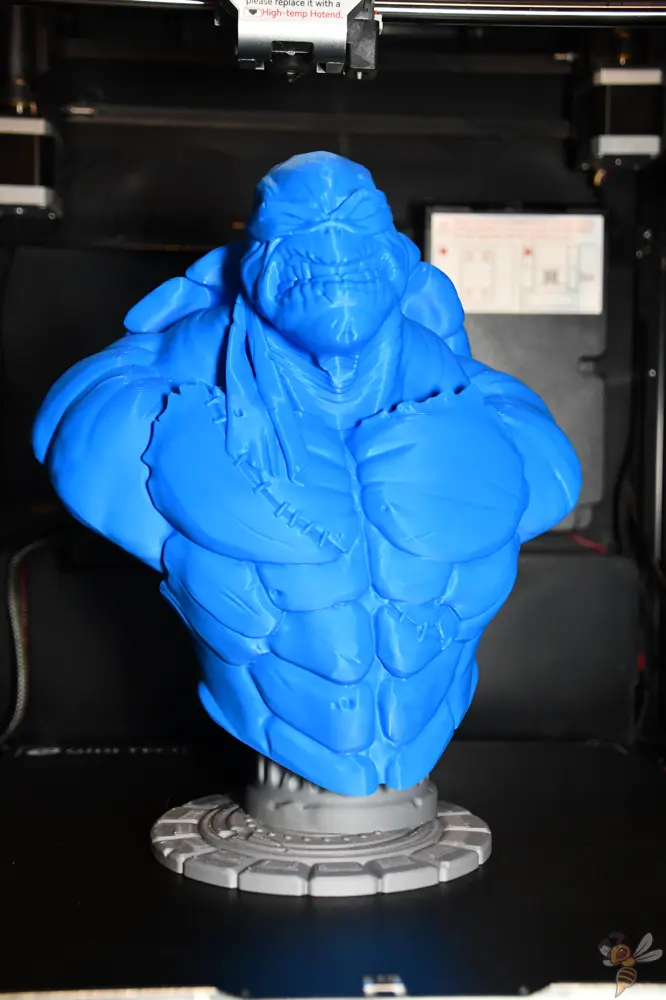

The first test after calibration was a TMNT bust. This bust was designed to not require any supports.
The print quality is absolutely brilliant! I could only find very isolated tiny print defects on the entire object, which you can’t see when looking at the bust normally. Really very impressive!

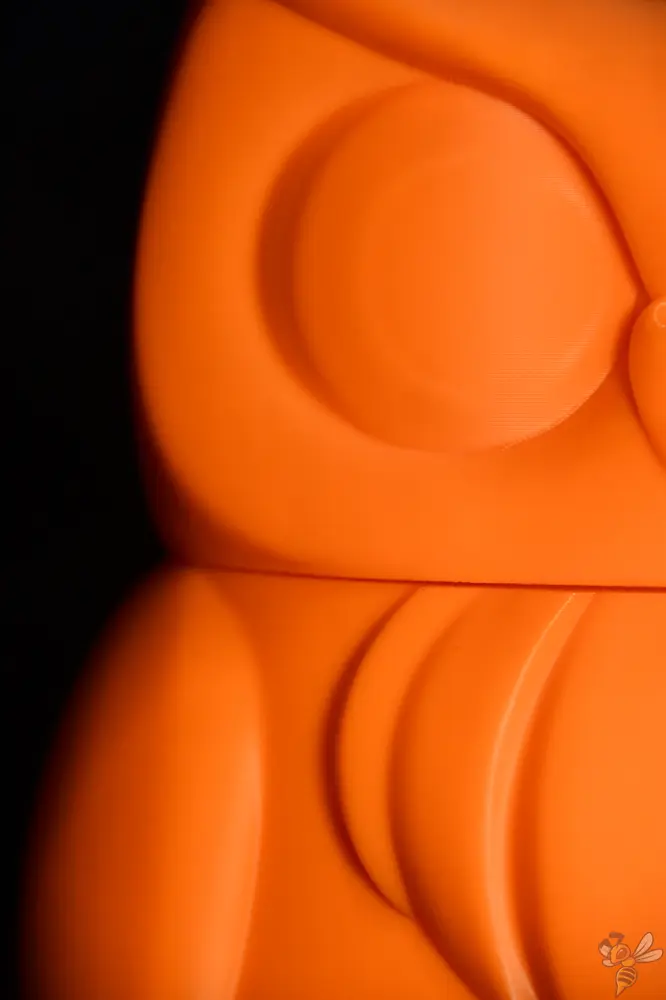

The next test was this two-piece owl, where it’s difficult to see individual layers at all. These smooth surfaces lent themselves to testing the result of the PID tuning. And as you can easily see from the pictures, the print temperature is extremely homogeneous across the entire figure!
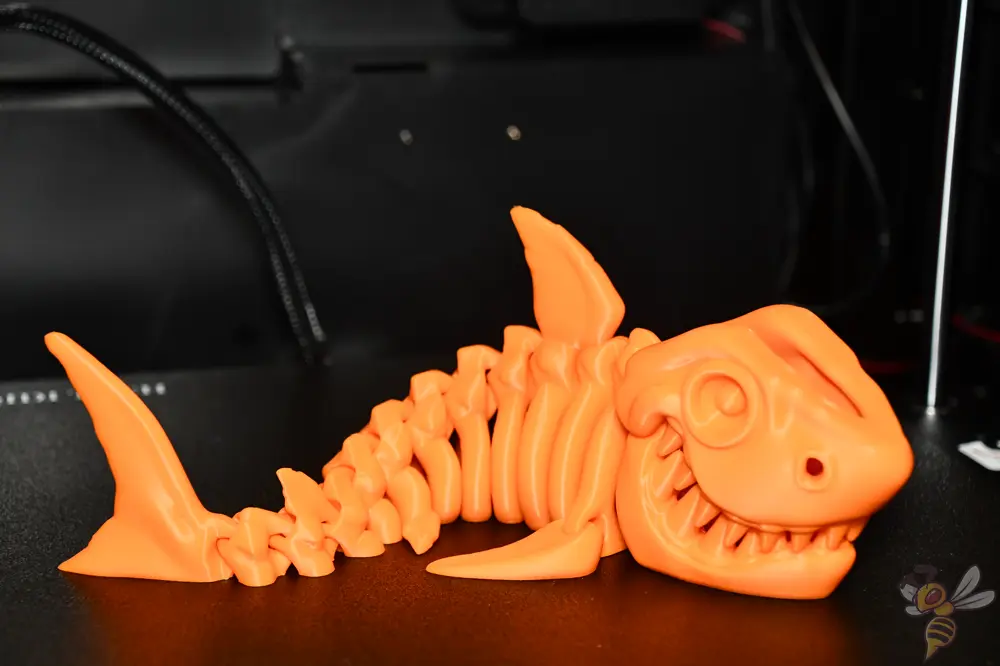


Next, I wanted to try something more detailed. This shark skeleton was perfect for that. This object consists of two parts, the top part of the skull and the rest. All the details were printed accurately and there were no printing errors at all!
Is the X-Max 3 the Right 3D Printer for You?
What I really liked about the X-Max 3:
✓ High printing speed of up to 600 mm/s
✓ High and very reliable accuracy without a lot of calibration effort
✓ Really great filament compatibility
✓ Huge enclosed & heatable print volume, including the possibility to store sensitive filament in a dry box during printing.
The disadvantages of the X-Max 3:
× The filament holder on the back can be inconvenient if the printer is right up against the wall.
If you’re looking for a 3D printer that can handle countless different filaments, delivers great print quality, and prints fast, the QIDI Tech X-Max 3* is definitely the one for you!
Before I tested it myself, I thought the X-Max 3 was just a slightly improved version of its predecessor. But that is absolutely not the case! Thanks to Klipper, the new extruder and the improved filament compatibility, it has become a lot better. This may sound a bit exaggerated, but I can highly recommend it.
The X-Max 3 is definitely one of the top 5 best FDM 3D printers in 2023! If your requirements match the features of the X-Max 3, look no further…
The QIDI Tech X-Max 3 is a huge CoreXY 3D printer that reaches a reliable 600 mm/s with Klipper. Even very large objects are printed quickly and without errors.
Build Volume: 325 × 325 × 315 mm
Speed: ≤ 600 mm/s
Extruder: 1 x direct drive
Print Bed: PEI, magnetic, flexible
Leveling: Automatic
Firmware: Klipper
Nozzle Temp.: ≤ 350 °C
Bed Temp.: ≤ 120 °C
Connectivity: WiFi, LAN, USB
Pros:
✓ High printing speed
✓ High accuracy
✓ Great filament compatibility
✓ Huge enclosed & heatable print volume
Cons:
× Filament holder at the back can be inconvenient
Important Accessories for a FDM 3D Printer
Hydroscopic filaments such as PETG or nylon absorb water from the air. This results in printing errors. A filament dryer dries the filament before printing.
Most filaments need to be stored dry to avoid printing errors such as stringing. Vacuum bags with desiccant are perfect for this.
Filament Storage Vacuum Bags:
Desiccant Silica Gel Packs:
Disclosure: This website is the property of Martin Lütkemeyer and is operated by Martin Lütkemeyer. Martin Lütkemeyer is a member of the Amazon Services LLC and other Affiliate Programs. These are affiliate advertising programs designed to enable websites to earn advertising revenue through advertising and linking to Amazon.com and others. Links marked with * are affiliate links.
