
- Wet Filament: Prevention, Symptoms & Drying - July 18, 2024
- Sovol SV08 – Best PrusaSlicer Settings & Profile - June 26, 2024
- Sovol SV08 – Best Orca Slicer Settings & Profile - June 26, 2024
Disclosure: Links marked with * are Affiliate Links. I earn from qualifying purchases if you decide to make a purchase through these links – at no additional cost for you!
In 3D printing, the right slicer settings can make the difference between a perfect print and a messy failure. The QIDI Tech X-Max 3 showed a lot of potential in my tests. But as with any machine, the right tuning makes all the difference.
After intensive experimentation and trying a wide variety of filaments, I was able to achieve perfect results. And I’ll show you the settings in Cura for that in this article.
| PLA | ABS | TPU | PETG | |
|---|---|---|---|---|
| Print Temperature | 220 °C | 260-270 °C | 230 °C | 250-260 °C |
| Print Bed Temperature | 60 °C | 100 °C | 60 °C | 70-80 °C |
| Print Chamber | / | 45 °C | / | / |
| Speed | 200 mm/s | 220 mm/s | 60 mm/s | 120 mm/s |
| Retraction | 1,0 mm at 30 mm/s | 1,0-1,2 mm at 30 mm/s | 0,8-1 mm at 30 mm/s | 1,0 mm at 30-40 mm/s |
| Cooling | 100 % | 30% | 100 % | 60 % |
Table of Contents:
How to Create a Profile for the QIDI Tech X-Max 3 in Cura
A 3D printer profile in Cura is essentially a blueprint of your machine and print settings. It’s a comprehensive file that encapsulates all the key factors that influence your print quality. These factors include – but are not limited to – the print temperature, bed temperature, print speed, retraction, and cooling settings.
When creating a profile, each setting should be carefully calibrated to ensure it complements the material in use and the specific requirements of the print job. By optimizing these parameters in the profile, you ensure that your 3D printer operates at peak performance, yielding high-quality prints.
To add a 3D printer in Cura, follow these steps:
- Open Printer Settings: Navigate to the “Settings” menu from the top menu bar, then click on “Printer,” and finally, “Add Printer.”
- Select Printer: A new window will pop up. If your printer is connected to your computer, you can select it under “Network.” If your printer is not listed, select “Non-Networked.”
- Enter Printer Details: In the “Add a Non-Networked Printer” section, scroll to “Custom” if you don’t see your printer’s brand in the list. Click on “Custom FFF printer”, type in the name of the printer and then click on “Add.”
- Configure Printer Settings: Fill in the necessary fields with your printer’s specifications. These may include machine settings such as X (width), Y(depth), and Z(height) dimensions, nozzle size, and heated bed information (see screenshot).
- Save Your Settings: Once you’ve entered your printer’s specifications, click on the “Next” button to save your settings.
Your 3D printer is now added in Cura. You’ll be able to see it in the printers list, and you can select it whenever you’re ready to start a new print project.
Now that your 3D printer is successfully added in Cura, you can proceed to define your print settings. These settings will significantly influence the outcome of your 3D prints.
You can find more information on how to create a 3D printer profile in Cura and what you need to pay attention to in this article: How to Create a Custom 3D Printer Profile in Cura
PLA Settings
These are the correct Cura settings for the QIDI Tech X-Max 3 for PLA:
- Print temperature: 220 °C
- Print bed temperature: 60 °C
- Print chamber temperature: /
- Print speed: 200 mm/s
- Retraction: 1,0 mm at 30 mm/s
- Cooling: 100%
- First layer: 5-10 mm/s, 0% cooling, 100% extrusion width, 100% layer height
With the QIDI Tech X-Max 3, printing with PLA becomes a straightforward process. The values mentioned above have provided good results for me with various PLA filaments.
The print temperature, specifically set at 220°C for the QIDI Tech X-Max 3 when using PLA, is a critical parameter in the 3D printing process. It directly influences the quality of the print and the successful extrusion of the filament. Too low, and the filament won’t melt properly, leading to subpar extrusion and uneven prints.
On the other hand, if the temperature is too high, it can cause the filament to overheat, resulting in stringy prints and potential damage to the printer.
The optimal temperature range for PLA usually lies between 190°C and 220°C. In the case of the QIDI Tech X-Max 3, the set temperature of 220°C has consistently yielded excellent results across various PLA filaments for me.
Retraction settings also play a pivotal role in the 3D printing process. As listed above, I used a retraction setting of 1.0 mm at 30 mm/s for most PLA filaments. Retraction is the process by which the filament is pulled back from the nozzle when the print head moves across non-print areas. This setting is imperative in preventing stringing or oozing, which can affect the quality of the final print. Inappropriately set retraction can either lead to excessive stringing if too low, or potential clogging of the nozzle if too high.
The settings provided above serve as an excellent baseline for further optimizations according to the specific requirements of your 3D printing project. Different models and materials may necessitate different tweaks to these settings. Later in this article, I will guide you through the process of calibrating these settings for optimum results, ensuring your 3D printing projects with the QIDI Tech X-Max 3 are successful and hassle-free.
ABS Settings
These are the correct Cura settings for the QIDI Tech X-Max 3 for ABS:
- Print temperature: 260-270 °C
- Print bed temperature: 100 °C
- Print chamber temperature: 45 °C
- Print speed: 220 mm/s
- Retraction: 1,0-1,2 mm at 30 mm/s
- Cooling: 30%
- First layer: 5-10 mm/s, 0% cooling, 100% extrusion width, 100% layer height
ABS is a common thermoplastic used in 3D printing. It offers strong and durable prints with good temperature resistance, making it suitable for functional parts and prototypes. However, ABS can be more challenging to print compared to PLA due to its higher printing temperature and tendency to warp. Therefore, it is important to use the correct settings for ABS with your QIDI Tech X-Max 3 to achieve successful prints.
The recommended print temperature range for ABS with the QIDI Tech X-Max 3 is between 260-270 °C. This higher temperature is necessary for proper bed adhesion and layer bonding. It is also important to have a heated print bed, set at 100 °C, to prevent warping and ensure the first layer sticks to the build plate.
In addition to a heated print bed, you should activate the print chamber and set its temperature to 45 °C for ABS. This will help maintain a consistent temperature throughout the printing process and minimize any potential warping or cracking. Be sure to activate the chamber heating at least 10 minutes before printing.
Retraction is an critical setting when printing with ABS, as it helps prevent stringing between layers. A retraction distance of 1.0-1.2 mm at a speed of 30 mm/s was ideal for my ABS filaments.
When printing with ABS, it is also essential to adjust the cooling settings. Compared to PLA, ABS requires less cooling during printing. For some ABS Filaments, 0% cooling is perfect. For me, max. 30% worked best to avoid warping and cracking.
The X-Max 3 features a carbon filter that is designed to filter out the toxic gases produced when printing with ABS. This is a significant safety feature, as it helps to mitigate potential health risks associated with ABS fumes. Despite this, it’s advisable to thoroughly ventilate the room after printing.
TPU Settings
These are the correct Cura settings for the QIDI Tech X-Max 3 for TPU:
- Print temperature: 230 °C
- Print bed temperature: 60 °C
- Print chamber temperature: /
- Print speed: 60 mm/s
- Retraction: 0,8-1 mm at 30 mm/s
- Cooling: 100%
- First layer: 5-10 mm/s, 0% cooling, 100% extrusion width, 100% layer height
TPU is a flexible filament, which necessitates careful calibration of print speed and retraction settings to achieve high print quality and prevent blockages. Due to its elastic nature, TPU demands a slower print speed; this allows the material to be fed into the extruder at a controlled pace, reducing the risk of it buckling or causing a jam. I got good results with around 60 mm/s.
Retraction settings are also pivotal. As TPU is prone to oozing, adequate retraction can help pull back the filament and prevent extraneous strings or blobs on the printed model. The QIDI Tech X-Max 3 settings outlined above offer a good starting point, but remember that specifics can vary based on the exact TPU brand. Always perform a test print and fine-tune your settings as necessary for optimal results (I’ll explain the calibration later in this article).
Thanks to the direct drive extruder of the QIDI Tech X-Max 3, flawless printing with TPU filament can be achieved. This feature allows for a shorter path for the filament, which is crucial when dealing with flexible filaments like TPU.
In this article, I explain the difference between Bowden and direct drive extruders.
PETG Settings
These are the correct Cura settings for the QIDI Tech X-Max 3 for PETG:
- Print temperature: 250-260 °C
- Print bed temperature: 70-80 °C
- Print chamber temperature: /
- Print speed: 120 mm/s
- Retraction: 1,0 mm at 30-40 mm/s
- Cooling: 60%
- First layer: 5-10 mm/s, 0% cooling, 100% extrusion width, 100% layer height
PETG is relatively easy to print and yet robust. However, it is very prone to stringing. Therefore, the precise setting of temperature and retraction is crucial. I have achieved excellent results with the values provided above, although calibration is necessary in most cases.
PETG filament absorbs moisture from the air, making dry storage essential. Exposure to humidity can negatively impact the quality of your prints, causing issues like stringing, poor layer adhesion, and a rough surface finish.
The QIDI Tech X-Max 3 features a dry box which can be mounted at the back of the filament holder. This arrangement ensures that the filament remains dry even during extensive projects. The dry box is particularly crucial when working with materials such as PETG, which absorb moisture from the environment. A dry filament contributes to the quality of the prints, preventing issues associated with moisture absorption such as stringing, poor layer adhesion, and a rough surface finish.
Best Cura Settings for the QIDI Tech X-Max 3
In the following section, we will delve into the details of each individual setting, providing a comprehensive understanding of how to optimize the Cura settings for the QIDI Tech X-Max 3.
Print Temperature
The best printing temperatures for the QIDI Tech X-Max 3 in Cura:
- PLA: 220 °C
- ABS: 260-270 °C
- TPU: 230 °C
- PETG: 250-260 °C
An improperly set print temperature can lead to various print errors in 3D printing. For instance, a temperature that’s too high can result in overly fluid print material, causing stringing or blobs on the print surface. Conversely, a temperature that’s too low may not fully melt the filament, leading to poor layer adhesion and potentially causing the print to fail.
It’s essential to calibrate the print temperature accurately according to the type of filament in use, ensuring optimal print quality and minimizing potential issues. If the values given above do not yield perfect results, they are still a very good starting point for calibration.
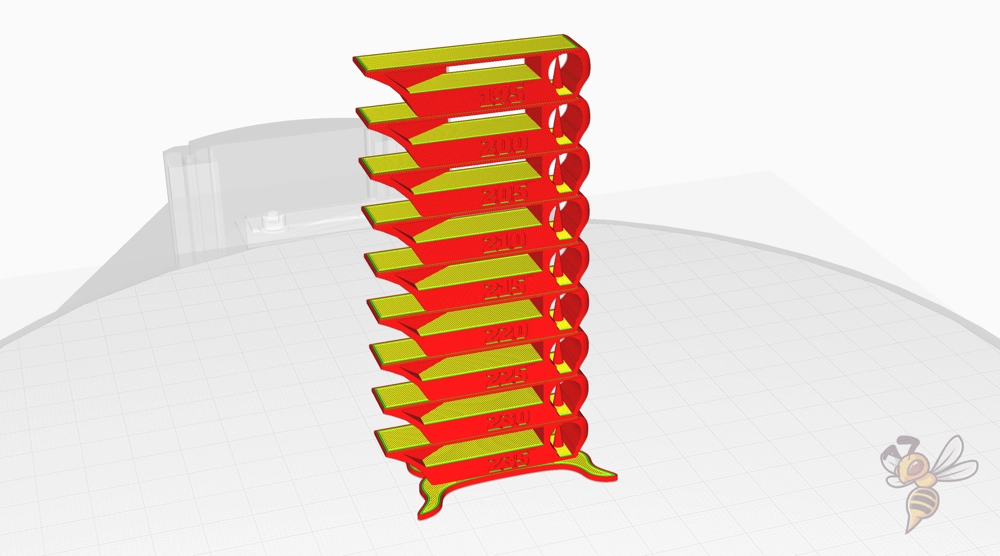
To calibrate the print temperature, you can print a temperature tower test. This type of test prints multiple temperature settings on the same object, allowing you to determine the ideal print temperature for your specific filament and printer setup.
Calibrating the print temperature for the QIDI Tech X-Max 3 is a straightforward process, principally due to its highly accurate extruder. This accuracy minimizes the likelihood of encountering print errors associated with temperature fluctuation, thereby making the temperature calibration process simpler and more efficient.
With PLA, it was actually the case that the recommended temperature of 220 °C already delivered perfect results without needing to calibrate anything!
I will show you in this article exactly how to calibrate the print temperature if this is not the case for you and also show you how to create the appropriate script for the temp-tower: 3D Printer Calibration: Step-by-Step to Perfect Results
Print Bed Temperature
These are the best print bed temperatures for the QIDI Tech X-Max 3 in Cura:
- PLA: 60 °C
- ABS: 100 °C
- TPU: 60 °C
- PETG: 70-80 °C
The print bed temperature is crucial in determining how well the 3D printed object adheres to the printer’s print bed. The optimal print bed temperature varies depending on the filament type. For instance, PLA and TPU often require a print bed temperature of around 60 °C, while ABS requires a higher temperature, typically around 100 °C. PETG may necessitate a print bed temperature anywhere between 70 and 80 °C. It is important to adjust these temperatures as necessary to ensure optimal adhesion and minimize the risk of print failure.
The flexible print bed of the QIDI Tech X-Max 3 has a PEI coating, providing excellent bed adhesion for most filaments. Therefore, it is not difficult to find the right temperature for the specific filament being used.
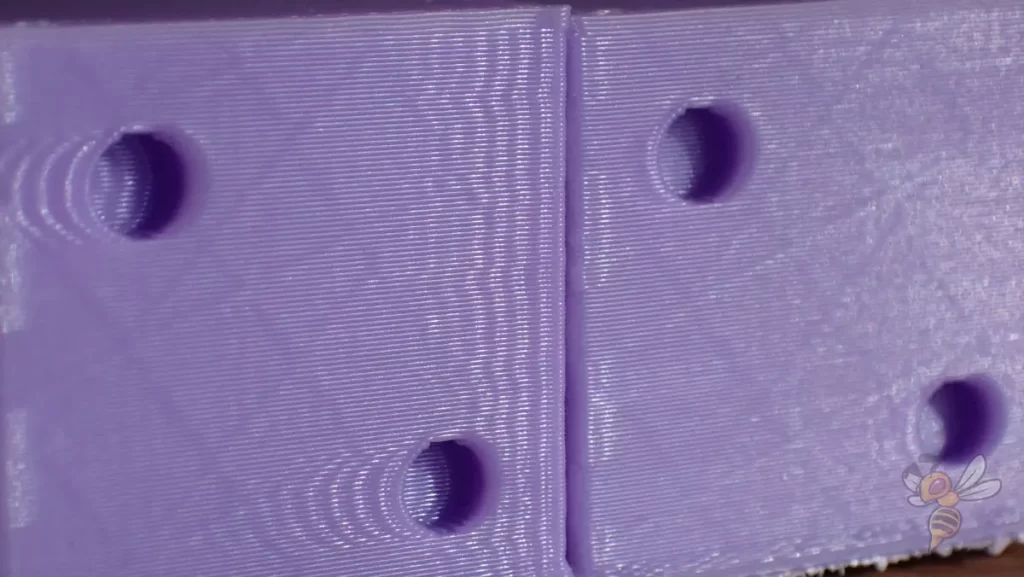
Remember to find the lowest temperature at which adhesion is still good enough to avoid an elephant’s foot.
Print Speed
The optimal print speed for the QIDI Tech X-Max 3 in Cura:
- PLA: 200 mm/s
- ABS: 220 mm/s
- TPU: 60 mm/s
- PETG: 120 mm/s
The QIDI Tech X-Max 3 utilizes Klipper as its firmware, which enables high print speeds. With this, it can achieve a maximum printing speed of 600 mm/s. However, I have achieved the best print quality with the values provided above.
To test if you can print even faster without generating any printing errors, there are specific calibration objects that you can use for that purpose.
Layer Height
The best layer heights for the QIDI Tech X-Max 3 in Cura:
- Decorative objects: 0.1 mm
- Standard: 0.2 mm
- Coarse, fast prints: 0.3-0.4 mm
The layer height is another crucial parameter in achieving optimal print quality. The higher the layer height, the faster the printing speed, but it also results in a lower resolution and more visible layers on the final print. Therefore, it is essential to choose the right layer height depending on the desired outcome of the print.
Flussrate
The best flow rate for the QIDI Tech X-Max 3 in Cura:
- Default value: 100%
- In case of over-extrusion: 90% to 99%
- In case of under-extrusion: 101% to 110%
The flow rate, also known as extrusion multiplier, determines how much filament is being extruded during printing. It is crucial to calibrate the flow rate for each filament type because different filaments have different densities and properties that can affect their flow rate. Over-extrusion can lead to bulging and stringing, while under-extrusion can result in gaps and weak prints.

To calibrate the flow rate, you can print a simple calibration cube without infill and top layers. Adjust the flow rate until the wall thickness of the cube is equal to the set value in Cura. Repeat this process for each filament type to ensure optimal printing quality.
Retraction
The best settings for retraction for the QIDI Tech X-Max 3 in Cura:
- PLA: 1,0 mm at 30 mm/s
- ABS: 1,0-1,2 mm at 30 mm/s
- TPU: 0,8-1 mm at 30 mm/s
- PETG: 1,0 mm at 30-40 mm/s
Incorrect retraction settings in 3D printing can lead to a range of issues that detrimentally affect the final print quality. Too high retraction speed or distance can cause filament grinding or the hotend to clog, leading to under-extrusion or, in extreme cases, complete print failure.
On the other hand, insufficient retraction may result in stringing or oozing, where excess filament seeps out of the nozzle during travel moves, creating thin strands between separate parts of the model. Therefore, careful calibration of the retraction settings for each material type is vital to ensure optimal print results.
It could be that the above values already achieve perfect results for you, but unfortunately this will still rarely be the case with retraction.
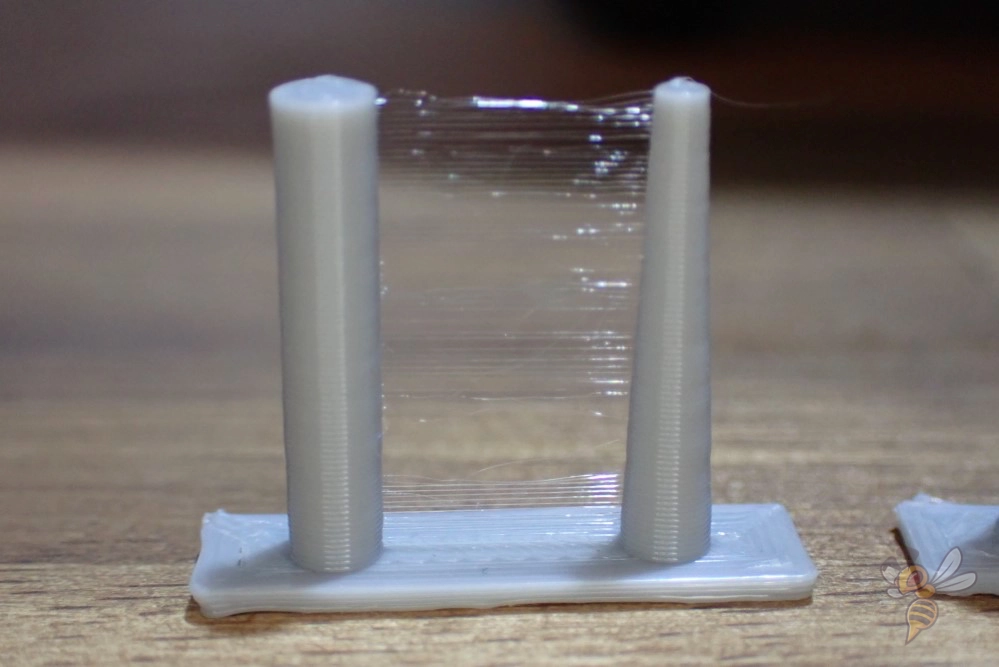
To calibrate the retraction settings for your 3D printer, you’ll need to print a retraction test model, which usually consists of two or more pillars. Begin with the settings mentioned above for your filament type and make small adjustments for each subsequent test.
If stringing occurs between the pillars, incrementally increase the retraction distance by 0.1 mm until the stringing stops. If you observe symptoms of under-extrusion, such as gaps or thin layers, decrease the retraction speed.
Remember, calibrating retraction is an iterative process and requires careful observation, so don’t rush it. Each filament type might need different settings, thus note down the optimal parameters for each one for future use.
Infill
The best infill density for the QIDI Tech X-Max 3 in Cura:
- Decorative objects: 0-15%
- Standard objects: 15-50%
- Stable objects: 50-100%
It’s essential to remember that the infill settings, while recommended for specific printers like the QIDI Tech X-Max 3, are ultimately determined by the specific requirements of the project at hand. In other words, infill is not intrinsically tied to the printer, but to the purpose of the printed object.
For instance, decorative objects typically require a lower infill density, as they are often not subjected to heavy stress or load. In contrast, objects designed for durability or functional use necessitate higher infill percentages. Consequently, understanding the purpose of your 3D printed model is crucial for determining appropriate infill settings.
First Layer
These are the best Cura settings for the first layer on the QIDI Tech X-Max 3:
- Layer Height: 100-200% of the normal layer height (higher values to increase bed adhesion)
- Line Width: 100-200% of the normal line width (higher values to increase bed adhesion)
- Printing Temperature: Same as the rest of the object or 5-10 °C higher for better bed adhesion.
- Printing Speed: 50% of the normal printing speed (i.e., 25 mm/s for a normal printing speed of 50 mm/s) or 5-10 mm/s for high bed adhesion.
- Flow Rate: 100-110% (higher values for poor bed adhesion)
- Raft/Brim/Skirt: Not necessary as the X-Max 3 printer has a PEI print bed.
The first layer in 3D printing is of paramount importance for the resulting print, often determining its success or failure. A well-executed first layer ensures proper adhesion to the print bed, thereby avoiding potential issues such as warping or shifting that can compromise the print’s structure and aesthetics.
One way to increase the adhesion of the first layer in 3D printing is to decrease the print speed or increase the print temperature. Both measures improve the adhesion between the first layer and the print bed. However, with printers like the X-Max 3, this is usually not necessary as it is already equipped with a PEI print bed that provides excellent adhesion. This reduces the need to manipulate the aforementioned settings to achieve higher adhesion.
Conclusion
The Cura parameters outlined in this guide are meticulously tailored for the QIDI Tech X-Max 3, and they can significantly influence the success of your print.
While these settings should yield good results, it may be necessary to fine-tune them according to the specific materials and designs used. As with any new printer or material, it is recommended to perform test prints and adjust the settings accordingly for optimal results.
With proper care and calibration, the X-Max 3 can produce high-quality prints that meet your expectations. I hope this guide has provided you with a better understanding of the cura settings for this printer and enables you to achieve your desired prints with ease. Happy printing!
Disclosure: This website is the property of Martin Lütkemeyer and is operated by Martin Lütkemeyer. Martin Lütkemeyer is a member of the Amazon Services LLC and other Affiliate Programs. These are affiliate advertising programs designed to enable websites to earn advertising revenue through advertising and linking to Amazon.com and others. Links marked with * are affiliate links.
