
- Wet Filament: Prevention, Symptoms & Drying - July 18, 2024
- Sovol SV08 – Best PrusaSlicer Settings & Profile - June 26, 2024
- Sovol SV08 – Best Orca Slicer Settings & Profile - June 26, 2024
Disclosure: Links marked with * are Affiliate Links. I earn from qualifying purchases if you decide to make a purchase through these links – at no additional cost for you!
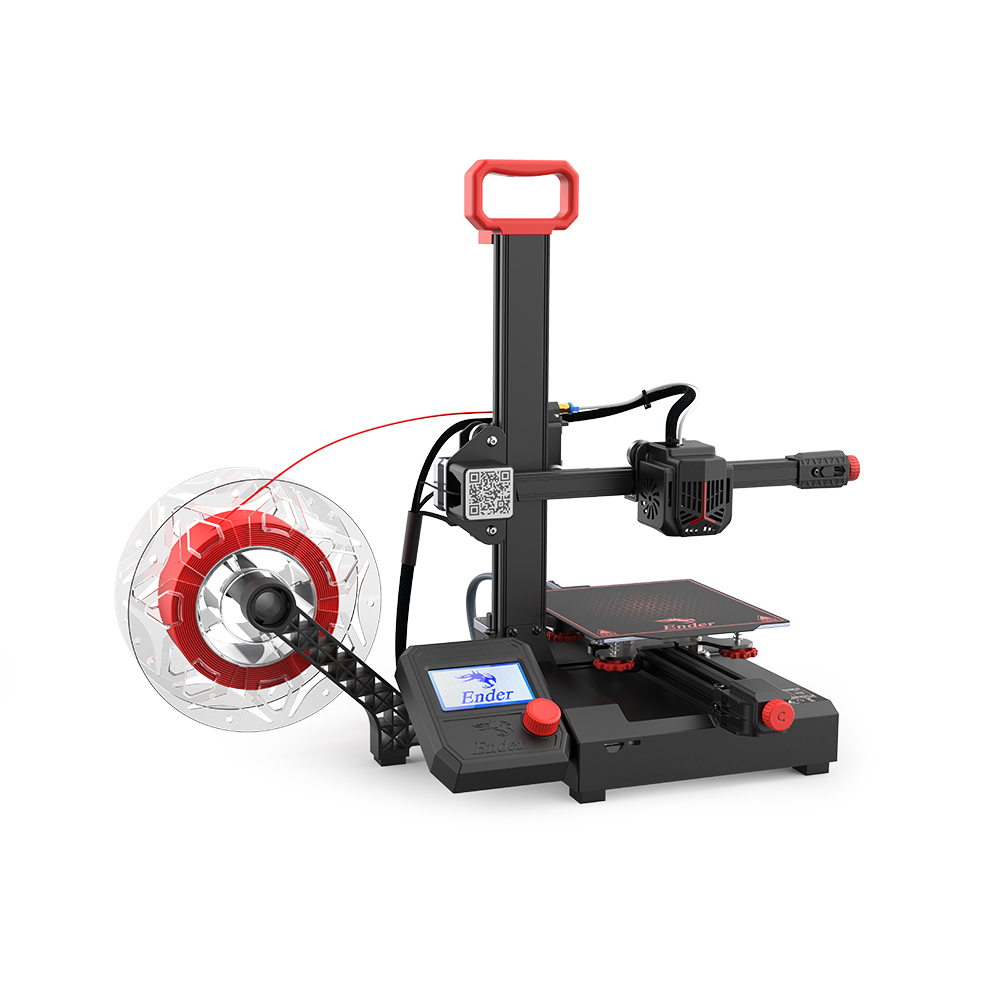
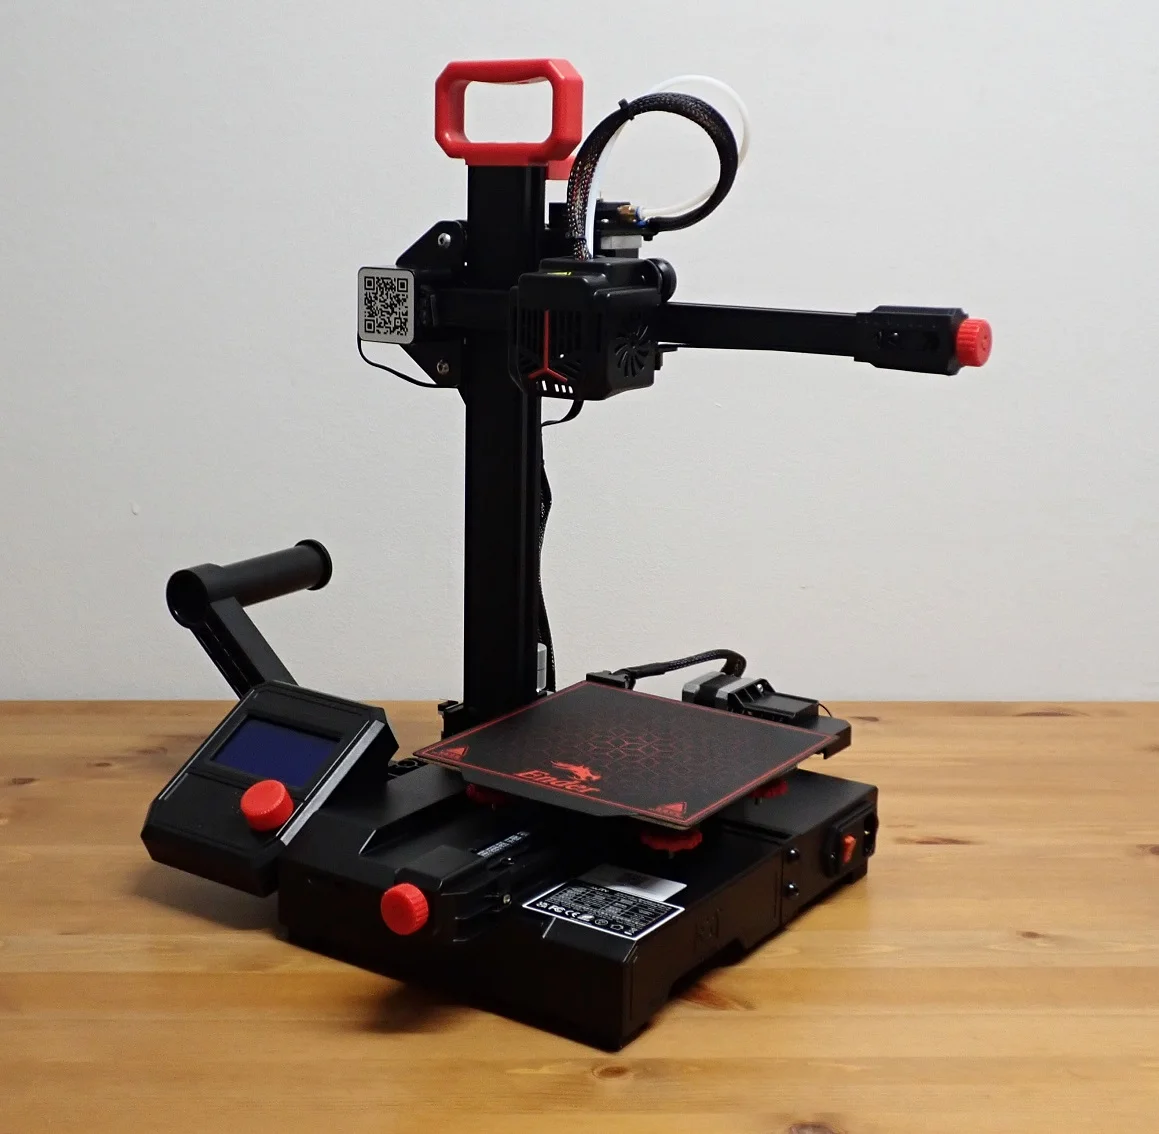
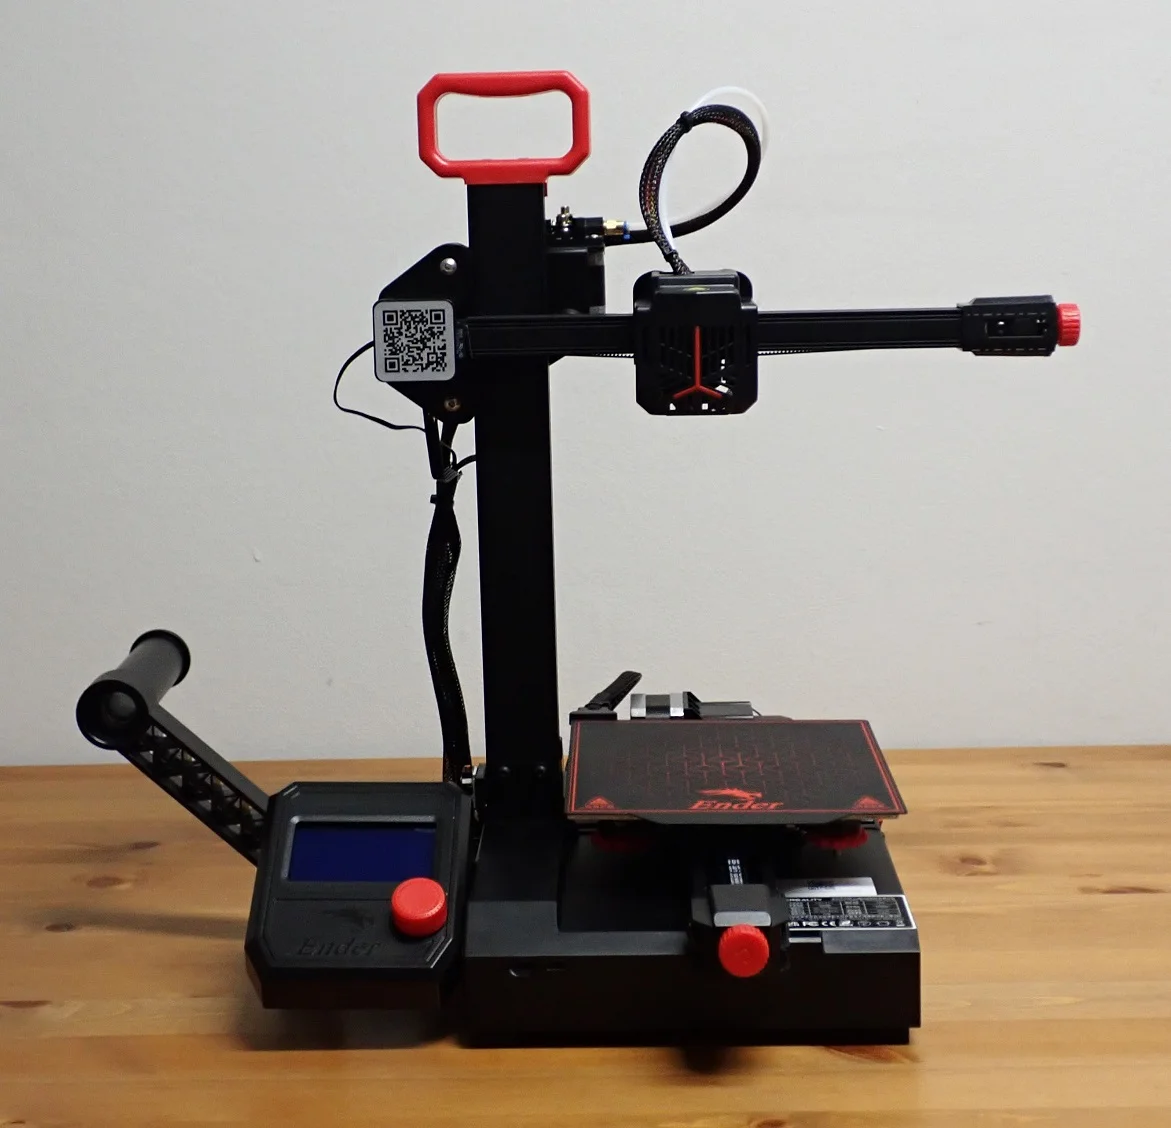
The Ender 2 Pro* is a small-format printer with a single Z-axis and a cantilever X-axis. Due to the clever design, the X-axis is so stable that it achieves accuracies of 3D printers in the next higher price range.
The Ender 2 Pro from Creality achieves accuracies of 0.1 mm and has a print volume of 165 x 165 x 180 mm. This small-format 3D printer is especially suitable for beginners and children. Its flexible magnetic print bed and the other Pro features make it very user-friendly.
I tested the Ender 2 Pro from top to bottom in this hands-on review, showing you how it’s built, what features it offers, and what kind of results you can expect.
Check Price at:
Table of Contents:
- 1 Key Takeaways
- 2 Who Should Buy the Ender 2 Pro?
- 3 Advantages & Disadvantages > Ender 2 Pro Review
- 4 Technical Specifications > Ender 2 Pro Review
- 5 Scope of Delivery > Ender 2 Pro Review
- 6 Assembly > Ender 2 Pro Review
- 7 Features > Ender 2 Pro Review
- 8 Heating Times > Ender 2 Pro Review
- 9 Noise Level > Ender 2 Pro Review
- 10 Print Speed > Ender 2 Pro Review
- 11 Operation > Ender 2 Pro Review
- 12 Slicer > Ender 2 Pro Review
- 13 Print Quality > Ender 2 Pro Review
- 14 Is the Ender 2 Pro Worth It? > Ender 2 Pro Review
- 15 Similar 3D Printers
Key Takeaways
- 165 x 165 x 180 mm print volume
- PLA, TPU and wood filament
- 0.1 mm accuracy
- Hardly any vibrations due to stable construction
- Efficient part cooling
- Very mobile
- Excellent price-performance ratio
Who Should Buy the Ender 2 Pro?
The Ender 2 Pro is an affordable, small-format 3D printer with good accuracy. It is suitable for beginners and children. Due to its mobility, it is easy to store. The good price-performance ratio, the simple operation and the high accuracy exclude a bad buy.
Advantages & Disadvantages
> Ender 2 Pro Review
PRO:
- Excellent price-performance ratio
- Simple 4-step installation
- User-friendly design
- Lightweight and mobile
- Stable construction
- Integrated tool compartment
- Flexible, magnetic print bed
CON:
- Small print volume
- Sometimes difficulties with print bed adhesion
Technical Specifications
> Ender 2 Pro Review
DEVICE
- Technology: FDM
- Assembly: mostly pre-assembled
- Display: 2-colour LCD screen with rotary knob operation
- Size: 421 x 383 x 465 mm
- Weight: 4,65 kg
- Power: 150 W
- Print volume: 165 x 165 x 180 mm
- Layer thickness: 0.12 to 0.28 mm
- Print speed: < 100 mm/s, standard 50 mm/s
- Max. nozzle temperature: 260 °C
- Max. print bed temperature: 80 °C
- Material: 1.75 mm PLA, TPU, wood
- Nozzle diameter: 0.4 mm
- Nozzle quantity: 1
- Print bed: Magnetic, flexible, removable
- Print bed leveling: manual
- Filament detector: no
- Resume print: yes
SOFTWARE
- Slicer: Creality Slicer, Cura
- Operating systems: Windows
- Connectivity: MicroSD
Check Price at:
Scope of Delivery
> Ender 2 Pro Review
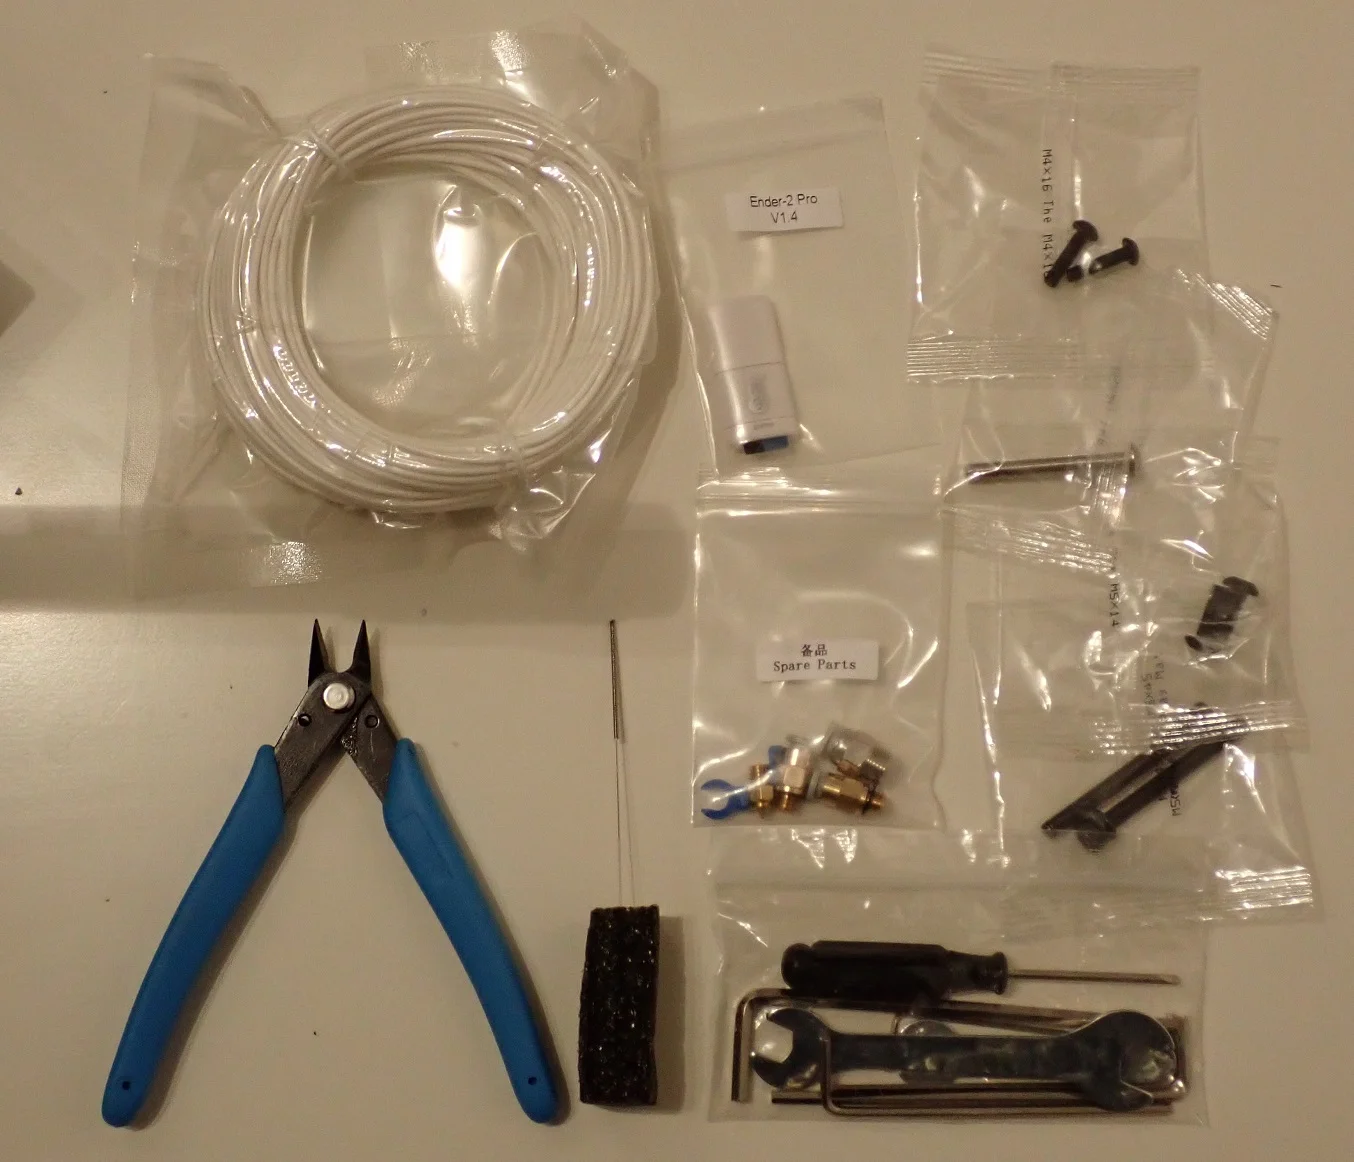
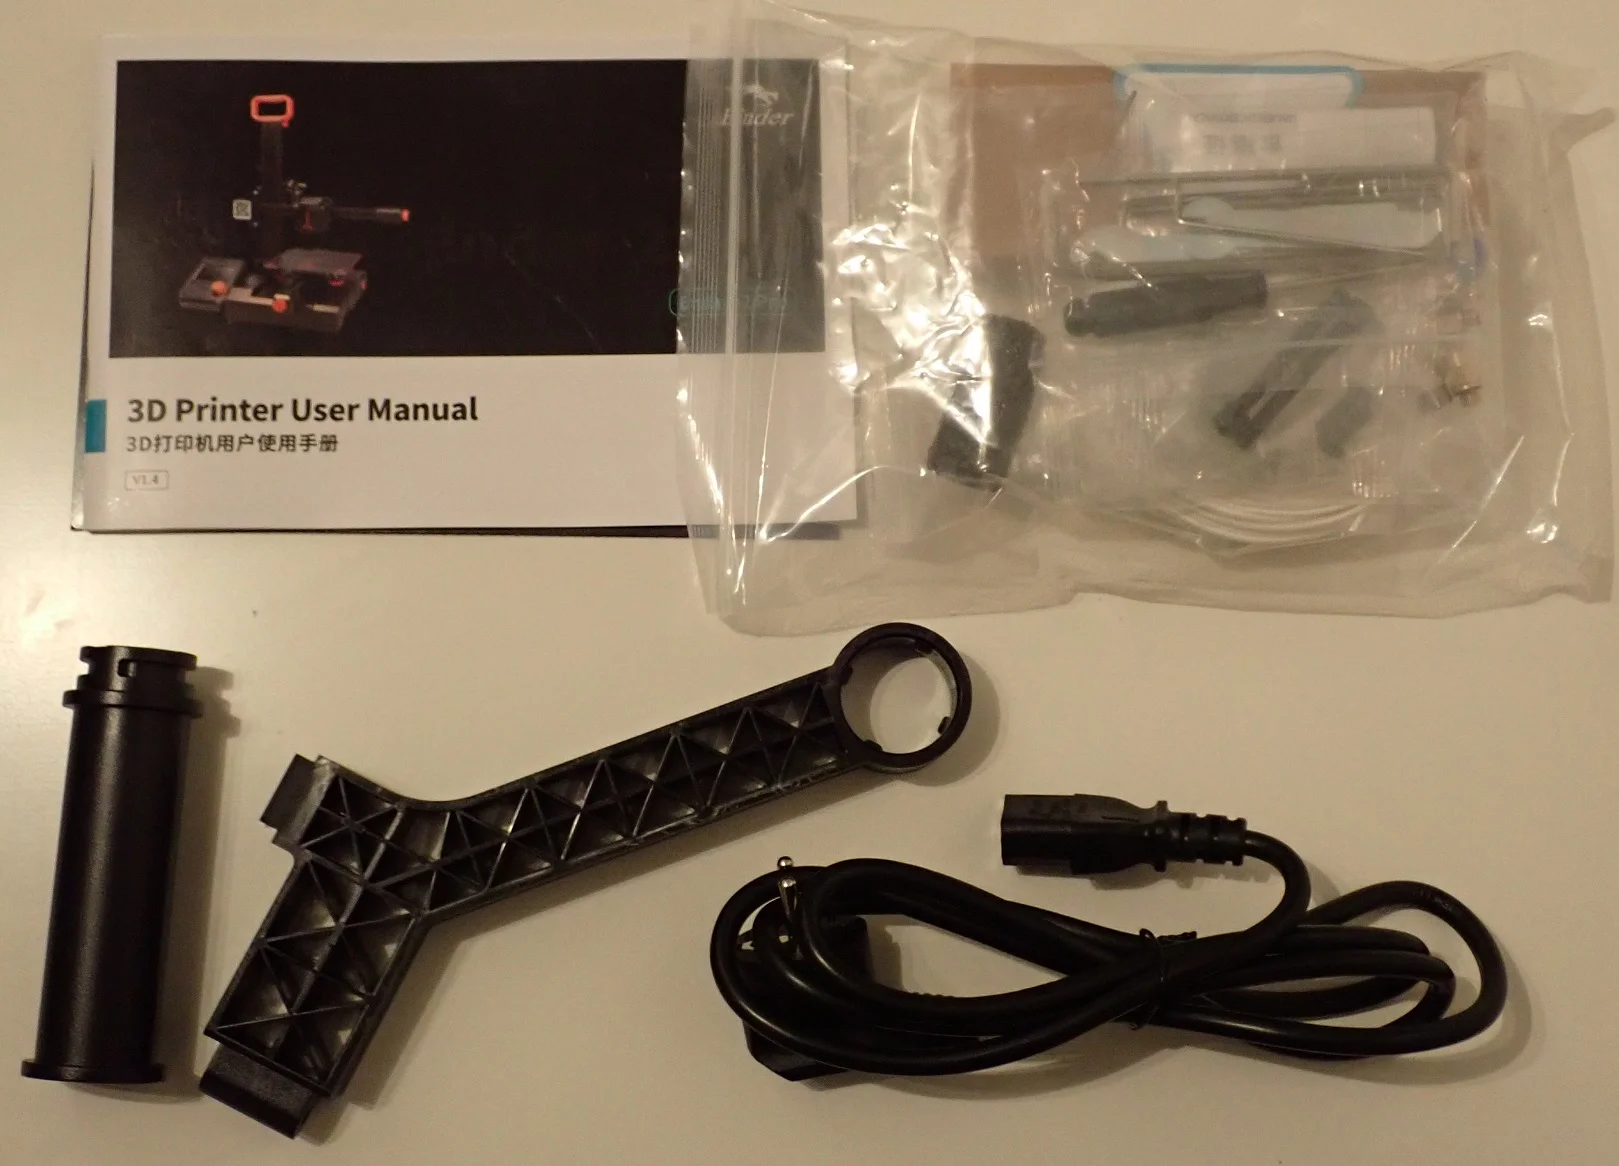
The Ender 2 Pro comes mostly pre-assembled in a compact package. Everything is included to set up the 3D printer and start with the first test prints.
As with most other 3D printers, there is some filament included in the box. However, this will only be enough for the first few test prints. You should get some high-quality filament, such as the PLA filament from ERYONE.
The included manual is as you would expect from Creality intuitively understandable and has many pictograms that explain even without text understandable the assembly and operation. For experienced users, there is even a drawing of the motherboard with the corresponding functions of the individual components included at the end.
The following items are included in the scope of delivery:
- Pre-assembled printer base
- Handle to carry the printer
- Pre-assembled XZ-axis with the printhead
- Control unit with screen and rotary knob
- Filament holder
- Power cable
- Some PLA filament
- Operating instructions
- Tools:
- All necessary screws
- Screwdriver
- Wrench
- Allen key
- Pliers
- Needle for nozzle cleaning
- Spare parts
- USB-MicroSD Adapter
- MicroSD card:
- Operating instructions
- Creality slicer
- Troubleshooting Guide
- Sliced models ready for printing
- Operation video
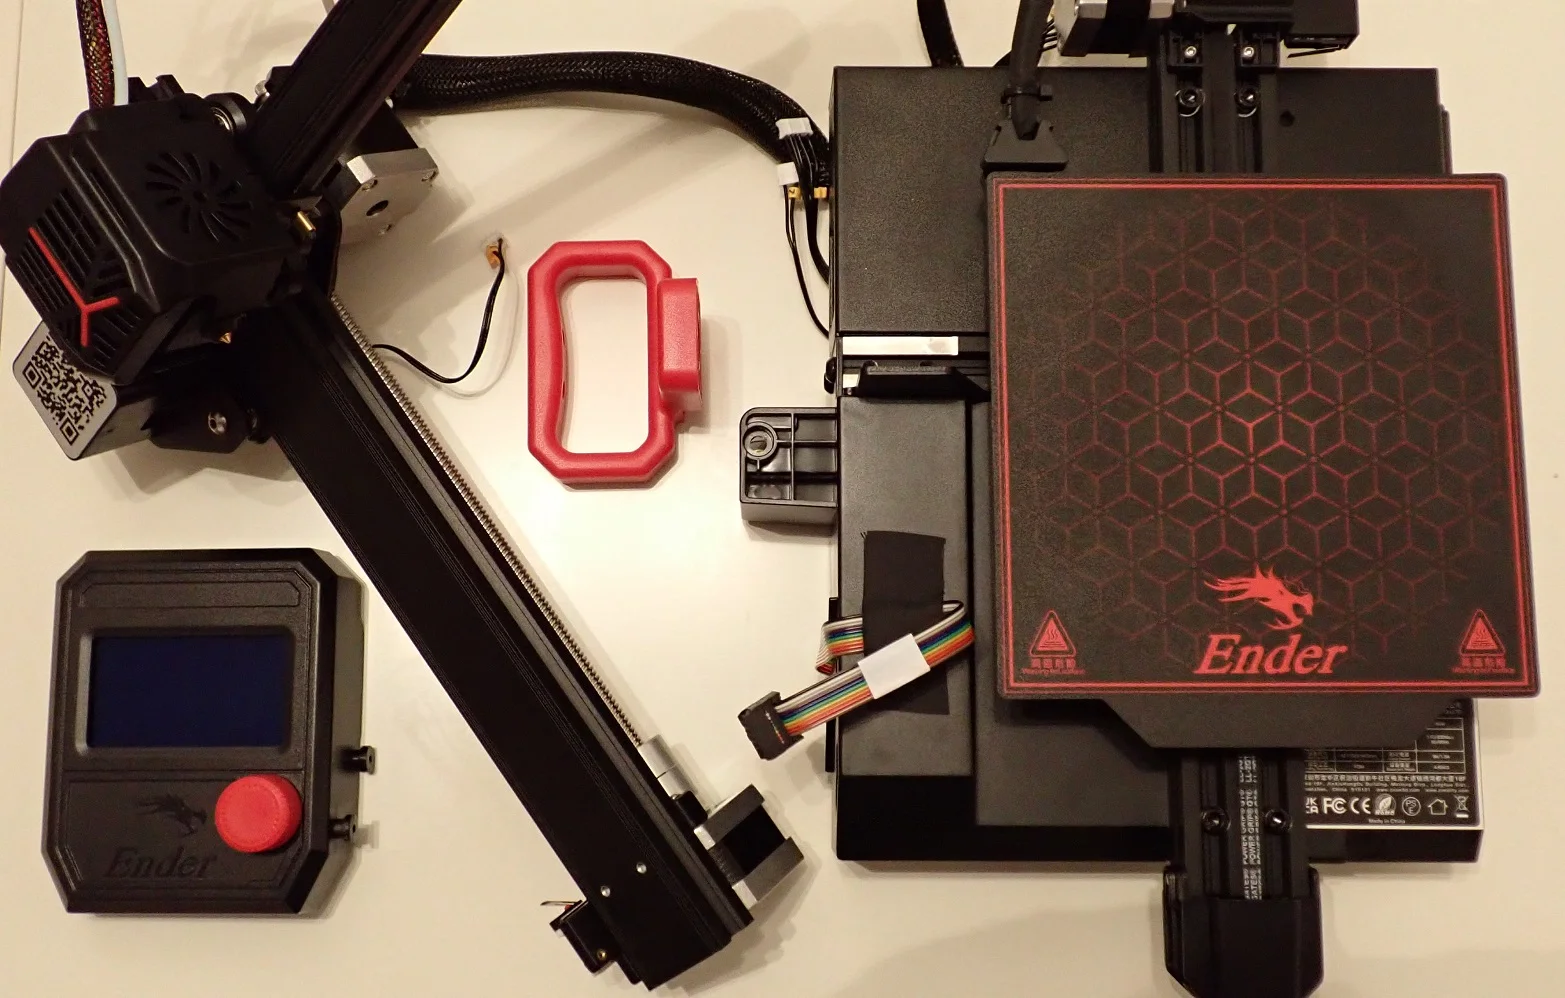
Assembly
> Ender 2 Pro Review
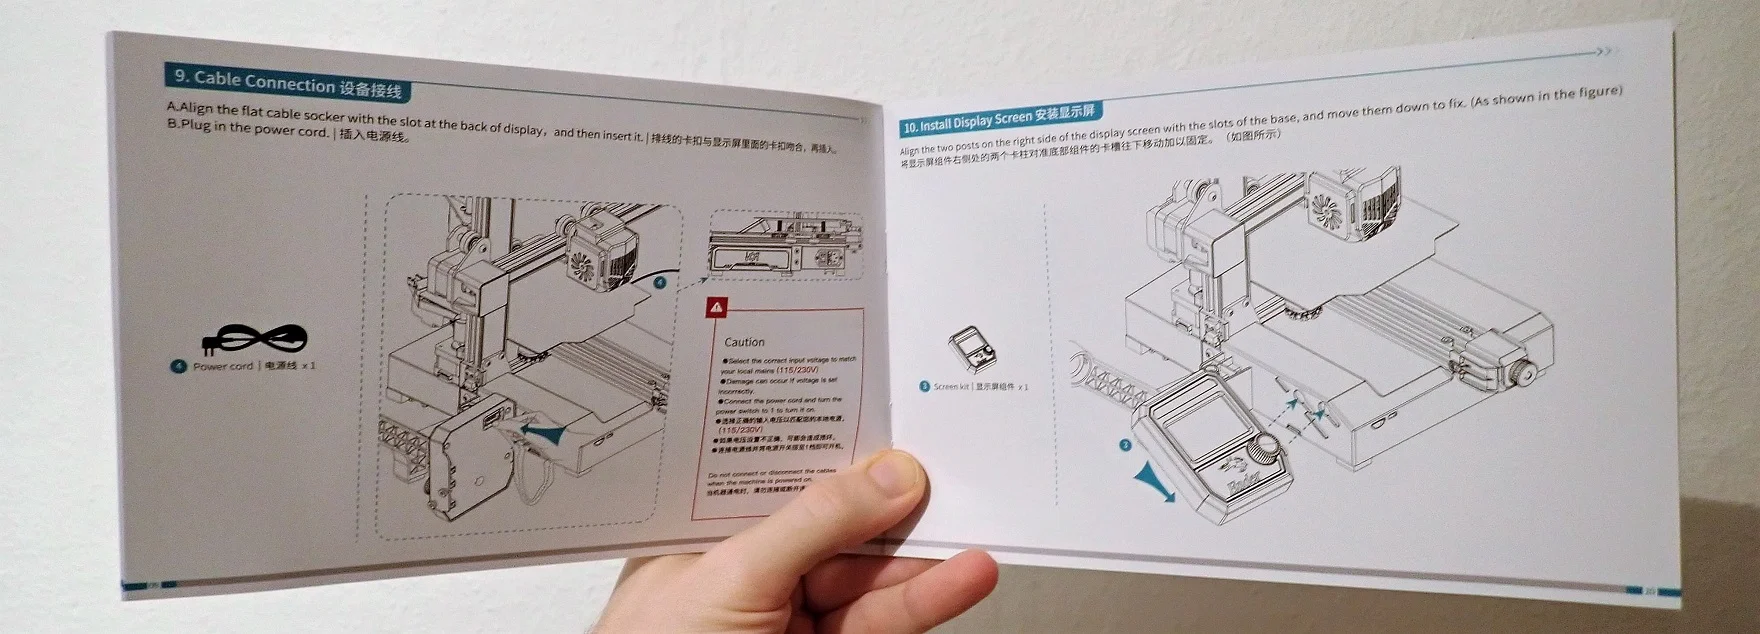
Since the Ender 2 Pro comes in a few parts, most of which are already pre-assembled, assembly is done in minutes.
- Step 1: Mount the XZ-axis to the printer base.
- Step 2: Install the filament holder.
- Step 3: Mount the handle on the top of the Z-axis.
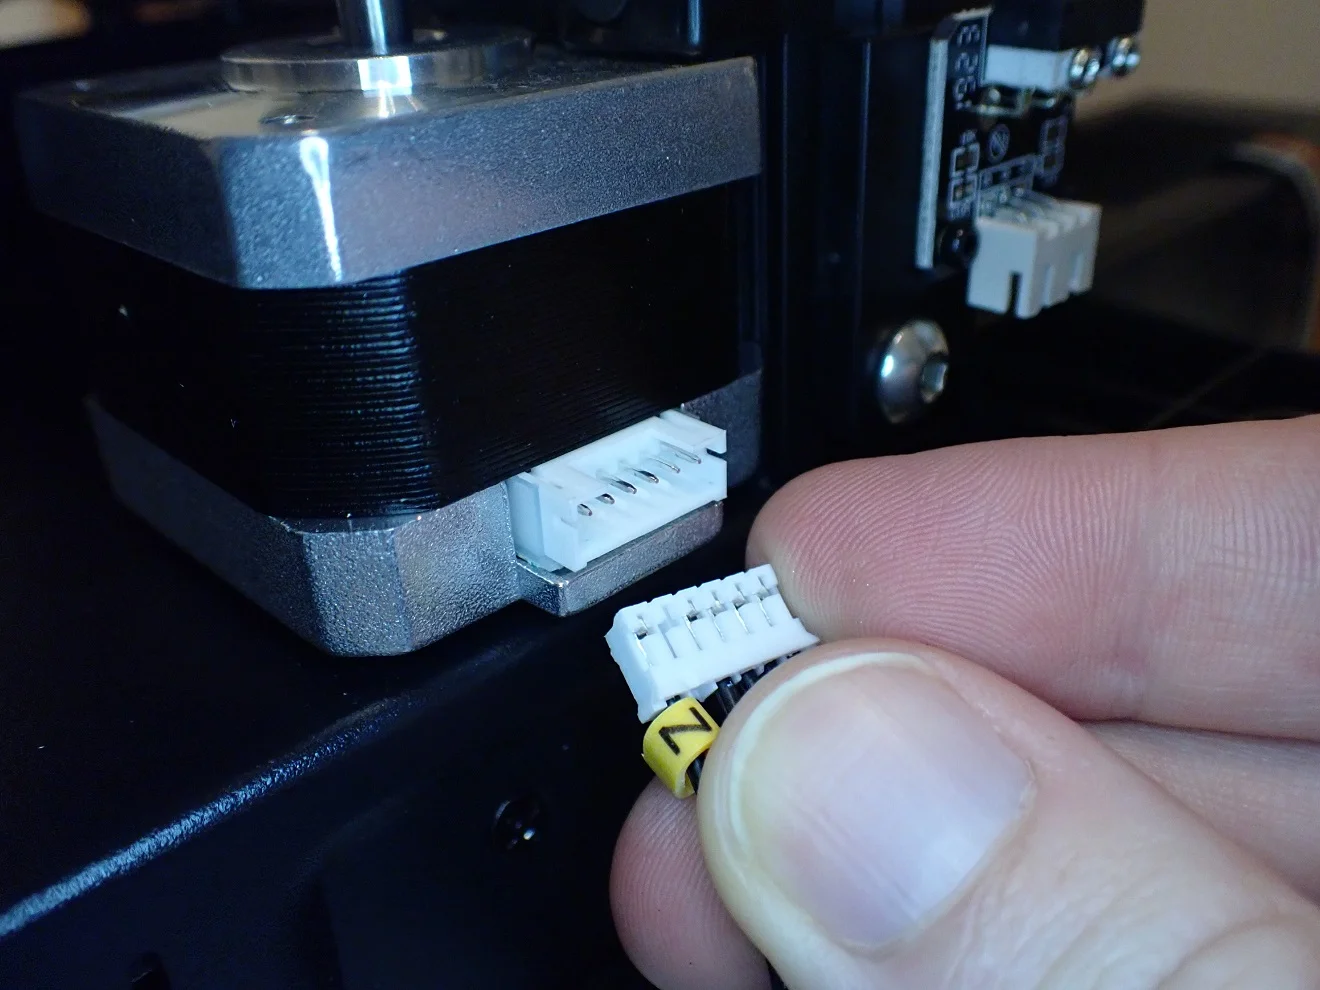
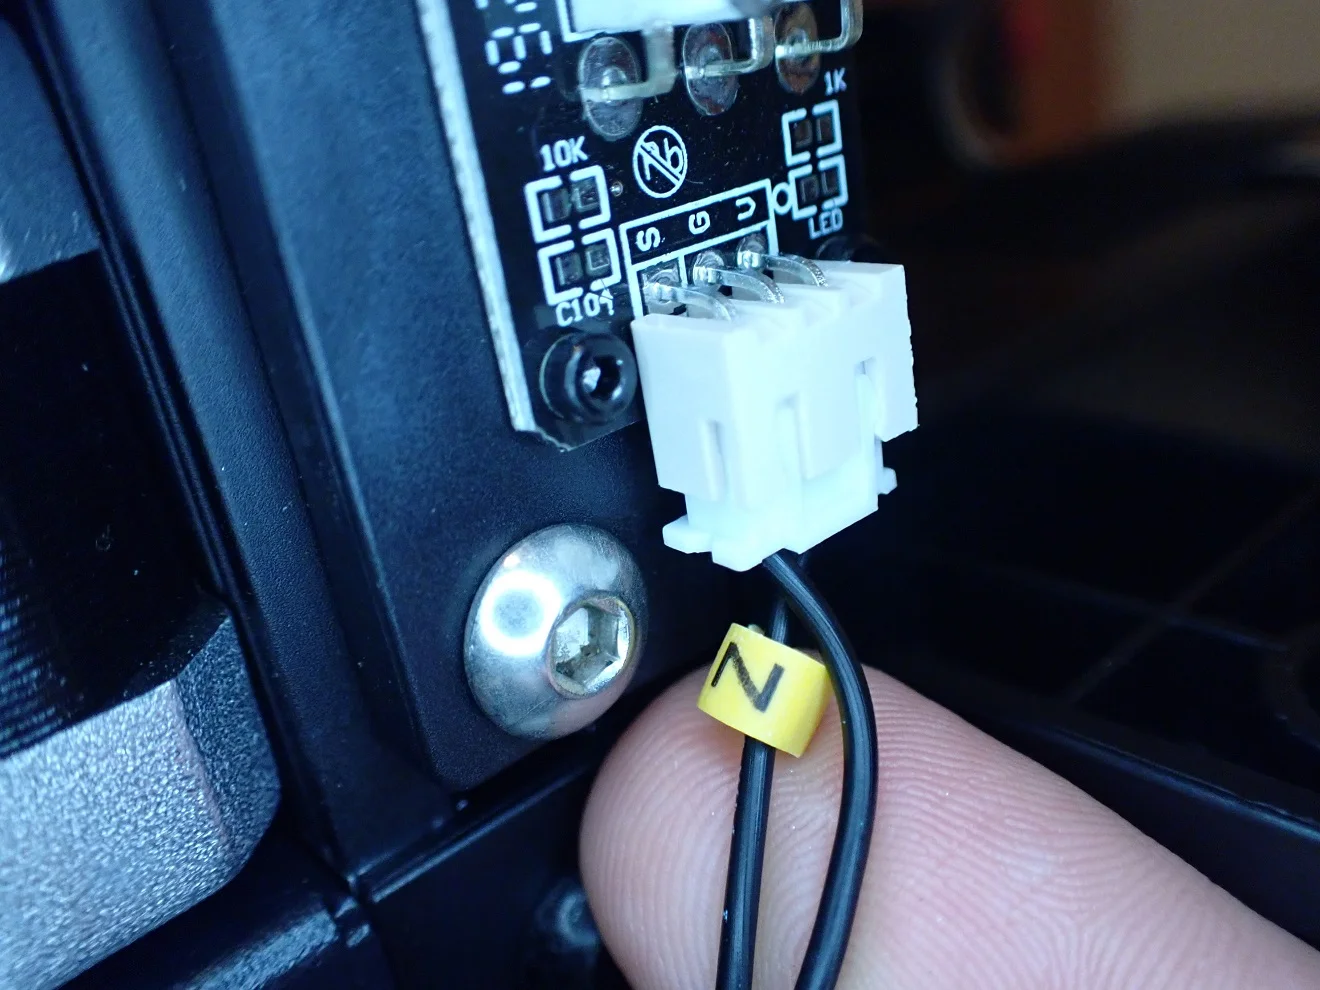
- Step 4: Connect the cables (all cables are clearly marked so that a wrong connection is almost impossible).
- Step 5: Install the control unit.
- Step 6: Check the screws of the wheels for each axis and the print bed.
- Step 7: Check the toothed belt tension.
Once the printer is fully assembled, you can turn it on and level the print bed. With the Ender 2 Pro, the print bed is leveled completely manually. Thanks to the large rotating screws under the print bed, it is easier to perform the leveling.
The print bed is leveled with the paper method. For this, you only need a piece of paper with a thickness of 0.1 mm (normal paper has this thickness). Use the printer menu to move the nozzle to the home position and deactivate the stepper motors so that you can move the print head freely.
Then adjust the distance between the nozzle and the print bed so that you can move the piece of paper back and forth between the nozzle and the print bed with a little friction. If you have problems with print bed adhesion later on, you can adjust the distance even smaller, so that the filament is squeezed a bit and forms a larger surface for adhesion.
Check Price at:
Features
> Ender 2 Pro Review
For such a small and affordable 3D printer, the Ender 2 Pro* has a lot of useful features that improve operation and printing results.
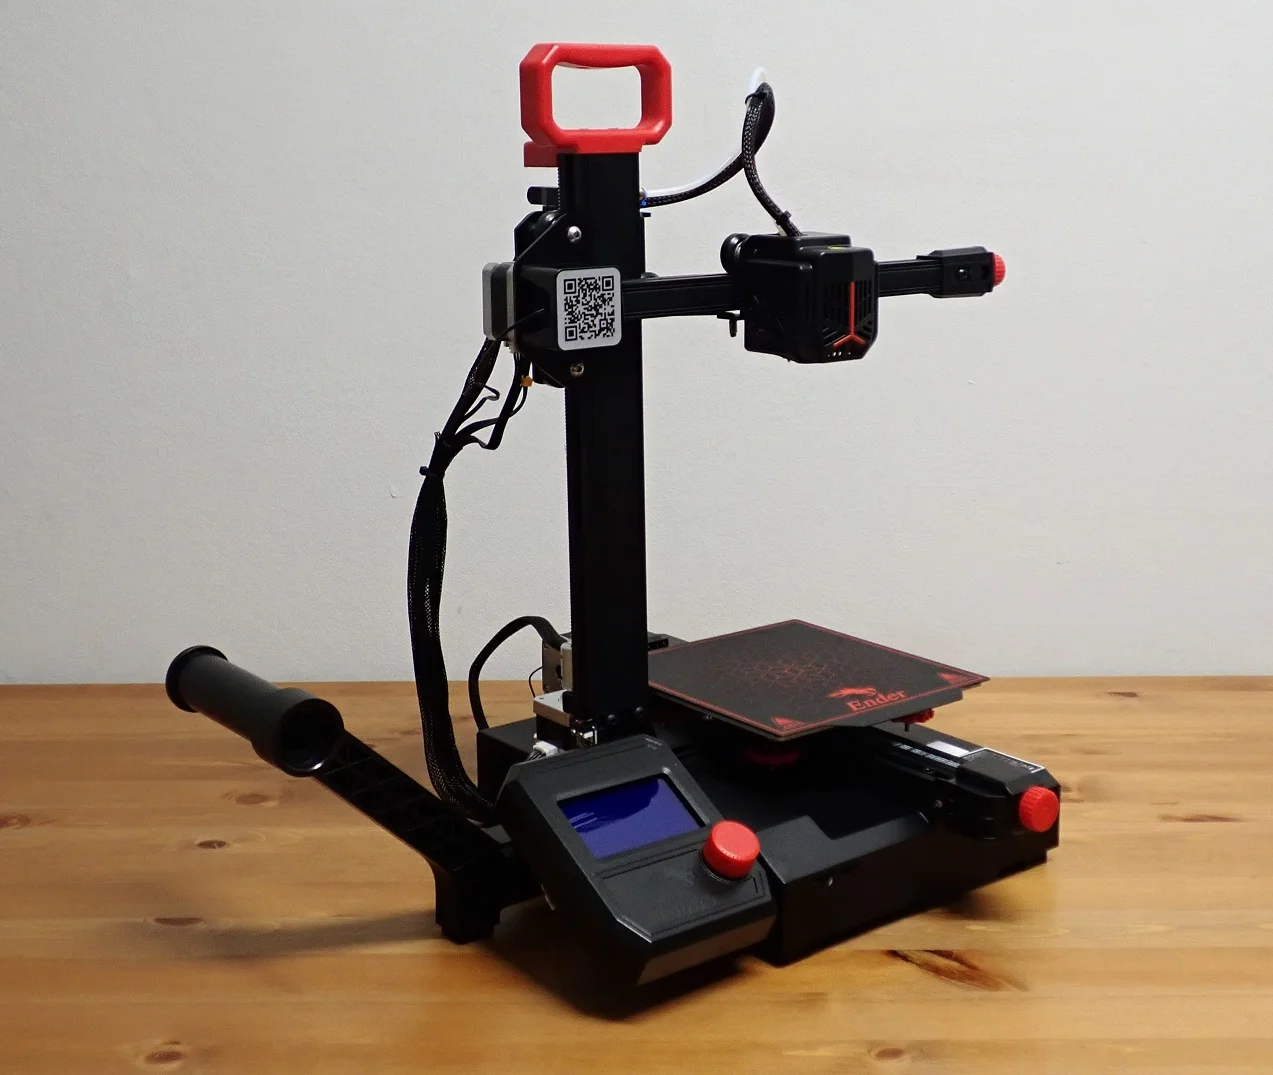
All important controls of the printer are kept in a bright red. Creality has implemented the ease of use with this 3D printer really well, making the Ender 2 Pro also very suitable for children.
Tool Drawer
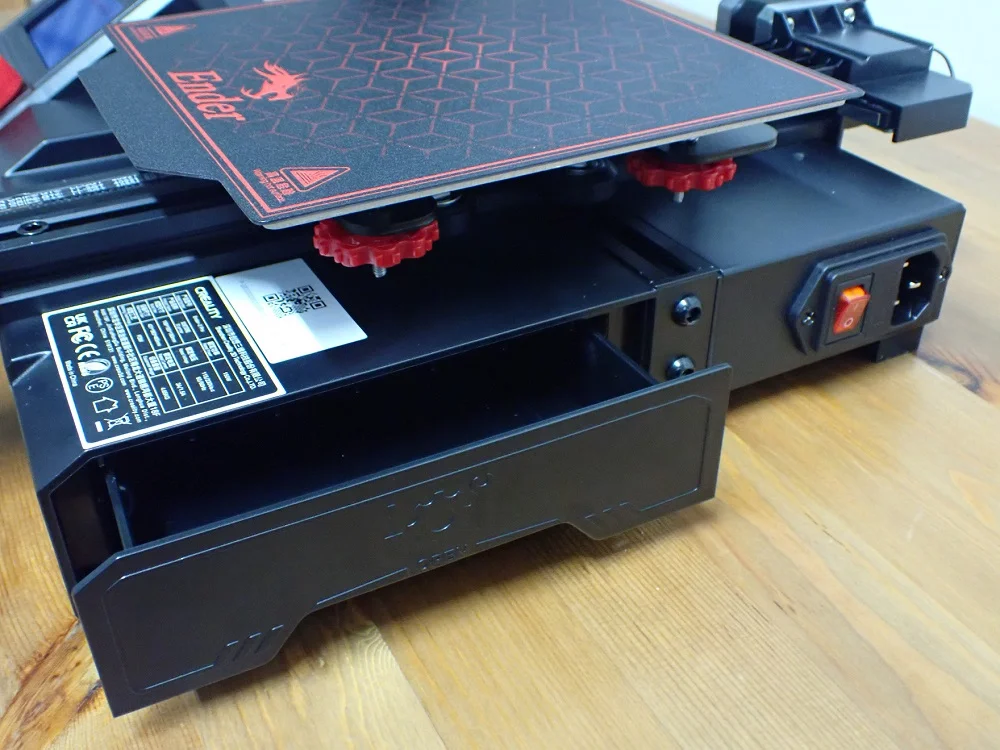
The Ender 2 Pro has a very attractive and minimalist design. The integrated tool drawer also ensures that the work surface around the printer stays nice and tidy.
This drawer holds all of the included tools and is roomy enough that you could store even more. If you plan to move the 3D printer often, you might want to put some foam in the drawer to keep the contents from bouncing around too much. Unfortunately, this is not included in the scope of delivery.
Timing Belt Tensioner
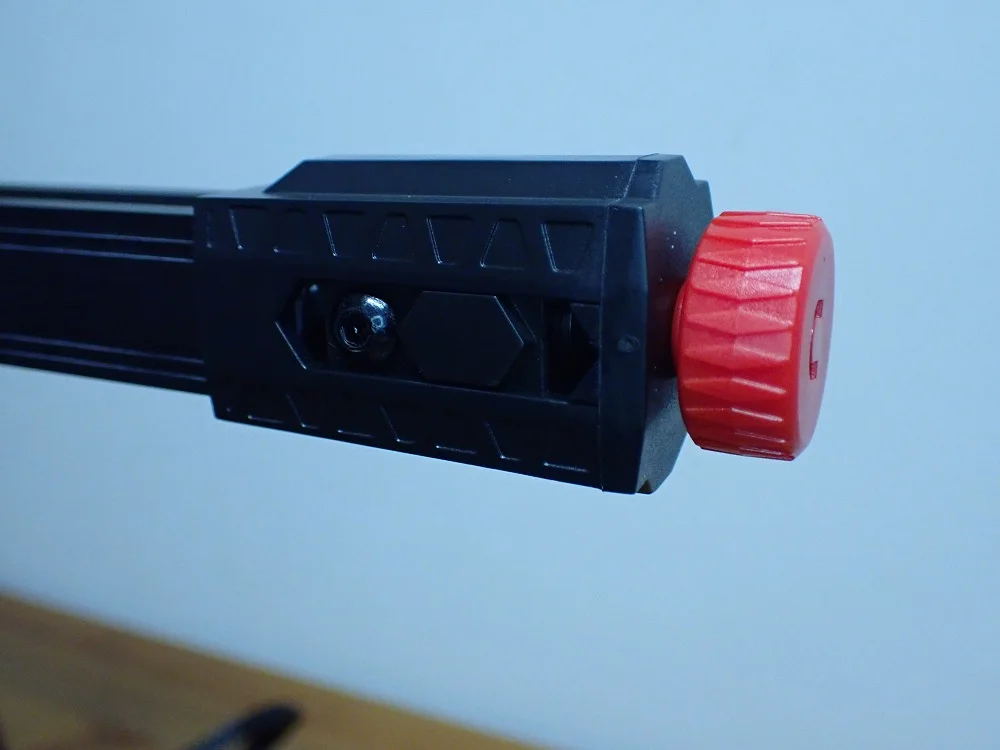

With its many practical upgrades, this 3D printer earns the name “Pro“. This also applies to the practical timing belt tensioners, which allow you to tension the timing belts quickly and easily.
The timing belts should be tight enough so that there is no vibration or inaccuracy, but not too tight so that they do not break and last a long time. There are a total of two timing belt tensioners for the print bed and the X-axis.
Clip-On Screen
To make the assembly as easy as possible, Creality has pre-assembled most of the Ender 2 Pro. The control element with screen and rotary knob only needs to be clipped into the base of the 3D printer and connected to the corresponding cable on the back.
Due to the simple clip-on system, it is also very easy to store the 3D printer in tight spaces. Within seconds you have removed the control element from the 3D printer and thus reduce its dimensions to store it space-saving.
Magnetic Print Bed
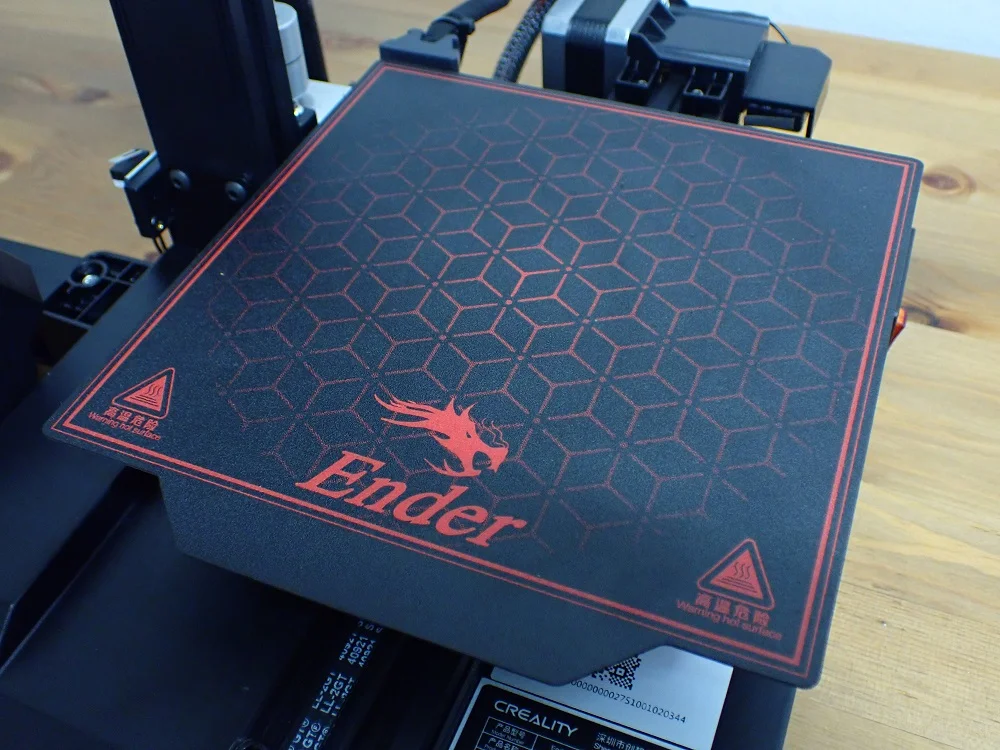


The flexible and magnetic print bed of the Ender 2 Pro can be removed from the printing plate after printing. This way you can easily detach your print objects from the print bed.
Due to the flexibility, it is very easy to detach print objects from the print bed. Most parts detach themselves by bending. Another argument that this 3D printer is very suitable for children.
With very filigree parts that take up little surface on the print bed, the print bed adhesion on this print bed can sometimes not be perfect. To improve the print bed adhesion, the distance from the nozzle to the print bed must not be too large and in a pinch a glue stick can help.
Easy Storage
The fact that the filament holder can be folded and the control panel with the screen can be easily removed makes the Ender 2 Pro easy to store. The convenient handle at the top of the Z-axis helps to carry it.
Due to the handle and its small dimensions, its 4.65 kg are not too heavy and can also be carried by a child. Thus, the 3D printer can be quickly built up if necessary and also dismantled again if it is used only rarely or space is generally scarce.
Reinforced Z-axis

With 3D printers with a cantilever X-axis, there is always the danger that the X-axis vibrates too much. With the Ender 2 Pro, this problem has been solved by mounting the Z-axis very stably on the 3D printer base and leaving only the most necessary parts on the cantilever X-axis.
The Z-axis is not only mounted from below on the 3D printer base, it is also prevented from vibrating laterally in the X-direction. This design definitely provides more stabilization than comparable 3D printers with cantilever X-axes.
With this clever design, the small Ender 2 Pro can keep up with the accuracies of larger models.
Built-In Power Supply
In the Pro version, the power supply is now built into the housing and no longer attached to the outside of the 3D printer. This gives the Ender 2 Pro a very tidy and professional look.
In addition, the power supply is no longer so easy to reach for children, which increases operator safety.
Two Part Fans
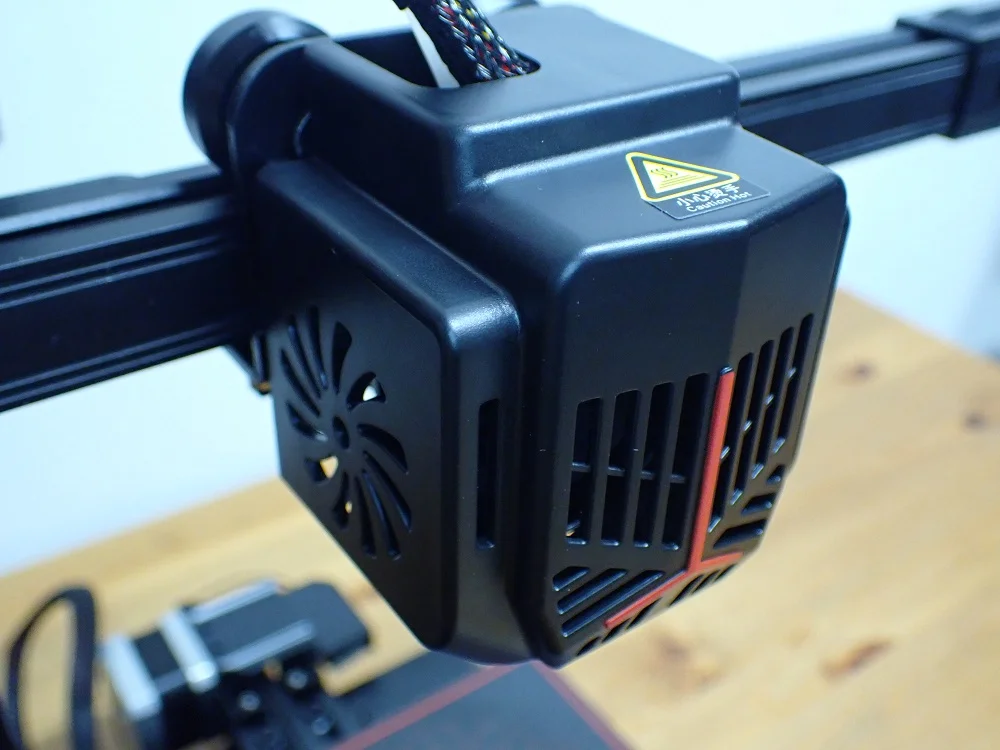
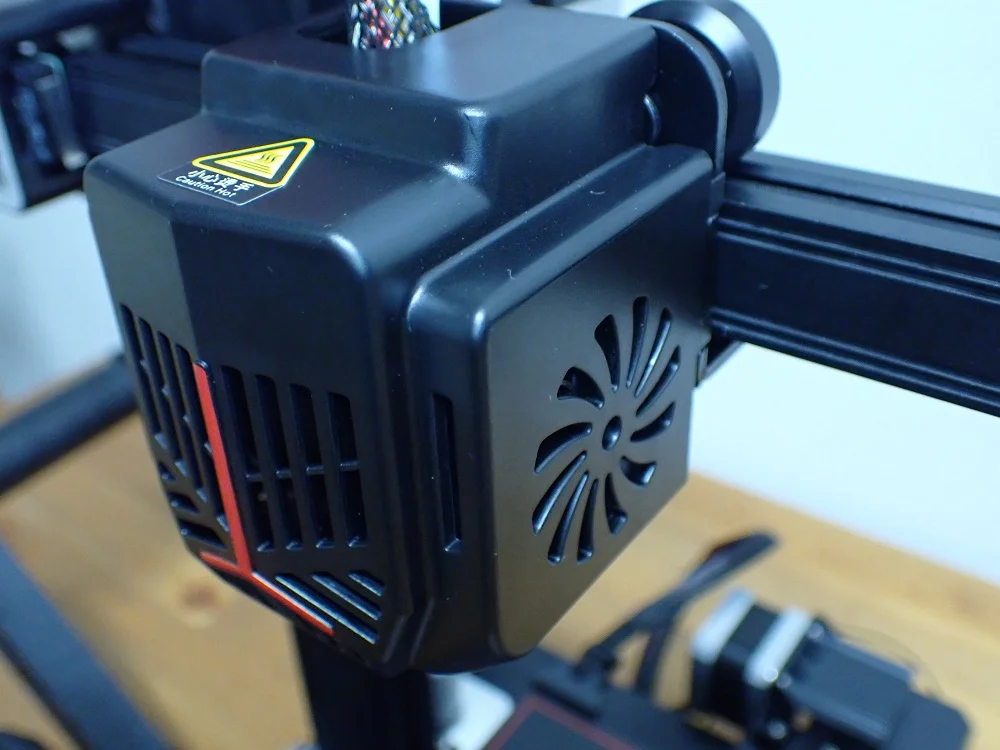
Most 3D printers with a cantilever X-axis do not use part fans to save weight. In the Ender 2 Pro, two lightweight fans are directly installed for part cooling.
This allows you to print higher accuracies, better overhangs and finer details than without. The only drawback to these lightweight fans is their loudness. Quieter fans require different materials and would be heavier. I think this is a very good compromise and the slightly higher noise is totally worth it.
High Mobility
With its 4.65 kg, its small dimensions and the practical handle at the upper end of the Z-axis, the Ender 2 Pro is very mobile and can be carried from A to B very easily. Thanks to the stable construction, you don’t have to worry about having to re-level the print bed every time.
Creality also advertises a high customizability of the handle. The included USB stick already contains two different grips that you can print.
Due to its high mobility, the Ender 2 Pro is generally very suitable for children and for those who want to use a 3D printer only sporadically and want to store it in the meantime to save space.
Bowden Extruder
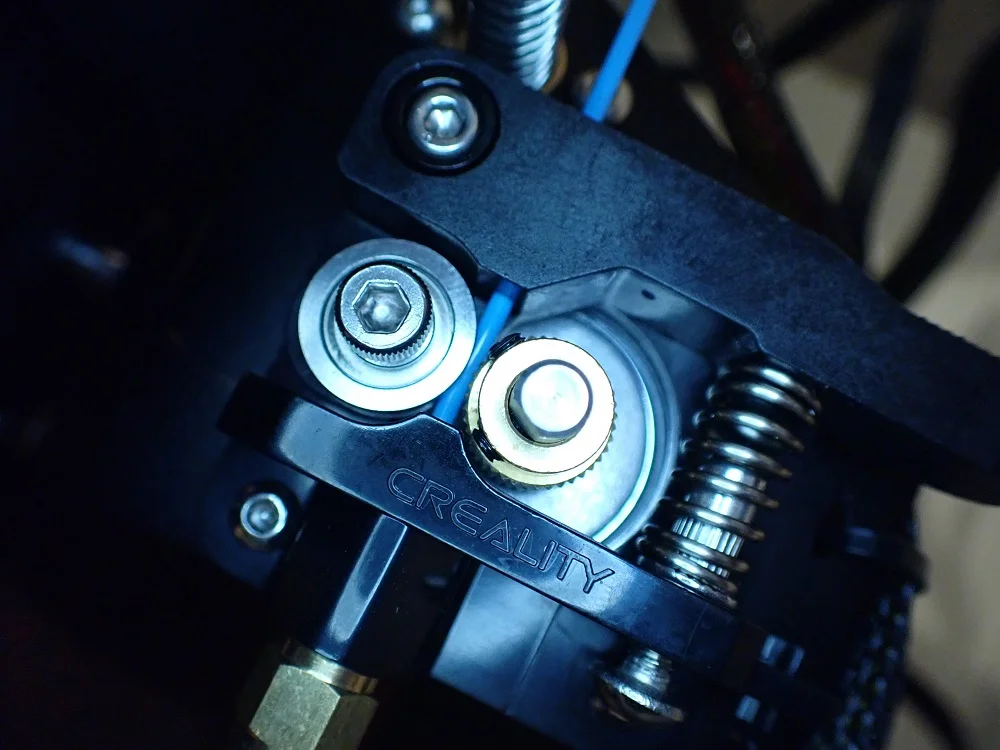
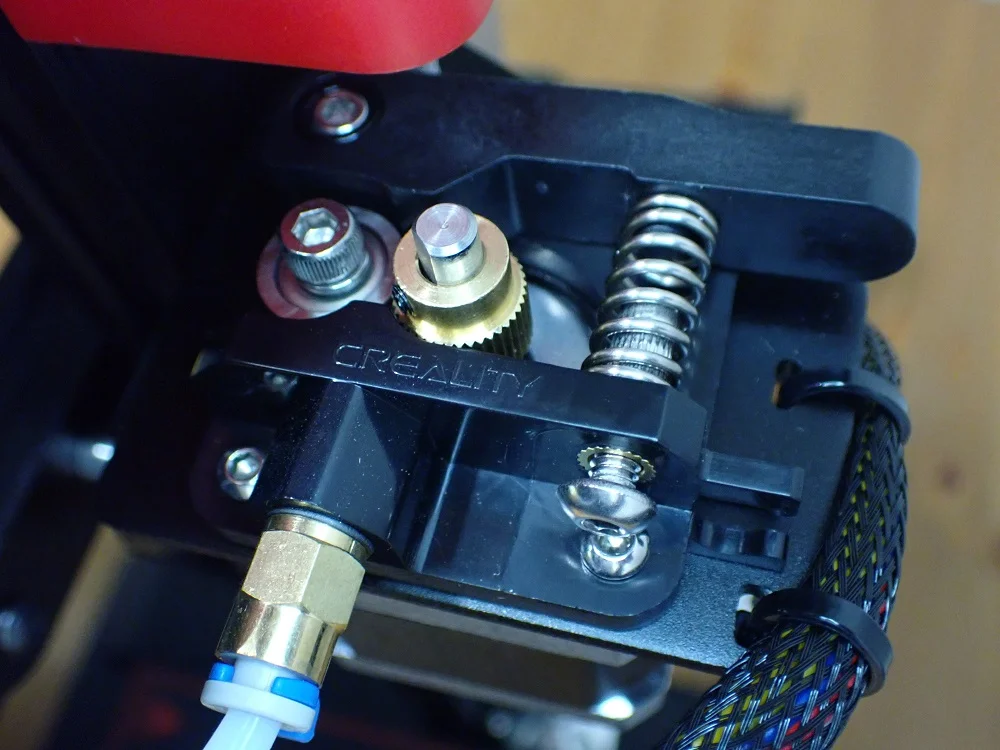
The Ender 2 Pro uses a Bowden extruder. This means that the filament is pushed along the extruder on the Z-axis to the print head. A Direct Drive extruder, where the extruder sits in the print head, would be too heavy for the cantilever X-axis and would lead to vibrations and other complications.
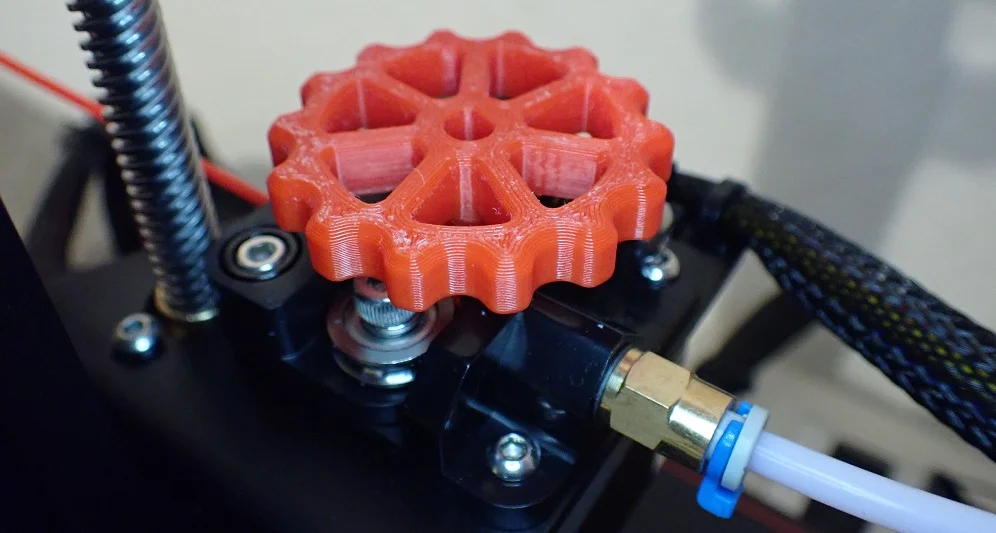
I missed the extruder wheel that comes with the Ender 3 V2 for example. With this wheel, you can load or unload the filament much easier manually. Fortunately, there are already capable designers who have uploaded a self-printable extruder wheel on Thingiverse (link to the object). I printed it in a bright dark red to match the rest of the 3D printer’s design.
Resume Print Function
Like most modern 3D printers, the Ender 2 Pro has a Resume Print feature. With this feature, power outages or other interruptions to the power supply are no longer a death sentence to the currently printed object. Once the printer is reconnected to power, it will resume from where it left off.
Heating Times
> Ender 2 Pro Review
The heat-up times of the Ender 2 Pro are quite fast. It has preset default values for different filaments. I used the “Preheat PLA” program, where 200 °C is set for the nozzle and 60 °C for the print bed.
To reach these temperatures, the Ender 2 Pro needs about two minutes. It overshoots only slightly and maintains the temperature very accurately over the course of the print.

| Time | Temp. Nozzle | Temp. Print Bed |
|---|---|---|
| 00:00 | 19 °C | 19 °C |
| 00:10 | 35 °C | 23 °C |
| 00:20 | 66 °C | 29 °C |
| 00:30 | 88 °C | 33 °C |
| 00:40 | 108 °C | 36 °C |
| 00:50 | 125 °C | 40 °C |
| 01:00 | 141 °C | 42 °C |
| 01:10 | 155 °C | 45 °C |
| 01:20 | 168 °C | 48 °C |
| 01:30 | 180 °C | 51 °C |
| 01:40 | 188 °C | 54 °C |
| 01:50 | 191 °C | 57 °C |
| 02:00 | 196 °C | 59 °C |
| 02:10 | 199 °C | 61 °C |
| 02:20 | 201 °C | 61 °C |
| 02:30 | 200 °C | 60 °C |
| 02:40 | 200 °C | 60 °C |
Noise Level
> Ender 2 Pro Review
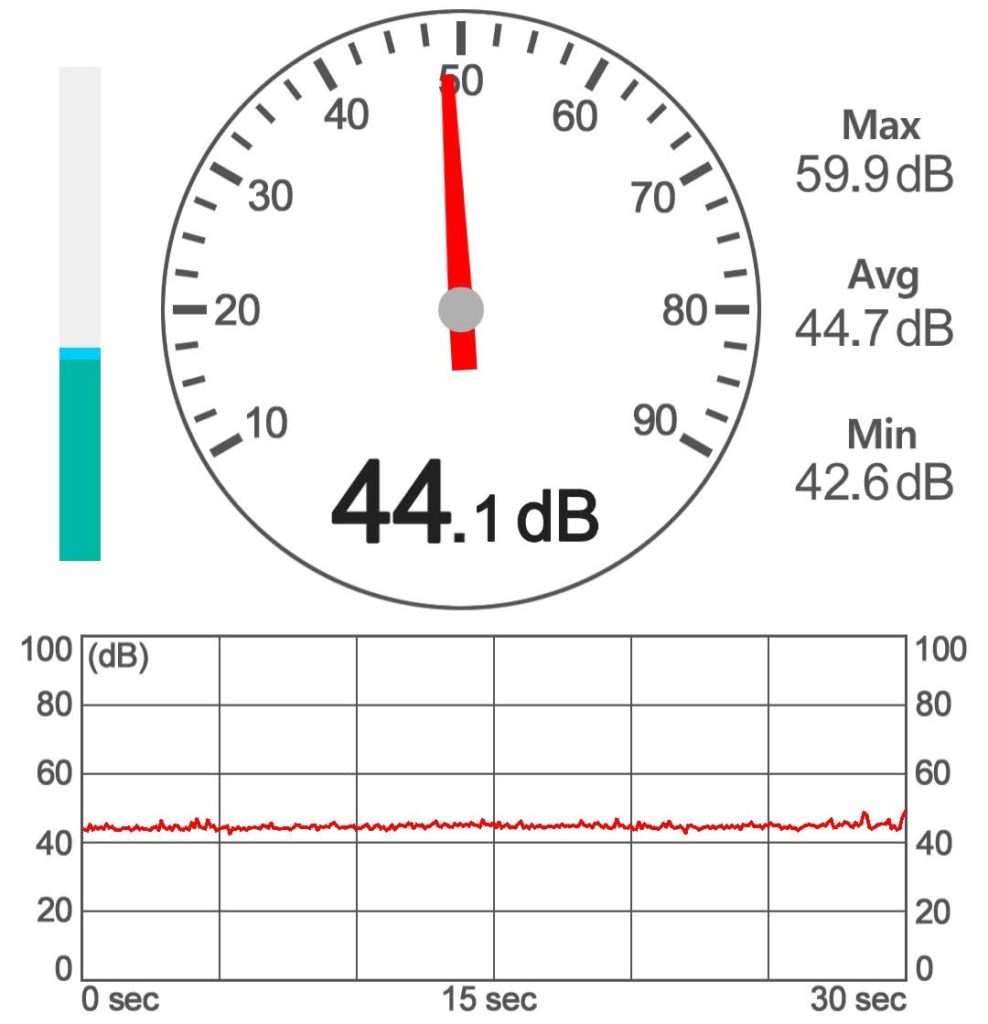
Due to the double part cooling in the print head, the noise of the Ender 2 Pro is a bit louder than you are used to from other low-budget 3D printers. However, this is simply because the cantilever X-axis must not have too much weight so that it does not vibrate.
Over the course of 30 seconds during a print, I was able to measure a volume of about 45 decibels on average. This is too loud to be able to concentrate next to it, but in a workshop or a room that you do not necessarily have to enter during printing, this volume is absolutely acceptable.
Print Speed
> Ender 2 Pro Review
The maximum print speed of the Ender 2 Pro is 100 mm/s. In reality, however, speeds around 50 mm/s are the standard. Even the standard profiles in the Creality slicer use a speed of 50 mm/s. This speed is found in most other 3D printers in the hobby sector and is absolutely acceptable for this price range.
If you want to print with TPU, you should reduce the speed even further, to about 30 mm/s.
Operation
> Ender 2 Pro Review
MENU: The Ender 2 Pro is very easy to operate. The LCD screen is very easy to operate with the rotary knob. A nice big touchscreen would of course be better, but would also drive up the price. For the functions it has, the existing LCD screen is absolutely sufficient.
PRINT BED: The print bed is flexible and magnetic. It can be easily removed after printing to conveniently detach the print object. Also, the magnets are attached so that it is easy to put the print bed back in exactly the same place where it was before. Overall, this feature is a very big plus.
SLICER: I have been using my Ender 2 Pro with the Creality Slicer. If you compare the current version of the Creality Slicer with Cura, the two slicers are very similar, even if the Creality Slicer lacks a few newer features like the Lightning Infill. The default profiles for the Ender 2 Pro delivered good results without further adjustment.
PRINTING: Printing with the Ender 2 Pro is easy. The operation is very user-friendly and there are rarely problems. The only problems I had were a not quite perfect print bed adhesion with very filigree objects. But this could be saved with some glue stick.
Slicer
> Ender 2 Pro Review
The Ender 2 Pro is compatible with Cura and the Creality Slicer. The default profiles in the Creality Slicer are very well preset and give very good results without further adjustment. I didn’t have to print a Retraction or Temperature Tower to find the right settings!
Print Quality
> Ender 2 Pro Review
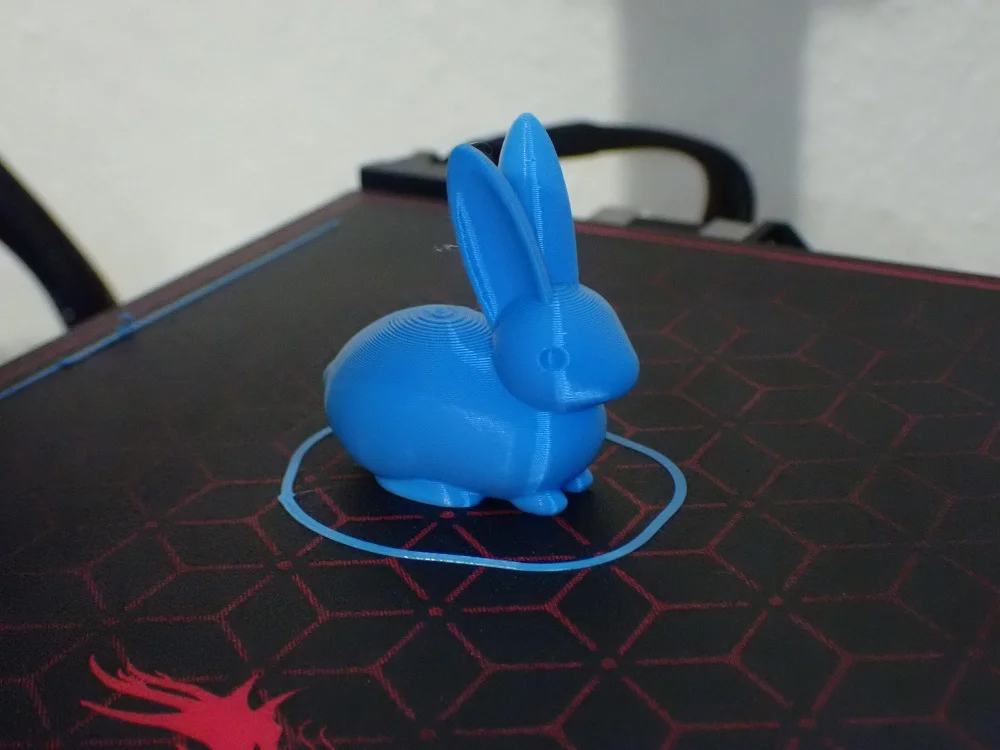
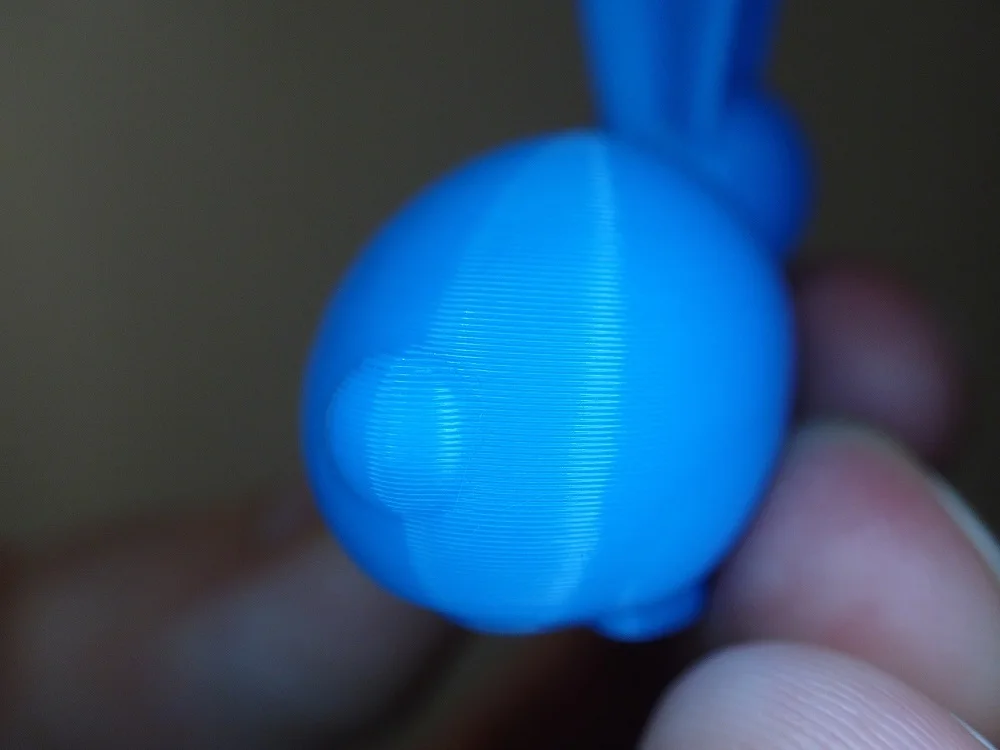
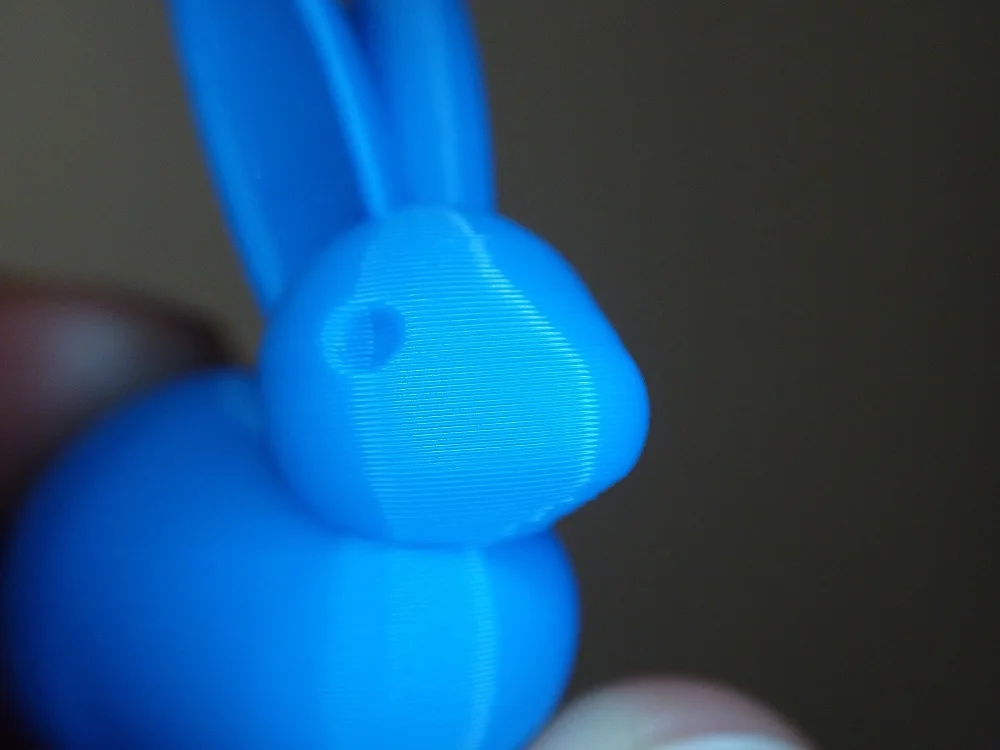
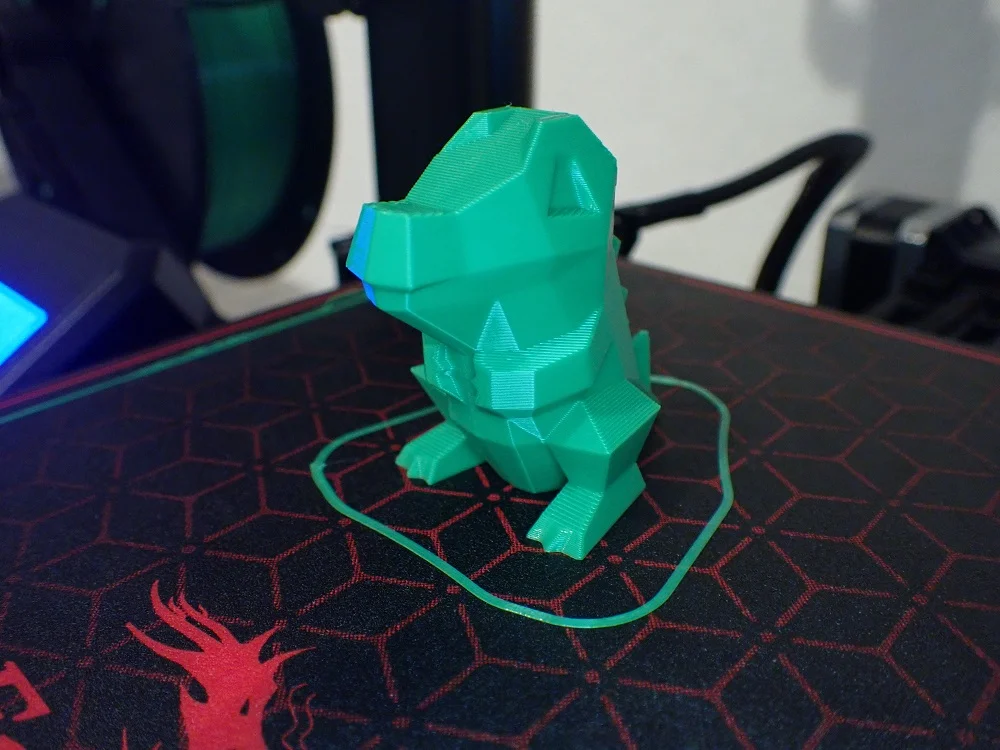
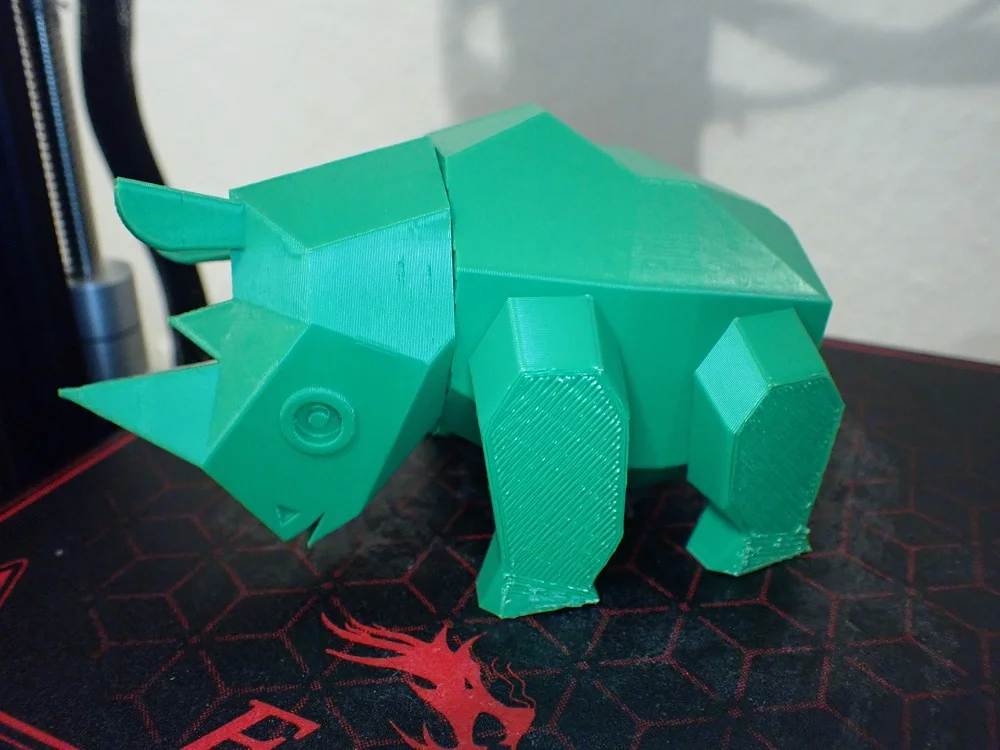
The print quality of the Ender 2 Pro is very good for its price range with 0.1 mm layer thicknesses. The efficient part cooling and the stable construction allow the smallest details. The accuracy is comparable to 3D printers in the next price range, such as the Ender 3 V2.
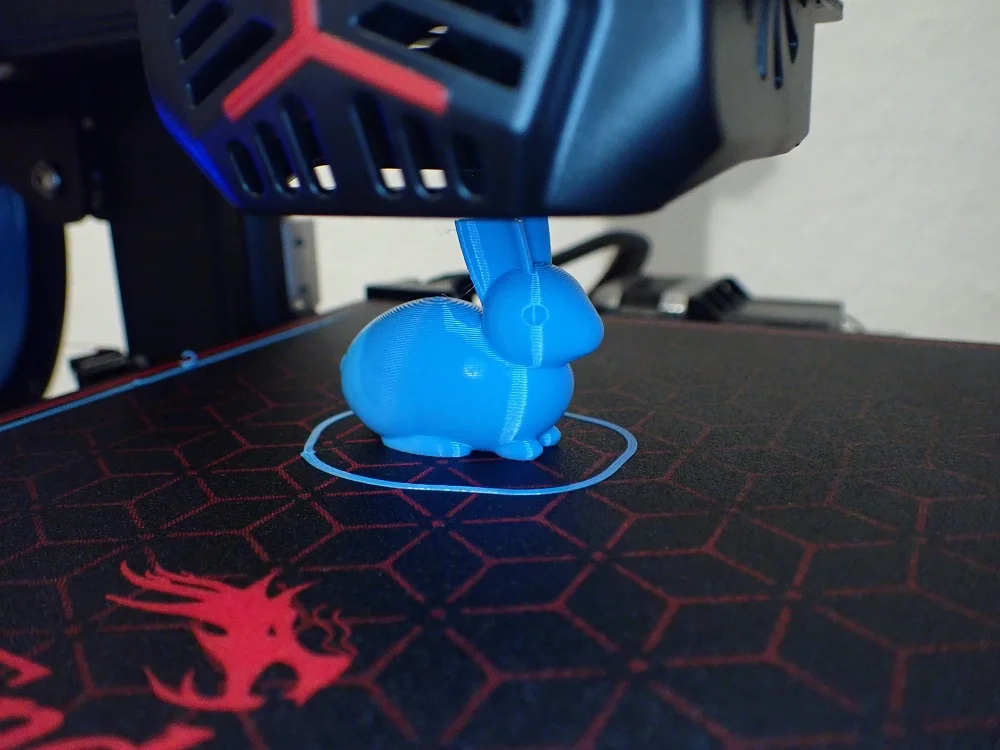
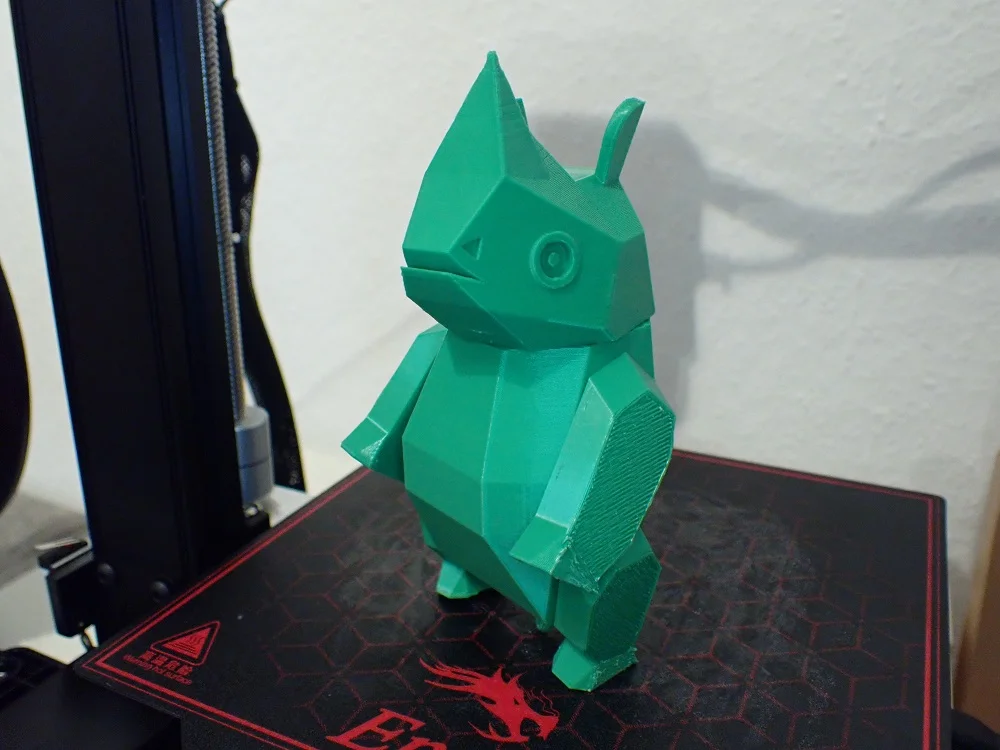
To test the print quality I first printed all objects on the included micro SD card. Among them were two different handle designs and a small bunny.
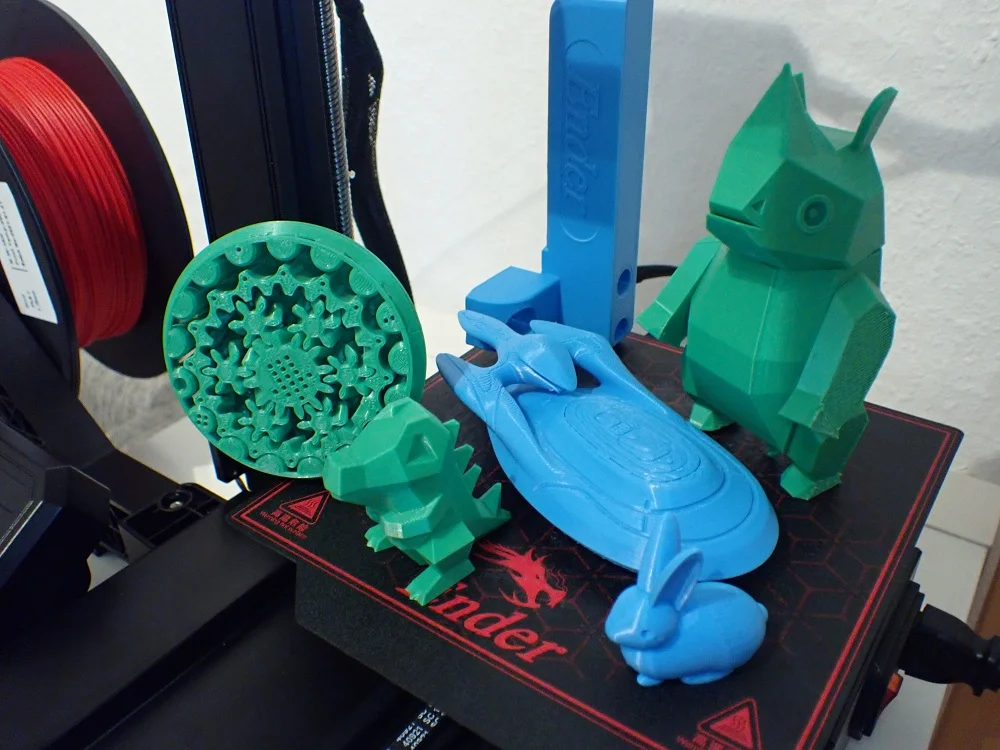
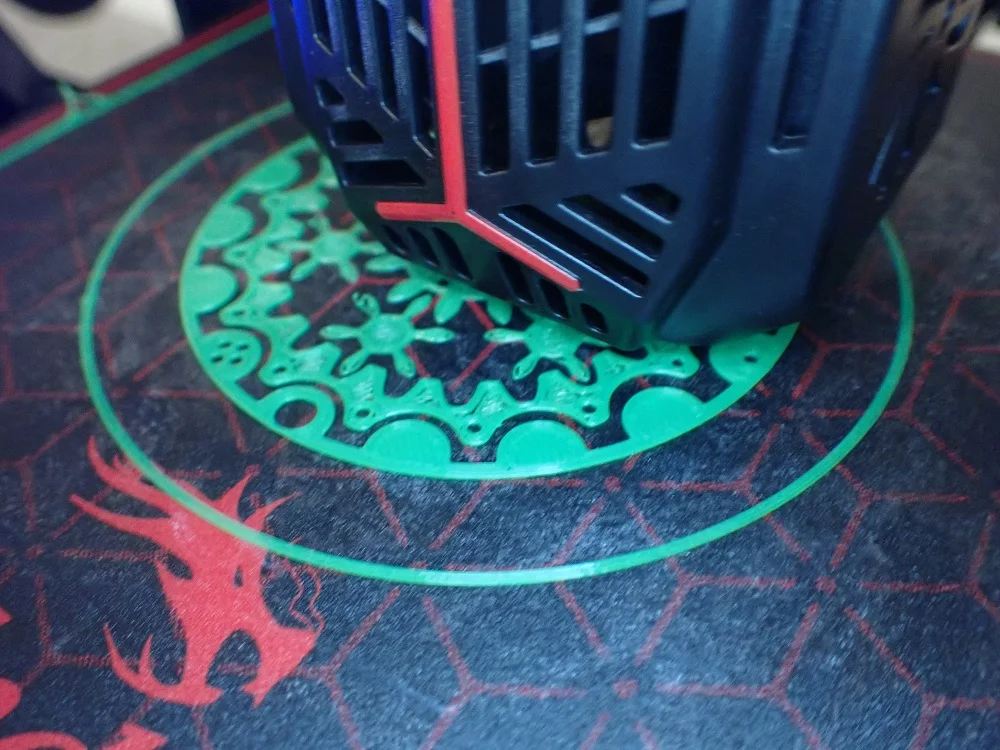
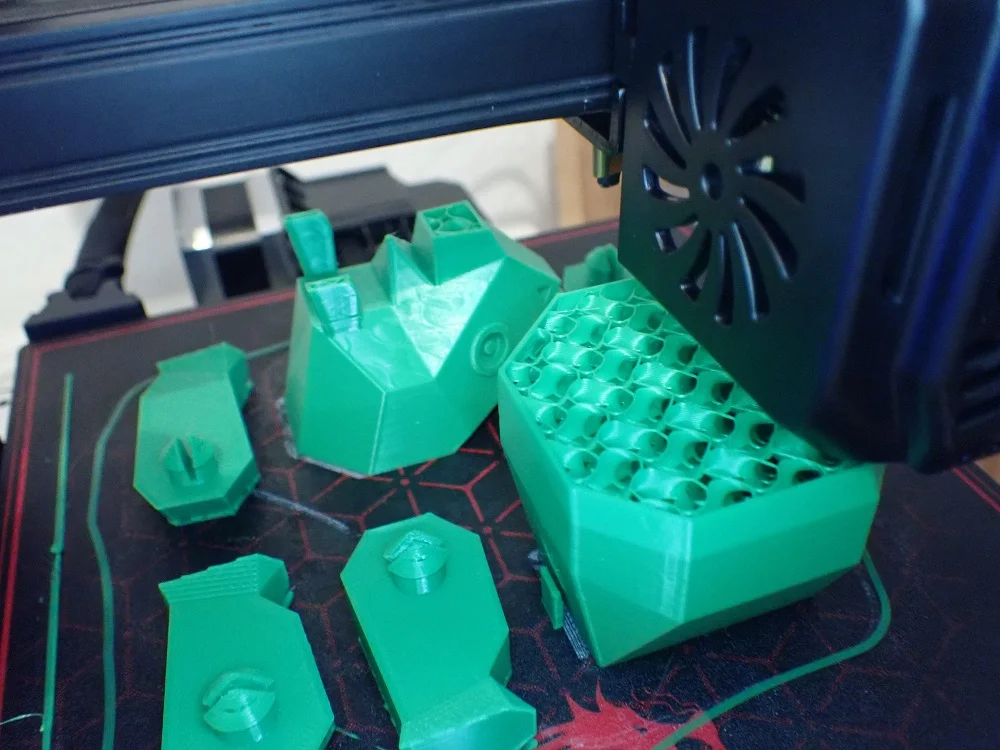
To push the accuracy and print bed adhesion to their limits I printed a mechanical part with many small gears. To support the print bed adhesion I used some glue stick because the small tips of the gears often didn’t want to hold properly.
Nevertheless, all prints went smoothly and the results are comparable to those of 3D printers that sometimes cost twice as much.
Is the Ender 2 Pro Worth It?
> Ender 2 Pro Review
Check Price at:
The question of whether the Ender 2 Pro* is worth it can be answered with a clear yes. It has an extremely good price-performance ratio and offers easy operation with printing results of much more expensive 3D printers.
The stable design of the cantilever X-axis guarantees low-vibration movement and thus delivers high accuracy. If you don’t need the highest print volume, are comfortable with PLA and TPU, and 0.1 mm accuracy is enough for you, the Ender 2 Pro is definitely a good choice for you!
Similar 3D Printers
Monoprice Mini
The Monoprice Mini* is one of the smallest and most affordable 3D printers on the market. It has a cantilever X-axis with a Bowden extruder and can process materials up to a temperature of 250 °C.

Check Price at:
Ender 3 V2
The Ender 3 V2* is slightly more expensive than the Ender 2 Pro, but offers proven technology, a larger print volume and many upgrade options. It is one of the most popular 3D printers around and enjoys a large community.

Check Price at:
Disclosure: This website is the property of Martin Lütkemeyer and is operated by Martin Lütkemeyer. Martin Lütkemeyer is a member of the Amazon Services LLC and other Affiliate Programs. These are affiliate advertising programs designed to enable websites to earn advertising revenue through advertising and linking to Amazon.com and others. Links marked with * are affiliate links.
