
- Wet Filament: Prevention, Symptoms & Drying - July 18, 2024
- Sovol SV08 – Best PrusaSlicer Settings & Profile - June 26, 2024
- Sovol SV08 – Best Orca Slicer Settings & Profile - June 26, 2024
Disclosure: Links marked with * are Affiliate Links. I earn from qualifying purchases if you decide to make a purchase through these links – at no additional cost for you!
Cura Lightning Infill was introduced with version 4.12.0 and gives you a whole new infill alternative with its own applications and features.
With the Cura Lightning Infill, hollow objects can be stabilized with a lightning-like infill pattern. This special infill ensures that the upper layers of the roof can be printed with high quality. This infill pattern is especially suitable for decorative objects and saves a lot of material.
In this article you will learn what the Lightning Infill is, what it does, how you use it, and how it differs from other infill types or vase mode.
Table of Contents:
What is Lightning Infill in Cura?


Decorative objects require very little infill. With traditional infill patterns such as Grid, Lines or Cubic, 5 to 10% of the interior of the object is filled with material.
Although this stability is not essential for the decorative object, the infill is important to print the top layers of the object. If the top layers are not supported, they would sag or there would be cracks or holes in the surface.
To save even more material and still be able to print high quality surfaces, the Lightning Infill was invented. The development of Cura’s Lightning Infill is based on this paper by T. Tricard, F. Claux and S. Lefebvre. The name comes from the lightning-like shape, as they continue to split and seem to evolve in random patterns.
This lightning infill pattern is generated in Cura only in the upper part of the object, so that every part of the roof is well supported. The rest of the interior of the object remains hollow, saving an extremely large amount of material. If your walls are thick enough, the stability should be absolutely sufficient if it is a decorative object.
“Our structures use little material while providing a dense support, enabling reliable, high quality printing at a fraction of the time and cost normally required.”
(Thibault Tricard, Frédéric Claux, Sylvain Lefebvre. Ribbed support vaults for 3D printing of hollowed objects. Computer Graphics Forum, Wiley, 2019, 10.1111/cgf.13750 . hal-02155929)
What is Cura Lightning Infill Used for?
Cura Lightning Infill is used for decorative objects that do not require great mechanical stability and where you want to save a lot of material.
The aim of this infill pattern is a perfect outer surface of the object with as little material consumption as possible. The lightning structure inside allows to generate a stable structure for the roof of the object that consumes very little material. Most of the inner volume of the object remains hollow, the Lightning Infill is only needed in the upper part of the object to support the roof.
You use the Lightning Infill whenever you want to print a decorative object that does not require high mechanical stability and is unsuitable for the vase mode.
However, this infill type is not good for transparent objects because you will see the lightning-like structure at the top of the object. If you want to print a transparent object with an interesting infill, the wavy gyroid infill would be more appropriate.
How Do I Use Cura Lightning Infill?
You can find the Lightning Infill pattern under the infill settings.
However, the settings for the Lightning Infill pattern are sometimes very different from the other infill patterns. To show the effects of the different infill settings, I simulated them in Cura.
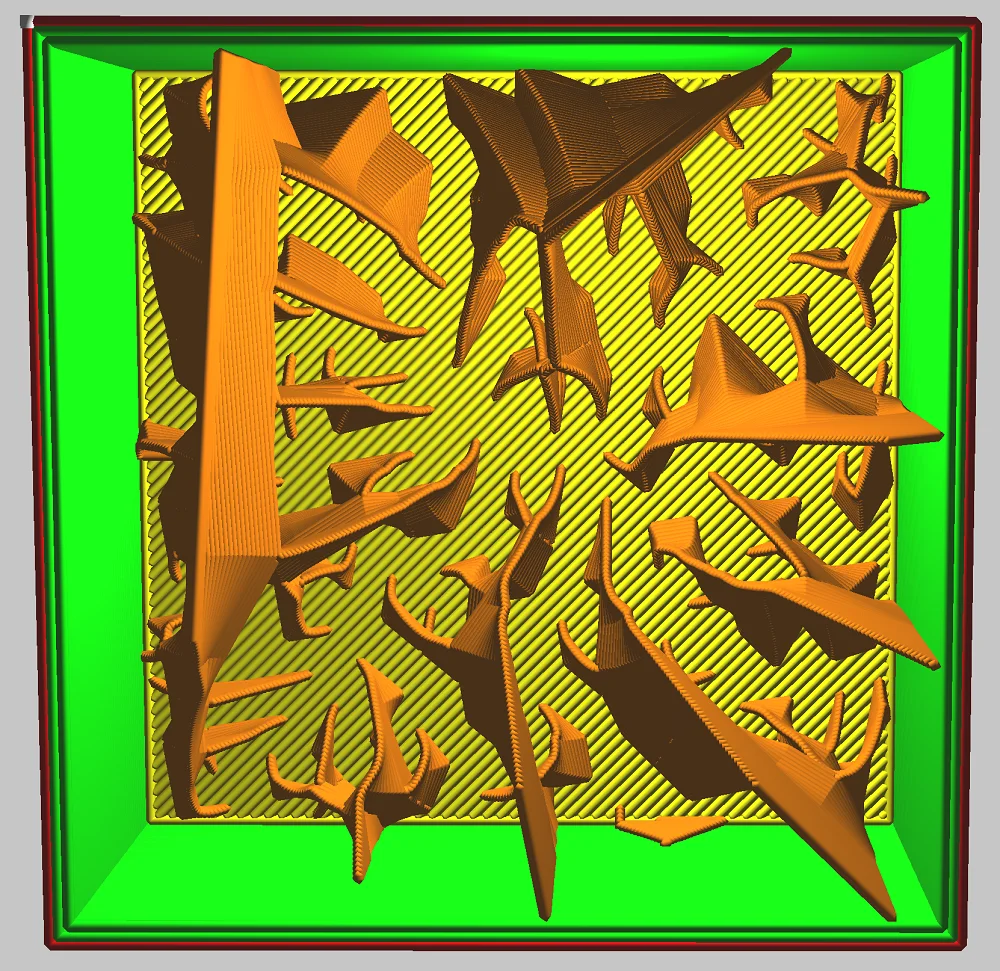
20 % 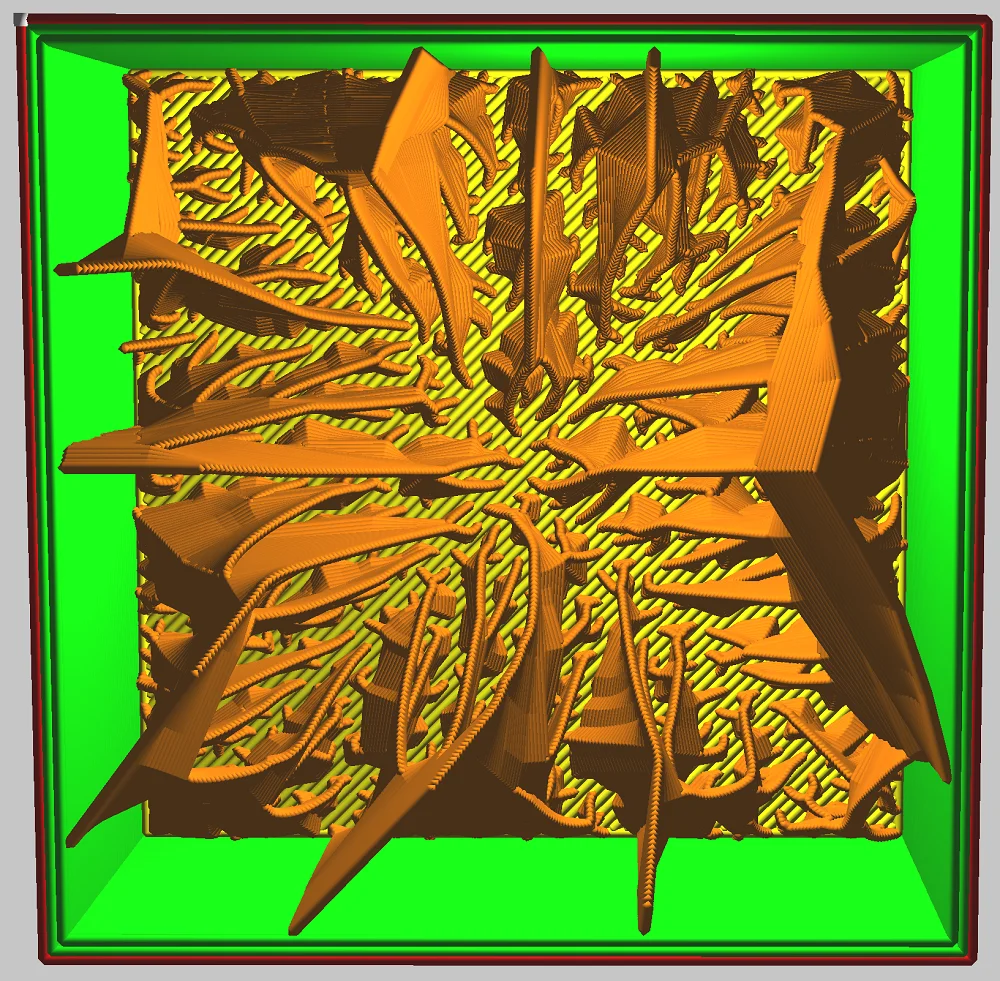
40 % 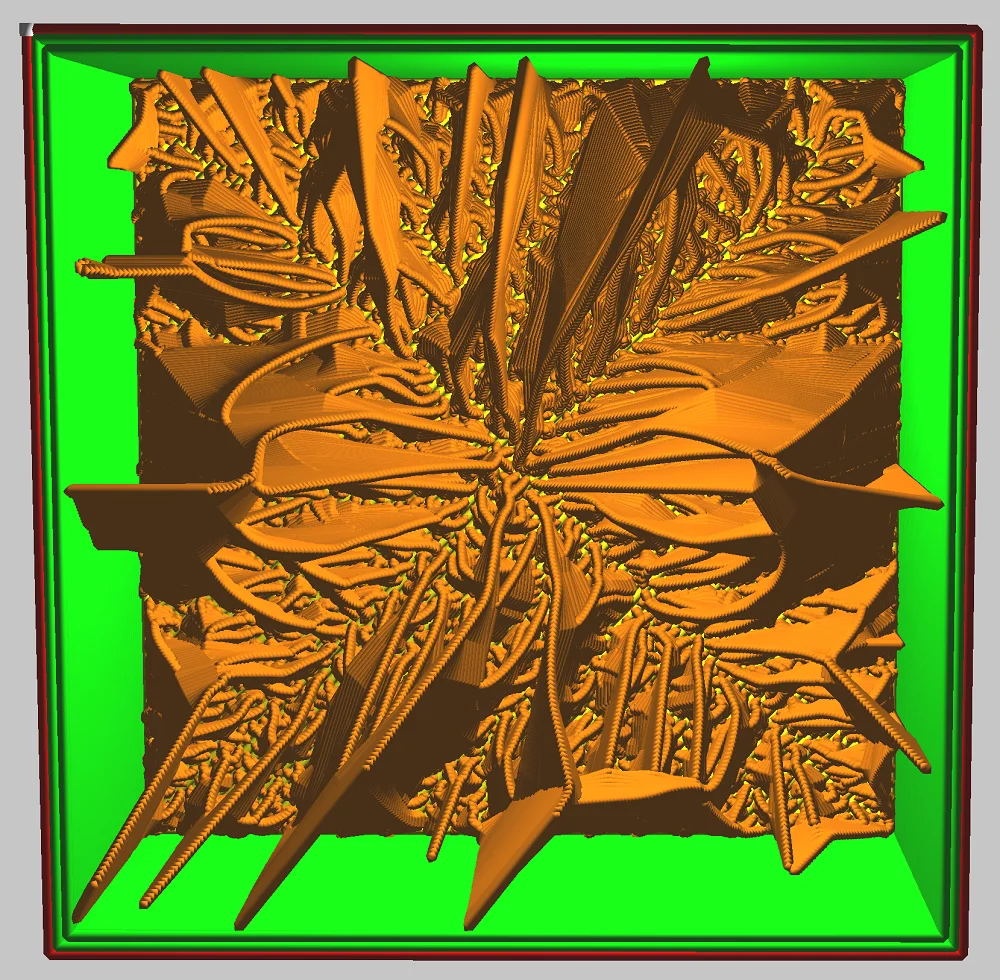
99 %
Infill Density: The infill density works a little differently with Lightning Infill than with other infill patterns. In Lightning Infill, the fill density does not seem to mean the percentage of infill of the volume. Although 100% infill density makes a solid object, you can clearly see at 99% that the percentage is calculated differently. The parameter would be more consistent with what percentage of the roof’s surface area is covered by supports.

1 Line 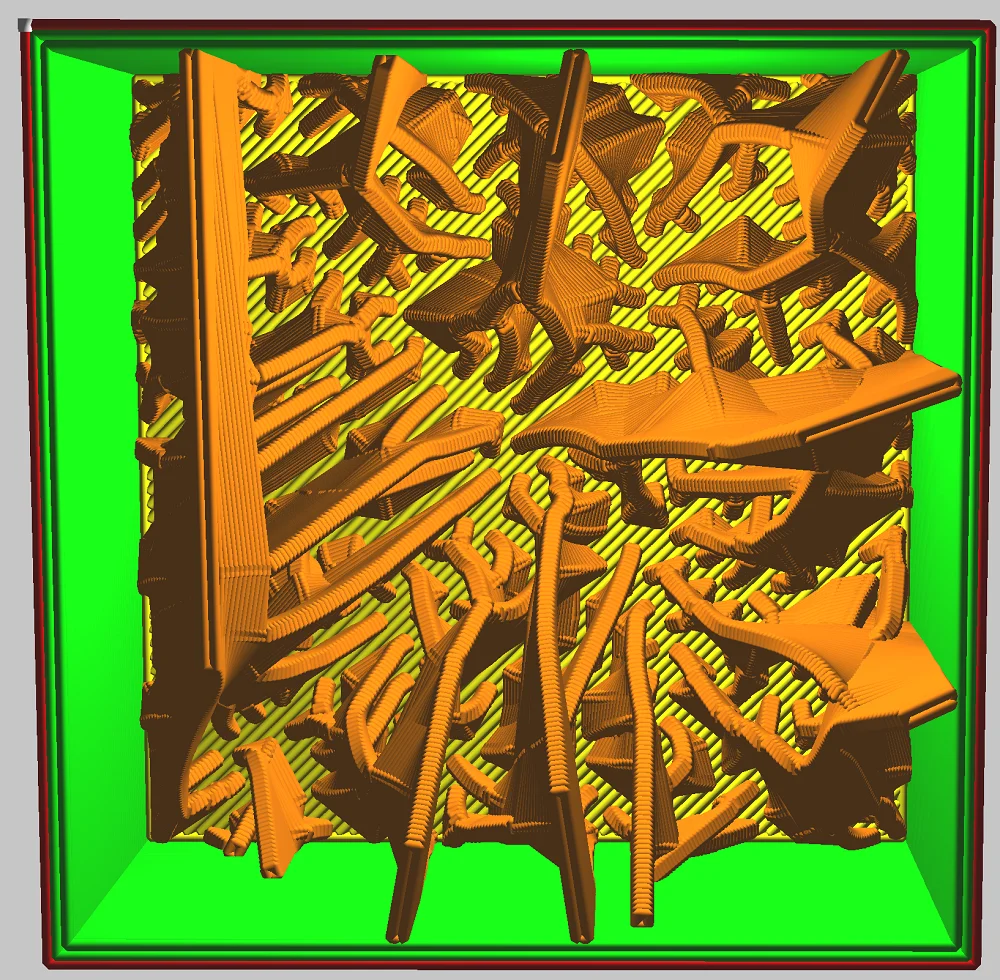
2 Lines
Infill Line Multiplier: This setting causes the individual lightning to consist of two lines rather than one. This increases their stability enormously, but could also be achieved with a higher infill density and somewhat destroys the advantage of saving material.
40° 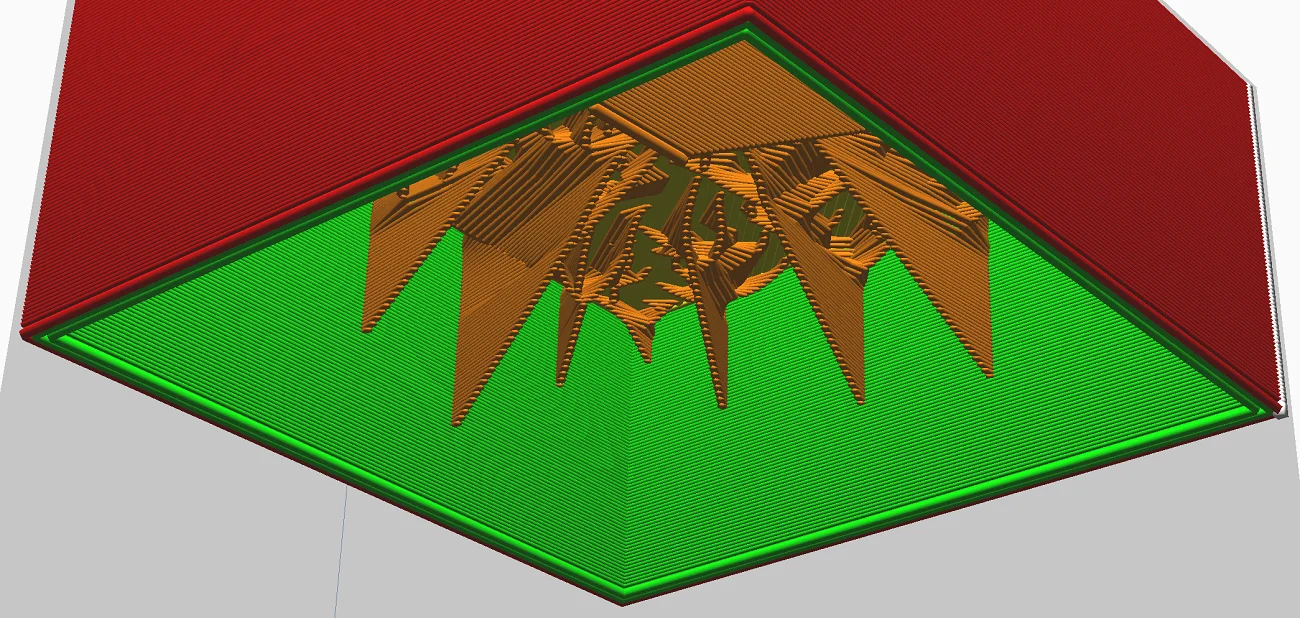
60°
Lightning Infill Support Angle: The support angle indicates how vertically or horizontally the lightning runs through the object. The smaller the angle, the stronger the flashes run along the Z-axis, the larger the angle, the more horizontal they become. This results in more stable constructions if the support angle is chosen small. The default setting is 40° and seems to be a very good compromise.
Cura Lightning Infill Stability
Compared to other infill patterns, the stability of the Lightning Infill is not very high. This infill pattern was invented to print decorative objects with as little material as possible. This makes the main part of the object hollow.
The end result is an object that has no high mechanical stability and at most becomes more stable in the upper area due to the Lightning Infill.
If you still want to increase the stability of your object, you can increase the number of lines in the walls, increase the density of the Lightning Infill, or decrease the support angles so that the infill starts further down in the object.
Cura Lightning Infill vs. Gyroid, Cubic & More
To compare the Lightning Infill with other infill patterns I sliced a 20 x 20 x 20 mm cube with all infill patterns. The different material consumption and print durations give you an idea of which infill pattern might be suitable for you.
As you can see in the table below, the Lightning Infill pattern is very different from all the others. The stability is very inhomogeneous, very low at the bottom of the object and gets stronger as you get closer to the roof of the object.
However, the material consumption is considerably smaller and the printing time is much shorter since the infill density is calculated differently for this pattern and does not correspond to the actual density inside the object.
Basically, you can think of the Lightning Infill as a better/sturdier vase mode for closed objects.
| Infill Pattern | Stability | Print Duration | Filament Consumption |
|---|---|---|---|
| Grid | medium | 01:12:00 | 1,25 m |
| Lines | low | 01:11:00 | 1,24 m |
| Triangles | medium | 01:12:00 | 1,25 m |
| Tri-Hexagon | medium | 01:11:00 | 1,25 m |
| Cubic | high | 01:11:00 | 1,24 m |
| Cubic Subdivision | high | 01:06:00 | 1,15 m |
| Octet | high | 01:11:00 | 1,24 m |
| Quarter cubic | high | 01:11:00 | 1,24 m |
| Concentric | low | 01:18:00 | 1,23 m |
| Zig Zag | low | 01:11:00 | 1,29 m |
| Cross | low | 01:12:00 | 1,22 m |
| Cross 3D | medium | 01:08:00 | 1,17 m |
| Gyroid | high | 01:10:00 | 1,25 m |
| Lightning | low | 00:51:00 | 0,80 m |
Cura Lightning Infill vs. Vase Mode
Lightning Infill in Cura is intended for decorative objects with a closed top layer. You can sometimes print such objects in vase mode, but larger overhangs are a problem in this mode because the outer wall is only one line.
With the Lightning Infill, larger overhangs within the object are supported by the lightning pattern. You can think of the structure as being similar to the tree support structures you can generate on the outside of the object.
While in vase mode you only have one continuous line, with Lightning Infill you can make the walls as thick as you want. It may very well be that the Lightning Infill pattern becomes the new standard for decorative objects, as you save yourself a lot of material and time.
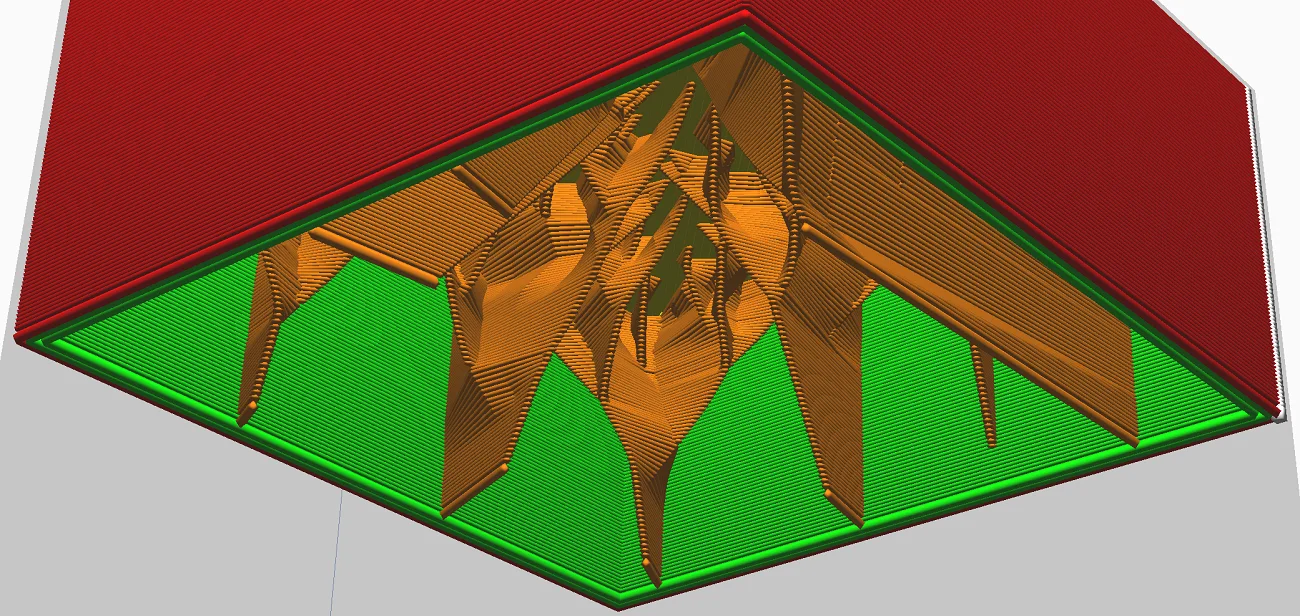
Examples for Cura Lightning Infill
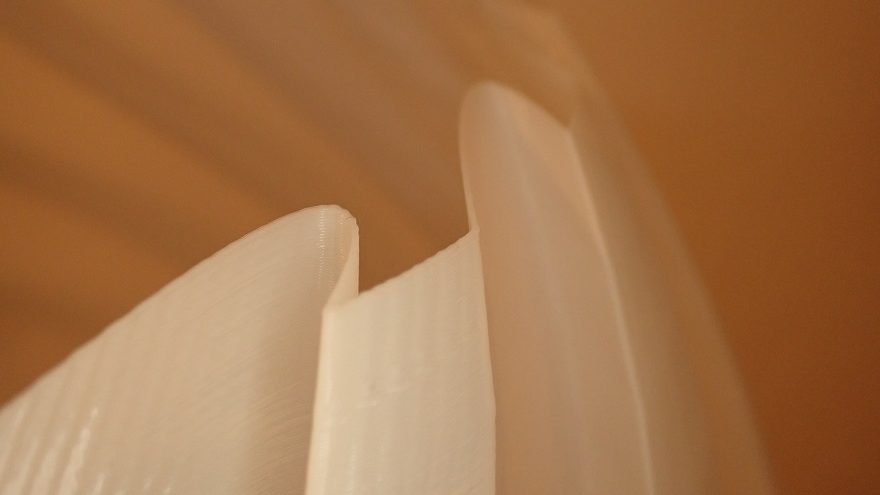
I tried the Lightning Infill with my Qidi Tech X-Max and ERYONE PLA filament. The results were consistently flawless and the surfaces turned out nearly perfect.
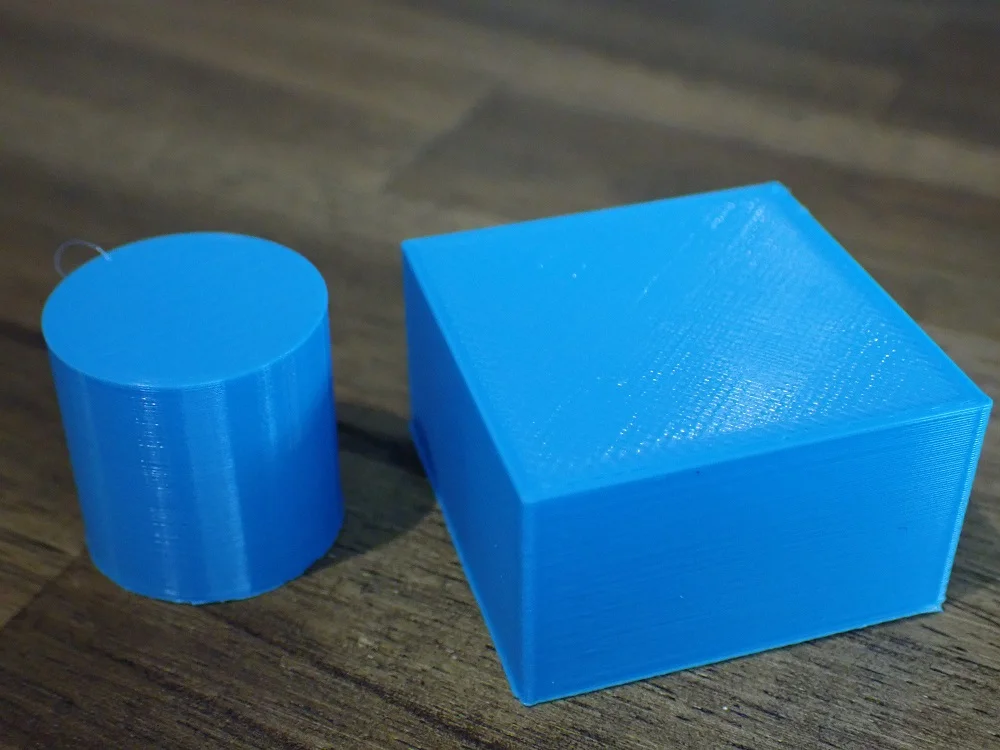
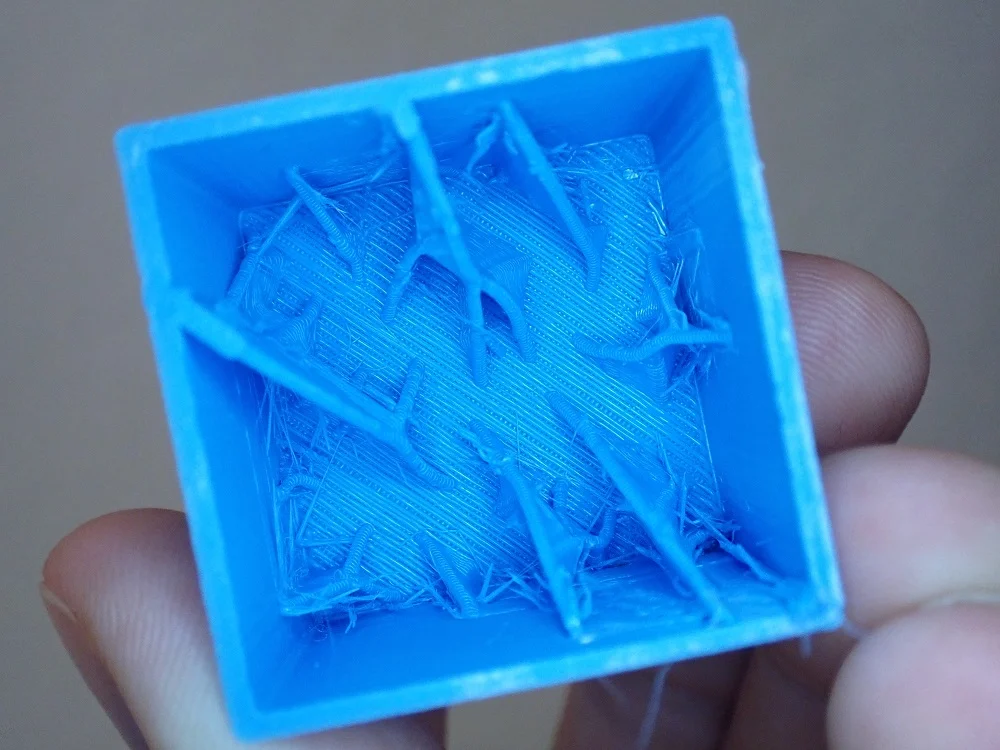
However, I noticed that there was an extreme amount of stringing on the inside. In the second attempt, I increased the number of lines of the infill to 2 and removed most of the threads by hand after printing, so that you can see the lightning structure better.
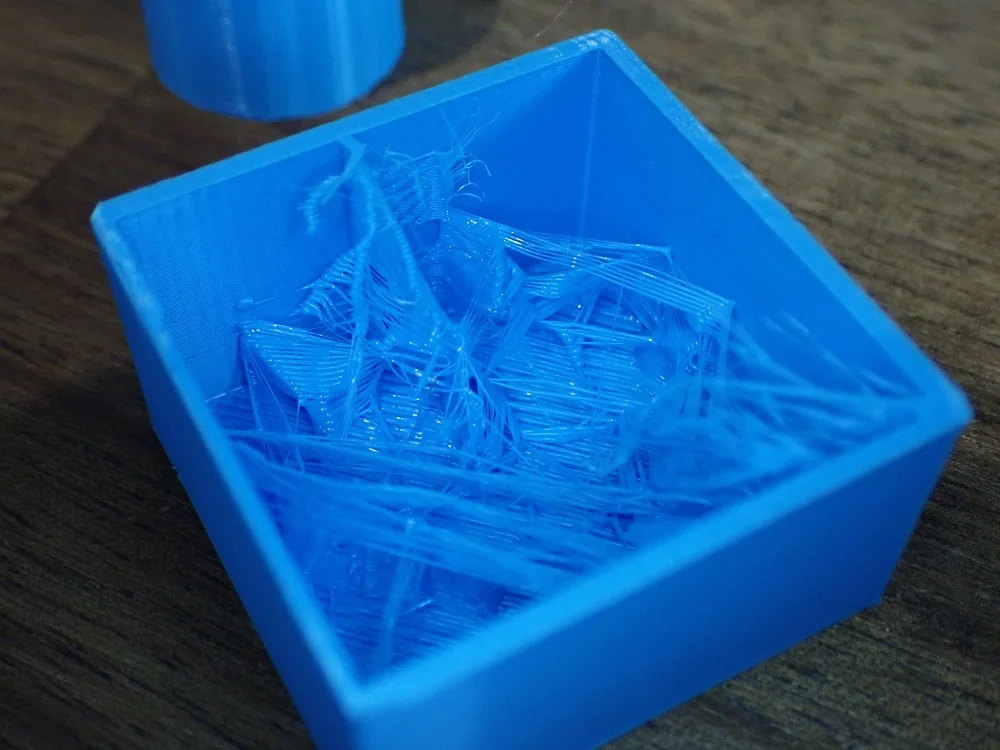
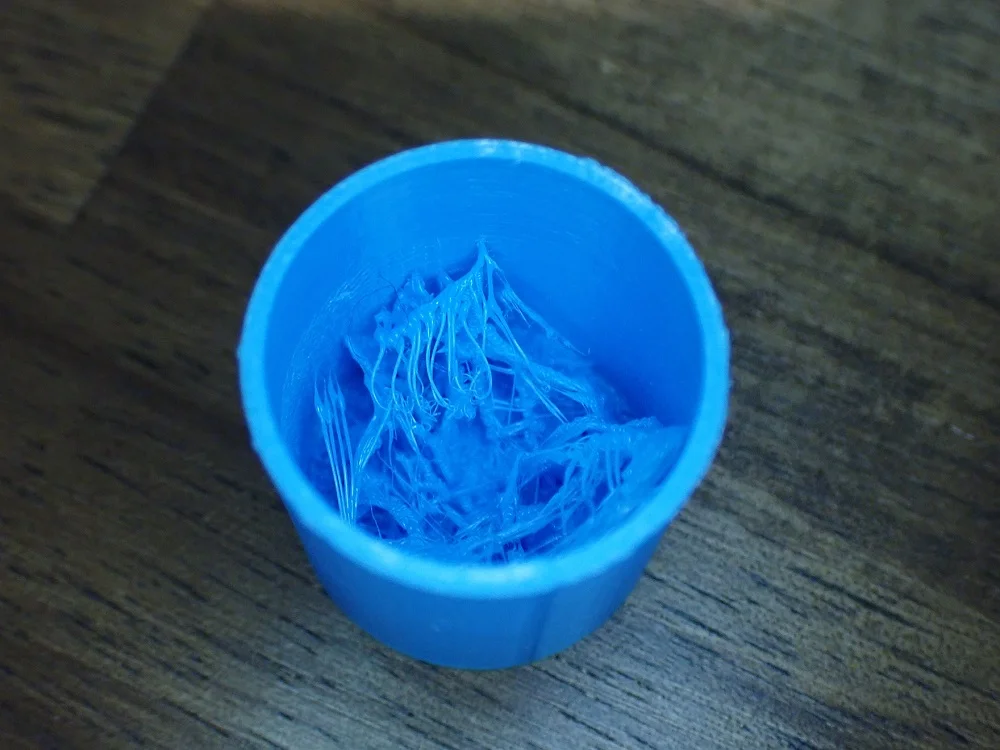

I’m not quite sure why there is so much stringing inside. A quick retraction tower showed me that my print settings are perfect and it can’t be that. The printer is very well calibrated to the PLA filament used.
It seems that this infill pattern tends to string in general, but this may be improved with future updates. On the other hand, it doesn’t really matter what the object looks like inside since it’s closed and you can’t see the inside anyway.
I was definitely very amazed at how fast the print was, how little filament was used and the stability is still acceptable. I will definitely be using this infill pattern more often for future decorative objects!
Disclosure: This website is the property of Martin Lütkemeyer and is operated by Martin Lütkemeyer. Martin Lütkemeyer is a member of the Amazon Services LLC and other Affiliate Programs. These are affiliate advertising programs designed to enable websites to earn advertising revenue through advertising and linking to Amazon.com and others. Links marked with * are affiliate links.
