
- Wet Filament: Prevention, Symptoms & Drying - July 18, 2024
- Sovol SV08 – Best PrusaSlicer Settings & Profile - June 26, 2024
- Sovol SV08 – Best Orca Slicer Settings & Profile - June 26, 2024
Disclosure: Links marked with * are Affiliate Links. I earn from qualifying purchases if you decide to make a purchase through these links – at no additional cost for you!
A raft in 3D printing forms a new base for the object and greatly improves adhesion to the print bed. Settings such as the width and thickness determine the effectiveness of the raft and a larger air gap makes it easier to remove.
In this article, we take a detailed look at the raft, its functions, settings and when it really makes sense to use it.
Table of Contents:
What is a Raft?
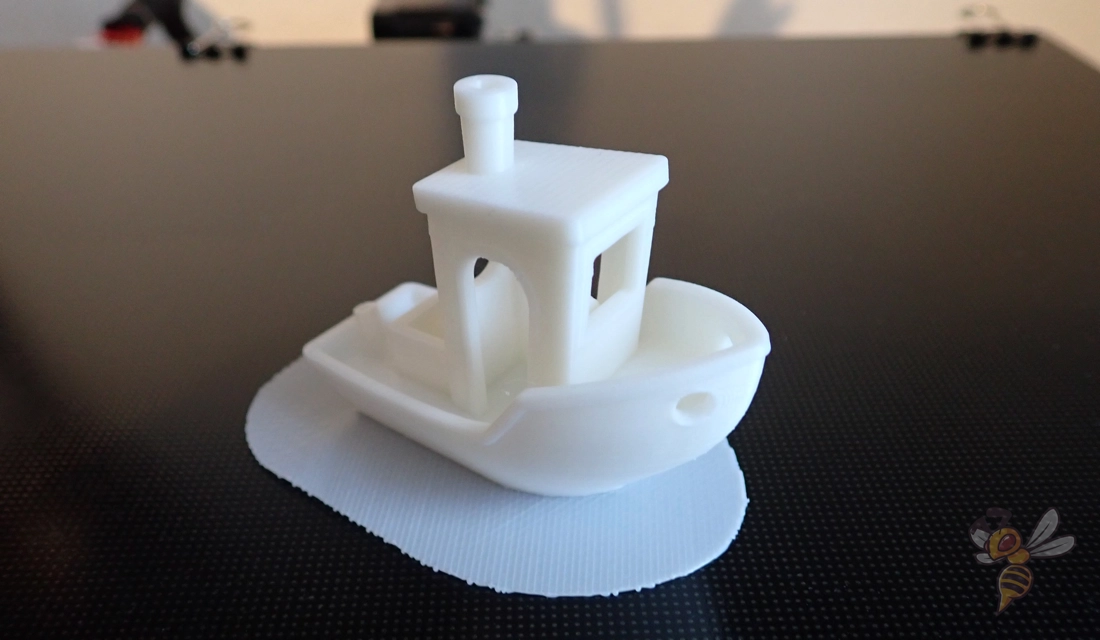
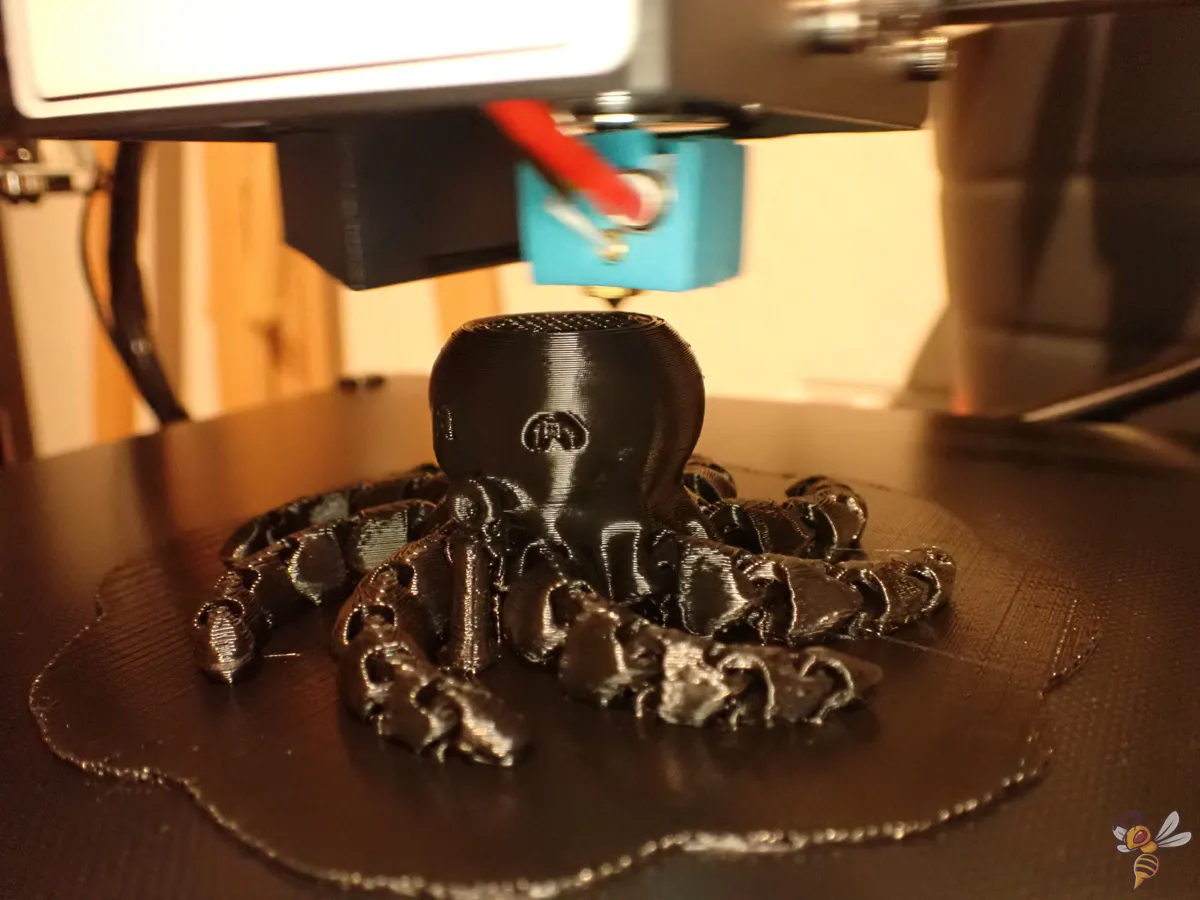
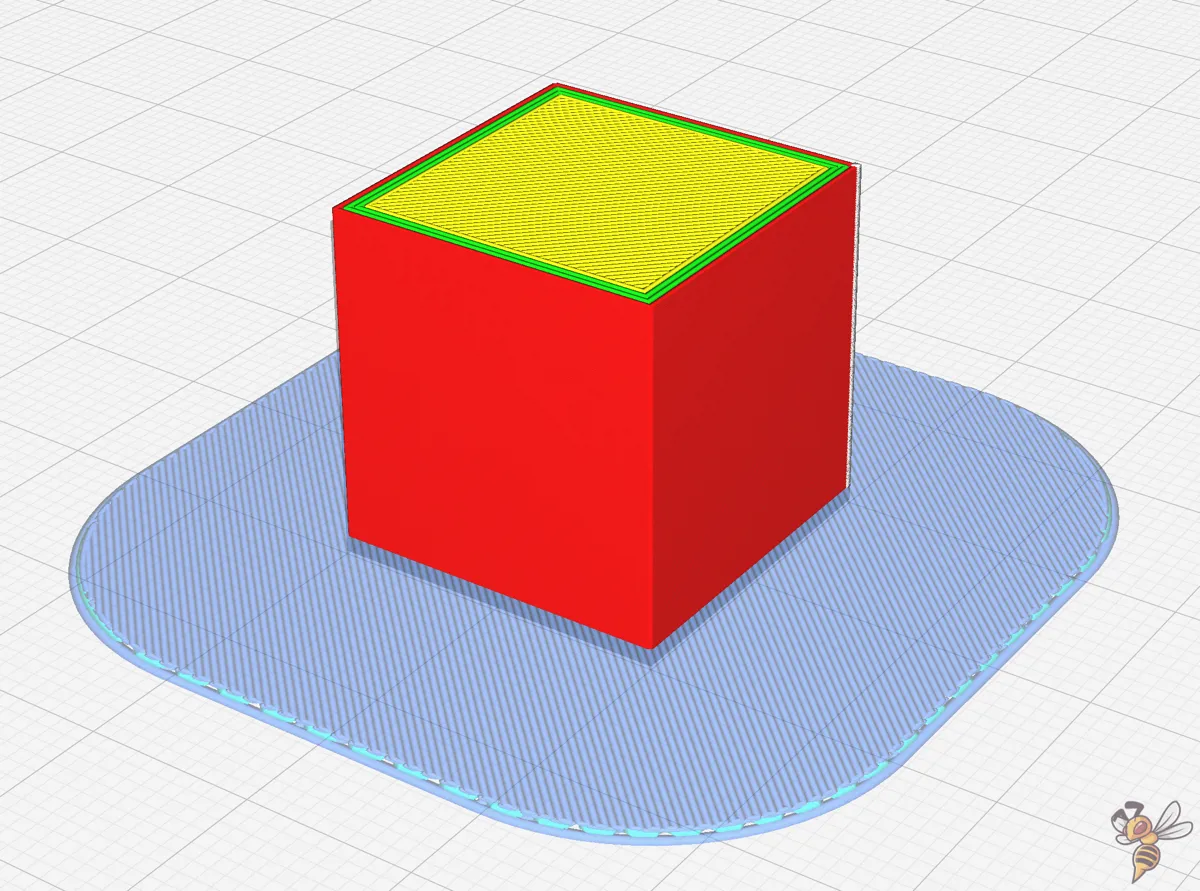
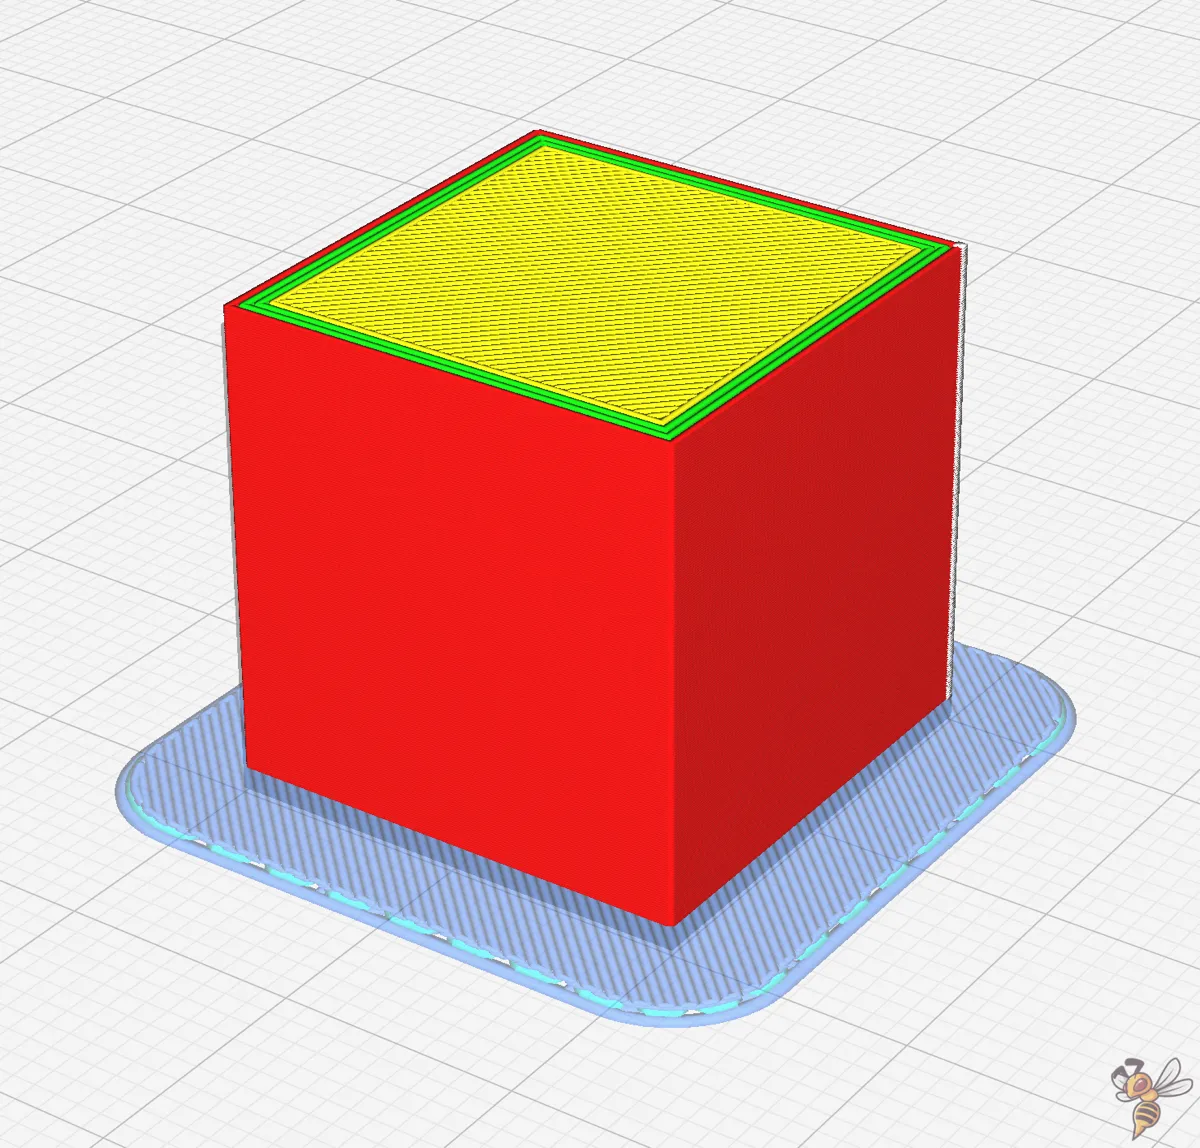
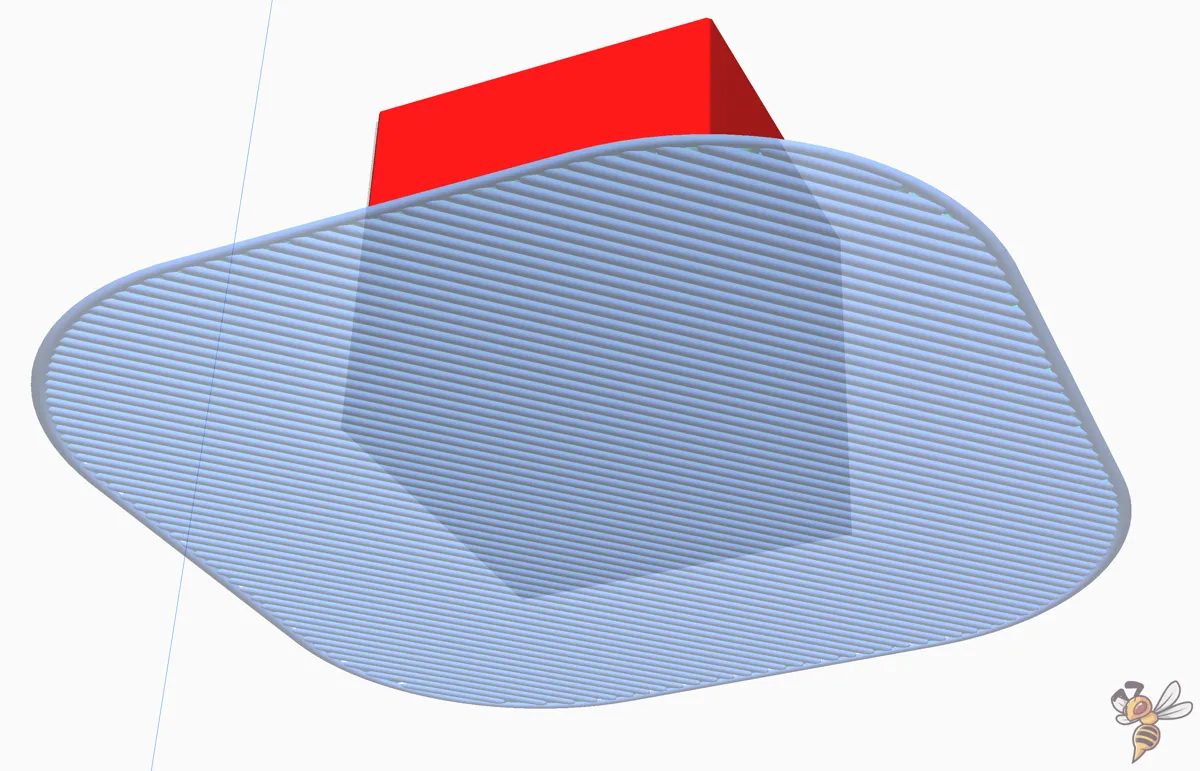
A raft is a special type of auxiliary construction that you use to improve the adhesion of your print object to the print bed. It is an additional layer or several layers of filament that are printed onto the print surface before your main object is printed.
This base serves as a kind of foundation for your object. In contrast to other tools such as a skirt or brim, which are only printed around or at the edge of the object, the raft covers a larger area. It forms a more stable support surface, especially useful when working with materials that tend to warp or if your printer has trouble adhering the first layer to the print bed.
Rafts consist of several layers of filament, which are set in the slicer, the software of your 3D printer. You can customize parameters such as the thickness of the raft, the number of lines and the printing speed. These settings depend on your printer, the filament used and the complexity of your workpiece.
The special thing about rafts is that they not only offer good adhesion, but can also compensate for height differences in the printing plate. This is a great advantage, especially for printing plates that are not perfectly leveled or are uneven.
When Do I Need a Raft?
In 3D printing, a raft is more than just an auxiliary construction; it is an indispensable tool for some printing projects that can perform multiple functions to optimize the quality of your print results.
In over 90% of all cases, a raft is a stopgap solution for poor print bed adhesion. If this is the case, you should use all other methods to improve adhesion before using a raft!
All the methods and information on how to improve print bed adhesion can be found in this article, in this video and in this 3D printing course.
Here are some reasons why using a raft can be useful:
Improved print bed adhesion: the main goal of a raft is to create a strong bond between the print object and the print bed. When using materials such as ABS that are prone to warping or you have problems with print bed adhesion in general, a raft can make all the difference. It prevents the corners of your object from detaching from the print bed during printing.
Compensating for unevenness in the print bed: Not all print beds are perfectly flat. A raft can compensate for unevenness by creating an even base for the print object. This is particularly important for larger objects that require a wider contact surface.
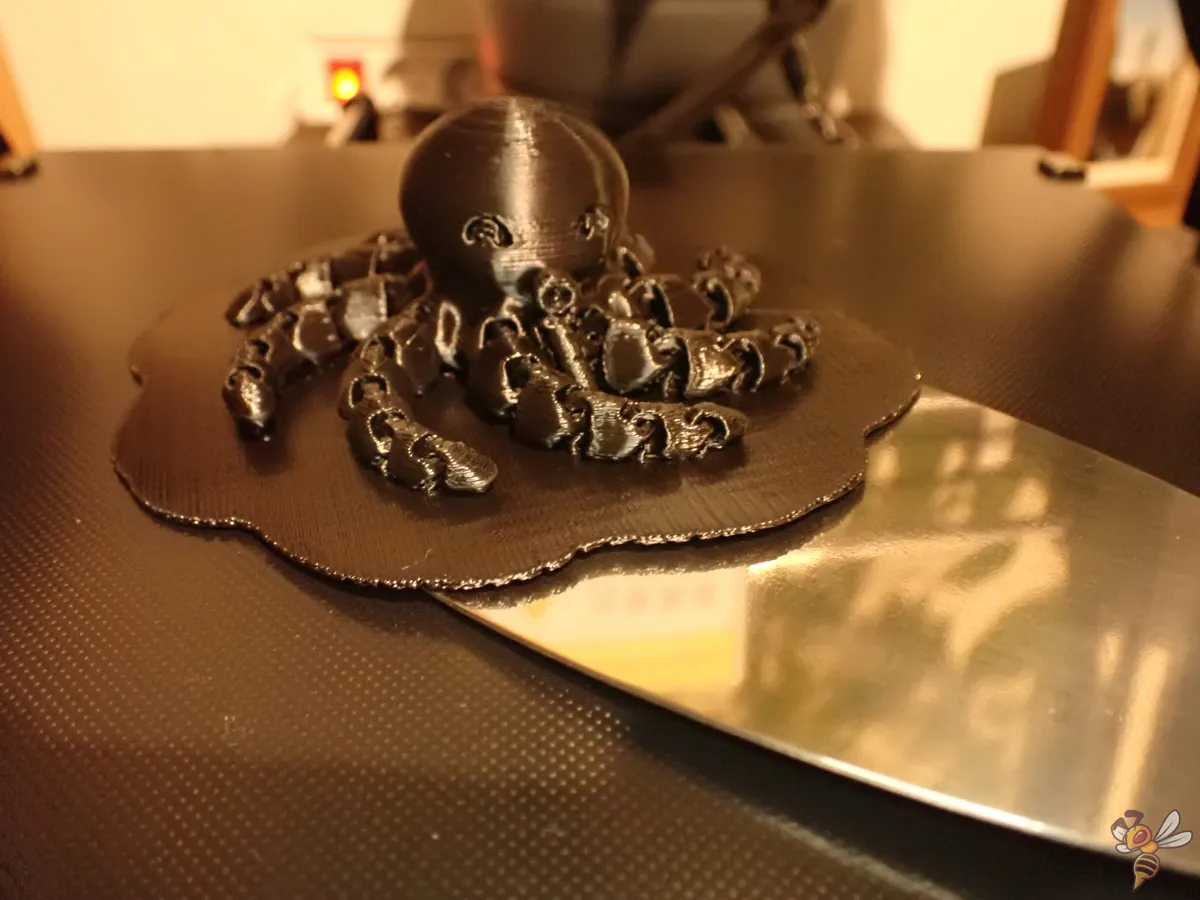
Easier removal of the object: When your print is finished, the raft can make it easier to remove the object from the print bed. This is particularly helpful with materials that adhere strongly to the print bed. For the raft, you can then use rough methods such as a spatula to detach the raft, which would otherwise damage the print object.
Optimizing filament flow and print quality: A raft gives your 3D printer time to stabilize the filament flow before starting with the actual print object. This results in a more even first layer of the object, which is beneficial for the overall appearance and strength of the print. Incidentally, this is precisely the function of a skirt.
Ability to print complex geometries: For objects with small support points or unusual shapes, the raft provides the necessary support. It helps to keep the object stable during the entire printing process.
Prevention of printing errors: By using a raft, you reduce the risk of errors such as warping or the object detaching during printing. This is especially important when working with expensive or difficult materials.
Raft Settings
When using a raft in your 3D printing project, the settings are crucial. They determine how well the raft performs its function and how easily it can be removed after printing. Here are the most important settings you should adjust in your slicer:
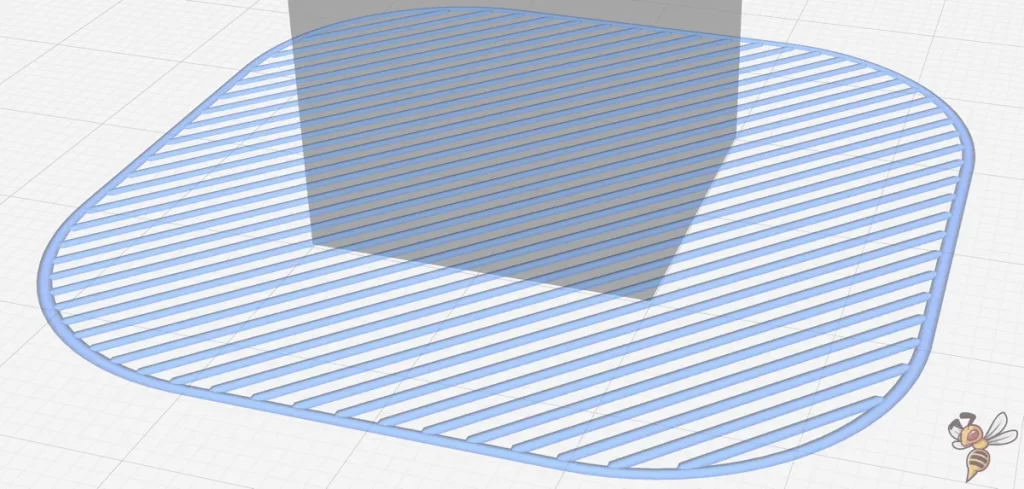
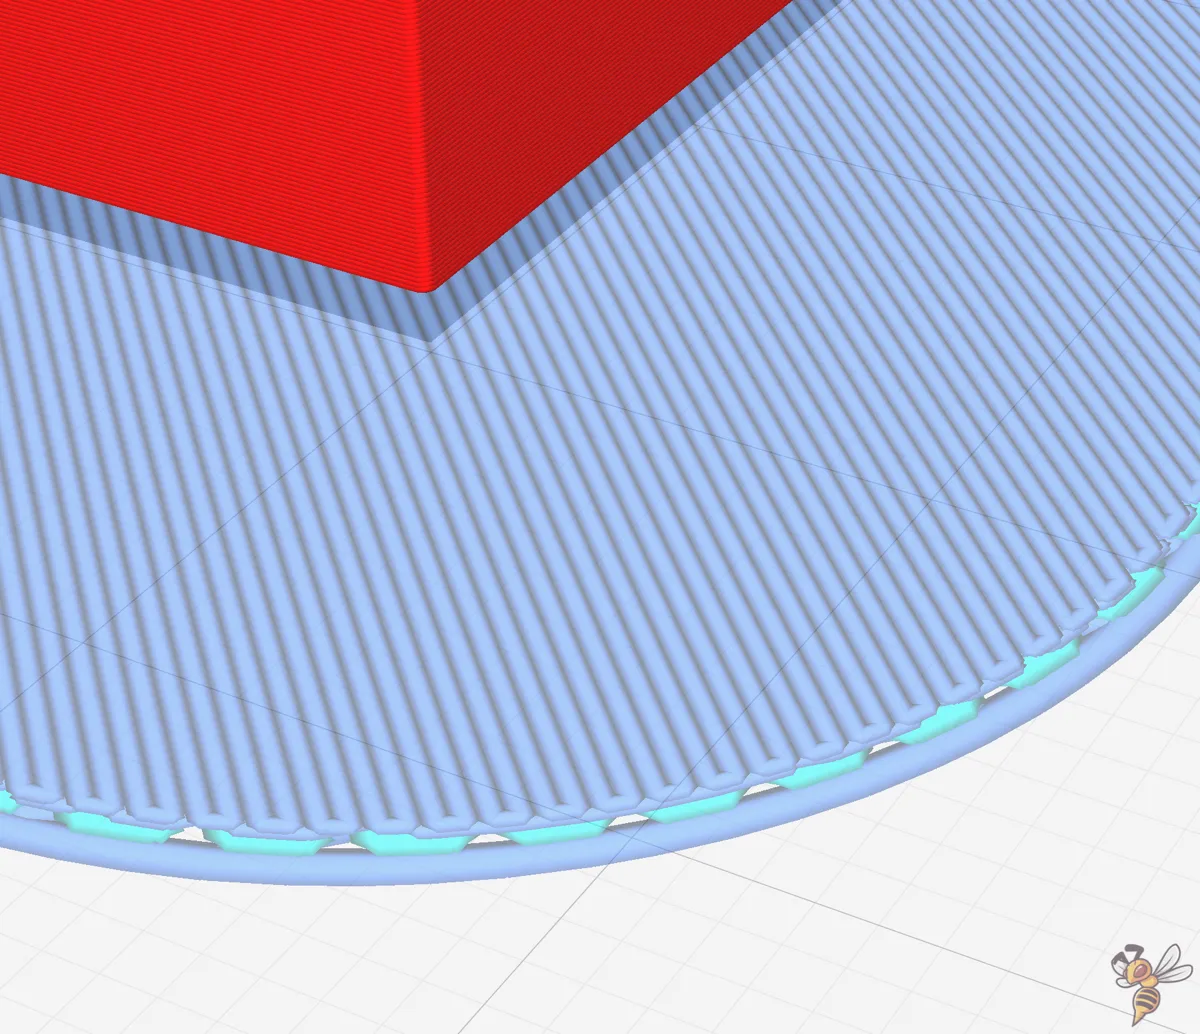
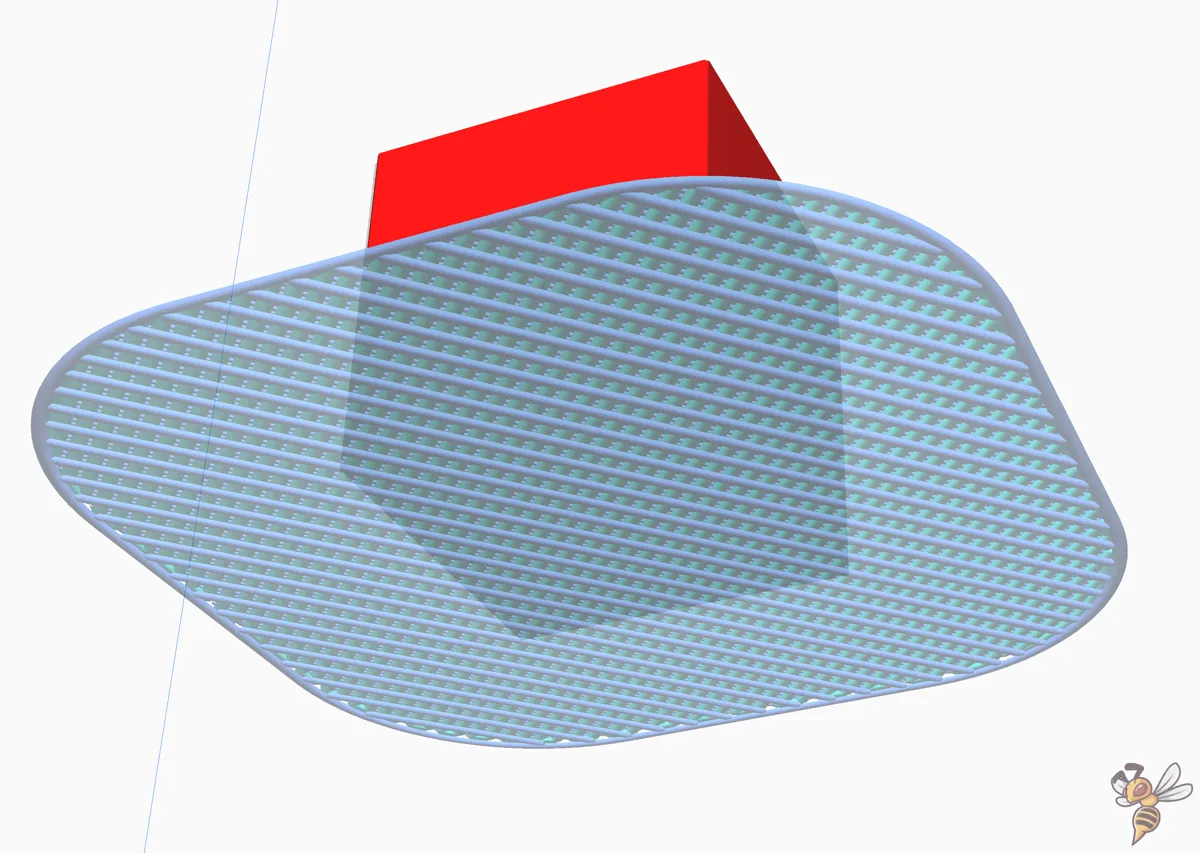
Raft Extra Margin
- This setting determines how far the raft extends beyond the edge of your workpiece.
- A wider raft provides more grip. This setting has the greatest influence on adhesion to the print bed.
- Note that wider rafts use more material and can increase the printing time.
Raft Air Gap
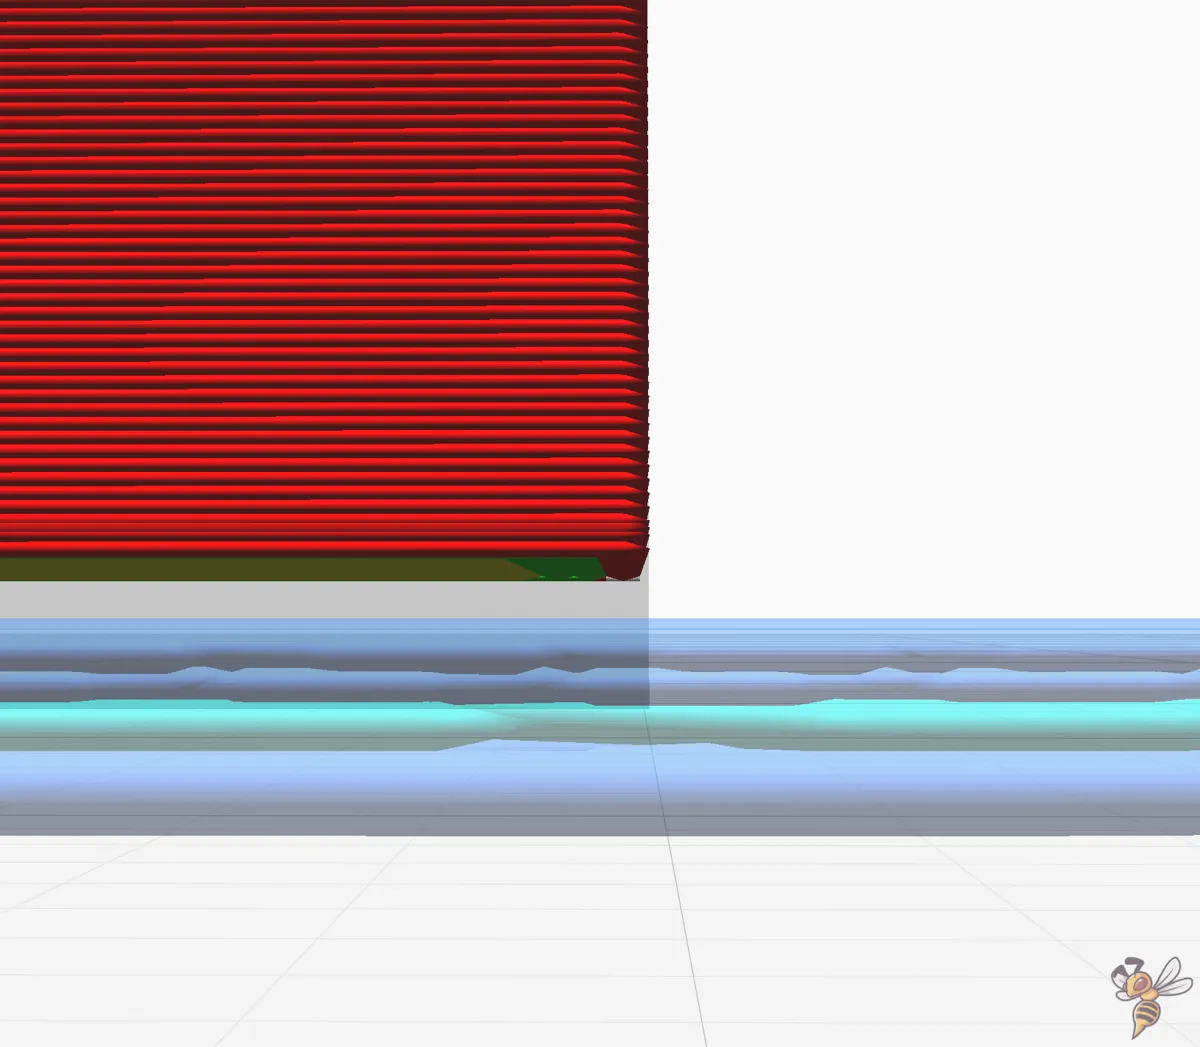
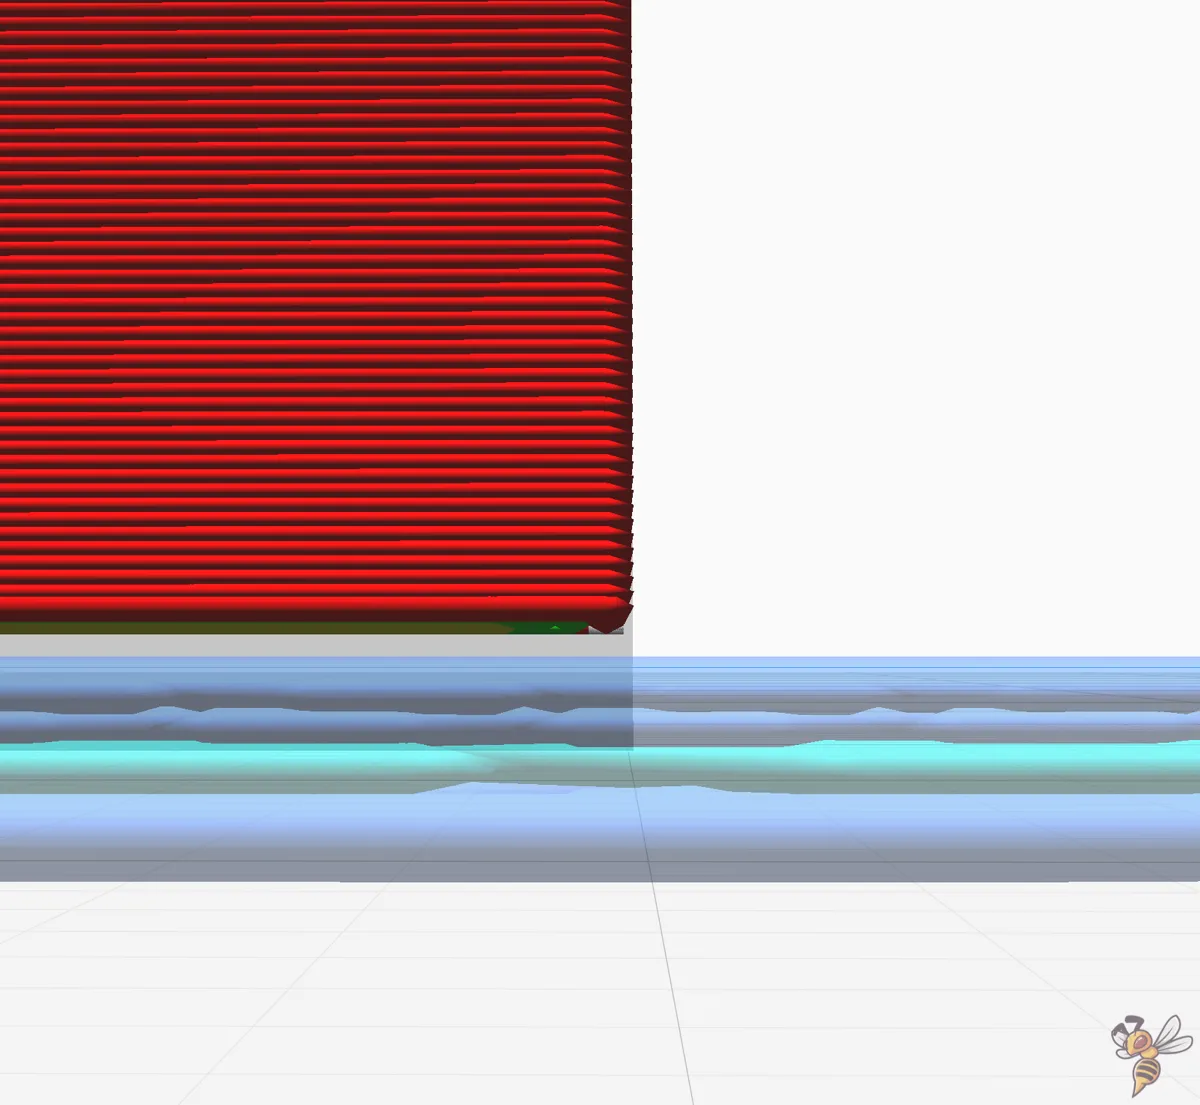
- The air gap is the distance between the raft and the underside of your print object.
- A larger air gap makes it easier to remove the raft, but can lead to a less smooth surface on the underside of the workpiece.
- Fine-tuning is essential here to find a good compromise between adhesion and removability.
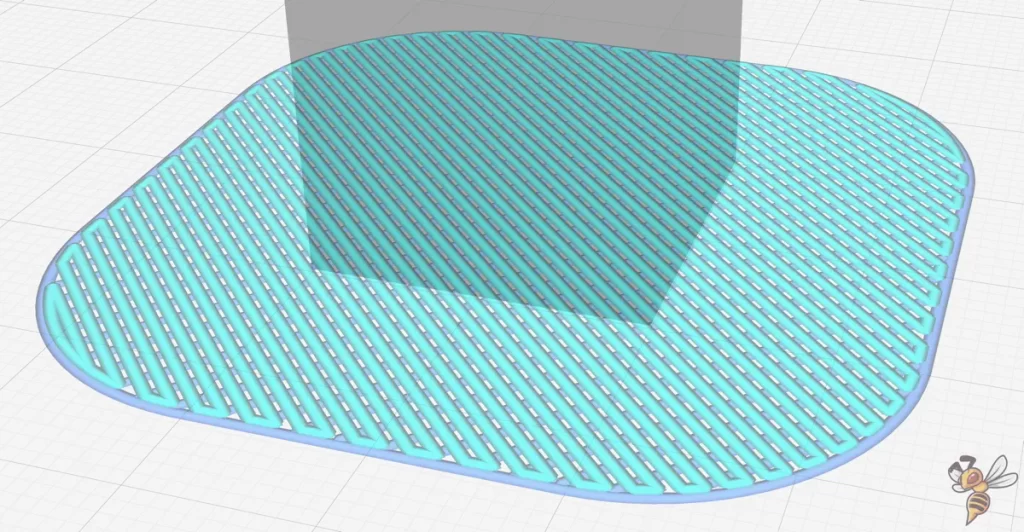
Raft Top Line Spacing
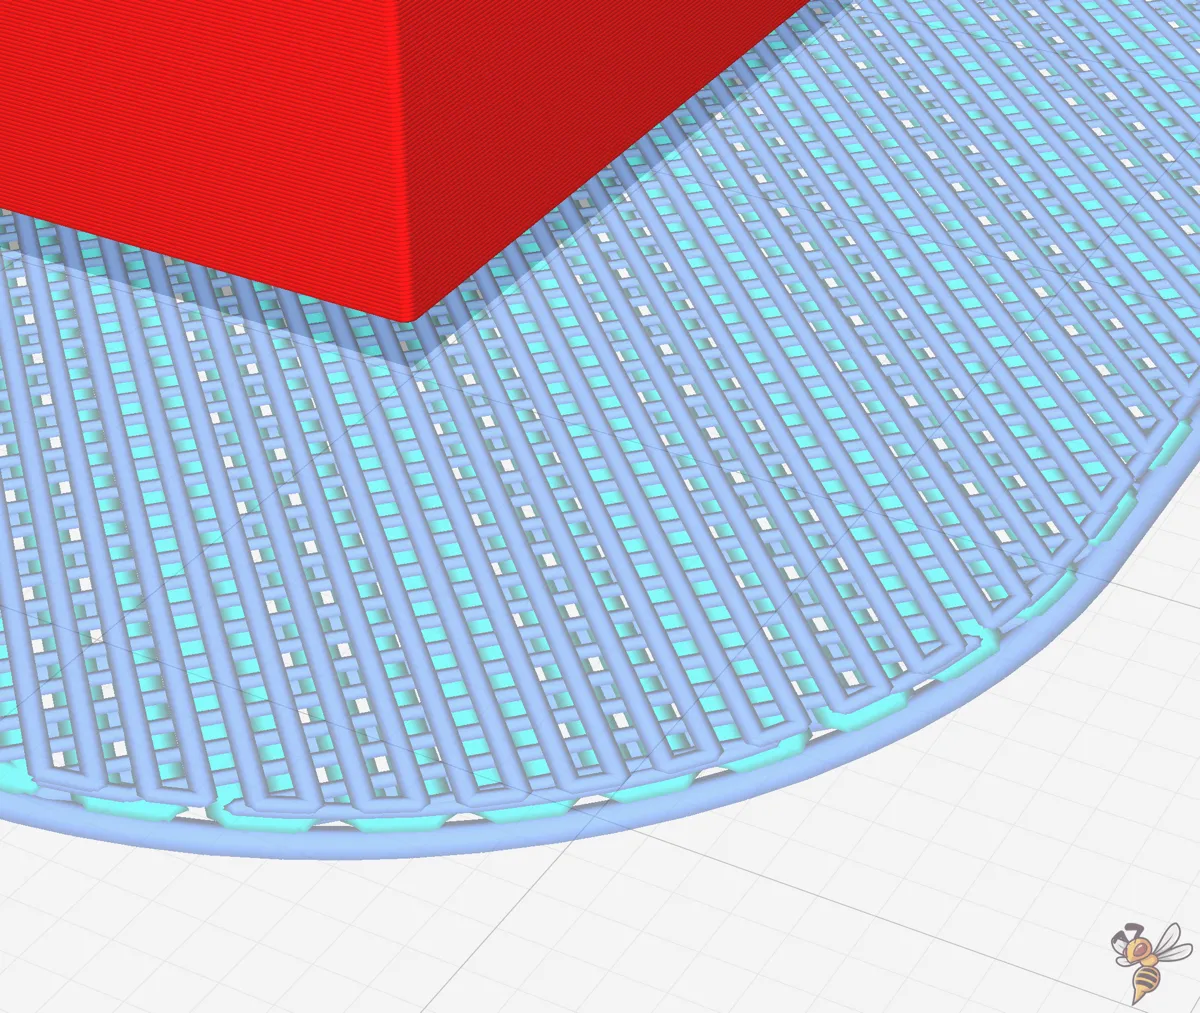
- This spacing determines how close the lines are printed on the top layer of the raft. Closer lines provide a better surface finish on the bottom of the 3D print, but make the raft more difficult to remove.
- Adjustment may be necessary depending on how important the surface quality is for your project.
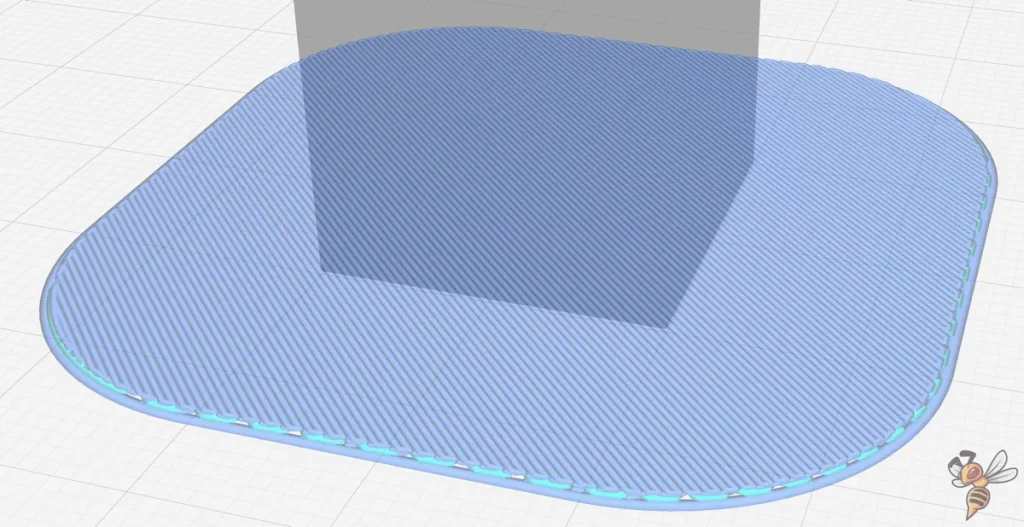
Raft Base Line Spacing
- This refers to the spacing of the lines in the lower layers of the raft. Closer lines improve adhesion to the print bed, which is particularly important for materials that tend to warp.
- However, too close a line spacing can lead to a raft that is difficult to remove.
- Here too, it is important to find a good balance between printing time, material consumption and benefit.
Raft Print Speed
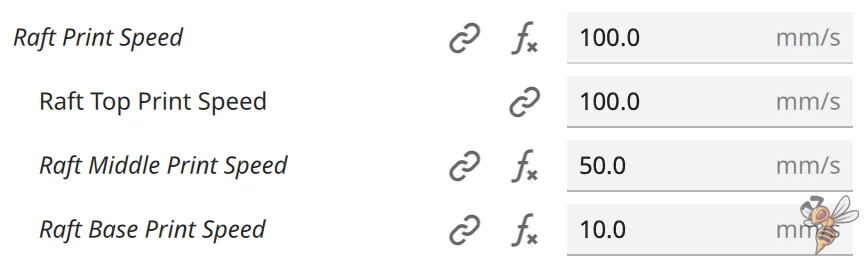
- The speed at which the raft is printed has a major influence on adhesion.
- A slower print speed ensures better adhesion as the material has more time to bond with the print bed.
- On the other hand, a slower speed increases the overall printing time.
- If there are problems with adhesion to the bed, print speeds of around 10 mm/s are recommended.
These settings give you the option of optimally adapting the raft to your specific printing project. Experiment with different combinations to achieve the best results for your workpiece. Remember that the perfect setting depends on many factors, including the material used, the size and shape of your object and the nature of the printing surface.
Removing the Raft
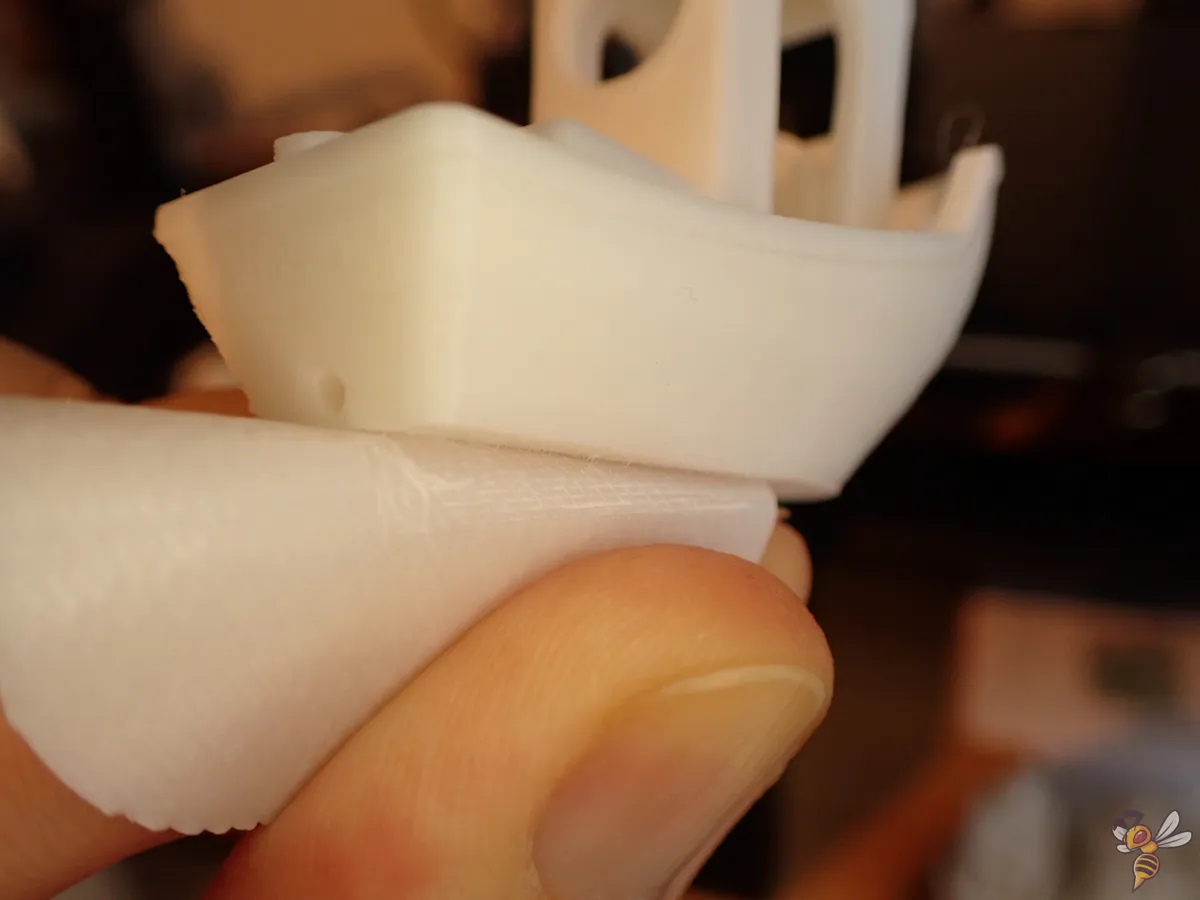
Once your print project is complete, the next step is to remove the raft. This is crucial to ensure that your finished piece remains undamaged and has a clean surface.
Here are some tips and techniques to help you remove the raft efficiently and safely:
Allow cooling time:
- Allow your workpiece and the raft to cool completely before attempting to separate them. Cooling will cause both parts to contract slightly, making it easier to detach.
Apply careful leverage:
- Use a suitable tool such as a knife or similar instrument to carefully get under the raft. Start at the corners or edges and work your way slowly.
- Make sure that you do not use too much force to avoid damaging the workpiece.
- If you have a flexible print bed, bend it after it has cooled down. The raft should then release on its own.
Use the air gap:
- The air gap previously set in the slicer between the raft and the object is your ally. An optimally set air gap allows you to remove the raft more easily without damaging the workpiece.
Remove the raft in parts:
- Sometimes it can be easier to remove the raft in smaller sections rather than pulling it off in one piece. This can be particularly helpful with larger or more complex rafts.
Finishing for a smooth surface:
- After removing the raft, the underside of your workpiece may have rough spots. These can be smoothed with sandpaper or other finishing tools.
Handle delicate parts with care:
- If your workpiece has thin or delicate parts, be extra careful when removing the raft. These areas are prone to breakage or deformation.
Dealing with rafts that are too tight:
- If the raft is sticking too tightly to the workpiece, first check the air gap (the distance between the raft and the object). Too small a gap can lead to a strong bond. Increase the gap slightly in your slicer software.
- Too high a temperature during printing can also lead to a strong bond. Experiment with lower temperatures to allow for easier separation.
By following these steps, you can ensure that your 3D-printed object is safely and cleanly separated from its raft. Remember that practice makes perfect. Over time, you will develop a feel for how best to proceed to achieve optimal results.
FAQ – Frequently Asked Questions
What is the difference between a Raft, Skirt and Brim?
A raft is a multi-layered new surface that is printed under the entire print object to improve adhesion and stability. A skirt, on the other hand, is a single line or multiple lines that are printed around the object without touching it. It is used to stabilize the filament flow. A brim is an extension of the first layer of the object that is directly adjacent to the object and improves adhesion to the print bed.
When should I use a Skirt instead of a Raft?
A skirt is ideal if you have no problems with adhesion or warping, but want to stabilize the filament flow before starting the actual print. It is a material-saving option to ensure that the 3D printer is working properly before the print starts.
What do I do if my Raft does not adhere properly to the print bed?
If your raft has problems sticking to the print bed, first check the bed temperature and the cleanliness of the print plate. Make sure the printing plate is properly leveled and the nozzle is at the correct height. You can also use adhesion promoters such as a glue stick or adhesive spray. Adjusting the print speed and temperature in your slicer software can also help.
Conclusion
To summarize, using a raft in 3D printing is an effective way to overcome challenges such as poor adhesion and irregularities in the first layer. Although it is considered a stopgap in some cases, it provides a reliable base for a variety of printing projects, especially with difficult materials and complex geometries.
Disclosure: This website is the property of Martin Lütkemeyer and is operated by Martin Lütkemeyer. Martin Lütkemeyer is a member of the Amazon Services LLC and other Affiliate Programs. These are affiliate advertising programs designed to enable websites to earn advertising revenue through advertising and linking to Amazon.com and others. Links marked with * are affiliate links.
