
- Wet Filament: Prevention, Symptoms & Drying - July 18, 2024
- Sovol SV08 – Best PrusaSlicer Settings & Profile - June 26, 2024
- Sovol SV08 – Best Orca Slicer Settings & Profile - June 26, 2024
Disclosure: Links marked with * are Affiliate Links. I earn from qualifying purchases if you decide to make a purchase through these links – at no additional cost for you!
If you’re new to 3D printing, you might have heard about various techniques to improve print quality and adhesion. One such technique, crucial for beginners and experts alike, is the use of a ‘brim‘. But what exactly is a 3D printing brim and why is it so important?
A 3D printing brim is a flat extension of the first layer, enhancing bed adhesion and reducing warping, especially for small, tall, or warp-prone prints. Adjusting brim settings like width and line count tailors its effectiveness, though it requires extra post-processing for removal.
In this article, we’ll dive into the essentials of brims in 3D printing. We’ll explore what brims are, their purpose, how they can be a game-changer in achieving perfect print adhesion and how to remove them without residue.
Table of Contents:
What is a Brim?

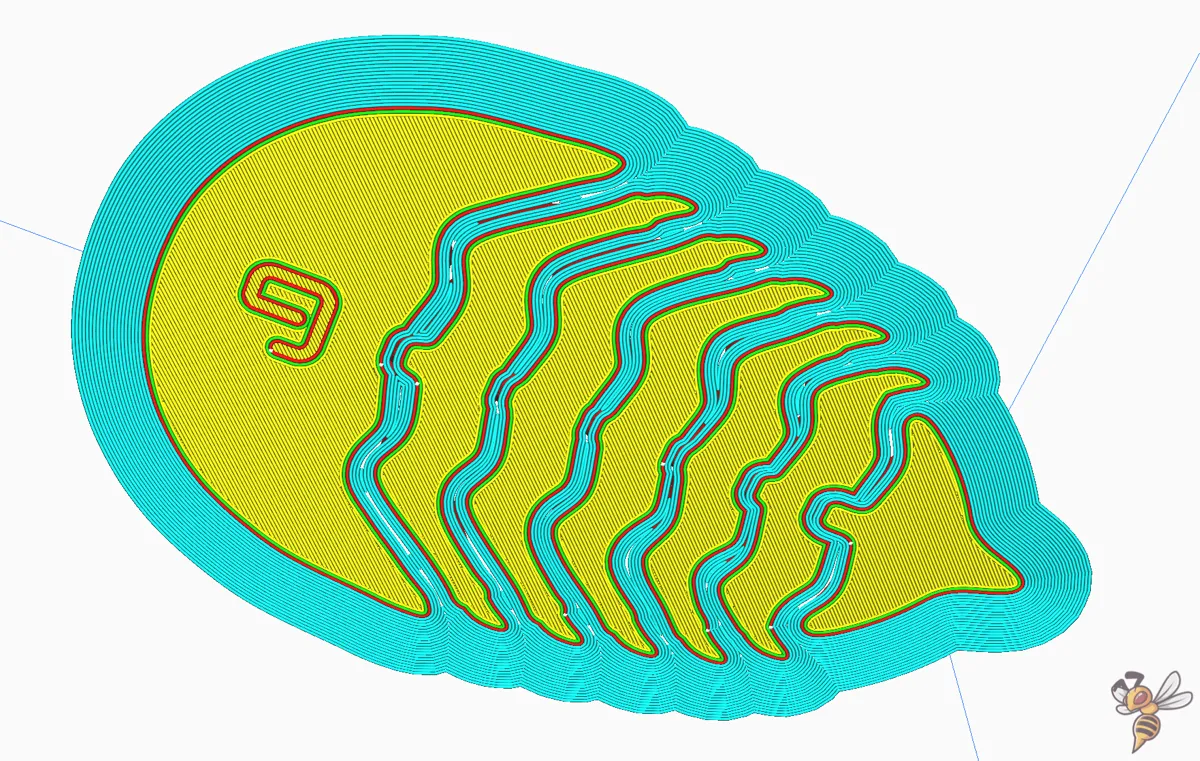
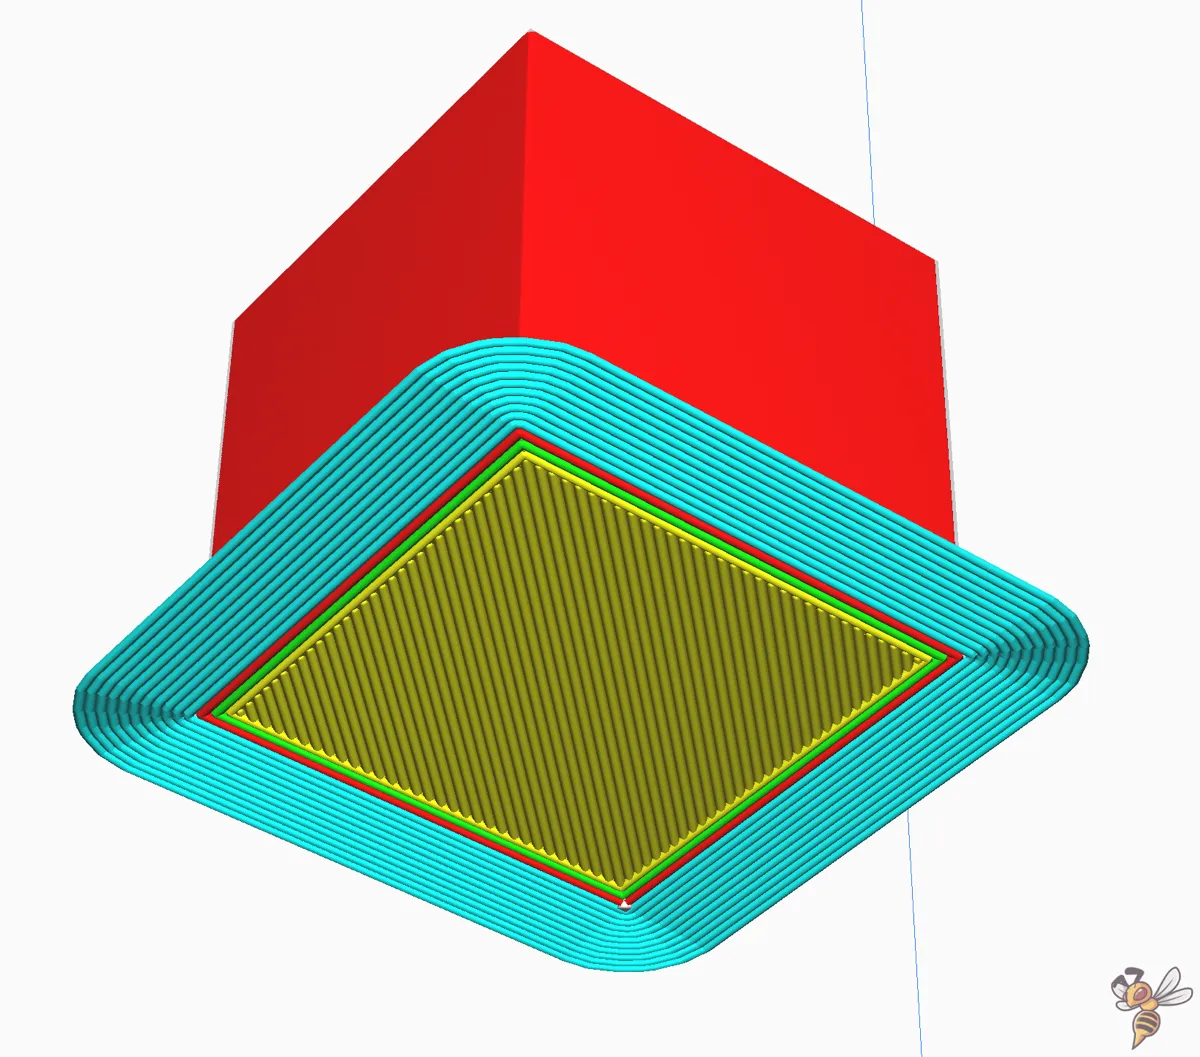
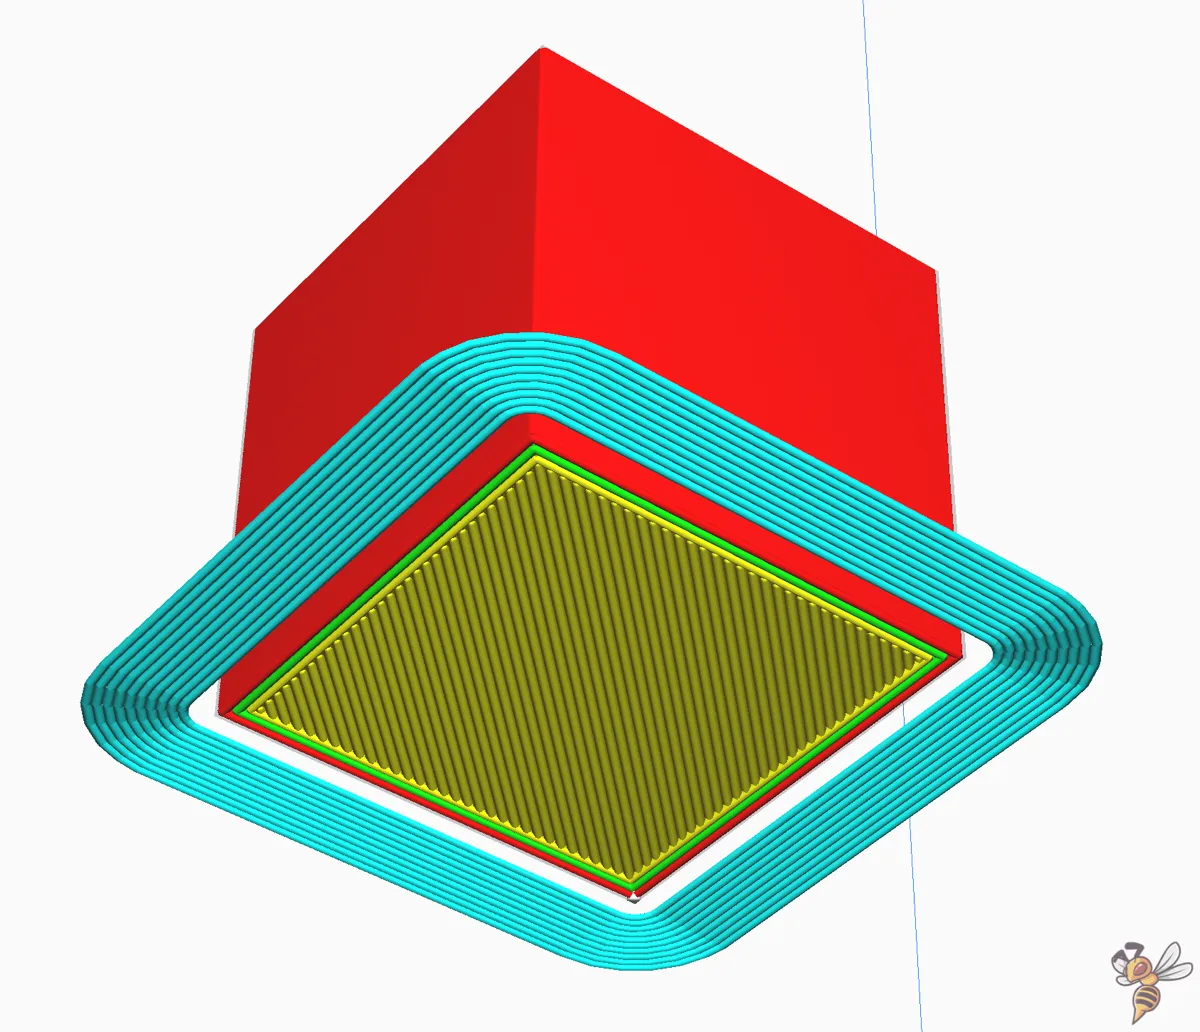
A 3D printing brim is essentially an extension of the base layer of your print. Imagine it as a thin, flat border that surrounds your model on the print bed. This border is not part of your actual design but serves a crucial support role during the 3D printing process.
Unlike a skirt, which are lines of filament printed around the object but not attached to it, or a raft, which is a thick grid under your entire print, a brim is directly connected to the edges of your print. It increases the surface area of the first layer and therefore improves the bed adhesion massively. The larger the first layer is, the better the first layer adhesion gets.
The main idea behind a 3D printing brim is to provide extra adhesion to the printing bed and to prevent warping – a common issue where the corners of the print lift off the bed during 3D printing. Warping often happens due to temperature differences between layers, but a brim helps mitigate this by firmly anchoring the print’s edges.
Brim settings can usually be adjusted in your slicing software. You can control the width of the brim (how many lines of filament it contains) and sometimes its height (how many layers it consists of), allowing for customization based on the needs of your specific print. Later in this article, we’ll delve into the individual print settings in detail.
When to Use a Brim (and When Not)
The first rule for using a 3D printing brim is to not use a brim! The only real advantage of a brim is a better print bed adhesion.
However, there are many other methods to improve bed adhesion that you should try first before resorting to a brim. Further down in this article, you’ll find brim alternatives. For more detailed information on how to improve the print bed adhesion, you can read this guide or watch this video.
But now, let’s break down the scenarios where a brim is beneficial and those where it might be unnecessary.
Scenarios Benefitting from a Brim:
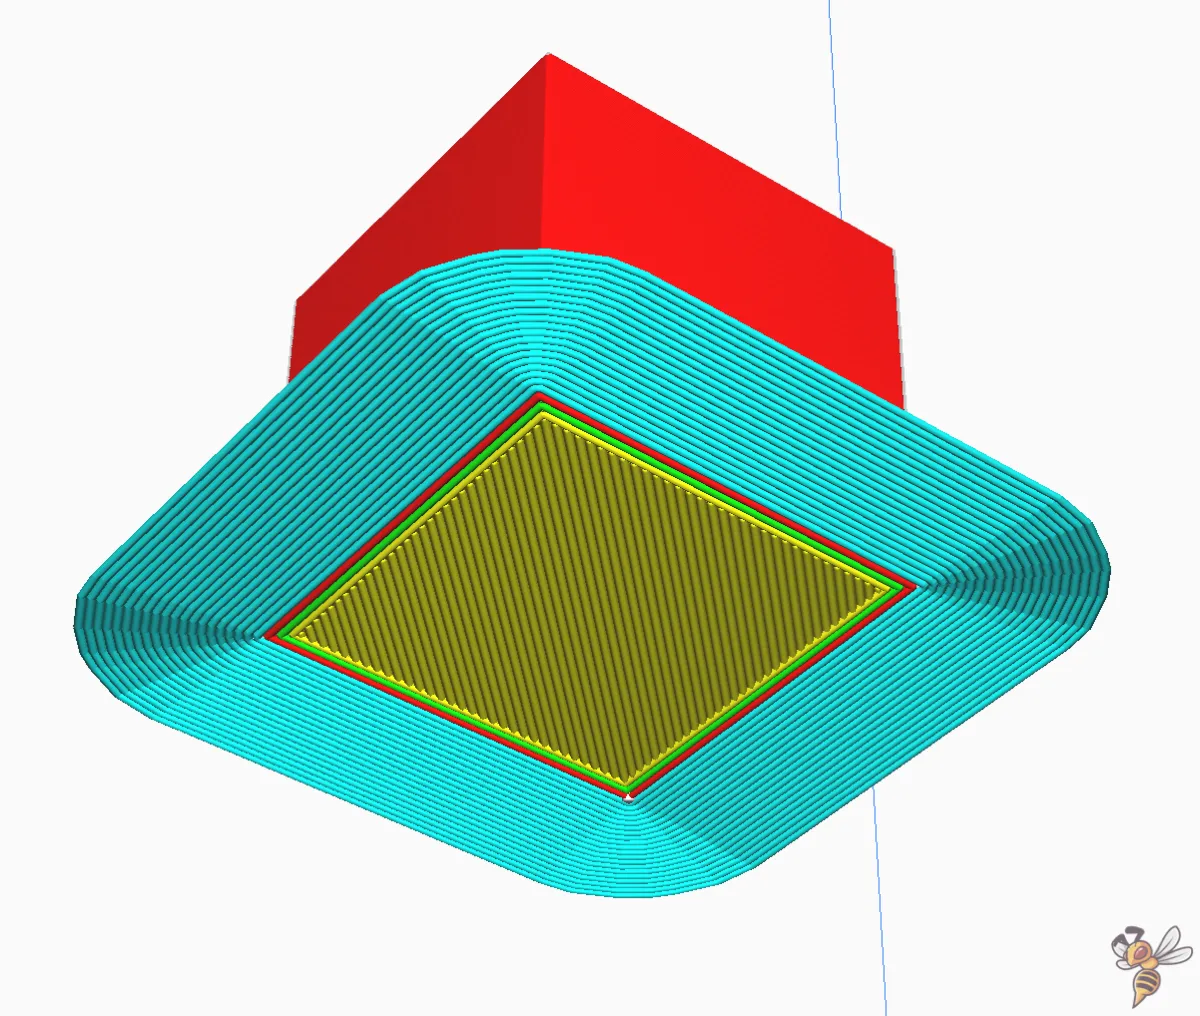
- Small Footprint Objects: When 3D printing objects with a small base, there’s less surface area for adhesion, increasing the risk of the print detaching from the bed. A brim extends this area, providing extra stability and bed adhesion, often leading to a successful print.
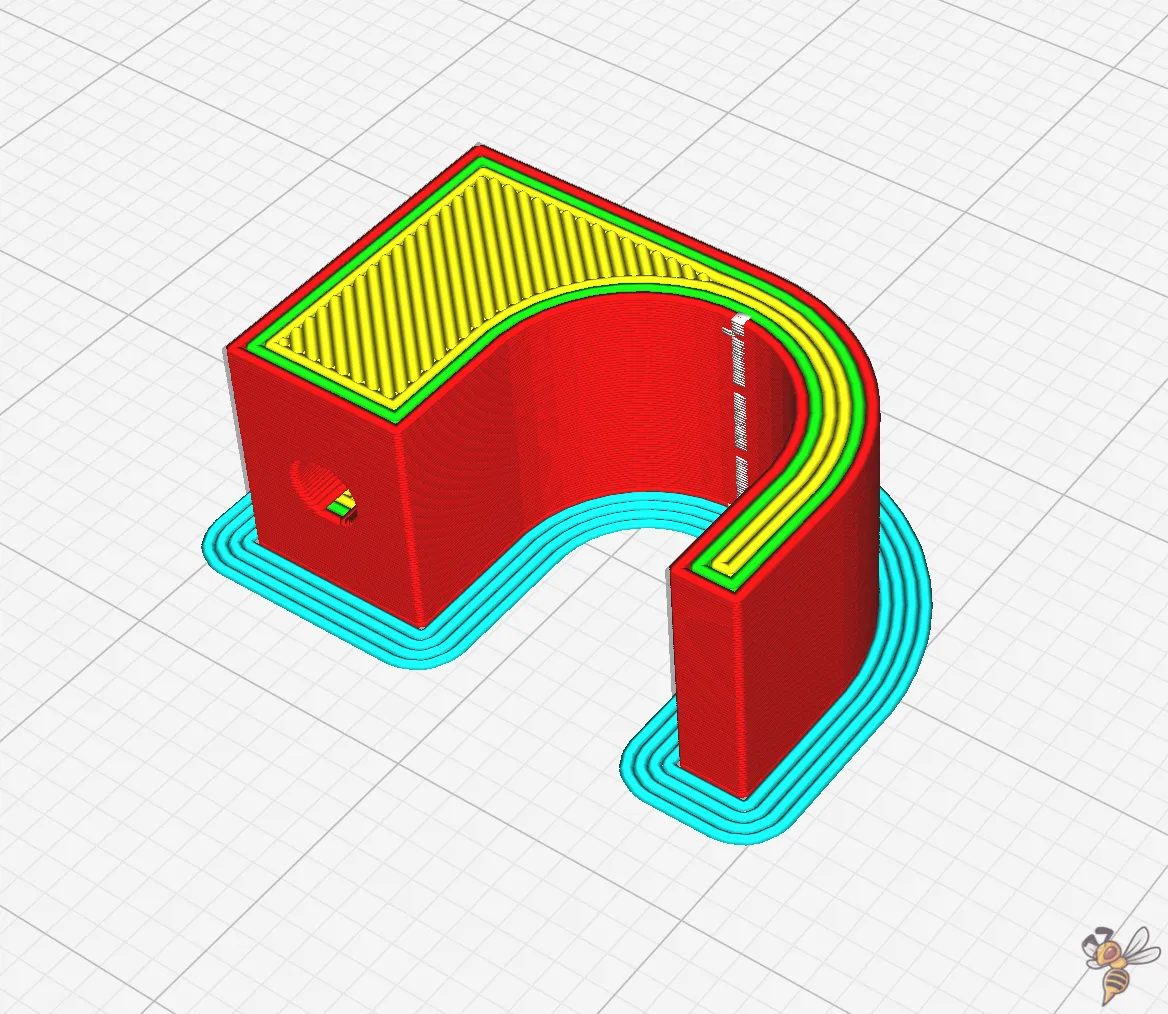
- Tall, Slim Prints: Tall objects, especially those with a narrow base, are prone to toppling or wobbling as the print progresses. A brim acts like an anchor, keeping these structures firmly in place.
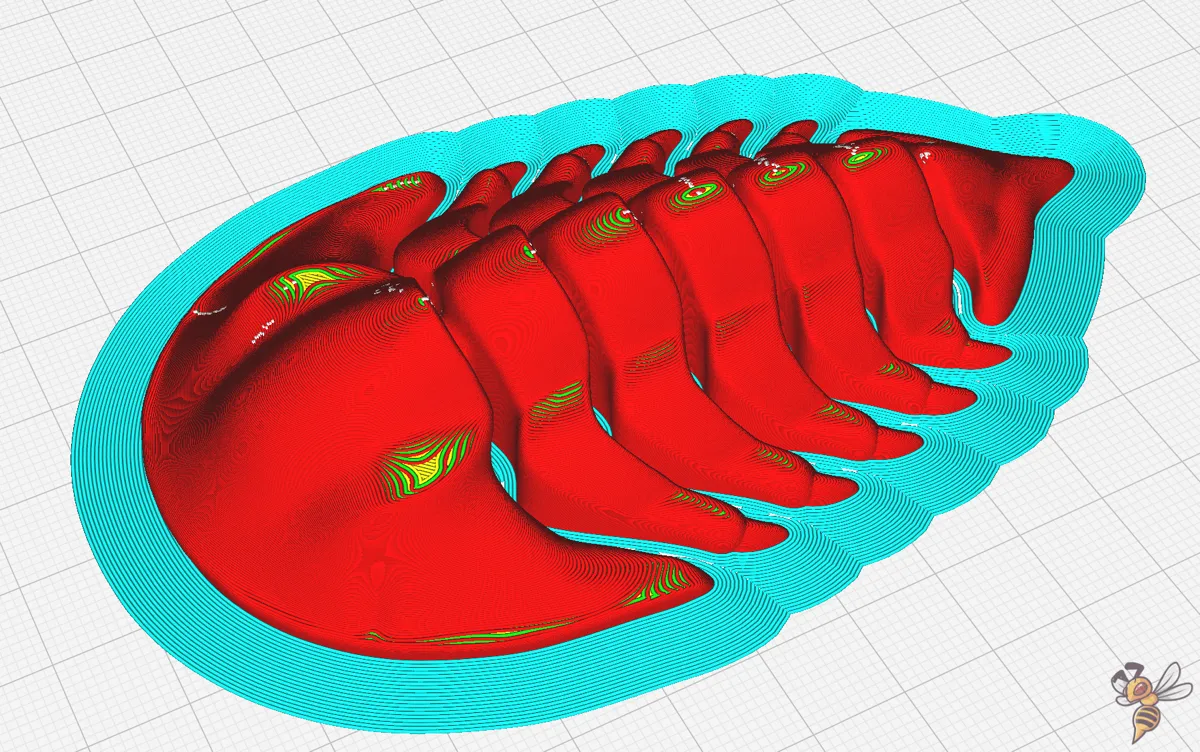
- 3D Printing with Warp-Prone Filaments: Certain materials, like ABS, are notorious for warping due to their contraction as they cool. A brim can be crucial in maintaining a flat, well-adhered first layer with these materials and prevent warping effectively.
Scenarios Where a Brim Might Not Be Useful:
- Large Footprint Objects: If your object already has a broad base, the additional adhesion provided by a 3D printing brim might be unnecessary. In this case, the brim would just consume extra material and time.
- Bottom Layer Dimensional Accuracy is Key: For prints where the bottom layer’s dimensions are critical, a brim might interfere. It can slightly distort the edge of the bottom layer, affecting the precision of the final product.
- Detailed First Layers: If the initial layer of your print contains intricate details or text, a brim can make post-processing difficult. Removing the brim without damaging these fine features can be challenging.
Brim Pros and Cons
Brim advantages:
✓ Improved Adhesion: Enhances the first layer adhesion to the bed, reducing the likelihood of the print detaching mid-process.
✓ Prevent Warping: Especially useful for materials prone to warping, as it helps maintain a flat print base.
✓ Stabilizes Tall Prints: Provides extra support for tall or slender models, preventing movement or toppling.
Brim disadvantages:
× Additional Material Use: Consumes extra filament, which can add up over many prints.
× Post-Processing Effort: Requires removal after the 3D printing process, adding an extra step to the finishing process.
× Potential for Surface Marks: Removing the brim can sometimes leave marks on the edges of the initial layer.
× Not Suitable for Detailed First Layers: Can interfere with prints that have intricate details on the bottom layer.
× Dimensional Inaccuracy: May cause slight distortions at the base of the print, affecting precision.
× Time-Consuming: Adds to the overall print time, especially for larger brims.
Brim Settings
Understanding and adjusting the brim settings in your slicer allows you to tailor the brim to suit the specific needs of each print. Configured correctly, a brim can be the decisive factor between a failed and a successful print. Here, we’ll delve into the key settings you should be aware of.
How many slicer settings there are for the 3D printing brim depends on the slicer. Sometimes you can only set the width and the location. In slicers like Cura, there are even more settings. This is why I will explain the settings with Cura as an example. Further down in this article, I will show you how to adjust your 3D printing brim in different slicers as well.
Brim Minimum Length

The Brim Minimum Length setting determines the minimum length of the brim lines. This setting becomes crucial when 3D printing smaller objects or objects with irregular bases. A longer brim line ensures more continuous filament deposition and a larger layer surface, leading to better bed adhesion.
Usually, this setting gets overridden by the brim width and/or the brim line count, and I recommend you to do so. In my experience, controlling the brim size is way easier with the brim width setting.
Brim Width
The brim width controls how far the brim extends out from the edge of your print. This setting is measured in millimeters and directly influences the surface area of the brim.
This setting is the most crucial one for improving the bed adhesion.
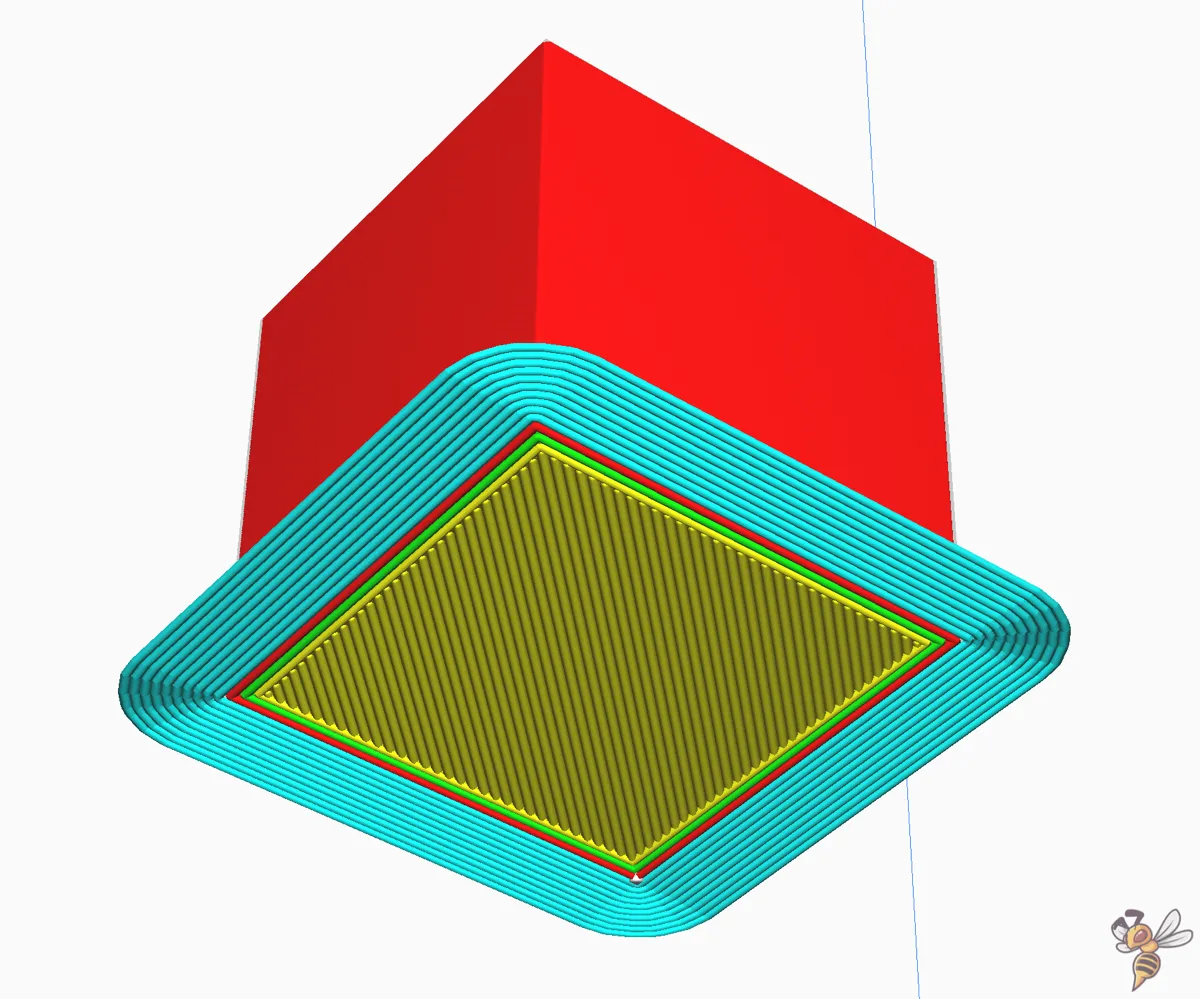
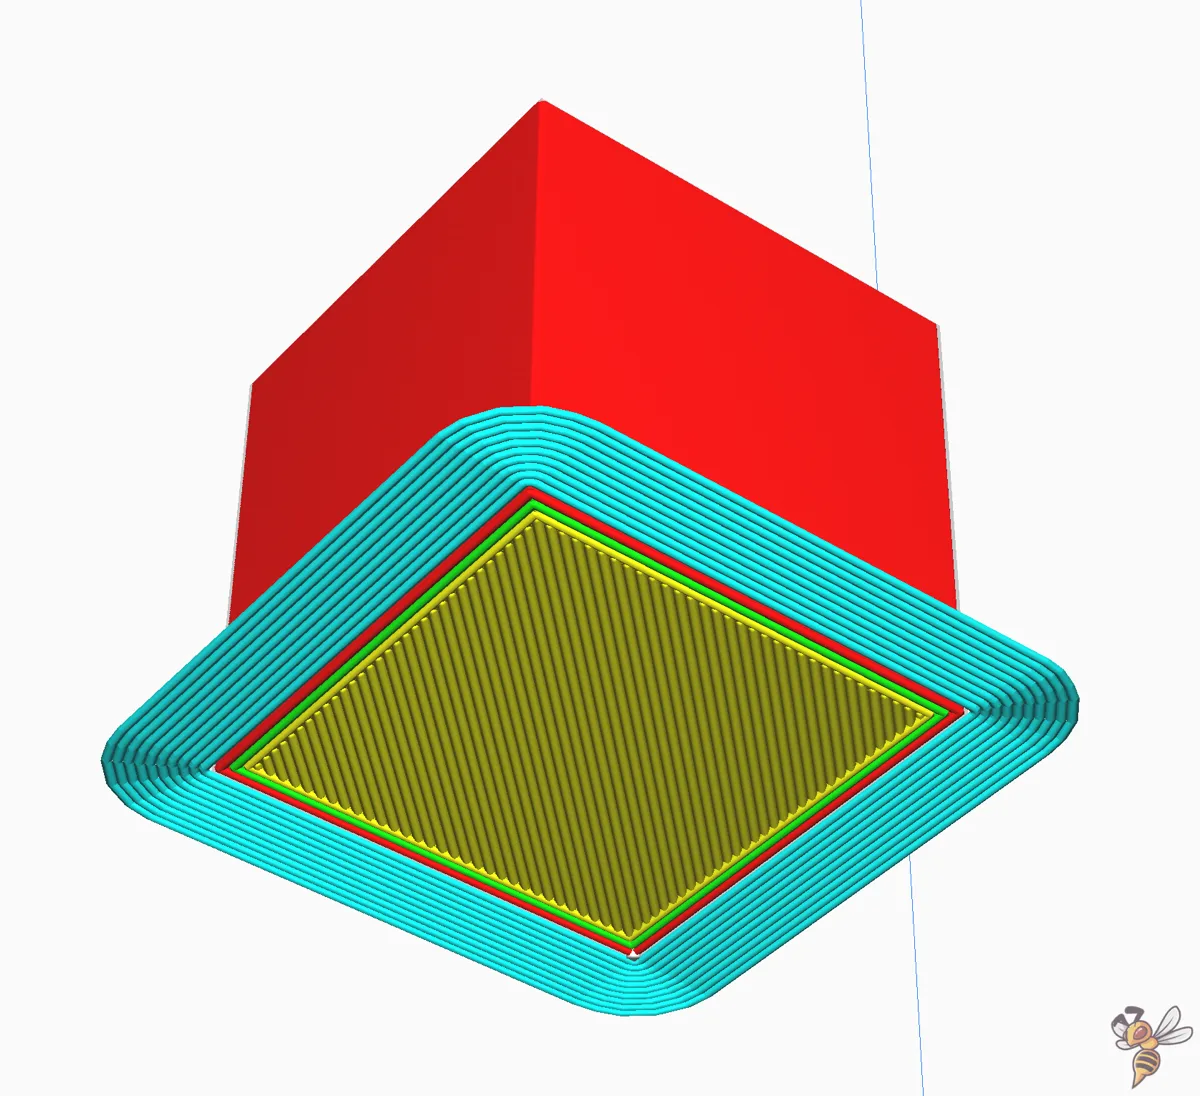
Brim Line Count
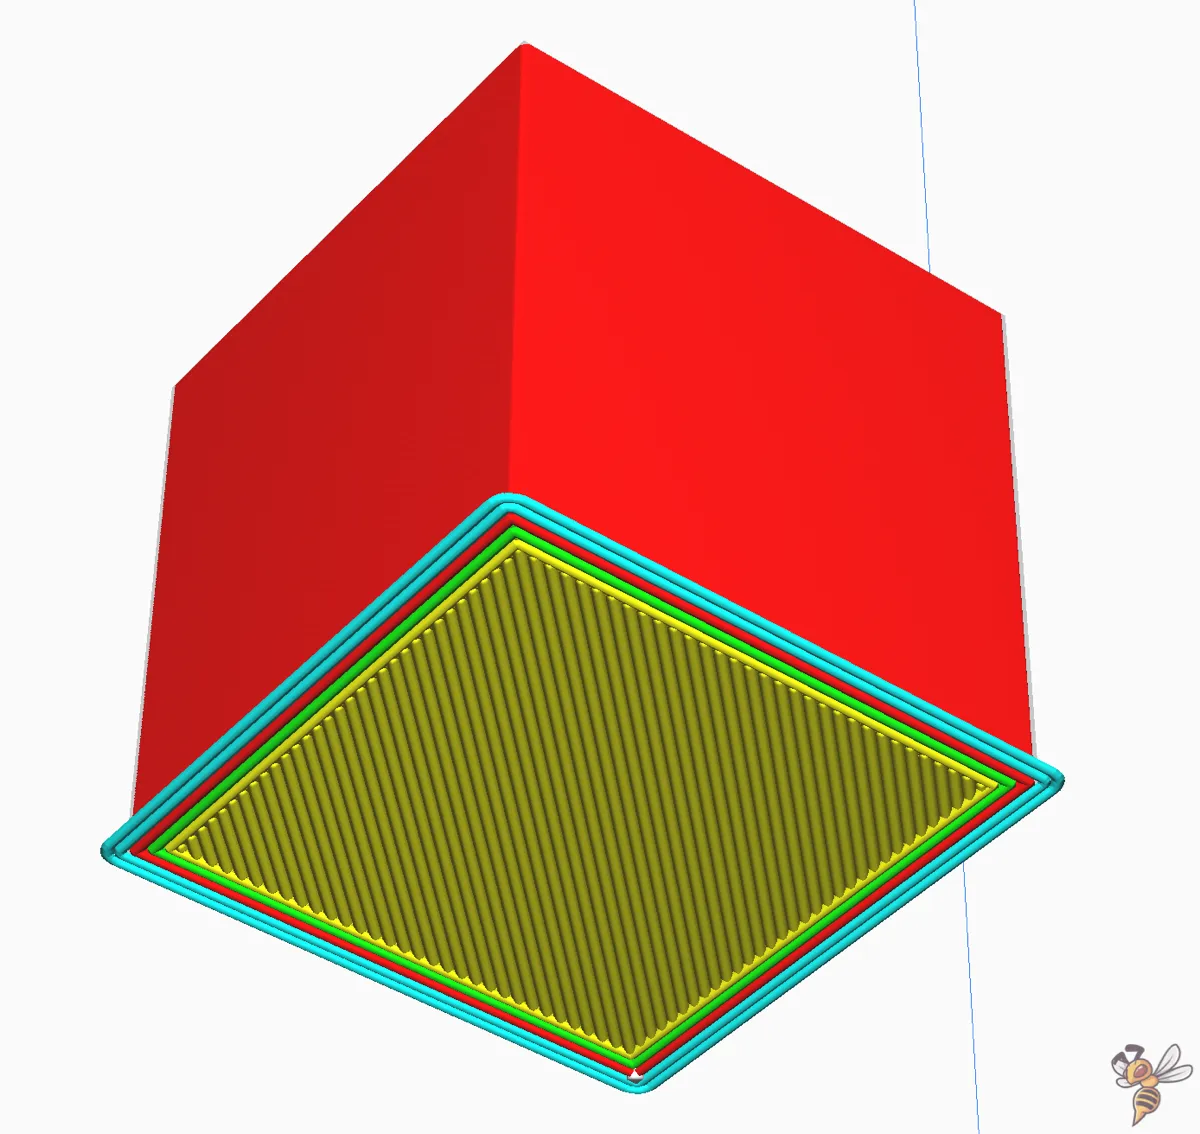
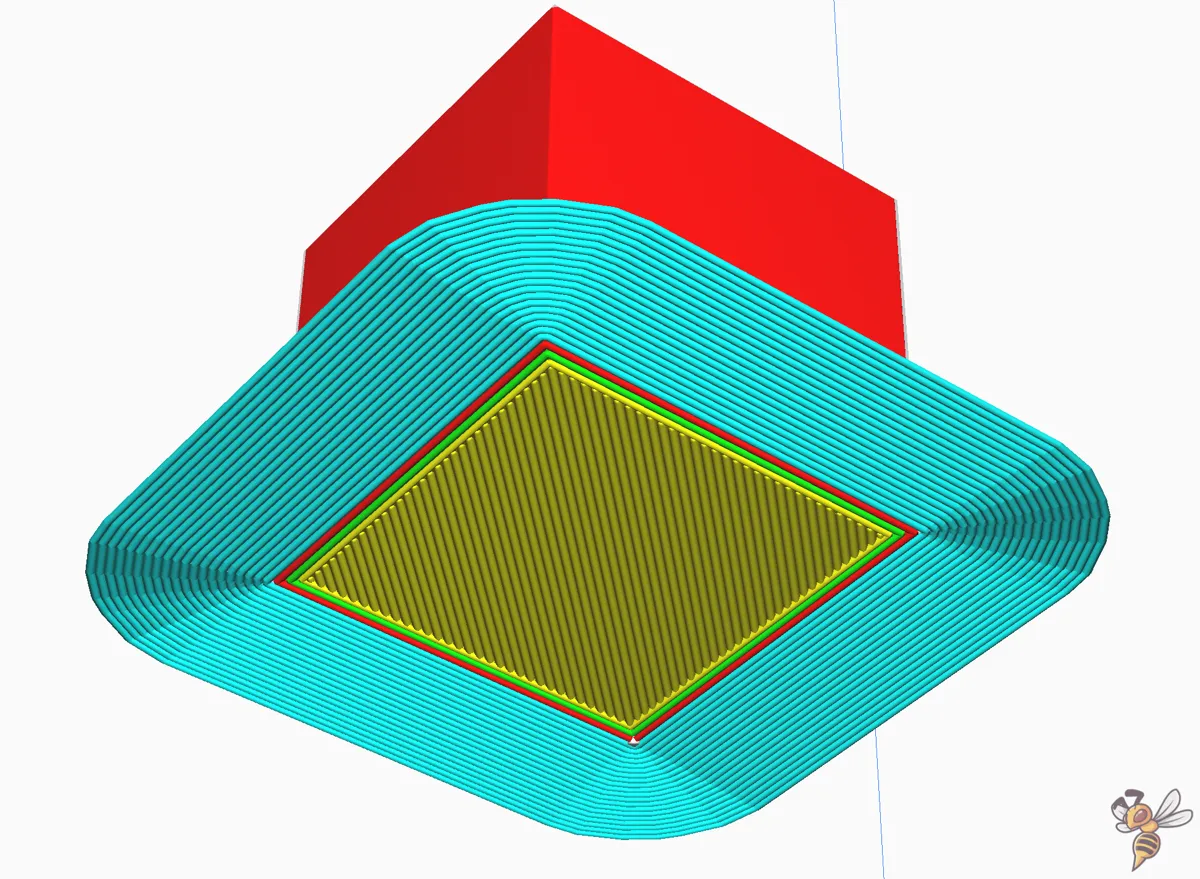
Brim Line Count refers to the number of lines or circuits the brim makes around your object. This setting is an alternative way to control the brim’s width without specifying it in millimeters. Increasing the line count results in a wider brim, offering more stability and adhesion.
This setting is useful for fine-tuning the brim’s width, especially for prints with varying shapes and sizes.
Minimum Length vs. Width vs. Line Count
When configuring your brim settings, the interplay between Length, Width, and Line Count can be confusing. Each of these settings can override the others if set larger, offering flexibility in how you define the brim’s dimensions.
Interestingly, you can set two of these parameters to zero and exclusively use the remaining one to adjust the brim size. This approach simplifies the process and can be particularly effective in certain slicing scenarios.
From my experience, a best practice involves using a small minimum length, setting either the width or line count to zero, and then adjusting the brim size with the non-zero parameter. In many slicers, width is the primary adjustable setting, which works quite well in most cases.
Brim Distance
Brim distance or brim separation gap is the gap between the edge of the brim and the printed object. This small gap can be crucial for easy removal of the brim.
If set to zero, the brim attaches directly to the print, which might be necessary for very delicate or unstable prints. However, a small gap (like 0.1-0.2 mm) allows for easier brim removal without compromising too much on the adhesion benefits.
To optimize this setting, print a few small objects with different distances between the brim and the object and see which one works best. Also, different materials can behave very different when it comes to bed adhesion and the adhesion between two lines of filament. So this setting can be material dependent.
Outer or Inner Brim
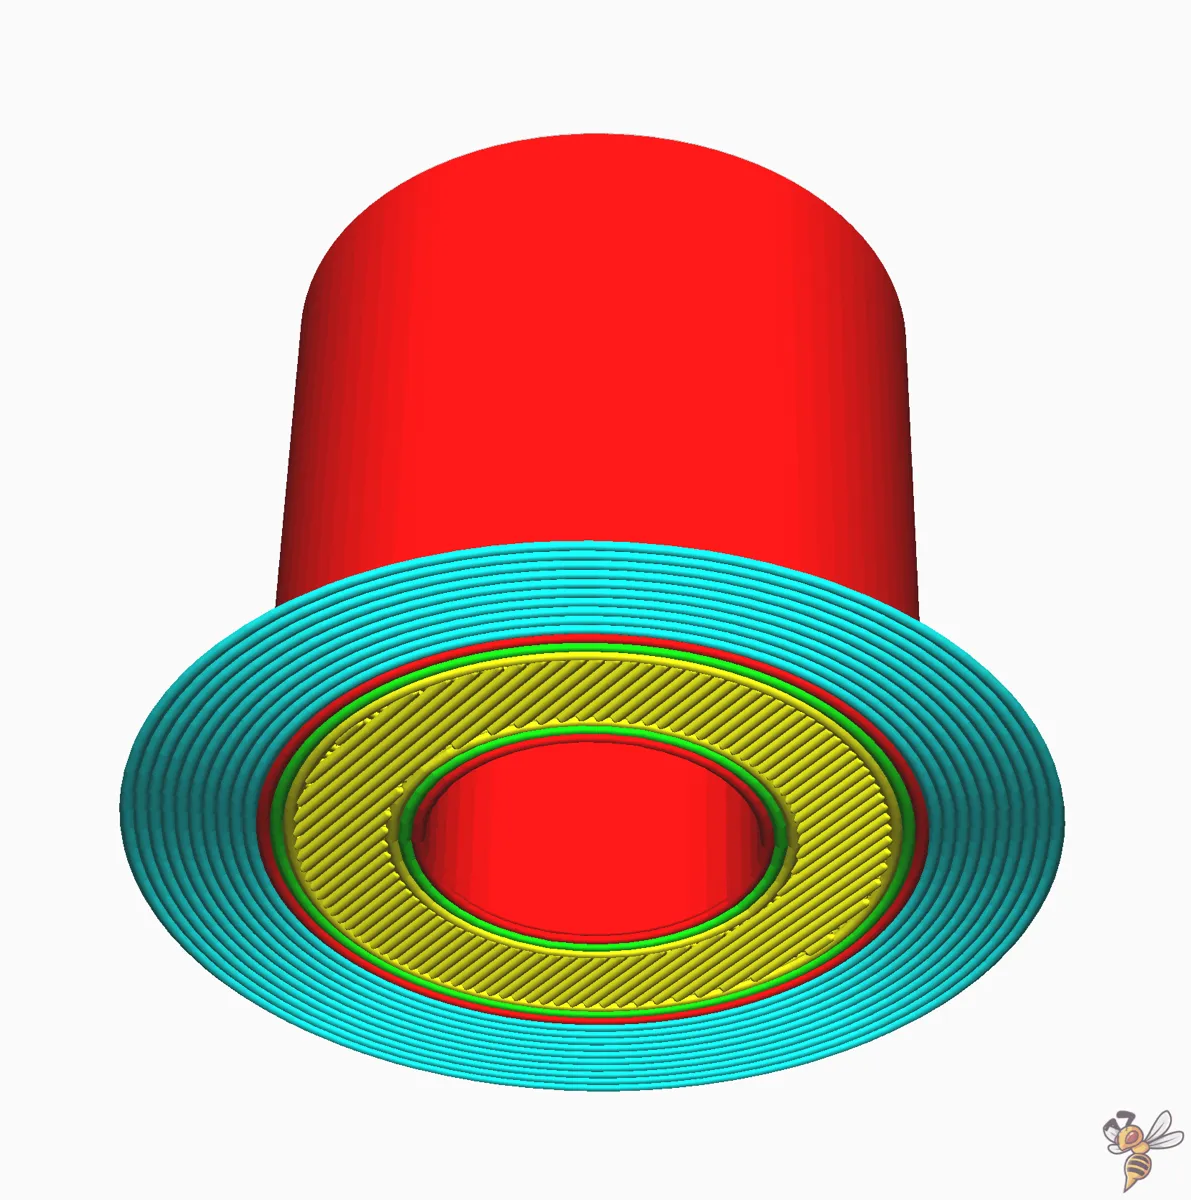
The choice between an outer or inner brim depends on your specific print and the level of detail required. An outer brim is the standard setting, where the brim extends outward from the printed object’s outer edge.
A brim on the outside is effective for general use but can affect the outer dimensions and appearance of the print. An Inner Brim, on the other hand, is printed inside the outer edge of the bottom layer. This can be useful for prints where maintaining the precise outer dimensions is critical. However, an inner brim might not provide as much adhesion assistance as an outer brim.
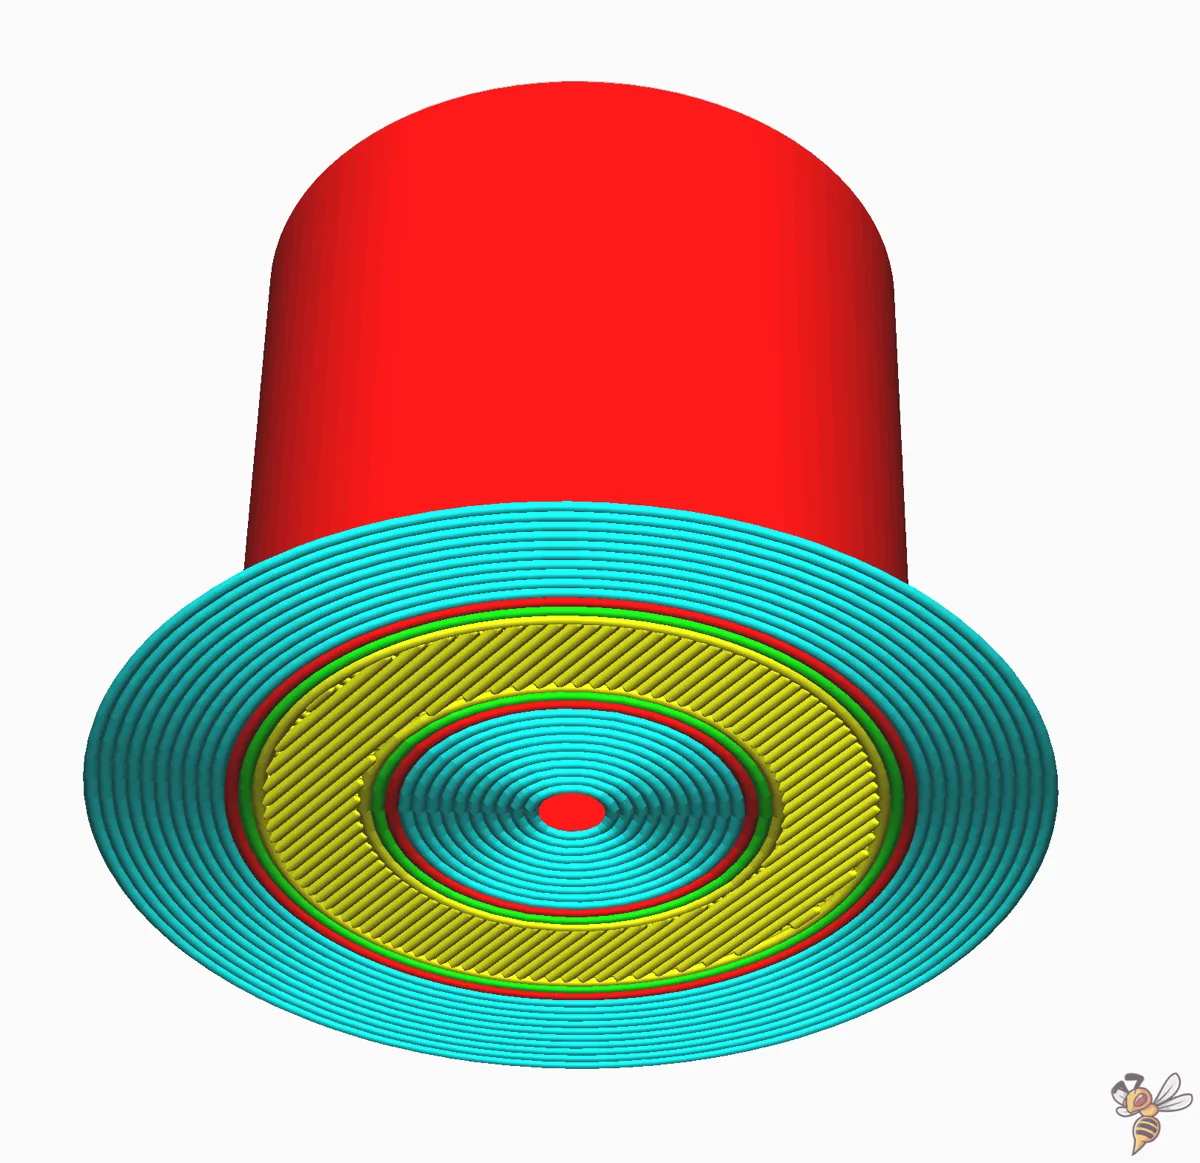
In most slicers, you can even choose to print brims on both location, inside and outside. With this, you improve bed adhesion of every edge of the first layer.
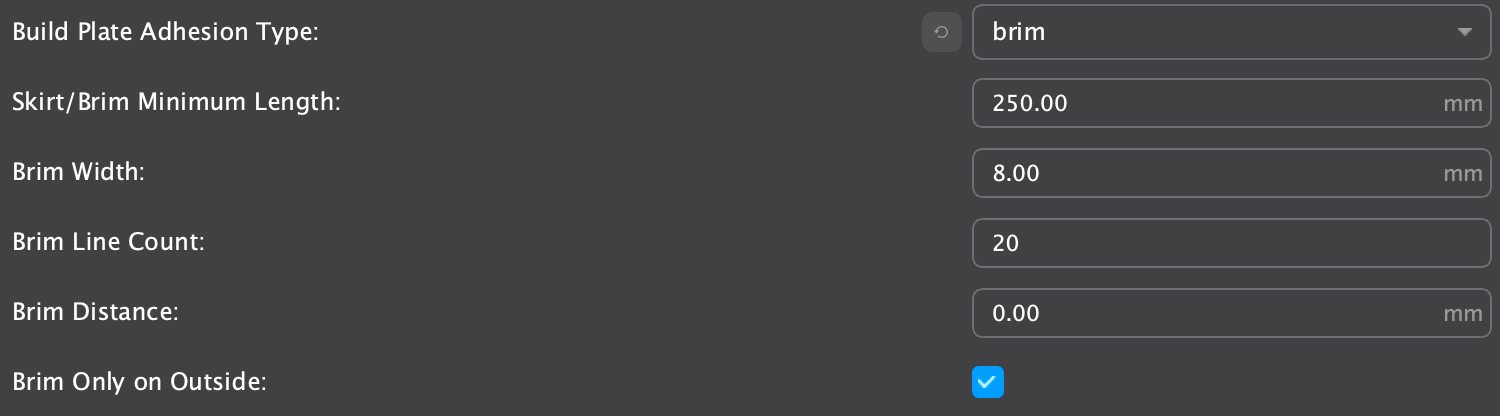
Brims in Cura
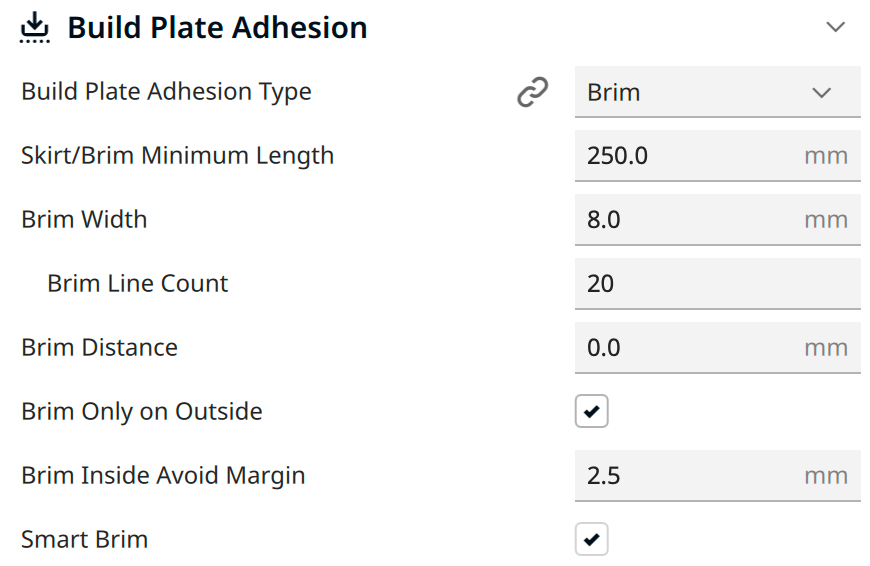
In Cura, you will find the settings for a brim under the settings for bed adhesion. You have a wide range of settings here with which you can change the size and position and make removal easier.
Brims in PrusaSlicer
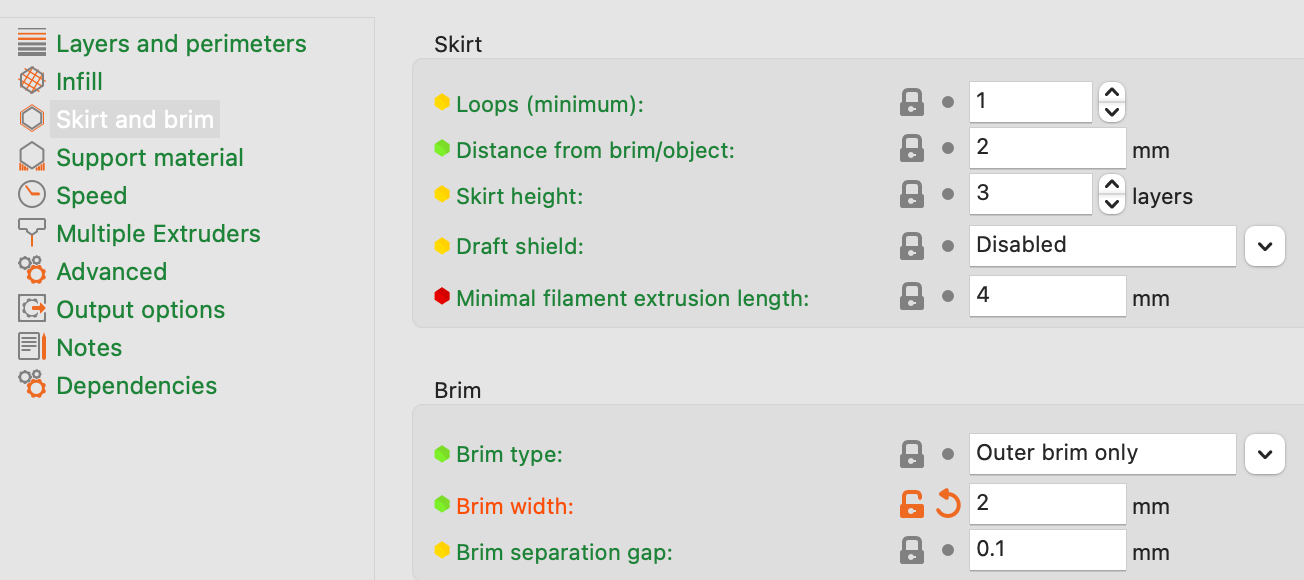
In PrusaSlicer, you activate the brim by setting a brim width greater than 0. Here you can only set the width, the position and the distance to the printed object. In principle, you only need these three settings to configure the brim to work properly.
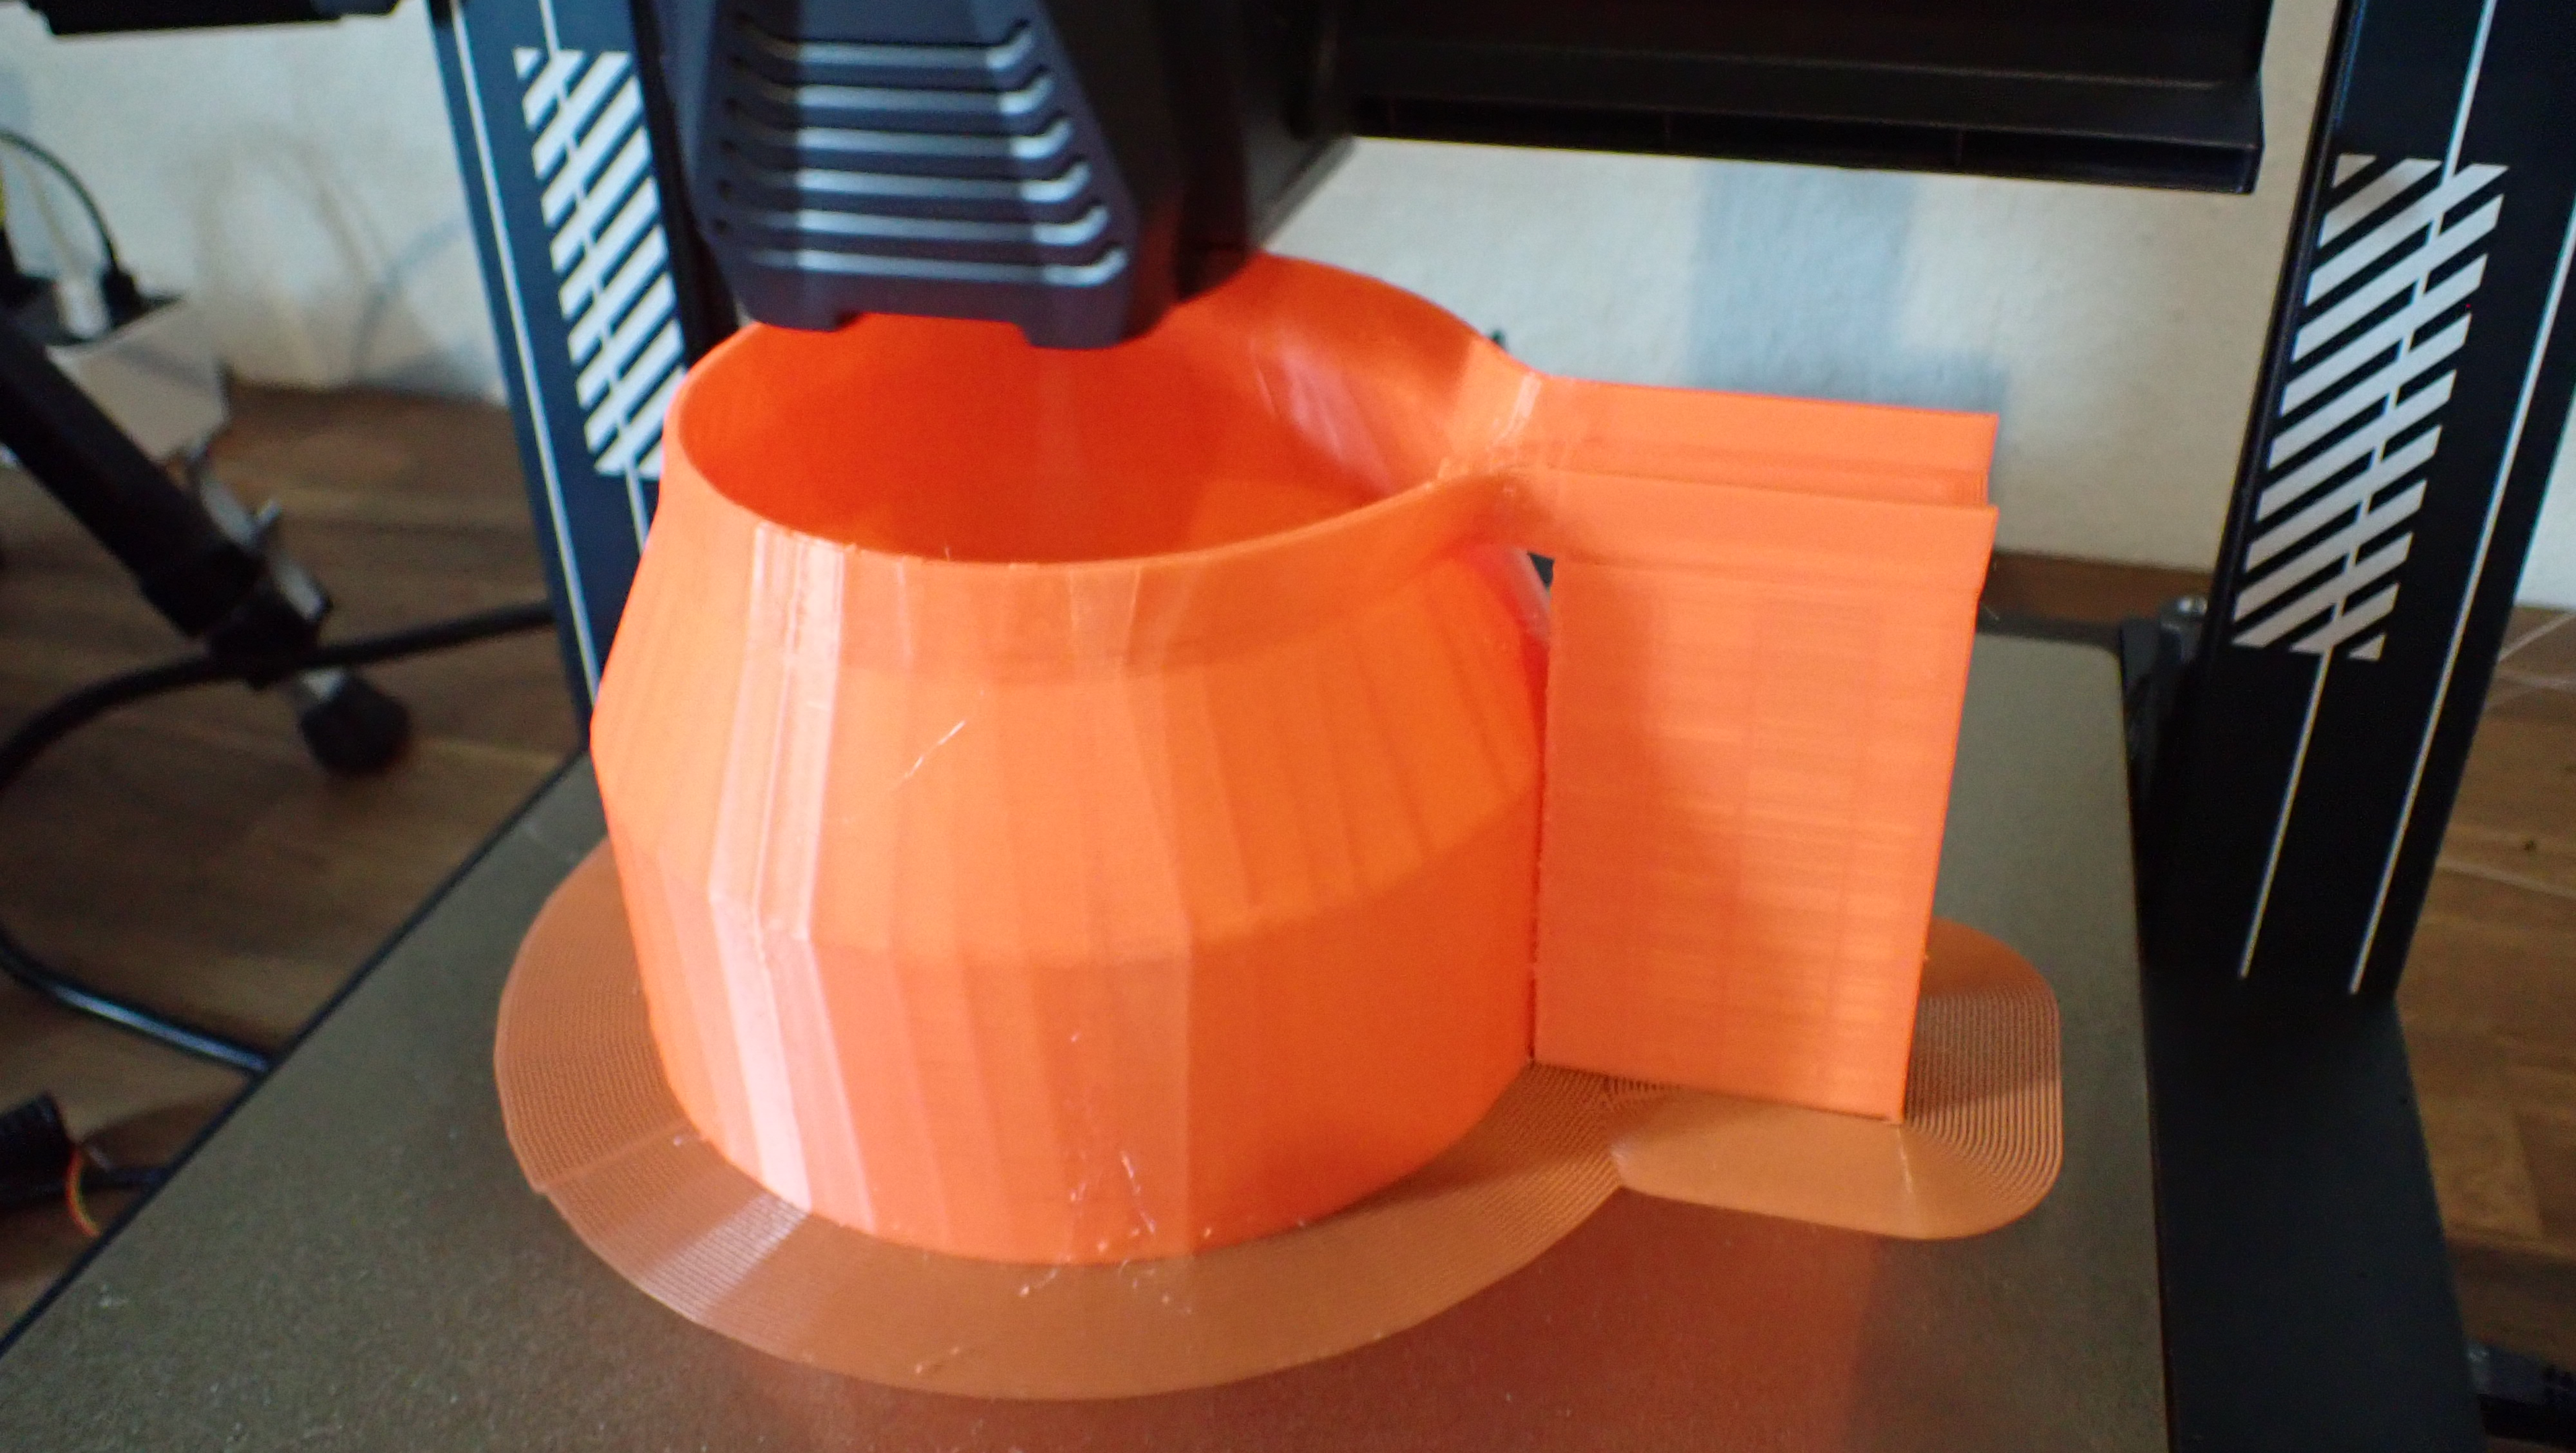
Another noteworthy aspect here is that you can print both a skirt and a brim. A skirt is mainly used to stimulate the filament flow so that the first layer of the actual print is printed correctly. However, since you are already 3D printing a brim outside the object, a skirt is redundant and unnecessary.
Brims in CrealityPrint
CrealityPrint is a Cura clone. You basically have the same brim settings to choose from.
But CrealityPrint has an “autobim” that adds a fitting brim when the slicer “thinks” it should be added. I don’t like these features because I want to have full control over these kinds of settings. But for some users, this might be precisely what they are looking for.
Brims in Bambu Studio
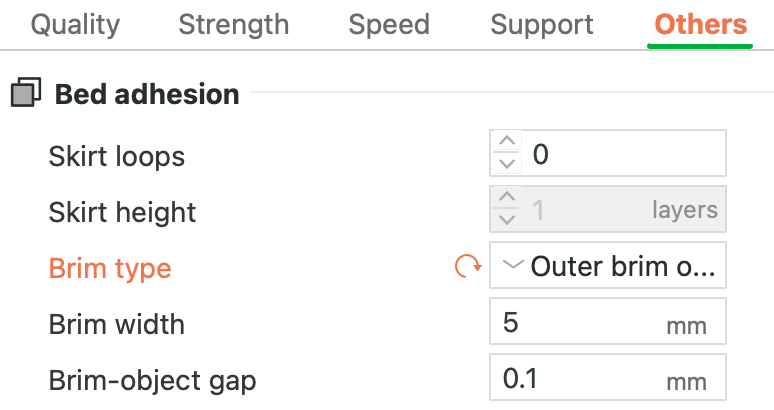
In Bambu Studio, you also have the most important brim settings: brim width, brim-object gap and the location (inner and/or outer edges).
Tips for Easy Brim Removal
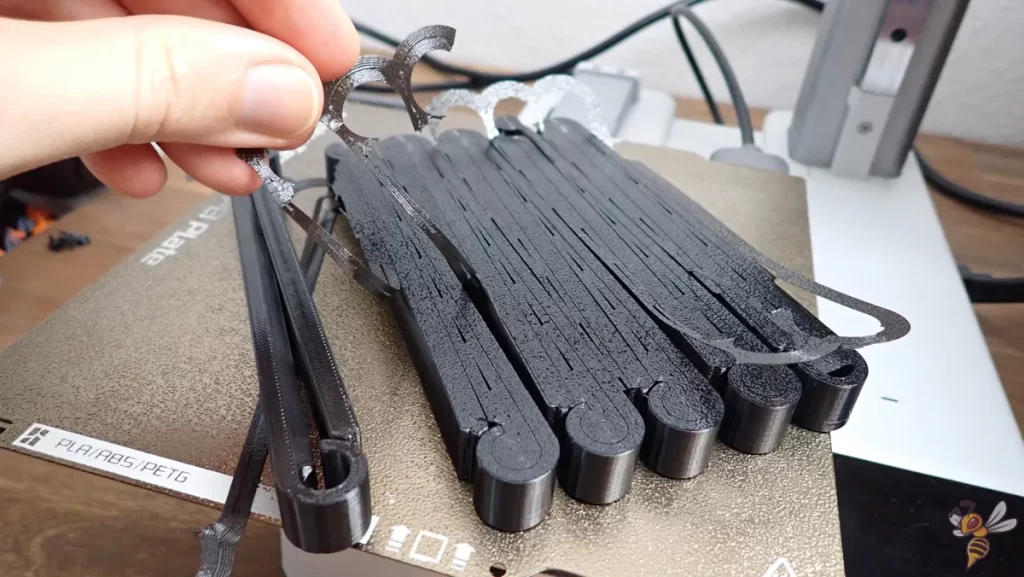
Removing a brim without damaging your print can be a delicate task, but with the right techniques and tools, it becomes much simpler.
Here are some tips to ensure a smooth brim removal process without ruining an otherwise successful print:
- Calibrate Brim Distance: The gap between the brim and your printed object, often called brim distance, is crucial for easy removal. A good starting point is a setting of 0.1 mm. Ideally, this should be calibrated through test prints. You can print either a small, simple object or just the first few layers of your actual project to determine the optimal brim distance. A well-calibrated brim distance allows the brim to provide necessary adhesion during 3D printing but ensures it can be removed without excessive force.
- Gentle Removal Techniques: To remove the brim, start by gently peeling it away from the edges. If you’ve set an appropriate brim distance, it should come off without too much effort and without residue. Be particularly careful with delicate parts or fine details, as they are more prone to damage. If the brim is stubborn, flex the print bed (if flexible) or gently use a scraper to lift the edges.
- Useful Tools for Brim Removal:
- Scrapers: A flat-edged scraper is a go-to tool for getting between the brim and the object.
- Tweezers: For finer prints, tweezers can be used to pull away small sections of the brim without applying too much force.
- Sandpaper: If there are small remnants or rough spots left after brim removal, fine-grit sandpaper can smooth these out.
- Cutting Tools: In some cases, a hobby knife or a pair of small scissors can be helpful to cut away the brim, especially in tight spots.
- Deburring Tool*: A deburring tool is an effective solution for removing brim residue from the initial layer.
Alternatives to a Brim
As mentioned earlier, there are some methods to improve poor adhesion that you should implement before using a brim. Here’s a rundown of these essential steps:
- Clean the Bed: Always start with a clean bed. Any residue, dust, or oils can significantly reduce adhesion.
- Level the Bed: A well-leveled bed is crucial for even adhesion across the entire print area.
- Adjust/Reduce the Z-Offset: Fine-tuning the Z-offset ensures the nozzle is at the optimal distance from the bed. This can greatly affect the first layer adhesion and overall print quality.
- Slow Down the First Layer: 3D printing the first layer slower, down to 5-10 mm/s, can significantly improve the bed adhesion. This slower speed allows the filament to bond better to the bed.
- Deactivate Cooling for the First Layer: Turning off the cooling fan for the first layer gives the hot filament more time to bond with the print bed.
- Increase Bed Temperature: A slightly higher bed temperature can improve filament adhesion. However, be careful not to set the temperature too high, as this can lead to other issues like an elephant’s foot.
- Print Thick Layers and/or Wide Lines in the initial Layer: Increasing the diameter of the printed lines makes them cool down slower because of the higher thermal mass.
- Use Mouse Ears: Mouse ears are small, circular “mini brims” placed at critical points on the first layer, especially around corners and edges. They provide localized adhesion support without the need for a full brim around the entire object.
- Use a Raft: When enabling a raft in your slicer, your 3D printer prints multiple layers under the actual object. This increases the contact surface and therefore the bed adhesion. But rafts take longer than brims, use more material and are often even more difficult to remove. If you want a smooth surface on the bottom of your printed part, a raft is a bad choice.
Conclusion
In closing, understanding and effectively using a 3D printing brim can be a game-changer in your FDM 3D printing journey. It’s a tool that, when applied correctly, significantly boosts the success rate of your prints, especially those prone to warping or detachment.
However, it’s equally important to recognize situations where a brim may not be necessary and to consider alternative methods for improving bed adhesion. Remember, the key to mastering 3D printing lies in experimenting and finding the right balance for each unique print.
Happy printing!
Disclosure: This website is the property of Martin Lütkemeyer and is operated by Martin Lütkemeyer. Martin Lütkemeyer is a member of the Amazon Services LLC and other Affiliate Programs. These are affiliate advertising programs designed to enable websites to earn advertising revenue through advertising and linking to Amazon.com and others. Links marked with * are affiliate links.
