
- Wet Filament: Prevention, Symptoms & Drying - July 18, 2024
- Sovol SV08 – Best PrusaSlicer Settings & Profile - June 26, 2024
- Sovol SV08 – Best Orca Slicer Settings & Profile - June 26, 2024
Disclosure: Links marked with * are Affiliate Links. I earn from qualifying purchases if you decide to make a purchase through these links – at no additional cost for you!
Print bed adhesion is one of the most important things in 3D printing. If the object does not adhere properly to the print bed, it will come loose and the job will have to be restarted. There are many ways to improve print bed adhesion and “mouse ears” are one of them (sometimes called “brim ears“).
In 3D printing, mouse ears or brim ears are small discs that can be added to critical areas of the object. They usually consist of only one or two layers and prevent the object from detaching from the print bed. They are an alternative to rafts and brims.
In this article, I’ll show you how mouse ears work in 3D printing, how to add them to your object and what alternatives you have.
Table of Contents:
Key Takeaways
- Mouse ears / Brim ears are small discs that greatly increase the print bed adhesion at the corners of an object.
- They are easier to remove after printing than a raft or brim.
- They can be added manually or by a suitable plug-in in the slicer.
What Are Mouse Ears in 3D Printing?
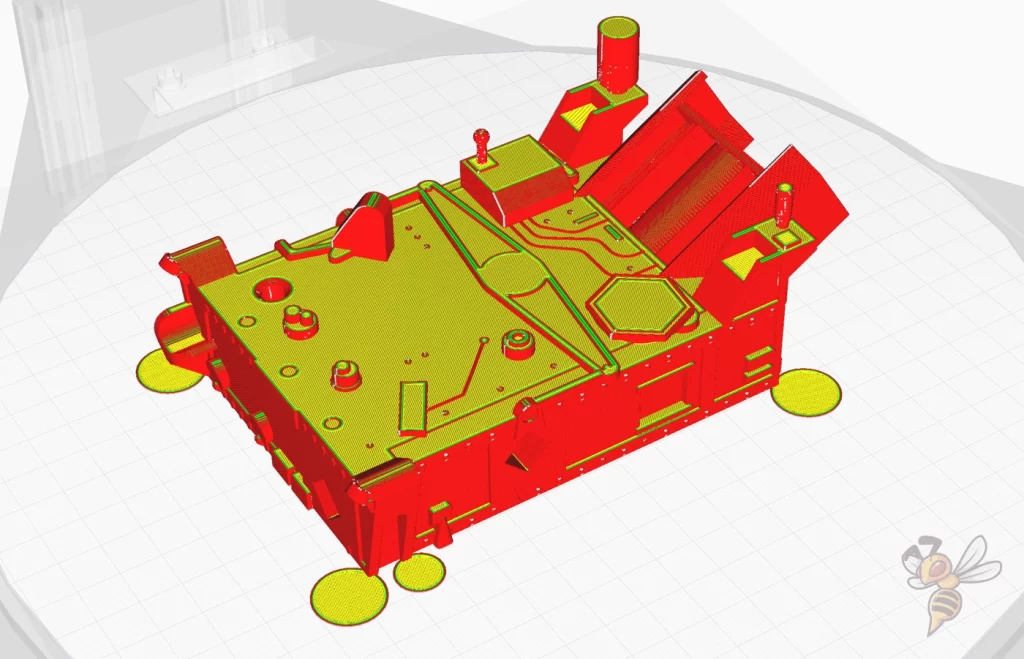
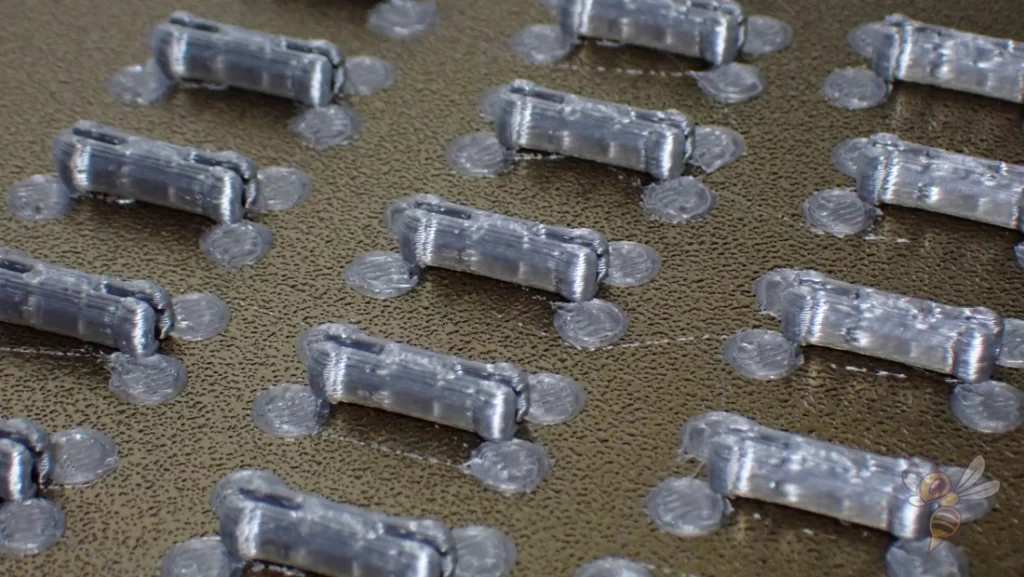
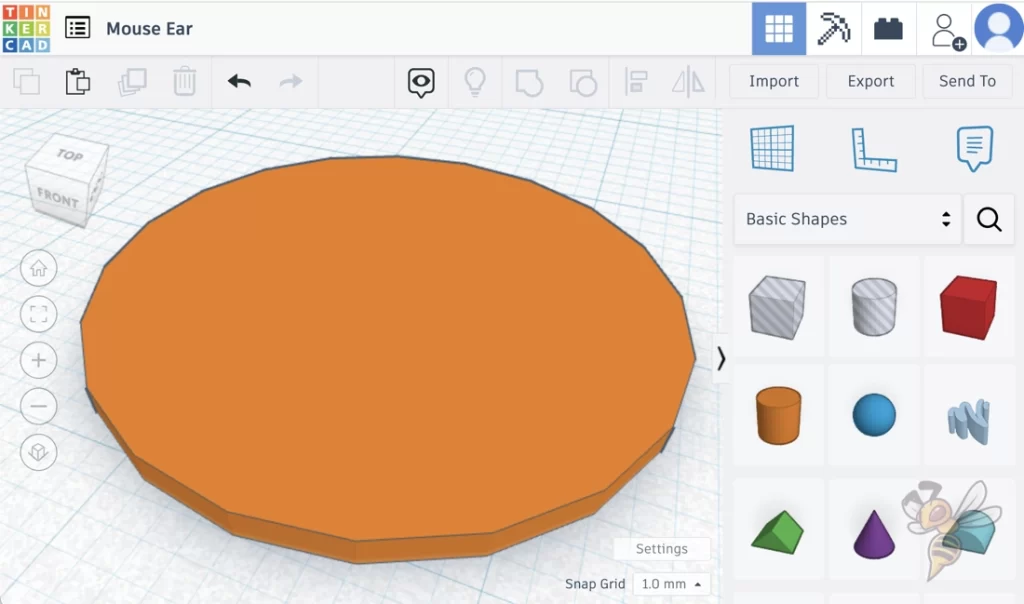
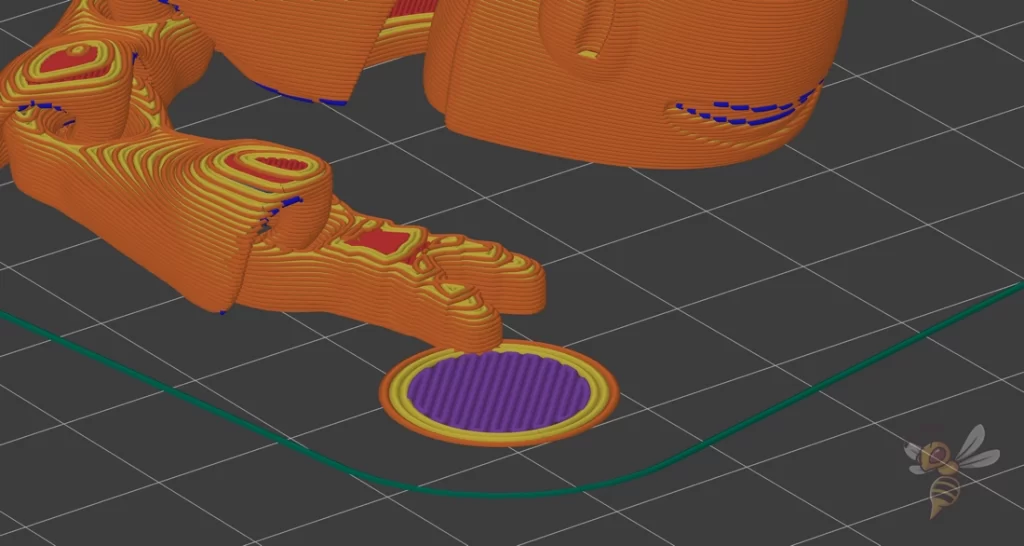
Mouse ears in 3D printing are small discs that consist of one to two layers of filament.
Theoretically, these mouse ears could have a geometry other than a circle. Hexagons or triangles would probably work too, but the round shape is the least likely to come off the print bed.
These discs are placed at the corners of an object to prevent those corners from lifting during the printing process. You can either place them after the fact, when you already know which corners are not sticking, or preventively.
The bigger the mouse ears are, the better they stick to the print bed. Sometimes it is better to place several small mouse ears. Since they require very little filament, you can be quite generous with the placement.
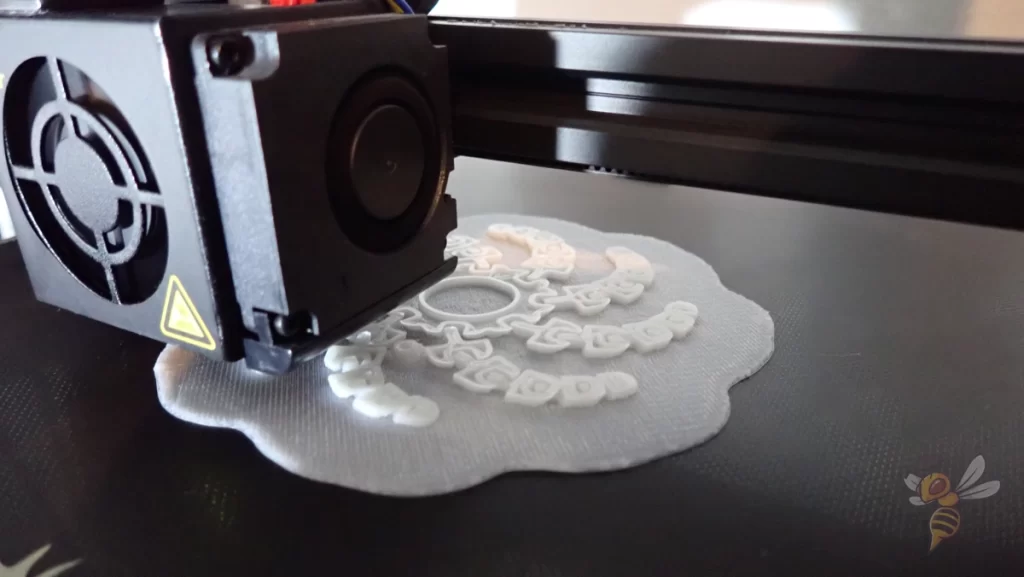
Mouse Ears Help Against Warping
Mouse ears are placed in 3D printing at corners that are particularly prone to warping. The lifting of these corners is mostly prevented by the mouse ears.
The print bed adhesion can be too poor for various reasons. Mostly either the combination of the filament and the print bed material is not ideal or the print bed temperature is too low.
One of the most common errors is a too large z-offset or a badly leveled print bed.
Some filaments, such as ABS for example, contract during cooling. Therefore, especially with such filaments, it is often the case that the object detaches from the print bed at the corners.
You can prevent this with mouse ears. They increase the contact surface between the object and the print bed. A larger contact surface also means a larger adhesive effect.
How Do I Add Mouse Ears in the Slicer?
Mouse ears can be placed on the object manually or via a slicer plugin.
If you want to add mouse ears manually, you need a suitable 3D object. You can create this yourself with Tinkercad or your CAD program of your choice and insert it into the slicer.
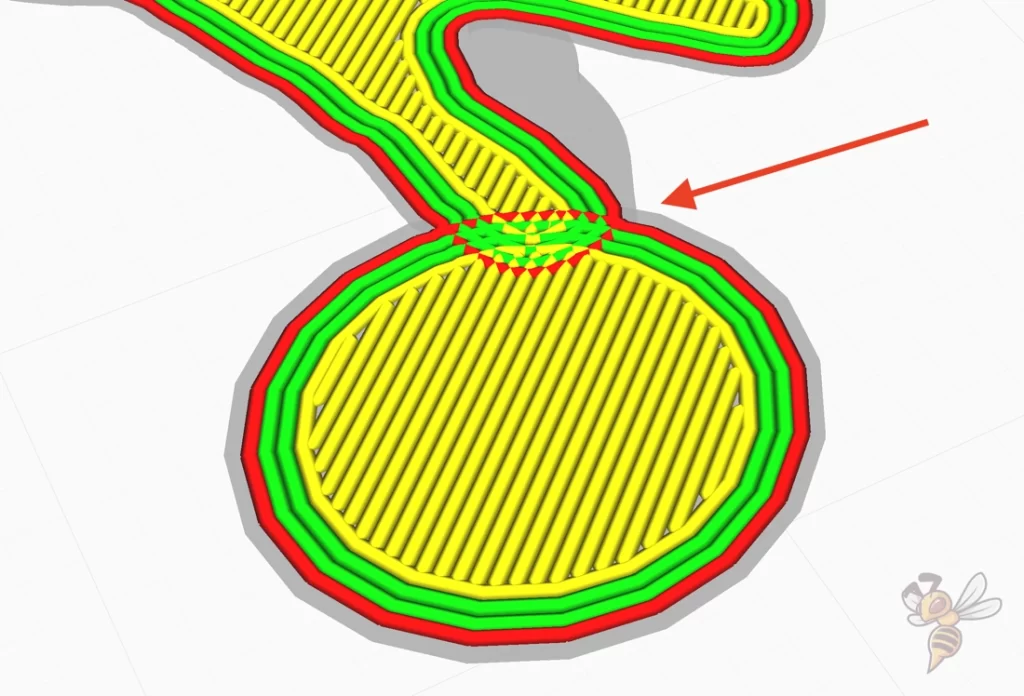
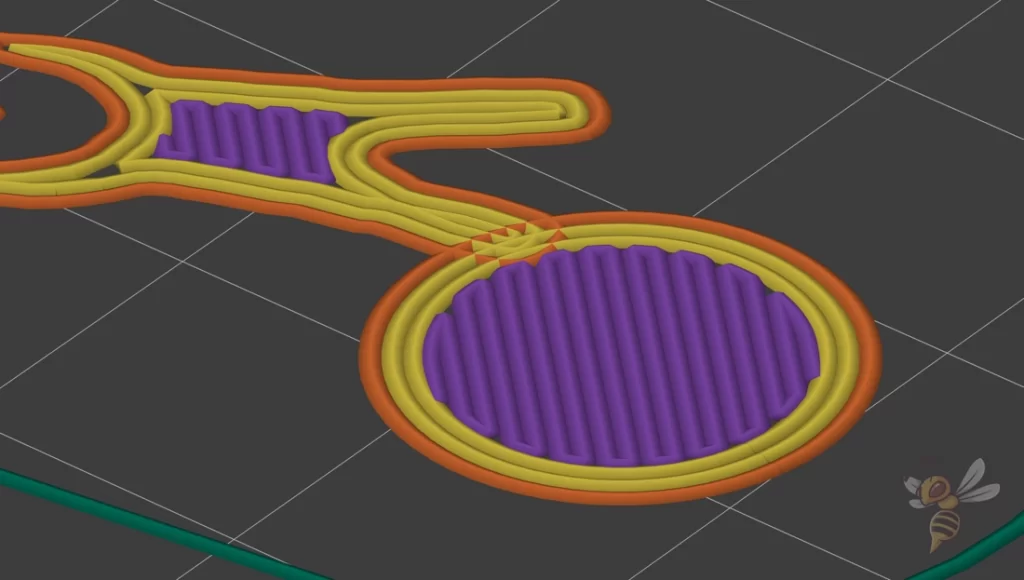
The problem with adding them manually is that with most slicers this causes the two objects to overlap, leading to collisions.
However, if the mouse ear consists of only one or a few layers and the overlapping areas are small, this is not an issue. The hot nozzle melts the existing filament and continues almost undisturbed. Only with larger overlaps, collisions can occur.
Therefore, for slicers that support such a thing, it is better to use a suitable plugin – like with Cura for example. Such plugins do not create overlapping layers. The object and the mouse ear just touch each other a bit. This makes it even better to remove.
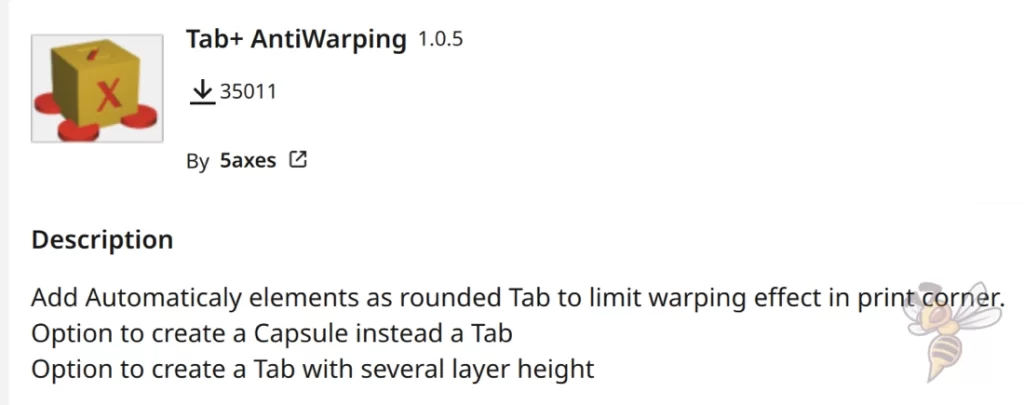
I have had good experiences with the Cura plugin Tab+ in the past. It is downloadable for free via the marketplace in Cura.
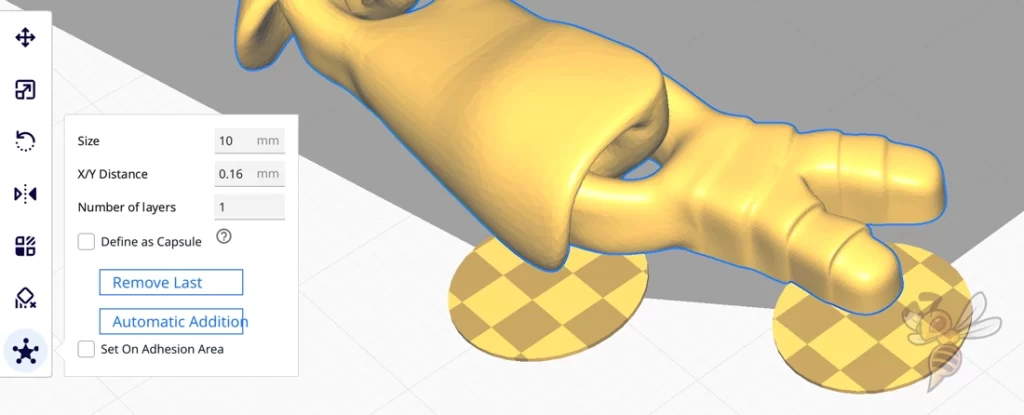
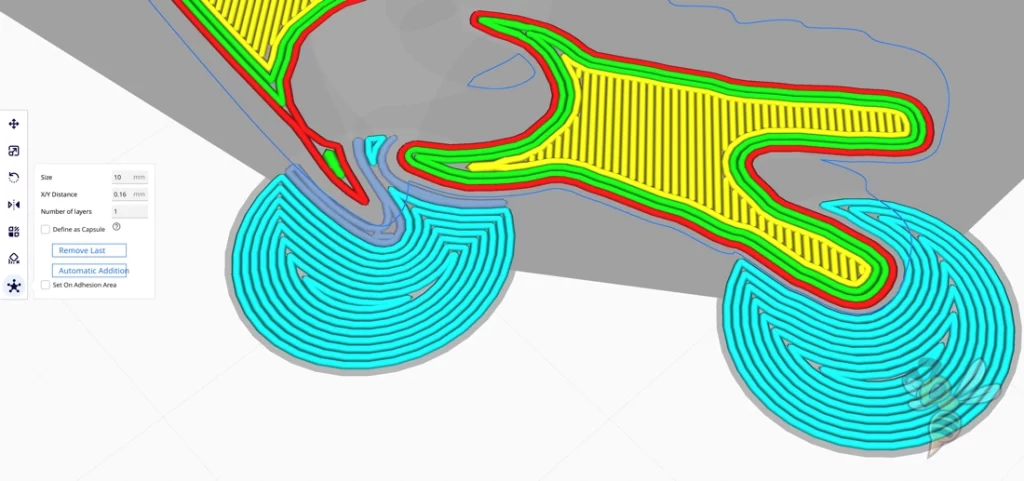
With this plugin, you can define the size of the mouse ears and their X/Y distance to the model. You can also set the number of layers and thus determine the height of the mouse ears. Usually one layer is enough.
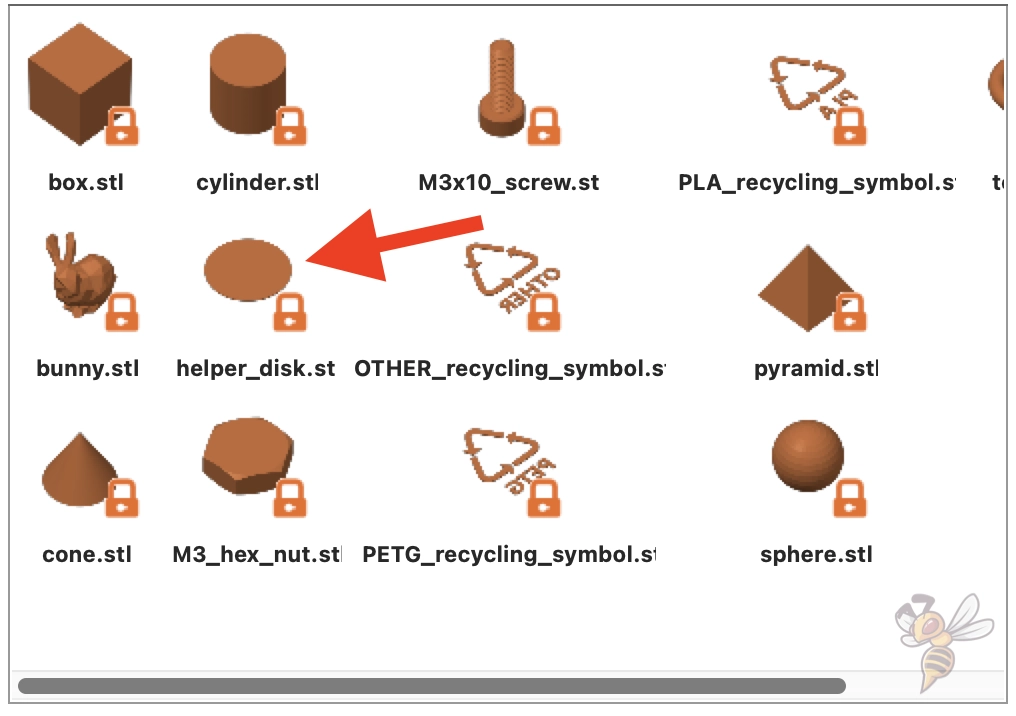
Other slicers like PrusaSlicer also have the function to insert simple shapes. There is even a “Helper Disc” in the shapes gallery. This shape represents a mouse ear or brim ear and is intended for just this purpose.
That means you don’t have to design an object yourself. But here, too, the two objects overlap. As with many things in 3D printing, you need to experiment a bit. A good start is a mouse ear of one layer and a minimal overlap.
Disadvantages of Mouse Ears
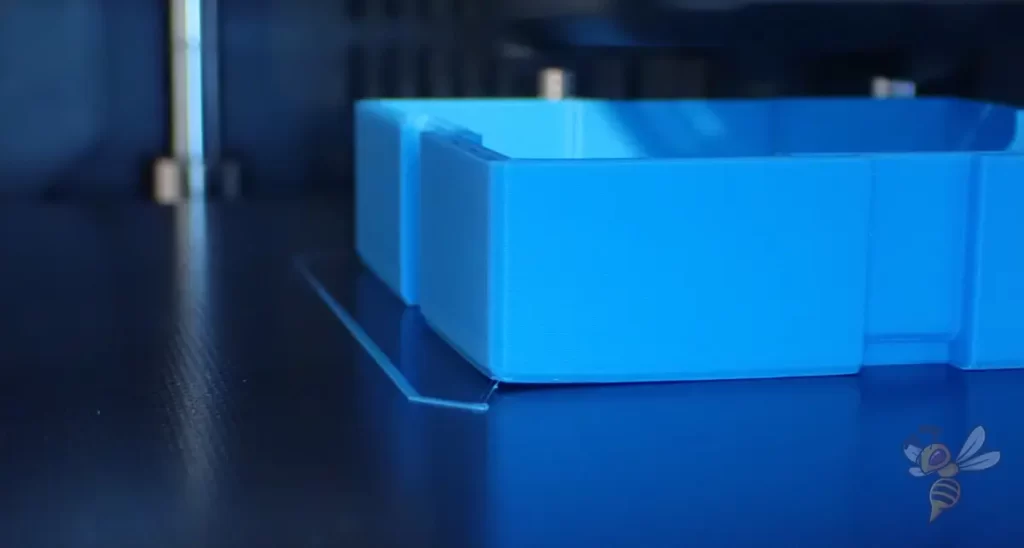
Just like brims or rafts, mouse ears / brim ears can leave marks on the object.
Especially when the mouse ears overlap with the object, the connection between object and mouse ear is stronger. This can lead more often to residues on the object than with non-overlapping mouse ears.
However, the marks left on the object are usually very minimal, as only the first layer is affected. When removing the mouse ears, you must also be careful not to remove more of the first layer of the object.
Mouse Ears or Full Brim?
Mouse ears only affect a few corners of the object, a brim outlines the entire outer skin of the 3D-printed object.
As a result, mouse ears leave much fewer traces and are easier to remove than a complete brim. Especially with bad Brim settings it can sometimes be impossible to remove it from the object without tools.
A brim would only be advantageous if mouse ears do not sufficiently increase the print bed adhesion. In my opinion, brims are one of the worst ways to increase print bed adhesion.
Before that, you should use a raft or better still have used all the methods from this article: 3D Print Not Sticking to the Bed: How to Fix it Step-by-Step
Mouse Ears or Raft?
With a raft, several layers are printed under the object and in a way form a new print bed surface for the object to be printed. The raft has a larger contact surface to the print bed and therefore also a better print bed adhesion than mouse ears.
Mouse ears generally create a little less print bed adhesion since they only target a few corners of the object, but they save a lot of filament and time compared to a raft.
So, before you use a raft, it would be advisable to try mouse ears. With a little practice or a suitable plugin, they can be attached to the object at least as quickly as a raft.
Conclusion: Can Mouse Ears be Useful in 3D Printing?
Mouse ears / Brim ears can definitely be useful in 3D printing to selectively increase print bed adhesion.
Often the print bed adhesion is insufficient for only part of the object. It is therefore often a waste of filament and time to use a raft.
Disclosure: This website is the property of Martin Lütkemeyer and is operated by Martin Lütkemeyer. Martin Lütkemeyer is a member of the Amazon Services LLC and other Affiliate Programs. These are affiliate advertising programs designed to enable websites to earn advertising revenue through advertising and linking to Amazon.com and others. Links marked with * are affiliate links.
