
- Wet Filament: Prevention, Symptoms & Drying - July 18, 2024
- Sovol SV08 – Best PrusaSlicer Settings & Profile - June 26, 2024
- Sovol SV08 – Best Orca Slicer Settings & Profile - June 26, 2024
Disclosure: Links marked with * are Affiliate Links. I earn from qualifying purchases if you decide to make a purchase through these links – at no additional cost for you!
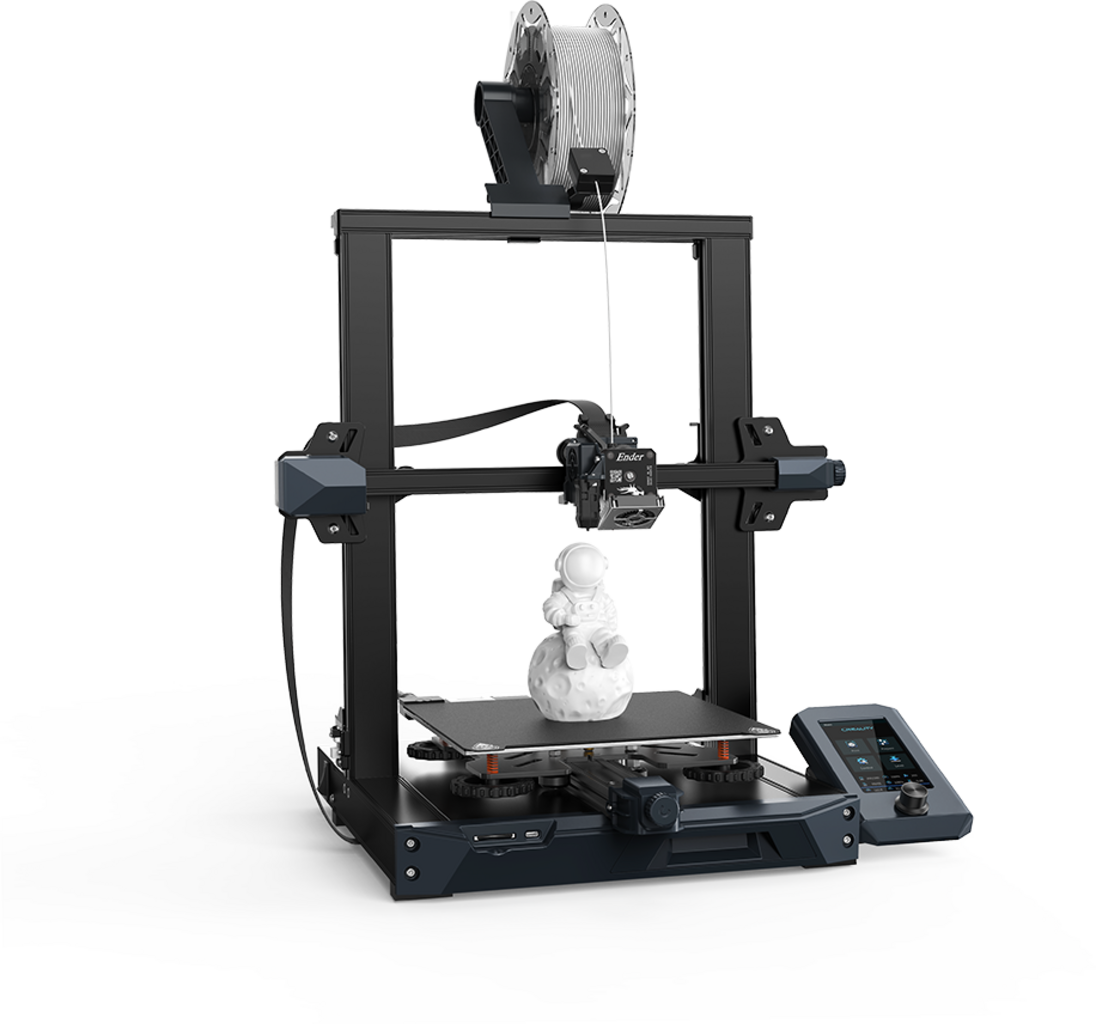
The Ender 3 S1* is the comprehensively improved version of the Ender 3 V2. The S1 is likely to be even more successful as it includes the most popular upgrades of the Ender 3 V2 out of the box, and in an improved form.
The Ender 3 S1 has a print volume of 220 x 220 x 270 mm, a direct drive extruder with very low weight and a magnetic flexible print bed with perfect adhesion. In its price range, it is by far the best FDM 3D printer at the moment.
Find out what makes the Ender 3 S1 so good, what features it has and what print quality you can expect with it in this detailed hands-on test and review.
Check Price at:
Table of Contents:
- 1 Key Takeaways
- 2 Who Should Buy the Ender 3 S1?
- 3 Advantages & Disadvantages > Ender 3 S1 Review
- 4 Technical Specifications > Ender 3 S1 Review
- 5 Scope of Delivery > Ender 3 S1 Review
- 6 Setup > Ender 3 S1 Review
- 7 Features > Ender 3 S1 Review
- 7.1 Dual Gear Direct Drive Extruder “Sprite”
- 7.2 CR-Touch Print Bed Leveling Sensor
- 7.3 32-bit Silent Motherboard + Quiet Fans
- 7.4 Easy Setup
- 7.5 Double Z-axis
- 7.6 Flexible Magnetic Print Bed
- 7.7 Filament Sensor
- 7.8 4.3-inch LCD Screen
- 7.9 Resume Print
- 7.10 Belt Tensioner
- 7.11 Room for Upgrades
- 7.12 High-Quality Design
- 7.13 Tool Drawer
- 7.14 SD Card Instead of Micro SD
- 8 Heating Times > Ender 3 S1 Review
- 9 Noise Level > Ender 3 S1 Review
- 10 Print Speed > Ender 3 S1 Review
- 11 Operation > Ender 3 S1 Review
- 12 Slicer > Ender 3 S1 Review
- 13 Print Quality > Ender 3 S1 Review
- 14 Ender 3 S1 vs. Ender 3 V2
- 15 Is the Ender 3 S1 Worth it?
Key Takeaways
- Best FDM 3D printer in its price range
- Reliable 0.1 mm accuracy with extremely rare print errors
- Direct drive extruder
- Magnetic, flexible print bed with perfect adhesion
- Perfect for beginners and advanced users
Who Should Buy the Ender 3 S1?
The Ender 3 S1 is suitable for beginners and experienced users alike. It delivers perfect results without much calibration effort and is very user-friendly. It is the best FDM 3D printer in its price range and is the evolution of several bestsellers.
Advantages & Disadvantages
> Ender 3 S1 Review
PRO:
- Excellent print quality
- Direct drive extruder
- Perfect print bed adhesion
- Double Z-axis
- Filament sensor
- Easy setup and operation
- Clever design and cable management
- Belt tensioner
- Tool drawer
CON:
- No touchscreen
Technical Specifications
> Ender 3 S1 Review
DEVICE
- Technology: FDM (Fused Deposition Modeling)
- Assembly: Partially pre-assembled
- Size: 487 x 453 x 622 mm
- Weight: 9.1 kg
- Frame Material: Aluminum
- Operation: 4.3-inch color LCD via a rotary knob
- Extruder: Direct drive (extruder sits directly over the nozzle in the print head)
- Print volume: 220 x 220 x 270 mm
- Accuracy: 0.1 mm
- Layer thickness: 0.05 – 0.35 mm
- Nozzle quantity: 1
- Nozzle diameter: 0.4 mm
- Max. Nozzle temperature: 260 °C
- Max. Print bed temperature: 100 °C
- Max. Print speed: 150 mm/s
- Filaments: PLA, ABS, PETG, TPU
- Filament diameter: 1.75 mm
- Print bed: PC on spring steel, flexible, magnetic
- Print bed leveling: Automatic (CR-Touch)
- Resume Print: Yes
- Filament Sensor: Yes
SOFTWARE
- Connectivity: SD card, USB
- File formats: STL, OBJ, AMF
- Slicer: Creality Slicer, Cura, Simplify3D, Repeat Host
Check Price at:
Scope of Delivery
> Ender 3 S1 Review
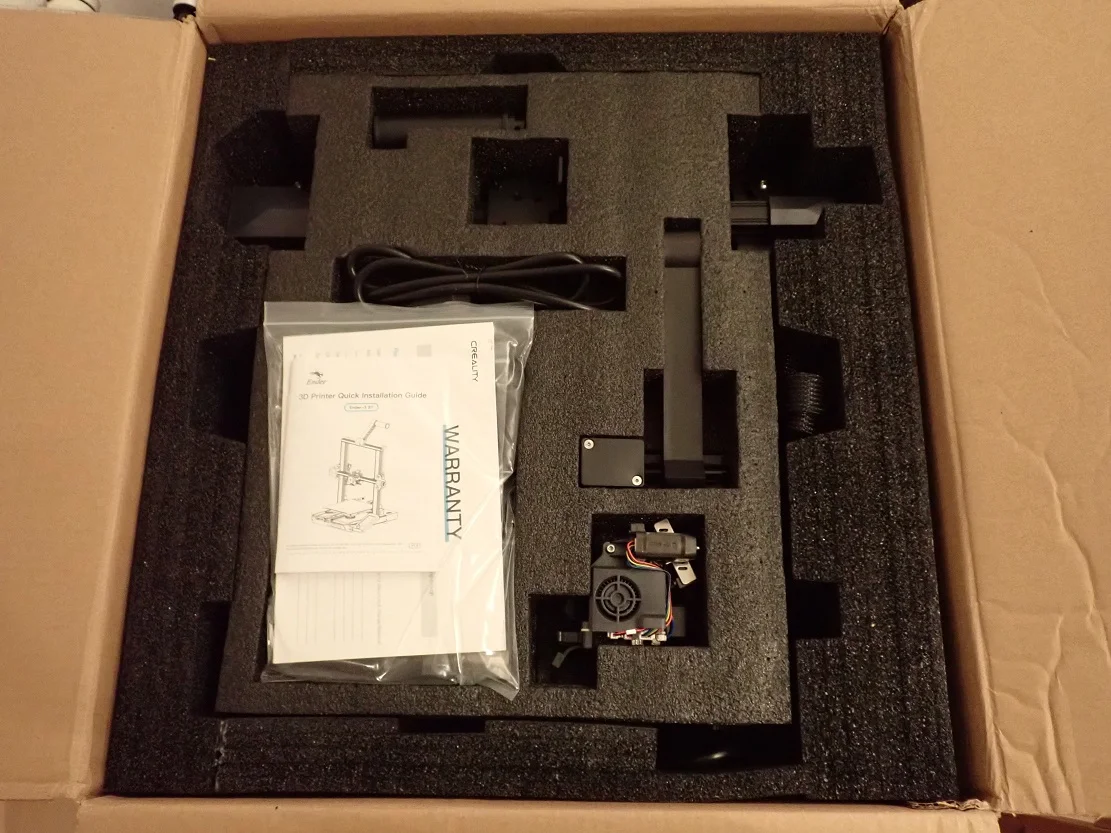

The Ender 3 S1 comes, as we are used to from Creality, with everything you need for your first test prints. You don’t need to buy any tools for the setup (since everything you need is included) or print bed adhesion tools like Blue Tape or Magigoo.
The only thing you should get in parallel to the Ender 3 S1 is more filament. The included PLA filament is only a sample and is just enough for a few test prints. I had very good results with the PLA filament from Eryone during this test.
Upon delivery of the Ender 3 S1, I was amazed at the small pack size of the package, although the fully assembled printer is not exactly small in itself. The individual parts are well protected and cleverly arranged in the package to save space. Someone at Creality is good at Tetris!
The following things are included in the scope of delivery of the Ender 3 S1:
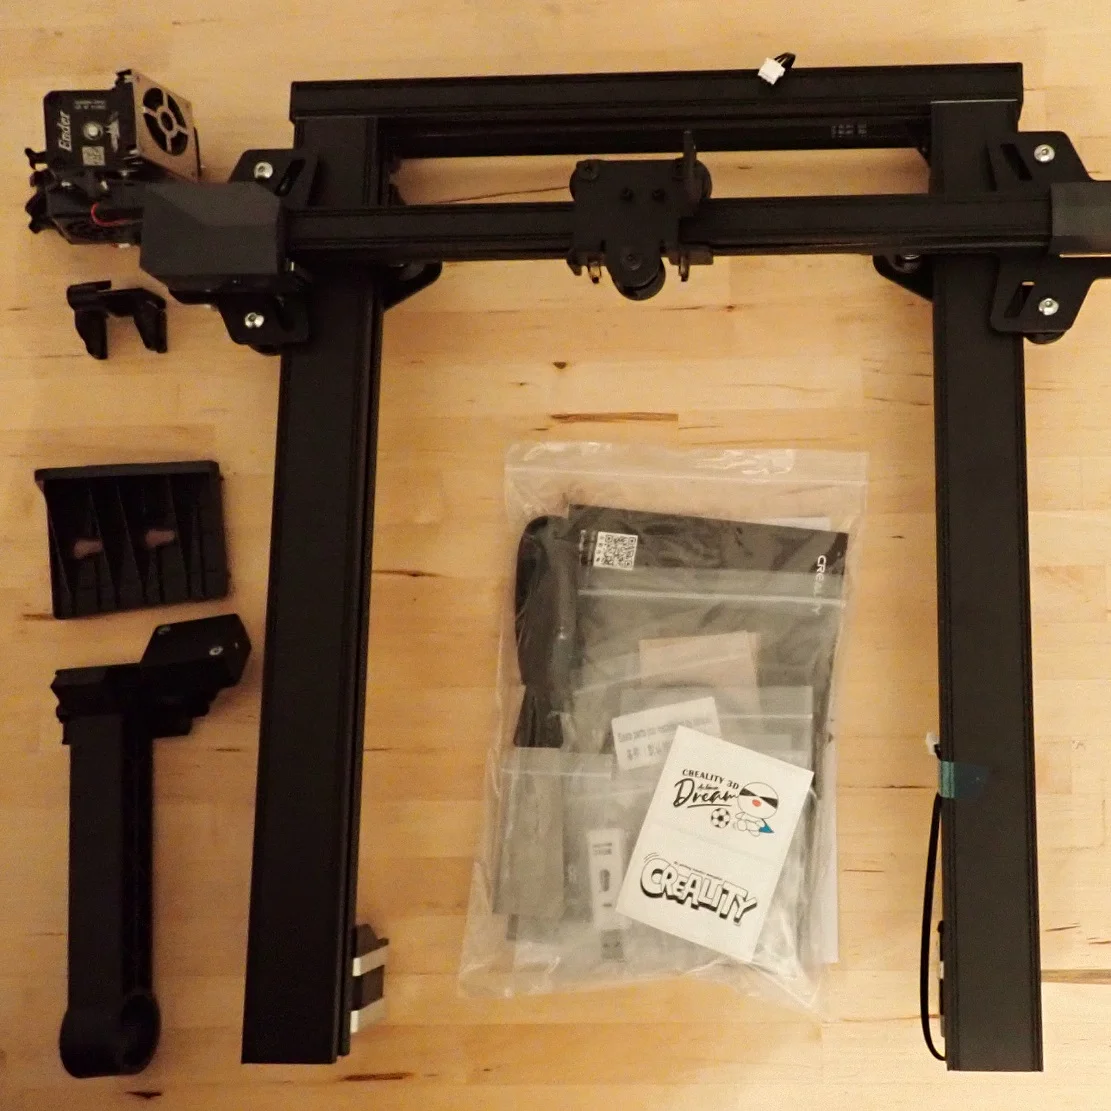
- Pre-assembled 3D printer:
- Base with print bed
- Printhead
- Frame with X-axis (the belt is already preassembled and tensioned)
- Display and display mount
- Filament holder
- Cable guide for the cables of the printhead
- Tools:
- Spatula (for removing filament residues on the print bed)
- Pliers (for cutting the filament)
- Small screwdriver
- Wrench
- Allen key
- Nozzle cleaner (long, thin needle)
- PLA filament sample
- Replacement nozzle
- Replacement Z end stop
- All necessary screws for mounting
- Power cable
- Adapter for USB and SD cards
- SD card:
- User manual
- Software and drivers
- Operation videos
- Pre-sliced models
Setup
> Ender 3 S1 Review
Unlike its predecessors, the Ender 3 S1 is almost completely pre-assembled. You only need to perform a few steps to fully assemble the 3D printer. Particularly critical parts, such as the toothed belts or the print head, are also already pre-assembled, which minimizes the risk of errors. Especially for beginners, the easy assembly is a big advantage.
The Ender 3 S1 is completely assembled after the following steps:
- Mounting the printhead on the X-axis: Mounting the printhead to the X-axis is pretty ingeniously solved by Creality. You can hook the printhead into the X-axis and then quite comfortably tighten the 4 screws to fix it.
- Mount the cable holder on the X-axis: To prevent the cable leading from the base to the printhead from coming into contact with the print, there is a cable holder on the X-axis. It is mounted by simply clipping it in place.
- Mount the frame with X-axis to the base: The frame is firmly mounted to the base with 2 long screws on each side. This construction has already proven itself with the predecessors and provides sufficient stability.
- Mount the display to the base: The display is simply inserted into the holder, which in turn is screwed to the base.
- Mount the filament holder: The filament holder is mounted on the upper end of the frame and already has the filament sensor. The sensor hangs somewhat loosely on the filament holder, but this is intentional so that it can adapt to the inclination of the filament.
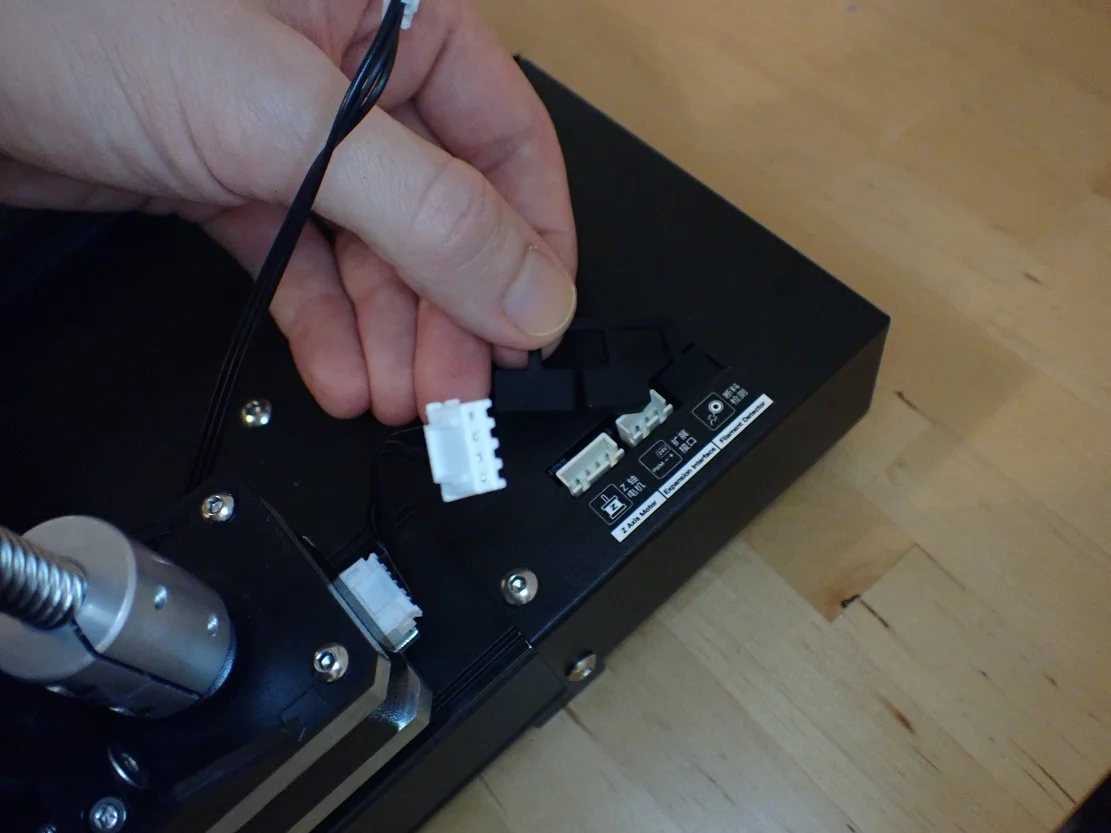
- Connect the cables: The last thing you need to do is connecting the cables. All cables are marked so that errors are not possible.
Print Bed Leveling
The print bed leveling of the Ender 3 S1 is done automatically by the CR-Touch leveling sensor. The CR-Touch looks similar to the BL-Touch but works slightly differently. Yes, it also mechanically senses the print bed, but there is an optical sensor inside, making it slightly more accurate than the BL-Touch.
This sensor allows the print head to independently sense where the print bed is located in three-dimensional space and can compensate for the inclination of the print bed during printing. This saves you a lot of time and gives you even more accurate results and better print bed adhesion.
Creality recommends in the operating instructions to use only the automatic print bed leveling. Only if the print bed tilt is so high that the CR-Touch can no longer compensate for it (more than 2 mm), would the manual leveling be used once.
However, I always like to level the print bed by hand at the beginning to get a good base. But this is also very easy with the large screws under the print bed.
Check Price at:
Features
> Ender 3 S1 Review
The Ender 3 S1* has learned from its predecessors in the Ender 3 series and especially from its direct predecessor the Ender 3 V2. All the popular upgrades that had to be retrofitted to the predecessor models are already built into the Ender 3 S1.
These include the direct drive extruder, the automatic print bed leveling and the flexible and magnetic print bed. But still, the Ender 3 S1 was designed in such a way that it is quite easy to install further upgrades.
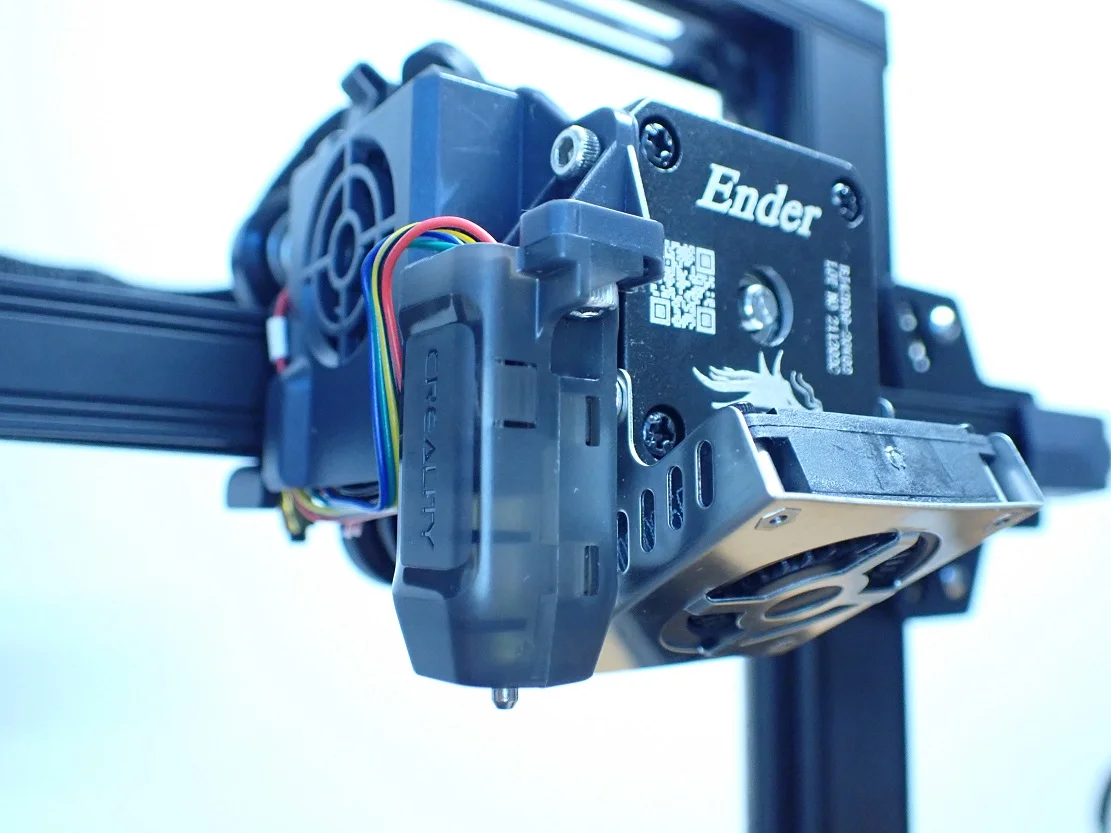
Dual Gear Direct Drive Extruder “Sprite”
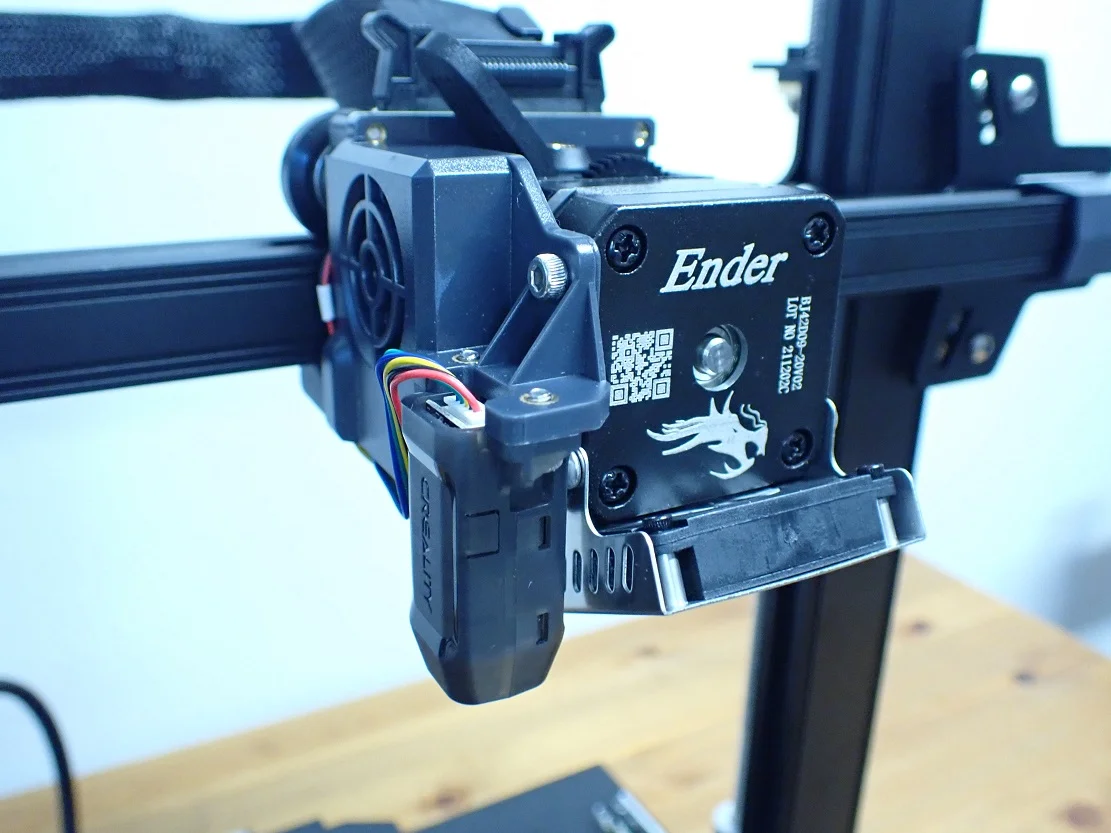
With a direct drive extruder, the extruder sits directly above the nozzle and not far away on one side of the X-axis as with a Bowden extruder. The advantage of this design is that flexible filament cannot get tangled on the way from the extruder to the nozzle. In addition, inflexible and flexible filament is generally extruded more accurately.
Due to the direct drive extruder, print quality is better and printing of TPU and other flexible filaments is greatly improved. The Ender 3 S1 is therefore very suitable for flexible filaments.
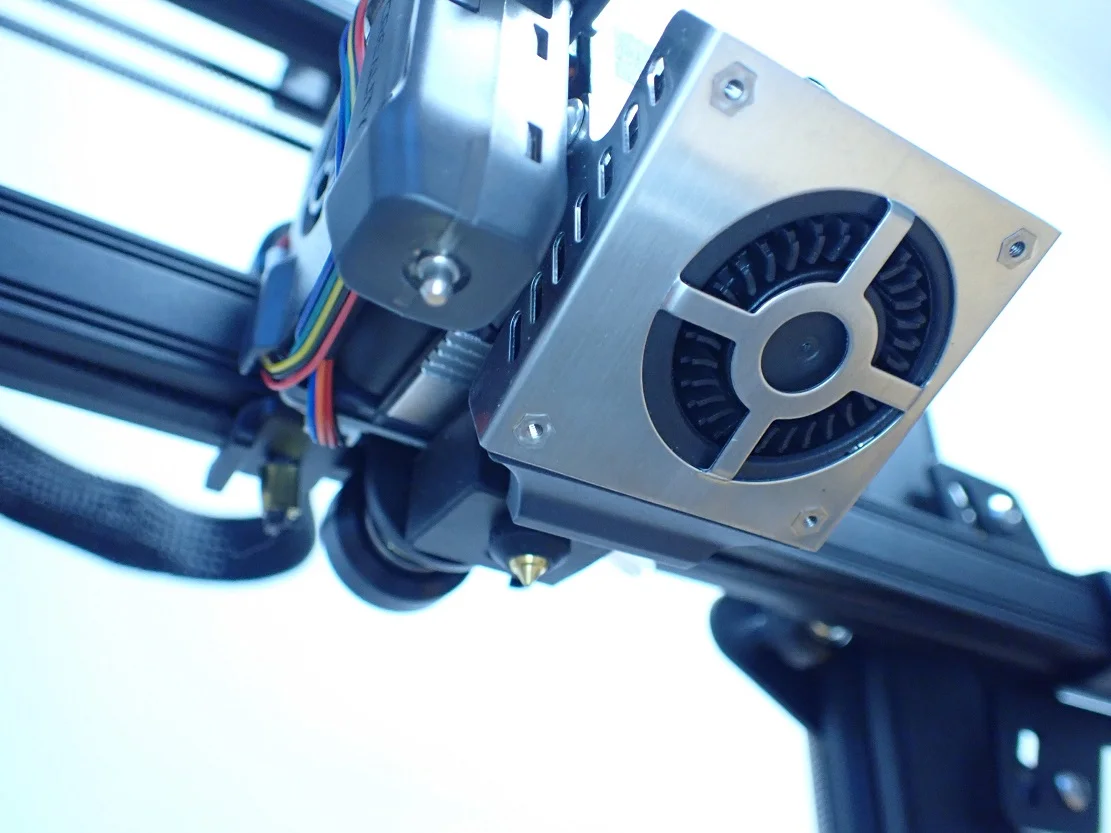
With a direct drive extruder, the weight of the printhead is essential and has been a disadvantage compared to Bowden extruders in the past. Since the printhead often makes jerky movements during printing, its inertial mass must not be too large. The larger the mass, the more vibrations occur during printing, which can lead to various printing errors such as ghosting or ringing.
However, the print head with the direct drive extruder of the Ender 3 S1 is extremely light with only 210g! This is really very good compared to other direct drive extruders and does not cause any vibrations during printing.
In the extruder itself, two gears feed the filament to the nozzle. This gives the extruder even more control over the filament. Inserting the filament and uncoupling the extruder is made very user-friendly by the lever on the side.
CR-Touch Print Bed Leveling Sensor

The Ender 3 S1 features a CR-Touch print bed leveling sensor. This sensor automatically levels the print bed, which automatically compensates for the inclination of the print bed during printing.
I am a big fan of the CR-Touch because it is extremely reliable and accurate. Compared to the popular BL-Touch, it is very sturdily built (metal pin instead of plastic) and the built-in sensor technology is more accurate (optical sensor instead of a Hall sensor).
The sensor is already mounted and wired to the printhead. You do not need to program it separately via the slicer or set it up otherwise. You can start the automatic print bed leveling via the menu at the touch of a button. In addition, the Ender 3 S1 automatically measures the Z-Offset before each print with the CR-Touch.
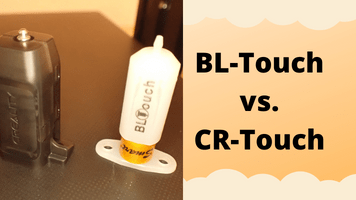
Detailed Comparison:
BL-Touch vs. CR-Touch | Comparison & Accuracy Test
32-bit Silent Motherboard + Quiet Fans
For most low-budget 3D printers, quieter fans and stepper motor drivers are among the most common upgrades. The Ender 3 S1 already has such quiet components built-in, giving it a noise level of only 34 dB. That is comparable to a whisper.
This low noise is a result of the 32-bit silent motherboard, the quiet stepper motor drivers and the high-quality fans. Even the fans in the print head are relatively quiet, even though they are very light. But they are the loudest parts of the printer.
Replacing a motherboard on a 3D printer is always a big challenge. Not only do all the cables have to be reconnected, but new software is also required. The motherboard is the heart of the 3D printer. Therefore, it is a great relief that you don’t have to do anything here at first. If you still have to do it at some point, there is a clear plan for all connections off the motherboard in the manual.
Easy Setup
Where the first 3D printers of the Ender 3 series were still complicated kits, the Ender 3 S1 is almost completely pre-assembled. To keep the packing size small, only the most necessary components are packed separately from each other.
The Ender 3 S1 can be assembled within a few minutes – there are only 11 screws in total that need to be fixed. Basically, you only have to mount the print head and the filament holder to the X-axis and the frame and the display to the base. In the end, you only have to plug the cables into the right places (which is easy due to very good labeling).
A very big advantage, especially for beginners, is that the belts are also already pre-assembled and tensioned. This makes the assembly of the Ender 3 S1 extremely fast and easy.
Double Z-axis
As already mentioned, vibrations can lead to various printing errors. To ensure reproducibly, high print quality, it is therefore important that the Z-axis is designed to be stable. But also the positioning of the X-axis by the stepper motors of the Z-axis must be as accurate as possible.
This is best ensured by a double Z-axis. This means that vibrations no longer have a chance to occur and the positioning accuracy is increased. The Ender 3 S1 is the first 3D printer in the Ender 3 series to feature a dual Z-axis. Even its direct predecessor, the Ender 3 V2, has only a single Z-axis. With only one Z-axis, layer shifts and other defects are much more likely.
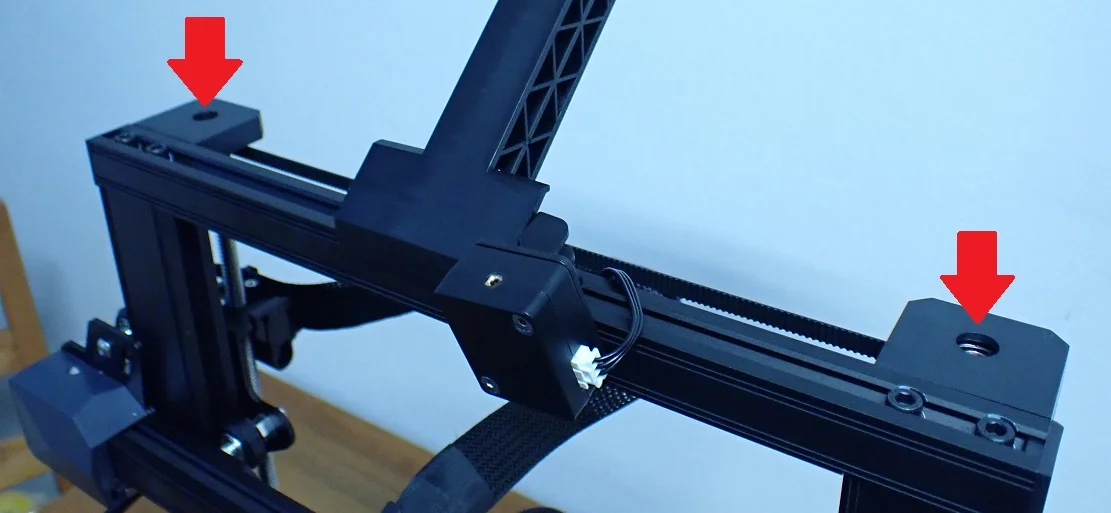
The upper ends of the two Z-axes are fixed by already pre-mounted brackets. This reduces vibrations even further. These brackets were a popular self-printable upgrade on previous Ender 3 series 3D printers.
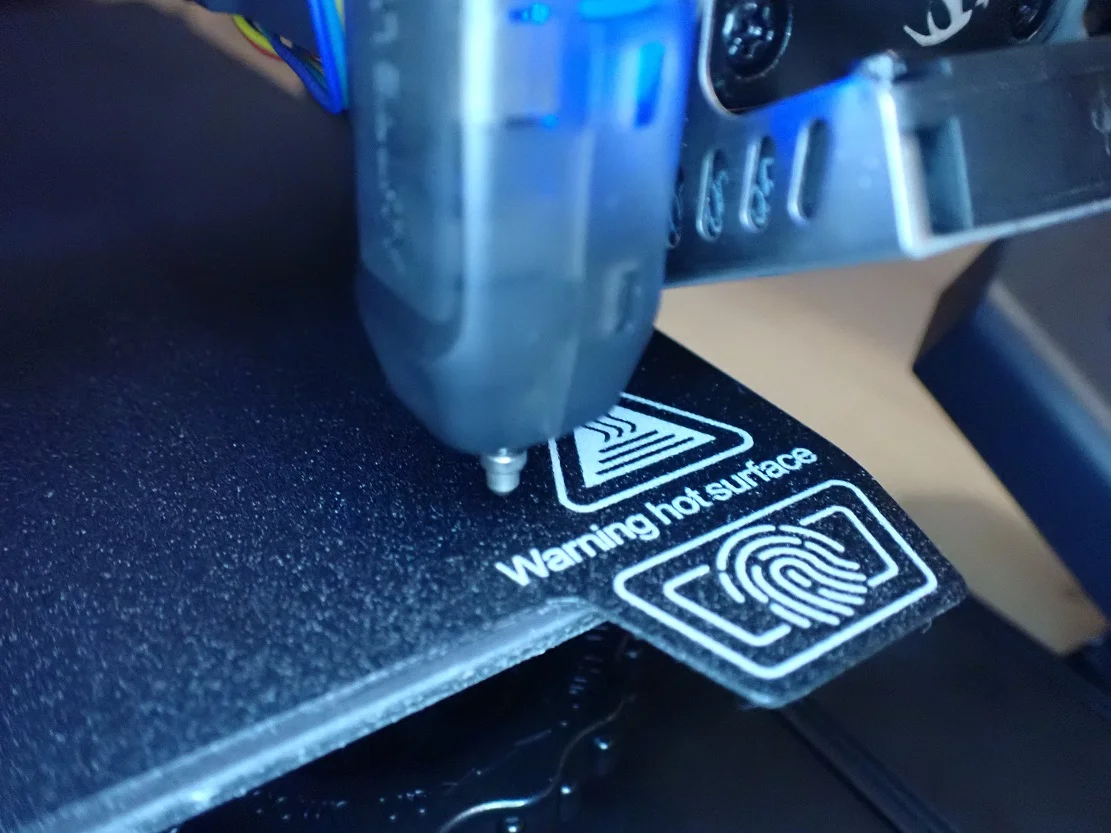
Flexible Magnetic Print Bed
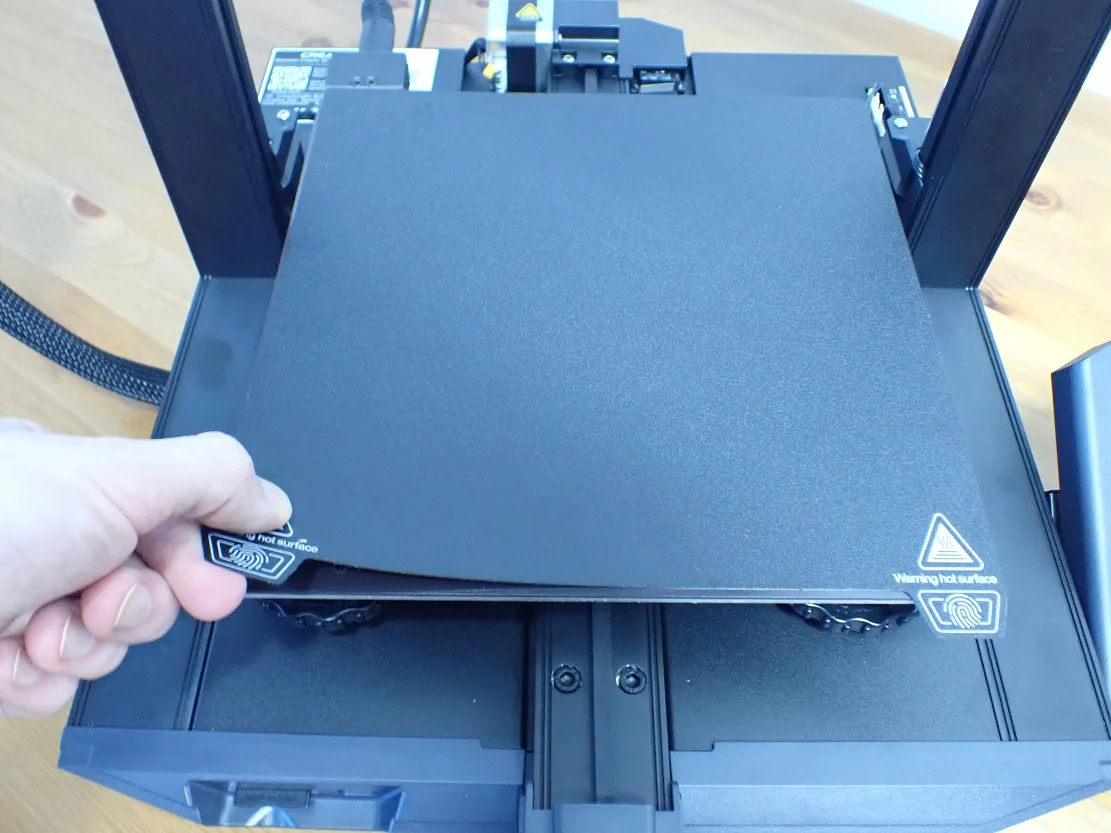
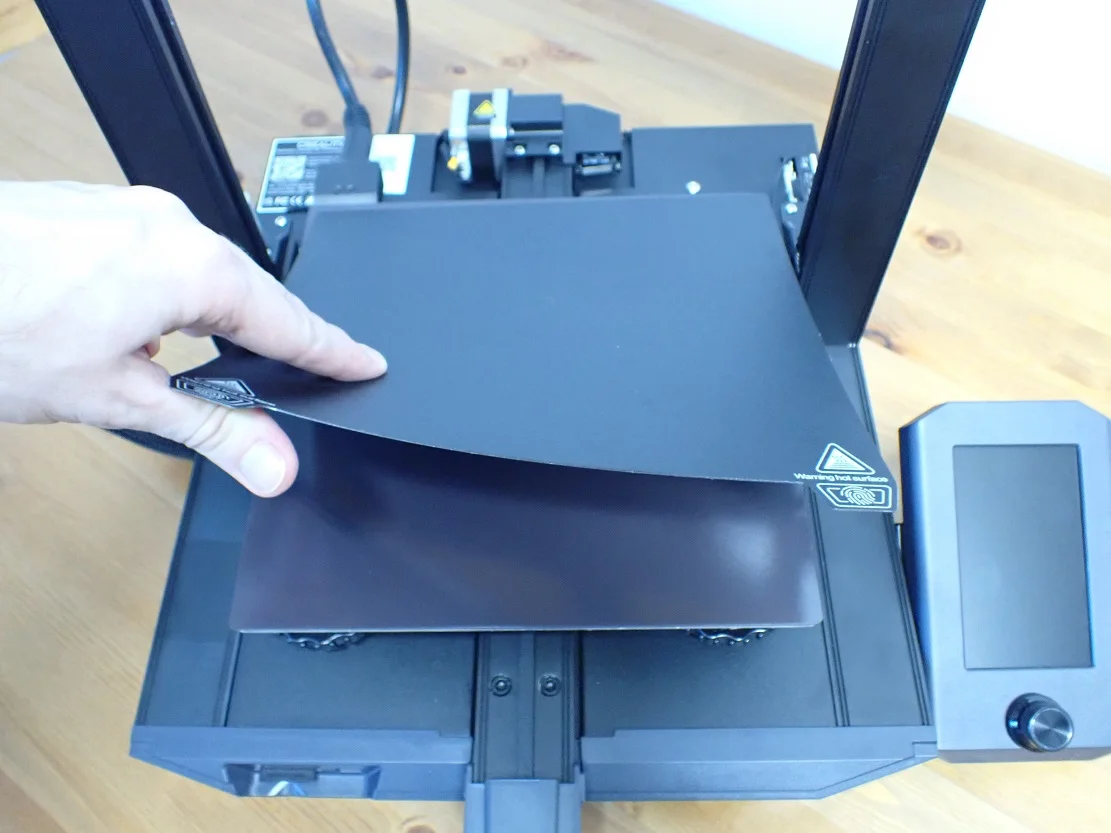

The print bed of the Ender 3 S1 is perfect! After all the 3D printers I have tested so far, I have never experienced such a practical and well-adhering print bed. And the print bed adhesion is not too extreme – the print bed of the Qidi Tech X-Max, for example, is such that it is even difficult to remove the print from the print bed afterward.
Even the smallest and most delicate first layers hold perfectly on the print bed. Not once has the print bed adhesion been too poor and I have never had to use Blue Tape or Magigoo.
The print bed is also flexible and can be easily detached from the printing plate due to magnetization. This makes it very convenient to detach the finished object from the print bed. The cooled filament is no longer so easy to bend (except for flexible filaments, of course), which means that the object comes off virtually by itself as soon as you bend the print bed.
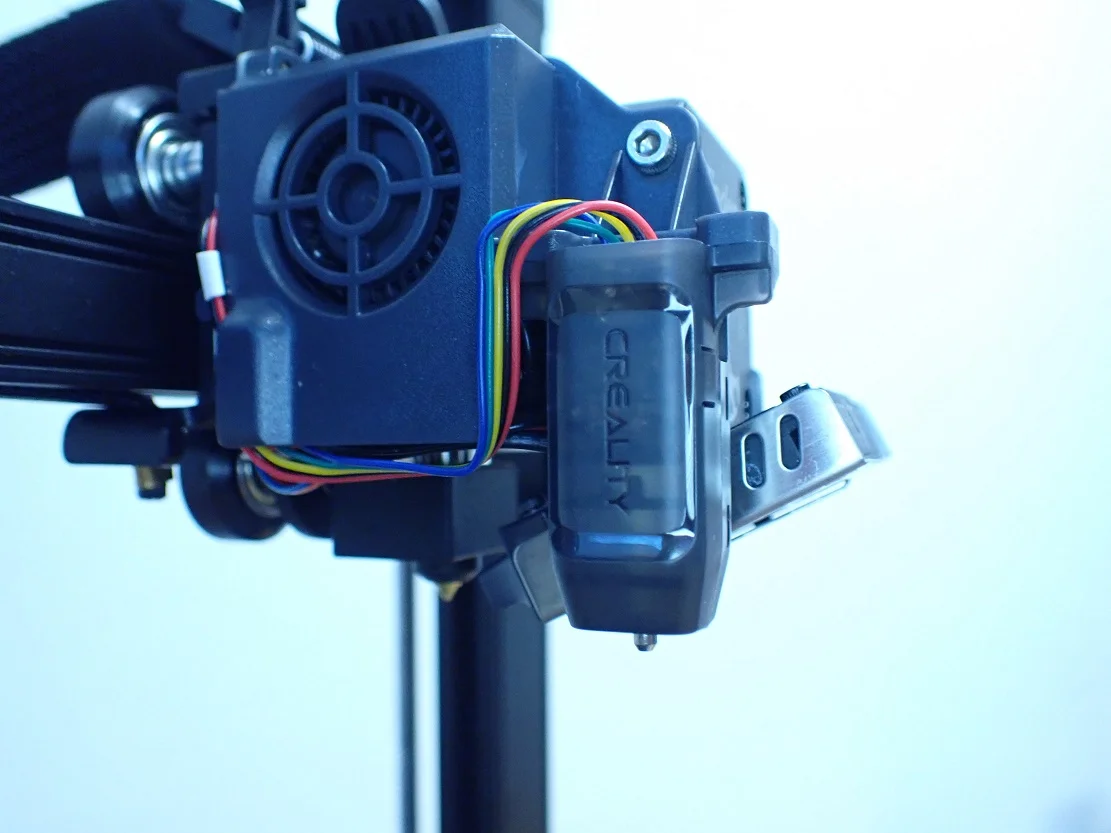
Filament Sensor
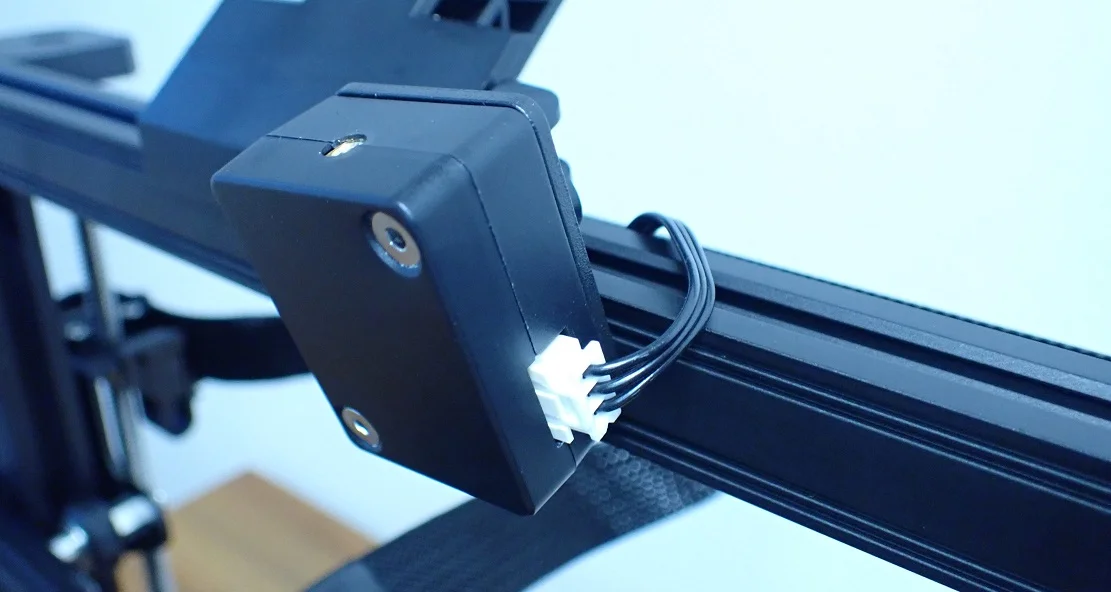
A filament sensor warns the 3D printer when it detects no more filament. If your filament spool runs out during printing, the Ender 3 S1 will stop printing so you can change the filament.
At first glance, the filament sensor of the Ender 3 S1 is a bit strange, as it is loosely mounted on the filament holder. However, this is not a defect, but intentional. The loose mounting allows the filament sensor to adjust to the direction of the filament to ensure smooth guidance of the filament from the spool to the extruder.
The cable for the filament sensor is already routed in the frame upon delivery. You only have to plug one end into the filament sensor and the other into the printer base. This keeps the design very tidy and the cable cannot get tangled with the axes.
4.3-inch LCD Screen
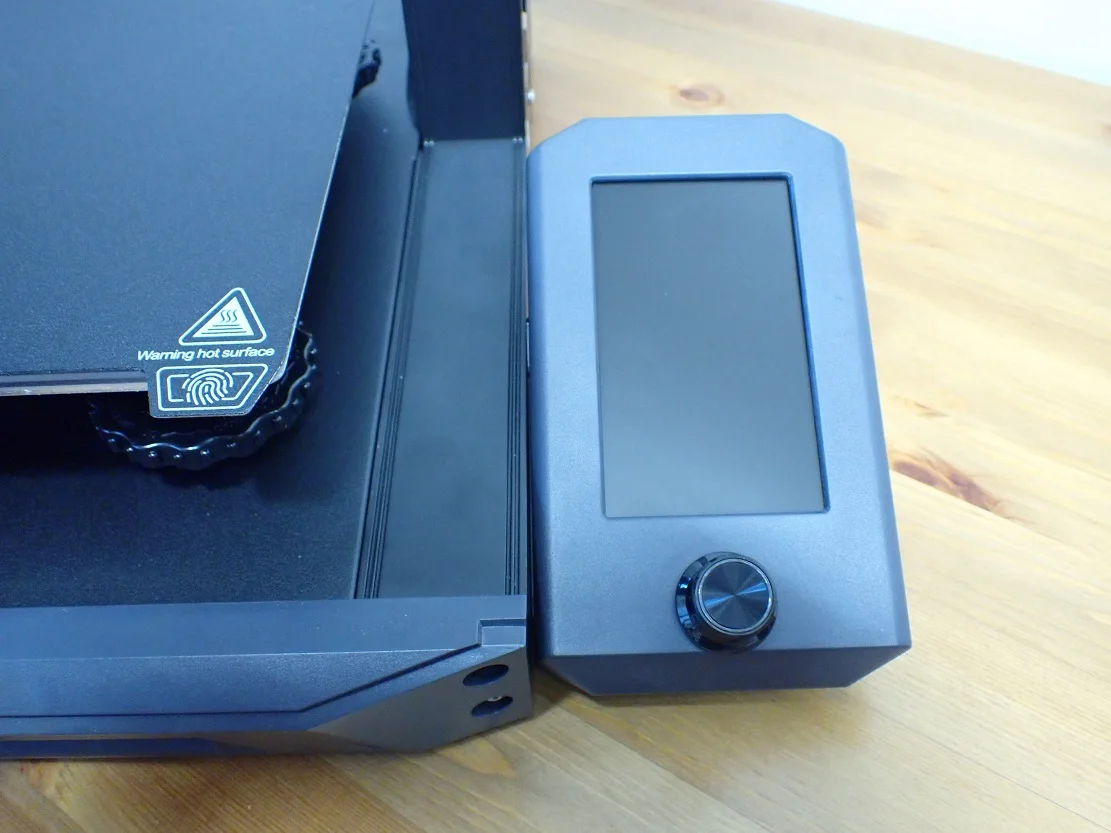
The display of the Ender 3 S1 is the same as that of the Ender 3 V2. It has proven itself with users and is large enough to display all options and texts in a pleasant size. Unfortunately, the LCD screen is not a touchscreen but is operated via a rotary knob. However, this does not slow down the operation much.
The menu navigation is very user-friendly. All important options can be accessed via the rotary knob in just a few steps. There are also preset temperatures for different filaments to quickly preheat the 3D printer to the required temperature. The leveling is also very well represented in the menu and all functions such as setting the Z offset or manually moving the axes are available.
Resume Print
The Resume Print feature has become a standard feature on modern 3D printers. This feature allows the Ender 3 S1 to resume printing at the exact point where it was interrupted by an unplanned power failure.
I tried this feature by manually disconnecting the power. As long as the 3D printer is not printing on the outside of the object, you will not see any defects when it resumes.
However, if it has been interrupted exactly when printing a wall, a blob or other protruding filament could remain. However, a small blob or some protruding material can easily be smoothed out with sandpaper.
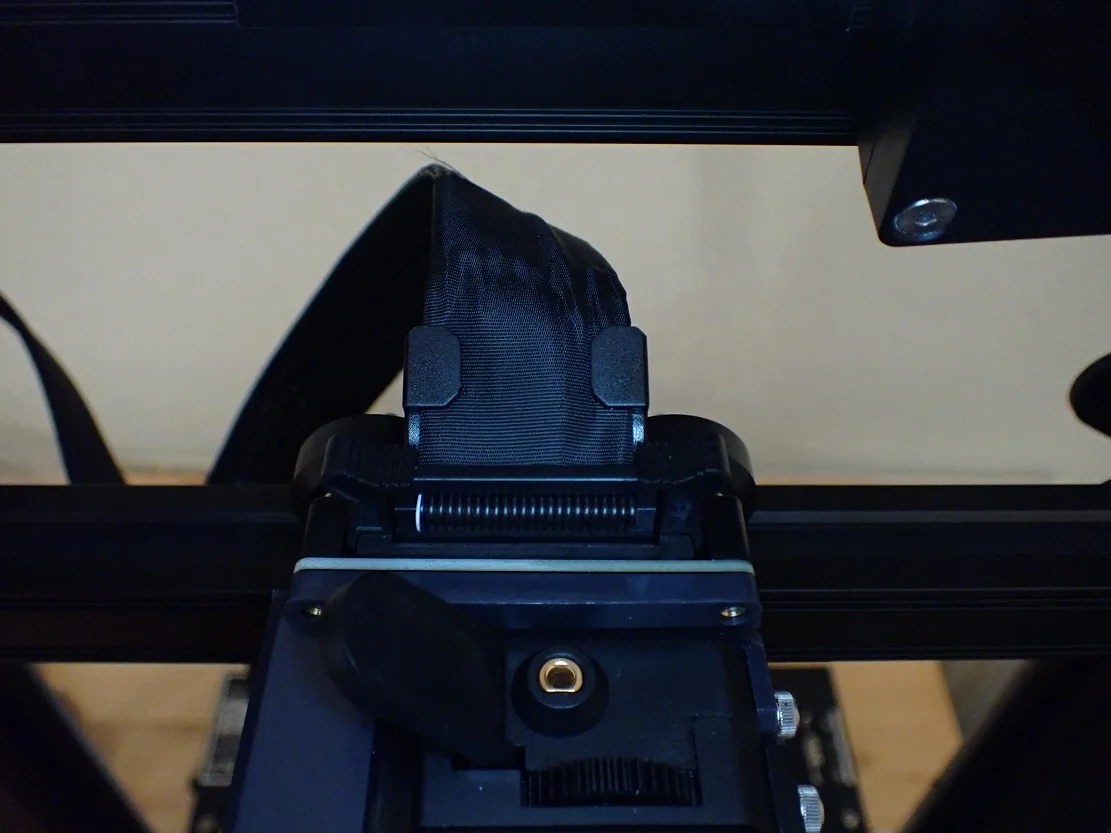
Belt Tensioner


The tension of the belts must be set correctly so that vibrations or displacements do not occur. However, the tension must also not be too high, so that the belt cannot tear in the long term. Setting the tension correctly is quite complicated without a belt tensioner since you have to completely disassemble the axle each time to get to the timing belt.
The Ender 3 S1 has convenient timing belt tensioners on both timing belts (on the Y-axis of the print bed and the X-axis of the print head) that allow you to easily adjust the tension.
The tension of the timing belt is set correctly when the belt makes a high-pitched sound when you flick it with your finger. It should still give slightly and not be too tight.
Room for Upgrades
Creality has left room for upgrades on the Ender 3 S1. With any 3D printer in the Ender 3 series, upgrades that can be purchased or printed are very popular, as many users prioritize not only the printing itself but also the technical perfection of the device in their hobby.
The Ender 3 S1 has slots for LEDs and a laser engraving module that can be hooked and mounted on the X-axis instead of the print head. The easy mounting of the print head also offers the possibility to replace it with other modules quite fast. I am very curious to see which modules Creality will come up with in the future.
I’m also very excited to see what DIY upgrades the community develops for the Ender 3 S1. In its condition right out of the box, it is already extremely well equipped, so I can think of very few essential upgrades.
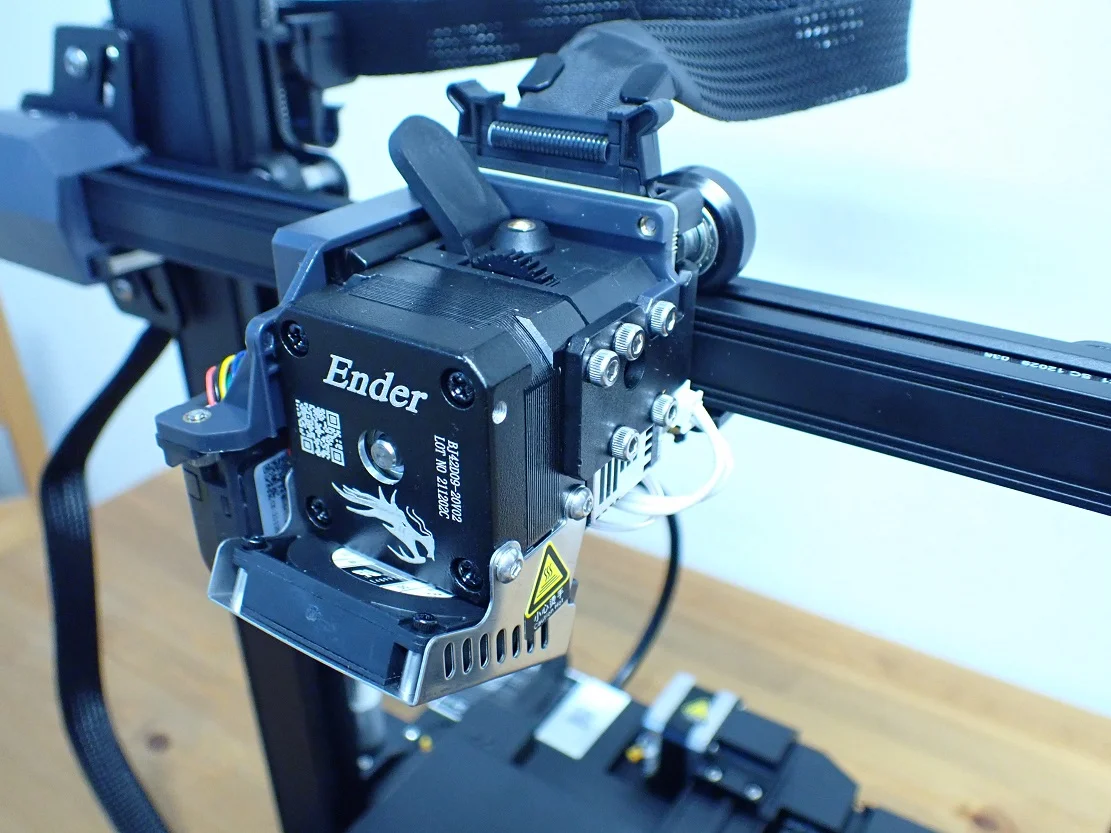
High-Quality Design
The first Ender 3 was a classic kit that looked extremely spartan and came with only the bare essentials. The Ender 3 S1 is not only ahead of it in terms of features, but also in design, which makes it a complete and user-friendly product.
Besides the ingeniously designed extruder, other parts of the 3D printer are also very cleverly designed to realize the highest functionality with low cost and a high-quality design. This can be seen, for example, in the unconventional yet very effective filament sensor, the X-axis hood and the front of the printer base.
Tool Drawer
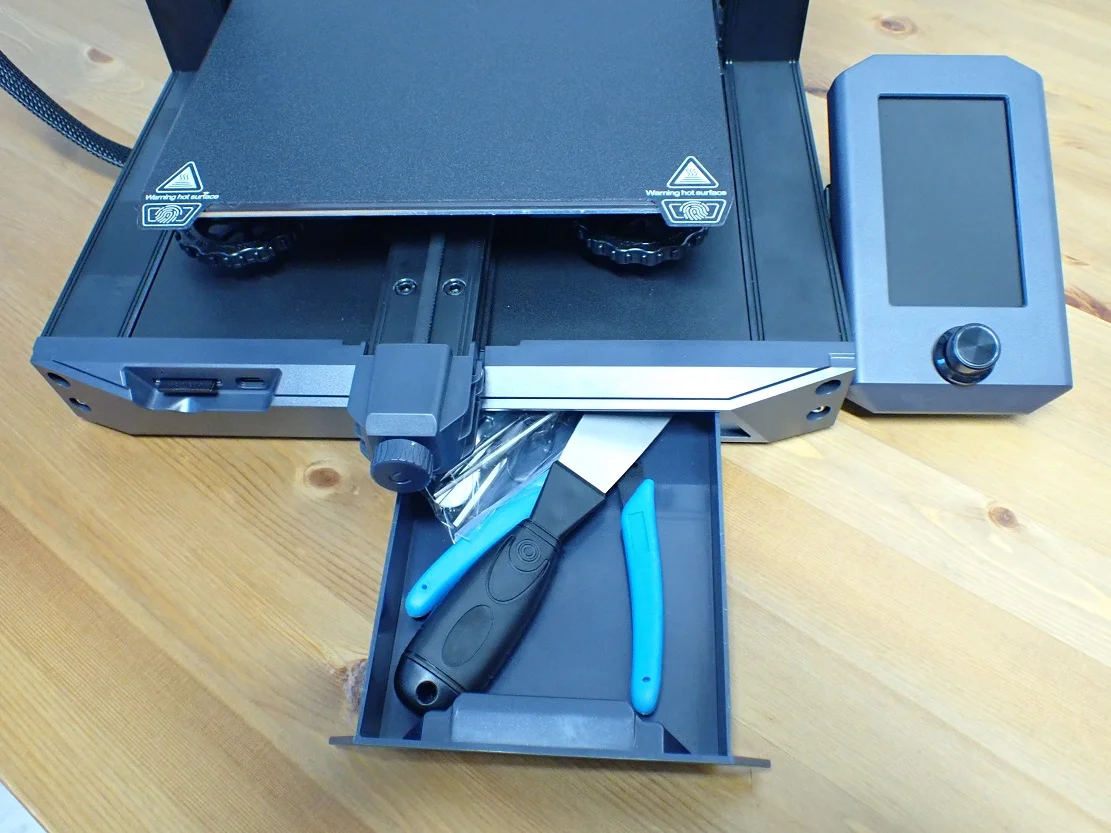
You see more and more tool drawers in 3D printers. I find the trend very good because this gives a very practical way to keep the area around the 3D printer tidy and clean. In the tool drawer, the supplied tools have enough space.
SD Card Instead of Micro SD
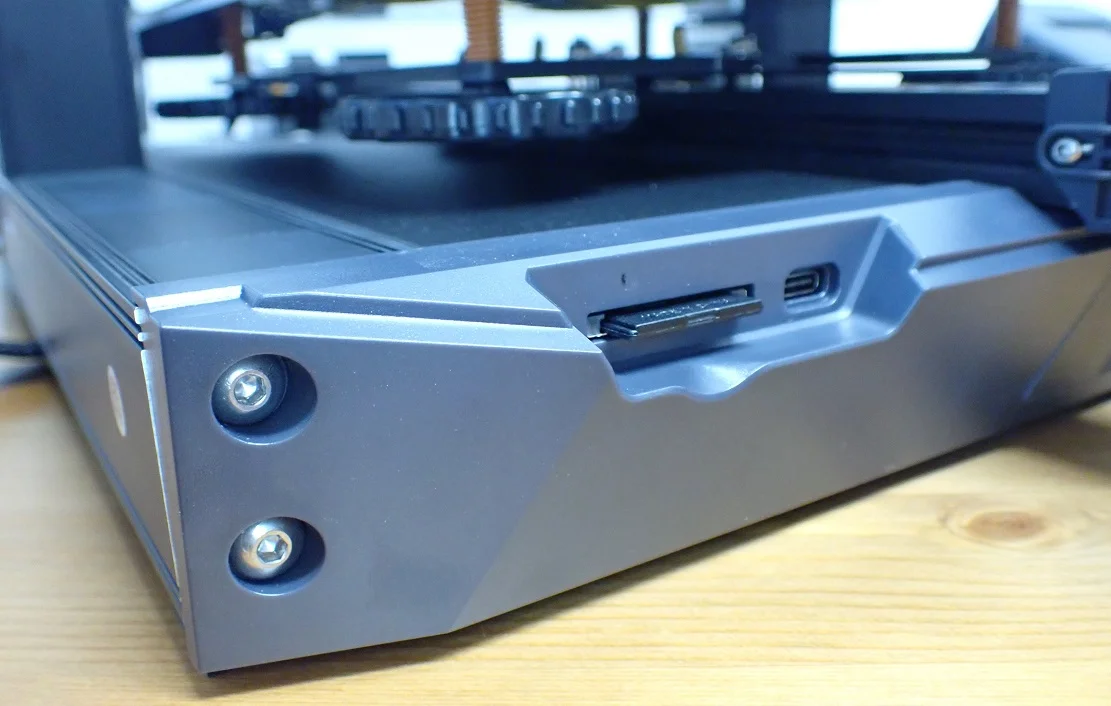
For most of us, it is a blessing that the Ender 3 S1 is fed with files through a normal SD card and not a micro SD card. The handling is so much easier.
Check Price at:
Heating Times
> Ender 3 S1 Review
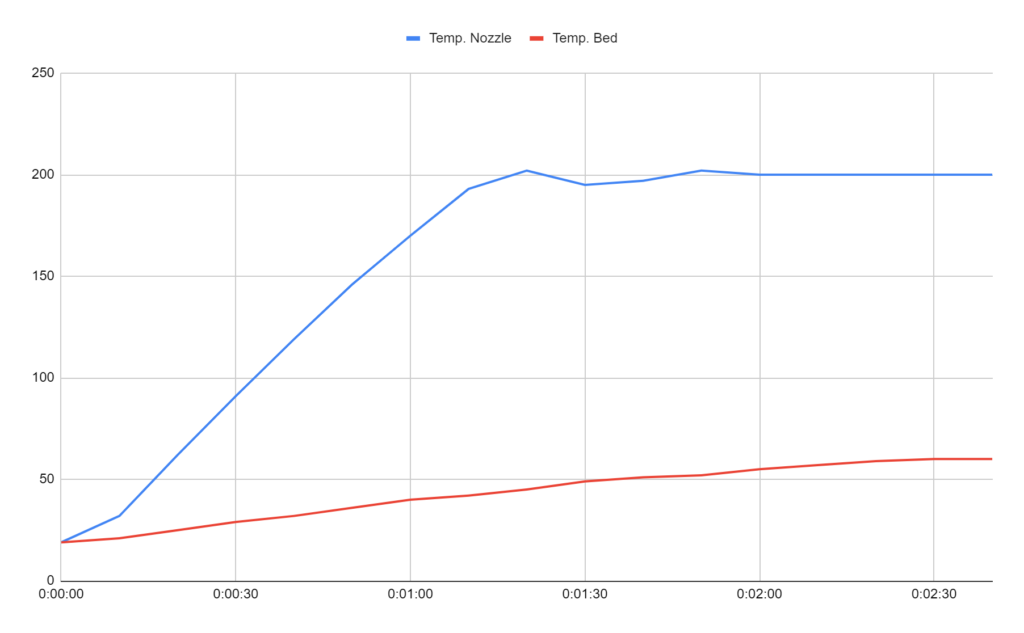
The heat-up times of the Ender 3 S1 are very good, but nothing special compared to other modern FDM 3D printers. The nozzle heats up to
| Time | Temp. Nozzle | Temp. Bed |
|---|---|---|
| 0:00:00 | 19 | 19 |
| 0:00:10 | 32 | 21 |
| 0:00:20 | 62 | 25 |
| 0:00:30 | 91 | 29 |
| 0:00:40 | 119 | 32 |
| 0:00:50 | 146 | 36 |
| 0:01:00 | 170 | 40 |
| 0:01:10 | 193 | 42 |
| 0:01:20 | 202 | 45 |
| 0:01:30 | 195 | 49 |
| 0:01:40 | 197 | 51 |
| 0:01:50 | 202 | 52 |
| 0:02:00 | 200 | 55 |
| 0:02:10 | 200 | 57 |
| 0:02:20 | 200 | 59 |
| 0:02:30 | 200 | 60 |
| 0:02:40 | 200 | 60 |
200 °C within 2 minutes and the print bed needs 2.5 minutes for 60 °C (the standard temperatures for PLA).
The regulation of the temperature is very effective. Overshoots do not occur, which means that the printer is quickly ready for use. In addition, the nozzle and print bed are heated up at the same time. With some 3D printers, the print bed is heated first and then the nozzle, which leads to delays.
Since the magnetic print bed is very thin, the true surface temperature is very close to the indicated temperature. With thick glass print beds, it makes sense to wait another 1-2 minutes until the temperature is actually reached. With the Ender 3 S1, you can start directly.
Noise Level
> Ender 3 S1 Review
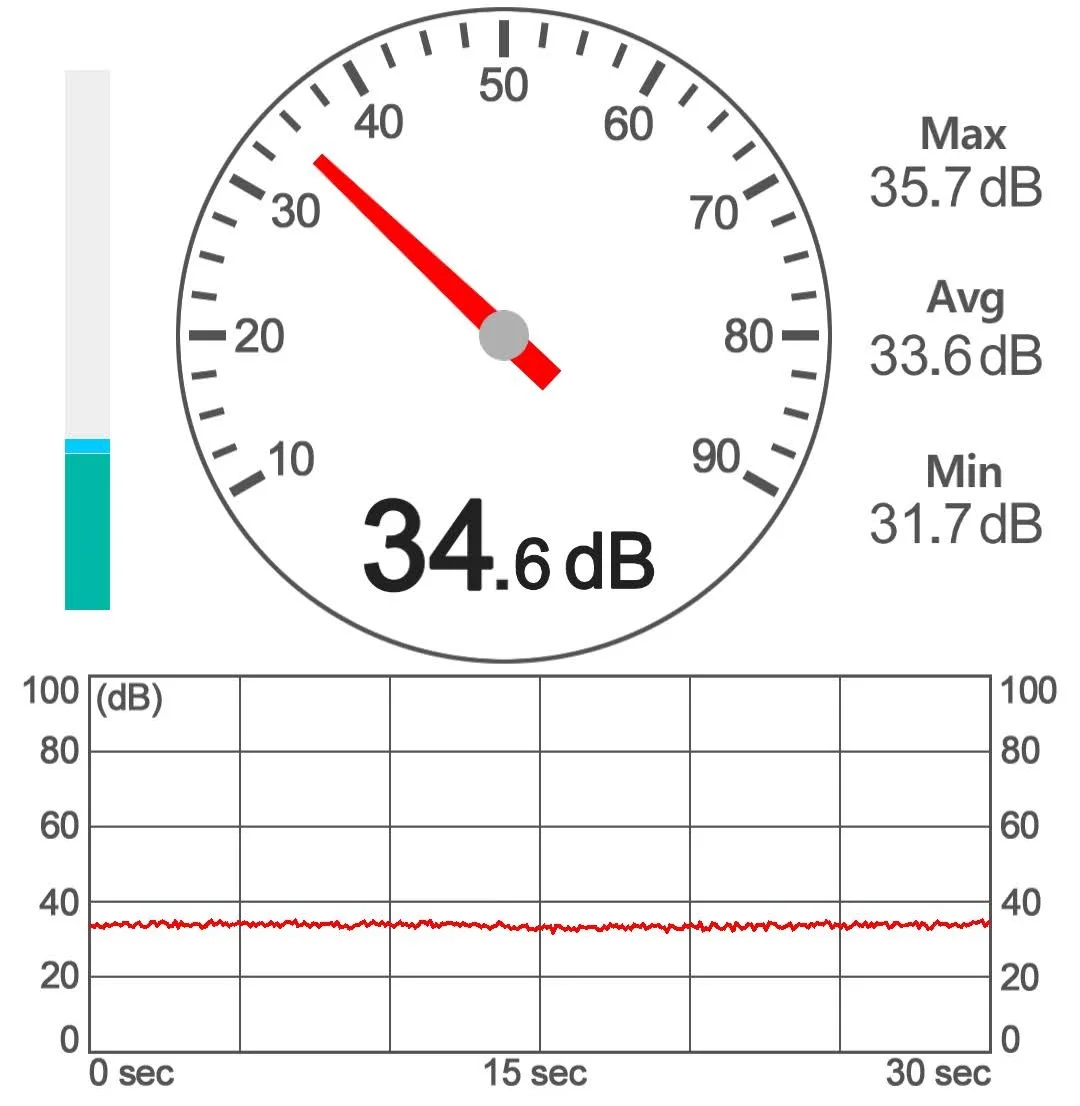
The Ender 3 S1 has a volume of about 34 dB while printing. This is very quiet and comparable to a whisper. The loudest noise sources are the fans of the “Sprite” direct drive extruder. Very quiet fans are more expensive and heavier.
To keep the extruder as light as possible, the compromise is justified. Better 5 dB more than poorer print quality.
Print Speed
> Ender 3 S1 Review
Although the standard profiles of the Ender 3 S1 in Cura and the Creality slicer provide for a print speed of 50 mm/s, higher speeds would also be easily possible. This is due to the lightweight printhead and the stable dual Z-axis. This results in little to no vibration and the positioning accuracy is very high.
According to Creality, the maximum printing speed is 150 mm/s, which will lead to quality losses at least at the upper limit. Nevertheless, thanks to the stable construction, you will be able to increase the speed without compromising quality. This is especially advantageous in a professional context since more parts can be printed per day.
However, these high printing speeds only apply to inflexible filaments. For flexible filaments, the printing speed should be lower, otherwise the filament could get tangled. The elasticity of TPU and other flexible filaments also leads to a certain inertia due to retraction, which means that the speed cannot be set too high.
Operation
> Ender 3 S1 Review
UI: In terms of user interface operation, the Ender 3 S1 is virtually no different from its predecessor, the Ender 3 V2. The display with the rotary knob is easy to use and guides you to the most important functions in just a few steps. Everything is described very clearly and the times of poor Chinese-English translation are thankfully over!
Print bed: I am really very excited about this print bed! I think it is the best print bed I have used so far. The adhesion is excellent and the release of the object is also very easy. Two features that were usually not present at the same time in the past.
Because the print bed is magnetic and flexible, releasing the object is even easier and because of the moderate adhesion when cold, it is very easy to release even delicate first layers from the print bed.
Slicer: In the first few weeks or months after the release, there are usually no standard profiles for Creality 3D printers in Cura. However, Cura usually follows suit very quickly. You can also use the more or less identical Creality Slicer, which contains very good profiles. Of course, you can also transfer the profiles to Cura. But also other slicers like Simplify3D are compatible with the Ender 3 S1.
Printing: Printing with the Ender 3 S1 is extremely straightforward, even for beginners – the Ender 3 S1 is like a plug & play product! After the easy assembly, the printer is ready for the first prints. The included SD card even contains pre-sliced models that you can print directly. The effort to calibrate the Ender 3 S1 is also very small because the default profile in the Creality Slicer is already very well-tuned.
Slicer
> Ender 3 S1 Review
The Ender 3 S1 is compatible with the Creality Slicer, Cura, Simplify3D and Repetier Host. I used the printer with the Creality Slicer, which is basically a modified version of Cura.
The default profile is very well matched to the device. In the package, there was a piece of paper with individual retraction settings. I used these settings and hardly had to change the profile after a few calibration prints (temperature tower, retraction tower, etc.).
Print Quality
> Ender 3 S1 Review
The Ender 3 S1 has a print quality of 0.1 mm with very good XY positioning accuracy. The print quality is very reproducible thanks to the vibration-free design.
With FDM 3D printers, the print quality cannot only be described in terms of layer thickness. The accuracy in the XY direction is also important. Due to the double Z-axis and the lightweight print head of the direct drive system, there are hardly any vibrations. Printing errors such as stringing or over-extrusion are also very easy to get under control or do not occur at all.
To test the print quality of the Ender 3 S1, I printed different models on the SD card and some other objects as an example.
Bunny + Cat

On the SD card were already a few sliced objects that I used as first test prints. Among them were a rabbit and a cat. I printed them with green PLA from Eryone and the result could not be better. The surfaces are very smooth, there was no over- or under-extrusion and no stringing.
But since these two objects are not very demanding and Creality seems to know exactly how to slice objects for the Ender 3 S1 correctly, I ignored the rest of the files on the SD card and searched for objects myself on portals like Thingiverse and prepared them for printing with the default profiles in the Creality Slicer.
Jaws 3D Benchy
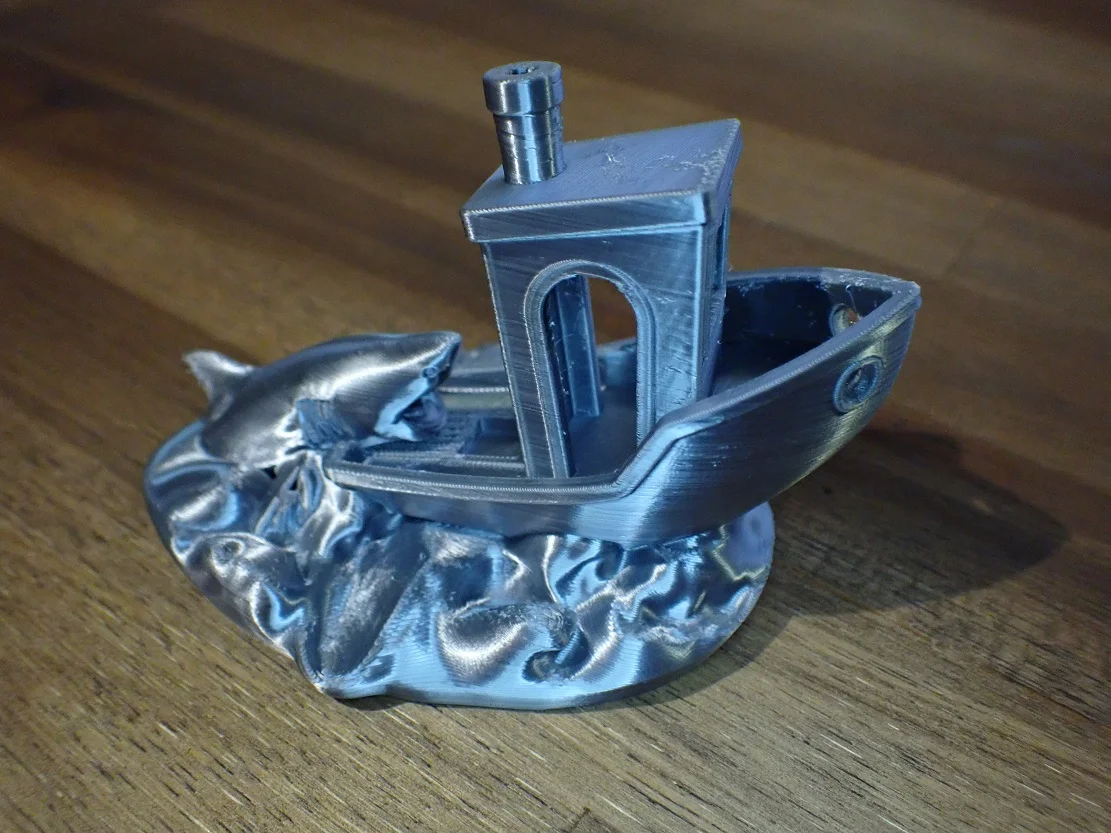
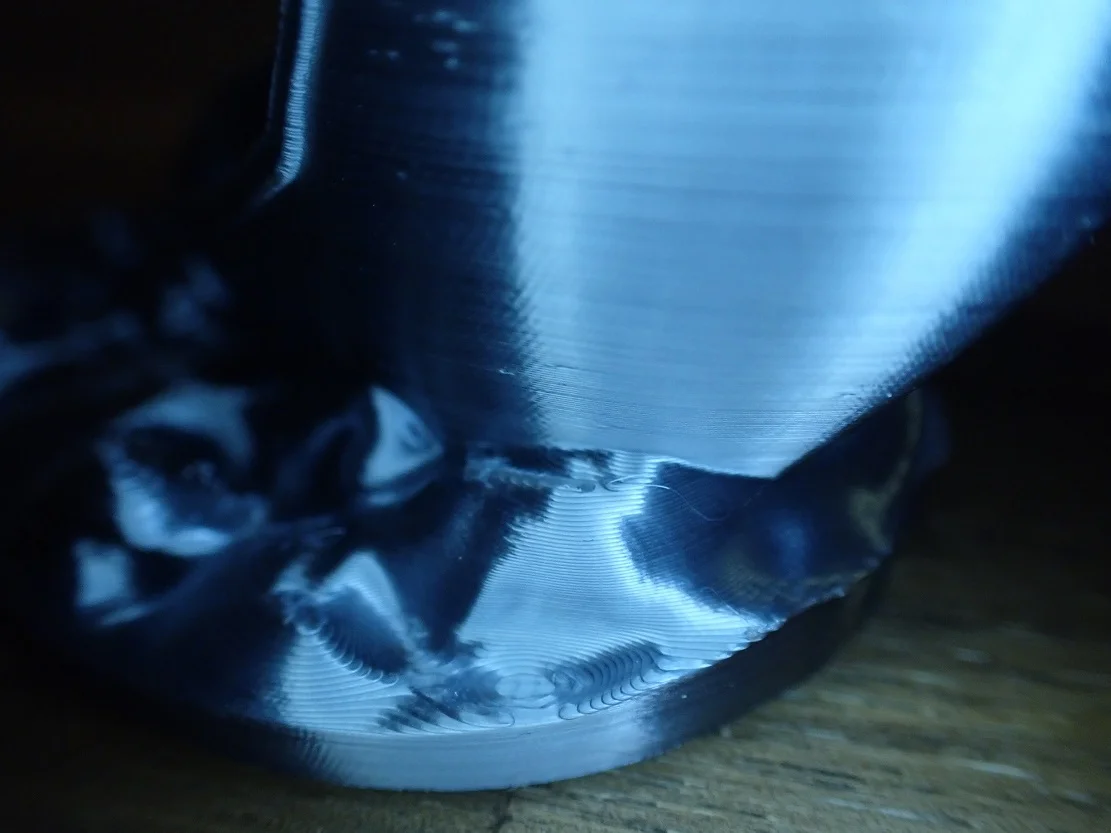
The small boat 3D Benchy is a very popular stress test for FDM 3D printers. There are now several variants of this object and I have chosen the Jaws 3D Benchy (link to the object).
I used the “Super Quality” profile with a layer thickness of 0.12 mm for this. The result turned out very well and the Ender 3 S1 passed this test with flying colors. Due to the very well-adjusted standard profile and the individual retraction settings included in the scope of delivery, there were no problems at all with the extrusion.
Spring-Loaded Box
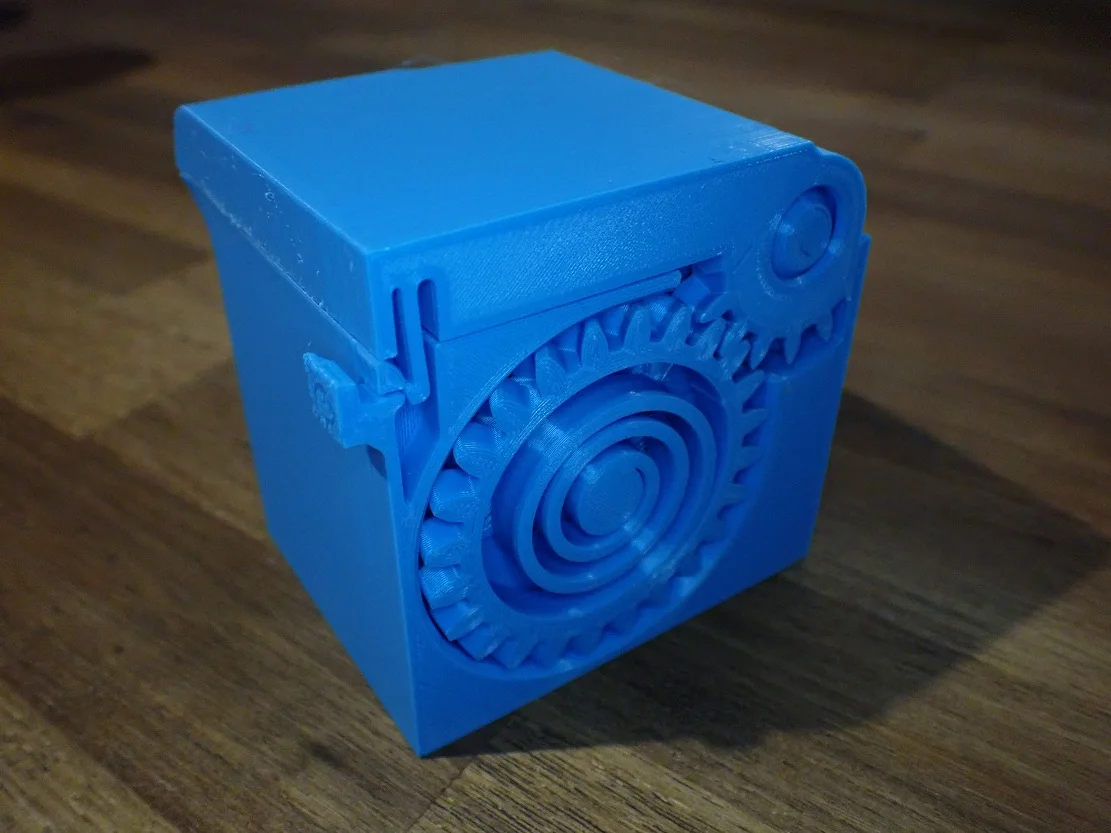
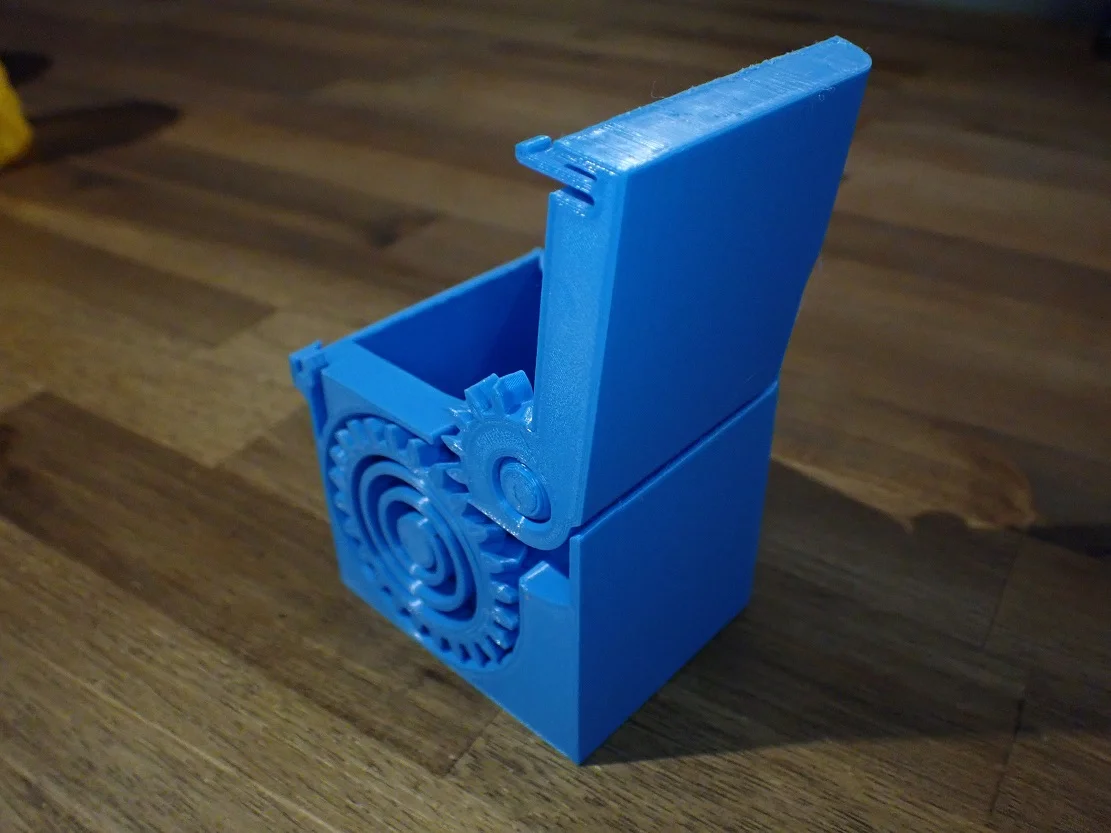
I like to print mechanical objects to test the dimensional accuracy of the extrusion. Of course, there are more suitable calibration objects for this, but they are not as much fun as the Spring Loaded Box (link to object).
I printed the box with the standard quality of 0.2 mm. For non-decorative objects, this is a good compromise between quality and speed.
In addition to the mechanics for opening and closing the box, the large overhang inside the box is also a challenge for the 3D printer. I used the bridge settings in the experimental options for this. The overhang is really big and for its dimensions, the result turned out very well.
Drippy Bucket
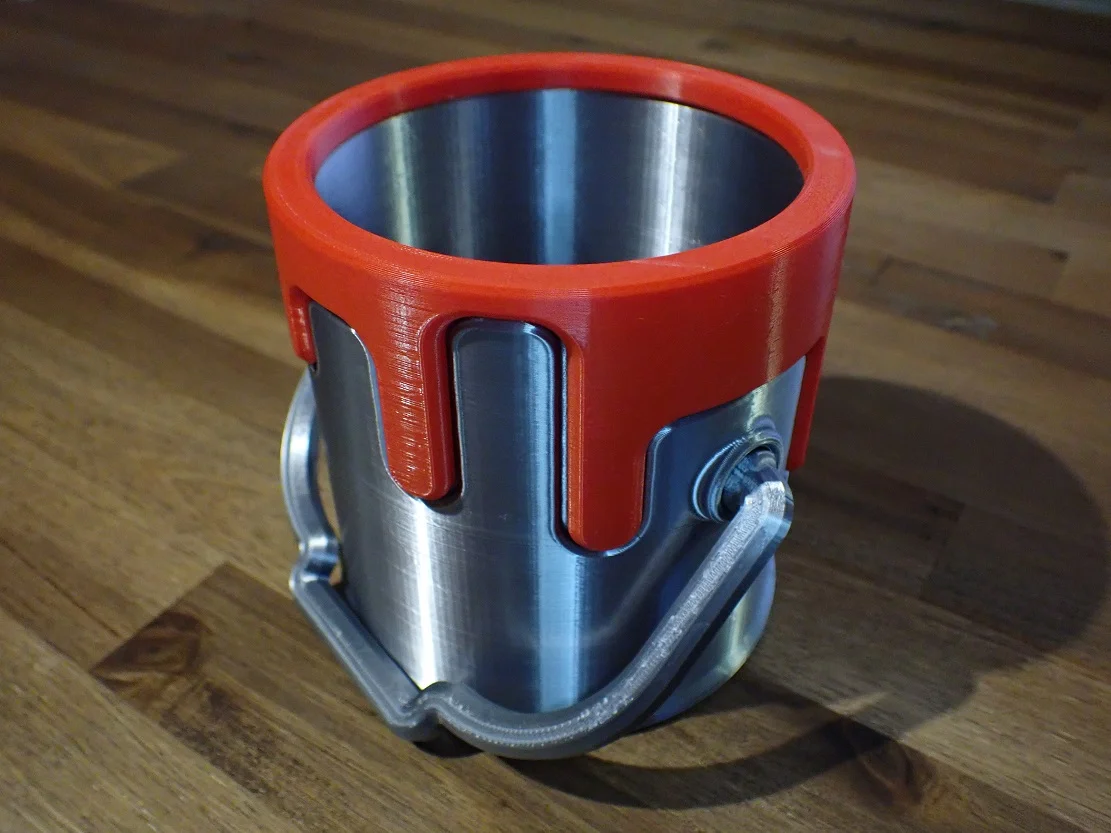
Next, I printed the Drippy Bucket (link to object). The bucket consists of three separate parts: the bucket, the handle, and the paint running down. For all three objects I used the Dynamic Quality of 0.16 mm.
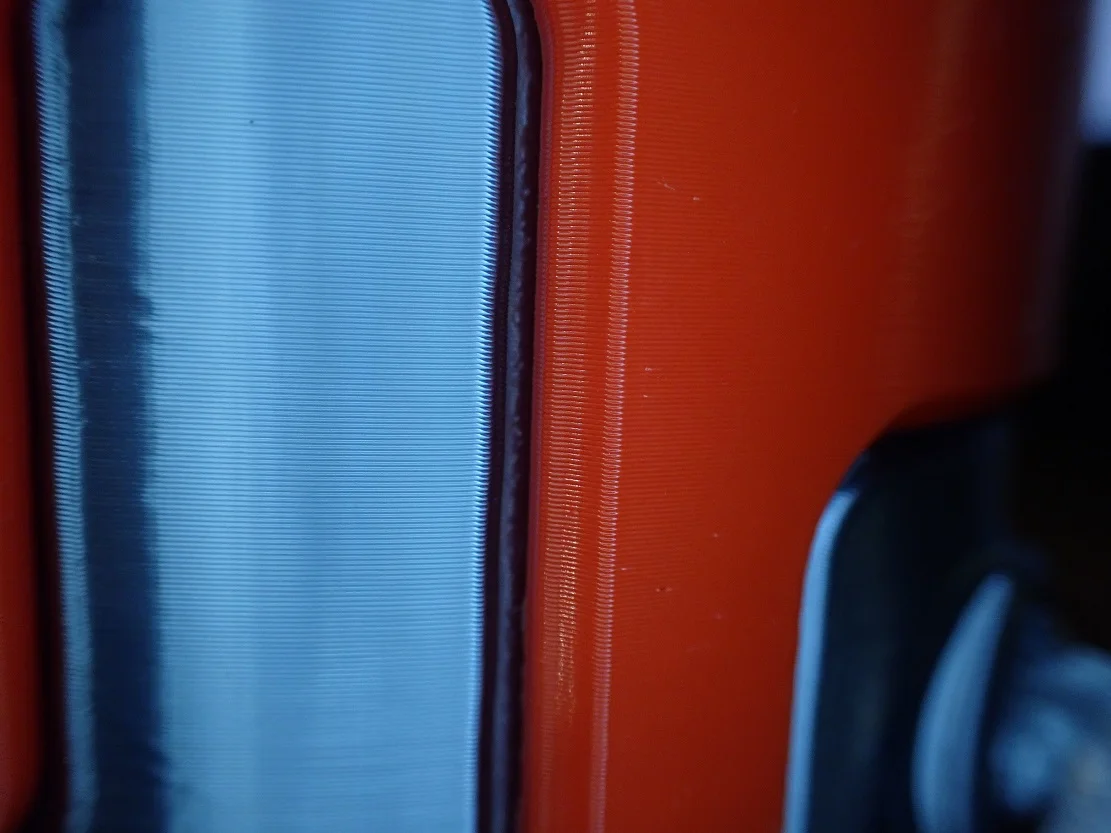
With this object, you can greatly influence the result with the choice of filament color. I chose a silver bucket with red color. As expected, the result is very good and the surfaces have become very smooth.
However, in some places you can see marks from the infill. This is not due to the printer, but to my settings – I should have set the number of walls higher.
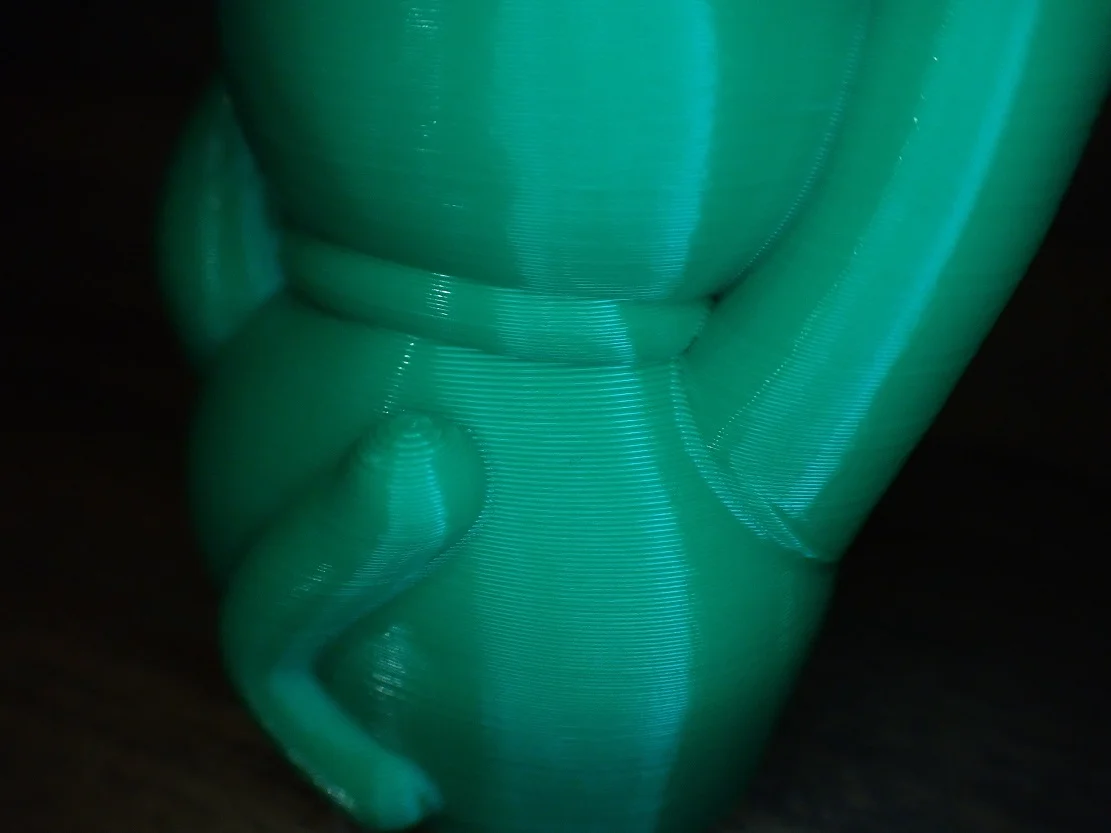
Conical Honeycomb Vase
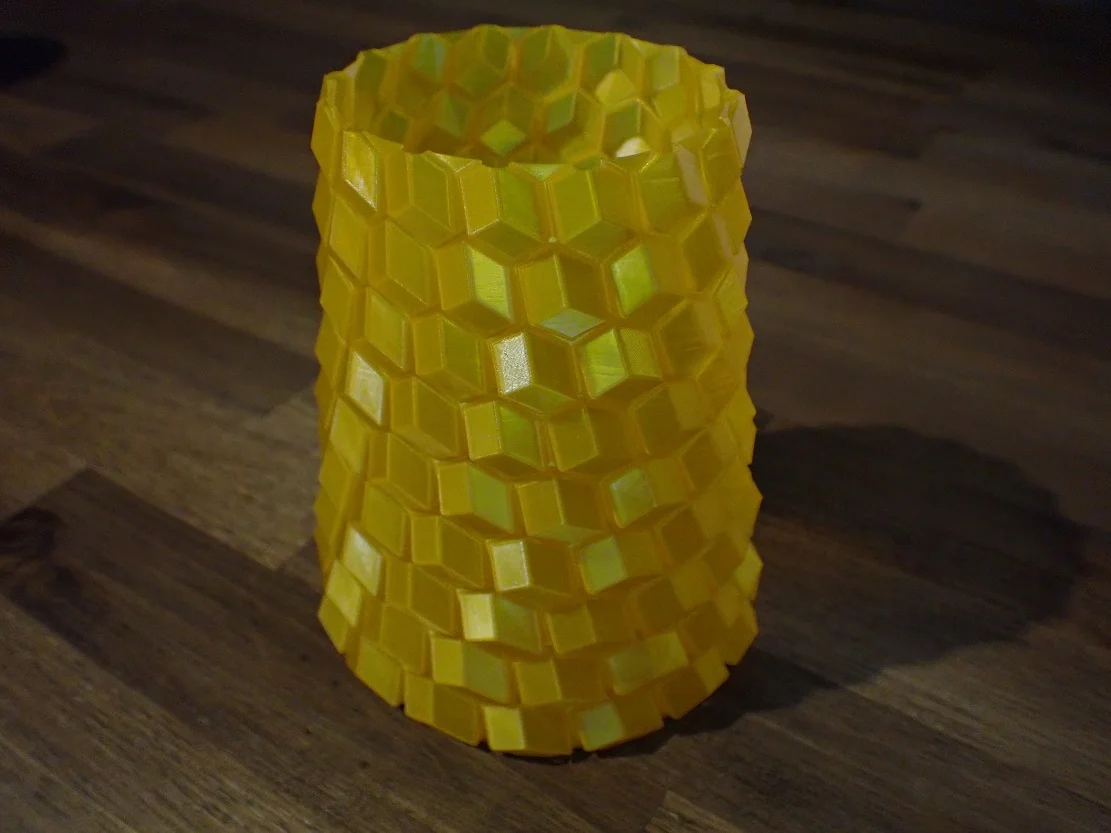
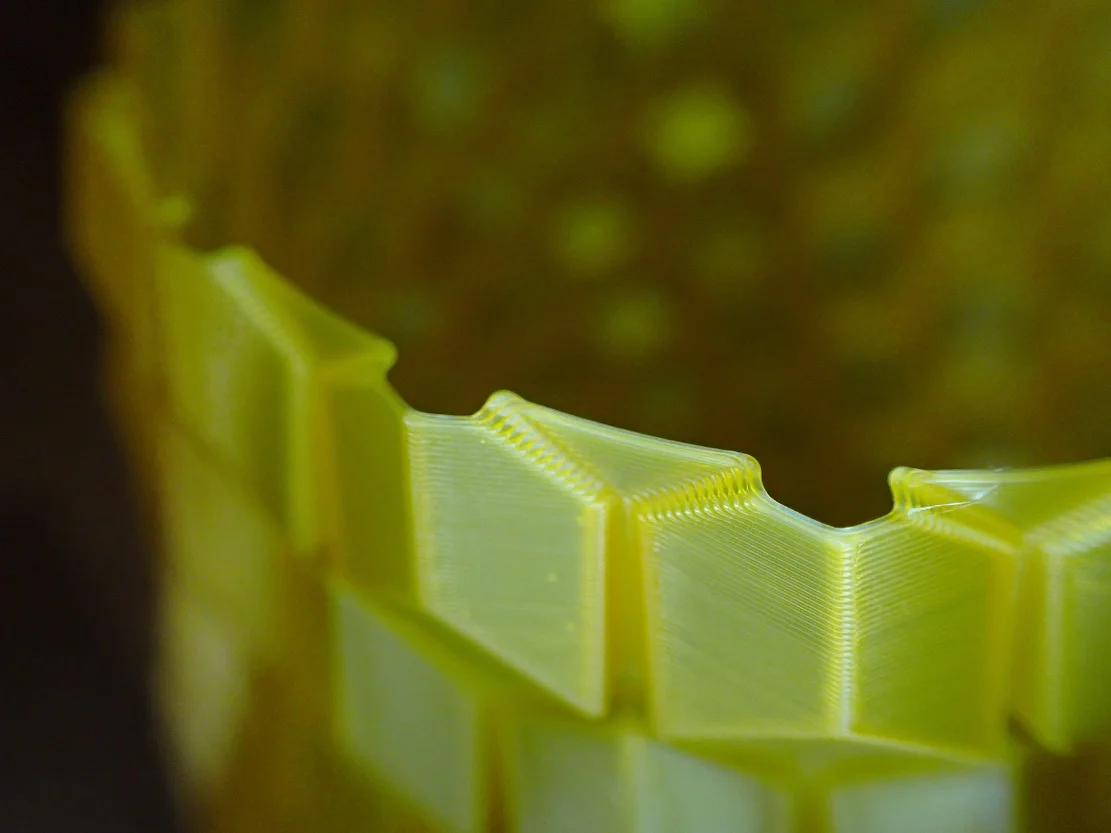
The vase mode is always very good for demonstration. That’s why I printed this Conical Honeycomb Vase (link to object).
In vase mode, the print head travels continuously along the outer wall and not in individual layers. This means that there is no Z-seam and the object only has a single wall at the end. This is where the name Spiralize Outer Contour comes from, as the print head travels in a spiral along the contour of the object from bottom to top without stopping once.
The finished printed vase is very impressive as hoped and will definitely find a place in my home or become a gift for friends or family.
Check Price at:
Ender 3 S1 vs. Ender 3 V2
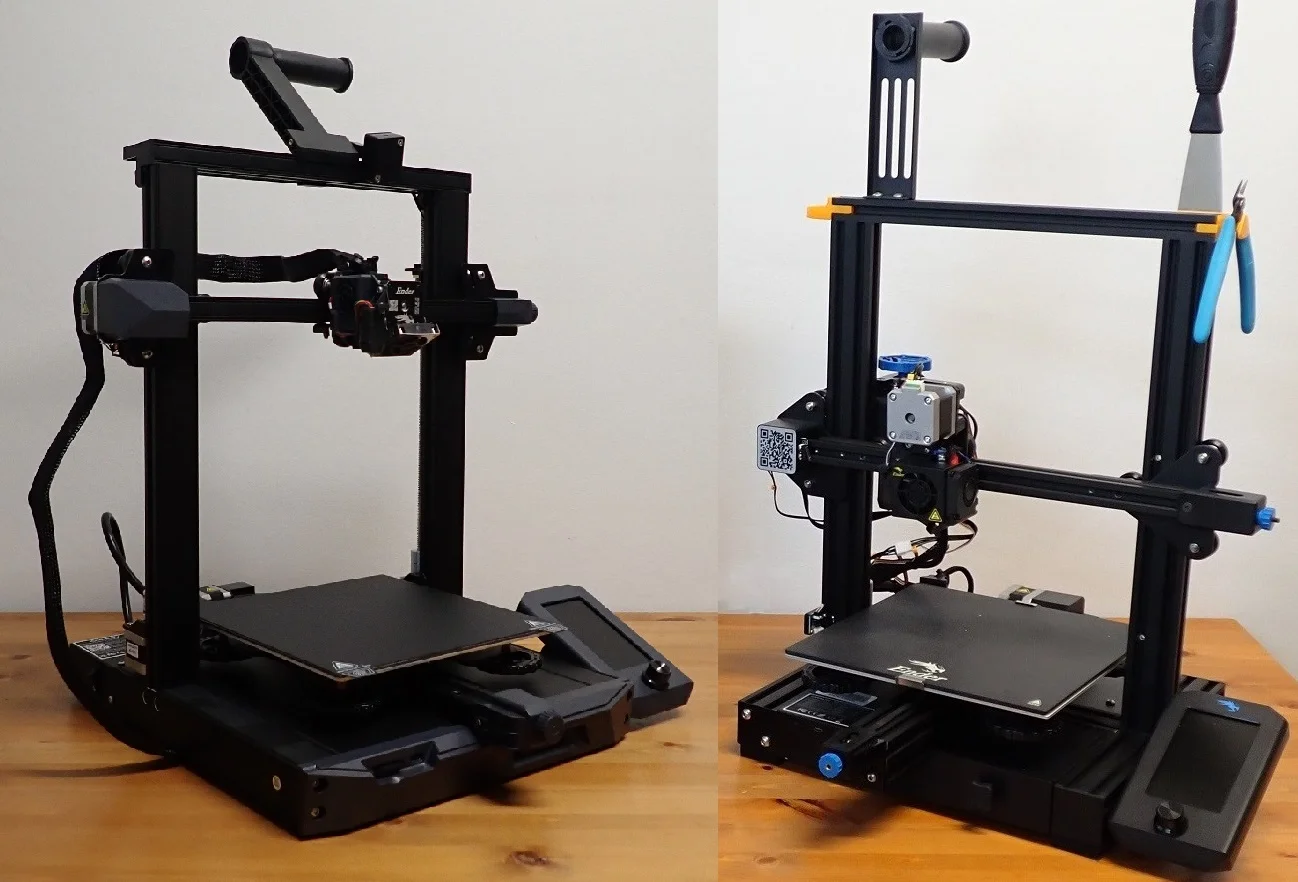
Probably the biggest competitor to the Ender 3 S1* is its direct predecessor, the Ender 3 V2. Directly behind it probably comes the Anycubic Vyper*, although most people interested in the Ender 3 S1 will probably ask themselves how it differs from its predecessor and what could justify the price difference. If you want to read the full hands-on comparison, read this article.
The Ender 3 S1 has the following features that the Ender 3 V2 does not:
Direct Drive Extruder: The Ender 3 V2 has only a normal Bowden extruder, which makes it not as suitable for flexible filaments as the Ender 3 S1. However, it can be upgraded with a direct drive kit. If you are interested in the upgrade, you can have a look at the installation and usage in this detailed guide.
CR-Touch: When it comes to ease of use and time savings, it’s hard to beat a sensor for automatic print bed leveling. With the CR-Touch, the Ender 3 S1 can level the print bed at the touch of a button.
The Ender 3 V2 does not have such a sensor installed as standard. But again, you can upgrade it and buy and mount the CR-Touch separately. The most complicated part is the cabling, but you can also see this in detail in this guide.
Dual Z-axis: The dual Z-axis of the Ender 3 S1 allows for greater accuracy in printing. the Ender 3 V2 has only one Z-axis, making vibration and shifting of the axes slightly more likely to occur.
Flexible, magnetic print bed: The print surface is also often replaced on the Ender 3 V2. A textured glass print bed is installed as standard, which ensures quite good adhesion. For very delicate first layers, however, it is sometimes necessary to use aids such as Blue Tape or Magigoo.
The flexible and magnetic print bed of the Ender 3 S1 is perfect in my eyes. The print bed adhesion is excellent and at the same time, the objects can be easily removed from the print bed when it has cooled down.
Filament Sensor: The Ender 3 V2 lacks a filament sensor. It is also not included in the direct drive upgrade. For some users, a filament sensor is a must-have feature, but for me it is more of a nice-to-have. Therefore, I would not rate this point as crucial, although the filament sensor of the Ender 3 S1 is very cleverly designed.
Easy assembly: The assembly of the Ender 3 S1 is much easier than that of the Ender 3 V2. The S1 variant only takes a few minutes to connect the pre-assembled parts together. The Ender 3 V2 is more of a kit and requires many small steps to assemble.
As you probably noticed, the Ender 3 V2 can get many features of the Ender 3 S1 through upgrades. However, the sum of the cost and effort would not justify the purchase of the Ender 3 V2.
In summary, the Ender 3 S1 is a better 3D printer than the Ender 3 V2. Its price/performance ratio is also much better since even with various upgrades for the Ender 3 V2, you can’t imitate the complete performance spectrum of the S1 for the same price. The Ender 3 V2 would therefore only be suitable for people who deliberately want a machine for tinkering.
Ender 3 S1 vs. Ender 3 V2 – Table
| Ender 3 V2 | Ender 3 S1 | |
|---|---|---|
| Size: | 475 x 470 x 620 mm | 487 x 453 x 622 mm |
| Print volume: | 220 x 220 x 250 mm | 220 x 220 x 270 mm |
| Display: | color 4.3 inch LCD display with rotary knob | color 4.3 inch LCD display with rotary knob |
| Structure: | Partially pre-assembled (> 45 min.) | Mostly pre-assembled (~ 15 min.) |
| Extruder: | Bowden | Direct Drive |
| Print bed leveling: | Manual | Automatic |
| Accuracy: | 0.1 mm | 0.1 mm |
| Min. layer thickness: | 0.1 mm | 0.05 mm |
| Nozzle: | 1 x 0.4 mm | 1 x 0.4 mm |
| Filament: | 1.75 mm (PLA, ABS, PETG, TPU) | 1.75 mm (PLA, ABS, PETG, TPU) |
| Max. nozzle temperature: | 255 °C | 260 °C |
| Max. print bed temperature: | 100 °C | 100 °C |
| Printing speed: | 30-60 mm/s (max. 180 mm/s) | 30-60 mm/s (max. 150 mm/s) |
| Resume print: | Yes | Yes |
| Filament sensor: | No | Yes |
| Print bed: | Textured glass bed | PC on spring steel, flexible, magnetic |
Is the Ender 3 S1 Worth it?
The Ender 3 S1* is the best FDM 3D printer in its price range! Therefore, the answer to the question of whether the Ender 3 S1 is worth it is a resounding Yes.
The original Ender 3 and Ender 3 V2 are extremely popular in the 3D printing community and have made the hobby internationally accessible for little money. The Ender 3 S1 outperforms these two best sellers by quite a bit.
The Ender 3 S1 is recommended for everyone. Not only beginners get the perfect 3D printer in its price range but also experienced users will appreciate the reproducible and reliable print quality. The Ender 3 S1 does not need any upgrades to be optimized. All important upgrades are already included in the scope of delivery.
Check Price at:
Disclosure: This website is the property of Martin Lütkemeyer and is operated by Martin Lütkemeyer. Martin Lütkemeyer is a member of the Amazon Services LLC and other Affiliate Programs. These are affiliate advertising programs designed to enable websites to earn advertising revenue through advertising and linking to Amazon.com and others. Links marked with * are affiliate links.
