
- Wet Filament: Prevention, Symptoms & Drying - July 18, 2024
- Sovol SV08 – Best PrusaSlicer Settings & Profile - June 26, 2024
- Sovol SV08 – Best Orca Slicer Settings & Profile - June 26, 2024
Disclosure: Links marked with * are Affiliate Links. I earn from qualifying purchases if you decide to make a purchase through these links – at no additional cost for you!
The printing speed of 3D printers is an important criterion when buying a 3D printer. But also when optimizing and improving an existing 3D printer, the printing speed has a great influence on the quality and the printing time of an object.
The print speed of a 3D printer is the speed at which the material is applied to the print bed. The printing time of the object depends on the printing speed. It also has a great influence on the quality of the object.
The goal in 3D printing is therefore always to achieve the highest possible printing speed without sacrificing quality.
In this article, you’ll learn everything you need to know about the printing speed when buying a 3D printer and how to optimize and improve the printing speed of an existing 3D printer.
If you are looking for test objects for the print speed, you can find the best ones in this article.
Table of Contents:
3D Printer Speed as a Purchase Criterion
In addition to other properties of a 3D printer such as the print volume or the material of the print bed, the print speed is an important purchase criterion. It differs greatly between the various 3D printer models and depends on the design of the 3D printer.
You can already read the print speed in the technical specifications before buying. However, it is not always specified uniformly.
How is the Speed of 3D Printers Specified?


For FMD 3D printers, the print speed is specified in mm/s and describes the speed of the print head during the extrusion of filament. For resin 3D printers, it is specified in s/layer or mm/h and describes the speed at which the object is printed in the z-direction.
Here are a few examples of print speed specifications for different 3D printers:
- FDM 3D printer: “50 mm/s” means that the print head moves at 50 millimeters per second during printing.
- FDM 3D printer: “max. 180 mm/s (normal 50 mm/s)” means that the 3D printer can get to a maximum of 180 mm/s without regard to quality, and normal to good quality can be expected at 50 mm/s.
- Resin 3D printer: “2 s/layer” means that the 3D printer takes 2 seconds per layer.
- Resin 3D printer: “30 mm/h” means that the 3D printer can print 30 millimeters per hour in the z-direction.
The specifications are therefore sometimes very inconsistent. They can falsely promise you a faster printing speed. The correct interpretation of these specifications is therefore important to make the right purchase decision.
What are Typical 3D Printer Speeds?
Typical speeds of FDM 3D printers are between 40 and 60 mm/s for Cartesian 3D printers and over 100 mm/s for Delta 3D printers. Modern resin 3D printers achieve a print speed of about 2-3 seconds/layer, which corresponds to about 30-50 mm/h.
To illustrate these print speeds, I’ve created a few sample objects to give you an idea of how fast different objects can be printed.
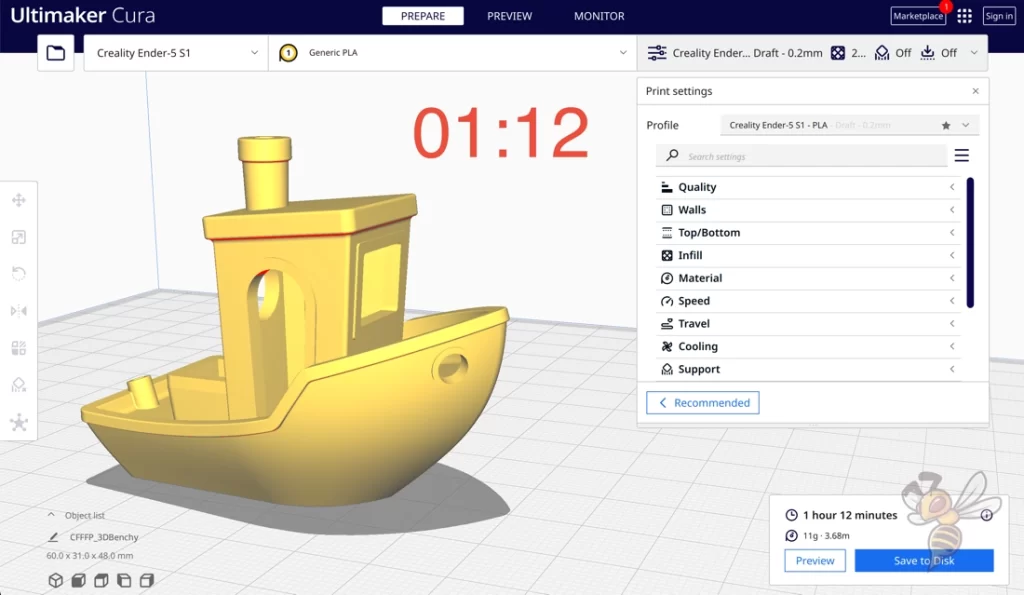
- Technology: FDM Cartesian
- Printing speed: 50 mm/s
- Material: about 11 g filament
- Printing time: 1 hour and 12 minutes
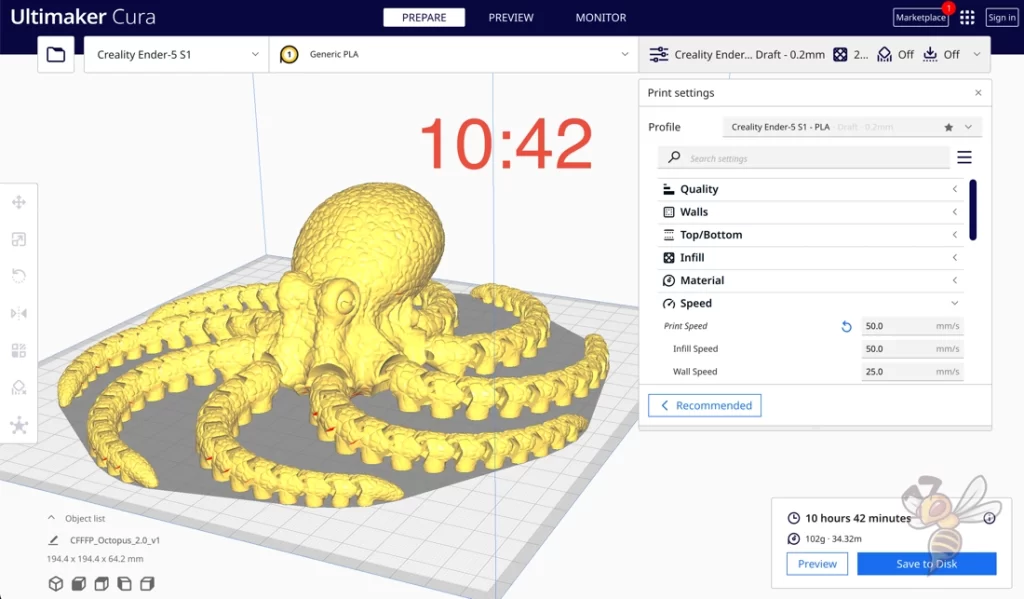
- Technology: FDM Cartesian
- Printing speed: 50 mm/s
- Material: about 102 g filament
- Printing time: 10 hours and 42 minutes
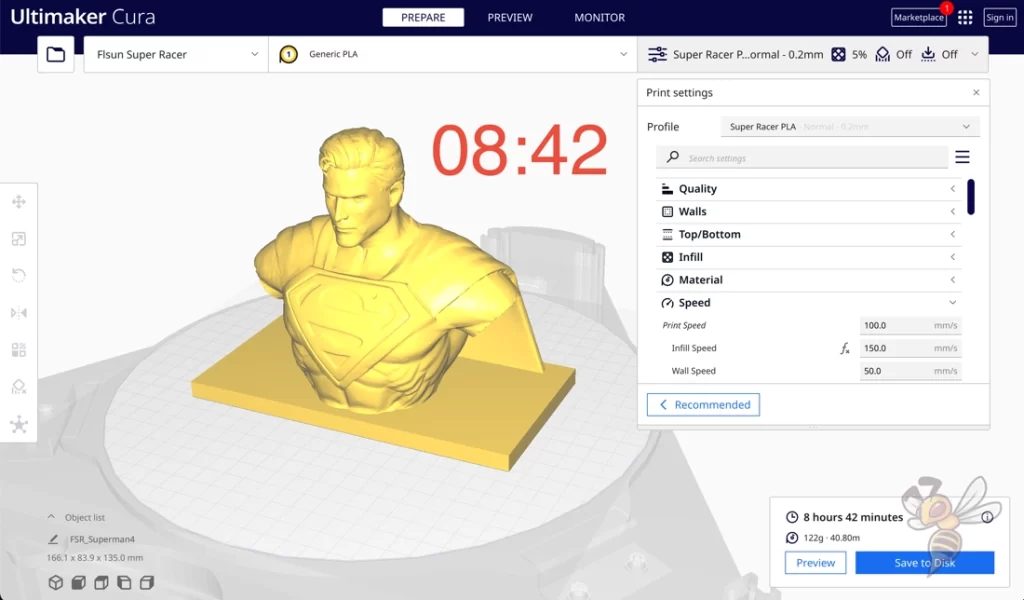
- Technology: FDM Delta
- Printing speed: 100 mm/s
- Material: about 122 g filament
- Printing time: 8 hours and 42 minutes
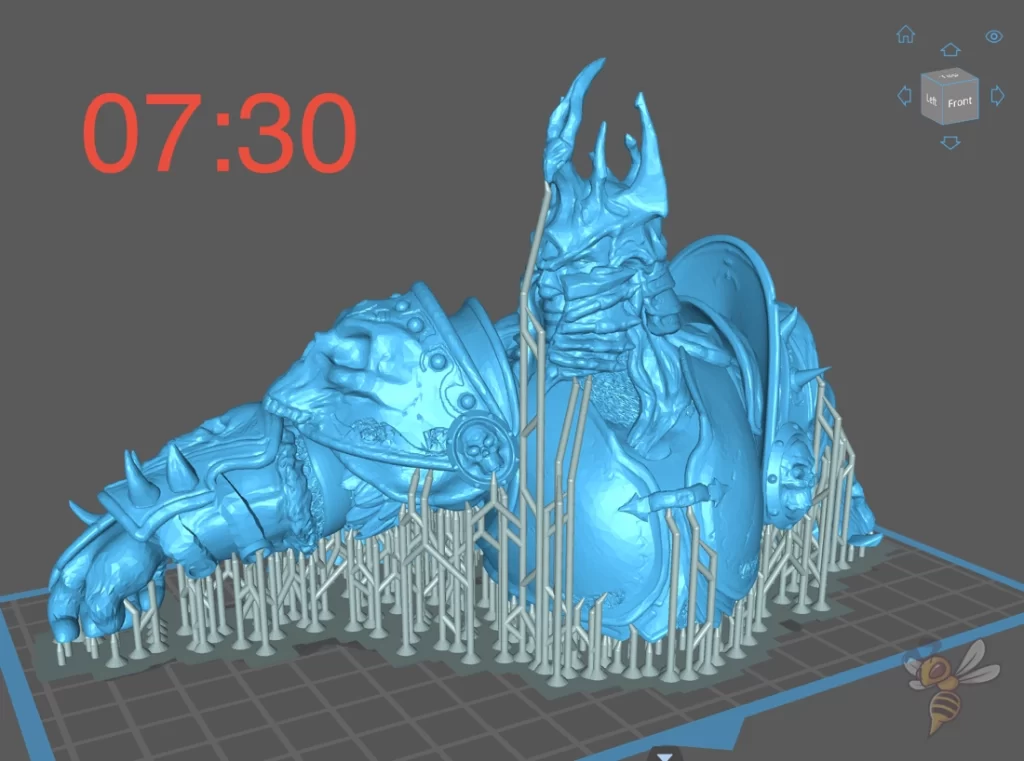
- Technology: Resin
- Print speed: 3 s/layer
- Material: about 70 ml resin (about 77 g)
- Printing time: 7 hours and 30 minutes
What Factors Influence the Printing Speed of a 3D Printer?
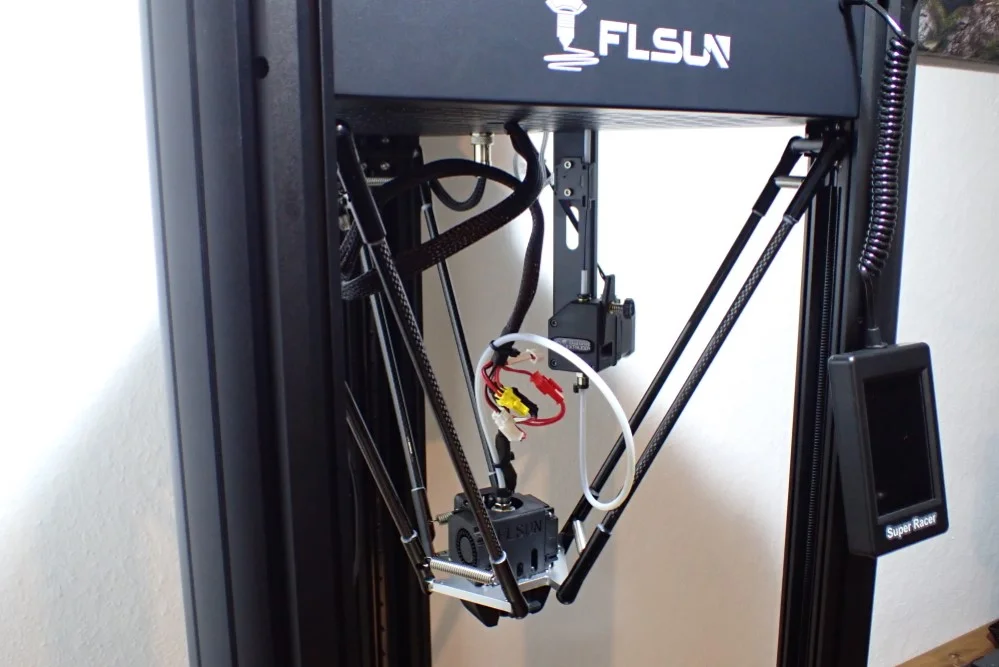
Operating principle of the 3D printer: Delta vs. Cartesian for FDM 3D printers, for example. In Delta 3D printers (such as the FLSUN Super Racer), the print head is lightweight and moved via three arms rather than rigid rails with heavy weight.
This allows a much higher printing speed to be achieved before vibrations occur that negatively affect the quality of the printed object.
Stability of the 3D printer: At high speeds, vibrations can occur when the 3D printer moves. The better the stability of the 3D printer, the higher the printing speeds can be set before disruptive vibrations occur.
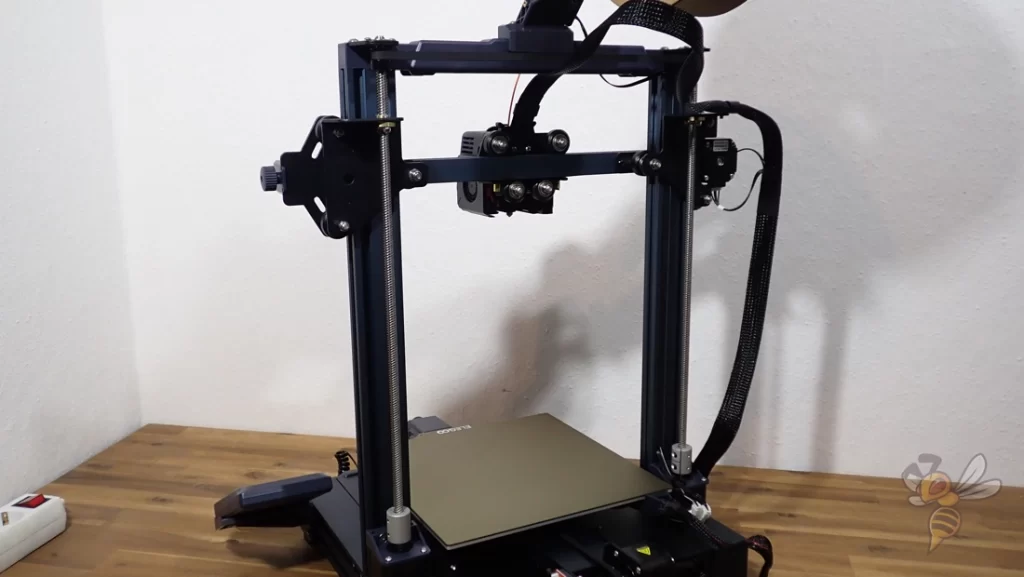
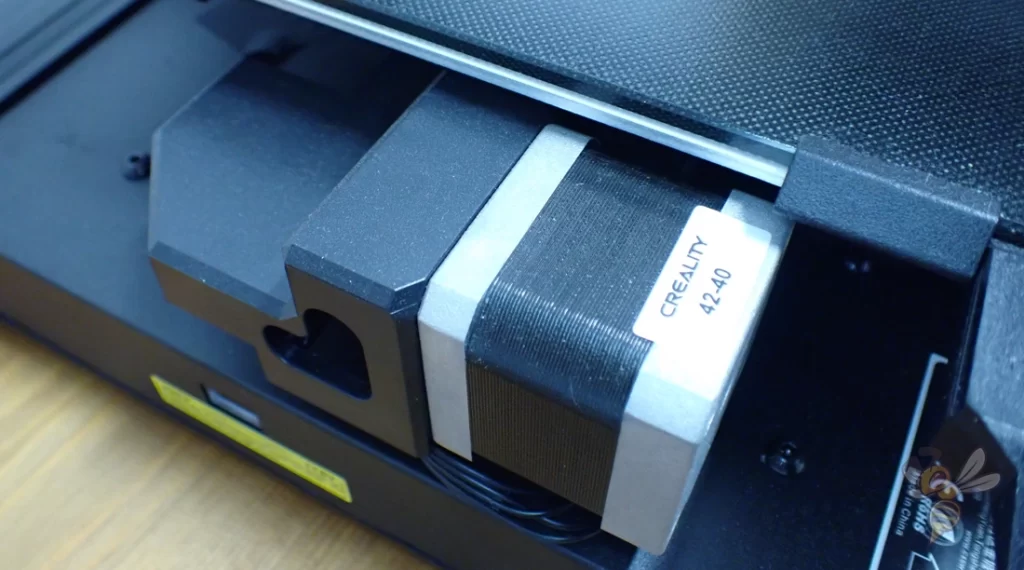
For example, in very large or accurate Cartesian 3D printers, a stepper motor is installed on both sides of the z-axis. This improves positional accuracy and reduces susceptibility to vibration. This is also called “double z-axis”.

Material used: Different filaments may have different print speed requirements. For example, flexible filaments such as TPU may print better at lower print speeds.
For resin 3D printers, the type of resin is critical to how long it needs to cure.
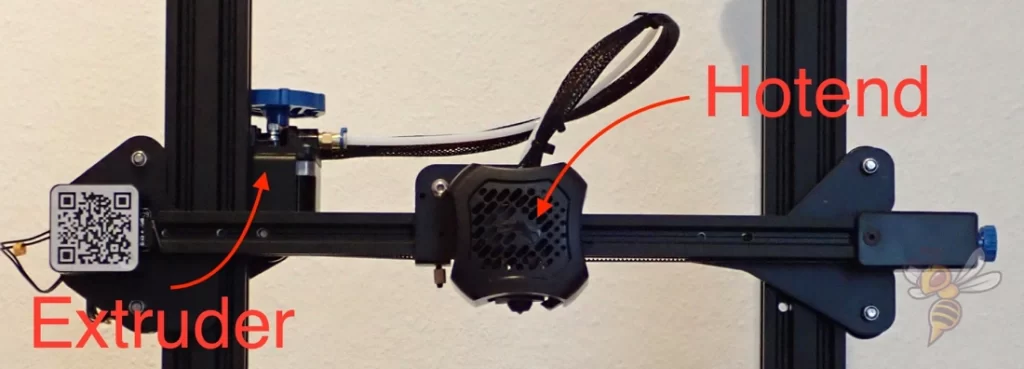

Print head design of FDM 3D printers: There are two different print head designs for FDM 3D printers.
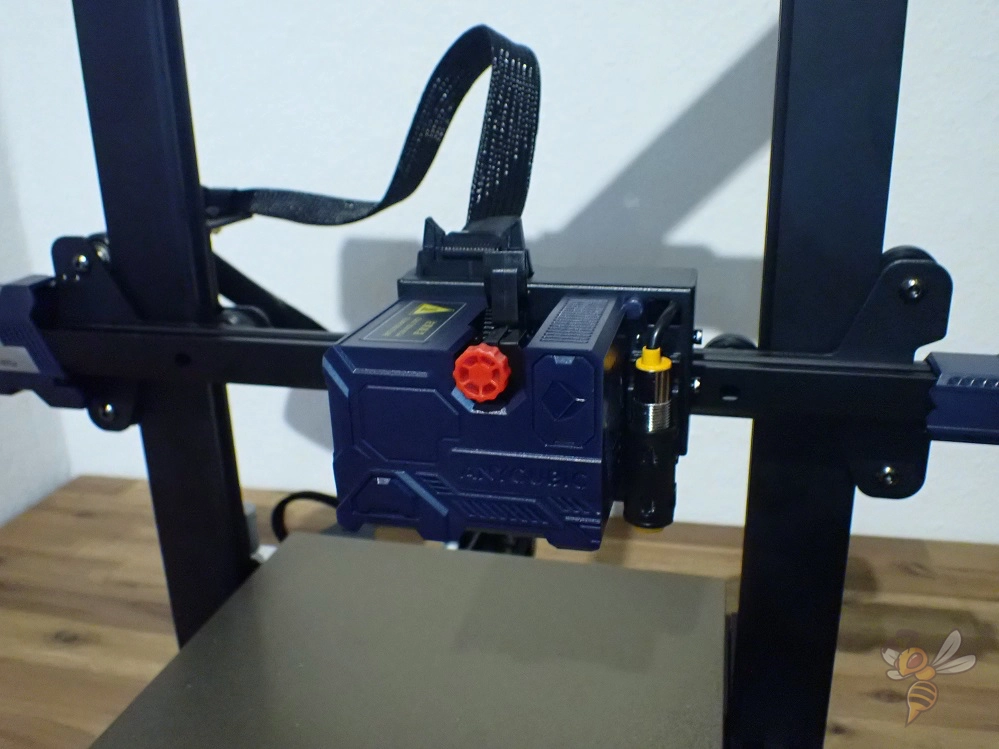
With a Bowden extruder, the extruder sits far away from the nozzle on the frame of the 3D printer and pushes the filament through a PTFE tube to the print head. This makes the print head very light and higher print speeds can be achieved.
With a direct drive extruder, the extruder sits in the print head, increasing its weight. The increased weight causes disturbing vibrations at lower speeds than with lighter print heads.
Layer height: When considering the print speed, it is important to note the influence of the layer height. For FDM 3D printers, the print speed specification is not coupled with the layer height.
The layer height only influences the print duration. The individual layers are nevertheless printed at the same printing speed.
However, for resin 3D printers, the print speed is often coupled with the layer height. With specifications such as “30 mm/h”, the print speed per layer is multiplied by the layer height, which is not specified.
The information about how long a layer has to be exposed or how strong the illumination is therefore helps you much more to compare different resin 3D printers. Whether you set the layer height to 0.01 mm or 0.1 mm has (almost) no influence on the printing speed, only on the printing duration.
What are the Advantages and Disadvantages of Fast Printing Speeds?
The print speed influences the print duration and the print quality in 3D printing. A low speed increases the print duration and improves the print quality. A high speed reduces the print duration and deteriorates the quality.
So, the advantage of a fast print speed is that it reduces the print duration. To show how much the print speed affects the print duration for FDM 3D printers, I sliced the same object at different print speeds.
| Print Speed | Print Duration |
|---|---|
| 10 mm/s | 17:53 |
| 20 mm/s | 09:15 |
| 40 mm/s | 05:09 |
| 60 mm/s | 03:57 |
| 80 mm/s | 03:26 |
| 100 mm/s | 03:11 |
| 120 mm/s | 03:03 |

So, as you can see from the data, a higher print speed definitely pays off up to a point. However, there is a point beyond which a higher print speed improves the print duration only slightly.
Increasing the printing speed from 50 to 100 mm/s almost halves the printing time. An increase from 100 to 200 mm/s only brings an improvement of about 20%.
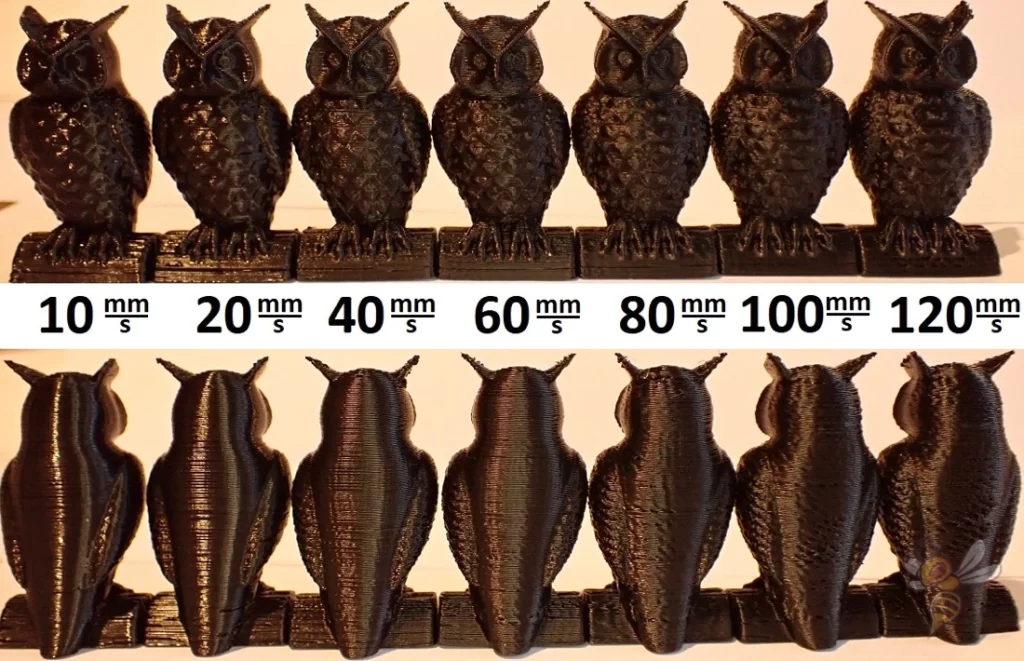
Considering the ever-increasing likelihood of print errors and ever-decreasing surface quality, it is often not practical to increase the print speed above a certain value. In general, the higher the print speed is set, the worse the print quality becomes.
There is therefore a sweet spot for each (FDM) 3D printer where good print quality can be achieved at the highest possible print speed.
Tip: Even if you want to set the print speed as high as possible without producing print errors, you should greatly reduce the print speed for the first layer. Especially if you have problems with print bed adhesion, values between 5 and 10 mm/s will help to create a good print bed adhesion.
Improving the Speed of 3D Printers
With resin in 3D printers, the printing speed is coupled to the light exposure system. Improving the print speed is therefore usually not possible. With FDM 3D printers, however, there are many ways to improve the speed.
Calibrating the Print Speed
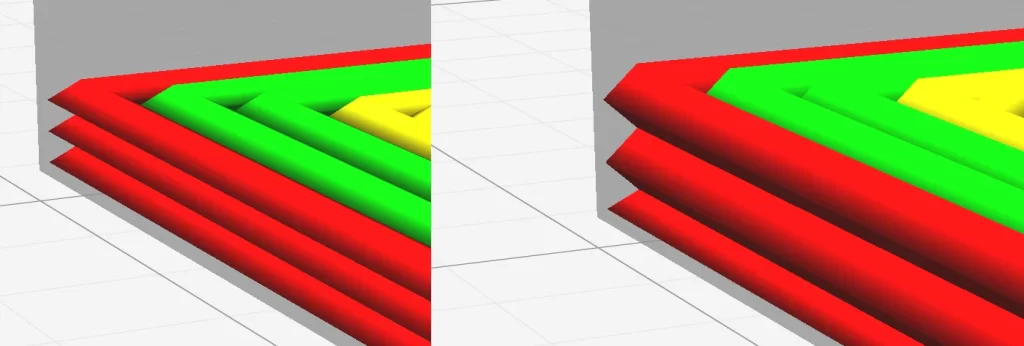
To determine the highest possible print speed while still maintaining good print quality of a 3D printer, calibration is necessary. Calibration objects for the print speed provoke print errors that can occur at high speeds (ringing/ghosting).
If the print head of the 3D printer moves too fast, vibrations occur that affect the object. In addition, the general positioning accuracy is lower, especially when changing the direction of movement.
The vibrations distort details on the surface and copy them horizontally in a kind of oscillation. In addition, corners are inaccurately executed and typically widened due to the high speed of the print head.
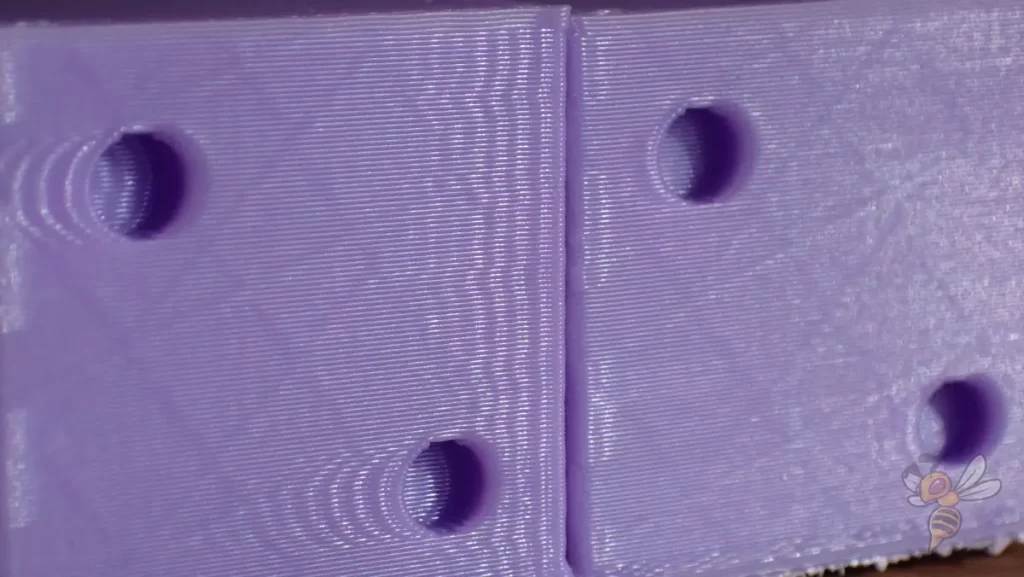
I like to use a cube with letters or holes on the sides for this type of calibration. The 3DBenchy is also great for this.
When calibrating the print speed with such objects, the goal is to generate as few of these print errors as possible. However, there is no hard limit from which the print errors appear and before which they do not. Threshold is very vague and you have to decide for yourself when these print errors are okay for you.
In the end, the application of the object is decisive. If the object has a decorative use, the quality should be as good as possible and the speed thus relatively slow. But with a doorstop for example, these printing errors are irrelevant and you can set the printing speed very high.
Improving the Mechanics of the 3D Printer
To increase the printing speed of an FDM 3D printer, components of the mechanics can be improved. These include, in particular, higher-quality linear guides* or rods*.
Such upgrades can improve the mobility of the print head. This improves positioning accuracy, resulting in better production of corners and small details at higher print speeds.
However, faster stepper motors* can also be installed. Occasionally, the speed of a 3D printer is limited by the speed of these motors. If the rest of the design is strong enough to support higher print speeds, this is a useful upgrade to improve the printing speed.
Using Klipper as Firmware
To improve the print speed of an FDM 3D printer, Klipper can be used as firmware. With this firmware, data from an accelerometer on the print head can be used to significantly increase the print speed without producing print errors.
The main factor limiting the printing speed is the vibrations that occur in the print head. The faster the print head changes its direction of movement, the stronger these vibrations become. Print errors caused by such vibrations therefore become more severe the higher the print speed.
The acceleration sensor is used to measure the vibrations in the print head. From the data obtained, Klipper can control the movements of the printer so that they generate as little vibration as possible.
I have often worked with Klipper, but one of the most impressive examples was when I used the Creality Sonic Pad on the Ender 3 V2. The print quality I achieved at 50 mm/s without Klipper, I could still achieve at 250 mm/s with Klipper!
So, it’s not always just hardware improvements that can improve print speed, firmware has a big impact on that too.
Use of other 3D Printing Materials
For FDM 3D printers, selecting high-quality filaments can increase print speed. Print errors occur less frequently with such filaments. With resin 3D printers, the various resins sometimes differ greatly in their curing time.
In addition, the transparency of the resin used has a major influence on the curing time. Transparent resins take much longer to cure than a matte and black resin. The ability to absorb the light and thus the energy for curing is much better with dark resins, which means that they cure faster.
Improving the Printing Time of a 3D Printer
The printing time of an FDM 3D print is not only influenced by the pure printing speed. Several other factors also play a role in how long an object takes to print.
Increase the Travel Speed
The travel speed of an FDM 3D printer determines the speed of extrusionless movements. Increasing the travel speed reduces the printing time. In this case, the travel speed is often more than twice the printing speed.
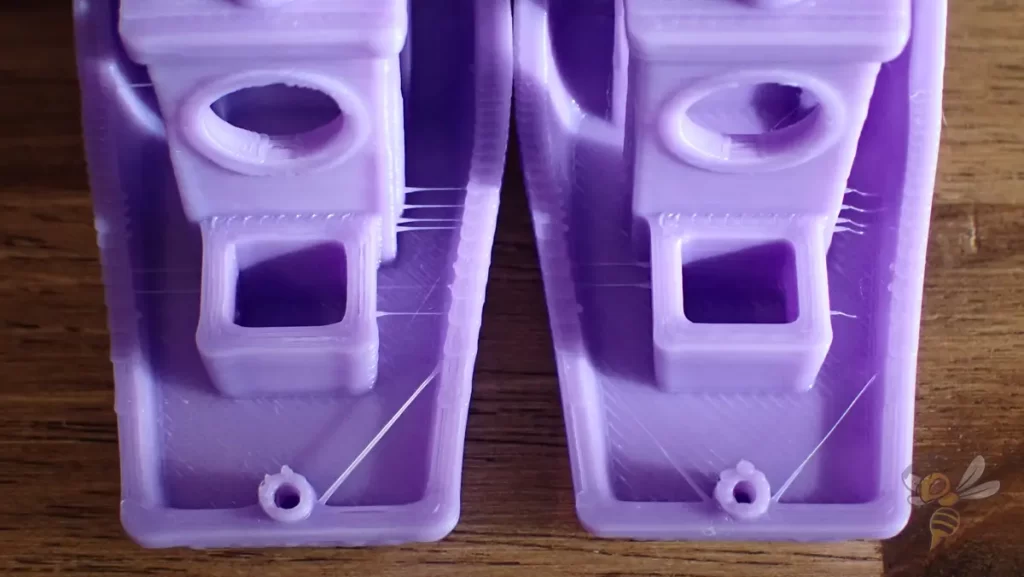
However, the travel speed must also not be set too high, otherwise typical printing errors such as ringing or ghosting can occur.
In extreme cases, a layer shift can also occur. Then the speed is so high that the toothed belts slip or the object slips.
Increasing the Layer Height
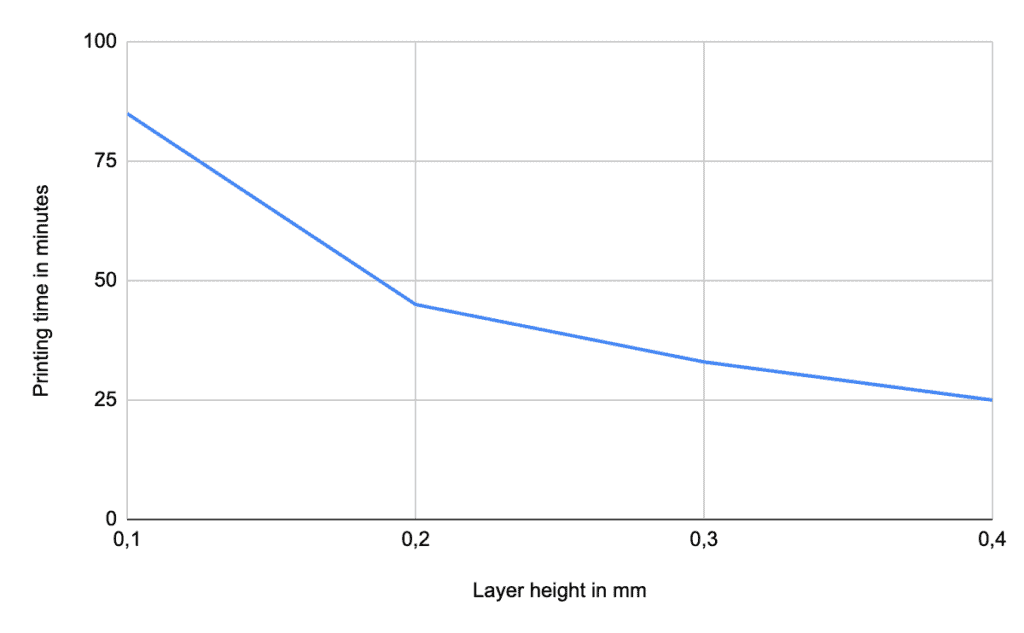
If the surface finish is secondary for an FDM print, thicker layers massively reduce the print duration.
To demonstrate the influence of layer height, I sliced the same object with different layer heights in Cura. The print time decreases rapidly as the layers get higher. Therefore, particularly fine 3D prints take an extremely long time to print.
In this article you will learn which layer heights you can implement with your nozzle.
Increasing the Line Width
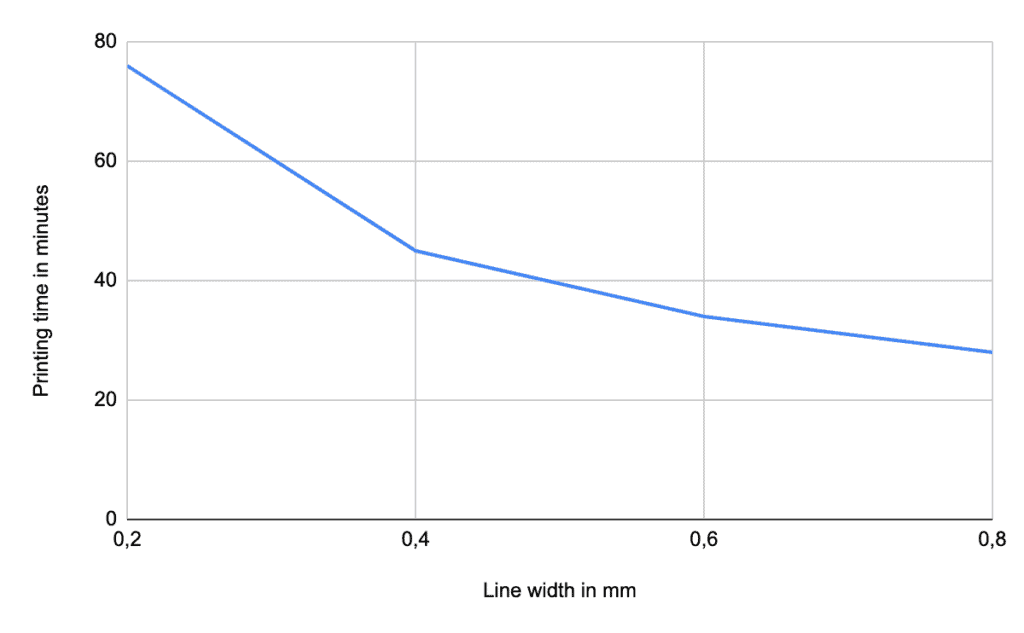
If the line width of a 3D print is increased, the printing time is reduced. The same amount of material is then printed in less time.
The line width behaves similarly to the layer height in reducing the print duration. The more filament is extruded at once, the faster the print is finished.
How wide the lines can be is determined by the diameter of the nozzle. In this article you will learn about the dependency between the diameter of the nozzle and the line width.
Increasing the Infill Printing Speed
Increasing the printing speed inside the object reduces the printing time. The infill, i.e. the material inside, is hidden, making the print quality there irrelevant.
In many standard profiles of 3D printers, the print speed of the infill is set as high as the normal print speed. Here you have great potential to save time when printing.
Since the print quality inside the object is irrelevant, you can start here with 150% of the normal print speed and observe the effects.
Using the Combing Mode in Cura
The Combing mode in Cura determines the paths of the print head during extrusionless travel movements. Depending on the geometry of the object, up to 25% of the printing time can be saved by optimizing these movements.
If you can’t find the Combing mode in Cura, the first thing you need to do is make the setting visible. You can activate or deactivate the visibility of the individual settings via the menu.
I always activate all settings, even if this can be a bit confusing at the beginning. However, you can then also quickly find certain settings via the search bar.
You can adjust the settings so that the print head either travels only over infill areas of the object, over no surfaces already printed, or avoids only the outer skin.
If you would like to learn more about this mode in Cura, you should check out this article.
Conclusion
The speed of a 3D printer has a great influence on the final result. In order for the result to be of high quality, the speed must not be too high so that no printing errors appear.
To delay the threshold at which such printing errors can occur, there are various improvements you can make to the printer itself and its firmware.
Disclosure: This website is the property of Martin Lütkemeyer and is operated by Martin Lütkemeyer. Martin Lütkemeyer is a member of the Amazon Services LLC and other Affiliate Programs. These are affiliate advertising programs designed to enable websites to earn advertising revenue through advertising and linking to Amazon.com and others. Links marked with * are affiliate links.
