
- Wet Filament: Prevention, Symptoms & Drying - July 18, 2024
- Sovol SV08 – Best PrusaSlicer Settings & Profile - June 26, 2024
- Sovol SV08 – Best Orca Slicer Settings & Profile - June 26, 2024
Disclosure: Links marked with * are Affiliate Links. I earn from qualifying purchases if you decide to make a purchase through these links – at no additional cost for you!

Layer shifts in 3D printing are extremely frustrating and can cost a lot of time, nerves and filament. When a layer shift occurs, the rest of the object is shifted above the layer where it occurred.
The most common causes of layer shifts in 3D printing are timing belts that are not pulled tight enough, poor print bed adhesion or overheated electronic components. If the cause is unclear, activating the Z-hop can help to avoid collisions of the hot nozzle with the print object.
In this article, I’ll show you step by step what solutions you can apply to avoid layer shifts. The order in this article is also the order or priority in which you should apply them.
Table of Contents:
Level the Print Bed

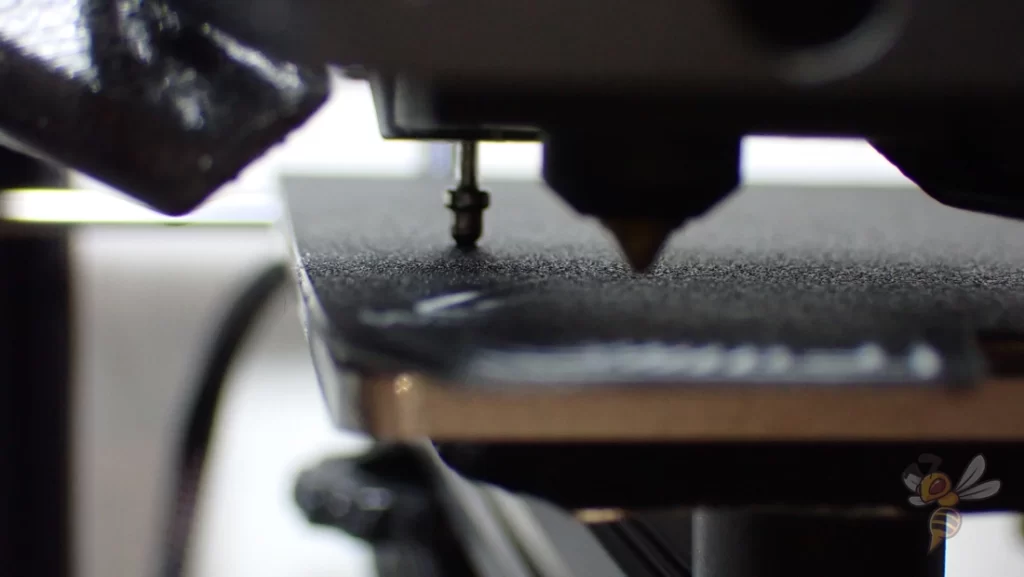
For most 3D printing errors, the very first thing to do is to re-level the print bed. This can also help with layer offsets or layer shifts. A poorly leveled print bed can cause layer shifts due to poor print bed adhesion.
The goal of print bed leveling is to set the print bed surface parallel to the plane of motion of the print head on the XY plane. In other words, the distance between the nozzle and the print bed must be the same everywhere on the print bed.
Most 3D printers have screws under the four corners of their print bed. Using the paper method, you can adjust the distance between the nozzle and the print bed equally at the four corners.
As a rule of thumb, the distance should be adjusted so that you can move the piece of paper with some friction between the nozzle and the print bed. This will push the filament slightly onto the print bed and allow it to flow into the small holes and cracks in the print bed surface.
The distance between the nozzle and the print bed (z-offset) must also not be too small. Otherwise you will cause an elephant foot.

There are also 3D printers with an automatic print bed leveling. Here, the distance and the inclination of the print bed is measured by a sensor installed in the print head. The measured values are used during printing to compensate for the inclination.
But even with 3D printers with such a sensor, you have to set the z-offset manually. Popular sensors are among others the CR-Touch and the BL-Touch.
Tighten the Belts
The most common reason why a layer shift occurs in 3D printing is that the toothed belts on the x- and/or y-axis are not tight enough. If the toothed belts are too loose, the stepper motor can slip, causing at least one step to be skipped.
To check if the tension of the toothed belts on the x- and y-axis of your 3D printer is sufficient, you can flick them with your finger. If they are too loose, there will be no noise at all, if they are too tight, the noise will be very high.
You should still be able to pull the timing belt slightly to the side with your finger, but it should not hang loosely. If it is too tight, a timing belt can tear eventually.
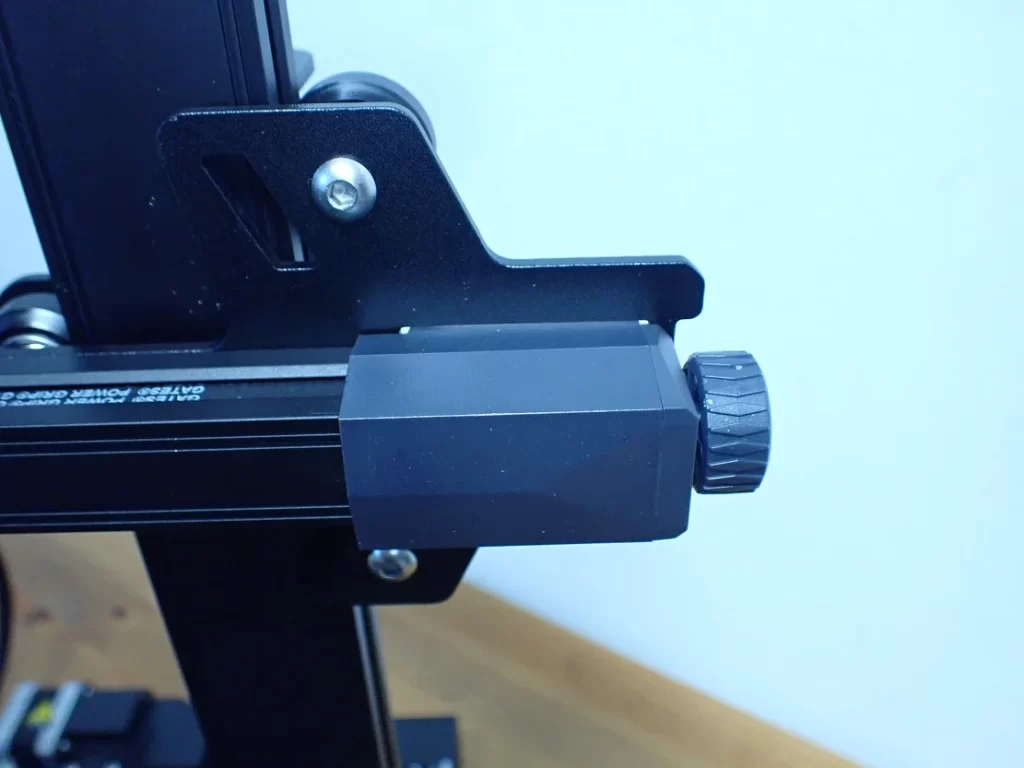
With modern 3D printers, it is common that there is a toothed belt tensioner on the x- and y-axis. You can conveniently adjust the tension with these rotary screws.
With older 3D printers, you may have to partially disassemble the respective axis to tighten the timing belts. If your 3D printer is one of these older models, it would make sense to upgrade. There are buyable and printable belt tensioners for many 3D printers.
Improve Print Bed Adhesion
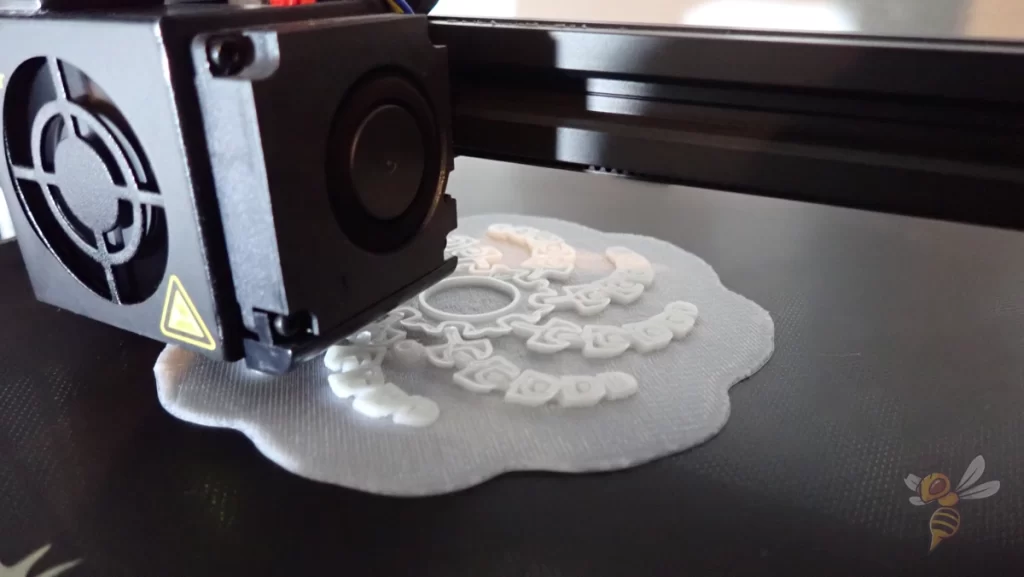
A layer shift is often caused by poor print bed adhesion in 3D printing. Print bed adhesion can be improved by using a smaller z-offset, lower speeds, adhesives and other methods.
If print bed adhesion is the cause of a layer shift, there is usually only one or a few layer shifts. Typically, the print then ends with the hot nozzle pushing the entire print object along with it.
In rare cases, however, the adhesion may be just good enough for the print object to adhere again and the rest of the print to be performed normally. In both cases, you should take the following measures to increase the print bed adhesion.
Clean the print bed: In order for the hot filament to adhere to the print bed, there must be no foreign objects such as filament residue or dust on the print bed. Clean the print bed before each new print to ensure the best print bed adhesion.
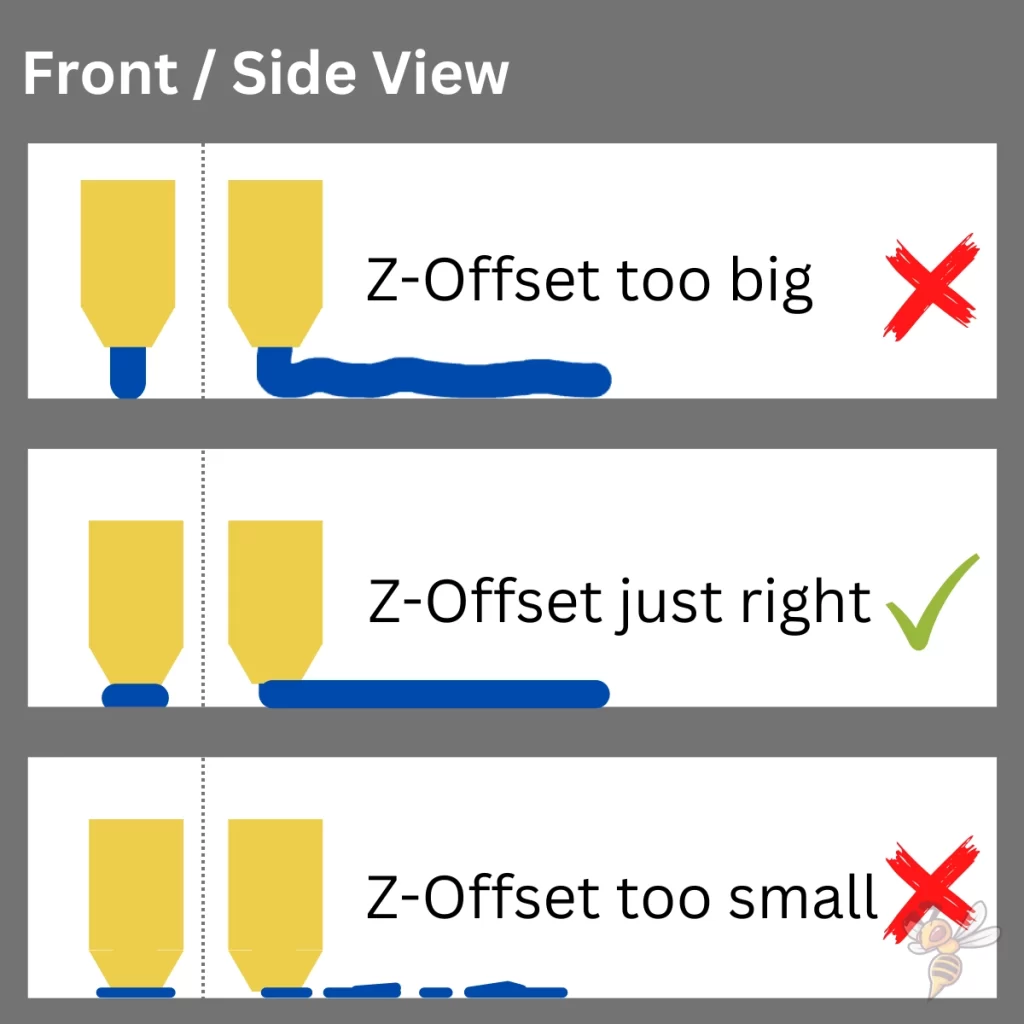
Reduce the distance between the nozzle and the print bed:The first layer should be slightly squeezed onto the print bed so that the hot filament can penetrate all small cracks and holes of the surface. This is the only way to get a good print bed adhesion.
However, the gap should not be so small as to prevent extrusion or create an elephant foot.
Reduce the print speed of the first layer: The print speed should only be 5 to 10 mm/s for the first layer to ensure a good print bed adhesion. Due to the low speed, the filament stays hot longer and can therefore bond better with the print bed.
Disable cooling for the first layer: For most filaments, you should disable cooling for the first layer. This is for the same reason as a slower print speed – the filament stays hot and liquid longer.
Increase print bed temperature: Even with a higher print bed temperature, the filament will remain liquid longer and will be better able to penetrate and adhere to the small holes and cracks in the print bed.
Thicker first layer: This approach also helps the filament stay hot longer, giving it more time to bond well to the print bed.

Use mouse ears: To increase the print bed adhesion, you can also use so-called mouse ears, which increase the connection surface between the object and the print bed on critical parts of the first layer. The larger bonding surface creates a better adhesion. The mouse ears can be easily removed after printing, mostly without residues.
Apply glue: Normal glue sticks, blue tape or hairspray are suitable for 3D printing. However, you will achieve the best results with special 3D printing adhesives. One of them is Magigoo, with which I have already had good experiences.
Use a raft: A raft consists of several layers of filament that are printed onto the print bed underneath the first layer of the object. In a sense, this gives the print object a new print bed to which it adheres ideally. Because the raft has such a large surface area, its adhesion is several times greater than that of the object.
Replace the print bed: If none of these methods worked to increase adhesion enough, you can still swap out your print bed for a better one. PEI* has proven to be ideal for most filaments.
If you want to learn more about the steps to increase print bed adhesion, you can read this article: 3D Print Doesn’t Stick: Step-by-Step Guide
Reduce the Print Speed
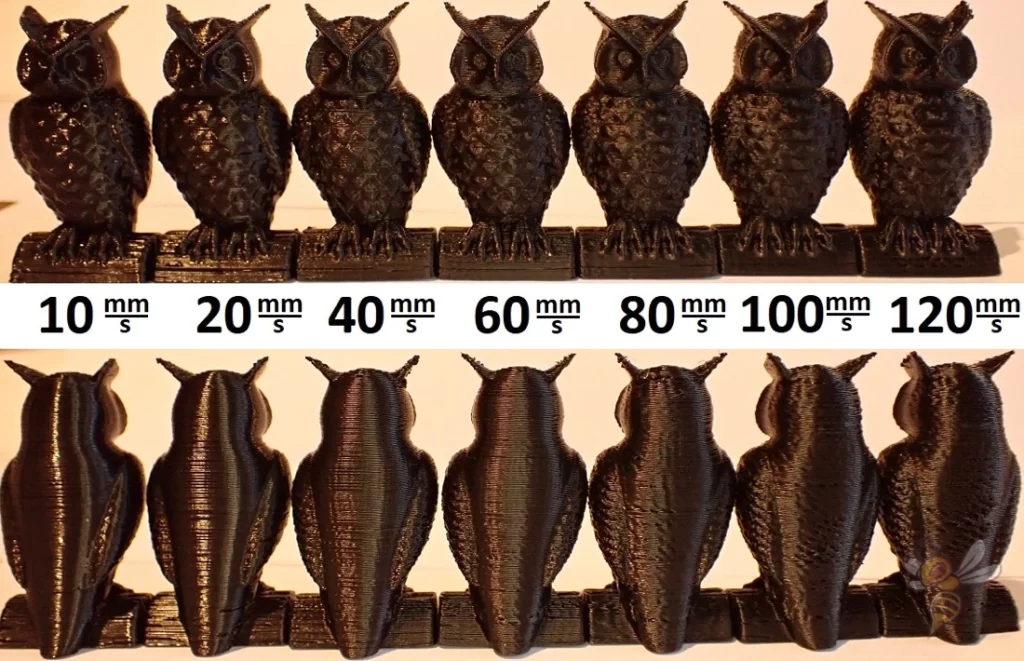
If the print speed is set too high, sometimes the stepper motors can’t keep up. If you observe layer shifts, you should set the print speed to half of the set value and check if this solves the problem.
Typical print speeds for FDM 3D printers are between 40 and 80 mm/s. With higher print speeds, not only the print quality decreases, but also print errors like layer shifts can occur.
If the print speed is set too high, the stepper motors sometimes cannot convert the desired speed and move less than required. This changes the end position of the nozzle relative to the previous layer.
Every so often, a combination of too high a printing speed and loose timing belts also occurs. At low print speeds the timing belts may not slip and at high print speeds they may. The solution here is to first check the belt tension and if the printing error then still exists, to reduce the printing speed.
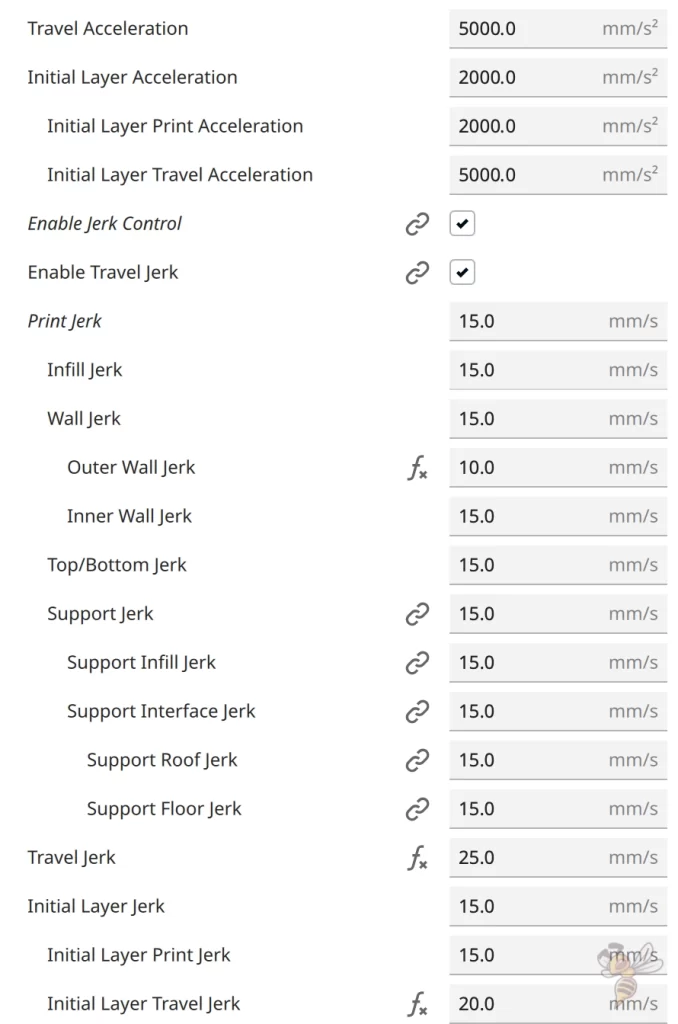
Besides too high printing speeds, too high accelerations of the print head and/or print bed can also cause the toothed belts to slip. In most slicers, you can activate the acceleration control and define the maximum acceleration.
Normally, this function is used to prevent printing errors such as ringing or ghosting caused by vibrations of the print head. However, lower accelerations can also cause the timing belt to stop slipping.
The heavier the print head, the smaller the accelerations should be set. The higher the weight of the print head, the more inertial mass it has. When changing direction quickly, such a heavy print head would exert a strong force on the toothed belt and the stepper motor. The probability of slipping is thus increased many times over.
It is therefore common to select a lower acceleration limit for direct drive extruders than for Bowden extruders, as the former are usually heavier.
Cool the Electronics
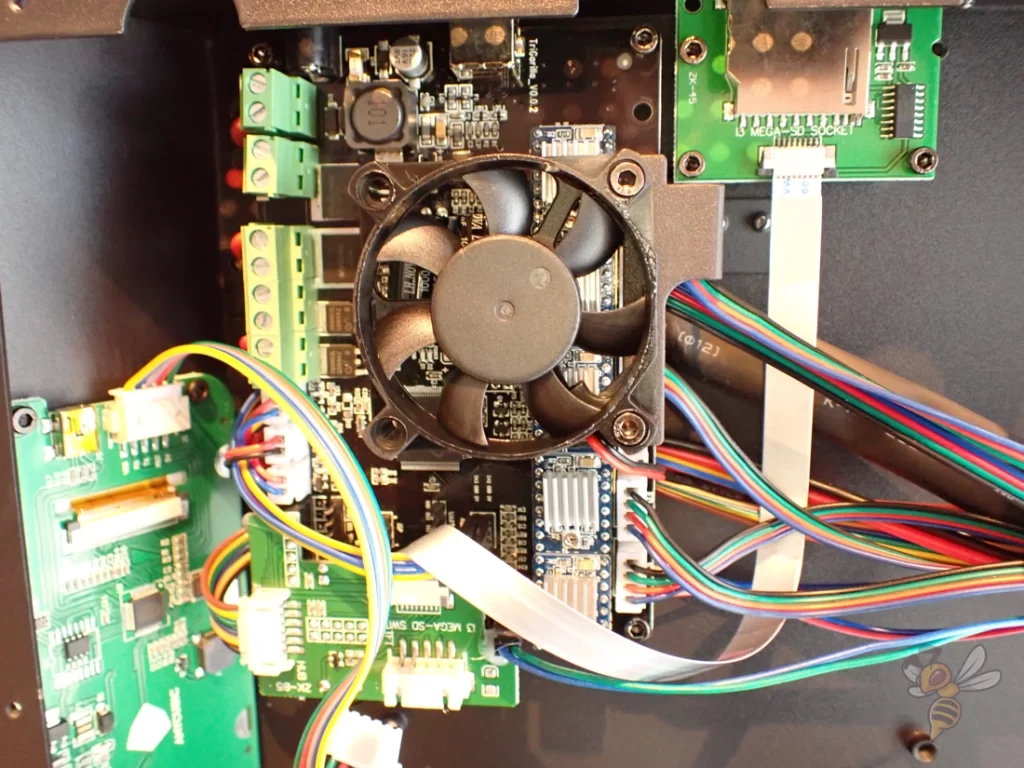
Layer shifts can occur when the stepper motor drivers on the 3D printer’s main board overheat. The overheating causes the stepper motor to skip individual steps. Adequate cooling of the components corrects the error.
To cool the stepper motor drivers, you can improvise or install a permanent upgrade. Improvised solutions would be to put a fan next to the 3D printer or place it in a cooler location.
You can also install a permanent fan in the 3D printer’s housing to better dissipate the warm air. Another possibility would be to mount better passive coolers on the stepper motor drivers.
Activate the Z-Hop

Layer shifts can occur when the nozzle moves between two extrusions over already printed parts and gets stuck there. By activating the Z-Hop, the nozzle moves up a bit after the extrusion and thus prevents collisions with already printed parts.
Occasionally, a printed piece may stick up a little due to warping. In such places, the nozzle can get stuck and push the object off the print bed. In most slicers, you can set the Z-hop individually and define how large it should be and over which surfaces it should be executed.
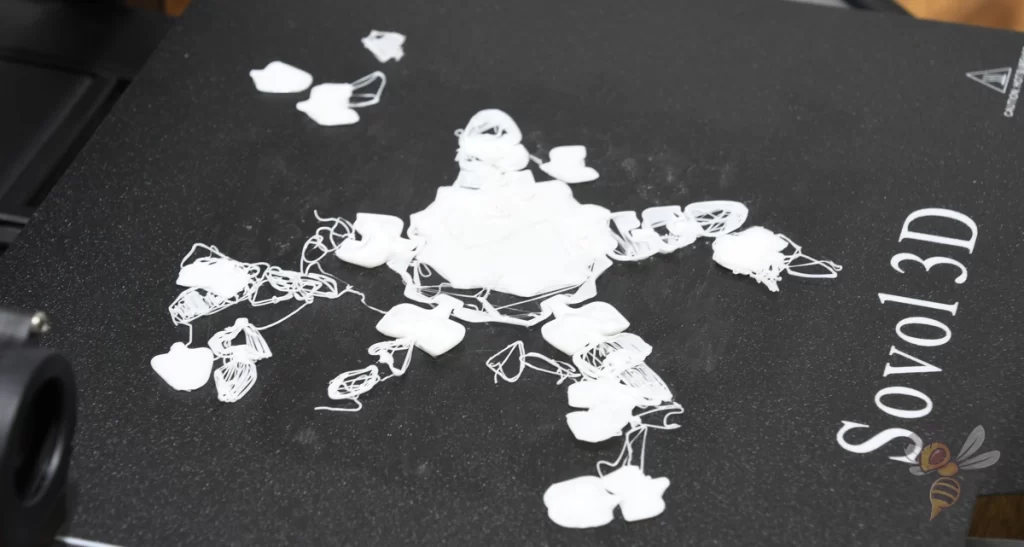
Typically, the layer shifts that are triggered by a collision are one-off and do not occur more frequently during the print. And the result is usually that the nozzle pushes the print object back and forth for the rest of the print and the famous spaghetti are formed.
In rare cases, however, the print bed adhesion can be so good that the print object adheres again after being displaced. Theoretically, the print object could therefore be displaced again with each layer. Then you get a staircase effect.
Avoid Strong Vibrations
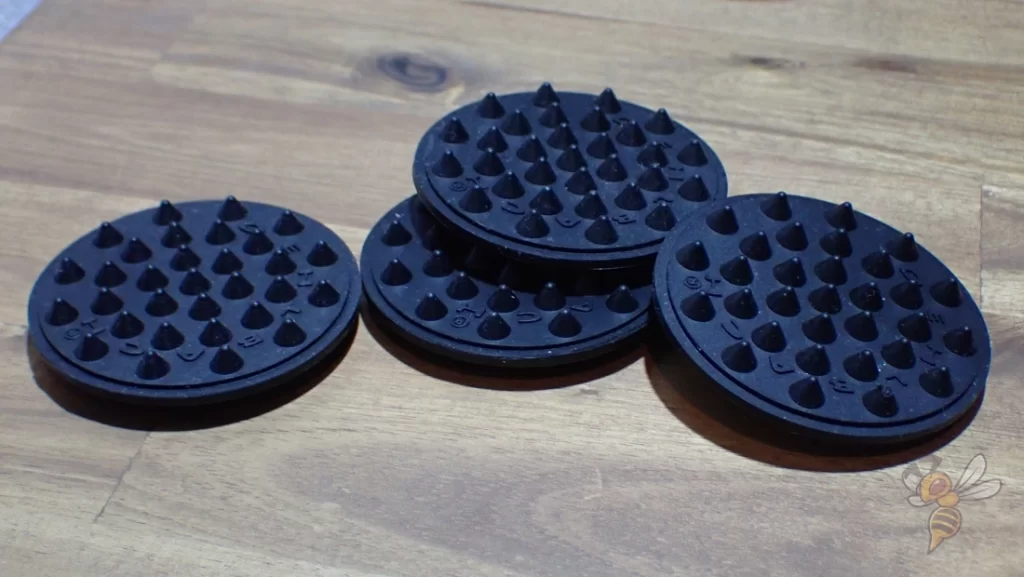
Strong vibrations can cause the toothed belt to lose its grip on the stepper motor and slip. This can lead to layer shifts.
Not only do you need to protect the 3D printer from strong vibrations that happen due to external influences (like accidentally bumping the work surface or something similar), you can also protect it from its own vibrations by giving it dampening feet.
For example, these* are suitable for any 3D printer.
The advantage of such shock absorbers is that they not only dampen mechanical vibrations, but also acoustic ones. The overall volume of the 3D printer is thus somewhat reduced.
You can also print your own shock absorbers. On portals like Thingiverse you can find many designs from other users who had the same problem. They are designed in such a way that you usually don’t need flexible filament and PLA or PETG is sufficient.
Avoid Collisions
Collisions of the print head with the axes or the print object can cause layer shifts.
If the print head is not in the correct home position at the beginning of the 3D print, it can collide with the beginning or end of its axis or the print bed. You will then hear a loud pop or rattle as the stepper motor slips and tries to move the print head against the object.
The start G-code of your 3D printer should therefore contain the G28 G-code for the home position.
The more common case where collisions can cause layer shifts is when the nozzle collides with the print object. Normally, this should not happen, but when warping occurs, parts of the object can protrude upwards.
If this is the case, you should make sure that the print bed is leveled and that the print bed adhesion is sufficient to prevent warping of the first layers.
Again, a makeshift solution would be to enable the Z-Hop or reduce the speed of movement between extrusions. If the movement speed is low, the hot nozzle simply melts away any obstacles in its path.
Clean the Axes


Foreign bodies in the mechanics of the axes can lead to layer shifts. The most common case is that filament residues have collected on the feed wheel of the stepper motor and either block the toothed belt or cause it to slip.
If you observe layer shifts, you should also clean the complete mechanics of the axes. Usually, it is enough to remove filament residues with your fingers or tweezers.
Grease the 3D Printer

Badly greased axes can lead to layer shifts.
To grease the axes, you need normal grease or special 3D printer grease*. However, do not apply too much and watch out for contamination, as dirty grease can accumulate and also cause the stepper motor to jam.
Disclosure: This website is the property of Martin Lütkemeyer and is operated by Martin Lütkemeyer. Martin Lütkemeyer is a member of the Amazon Services LLC and other Affiliate Programs. These are affiliate advertising programs designed to enable websites to earn advertising revenue through advertising and linking to Amazon.com and others. Links marked with * are affiliate links.
