
- Wet Filament: Prevention, Symptoms & Drying - July 18, 2024
- Sovol SV08 – Best PrusaSlicer Settings & Profile - June 26, 2024
- Sovol SV08 – Best Orca Slicer Settings & Profile - June 26, 2024
Disclosure: Links marked with * are Affiliate Links. I earn from qualifying purchases if you decide to make a purchase through these links – at no additional cost for you!
With the right test objects, you can optimize the speed of your 3D printer. When testing the speed of a 3D printer, the main goal is to find the highest possible speed at which no printing errors occur.
Print errors that first appear at too high print speeds are ringing or ghosting. In this case, the vibrations that occur in the print head at too high speeds are transmitted directly to the object. The details on the surface seem to echo on the horizontal plane.
A 3D print speed test has various surface details to be able to show even slight vibrations of the print head caused by too high speeds. There are also files that can test multiple print speeds in one print.
In this article, I will show you the best STL files to test the speed of your 3D printer. At the end of the article, I’ll give you some tips on how to increase the speed of your 3D printer even more without creating print errors.

Read the full calibration guide:
3D Printer Calibration: Step-by-Step to Perfect Results
Table of Contents:
Best STL Files
A good STL file to test the speed of a 3D printer uses little filament, prints fast and clearly shows if the speed is set too high.
I made a compilation of the best 3D printer speed tests, give you the appropriate links to them, and explain how to use them properly if necessary.
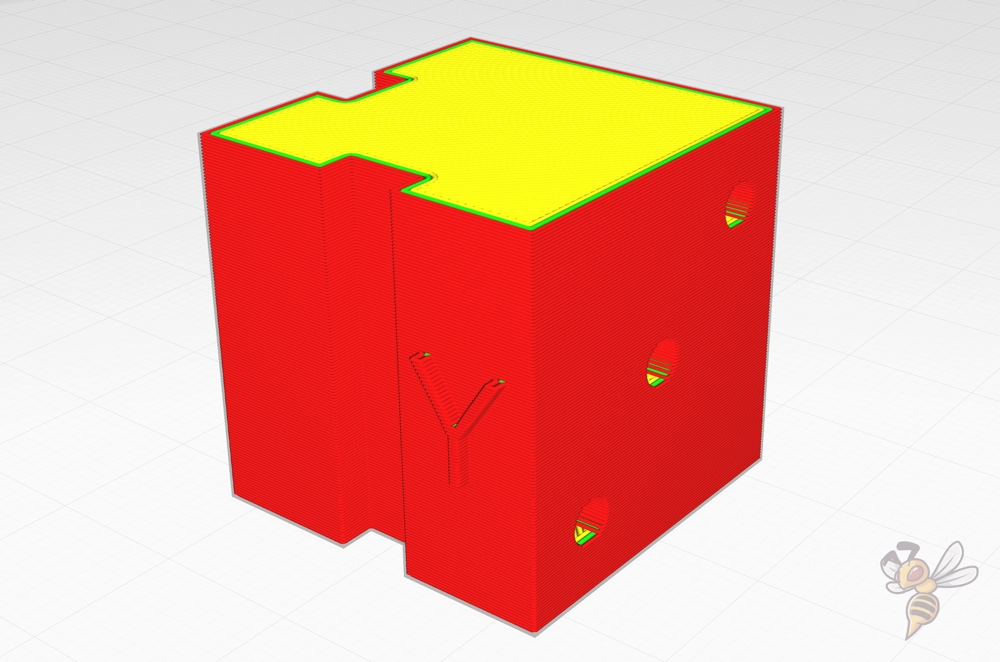
“Ringing Test Cube” – STL
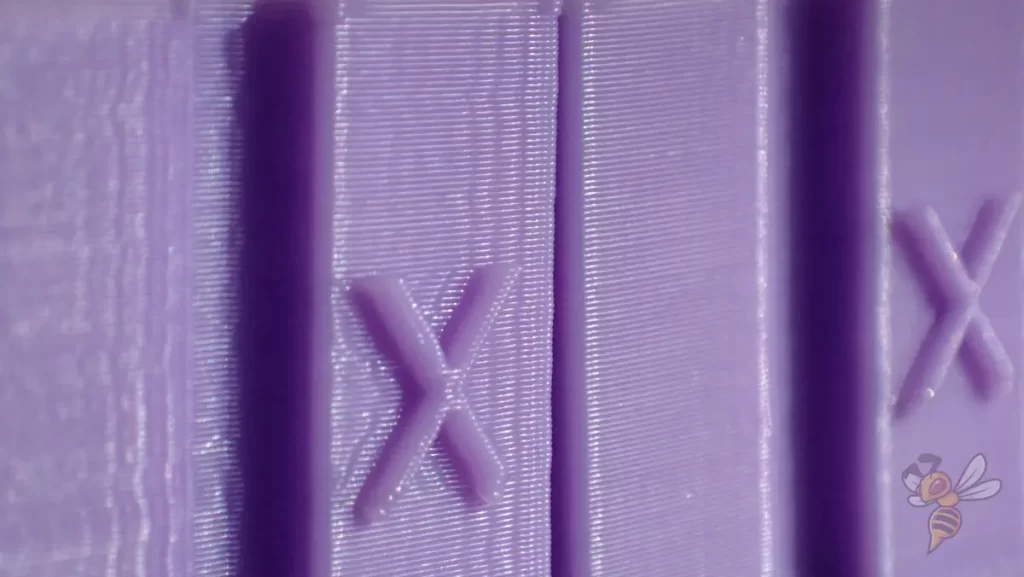
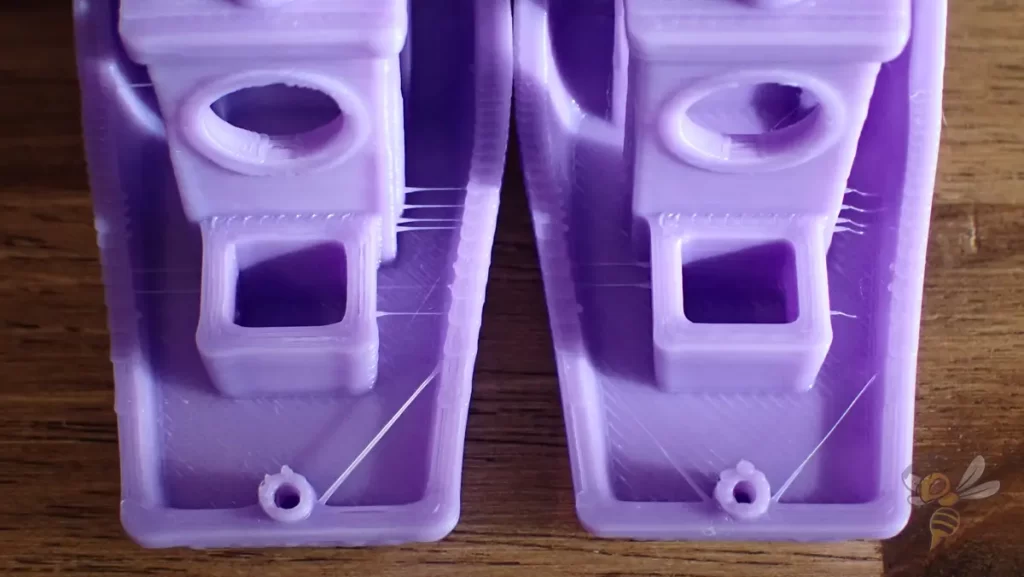
I like to use this test cube from “jstevewhite” on Thingiverse (click here for the file). Because of its many holes, the vertical incisions and the letters on its surface, the printing error ringing or ghosting can be detected quickly.
Since this object is all about the surface details, you can print the cube hollow or with lightning infill. This will save you a lot of time and filament.
The first print speed you should test is the normal speed you use, or the one from your slicer’s default profile. If you find errors at this speed, you need to decrease it or improve the stability of your 3D printer. Otherwise, you can slowly increase it to get closer to the perfect speed.
The advantage of this test cube is that it prints relatively quickly. However, you will need to make several prints to slowly approach the optimal printing speed. There are other objects that you can print in one piece and test different speeds at once.
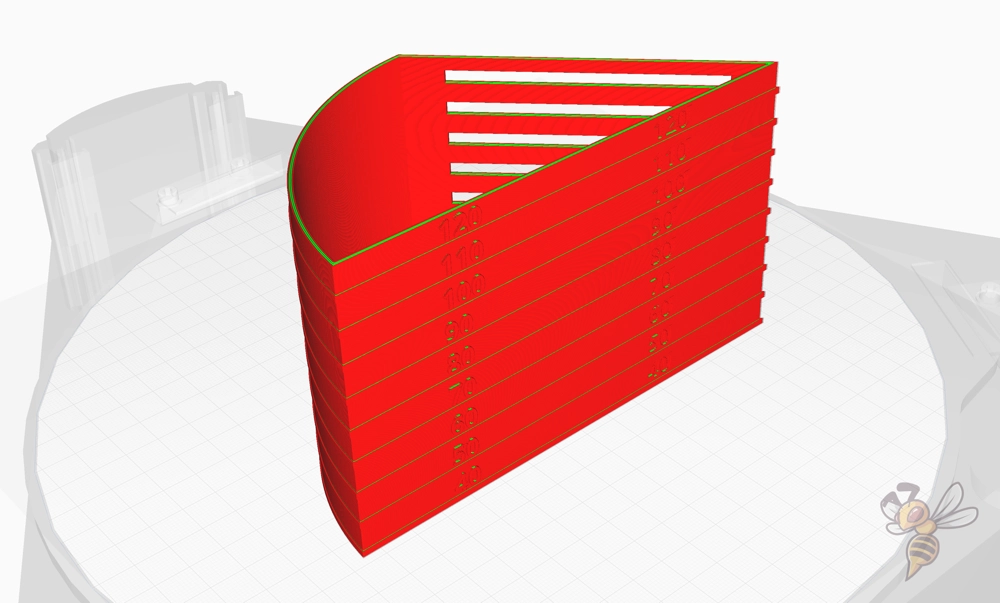
“Speed Test Calibration – STL
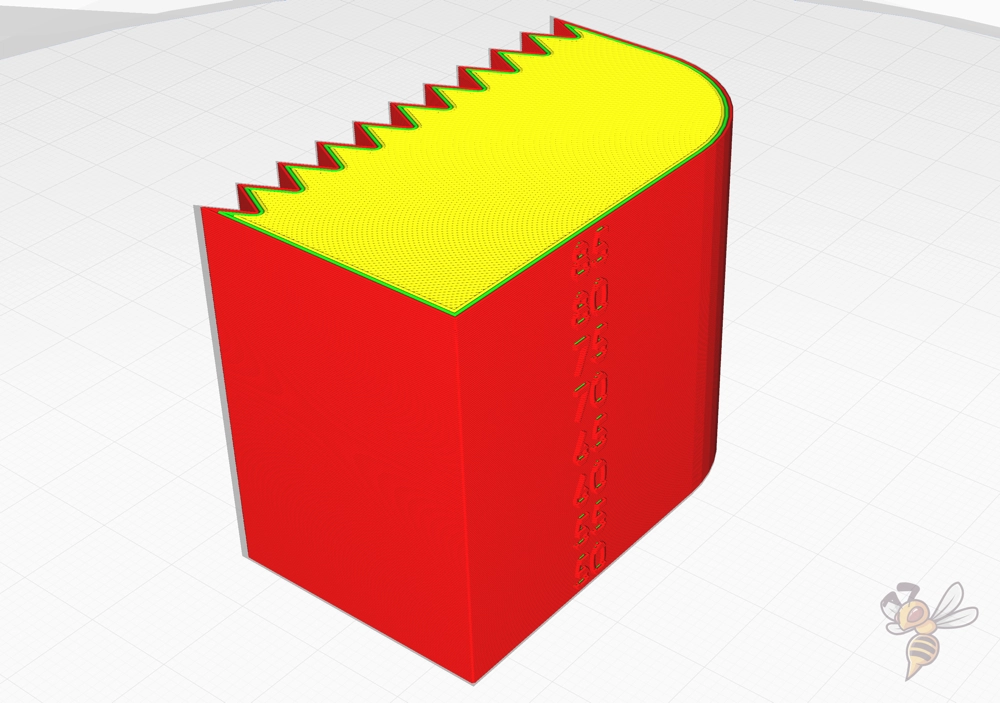
This speed test from ELLADD2007 on Cults3D can test multiple print speeds at once (link to file).
Most FDM 3D printers can handle a print speed of 50 mm/s well. Therefore, this test starts at 50 mm/s second and goes up to a maximum of 85 mm/s.
The numbers on the front do not only indicate the print speed of the respective layers, they are also the test criterion. If the speed is too high, you will notice echoes of the numbers here.
The back side also contains a test for the print speed. The saw-toothed pattern will not be executed correctly if the speed is too high.
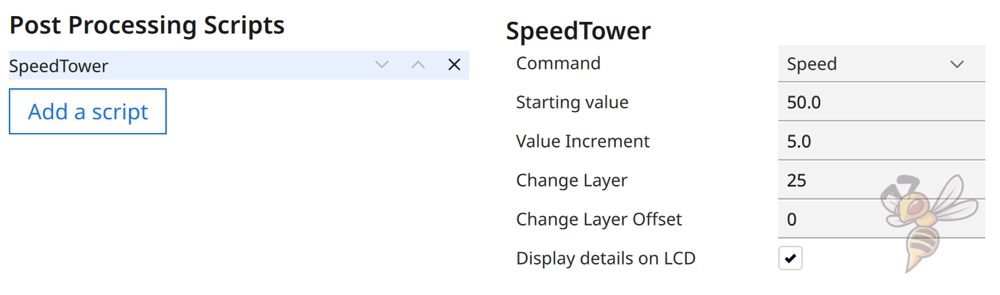
To print such objects, you need a suitable script in Cura. There is the Speed Tower Script, which is included in the Calibration Shapes Plugin.
With this script, the 3D printer changes the printing speed in z-direction during printing. The settings must be adjusted to the respective object. Here the values change after every 25 layers, if you have set a layer height of 0.2 mm.
“Speed Test” – STL

This 3D printer speed test also includes numbers and other surface details to test the optimal printing speed. It comes from poddy71 on Thingiverse (link to file).
This speed test comes in two variants, a coarser test and a more accurate test. The more accurate object tests the same range of speeds, but at finer intervals.
Again, you need the script to change the print speed in the z-direction after a certain number of layers. It’s best to print this object without infill and top layers as well to save filament and time.
“Kersey Fabrications Speed Test” – STL
The print speed test from kerseyfabrications on Cults3D is larger compared to the other tests and takes a relatively long time (link to file). But this object tests a few more printing errors, which can behave differently at different speeds.
On this object, there are straight surfaces, protruding numbers, embossed numbers, a curve and overhangs. So, you can also see at a glance at what print speed your overhangs will print best.
This test object also tests a wide range of speeds that would work for most FDM 3D printers.
How to Improve the 3D Print Speed
You have already taken the most important step in optimizing the print speed of a 3D printer by using the test objects presented in this article. By using these test objects, you will quickly find out what maximum print speed you can achieve without print errors.
But how can you increase this maximum print speed? Here are a few tips.
Improve the 3D Printer Components
The maximum print speed of a 3D printer is mainly influenced by the weight of the print head and the stability the overall construction of the 3D printer. There are a few other components like the stepper motors that have an impact on it.
So, to improve the highest possible print speed of a 3D printer, you can try to replace the individual components with better ones.
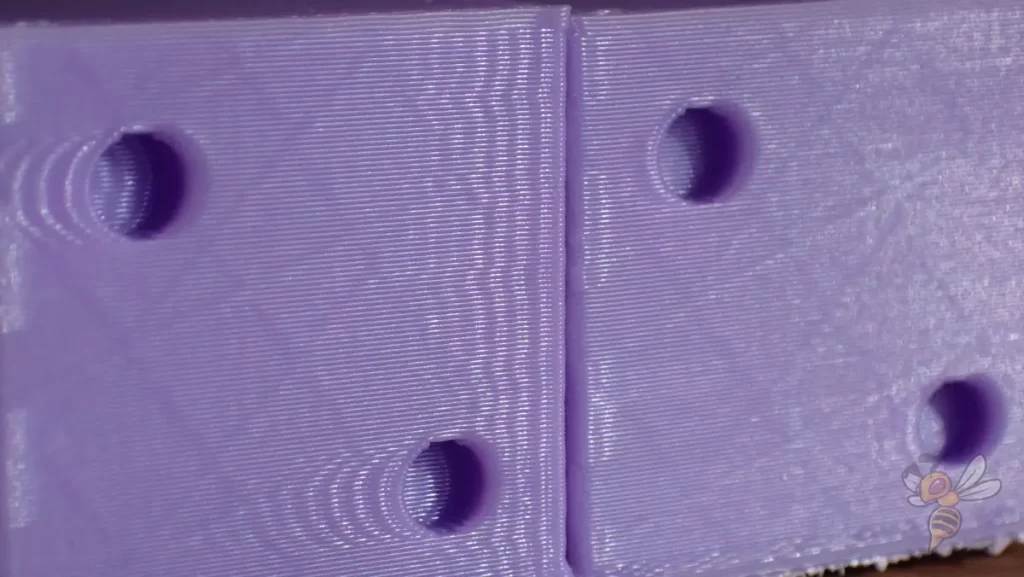
For example, you could see if there is a lighter print head for your 3D printer. For many Creality 3D printers, the Sprite extruder is ideal. It is extremely light and therefore only produces annoying vibrations at higher printing speeds. My detailed test on this is linked in the image above.
You can also try swapping out your stepper motors. There are lower quality stepper motors that slip at too high print speeds. You would notice this if layer shifts occur.
Tighten the Belts
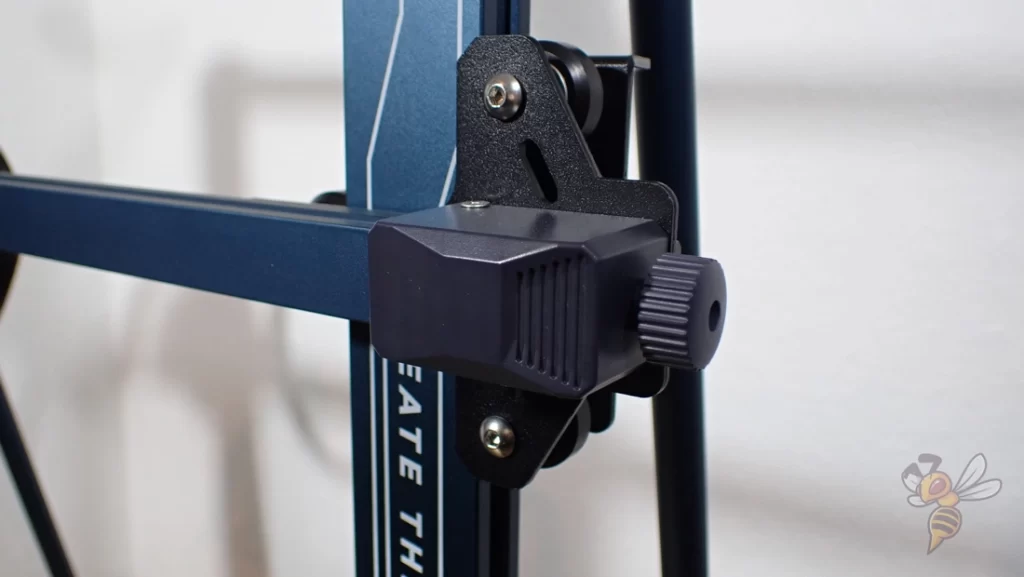
If your 3D printer’s belts are not properly tensioned, you may experience vibrations that can also affect the object. You must not tension them too little or too much.
If you tension the timing belts too little, they can slip and cause layer shifts. If you tension the toothed belts too much, the movements of the stepper motors cannot be transmitted properly to the print head because there is too much friction. In extreme cases, the toothed belts can also tear if the tension is too high.
You have reached the correct tension when the belt makes a high-pitched noise when you flick it with your finger. It must still be able to yield slightly to your finger.
Use Klipper as Firmware
Klipper is a firmware for 3D printers that can significantly improve the printing speed. The software can use data recorded by an accelerometer on the print head to optimize the acceleration forces when the print head changes direction.
In principle, Klipper reduces the speed of the print head selectively at points or direction changes where high vibrations occur. These vibrations are thus bypassed.
I have used Klipper on several 3D printers and have been able to more than double the print speed in many cases.
In the example above, I used the Ender 3 V2 and Creality Sonic Pad to print the Ringing Test Cube at a speed of 250 mm/s. Here you can find my detailed test about it.
Normally, the Ender 3 V2 achieves print speeds of 40 to 60 mm per second without producing print errors. An increase to 250 mm/s is enormous.
If you want to know how to save even more printing time, you can read this article.
Disclosure: This website is the property of Martin Lütkemeyer and is operated by Martin Lütkemeyer. Martin Lütkemeyer is a member of the Amazon Services LLC and other Affiliate Programs. These are affiliate advertising programs designed to enable websites to earn advertising revenue through advertising and linking to Amazon.com and others. Links marked with * are affiliate links.
