
- Wet Filament: Prevention, Symptoms & Drying - July 18, 2024
- Sovol SV08 – Best PrusaSlicer Settings & Profile - June 26, 2024
- Sovol SV08 – Best Orca Slicer Settings & Profile - June 26, 2024
Disclosure: Links marked with * are Affiliate Links. I earn from qualifying purchases if you decide to make a purchase through these links – at no additional cost for you!
The curing times of resin 3D objects vary greatly depending on the size of the object and the UV light source used. If the object is cured too short, it remains too soft, if it is over cured, it can become brittle and porous.
UV radiation cures 3D Resin. Depending on geographic location and cloud cover, sunlight will cure small objects (under 10 cm) in 2 to 4 hours and large objects in 4 to 8 hours. UV lamps and curing stations take 2 to 5 minutes for small objects and 5 to 20 minutes for large objects.
Curing with sunlight is free, but finding the right duration is difficult due to the many variables. Dedicated curing stations* are best for curing as they create perfectly homogeneous lighting. UV lamps for nail polish* have also proven effective.
In this detailed article, you will find out what you have to pay attention to, when you have over cured and what other effects can occur.
Table of Contents:
- 1 Curing Resin 3D Prints
- 2 How long does it take to cure 3D resin with UV light?
- 3 How to identify a fully cured resin 3D print?
- 4 What do fumes/vapors mean during curing?
- 5 Do resin 3D prints cure faster underwater?
- 6 Is it possible to over-cure resin 3D prints?
- 7 Why are resin 3D prints sticky after curing?
Curing Resin 3D Prints
Resin 3D prints are cured by UV light. The required UV light can be brought to the object after printing either by a UV lamp or by sunlight. Artificial UV light cures the resin faster.
In the 3D printer itself is a UV light source that cures the individual layers during printing. An LCD screen controls the UV light so precisely that only the areas belonging to the object are cured and the rest of the surface is not illuminated and cured.
After printing, the object is not yet fully cured. It must be further cured with artificial UV light or with the UV light from the sun. If you use the sun as a UV light source, the process takes much longer than with a UV lamp.
There are a few things to keep in mind when using artificial UV light as well as when curing in the sun. Not only should you know how long you have to cure the objects, the pre-treatment is also very important to get good results.
Washing Resin 3D Prints with Isopropyl Alcohol
After an object has been cured layer by layer in a resin 3D printer, it is still soaked with liquid resin. To prevent this thin layer of resin from curing, the object must be washed with isopropyl alcohol to preserve all details.
This step is extremely important to get the surface texture of the object as accurate as possible. If you don’t properly wash the remaining liquid resin off the object between printing and curing, it will be cured as well.
Even the finest resin residues can ruin the result when curing. There can be inaccuracies and residues in the form of thin, white ‘flakes’. This usually happens when the isopropyl alcohol is no longer concentrated enough and you have used it too often.
For washing resin 3D prints, 99% isopropyl alcohol* is best.
How to properly dispose of your used isopropyl alcohol or clean it of dissolved resin residue so you can reuse it, you can read in this guide.

Curing Resin 3D Prints with Sunlight
It can take several hours to cure a resin 3D print with sunlight. Depending on how strong the UV radiation is on the day, the duration can vary greatly. Uniform exposure from all sides must be ensured by turning the object and/or using reflectors.
Especially beginners who have bought a resin 3D printer but have not thought about curing, cure their first resin objects with sunlight. However, this method is more difficult and takes much longer than with artificial UV light.
The strength of the UV radiation hitting the object depends on an extremely large number of factors: Temperature, degree of cloud cover, geographic location and time of day. Due to these many uncertainties, you can never be sure how long the object really needs in the sunlight to be completely cured. It can quickly happen that it is over cured and becomes brittle.
Curing with artificial UV light is much more reliable.
Curing Resin 3D Prints with a UV Lamp
Resin 3D prints can be cured quickly and reproducibly with artificial UV light from a UV lamp. With a UV lamp, the process takes only a few minutes. Uniform irradiation is important. Special curing stations are best suited for this.


When curing resin 3D prints, uniform light is important. With special curing stations, such as the ELEGOO Mercury Plus* or ANYCUBIC Wash and Cure*, the objects rotate on a turntable at a constant speed so that all sides are illuminated evenly.
However, you can also use cheaper UV lamps. UV lamps for nail polish* have proven themselves for smaller objects, for example.
The disadvantages of such UV lamps for nail polish are their small sizes and that it is difficult to get an even illumination. To ensure this, you need to turn the object regularly.
To avoid these disadvantages, you could build a box with reflective walls. You mount the UV lamp on the top and a small turntable on the floor. This way you could ensure even lighting from all sides.
How long does it take to cure 3D resin with UV light?
Resin 3D prints cure completely in 2-8 hours under sunlight, depending on size. With a UV lamp or a curing station, curing takes 2-5 minutes. Very large objects take up to 20 minutes. Transparent objects cure faster because the UV light reaches everything.
| Curing method | Duration for small objects | Duration for large objects | Duration for transparent objects |
|---|---|---|---|
| Sunlight | 2-4 hours | 4-8 hours | 1-2 hours |
| UV lamp | 2-5 minutes | 5-20 minutes | 1-2 minutes |
| Curing station | 2-5 minutes | 5-20 minutes | 1-2 minutes |
The curing times for a UV lamp are identical to those for special curing stations. However, the prerequisite for this is that the objects are rotated evenly under the UV lamp. Otherwise, you have to interrupt the curing process regularly to turn the object.
Here are once again summarized the individual curing times for 3D resin:
- Small objects made of 3D resin need about 2-4 hours in sunlight to be completely cured. With a UV lamp or a special curing station, it takes only two to five minutes. Extremely small and filigree objects can also be completely hardened after 1 minute.
- Large objects made of 3D resin need about 4-8 hours with sunlight until they are completely cured (depending on size and weather conditions). With a curing station or UV lamp, it takes only 5-10 minutes. For very large or thick objects, it can take up to 20 minutes.
- The curing time of transparent objects made of 3D Resin is shorter than for opaque objects because the UV light reaches every part of the object immediately. Transparent 3D resin objects cure in 1-2 minutes under a UV lamp and in 1-2 hours under sunlight.
As you can see, it’s worth investing in a UV lamp or a special curing station. You’ll get much better results from the homogeneous lighting and you won’t have to wait as long. Also, the weather conditions are not always so good that you can cure in the sunlight.
How to identify a fully cured resin 3D print?
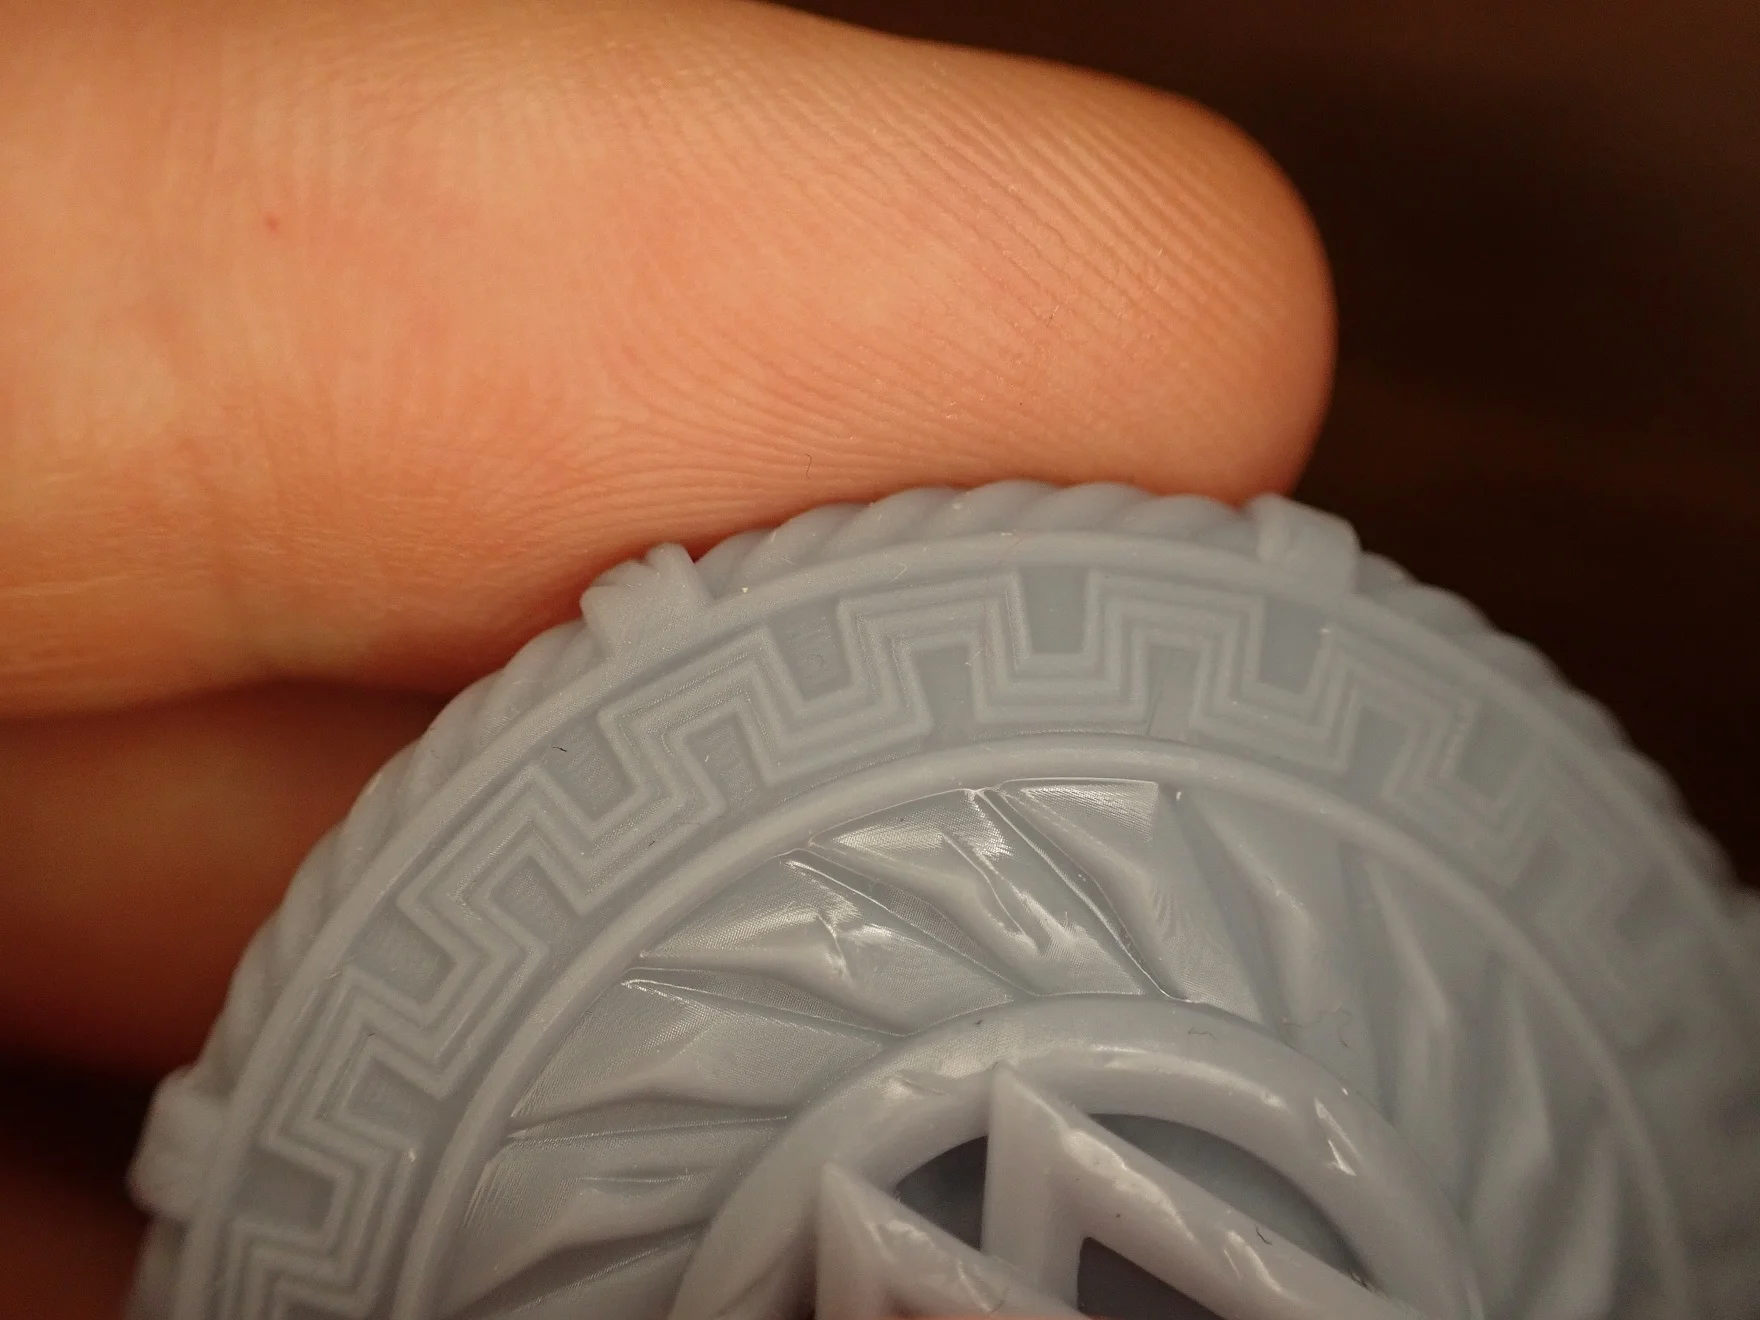
A fully cured resin 3D print has a satin to matt surface. If the object is not yet completely cured, the surface looks glossy or even wet. If the object has been exposed to UV light for too long, it will become extremely dull, brittle and porous.
How the surface looks exactly also depends a bit on the material used. There are slight differences between the different brands and colors.
In general, however, you can be sure that the model is properly cured as soon as the surface has become matt.
If you are curing your object with sunlight, you will need to periodically check the status of the cure. Since the strength of the UV radiation depends on many variables such as your geographical location or cloud cover, it is difficult to find the perfect curing time. Therefore, it is advisable to check the result in intervals of one hour and to turn the object if it is not yet ready.
With UV lamps, the same radiation always reaches the object. Here, the curing time is only dependent on how large and thick your object is. If you already have some experience with how long which objects last in a curing station or under a UV lamp, you can already directly set the correct duration.
To gain experience, I recommend that you always check the result after one minute to get a feeling for how long which objects need and to avoid over curing.
What do fumes/vapors mean during curing?
Vapors during the curing of 3D resin are normal in moderation and usually not visible. If there is a strong development of steam, there is still too much liquid resin on the surface. Before curing, the liquid resin must be washed off with isopropyl alcohol.
Since the liquid resin changes to a solid state when cured under UV light and heat, the development of some steam is quite normal. However, since the object has already been pre-cured in the 3D printer, the amount is usually so small that it is not visible.
If you still see fumes, it doesn’t necessarily mean you did something wrong. Sometimes this can indicate that you have not properly washed off liquid resin residue on the surface. It can also be that your isopropyl alcohol already contains too much resin, which leaves a thin layer of resin after the isopropyl alcohol has evaporated. This evaporates then stronger and leaves unsightly spots on the surface.
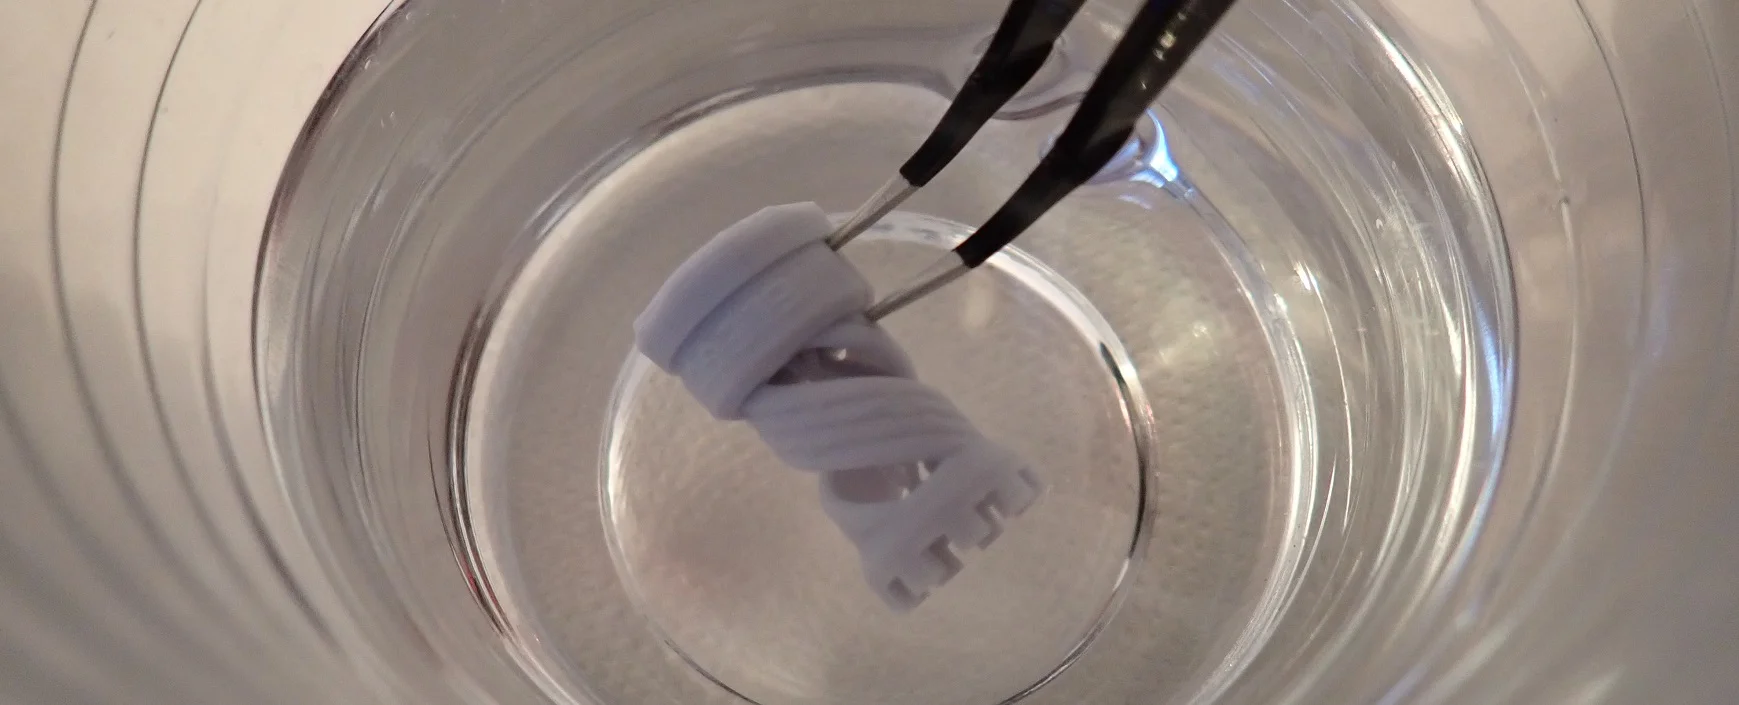
Do resin 3D prints cure faster underwater?
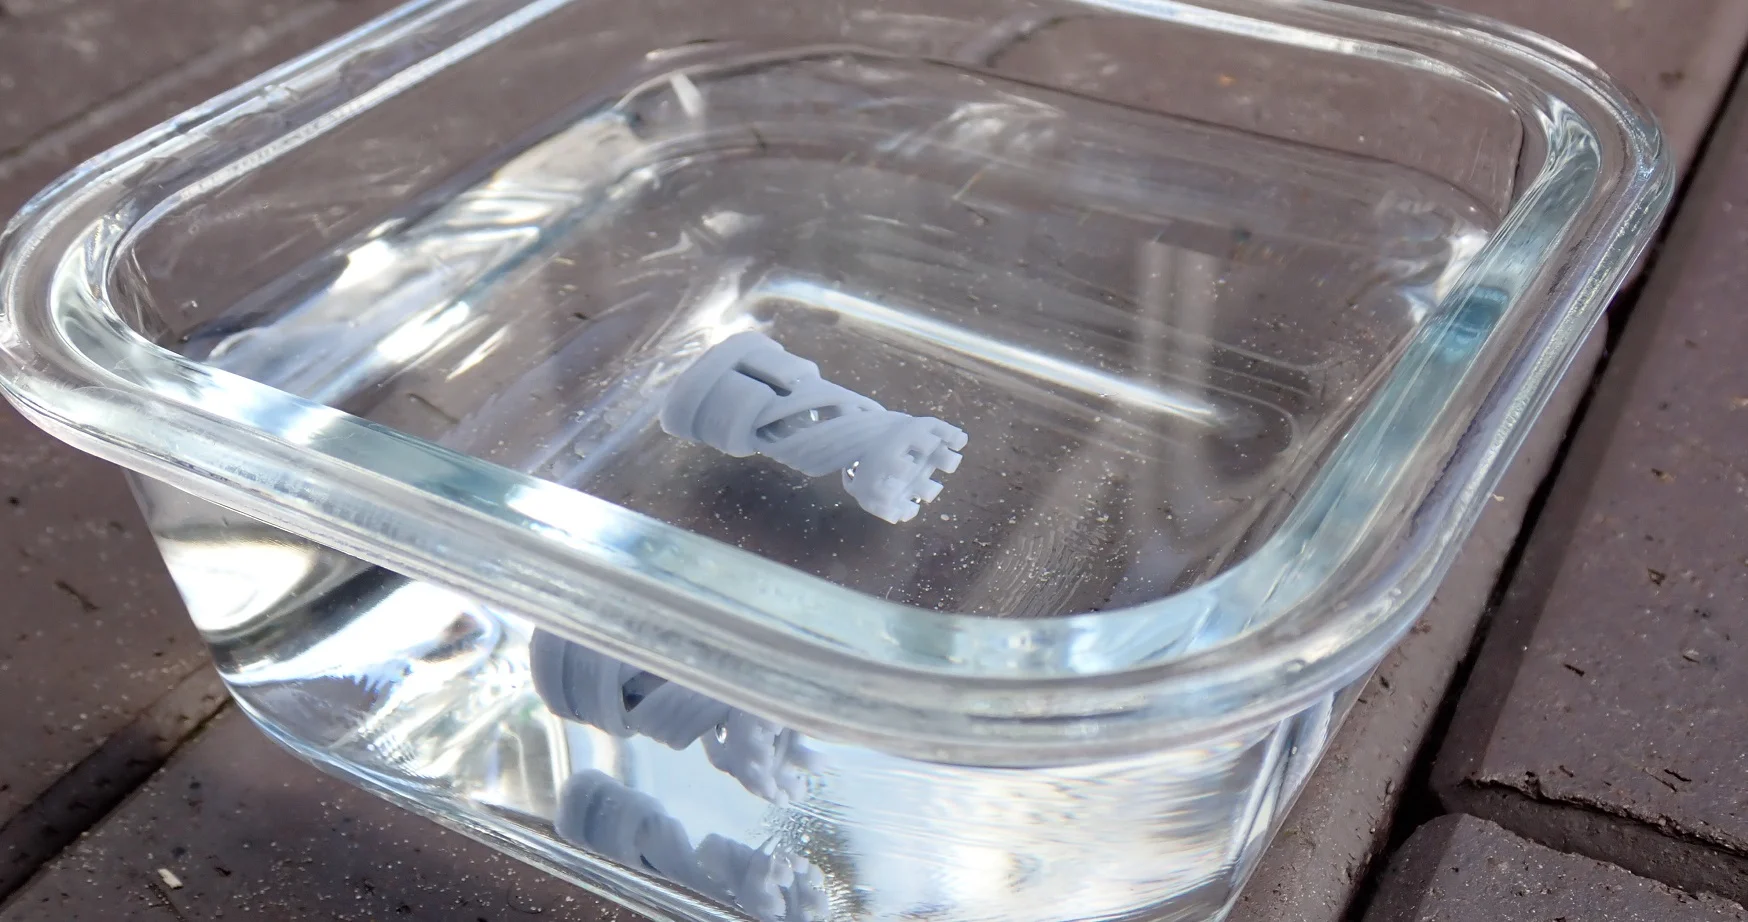
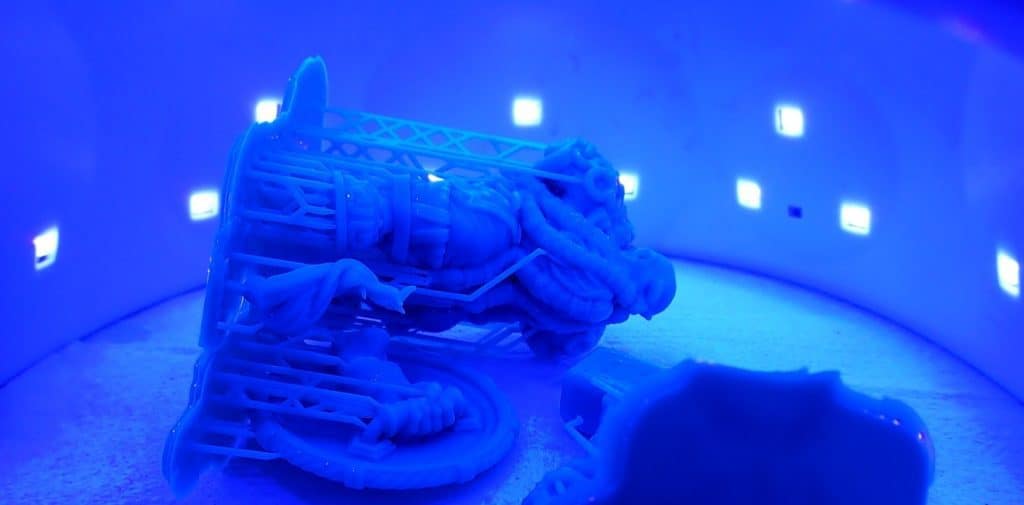
When resin 3D prints are cured underwater, they cure faster and more evenly. The water scatters the UV rays, allowing them to reach the object from multiple directions at once. Regular turning is still necessary, as the underside does not see UV light.
When you cure a resin 3D print under the sun, sharp lines form at the transition between sunlight and shadow. This means that only the side facing the sun is cured strongly and all others much less or not at all.
You could also solve the problem by placing a turntable under the object. But if you have a turntable, you can also directly get a UV lamp to optimize the process even more.
But even with a UV lamp, curing underwater is still faster and more uniform.
Special curing stations* work without water, but this is because their exposure is already homogeneous enough.
Is it possible to over-cure resin 3D prints?
Small to normal-sized resin 3D prints take 2 to 5 minutes to cure with a UV lamp. If they are exposed to UV radiation for longer, the surface becomes porous and the whole object becomes brittle. The transition between too short and over cured is continuous.
With time you will get more and more experience how long you have to cure which objects under UV light. In the beginning, you will often have the problem that the 3D prints are not completely cured. However, you can easily solve this problem by putting them under the UV light again for a minute and checking the result.
The other case, that you have over cured the resin, can unfortunately no longer be remedied. The object then becomes brittle and porous. However, the transition between these two stages is fluid and greater than you think.
Photopolymerization by UV light cures 3D Resin
3D Resin is cured by photopolymerization. The polymer chains bind to each other until the resin has reached its optimal visual and mechanical state and is completely cured. More UV light breaks these bonds and the object becomes porous and brittle.
However, this effect is not only responsible for 3D resins becoming brittle and porous in the long run. All organic materials are slowly decomposed by UV light over time.
Depending on the material, this process can take days, weeks or even years. In constant sunlight, 3D prints made of resin slowly become brittle after several weeks. However, this does not necessarily mean that their surface then already becomes porous and loses details.
Why are resin 3D prints sticky after curing?
A sticky surface on resin 3D prints is caused by liquid resin residue. Contaminated isopropyl alcohol used for washing can also leave sticky areas if it contains too much liquid resin.
Sticky spots on the surface of your 3D print are usually an indication that the isopropyl alcohol* with which you washed the object now contains too much liquid resin.
You can dissolve out the liquid resin in the isopropyl alcohol by UV light. You can do this with two methods:
- Let the isopropyl alcohol evaporate in the sun. The resin remains and cures.
- You fill the isopropyl alcohol resin mixture into a transparent bottle and place it in the sunlight for a few days. The dissolved resin residues will harden and fall to the bottom of the bottle. You can then filter out the clear isopropyl alcohol.
You can also read exactly how to do this in this full guide.
How to avoid sticky resin 3D prints?
The best way to avoid sticky resin 3D prints is to use a two-step washing process. First, most resin residues are washed off with used isopropyl alcohol. Then pure isopropyl alcohol is used to remove the last residues.
So in principle, you have two different washing liquids for your objects. For your first wash, you always use the isopropyl alcohol that you have already used more often for washing.
This mixture of isopropyl alcohol and resin contains enough resin to leave a residue, but not so much that you can still use it to wash off coarse residues. In the second step, you use pure isopropyl alcohol to remove the last residues of the first wash.
If the isopropyl resin mixture becomes increasingly milky and has absorbed too much resin, you can clean it with UV light as described above. You can then use this cleaned isopropyl alcohol again.
Are sticky resin 3D prints toxic?
Liquid resin is toxic. Sticky spots on a resin 3D print are partially made of liquid resin. Thus, these sticky spots are potentially toxic and should be avoided. Sticky spots can be avoided by proper washing and curing.
But there are now also resins that are not as toxic as others. I myself use mainly the Eco Resin from Anycubic* because this is by far not as harmful to you and the environment.
The disadvantage of such resins, however, is the longer curing time of the layers during the printing process.

Check Price at:
Disclosure: This website is the property of Martin Lütkemeyer and is operated by Martin Lütkemeyer. Martin Lütkemeyer is a member of the Amazon Services LLC and other Affiliate Programs. These are affiliate advertising programs designed to enable websites to earn advertising revenue through advertising and linking to Amazon.com and others. Links marked with * are affiliate links.
