
- Wet Filament: Prevention, Symptoms & Drying - July 18, 2024
- Sovol SV08 – Best PrusaSlicer Settings & Profile - June 26, 2024
- Sovol SV08 – Best Orca Slicer Settings & Profile - June 26, 2024
Disclosure: Links marked with * are Affiliate Links. I earn from qualifying purchases if you decide to make a purchase through these links – at no additional cost for you!
Printing objects in Cura with different settings per model is possible with a few clicks. This way you can print multiple objects at once and still customize them for their different purposes.
For example, you could use it to print a decorative object next to a functional part with a particularly high infill density and save a lot of time.
To apply per model options in Cura, you need to click on them individually and select the respective options in the Mesh Type section of the Object menu on the left.
Small hint: When placing the objects, you don’t have to worry about the printer colliding with an object because it still prints all models layer by layer at the same time and not one after the other. The printer adjusts its model settings immediately as it moves between objects.
Table of Contents:
Step 1: Load Models or Multiply Them

First, you need to load all your models that you want to print at the same time.
Alternatively, you can multiply an object and print it several times with different settings.
Step 2: Select Model
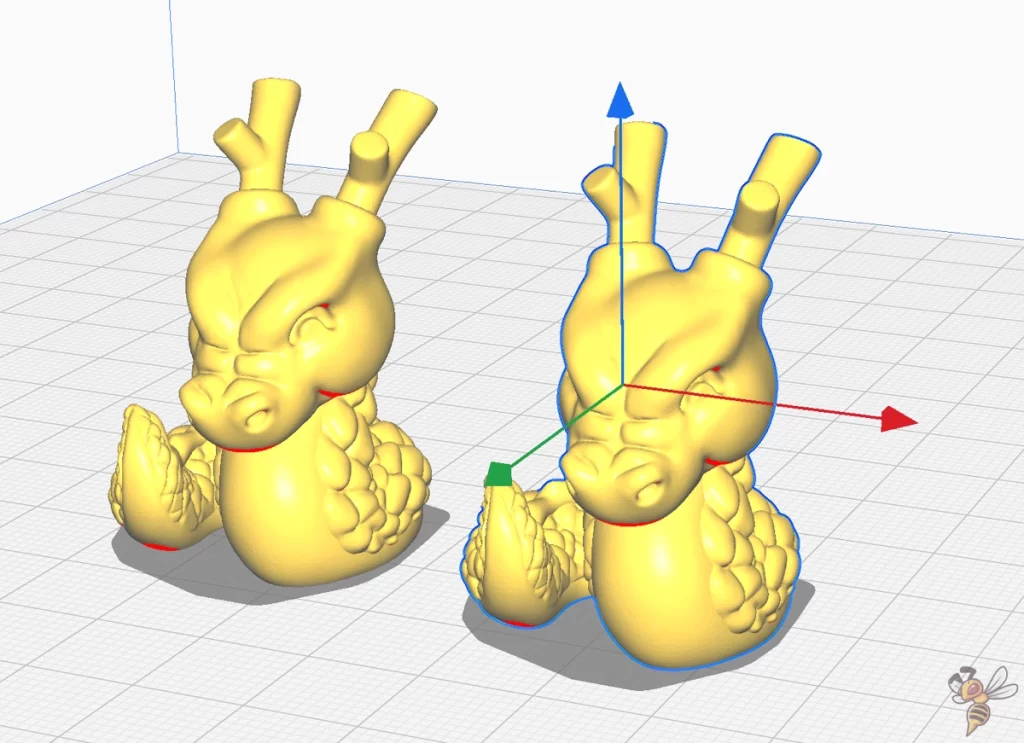
To be able to select the different print settings, you have to click on the objects one after the other where you want the print options to differ from the global default settings.
Step 3: Select Options Under Mesh Type
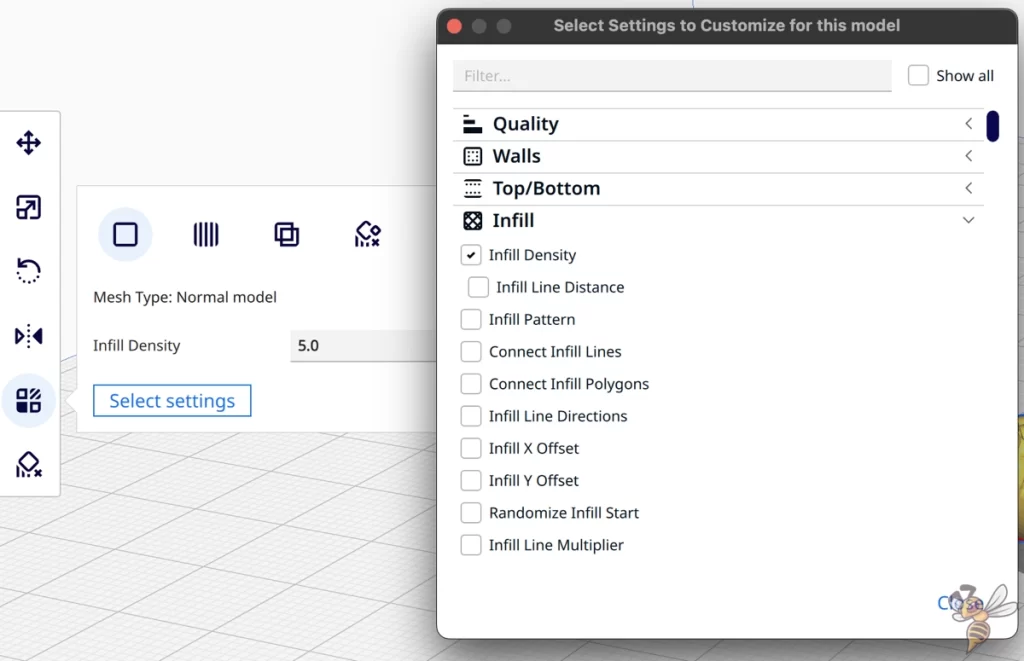
After you have clicked on the object, you can open the options window on the left in the object menu under Mesh Type.
There you can select the options you want to change from the default settings. Use the search bar to find them faster.
For this example, I decided to use a different infill density per model.
Step 4: Select Options for Other Models
For all other models you have to repeat the process:
- Click model
- Click on “Select settings” in the Mesh Type object menu
- Select the options you want to customize (normally only a few settings)
- Customize the per model settings
In this example, one model, has an infill density of 5% and the other one of 20%.
Step 5: Slicing
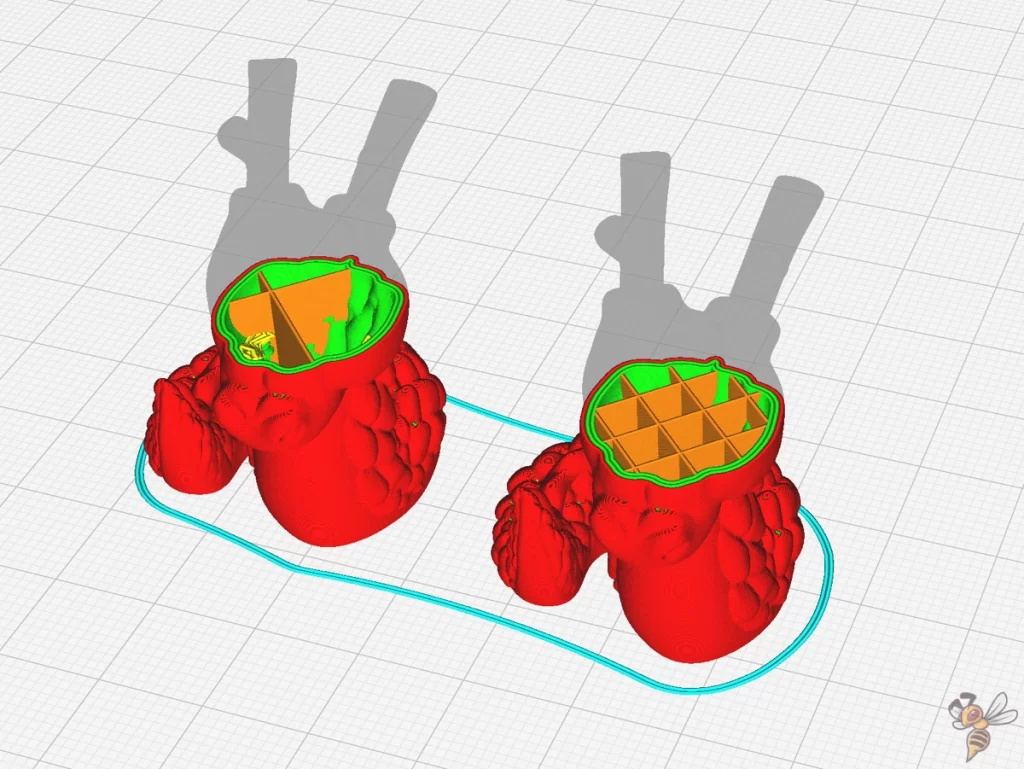
After you have customized the options for all your models, you can slice them as usual.
If you have changed options that are easily visible, such as the infill density, you can easily check them after slicing. In our example, you can clearly see the difference in infill density between the two models.
Step 6: Print
Once you are satisfied with the result and have adjusted all the options, all that remains is to print the objects. You will see that this option will save you a lot of time and you will not have to print all the objects one after the other.
Disclosure: This website is the property of Martin Lütkemeyer and is operated by Martin Lütkemeyer. Martin Lütkemeyer is a member of the Amazon Services LLC and other Affiliate Programs. These are affiliate advertising programs designed to enable websites to earn advertising revenue through advertising and linking to Amazon.com and others. Links marked with * are affiliate links.
