
- Wet Filament: Prevention, Symptoms & Drying - July 18, 2024
- Sovol SV08 – Best PrusaSlicer Settings & Profile - June 26, 2024
- Sovol SV08 – Best Orca Slicer Settings & Profile - June 26, 2024
Disclosure: Links marked with * are Affiliate Links. I earn from qualifying purchases if you decide to make a purchase through these links – at no additional cost for you!
Oozing and stringing, the dripping of the printer nozzle and the pulling of fine hairs on the printed model, are two phenomena that often occur in 3D printing. However, with the right settings for retraction in the Cura slicer software, these problems can usually be eliminated in a few simple steps.
Therefore, in the following, the correct retraction settings in the free slicing software Cura are introduced and explained, so that you can look forward to flawless print results completely without threads and bubbles.
This is how you set the retraction settings in Cura correctly:
- Retraction Speed = 20 – 45 mm/s (5 mm/s steps)
- Retraction Distance (Direct Extruder) = 0.5 – 2 mm (1 mm steps)
- Retraction Distance (Bowden Extruder) = 4 – 8 mm (1 mm steps)
- Retraction Minimum Travel = 0.1 mm (up in 0.5 mm steps)
- Cura Combing on “Within Infill” and during tests completely off.
- Wiping Distance = 0.4 mm (up in 0.1 mm steps)
- Coasting Volume = 0.064 mm³ (up in 0.01 mm³ steps)
The individual settings have quite large ranges. This is due to the fact that some of the settings depend heavily on the individual printer and filament. However, they are a good guideline from which you can experiment with the steps recommended behind them in brackets and find the perfect value for your setup.
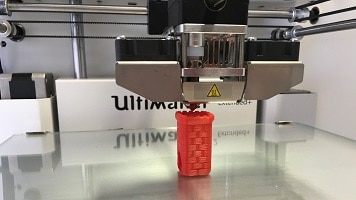
For experimentation, there are numerous test objects that do not consume too much filament:

Related Post:
Stringing Test | Best 3D Printer Calibration Objects
Table of Contents:
What is Retraction?
In 3D printing, retraction is the process of pulling the filament back a bit in the hotend. This is done to reduce the pressure in the nozzle of the printer and to prevent the filament from dripping out of the nozzle during so-called empty runs, which could then lead to oozing or stringing. “Empty runs” here refers to printing movements during which the printer is not feeding any filament.
The Most Important Settings for Retraction in Cura
The decisive parameters for retraction in 3D printing are the Retraction Speed and the Retraction Distance. In addition, however, other settings such as the temperature of the nozzle and the speed of the empty runs, the so-called travel moves, can also influence the quality of the print results.
Retraction Speed
The Retraction Speed determines how fast the filament is retracted in the printer and is usually between 20 – 45 mm/s. However, it varies depending on the printer.
To set the perfect retraction speed for your printer, you have to experiment a bit. To do this, call up the retraction speed settings in the Cura menu under “Travel”. Now you start to print a simple, preferably single-walled model of your choice with the default speed in Cura and observe the result.
In small steps, preferably with an interval of 5 mm/s, you now start to increase the speed slightly in each step. When the stringing disappears, you have found the ideal value for the retraction speed for your printer. With most 3D printers, the retraction speed is usually limited by the firmware to a relatively low speed and stopped in an emergency, otherwise the printer could be damaged. Therefore, you can’t really do much wrong when setting the retraction speed.
The setting “Retraction Speed” can be found in Cura under “Travel” or by using the search function:
Retraction Distance & Retraction Minimum Travel
The optimal Retraction Distance also differs depending on the model of your printer. For printers with a direct extruder, 0.5 – 2 mm is typical, while 4 – 8 mm is typical for Bowden extruders.
Here it is especially important that you find a suitable setting for your printer. Incorrect values can lead to major printing problems later on. This can be, for example, interruptions in the material flow and even a complete blockage of the nozzle. A good starting point are the values mentioned above and rough steps of 1 mm at the beginning.
The setting “Retraction Distance” can be found in Cura under “Travel” or by using the search function:
For the correct setting of the Retraction Distance, you should also enter a value for the “Retraction Minimum Travel” in Cura, i.e. the minimum distance at which the software should perform a retraction. Again, the value should be as high as possible to avoid printing errors. For small objects, however, it is sometimes necessary to reduce the minimum distance so that they are printed cleanly. A low setting of the minimum distance for retraction also increases the risk of grinding of the nozzle.
Therefore, you should set the Retraction Minimum Travel depending on the printed object and slowly feel your way forward. It is best to start in the Cura settings under Retraction Minimum Travel in the “Material” category again at 0.1 mm and slowly feel your way to the correct value in 0.5 mm steps.
The setting “Retraction Minimum Travel” can be found in Cura under “Travel” or by using the search function:
Other settings regarding retraction in Cura
In order to set the retraction correctly, there are further parameters in the Cura software which, with the correct values, can lead to optimization of the print results. These include, for example, the speed of the travel moves, i.e. the empty runs of the nozzle.
A fast speed reduces the printing time, but there is also the risk that the filament gets too hot if you set the speed too high. The temperature of the nozzle also has a high influence on the print quality.
However, the optimal temperature always depends on your printer and, of course, on the filament used. It is also important to calibrate your extruder correctly to get the best result.
Cura Combing
There is another function in the Cura software that allows you to edit the retraction settings. Cura Combing ensures that your 3D printer does not make unnecessary retractions in order to protect the filament.
By default, Cura’s combining is set to “All”. However, this is not always necessarily useful. To avoid the formation of threads and bubbles during printing, it is recommended to change the Combing settings to the “Within Infill” mode. In this way, combining only prevents retraction inside the infill of the 3D object, but not in the outer skin, where the threads would become visible accordingly.
You can find the “Combing” setting in Cura under “Travel” or by using the search function:
The Cura Combing retraction setting can also help with marks and scratches on the surface of your printed model. The trailing of already melted filament from the nozzle on the top layer of the object can cause so-called scars. However, if you activate the Cura Combing mode, the print head moves along the contour of the model, but no longer crosses it. This means that scratches on the surface can no longer occur.
While you are determining the appropriate values for Retraction Distance and Retraction Speed, you should completely deactivate Combing, otherwise you may not be able to determine the correct values.

Wiping & Coasting
While wiping and coasting are not direct retraction settings, they can still increase retraction performance.
During wiping, the nozzle of the printer is moved over a short distance through the outer layer of the object in order to “smear off” any remaining or superfluous filament.
When coasting, on the other hand, the extruder is switched off on the last millimeters of a print area in order to minimize the pressure in the hotend and thus also reduce filament and bubble formation, since this prevents excess molten filament from dripping onto the object. You have to also approach the optimal values for wiping and coasting in small steps, as they can vary greatly depending on the printer.
It is best to start with a distance of 0.4 mm for wiping and 0.064 mm³ for the coasting volume and then slowly increase in steps of 0.1 mm and 0.01 mm³ until you get an optimal result.
You should be especially careful with the settings for the coasting since too high a value can lead to holes in the print object. To avoid too long coasts, you can also simply set a “Minimum Volume Before Coasting” of about 0.8 mm³ before experimenting with the settings. The settings for wiping can be found in the “Shell” category under “Outer Wall Wipe Distance” and the parameters for coasting can be set in the “Experimental” category under “Coasting Volume” and “Minimum Volume Before Coasting”:

Further Information
Slicer Cura is a free open-source software that enjoys great popularity in the 3D printer community due to its ease of use and diverse features.
It was originally developed by the printer manufacturer Ultimaker, but can now also be used for 3D printers from other brands. Cura can easily be downloaded for free via the website. In addition to the retraction settings, Cura offers numerous other features and tools. With Cura, for example, prints can be integrated into the CAD software and prepared extensively, and with more than 400 different settings, they can also be set up and adjusted according to one’s own wishes.
However, Cura is not the only software that offers numerous retraction settings. Other slicing software also offers various parameters to prevent the problems of thread formation and bubbles on the print object. One of these is the open-source software Slic3r, which is also free of charge.
At first glance, this seems to be a bit more complicated than Cura, but it offers even more settings than Cura, which is especially suitable for beginners. In other slicer software like Simplify3D and also MatterControl the retraction settings can also be adjusted.
Related Questions
For which operating systems is Cura available?
The Cura software is available for Windows and Mac OS as well as for Ubuntu. Only the current version of the operating system and 550 MB of hard disk space are required for installation.
With which 3D printers can Cura be used?
The slicer Cura can be used with almost all commercially available 3D printers. It works with STL, OBJ, 3MF and X3D file types.
Are the retraction settings always the same?
No, the retraction settings always differ depending on the printer and also filament type and print object. What works perfectly with one printer and material can lead to a lot of stringing with another model and device. Therefore, the optimal values must be found out individually by means of testing.
Conclusion – What are the Retraction Settings in Cura useful for?
Once you figure out the perfect retraction settings for your 3D printer and the appropriate model and filament, you can also look forward to flawless print results without annoying strings and bubbles.
The settings in Cura are actually relatively simple to find and easy to set up thanks to the clear user interface. You just have to be patient and approach the optimal result with small steps and different values.
Thanks to the additional tools such as Cura Combing, as well as Coasting and Wiping, you have further tools at hand in the Cura software to achieve an ideal result. If you try out the various values for the individual parameters such as Retraction Speed or Retraction Distance on a small test object, you don’t have much to lose and you can’t really break anything, you can only win, because in the best case scenario you end up with a beautiful, error-free 3D object in your hands.
Disclosure: This website is the property of Martin Lütkemeyer and is operated by Martin Lütkemeyer. Martin Lütkemeyer is a member of the Amazon Services LLC and other Affiliate Programs. These are affiliate advertising programs designed to enable websites to earn advertising revenue through advertising and linking to Amazon.com and others. Links marked with * are affiliate links.
