
- Wet Filament: Prevention, Symptoms & Drying - July 18, 2024
- Sovol SV08 – Best PrusaSlicer Settings & Profile - June 26, 2024
- Sovol SV08 – Best Orca Slicer Settings & Profile - June 26, 2024
Disclosure: Links marked with * are Affiliate Links. I earn from qualifying purchases if you decide to make a purchase through these links – at no additional cost for you!
The Anycubic Vyper* is a very popular FDM 3D printer with a Bowden extruder and many useful features that improve the print quality. To get a perfect print quality, the settings in Cura must be correct and at best calibrated.
There is a pre-built Cura profile for the Anycubic Vyper. The included settings are a good starting point for PLA, but will not produce perfect results without calibration.
In this article, I will show you my Cura settings for the Anycubic Vyper and how to calibrate the most important ones to get perfect results.
Since the release of the Anycubic Vyper, my Vyper regularly produces detailed objects for me from a wide variety of filaments. So, the settings mentioned in this article come from a lot of testing, careful calibration and long-term experience.

Read the full calibration guide:
3D Printer Calibration: Step-by-Step to Perfect Results
| PLA | ABS | TPU | PETG | |
|---|---|---|---|---|
| Printing temperature | 200-210 °C | 245-255 °C | 210-225 °C | 230-235 °C |
| Print bed temperature | 60 °C | 90 °C | 60 °C | 60 °C |
| Print speed | 60 mm/s | 60 mm/s | 30 mm/s | 55 mm/s |
| Retraction | 5.5-6.5 mm at 25 mm/s | 5-5.5 mm at 25 mm/s | 5-7 mm at 20 mm/s | 5-6 mm at 30 mm/s |
| Cooling | 100% | 0% + enclosure | 100% | 50-100% |
Table of Contents:
Creating a Profile for the Anycubic Vyper in Cura
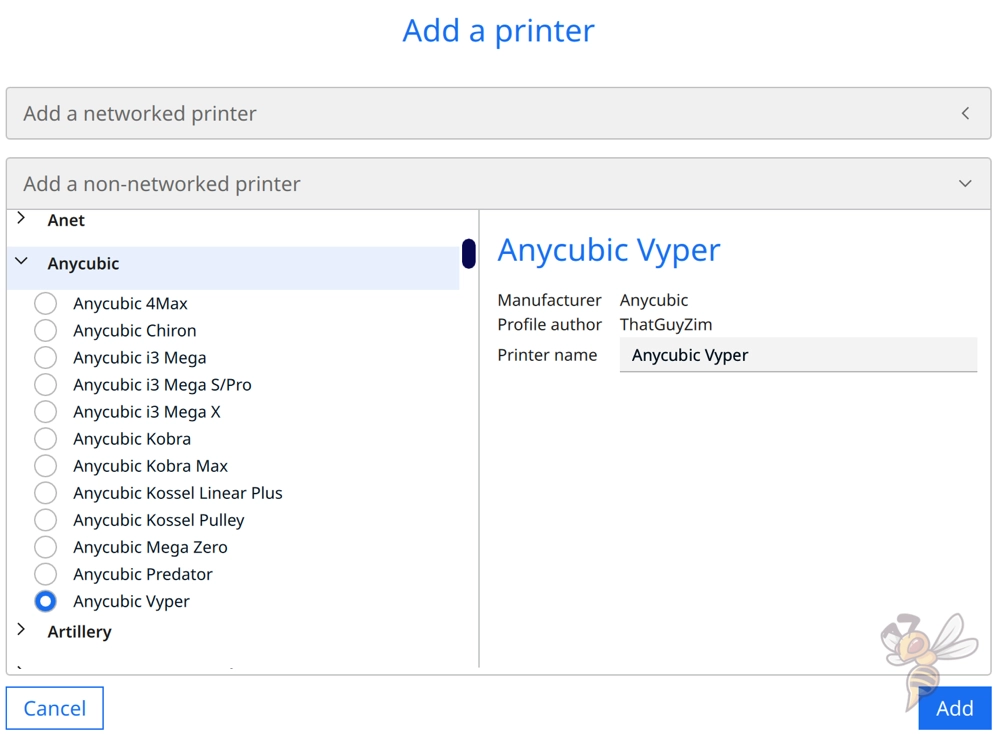
A 3D printer profile in Cura consists of the machine settings and the print settings. Since the Anycubic Vyper has been around for a while, there is a suitable profile for it in Cura.
To load this profile, go to the menu bar of Cura: Settings, Printer and then Add Printer. A window will open where you can choose from 3D printers from different manufacturers. Matching profiles will appear here some time after a 3D printer is released, providing a quick start for further optimization.
After adding the Anycubic Vyper, Cura automatically generates the profiles and machine settings.
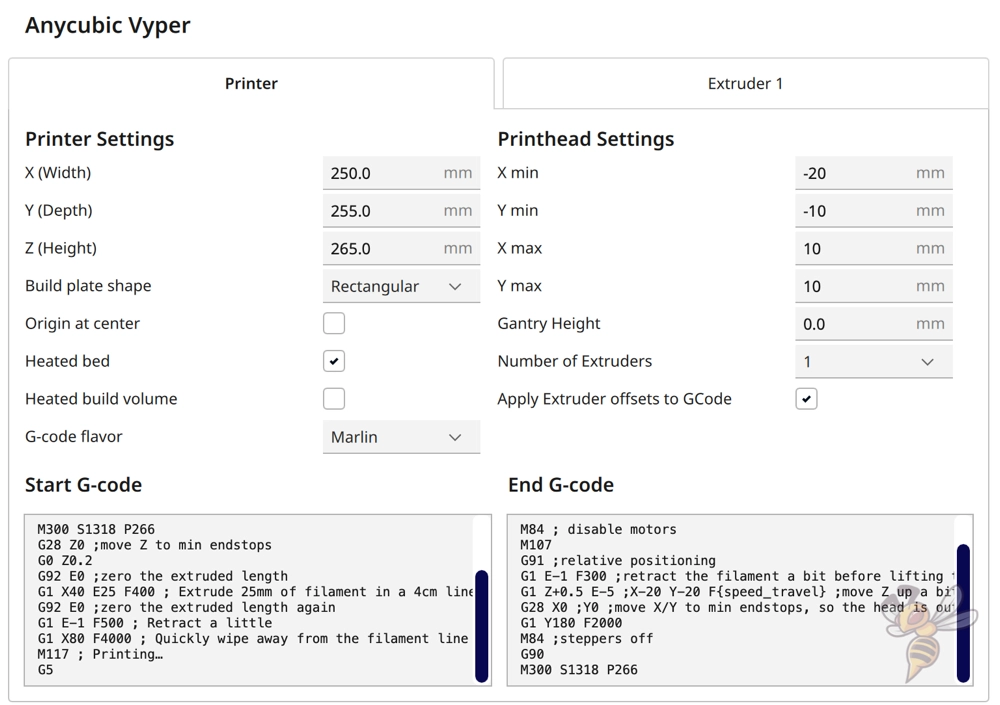
In the profile of the Anycubic Vyper, the machine settings are predefined with the dimensions of the 3D printer and the G-code snippets for the start and end of a print.
You don’t have to change anything here, because the settings are the same for every Anycubic Vyper. Only if you use a nozzle with a different diameter, you have to enter this on the second page of the machine settings.
In addition to the machine settings, Cura also automatically creates seven print profiles with settings for different layer heights. The included settings are very general and should be adapted to your needs and the filament used.
Create your own profile from the preset print settings, in which you make adjustments and calibrate certain settings. This way, you always have a simple backup copy of the default values in case of need.
The print settings that Cura generates for the Anycubic Vyper are a good start for PLA filaments. However, since every 3D printer is a little different and the filaments of the individual manufacturers sometimes differ greatly, you need to calibrate certain settings.
Before we look at the individual settings and their calibration, I’ll show you the Cura settings that give good results on my Anycubic Vyper for the four standard filaments.
You can find more information on how to create a 3D printer profile in Cura and what you need to pay attention to in this article: How to Create a Custom 3D Printer Profile in Cura
PLA Settings
These are the correct Cura settings for the Anycubic Vyper for PLA:
- Print temperature: 200-210 °C
- Print bed temperature: 60 °C
- Printing speed: 60 mm/s
- Retraction: 5.5-6.5 mm at 25 mm/s
- Cooling: 100%
- First layer: 5-10 mm/s, 0% cooling, 100% extrusion width, 100% layer height
Even though PLA filament is the easiest material to use in FDM 3D printing, the settings must be done correctly to achieve good results.
The Anycubic Vyper features a print bed with a PEI coating. This coating is especially optimal for PLA. The print bed adhesion of PLA on the PEI print bed is great as long as the print bed is clean and properly leveled.
Therefore, you don’t have to worry much about the print bed temperature. 60 °C is a value that produces ideal adhesion for all PLA filaments that I have printed on it so far.
For the print temperature, values between 200 and 210 °C are good starting points for further optimization. You should definitely calibrate the print temperature. How to do this with your Anycubic Vyper is explained below in the section about the printing temperature.
Although PLA is easier to print than other filaments, stringing is a common problem with PLA. To avoid this printing error, you need the right print temperature as well as appropriate retraction settings. The above values have produced good results for me with most PLA filaments.
ABS Settings
These are the correct Cura settings for the Anycubic Vyper for ABS:
- Print temperature: 245-255 °C
- Print bed temperature: 90 °C
- Printing speed: 60 mm/s
- Retraction: 5-5,5 mm at 25 mm/s
- Cooling: 0% + enclosure
- First layer: 5-10 mm/s, 0% cooling, 100% extrusion width, 100% layer height
The Anycubic Vyper’s hot end reaches temperatures of up to 260 °C and the print bed reaches a maximum temperature of 110 °C. This means it can also process ABS filament.
ABS is more difficult to print than PLA filament. This is mainly because ABS tends to warp. If this filament cools down too quickly during printing, it will shrink. This can cause it to detach from the print bed, create cracks, or otherwise be damaged.
You can print smaller ABS objects flawlessly with the Anycubic Vyper using a draft shield. This is a thin wall that is printed around the object. This allows the air between the wall and the object to be warmer than the ambient air due to the heat of the print bed and protects the object from cold drafts.
However, this is usually not enough for larger objects. If you want to print larger objects with the Anycubic Vyper from ABS more often, a suitable 3D printer tent is worthwhile. I use this one from Creality for many of my 3D printers to print ABS. It is also an ideal fit for the Anycubic Vyper.
TPU Settings
These are the correct Cura settings for the Anycubic Vyper for TPU:
- Print temperature: 210-225 °C
- Print bed temperature: 90 °C
- Printing speed: 30 mm/s
- Retraction: 5-7 mm at 20 mm/s
- Cooling: 100%
- First layer: 5-10 mm/s, 0% cooling, 100% extrusion width, 100% layer height
For TPU, the Anycubic Vyper is only suitable to a limited extent due to its Bowden extruder. Although it can process harder TPU filaments with the right settings without errors, it is difficult or impossible to avoid some printing errors such as stringing.
While the Bowden extruder allows for higher print speeds with rigid filaments, it reduces print quality with flexible filaments. The flexible filament can be stretched and compressed in the PTFE tube on its way from the extruder to the nozzle and thus partially compensate for the feed or the retraction.
If you want to print TPU with the Anycubic Vyper, I would advise you to start with harder variants first. It is also necessary to calibrate the retraction here. The values given above are relatively inaccurate, as they differ greatly between different TPU filaments.
PETG Settings
These are the correct Cura settings for the Anycubic Vyper for PETG:
- Print temperature: 230-235 °C
- Print bed temperature: 60 °C
- Printing speed: 55 mm/s
- Retraction: 5-6 mm at 30 mm/s
- Cooling: 50-100
- First layer: 5-10 mm/s, 0% cooling, 100% extrusion width, 100% layer height
PETG filament is suitable for objects with a mechanical application and for outdoor use. It is stronger than PLA, but is also more difficult to print. However, with the right settings, the Anycubic Vyper can process PETG flawlessly.
PETG filament has a strong tendency to pull strings. The right print temperature and retraction settings are therefore even more important here. The values given above are a good start and should give good results. Below, I explain how you can optimize and calibrate these settings to achieve perfect results.
There are other steps you should follow to avoid stringing with PETG. In this article, you will find them explained in detail: PETG Stringing | Main Causes and Step by Step Solutions
The Best Cura Settings for the Anycubic Vyper
So far, we’ve looked at the default settings for the four most popular filaments in 3D printing. To find the right values for each setting, we’ll go into detail about them in the rest of this article.
I’ll also show you how to calibrate the most essential of them so you can achieve perfect results without print errors.
Printing Temperature
The best printing temperatures for the Anycubic Vyper in Cura:
- PLA: 200-210 °C
- ABS: 245-255 °C
- TPU: 210-225 °C
- PETG: 230-235 °C
The printing temperature is one of the most influential settings in Cura to produce flawless prints with the Anycubic Vyper. If it is set incorrectly, various printing errors will occur.
In my experience, the Anycubic Vyper’s temperature control is very accurate. Therefore, it shouldn’t take you long to find the right temperature for your filament. One calibration run should be enough.
The values given above are only guidelines. Even if they led to error-free results for me, it does not mean that they are also ideal for your filament. You should therefore calibrate the print temperature.
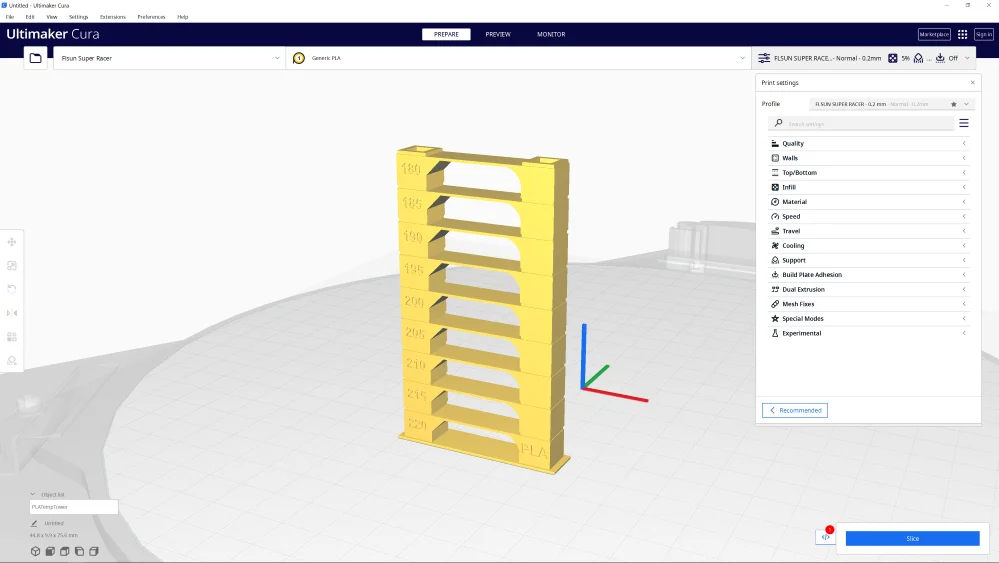
Since you are already using Cura, you can also directly install and use the Calibration Shapes plugin. In this plugin, you can find a temperature tower via the menu bar under extensions.
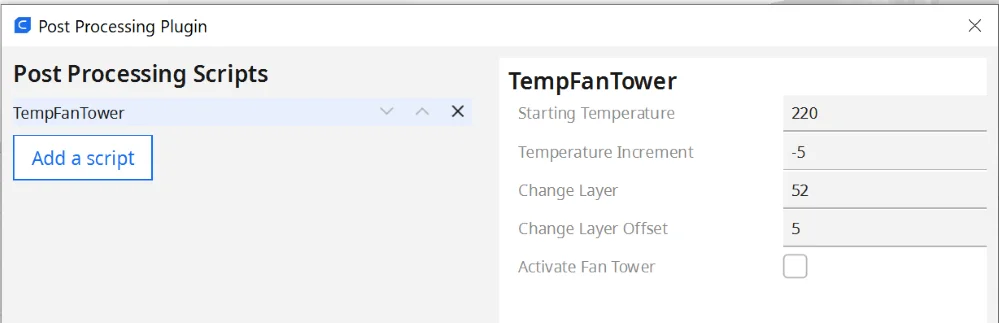
Using the appropriate script, you can increase the printing temperature level by level. As soon as the tower is printed, you can immediately see at which temperature the filament has produced the fewest errors.
Print Bed Temperature
The best print bed temperatures for the Anycubic Vyper in Cura:
- PLA: 60 °C
- ABS: 90 °C
- TPU: 60 °C
- PETG: 60 °C
The Anycubic Vyper has a print bed with a PEI coating. For most filaments, this surface creates ideal adhesion. Therefore, you do not have to experiment too much with the print bed temperature to find suitable values.
Before you set the print bed temperature higher than the above values, you should take other measures to improve adhesion. These mainly include reducing the z-offset and a slower printing speed for the first layer.
All measures to improve print bed adhesion are explained in detail in this article: 3D Print Not Sticking to the Bed: How to Fix it Step-by-Step
In most cases, you do not need to increase the print bed temperature. If the values are too high, you risk an elephant foot at the bottom of your object.
Print Speed
The best print speed for the Anycubic Vyper in Cura:
- PLA: 60 mm/s
- ABS: 60 mm/s
- TPU: 30 mm/s
- PETG: 55 mm/s
The Bowden extruder allows the Anycubic Vyper to achieve relatively high print speeds without producing print defects. The above values are relatively typical for FDM 3D printers with a Bowden extruder.
As you have surely noticed, TPU has to be printed at a very low print speed. This is because the flexible filament can hardly be printed error-free otherwise. The faster flexible filament is printed with a Bowden extruder, the more the flexible filament can compensate for the movements of the extruder.
If you want to set the print speed higher to save print time, you should perform a calibration to determine the optimal print speed for your Anycubic Vyper.
When the print head of the Anycubic Vyper changes direction too quickly, vibrations occur. These vibrations create ringing or ghosting, repetitive echoes of surface details. If you observe such print errors, you should reduce the print speed in Cura.
To calibrate the print speed, I like to use this calibration cube. Print this cube and increase the print speed each time until you notice these print errors. Depending on how tolerant your project is to this print error, you can sometimes increase the print speed a lot and save a lot of print time.
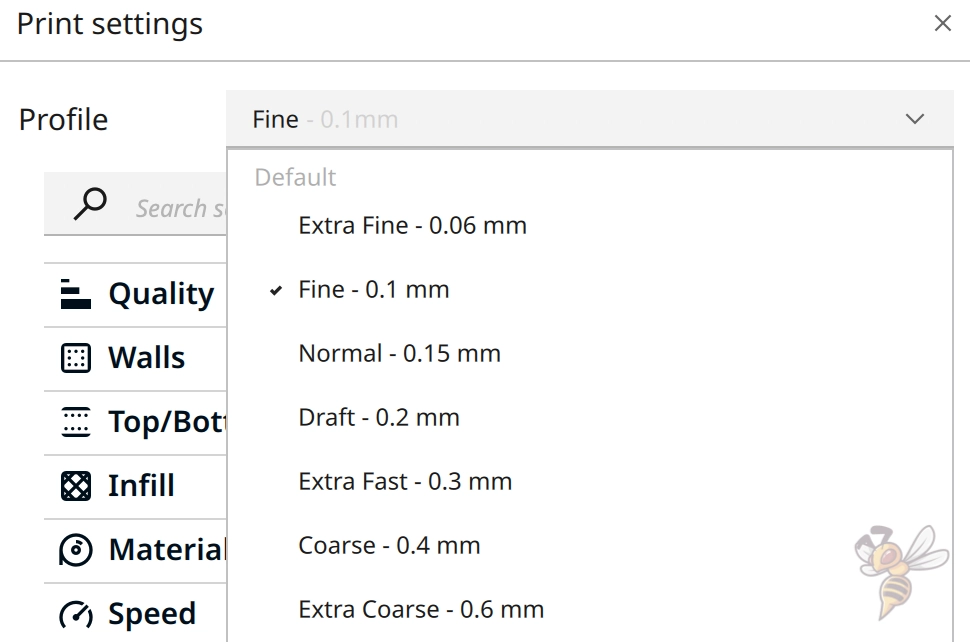
Layer Height
The best layer heights for the Anycubic Vyper in Cura:
- Decorative objects: 0.06-0.1 mm
- Standard: 0.15-0.20 mm
- Rough, fast prints: 0.3-0.6 mm
The layer height determines how smooth the surface will be. The smaller the layer height, the finer the surface will be. But the layer height also influences the printing duration. Higher layers lead to a shorter print duration.
After you have added the Anycubic Vyper in Cura, Cura generates different print profiles with different layer heights. These range from 0.06 to 0.6 mm. With the 0.4 mm nozzle, you can reliably print layer heights from 0.1 to 0.4 mm. Smaller and larger is also possible, but with a higher risk of printing errors.
For most of my projects, I use a layer height of 0.1 mm in Cura with the Anycubic Vyper. This layer height is optimal for decorative objects, as well as those with a mechanical purpose. With smaller layer heights, the object becomes more stable. However, if I only need a part that has low mechanical requirements and is not visible, higher layers are worthwhile due to the shorter printing time.
Flow Rate
The best flow rate for the Anycubic Vyper in Cura:
- Default value: 100%
- For over-extrusion: 90% to 99%
- For under-extrusion: 101% to 110%
The flow rate in Cura determines how much filament is extruded per second. Values above 100% widen the lines, values below 100% make the lines thinner.
To find the right flow rate in Cura for your Anycubic Vyper, you should calibrate it with a suitable object. I always use a cube without infill and upper layers for this. After printing, I can then use a caliper gauge to compare the wall thickness with the theoretical value in Cura.
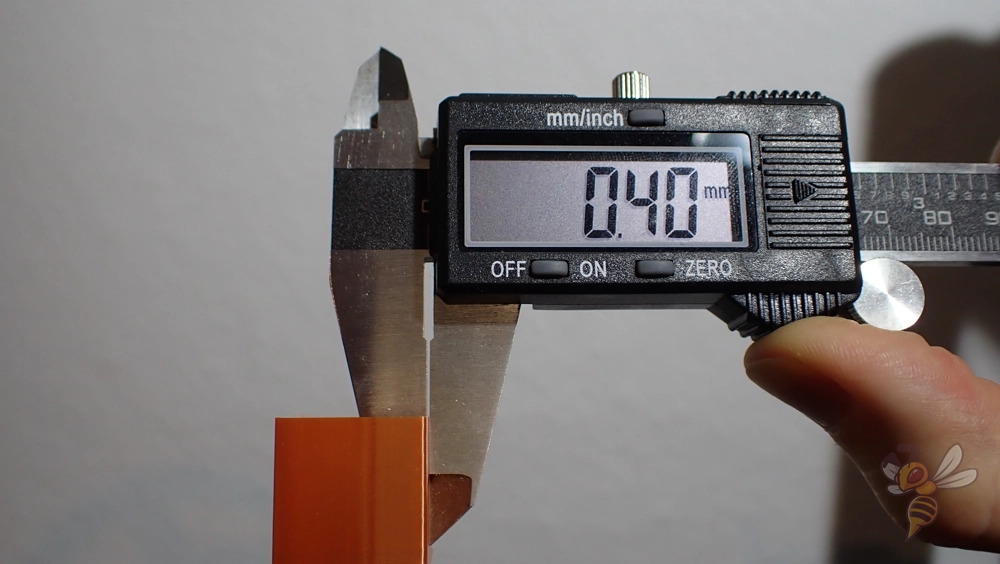
If the actual wall thickness is too wide, you have to reduce the flow rate, and vice versa.
You can use this calculator to enter your values and get the ideal flow rate. This will save you several calibration runs and you should be able to get the calibration done with one cube to determine the correct flow rate and one cube to check the results.
Retraction
The best retraction settings for the Anycubic Vyper in Cura:
- PLA: 5.5-6.5 mm at 25 mm/s
- ABS: 5-5.5 mm at 25 mm/s
- TPU: 5-7 mm at 20 mm/s
- PETG: 5-6 mm at 30 mm/s
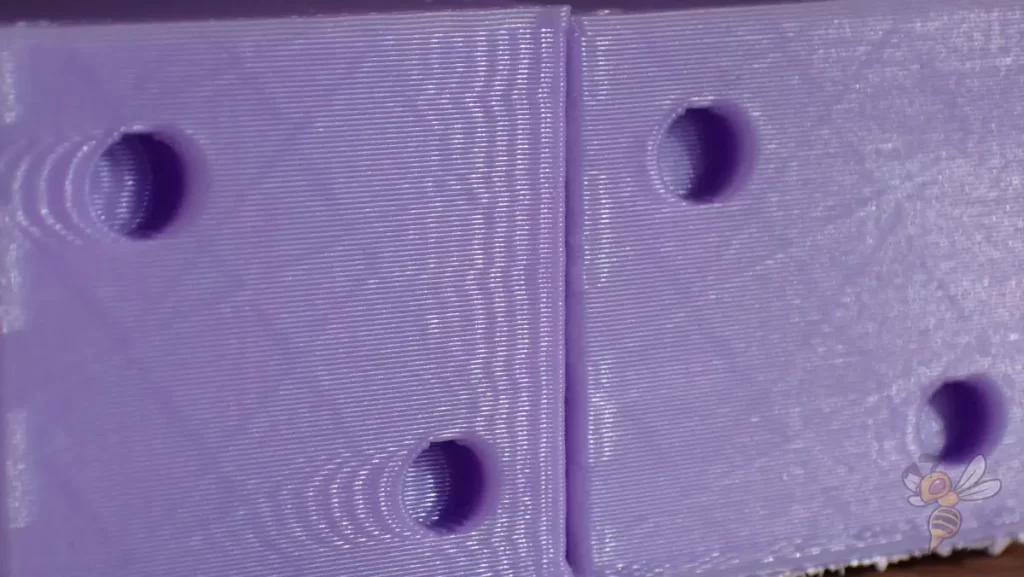
Retraction determines how much and how fast the filament is pulled back into the nozzle after an extrusion. This process ensures that the filament does not flow out of the nozzle in an uncontrolled manner and pull threads during extrusionless movements of the nozzle. The correct retraction settings therefore prevent stringing.
The above values are good starting points for most filaments, but will probably not give you perfect results. Especially the retraction is one of the print settings that should be calibrated in any case to get perfect results.
When calibrating the retraction, stringing is the main feature that needs to be reduced. There are some calibration objects for this.
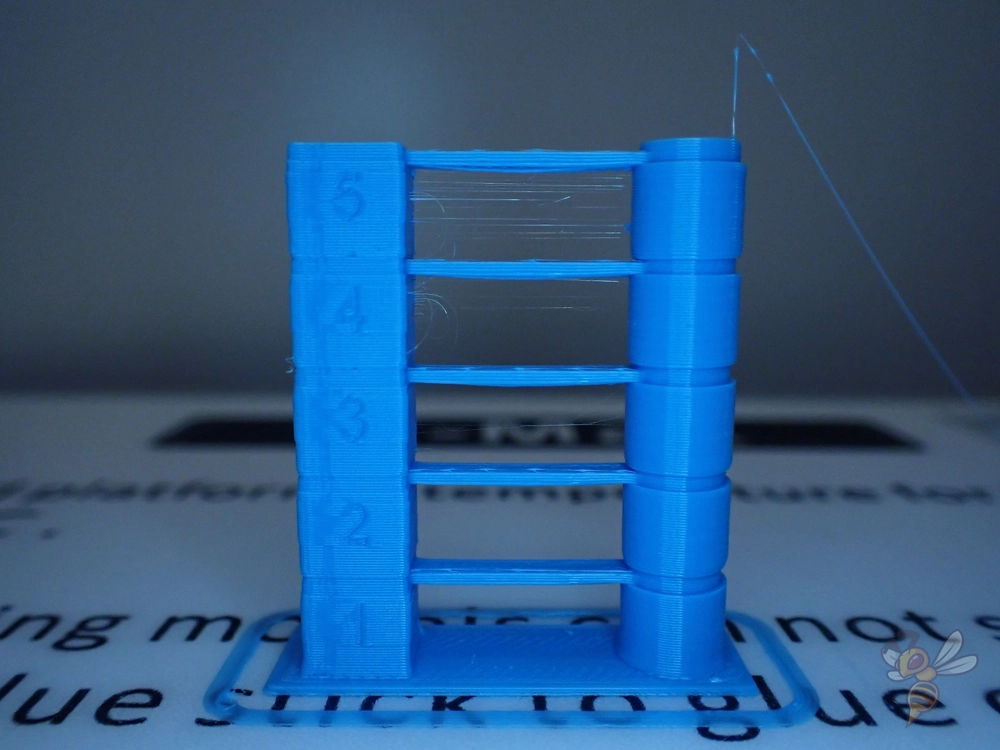
In the Calibration Shapes plugin from Cura, there is also a matching retraction tower. Here you can change the respective settings per layer and thus find the perfect value within a few prints.
Since the retraction settings consist of mainly two important settings, you will probably have to print at least two of these towers to find the perfect values.
Infill
The best infill density for the Anycubic Vyper in Cura:
- Deco objects: 0-15%
- Standard objects: 15-50%
- Stable objects: 50-100%
The filament inside a 3D-printed object is called infill. The infill determines the stability of the object with its density and the printed pattern. The more filament inside the object, the more stable it will be. But also the filament consumption and the printing time increase as well.
So for decorative objects, low infill densities are advisable to save filament and time. The higher the mechanical demands on the object, the more infill should be set. But also the pattern with which the filament is printed inside has an influence on the stability.
High stability (for stable objects):
- Cubic
- Cubic subdivision
- Octet
- Gyroid
Medium stability (for standard objects):
- Grid
- Triangles
- Tri-Hexagon
Low stability (for decorative objects):
- Lines
- Zigzag
- Lightning
First Layer
These are the best Cura settings for the first layer on the Anycubic Vyper:
- Layer height: 100-200% of normal layer height (higher values to increase print bed adhesion)
- Line width: 100-200% of normal line width (higher values to increase print bed adhesion)
- Print temperature: Same as the rest of the object, or 5-10 °C higher for better print bed adhesion.
- Print speed: 50% of normal print speed (i.e. 25 mm/s for a normal print speed of 50 mm/s) or 5-10 mm/s for high print bed adhesion
- Flow rate: 100-110% (higher values for a better print bed adhesion)
- Raft/Brim/Skirt: Not necessary, as the Anycubic Vyper has a PEI print bed and already extrudes a line at the edge of the print bed due to the Start G-Code.
The first layer of a 3D print is mainly about establishing good print bed adhesion. You have a lot of influence on this via the settings in Cura.
The settings above allow the filament to cool more slowly, giving the hot filament longer to bond to the print bed. Especially, the printing speed of the first layer is one of the most powerful settings for the print bed adhesion.
Conclusion
In this article, I have shown you the best Cura settings for the Anycubic Vyper. The given values should give you good results for the respective filaments. How to achieve perfect results by calibrating the most important print settings, you have also learned in this article.
Have fun 3D printing with your Anycubic Vyper!
Disclosure: This website is the property of Martin Lütkemeyer and is operated by Martin Lütkemeyer. Martin Lütkemeyer is a member of the Amazon Services LLC and other Affiliate Programs. These are affiliate advertising programs designed to enable websites to earn advertising revenue through advertising and linking to Amazon.com and others. Links marked with * are affiliate links.
