
- Wet Filament: Prevention, Symptoms & Drying - July 18, 2024
- Sovol SV08 – Best PrusaSlicer Settings & Profile - June 26, 2024
- Sovol SV08 – Best Orca Slicer Settings & Profile - June 26, 2024
Disclosure: Links marked with * are Affiliate Links. I earn from qualifying purchases if you decide to make a purchase through these links – at no additional cost for you!
The Ender 3 S1 Pro* is the improved version of the Ender 3 S1 and has several features that not only improve the operation but also the print quality. Without the right settings in Cura, however, these features will not help you.
To create a good Cura profile for the Ender 3 S1 Pro, a standard profile can be used as a basis. The settings must then be optimized and calibrated. In Creality Slicer there is also a good standard profile that can be used as a basis for optimizations.
How to do all this and which settings work perfectly with my Ender 3 S1 Pro, you will learn in this article. At the end of this post, you will learn how to calibrate the most important settings.
| PLA | ABS | TPU | PETG | |
|---|---|---|---|---|
| Printing Temperature | 190-200 °C | 220-250 °C | 215-230 °C | 220-245 °C |
| Print bed temperature | 60 °C | 90-100 °C | 55-60 °C | 70 °C |
| Printing speed | 40-60 mm/s | 40-60 mm/s | 30-40 mm/s | 30 mm/s |
| Retraction | 0.8-1.0 mm at 50 mm/s | 0.8-1.0 mm at 60 mm/s | 1.0-1.2 mm at 60 mm/s | 0.6-0.8 mm at 40 mm/s |
| Cooling | 100% | 0% + Enclosure | 100% | 100% |
How to Create a Profile for the Creality Ender 3 S1 Pro in Cura
A 3D printer profile in Cura contains the settings needed to achieve a good print result on a specific 3D printer. To create a good profile, it is important to calibrate the printer first. This means that the settings have to be adjusted until they result in a print with the correct dimensions and surface quality.
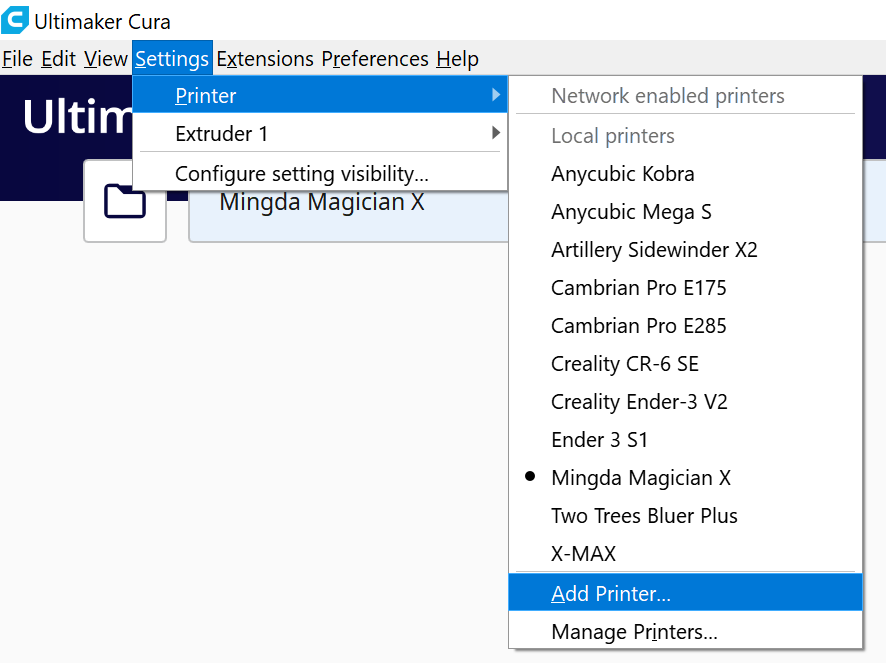
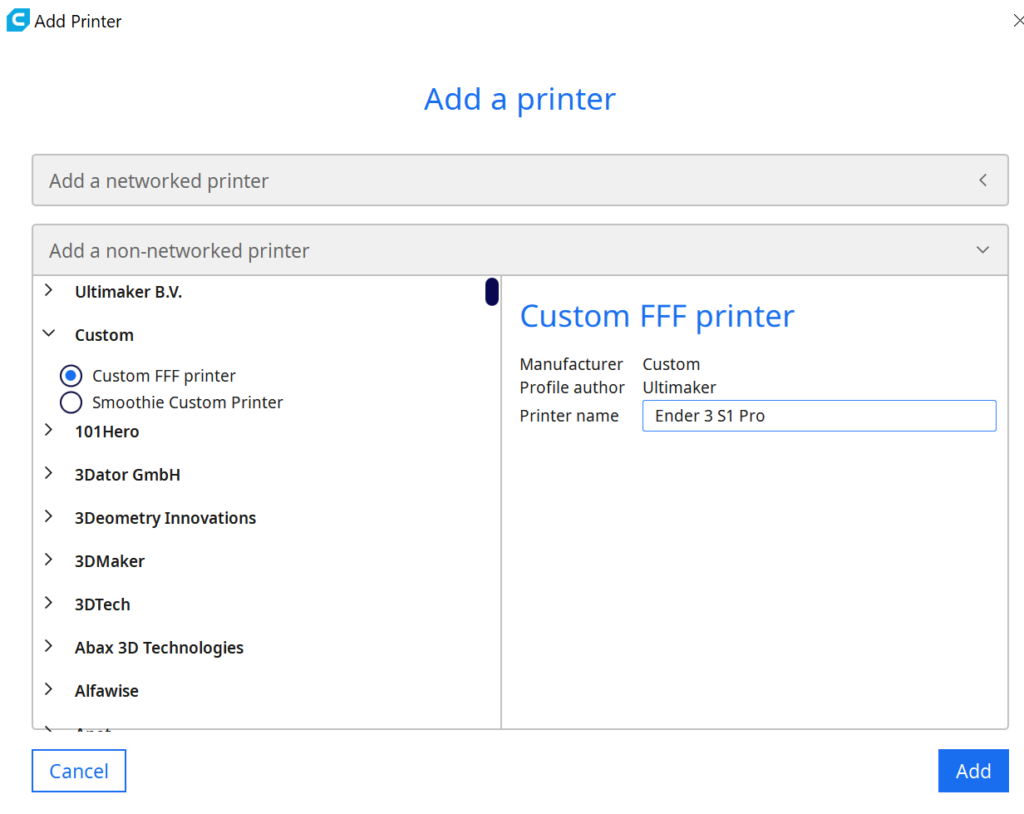
Adding a 3D printer in Cura is very simple. First, open the program and select “Settings” from the top menu bar. Then click on “Printers” and then “Add printer”. Open the drop-down menu and select “Custom FFF printer”. Enter the name of your printer (in this case Ender 3 S1 Pro). Click on “Add” and your printer will be added.
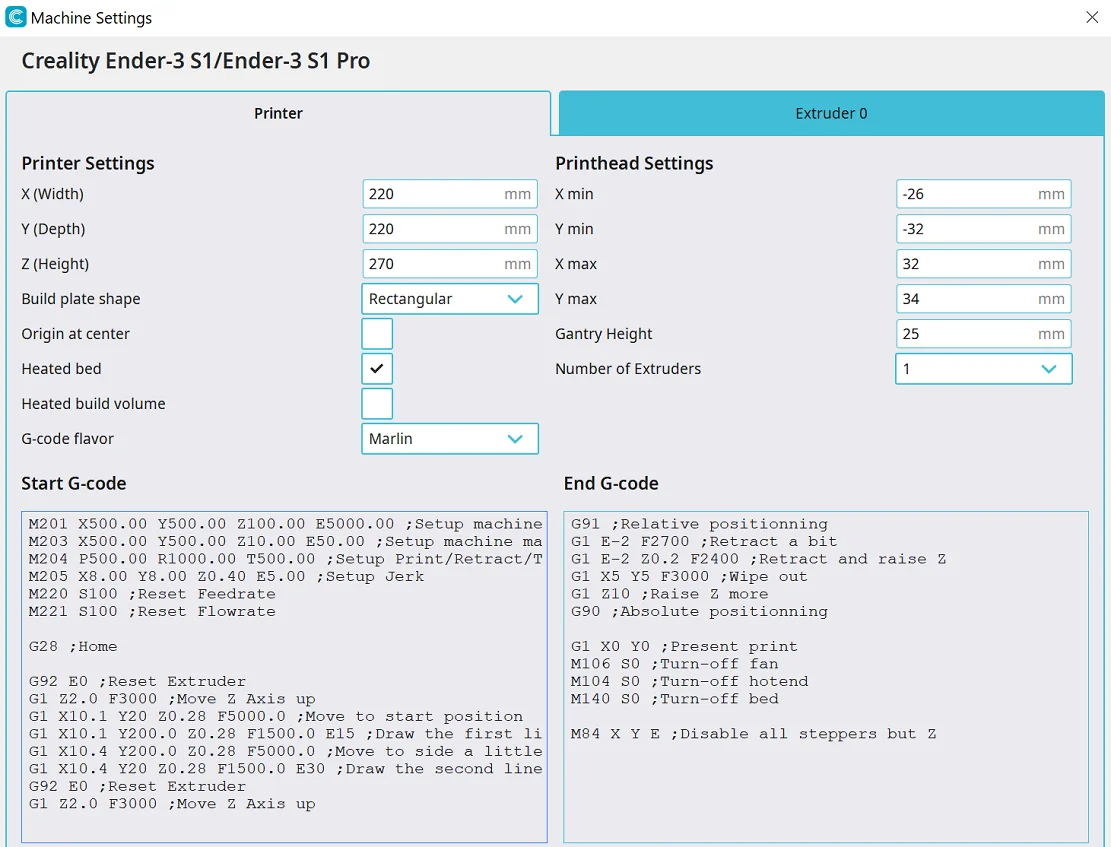
Next you need to define the printer properties under the machine settings:
- Printer settings:
- X (Width) = 220 mm
- Y (Depth) = 220 mm
- Z (Height) = 270 mm
- Build plate shape = Rectangular
- Origin at center = No
- Heated bed = Yes
- Heated build volume = No
- G-code flavor = Marlin
- Printhead settings:
- X min = -26 mm
- Y min = -32 mm
- X max = 32 mm
- Y max = 34 mm
- Number of extruders = 1
- Gantry Height = 25 mm
- Apply Extruder offsets to GCode = Yes
- Start G-Code = Leave at default values
- End G-Code = Leave at default values
- Nozzle Settings:
- Nozzle size = 0.4 mm
- Compatible material diameter = 1.75 mm
- Nozzle offset X = 0.0 mm
- Nozzle offset Y = 0.0 mm
- Cooling Fan Number = 0
- Extruder Start G-Code = Leave at default values
- Extruder End G-Code = Leave at default values
After creating the profile, Cura will independently create standard profiles for different accuracies. However, the values given by Cura are unsuitable default values which you must still adapt to the Ender 3 S1 Pro.
You can find more information on how to create a 3D printer profile in Cura and what you need to pay attention to in this article: How to Create a Custom 3D Printer Profile in Cura
PLA Settings at a Glance
When printing with PLA, you should always use a heated print bed. This is because PLA has a lower melting point than other materials and will not adhere as well to the print bed if it is not heated. You should also increase the fan speed to ensure good cooling of the print.
Cura settings for PLA with the Ender 3 S1 Pro require a print temperature of 190-200 °C, a print bed temperature of 60 °C, a print speed of 40-60 mm/s and a retraction of 0.8-1.0 mm at 50 mm/s. Cooling should always be set to 100%. The first layer should be printed with 0% cooling, 100% extrusion width and 100% layer height.
These are the correct Cura settings for the Ender 3 S1 Pro for PLA:
- Printing temperature: 190-200 °C
- Print bed temperature: 60 °C
- Printing speed: 40-60 mm/s
- Retraction: 0.8-1.0 mm at 50 mm/s
- Cooling: 100%
- First layer: 0% cooling, 100% extrusion width, 100% layer height

ABS Settings at a Glance
ABS printing requires a higher temperature than PLA printing. Therefore, it is important that your printer is properly calibrated and the print bed is heated to the correct temperature before you start printing.
A 3D printer enclosure is useful when printing with ABS because it helps to maintain a constant temperature and avoid deformation. For the Ender 3 S1 Pro there is a suitable enclosure from Creality.
ABS is known to be a difficult material to print because of its tendency to warp and peel from the print bed. To improve the adhesion of ABS, it is important to use a print surface that is specifically designed for ABS printing. The Ender 3 S1 Pro has a built-in heated bed that has a PEI coating. This creates excellent adhesion for ABS at the correct temperature.
These are the correct Cura settings for the Ender 3 S1 Pro for ABS:
- Printing temperature: 220-250 °C
- Print bed temperature: 90-100 °C
- Printing speed: 40-60 mm/s
- Retraction: 0.8-1.0 mm at 60 mm/s
- Cooling: 0% + Enclosure
- First layer: 0% cooling, 100% extrusion width, 100% layer height
TPU Settings at a Glance
When printing with TPU, it is important to consider the properties of the material. TPU is a flexible and elastic material that can easily warp. To prevent this, it is important to use a heated build platform and adjust the print settings accordingly.
A Bowden extruder has a PVC or PTFE tube running from the extruder motor to the hot end. This setup is often used in 3D printers that have limited space. A direct drive extruder has the motor mounted directly on the hot end.
A direct drive extruder is useful when 3D printing with TPU because the flexible filament has no chance of getting tangled in the Bowden tube. This makes the Ender 3 S1 Pro with its Sprite Pro extruder ideal for TPU.
When printing with TPU, it is important that the bed adheres well. This can be achieved by using a heated build platform and applying a layer of adhesive to the bed.
Magigoo is a great way to increase the print bed adhesion of TPU in 3D printing. When using TPU, it is important to have a surface that adheres well so that the material does not warp. Magigoo helps by providing an adhesive layer that firmly adheres to the print bed.
These are the correct Cura settings for the Ender 3 S1 Pro for TPU:
- Printing temperature: 215-230 °C
- Print bed temperature: 55-60 °C
- Printing speed: 30-40 mm/s
- Retraction: 1.0-1.2 mm at 60 mm/s
- Cooling: 100%
- First layer: 0% cooling, 150% extrusion width, 150% layer height
PETG Settings at a Glance
PETG is known for its high print quality and resistance to deformation. When printing with PETG, it is important that you set the temperature of your print bed correctly to ensure a good print. You also need to make sure that the print speed is not set too high.
However, in addition to its high print quality and durability, PETG is also known to pull strings in 3D printing when the print speed is too high. This is because the high print speed can cause the very tough and still liquid filament to swirl around and form threads. To avoid this, it is important to set the print speed correctly.
These are the correct Cura settings for the Ender 3 S1 Pro for PETG:
- Printing temperature: 220-245 °C
- Print bed temperature: 70 °C
- Printing speed: 30 mm/s
- Retraction: 0.6-0.8 mm at 40 mm/s
- Cooling: 100%
- First layer: 0% cooling, 100% extrusion width, 100% layer height
How to Import the Ender 3 S1 Pro Profile from Creality Slicer into Cura
Creality Slicer and Cura are both slicing software, however, there are some differences between the two. Creality Slicer has more default profiles for 3D printers when released, while Cura is more customizable. Also, Creality Slicer is a bit faster than Cura. The biggest difference for me, though, is that there are new features for Cura sooner. Then the new features eventually show up in Creality Slicer as well.
For Creality 3D printers, Creality Slicer, which is basically a Cura clone, already has good default profiles when the respective 3D printer is released. Since the user interfaces are very similar, it is very easy to copy the settings in Cura.
And by copy, I mean literally copying them. You can simply define all machine settings and print settings in a new “Custom FFF printer” at Cura and transfer the profile 1:1 to Cura.
In my experience, this works very well with many Creality 3D printers, but be sure to calibrate the most important settings. More about this later in this article.
Best Cura Settings for the Creality Ender 3 S1 Pro
Now that you know how to create a profile for the Ender 3 S1 Pro, we will now go into the correct Cura settings for the individual filaments. In addition to important settings such as the print temperature, this also includes parameters that are not insignificant for the end result, such as the infill or the layer thickness. How to calibrate the most important settings on your 3D printer, you will learn in detail afterward.
Printing Temperature

If the print temperature is set too high, the plastic may melt too quickly, resulting in blobs or stringing on the print. If it is set too low, the plastic may not melt enough and the print will be incomplete or have poor resolution.
The Ender 3 S1 Pro has an extruder that can reach a print temperature of up to 300 °C. The Sprite Pro Direct Drive Extruder allows for fast and clean prints with little to no spotting or filament. However, the temperature must be set correctly for the filament to produce optimal results.
The best printing temperatures for the Ender 3 S1 Pro in Cura:
- PLA: 180-190 °C
- ABS: 220-250 °C
- TPU: 215-230 °C °C
- PETG: 220-245 °C
Print Bed Temperature
An incorrectly set print bed temperature can result in poor print quality. If the bed is too cold, the filament will not adhere to the bed and printing will not be successful. If the bed is too hot, the filament will melt and deform, resulting in poor print quality.
The print bed of the Ender 3 S1 Pro can reach a temperature of up to 110 °C. The optimal temperature depends on the type of filament and the print speed. With this temperature range, you can create a good print bed adhesion for ABS and other high-temperature filaments.
The default values for the print bed temperatures of PLA, ABS, PETG and TPU are respectively:
- PLA: 50-60 °C
- ABS: 80-110 °C
- PETG: 70-80 °C
- TPU: 60-70 °C
However, these values are slightly different for each 3D printer and filament. With my Ender 3 S1 Pro, the best temperatures were rather in the lower range of these standard values, because the print bed of the Ender 3 S1 Pro is so thin and therefore gets hot quickly and does not lose as much heat as a thick glass plate for example.
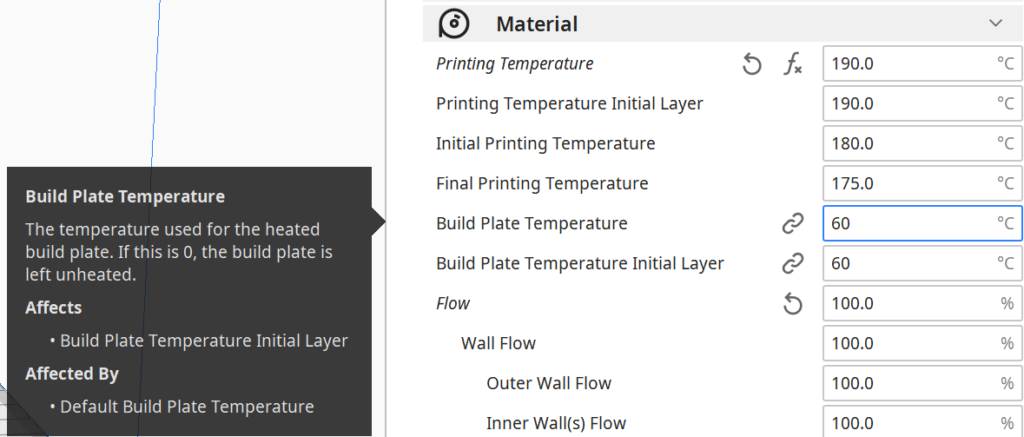
The best print bed temperatures for the Ender 3 S1 Pro in Cura:
- PLA: 60 °C
- ABS: 90-100 °C
- TPU: 55-60 °C
- PETG: 70 °C
Print Speed
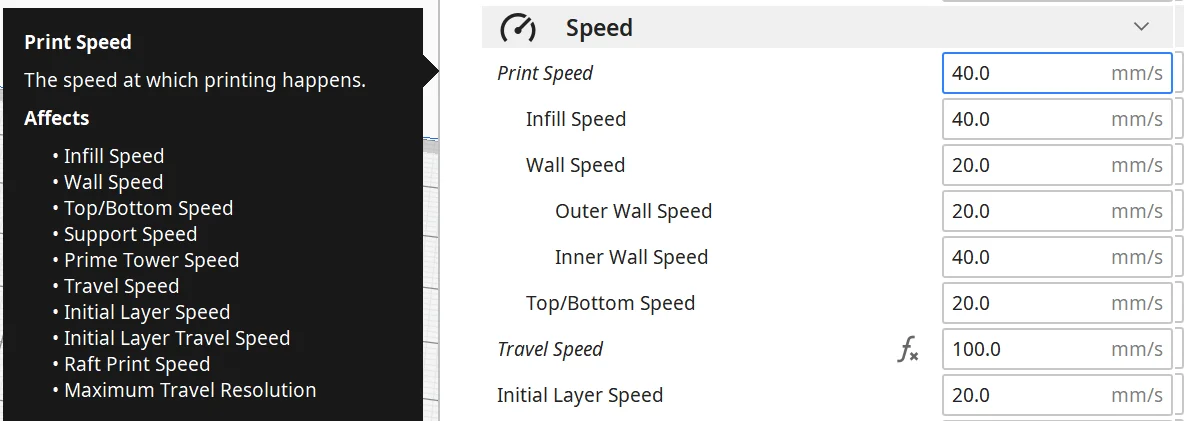
The Ender 3 S1 Pro is capable of printing at speeds of up to 180 mm/s. This makes it a good choice for those who need to print quickly. However, this is only a theoretical figure. If you want to print high-quality surfaces, the print speed should be set much lower.
If the print speed is set too high, there may be blurring and irregularities in the print. This is because the printer moves too fast for the filament to fuse with the underlying layer properly. This can result in the finished product not being entirely satisfactory.
If the print speed is set too low, printing will take too long and may result in over-extrusion as the filament runs out uncontrollably and prints too slowly.
The best printing speed for the Ender 3 S1 Pro in Cura:
- PLA: 40-60 mm/s
- ABS: 40-60 mm/s
- TPU: 30 mm/s
- PETG: 30 mm/s
Layer Height

The layer height of a 3D print affects its quality because it determines how thick the individual layers of the print are. A greater layer height results in thicker layers, which can lead to a rougher surface and more visible steps. Conversely, a smaller layer height leads to thinner layers, resulting in a smoother surface and fewer visible steps.
The Ender S1 Pro offers a layer height of 0.05 mm, which is smaller than the layer height of the Ender 3 (0.1 mm). The result is smooth prints with fewer visible steps.
Layer heights for 3D printing can vary depending on the type of object being printed. For decorative objects, a layer height of 0.1 mm is usually recommended as this gives a smoother surface with fewer visible steps. However, for functional objects with a mechanical function, a layer height of 0.05 mm is preferable as this results in a stronger and more accurate print.
The best layer thicknesses for the Ender 3 S1 Pro in Cura:
- Decorative objects: 0.08-0.12 mm
- Standard: 0.16-0.20 mm
- Coarse, fast prints: 0.24-0.28 mm
Flow Rate
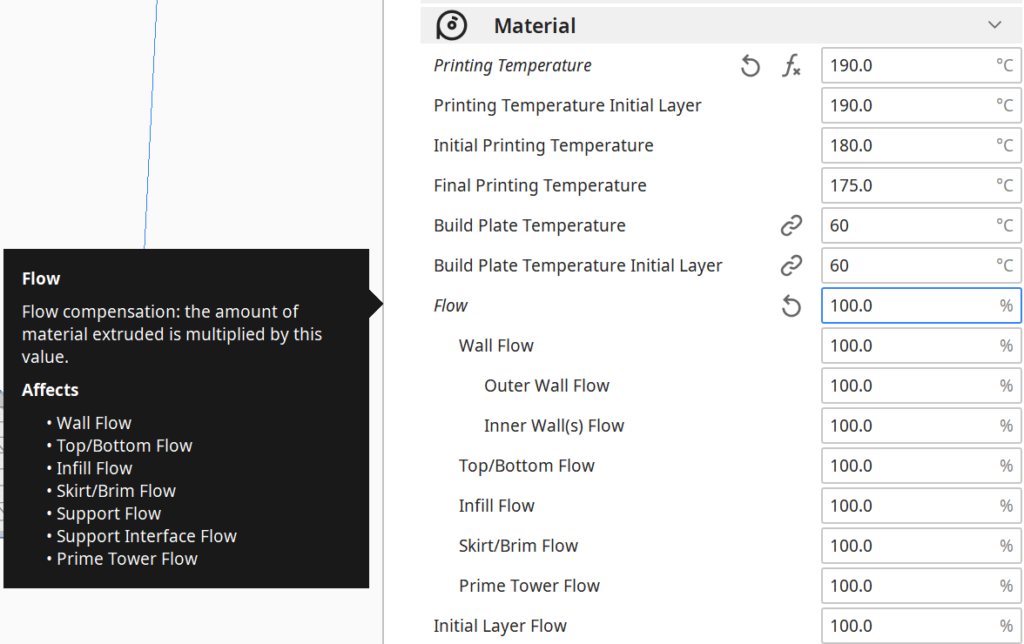
If the flow rate is not set correctly during 3D printing, it can affect the quality of the print. If the flow rate is set too low, not enough plastic will be extruded, which can cause cracks or holes in the surface. If the flow rate is set too high, too much filament will be extruded, which can result in unsightly blobs.
In general, a higher flow rate in 3D printing can also be used to increase the adhesion of the print bed. This is because a larger amount of filament is extruded, resulting in a stronger bond between the filament and the print bed. This makes it less likely that prints will come off or peel off the bed during the printing process. You can also adjust the flow rate in Cura for the first layer only.
The best flow rate for the Ender 3 S1 Pro in Cura:
- Default value: 100%
- For over-extrusion: 90% to 99
- For under-extrusion: 101% to 110%.
Retraction
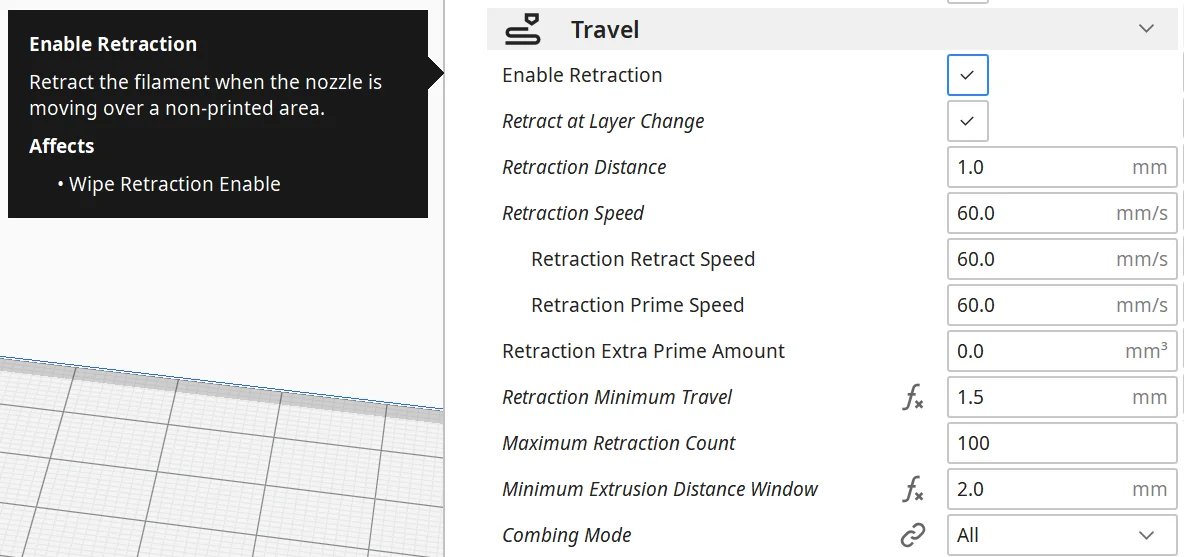
Incorrectly adjusted retraction in 3D printing can lead to a number of undesirable results, such as plastic threads between parts (stringing), uneven surfaces and poor resolution. In extreme cases, it can even cause the printer or nozzle to jam. Therefore, it is important that the retraction settings are correct for the type of filament and printer you are using.
Retraction is an important setting in 3D printing because it prevents stringing. As the extruder moves to the next layer, the filament can pull some of the plastic from the previous layer with it, creating a thread or “string” between the parts. This can result in uneven surfaces and poor resolution. Retraction pulls the filament back into the nozzle, preventing it from unintentionally escaping and pulling strings.
The settings for retraction in Cura are:
- Retraction Distance: This is the distance by which the filament is retracted.
- Retract Speed: This is the speed at which the filament is retracted.
The best retraction settings for the Ender 3 S1 Pro in Cura:
- PLA: 0.8-1.0 mm at 50 mm/s
- ABS: 0.8-1.0 mm at 60 mm/s
- TPU: 1.0-1.2 mm at 60 mm/s
- PETG: 0.6-0.8 mm at 40 mm/s
Infill
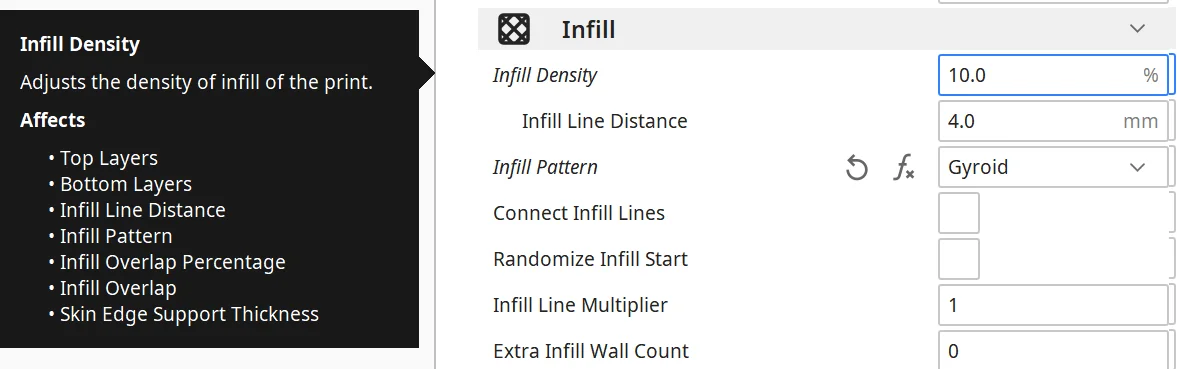
An incorrectly adjusted infill can lead to a number of undesirable results in 3D printing. If the infill density is too small, the finished product can be weak and fragile. On the other hand, if the infill is too dense, the print can overheat and warp.
The difference between infill pattern and infill density is that the infill pattern dictates the shape of the infill, while the infill density dictates how dense the object will be. If the density remains the same, different patterns produce significantly different stabilities of the finished object.
High stability (for stable objects):
- Cubic
- Cubic subdivision
- Octet
- Gyroid
Medium stability (for standard objects):
- Grid
- Triangles
- Tri-Hexagonal
Low stability (for decorative objects):
- Lines
- Zigzag
- Lightning
When it comes to choosing the best infill density for 3D printing, there are a few points to consider. The first is the strength and stability of the object you want to create. If you need an object that is very strong and stable, you should use a high infill density. If you want to print a decorative object that doesn’t need to be very stable, you can use a lower infill density.
The second thing to consider is the type of material you are using. Some materials, like PLA, don’t warp as easily at higher temperatures, so you can use a higher infill density without worrying about the print warping.
The best infill density for the Ender 3 S1 Pro in Cura:
- Decorative objects: 0-15%
- Standard objects: 15-50%
- Stable objects: 50-100%
First Layer
The first layer of a 3D print is incredibly important, as it is the foundation for the entire print. If the first layer is not done correctly, the rest of the print will likely not be successful. This is because the first layer is responsible for both the accuracy and stability of the print.
There are a few things you can do to increase the print bed adhesion of the first layer in 3D printing. One way is to increase the temperature of the print bed. This will create a stronger bond between the print and the print bed.
Other options are listed below. If these don’t help either, you can use an adhesive like Magigoo. This helps to increase the adhesion extremely. On the Ender 3 S1 Pro, I’ve used this glue a few times on very delicate first layers to make sure everything sticks well.
These are the best Cura settings for the first layer on the Ender 3 S1 Pro:
- Layer thickness: 100-200% of normal layer thickness (higher values to increase print bed adhesion)
- Line width: 100-200% of normal line width (higher values to increase print bed adhesion)
- Print temperature: Same as the rest of the object or 5-10 °C higher for better print bed adhesion.
- Print speed: 50% of the normal print speed (i.e. 25 mm/s with a normal print speed of 50 mm/s)
- Flow rate: 100-110% (higher values in case of poor print bed adhesion)
How to Calibrate the Creality Ender 3 S1 Pro Cura Settings
Calibrating a 3D printer is important because it ensures that the print is accurate and looks the way it should. If the printer is not calibrated properly, the print may be distorted or have other problems. This can be frustrating for the user and result in prints that are not up to par.
Print temperature, flow rate and retraction are three of the most important settings of a 3D printer. If these three settings are not calibrated correctly, various problems can arise. You’ll be amazed at what a big difference it makes to get these settings right. Fortunately, it is relatively easy to calibrate.
TIP: Learn how to calibrate your 3D printer to get perfect results every time in my 3D printing course: FDM 3D Printing: The Comprehensive Course from A to Z
(The course teaches everything you need to know for FDM 3D printing in over 60 lessons. The course will get beginners up to my level in no time!)

For each of these settings, there is a suitable object to find the right value. You can find such objects on portals like Thingiverse, I like to use the Calibration Shapes plugin in Cura.

Read the full calibration guide:
3D Printer Calibration: Step-by-Step to Perfect Results
How to Calibrate the Print Temperature
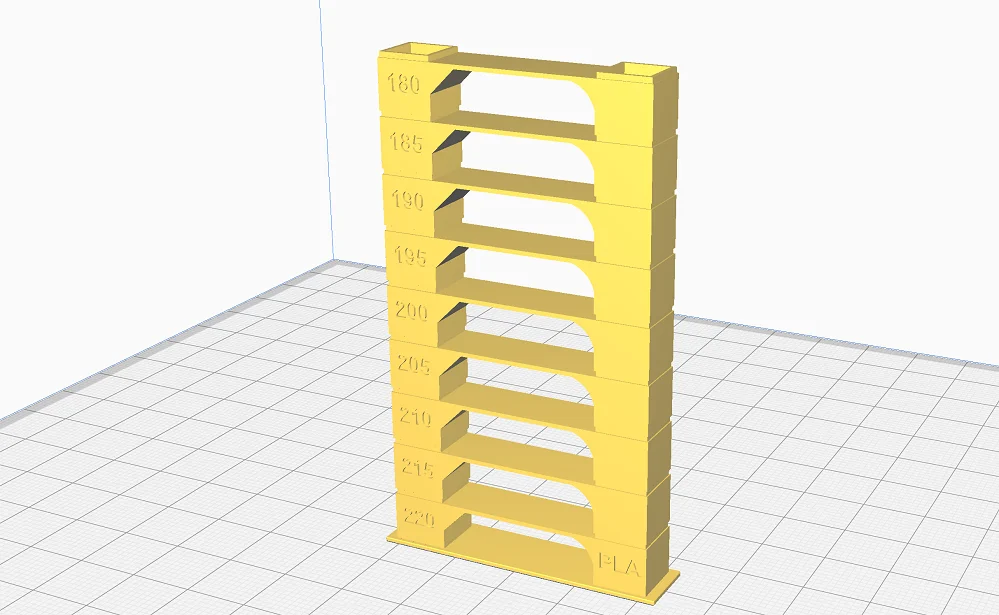
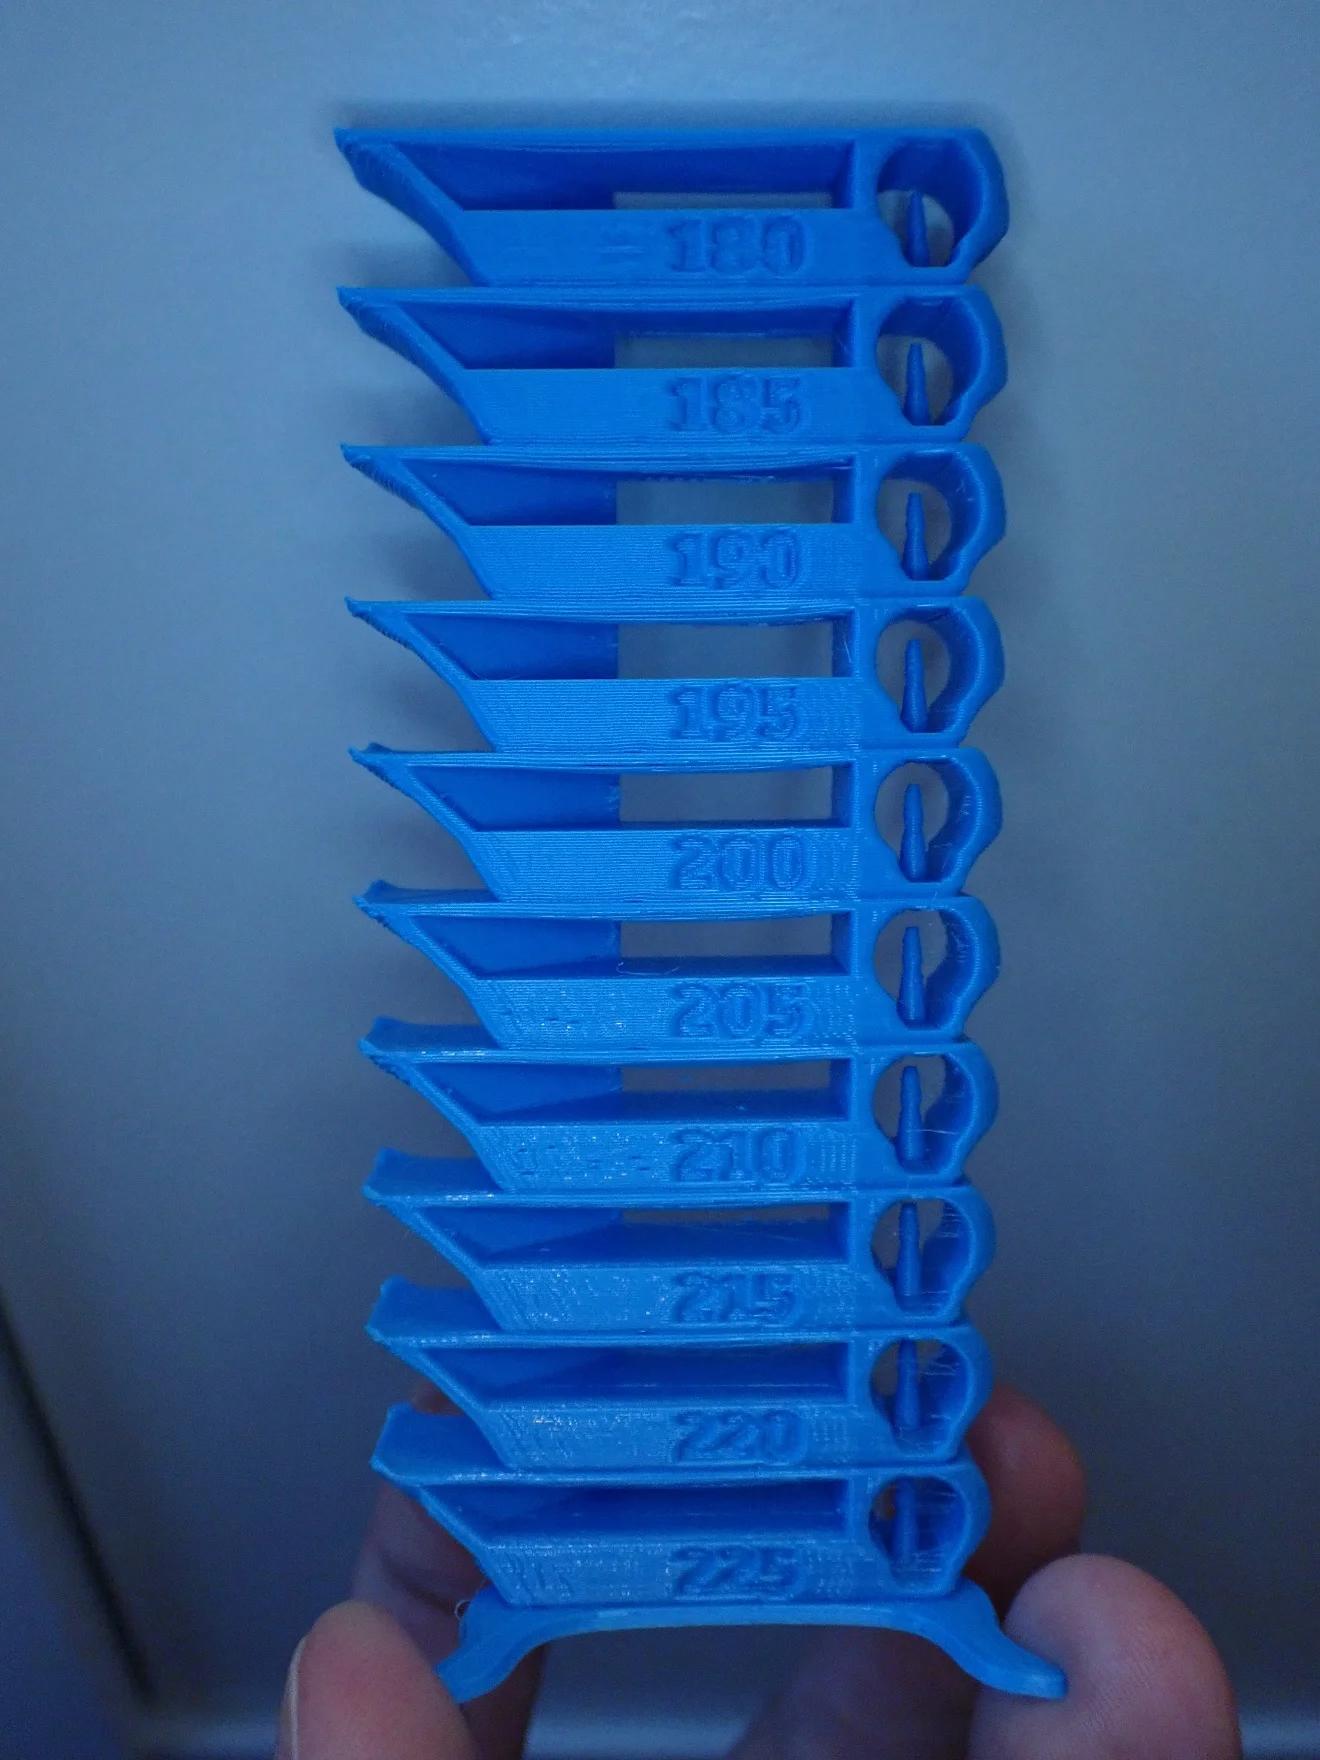
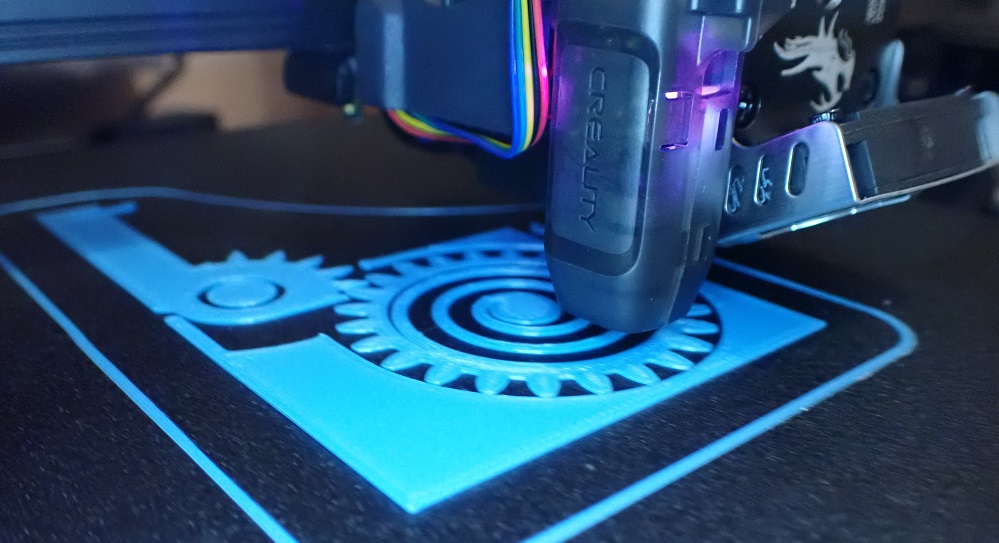
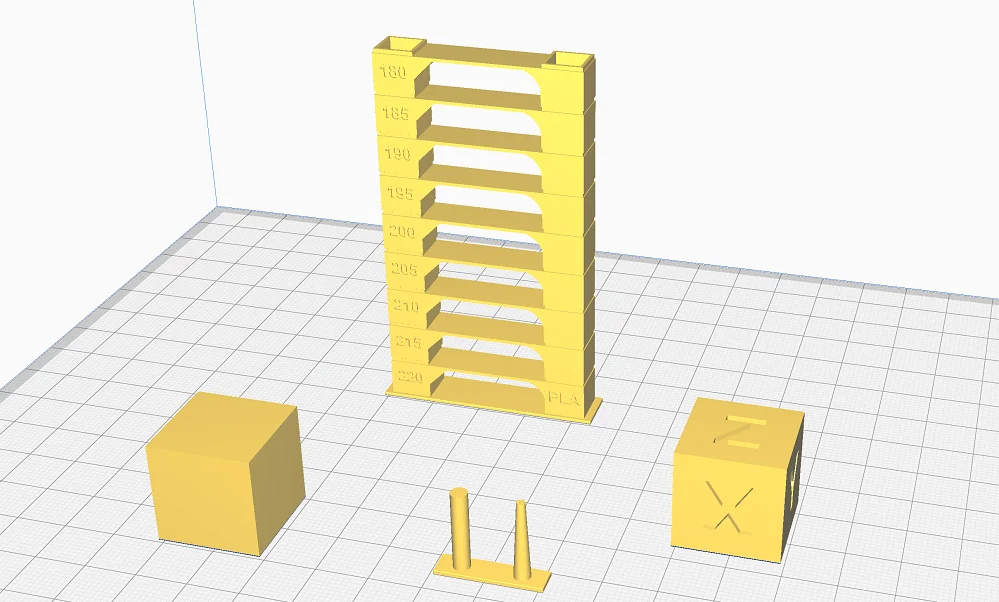
A temperature tower is used to calibrate the printing temperature of a 3D printer. A temperature tower consists of multiple floors. These tiers are each designed to provoke and test multiple print errors – including bridging and stringing.
To be able to calibrate the temperature with it, you have to use a script in Cura to change the temperature with each floor. After printing the tower with different temperatures, you can see at which temperature the result was best.
How to Calibrate the Flow Rate
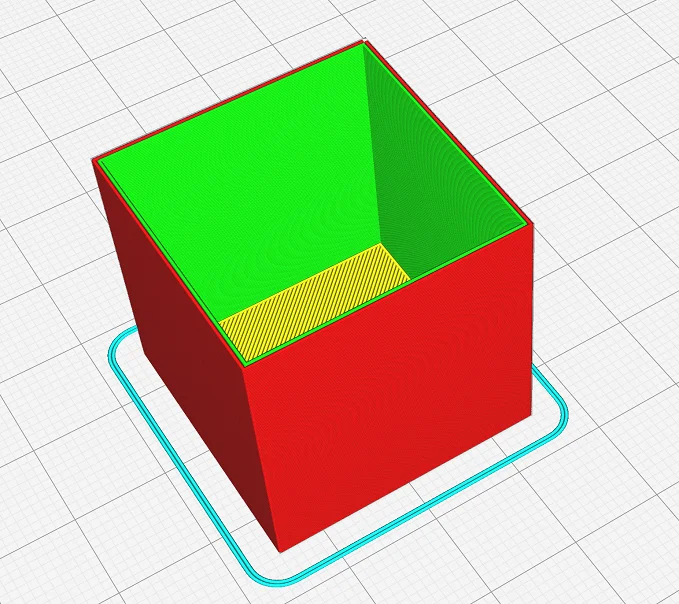
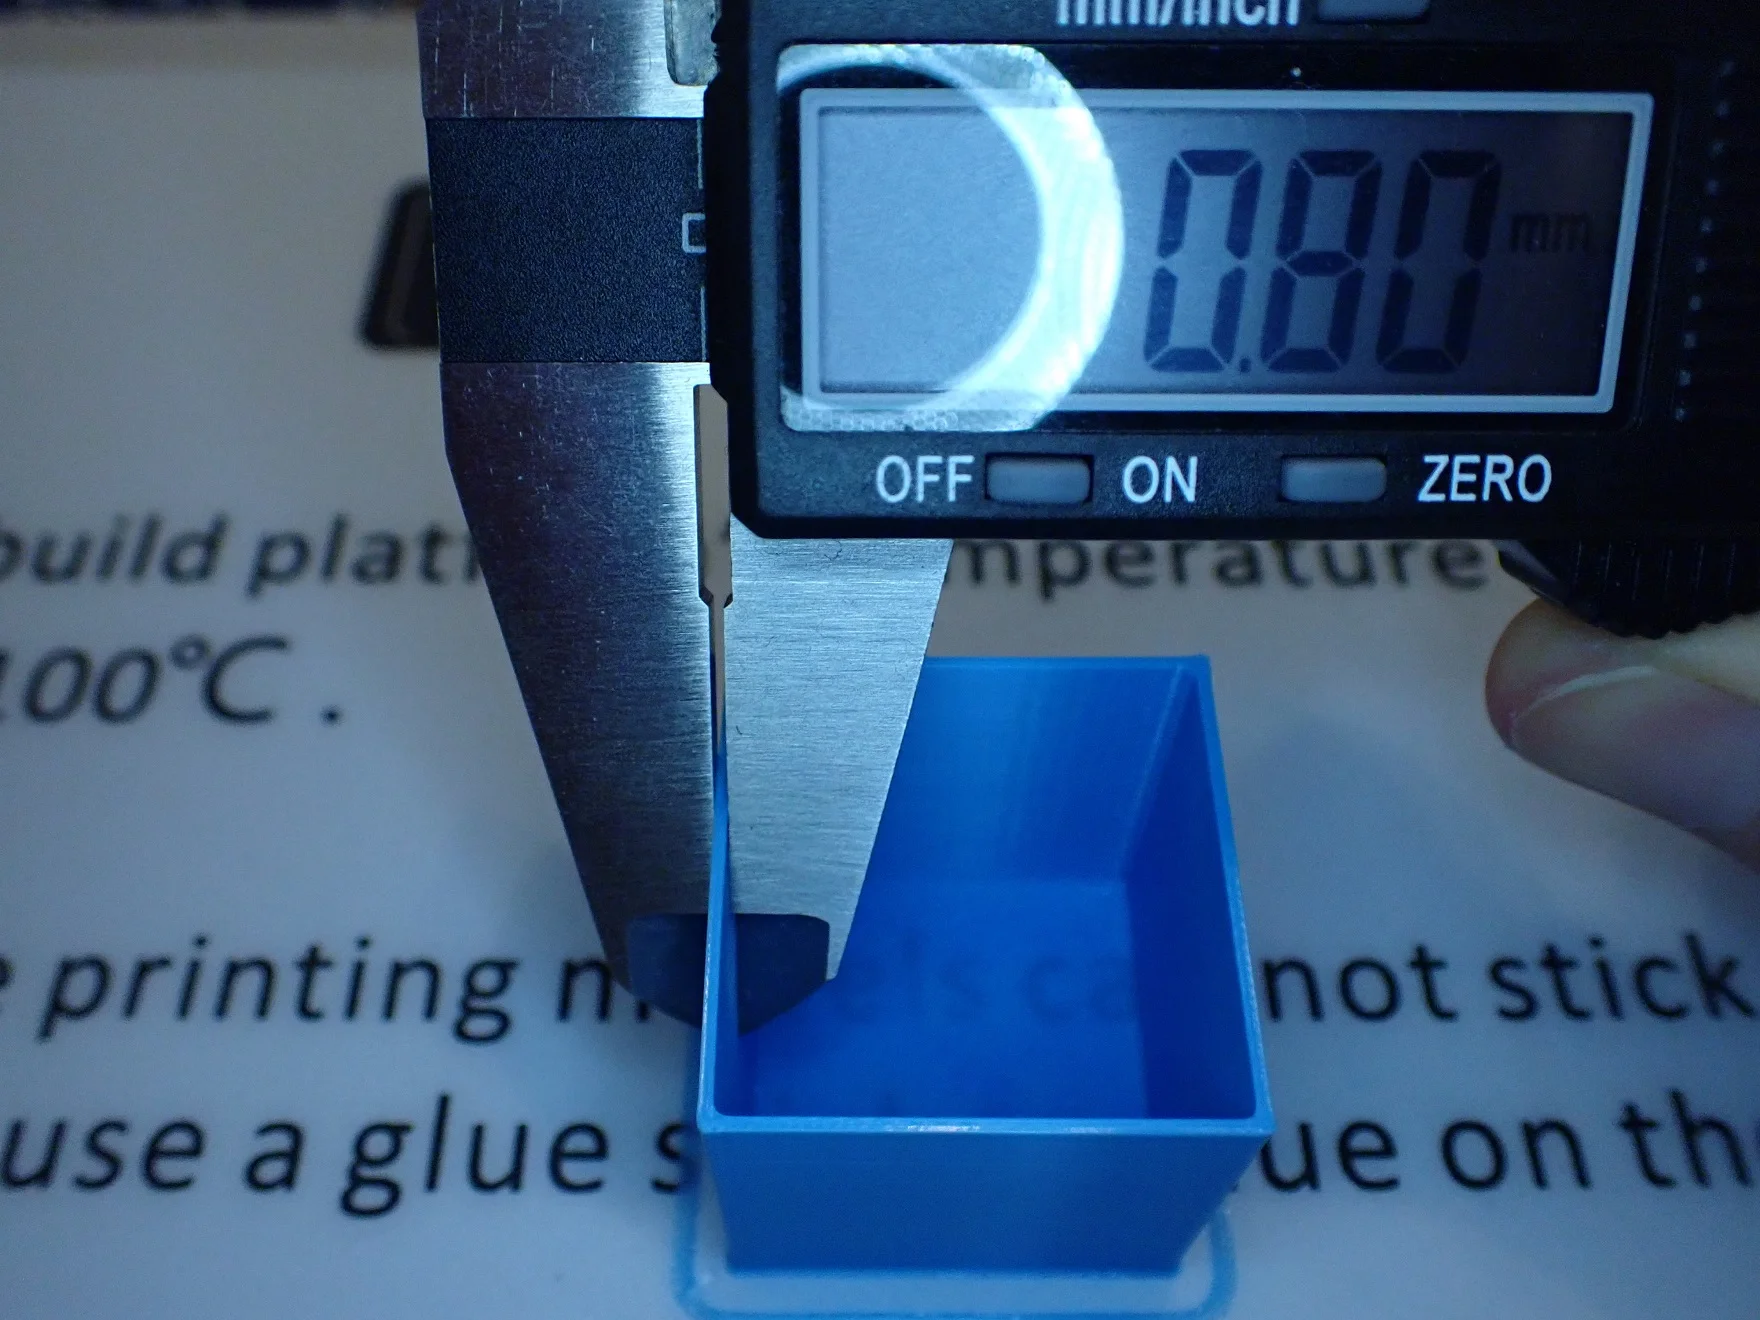
To calibrate the flow rate of a 3D printer, you need to print a calibration cube and measure its dimensions. Print the cube with 2 walls, no infill and no top layers. Then, after printing, you can measure the wall thickness with a caliper.
The multiplier for the flow rate is then calculated by dividing the wall thickness given in Cura by the actual wall thickness of the cube. Or more precisely:
- New flow rate = (theoretical wall thickness) +/- (wall thickness deviation) / (theoretical wall thickness)
Repeat the process until the actual wall thickness matches the theoretical wall thickness. Since the calibration cube is quite small and consumes little filament, the printing does not take very long and you have quickly determined the perfect flow rate.
How to Calibrate the Retraction

There are a few things you can do to calibrate the retraction of your 3D printer. You need to adjust the speed at which the printer retracts the filament and the distance by which it retracts the filament.
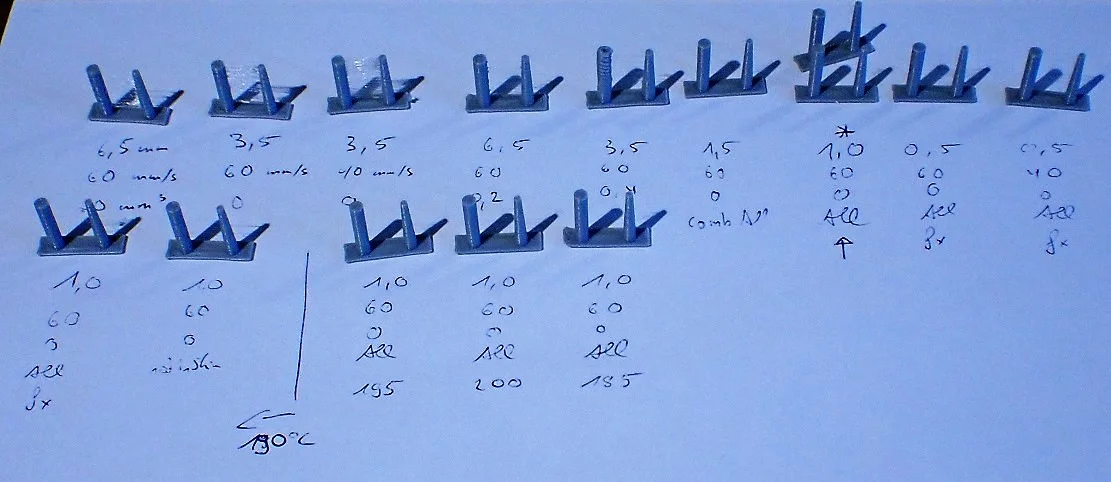
In the Calibration Shapes plugin, there is a small but very effective object to test the retraction settings. In principle, it consists of only two small columns. If the settings are not yet perfect, threads are drawn between these two columns.
Adjust the settings in small steps until you can’t see any stringing between the two columns. Since the object is extremely small, it can be printed in a few minutes.
Conclusion
After testing your Creality Ender 3 S1 Pro* with the Cura settings above and calibrating it using the methods described, you should now have prints that are accurate and look the way they should.
The Ender 3 S1 Pro is a great 3D printer and with the right Cura settings, you will have a lot of fun with it for a long time!
Disclosure: This website is the property of Martin Lütkemeyer and is operated by Martin Lütkemeyer. Martin Lütkemeyer is a member of the Amazon Services LLC and other Affiliate Programs. These are affiliate advertising programs designed to enable websites to earn advertising revenue through advertising and linking to Amazon.com and others. Links marked with * are affiliate links.
