
- Wet Filament: Prevention, Symptoms & Drying - July 18, 2024
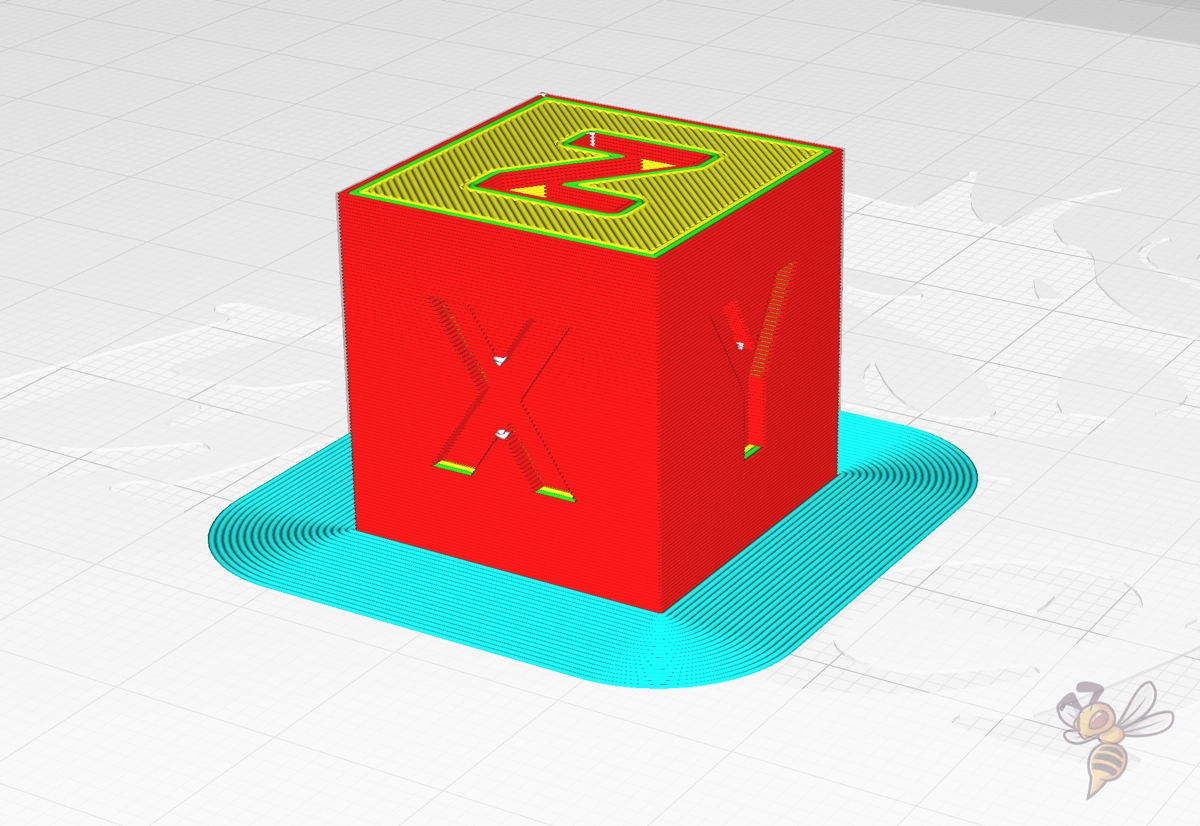
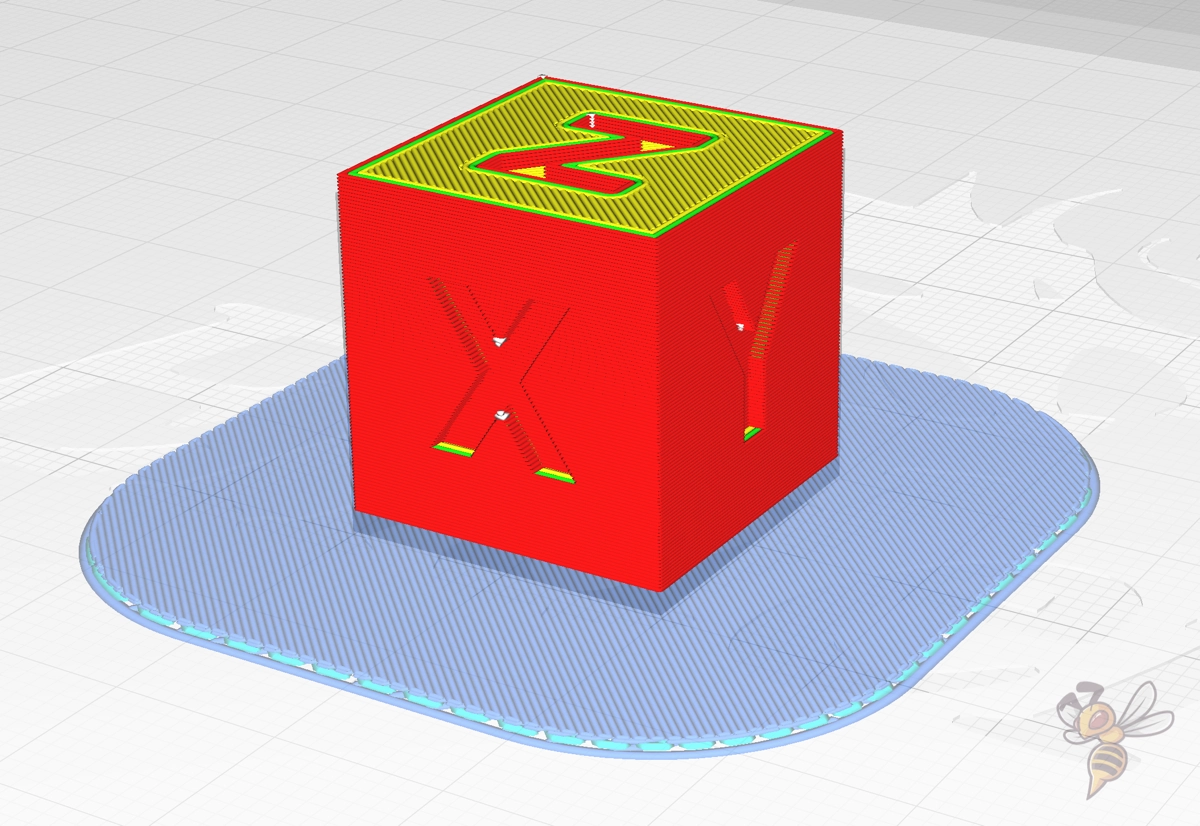
- Sovol SV08 – Best PrusaSlicer Settings & Profile - June 26, 2024
- Sovol SV08 – Best Orca Slicer Settings & Profile - June 26, 2024
Disclosure: Links marked with * are Affiliate Links. I earn from qualifying purchases if you decide to make a purchase through these links – at no additional cost for you!
PETG is not as easy to handle as PLA, but is nevertheless extremely popular due to its mechanical and chemical properties. However, the requirements for 3D printing are somewhat higher. This also includes print bed adhesion – if certain requirements are not met, the PETG filament will not stick to the print bed.
If PETG does not stick to the print bed, this is usually due to incorrect print settings, wet filament, poor filament quality, a dirty or unsuitable print bed.
This guide shows you the correct steps to increase the print bed adhesion of PETG. The order of the steps is also the order in which you should apply them.
Table of Contents:
- 1 Clean the Print Bed
- 2 Level the Print Bed
- 3 Reduce the Z-Offset
- 4 Reduce the Print Speed of the First Layer
- 5 Disable Cooling of the First Layers
- 6 Raise the Temperatures
- 7 Dry the Filament
- 8 Print a Thicker First Layer
- 9 Use a Brim or a Raft
- 10 Print “Mouse Ears” at the Corners
- 11 Use an Adhesive
- 12 Use a Different Print Bed Material
- 13 Conclusion
Clean the Print Bed
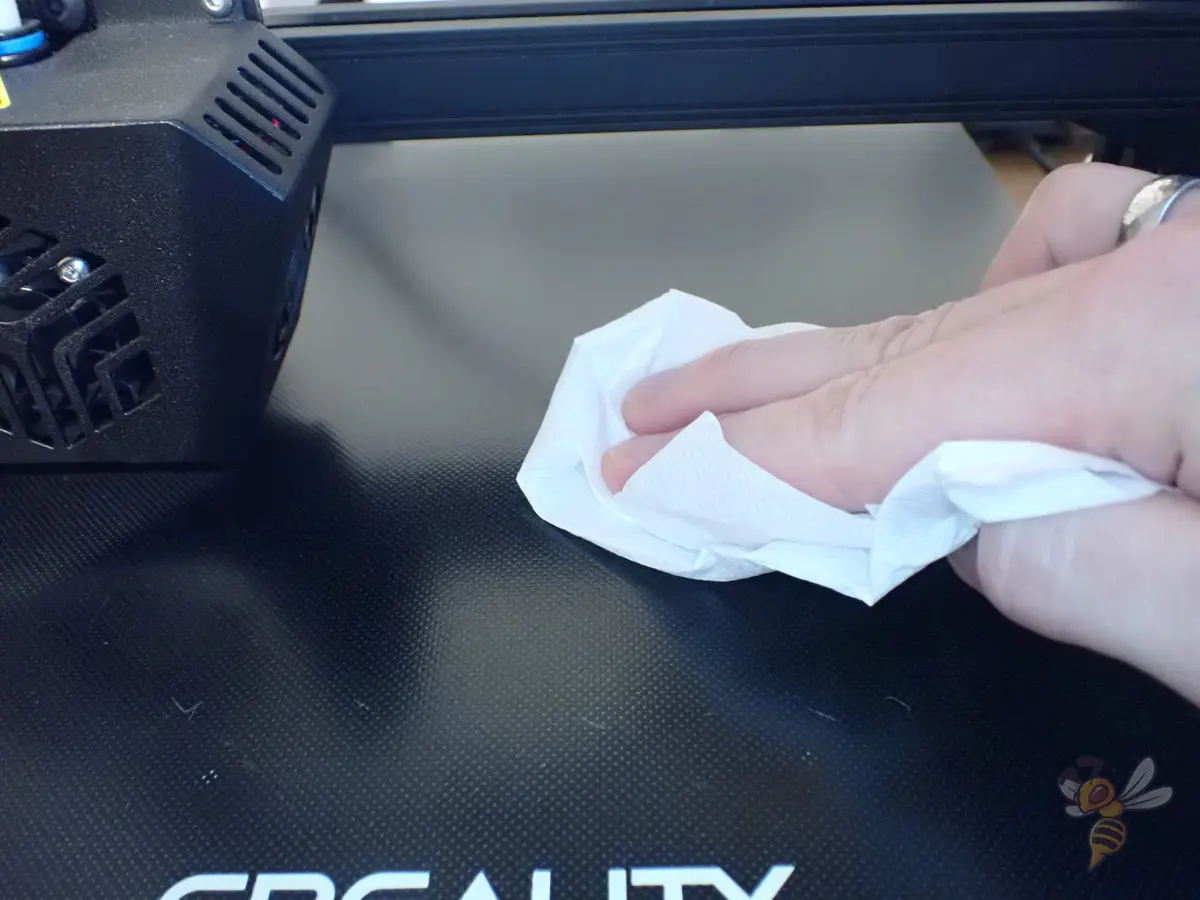
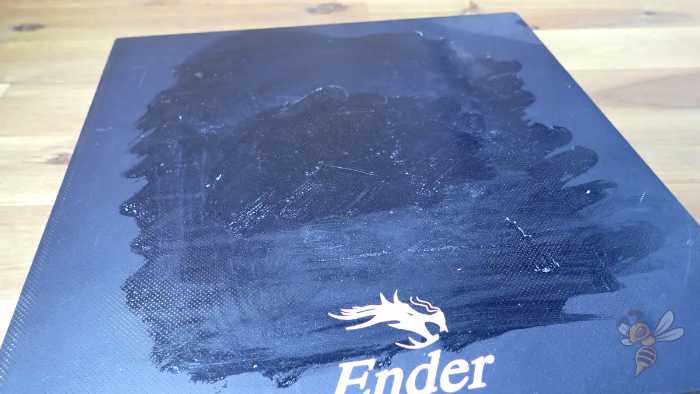
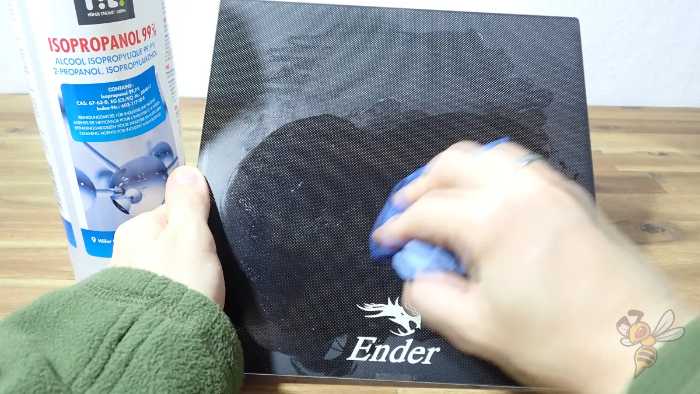
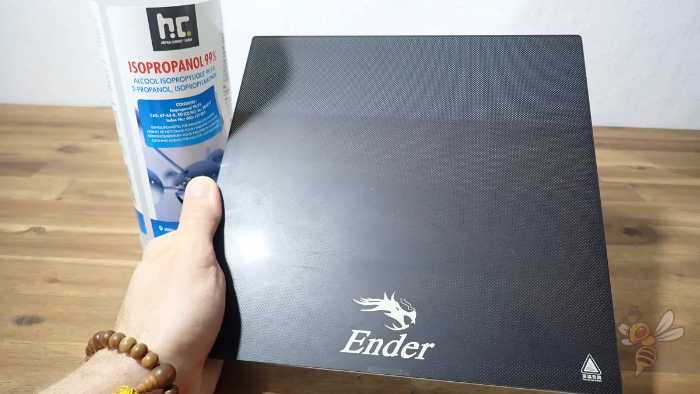
PETG filament can only adhere to a clean print bed. The first step for good print bed adhesion of PETG is therefore the removal of dust, filament residues, grease/oils and other foreign bodies from the print bed.
Depending on how badly and with what the print bed is contaminated, you have to use different solvents or tools. For dust and loose filament residues, you can simply use a cloth. For stubborn filament residues, you can use a spatula.
If you have already experimented with adhesives, it is important to remove the adhesive residues with a suitable solvent after each print. For glue sticks or hairspray, water with a little dishwashing liquid would be sufficient; for stronger adhesives, only isopropyl alcohol or acetone could help.
Depending on the print bed material you are using, you will need to be careful not to damage it when using certain cleaning methods. If you are using a glass print bed or a PEI coated print bed, you need to be cautious with a spatula so that you do not scratch the surface.
Generally, it is enough to put the spatula on the edge of the printed filament and slightly lever it upwards. This will remove even strongly adhering filament residues without leaving scratches. Quick scratching over the surface can reduce the adhesive properties of the print bed.
A good habit that I also had to get into is to consistently clean the print bed of filament residue and wash off adhesives after each print. Then, every time you make a new print, you’ll have a fresh print bed that you only need to clean of dust.
Level the Print Bed
If the PETG filament adheres unevenly to the print bed, this is often because the print bed is not properly leveled. If the leveling is incorrect, the distance between the nozzle and the print bed, and thus the adhesion, is not the same everywhere.
After cleaning the print bed, leveling is the first step to improve print bed adhesion. Like cleaning, leveling is one of the basics and should be ensured for every print.
A sure sign that PETG print bed adhesion is poor due to a poorly leveled print bed can be seen by the object always coming off the same side. While this phenomenon can also be triggered by a particular geometry of the object, it does not hurt to re-level it.
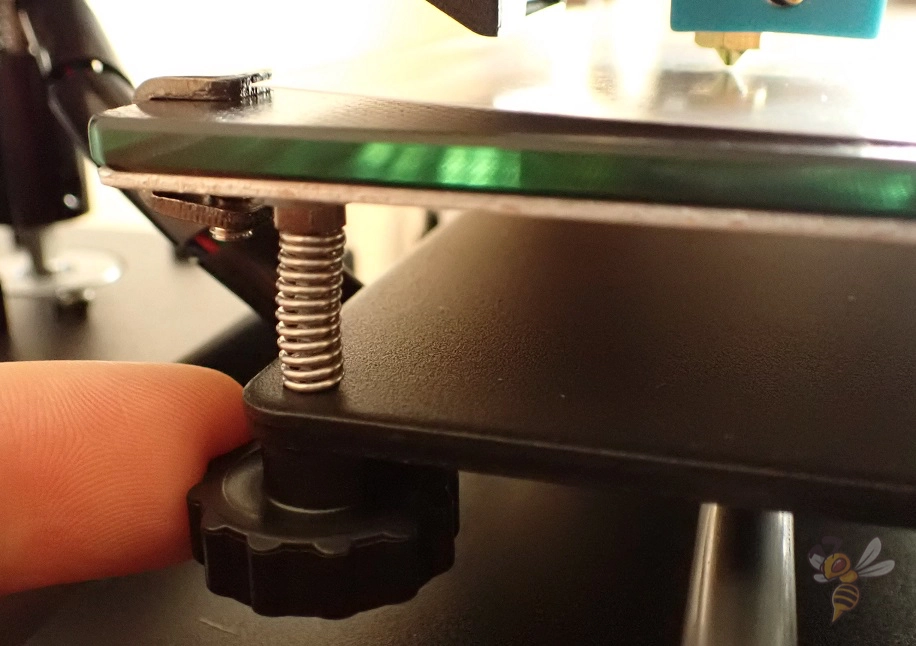
FDM 3D printers can be leveled either manually or automatically. For manual print bed leveling, the paper method has become widely accepted. You adjust the distance of the nozzle everywhere on the print bed with a normal piece of paper.
Using the knobs under the print bed, you adjust the distance between the nozzle and the print bed at all four corners so that the paper can be moved with a little friction. If the print bed was heavily misaligned, you will have to go through this process at least twice until the distance is the same everywhere.
However, there are also 3D printers that do not have such screws under the print bed. They then use a sensor that measures the distance at various points on the print bed to compensate for the tilt of the print bed.
If you have upgraded your 3D printer with a sensor like the BL-Touch or CR-Touch, you will still need to perform manual leveling regularly. Even the best sensors cannot compensate for very large inclinations.
Reduce the Z-Offset

PETG filament reacts strongly if the distance between the nozzle and the print bed is too large. Only when the distance is reduced to the correct level, the print bed adhesion improves significantly. The z-offset can be adjusted with a piece of paper or during printing of the first layer.
Leveling and cleaning the print bed are basics that must be ensured for every print. Reducing the distance between the nozzle and the print bed is the first actual method you can use to improve the print bed adhesion.
Although you already set the z-offset during leveling with the piece of paper, you can usually still adjust it manually in the menu of your 3D printer.
It is also usually possible to adjust the z-offset live while printing the first layer. This is often the most practical method, as you can then see directly whether the PETG filament adheres well or is even squashed too much by the nozzle.
You have to be careful here, otherwise you artificially create an elephant foot or even prevent the extrusion completely. If the distance between the nozzle and the print bed is too small, the PETG filament will be squeezed apart and become wider than desired.
So it is always a balancing act to set the z-offset correctly. However, with the tips mentioned here, you will find the right setting faster. Once you have done this a few times, you will have enough experience to quickly create a good print bed adhesion for PETG.
Reduce the Print Speed of the First Layer
The print bed adhesion of PETG filament can be extremely improved with low printing speeds. This means that the filament remains hot longer and can bond better with the print bed. Print speeds of 5 to 10 mm/s for the first layer have proven effective.
For printing with PETG, a speed between 40 millimeters per second and 80 millimeters per second is recommended – depending on the 3D printer model and the desired quality. However, at this print speed, print bed adhesion is relatively poor.
Reducing the print speed to 5 to 10 mm/s, however, would mean the entire print would take many times longer. However, with most slicers, the print speed can also be set separately only for the first layer.
All measures to increase the print bed adhesion of PETG that you can achieve through slicer settings all use the same physical principle. The goal in each case is to increase the time it takes for the filament to cool.
The longer the filament stays on the print bed at a higher temperature, the greater the print bed adhesion. The increased time that the filament remains more fluid for allows it to flow into the smallest recesses of the print bed. This greatly increases the contact surface between the filament and the print bed, resulting in greater adhesion.
And since you can’t just raise the print bed temperature to infinity because you’d cause a massive elephant foot, there are these tricks using the other slicer settings. Reducing the print speed for the first layer is my favorite, as it has the best cost-benefit ratio in increasing the print bed adhesion of PETG.
Disable Cooling of the First Layers
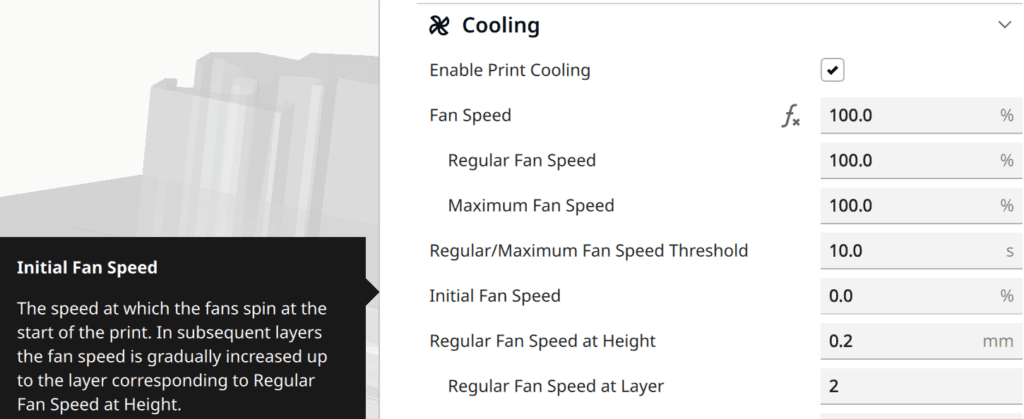
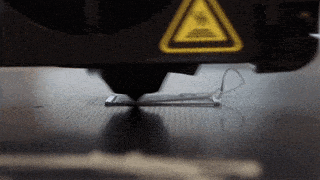
The cooling rate should be set to 0% for the first layer to ensure good print bed adhesion for PETG. If the filament cools too quickly on the print bed due to excessive cooling, it will not be able to bond with it and will detach.
PETG is a thermoplastic, so the material softens with heat and contracts somewhat as it cools. How quickly the PETG contracts as it cools affects its adhesive properties. This means that if the fan is set too high during the first layers, the PETG cannot adhere properly to the print bed.
For the print settings, this means: The first one or two layers of PETG should be printed with the fan switched off or with the fan only running at low speed. This is because the high temperature supports print bed adhesion. However, to ensure that the material remains securely on the plate afterwards and the model does not become too soft, the fan may be reactivated from the second or third layer onwards.
Fanless and with little ventilation, the temperature must be lowered. However, layers hold poorly if the material is too cold. Messy corners and dragged infills are an indication that the material was too cold, either because of the fan blowing too hard or because of the low temperature.
As for the cooling rate, you’ll have to experiment a bit with the PETG filament you’re using. While the advice to set it to 0% for the first layer always applies, for the rest of the print the values vary between 50 and 100%.
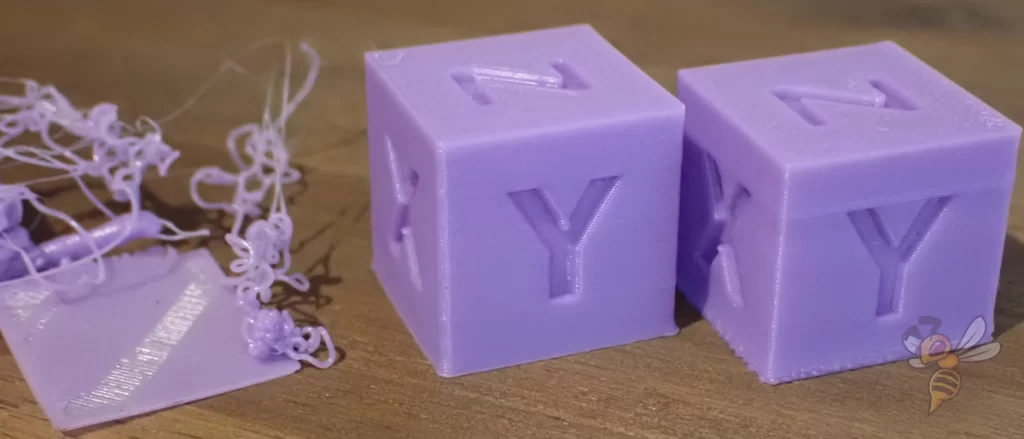
PETG is very prone to stringing, and by adjusting the cooling rate you can try to reduce this printing error. I’ve written a separate article on PETG stringing if you have problems with it.
Raise the Temperatures

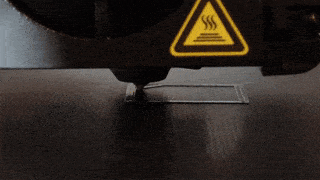
To increase the print bed adhesion of PETG, the printing temperature of the first layer and the print bed can be increased. This keeps the liquid filament hot longer and allows it to bond better with the print bed. However, values that are too high quickly lead to an elephant foot.
The melting point of PETG is higher than other filaments, such as PLA. Therefore, the extruder temperature should be higher and the build plate should also be preheated.
I have had good experience with PETG with a print bed temperature of around 70 °C and 90 °C on the build plate. However, each PETG filament is slightly different and it also depends on the print bed material you are using.
Theoretically, you can increase the print bed temperature here until you see the first signs of elephant foot. The same applies to the print temperature for the first layer. The higher it is, the better the print bed adhesion, but the risk of elephant foot also increases.
So, you have to experiment a bit until you find the maximum value at which the object can still be printed without print defects.
For the rest of the model, the same is true for the printing temperature, but there are some other printing errors, like stringing, that you have to watch out for.
To find the right print temperature for the rest of the model, you can calibrate it. This can be done best with a temperature tower. You can find the appropriate files for this on portals like Thingiverse.
Dry the Filament
If PETG filament is too wet, bubbles and strings will form during extrusion. This can also have negative effects on print bed adhesion. PETG filament has to be stored dry and can be dried at low temperatures in the oven or with special equipment.
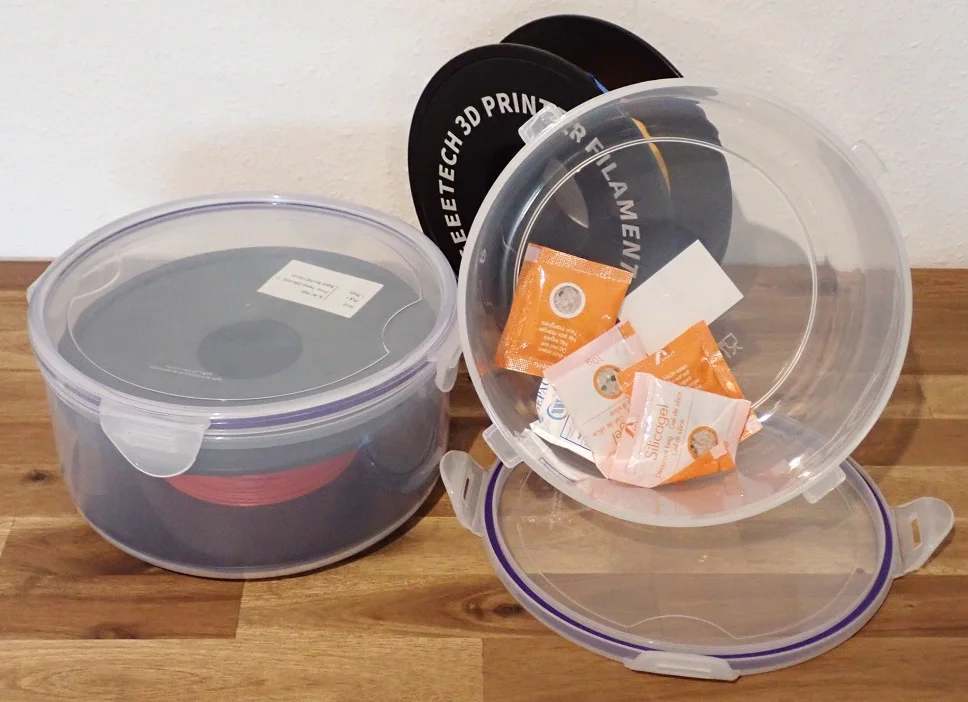
A common mistake with filament is its improper storage. If the filament becomes wet, the print quality suffers a lot. You don’t need much for storage.
You just need an airtight container and dry air through silica gel packets* for example. But there are also special storage containers for 3D printing filaments* that ensure optimal storage.
If the PETG filament is already wet, you have to dry it. I use the Sunlu FilaDryer S2 for this before printing with PETG. You can also dry the filament for a few hours at a temperature of 60-70 °C in the oven. Of course, the temperature must not be too high. Otherwise the filament will start to become liquid and stick together.
It is often not easy to attribute print defects or poor print bed adhesion to moist filament. If you observe stringing or bubbling on your PETG filament in addition to poor print bed adhesion, drying would be a good idea. If you do it right, drying won’t hurt and you can quickly eliminate this potential problem.
Related Post:
3D Printer Filament Storage: Complete Guide
Print a Thicker First Layer

Like other slicer settings, a thicker first layer can increase the contact area between the PETG filament and the print bed, resulting in improved print bed adhesion.
The maximum layer height can be as large as the nozzle diameter. Most 3D printers come with a nozzle of 0.4 mm. This means that the first layer can be a maximum of 0.4 mm high.
In this article, I go into detail about the relationship between nozzle diameter and layer height, in case you want to try even finer prints.
The maximum line width is two times the diameter of the nozzle. With a 0.4 mm nozzle, this would mean 0.8 mm. In some slicers like Cura, however, you specify the line width of the first layer not in millimeters, but as a percentage. The correct value would therefore be a maximum of 200% if your normal line width is 0.4 mm.
Like the other settings you can use with the slicer to increase print bed adhesion, a thicker first layer or wider lines aims to increase the time it takes for the filament to cool down.
The larger the cross-section of the extruded filament, the bigger its thermal mass and the longer it takes to cool. As described earlier, this increases the contact area between the filaments and the print bed, which automatically improves adhesion.
Normally, the appearance of your object should not be greatly affected by a thicker first layer.
Use a Brim or a Raft
To increase the print bed adhesion of PETG, auxiliary constructions such as rafts or brims can help. They artificially increase the contact area between the object and the print bed.
Rafts in particular are very popular when it comes to increasing print bed adhesion for tiny details on a printed object. I’m not a fan of brims, however, as they are difficult to remove and usually leave ugly marks on the object.
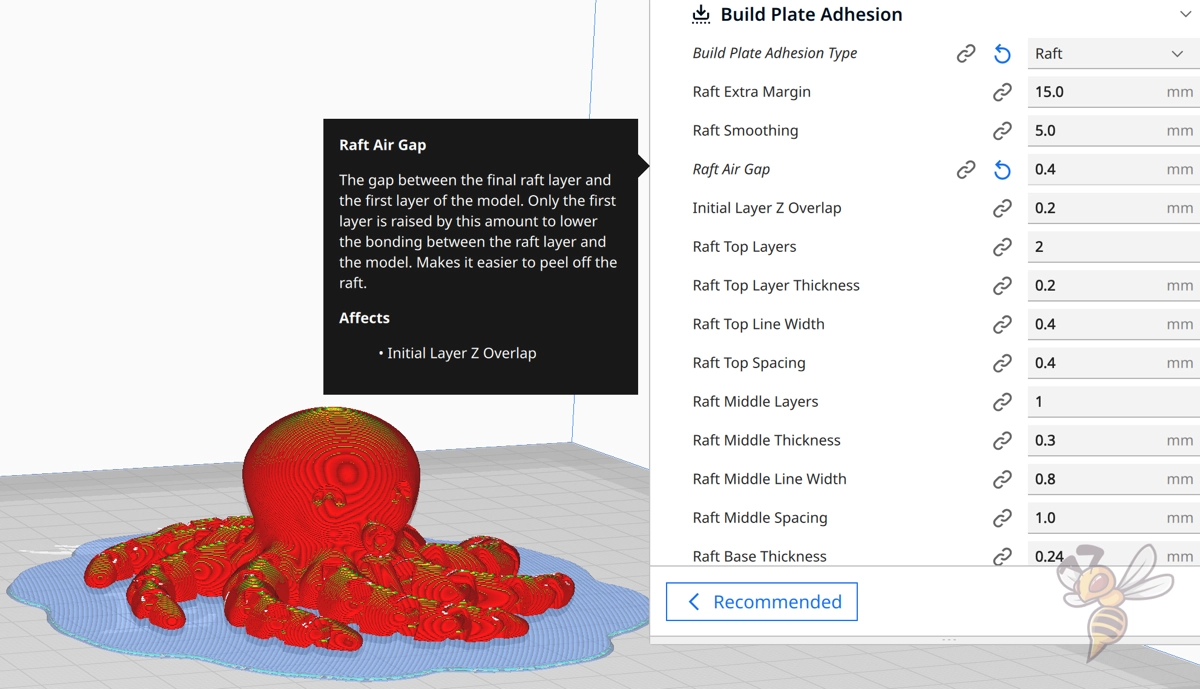
A raft can also be difficult to remove if you don’t use the right settings. Often the object sticks too much to the raft and you can hardly remove it. Especially the settings that define the distance between the raft and the first layer of the object can help. If you increase it, it will be easier to remove the object from the raft.
Another advantage to a raft is that you no longer have to worry about an elephant foot. Even if the settings cause an elephant foot, it would only affect the raft and not the first layers of the object.
However, the downside to a raft is that you need more filament and time to print your object. If the other steps to increase print bed adhesion for PETG filament have not worked so far, the cost-benefit ratio of a raft is still so good that you should try it.
Print “Mouse Ears” at the Corners
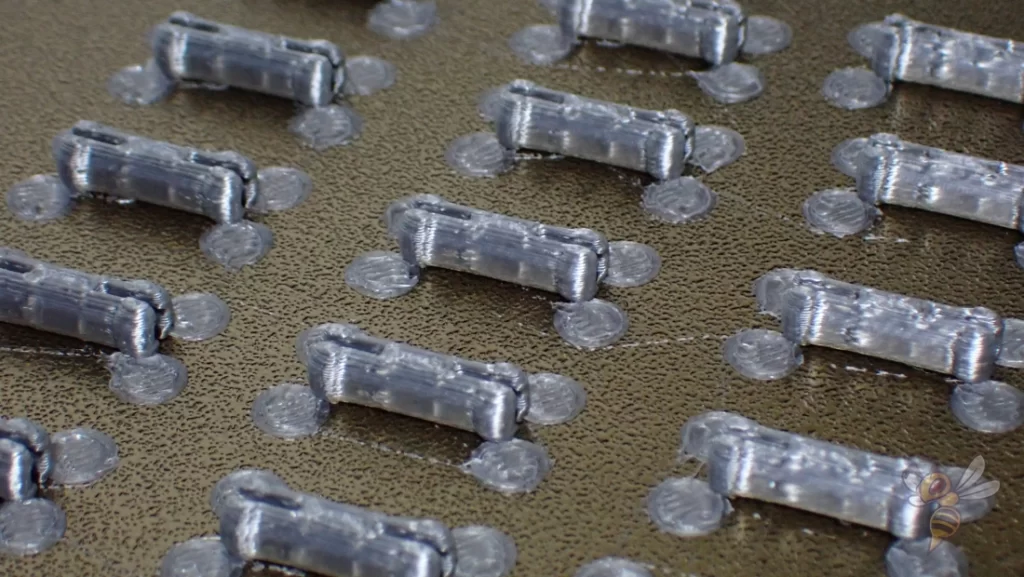
So-called mouse ears can be applied to the corners or fine details of the object to increase their contact areas with the print bed. In this way, the print bed adhesion of PETG can be increased locally.
Mouse ears are small brims that you can attach to the corners of the object. They are not as difficult to remove as a real brim and provide a strong increase in print bed adhesion at critical points.
You can add the mouse ears either in a CAD program yourself or through certain slicer plugins. In Cura, for example, there are various plugins that automatically or custom add mouse ears to the object.
If you find a large raft wastes too much material and your print bed adhesion with your PETG filament is too weak only in certain areas of the object, mouse ears may be just what you need.
If you want to learn more about mouse ears and how to use them, check out this article: Mouse Ears (Brim Ears) vs. Warping in 3D Printing – Guide
Use an Adhesive
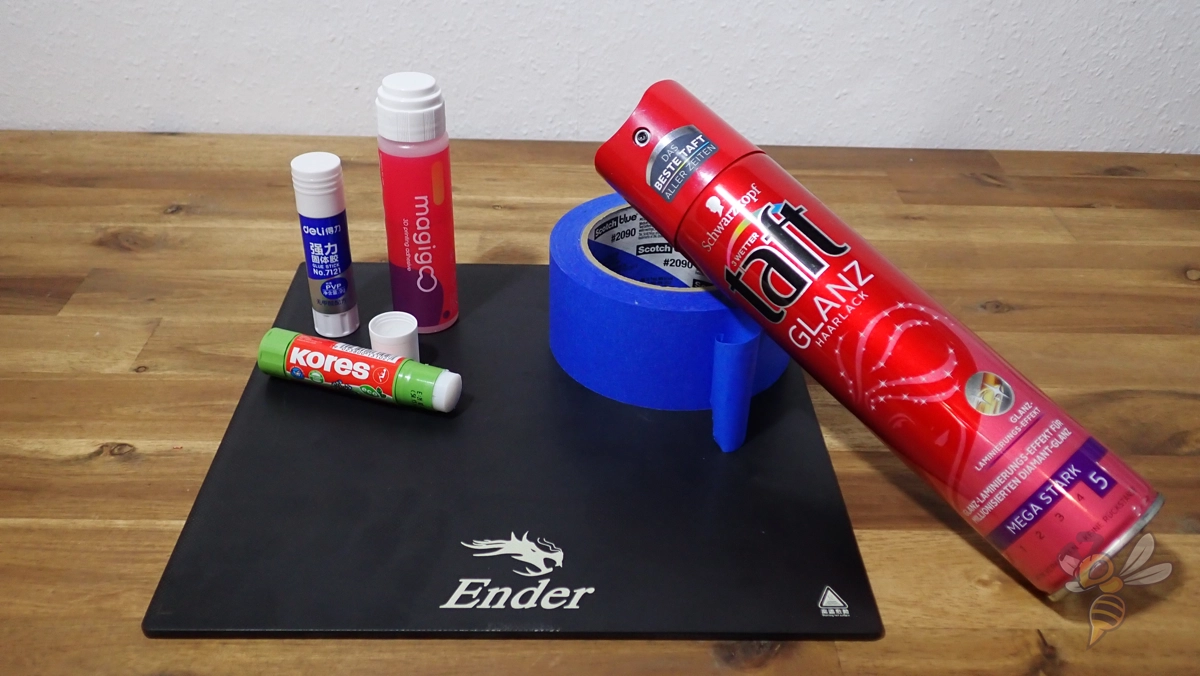
For some print bed surfaces, only adhesives can help to increase the print bed adhesion of PETG. There are a wide variety of adhesives that can be tried out.
You can choose between adhesives that are available in most households or special products for 3D printing.
Glue stick: The classic glue stick is probably the worst of all variants when it comes to adhesives for PETG. While it is relatively easy to apply the glue, no chunks should be left behind. Also, the finished object must be removed from the print bed quickly after printing. Otherwise, it could stick very firmly to it. Cleaning the object and the print bed is also more tedious than with the other variants.
Hairspray: On some print bed surfaces, a fine layer of hairspray can be just the thing to increase print bed adhesion for PETG filament. The problem with hairspray, however, is that it can quickly get into places it shouldn’t. So it’s best to remove the print bed and spray it in a safe place.
Blue Tape: Blue Tape can be used for PETG to both increase and decrease print bed adhesion. The rough surface provides many points of attack for the liquid filament. On some print bed surfaces, such as glass, PETG sometimes creates such great adhesion that it is almost impossible to remove it.
3D printing adhesives: The best kind of adhesives for PETG filament are special 3D printing adhesives. I have had very good experiences with Magigoo. The application is very easy, due to the liquid consistency there are no clumps and the cleaning of the print bed works with some dish soap and water.
Use a Different Print Bed Material
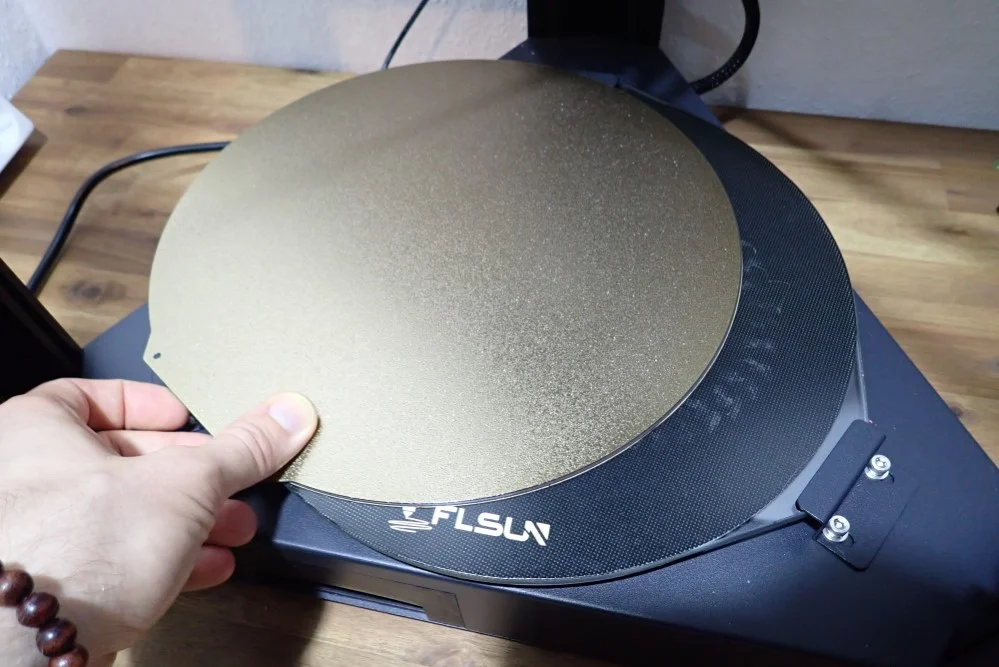
If no other measure has helped to sufficiently increase the print bed adhesion for PETG, a different print bed material could be the solution. Print beds with a PEI coating have proven to be excellent for PETG.
In addition to their good adhesion, PEI-coated spring steel printing plates can also be removed from their magnetic base and bent after printing. This releases the 3D-printed object without having to use much force or a spatula.
This one* is a good PEI print bed in different sizes.
If glass could also be bent, glass would be one of the best options for PETG. Obviously, however, this is not the case. The print bed adhesion to glass is often too strong with PETG. It is then regularly the case that it is almost impossible to remove the PETG from the glass print bed.
To detach PETG and glass from each other without damage, the glass plate should be rinsed with cold water after printing and before it cools down on its own. Then the print will come off by itself and is usually not damaged.
Conclusion
Why exactly PETG does not adhere to the print bed in individual cases simply has to be tried out. Sometimes it’s the temperature settings, sometimes the distance of the nozzle. Important to know: In most cases, it’s the settings, sometimes the quality of the filament, and often enough the print bed itself.
However, experimenting with tapes, glue, sprays or glue sticks is rarely a good solution. On the other hand, it’s worth checking the settings and playing with them a bit.
By the way, PETG is relatively sensitive when it comes to storage. The filament should never be exposed to temperature fluctuations or high humidity because it will then dissolve or become brittle (sometimes both). Therefore, you should always store your filament rolls in the original packaging in airtight plastic boxes made of a dark (light-protected) material.
PETG is not as sensitive to UV radiation as PLA, but eventually, even PETG will weather. Dry beads made of silica gel ensure that the humidity in the box never gets too high.
And sometimes it is simply better to use a somewhat more expensive PETG filament from a well-known manufacturer. Because the quality fluctuations in this case are not as great as with the cheaper products from the Far East.
If you want to know more about PETG, check out the full guide:
PETG Filament Guide | Settings, Adhesion, Stringing & More
Disclosure: This website is the property of Martin Lütkemeyer and is operated by Martin Lütkemeyer. Martin Lütkemeyer is a member of the Amazon Services LLC and other Affiliate Programs. These are affiliate advertising programs designed to enable websites to earn advertising revenue through advertising and linking to Amazon.com and others. Links marked with * are affiliate links.
