
- Wet Filament: Prevention, Symptoms & Drying - July 18, 2024
- Sovol SV08 – Best PrusaSlicer Settings & Profile - June 26, 2024
- Sovol SV08 – Best Orca Slicer Settings & Profile - June 26, 2024
Disclosure: Links marked with * are Affiliate Links. I earn from qualifying purchases if you decide to make a purchase through these links – at no additional cost for you!
The Ender 3 S1 is the successor of the popular Ender 3 V2 from Creality. It is packed with proven features that significantly improve usability and print quality.
However, for many users, the slicer settings stand between the excellent hardware and a perfect 3D print. To close this gap and get the best out of your Ender 3 S1, you need the right settings for the Cura profile.
The best strategy to get the perfect Cura profile with the best settings for the Ender 3 S1 is to take a good standard profile as a basis and then optimize and calibrate it.
The perfect Ender 3 S1 profile includes the following settings in Cura:
- Printing speed: 40 mm/s
- Layer height: 0.12 mm
- Printing temperature: 195 °C
- Print bed temperature: 60 °C
- Retraction: 1 mm at 60 mm/s
- Infill: 20
- Initial fan speed: 0%
- Speed of the first layer: 20 mm/s
The above values are valid for PLA. The perfect settings for other common filaments like ABS and PETG are also explained in this article.
Which settings have proven themselves in the hundreds of hours of operation of my Ender 3 S1, I show you in this article. You will also learn how to calibrate the most important settings yourself!
Table of Contents:
- 1 Which Cura Settings are Best for the Ender 3 S1?
- 2 Calibrating the Cura Settings for the Ender 3 S1
- 3 The Ender 3 S1 is Perfect for Beginners
- 4 Conclusion
Which Cura Settings are Best for the Ender 3 S1?
The best settings in Cura for the Ender 3 S1 depend on the intended use of the object, the filament used and other parameters. The fastest way to get a perfect Cura profile for the Ender 3 S1 is to use a pre-made standard profile.
After that, you only have to adjust it to your individual 3D printer and the used filament. The values given in this article are good guidelines, but will not be perfect for your individual device. Each nozzle, extruder and filament is slightly different and therefore requires different settings, even if they are close together.
Therefore, after the best default settings, you will also find a section that explains the calibration of the most important parameters. This way you can optimize the Cura profile of your Ender 3 S1.
You can find more information on how to create a 3D printer profile in Cura and what you need to pay attention to in this article: How to Create a Custom 3D Printer Profile in Cura
The Standard Profile from Cura as a Basis
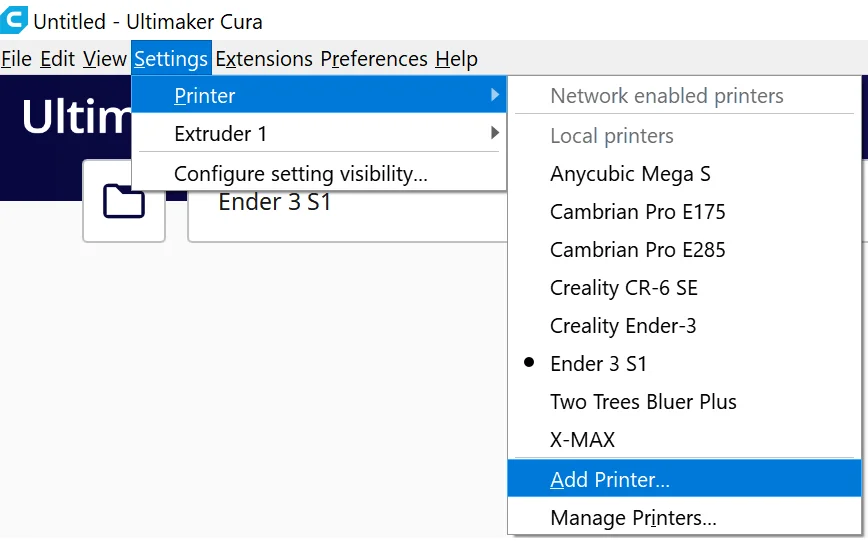
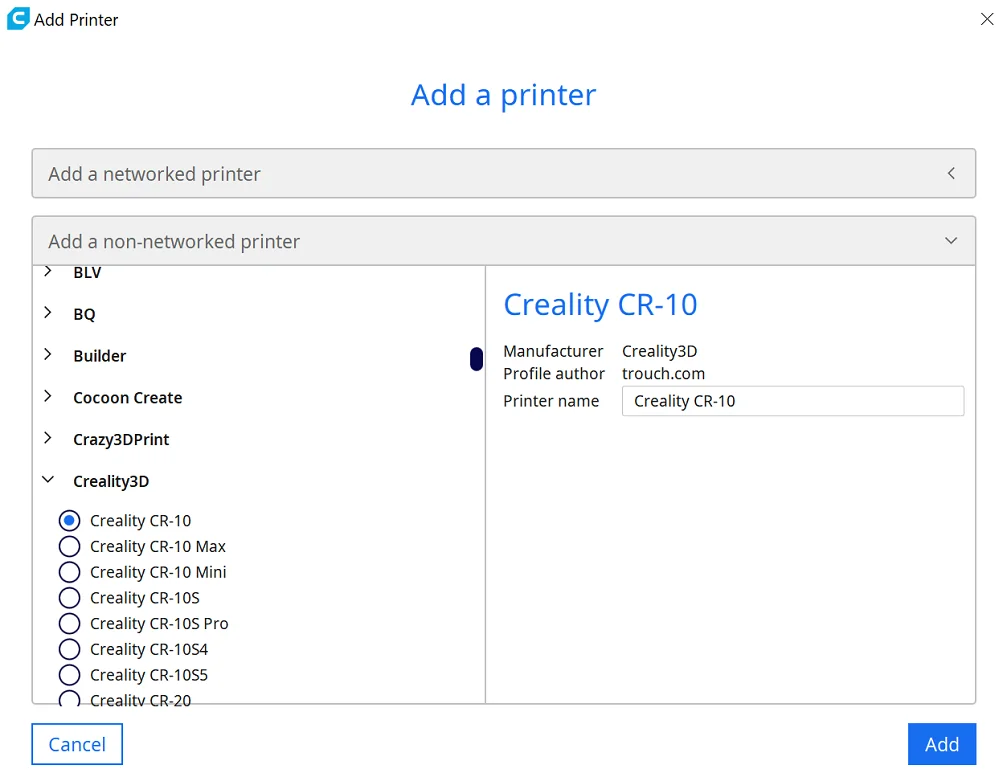
Cura offers excellent standard profiles for a lot of 3D printers. They are an excellent starting point for further optimization. You can find the default profiles under the settings for adding new 3D printers. This is how you can activate them:
- Click on “Settings” and then on “Printers” and “Manage printers”.
- Select “Add a non-networked printer” in the “Add” dialog.
- Now scroll down to “Creality3D”, expand the dropdown menu and select the “Ender 3 S1”.
With this profile, you have very good default values that you can further optimize. There are dozens of settings you can make in Cura to optimize your 3D printing, but a few of them are crucial. These very important settings are described in this article and how you can calibrate them yourself.
However, Cura often does not have default profiles for new 3D printers several weeks or even months after release. If you can’t find a standard profile for the Ender 3 S1, you have three options:
- Create a completely new profile (most complicated option)
- Select the Ender 3 and adjust its settings (error-prone)
- Import the default profile from Creality Slicer and optimize it (best variant)
The Standard Profile from Creality Slicer as a Basis
Creality has its own variant of Cura, the Creality Slicer. Creality Slicer is based on Cura, looks almost identical and has the same settings.
In short, the main difference is that Creality Slicer often has better and readily available default profiles for Creality 3D printers, but lags behind Cura with the latest updates. However, you can get the best of both worlds by adding the profiles from Creality Slicer to Cura.
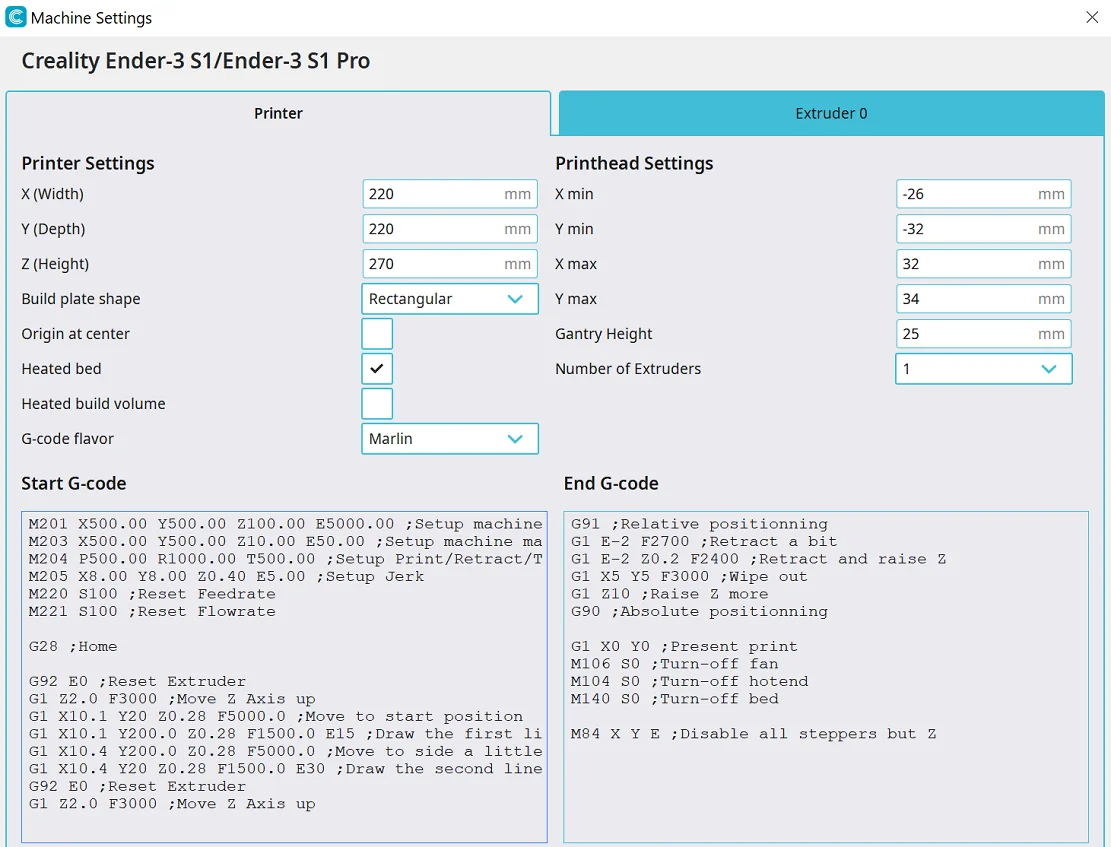
To create the new profile in Cura, you can either modify an Ender 3 profile or create an empty profile. Then you transfer all data from the Machine Settings and transfer the values for the print settings. If you can’t see all print settings, you have to activate the visibility in the settings.
In my experience, the profile from Creality Slicer is quite good, but far from perfect. Especially the settings for the retraction need a lot of calibration. How you do this, you can read below.
TIP: Learn how to calibrate your 3D printer to get perfect results every time in my 3D printing course: FDM 3D Printing: The Comprehensive Course from A to Z
(The course teaches everything you need to know for FDM 3D printing in over 60 lessons. The course will get beginners up to my level in no time!)
Printing Temperature
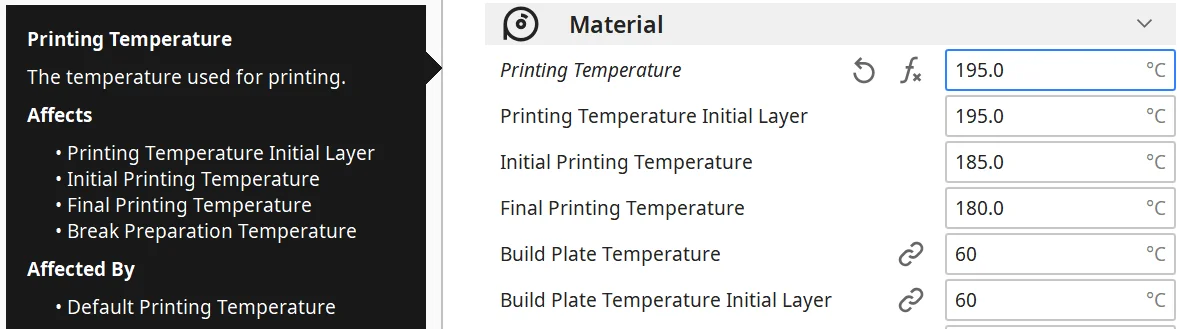
The printing temperature is one of the most important settings in 3D printing. If it is too high or too low, zits, stringing and over- or under-extrusion can quickly occur.
The Ender 3 S1’s hotend is very effective in my experience, keeping temperatures at the lower limit of recommended filament temperatures.
For the popular PLA filament, a temperature of 190 °C has proven itself. Depending on the filament, however, values up to 200 °C can also be ideal. For ABS, the temperature range between 220 and 250 °C works best, and for PETG between 220 and 245 °C.
No matter what filament you use, you should not just rely on the standard temperatures. It is always recommended to print test prints to find the perfect temperature. But more about that later.
The best printing temperatures for the Ender 3 S1 in Cura:
- PLA: 190-200 °C
- ABS: 220-250 °C
- PETG: 220-245 °C
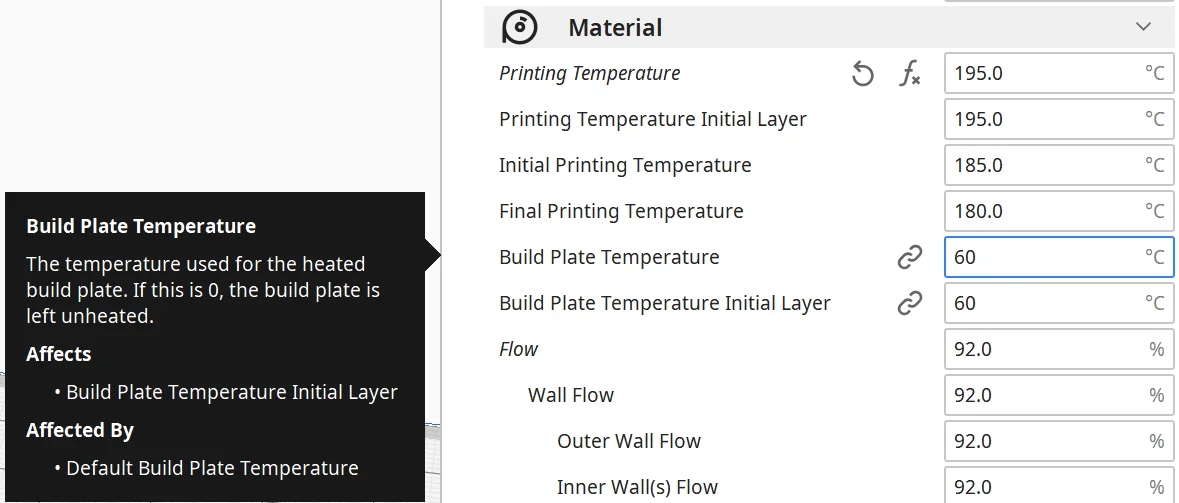
Print Bed Temperature
With the Ender 3 S1, you have very little to worry about in terms of print bed adhesion. The flexible print bed is almost perfect and I very rarely had to use adhesives like Magigoo to increase the adhesion.
Nevertheless, the correct print bed temperature is important to achieve this perfect adhesion. PLA theoretically does not need a heated print bed at all, but the best results are achieved at 60 °C.
With ABS, however, you cannot do without the print bed heater. Here, the temperature should be 90 to 100 °C. ABS not only tends to warp at the connection between the object and the print bed, it also contracts on the rest of the object during cooling. Therefore, when printing ABS, it makes sense to use an enclosure to keep the ambient temperature homogeneous and warm. There is a suitable enclosure from Creality, you can find the detailed test here.
PETG has similar print bed temperature requirements as PLA, but at 70 °C it needs slightly more.
The best print bed temperatures for the Ender 3 S1 in Cura:
- PLA: 60 °C
- ABS: 90-100 °C
- PETG: 70 °C
Print Speed
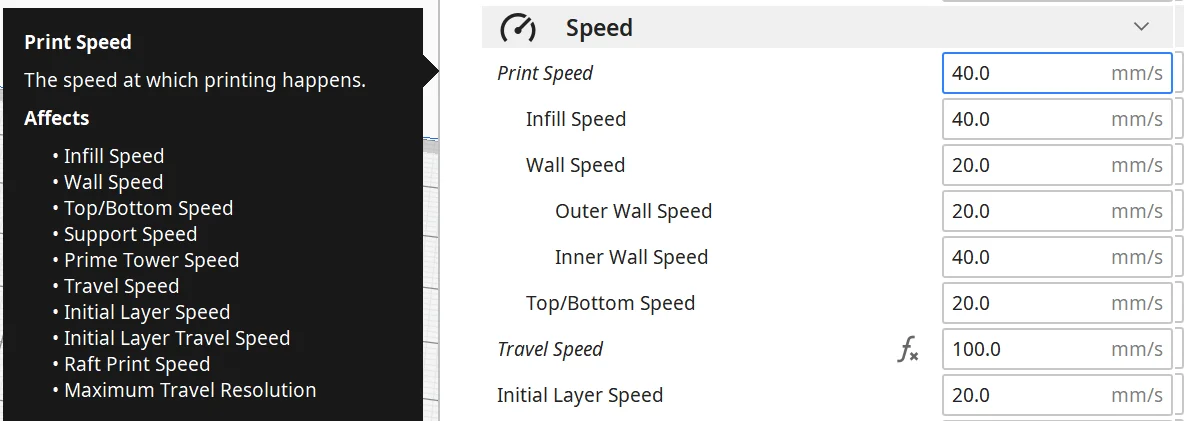
The specification of printing speeds for 3D printers often leads to confusion among 3D printing beginners. Even though the maximum print speed of the Ender 3 S1 is given as 150 mm/s, this is far from being the ideal speed. At most, such high values are used for rough prototypes that do not require high accuracy or smooth surfaces.
The actual print speed is a fraction of the maximum print speed so that the print quality remains as high as possible and the 3D print is still finished quickly.
For most non-flexible filaments, a print speed of 40 to 60 mm/s has proven successful with the Ender 3 S1. Only PETG needs lower speeds, as do flexible filaments such as TPU. Here, 30 mm/s has proven itself.
The best printing speeds for the Ender 3 S1 in Cura:
- PLA: 40-60 mm/s
- ABS: 40-60 mm/s
- PETG & TPU: 30 mm/s
Layer Height

The layer height of a 3D print is the decisive setting for the print quality. The thicker the layers, the coarser the surface. However, thinner layers are not always automatically the better choice, as there are also a few disadvantages with thinner layers. Namely, the printing time increases exponentially.
The following layer heights have proven effective with the Ender 3 S1:
- 0.08 mm
- 0.12 mm
- 0.16 mm
- 0.20 mm
- 0.24 mm
- 0.28 mm
Thinner layers are particularly suitable for decorative objects where a beautiful surface is important. For standard objects where dimensional accuracy but not necessarily a perfect surface is important, the medium layer height are suitable. For objects that have no aesthetic value, the coarse layer height can save a lot of printing time. Coarse layer heights are especially advisable for quick prototypes or spare parts in the household.
The best layer height for the Ender 3 S1 in Cura:
- Decorative objects: 0.08 and 0.12 mm
- Standard: 0.16 and 0.20 mm
- Coarse, fast prints: 0.24 and 0.28 mm

Flow
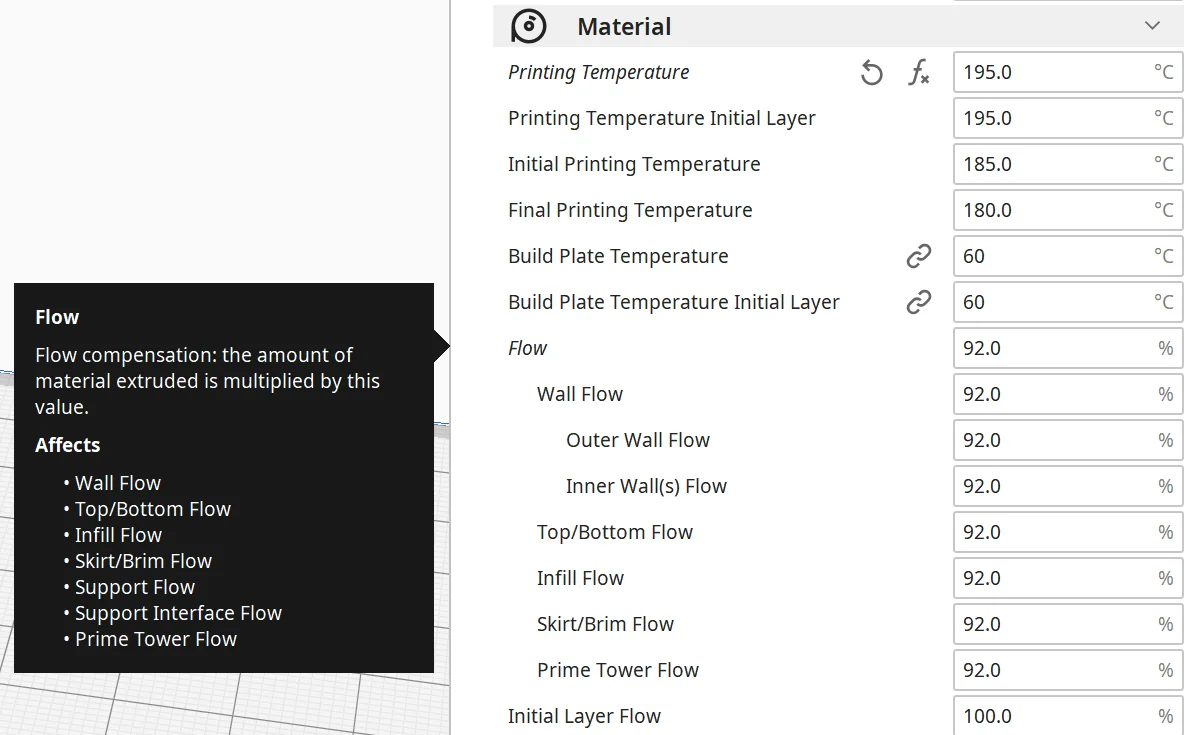
The flow rate in Cura is normally 100%. To counteract phenomena such as over- or under-extrusion, the flow rate can be changed. Values between 90 and 110% are common. The flow rate is then multiplied by the actual material flow to modulate it.
In addition to the settings for the retraction, the correct flow rate is very individual and can differ by several percent between individual 3D printers of the same model. However, most of the time 100% is either a very good starting value or already the perfect value for the flow rate.
The best flow rate for the Ender 3 S1 in Cura:
- Default value: 100%
- For over-extrusion: 90% to 99%.
- For under-extrusion: 101% to 110
Retraction
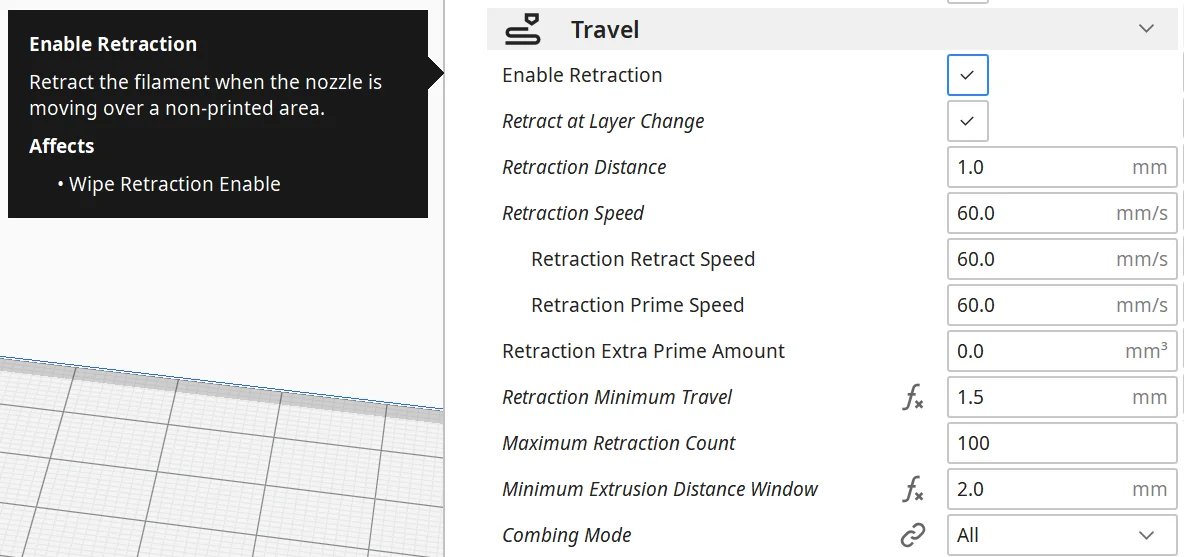
Stringing and oozing are common printing errors. The correct settings for the retraction can avoid these errors.
These print errors occur when excess material escapes from the nozzle during movement. If very little material escapes, a filament may be pulled from one place to another on the 3D model. If a lot of material comes out, blobs will appear where the nozzle has touched the object.
There are two values for the retraction that must be adjusted. The retraction distance and the retraction speed. The retraction distance defines the distance of filament that is pulled back into the nozzle on each retraction, the retraction speed defines the speed at which this happens.
The best retraction settings for the Ender 3 S1 in Cura:
- PLA: 0.8-1.0 mm at 50 mm/s
- ABS: 0.8-1.0 mm at 60 mm/s
- PETG: 0.6-0.8 mm at 40 mm/s
Retraction Distance
The retraction distance defines the length of the material that is retracted during the retraction movement. The value is only a few millimeters and differs greatly between 3D printers. This value is one of the most important and must be optimized individually.
The direct drive extruder of the Ender 3 S1 moves the filament very precisely. Once you find the right setting, the printing errors associated with incorrect retraction magically disappear.
The Ender 3 S1 requires only very small retraction distances. For PLA and ABS, 0.8 to 1.0 mm is sufficient, PETG only requires 0.6 to 0.8 mm.
The best retraction distance for the Ender 3 S1 in Cura:
- PLA: 0.8-1.0 mm
- ABS: 0.8-1.0 mm
- PETG: 0.6-0.8 mm
Retraction Speed
The retraction speed defines the speed at which the filament is retracted into the nozzle during a retraction movement. For the Ender 3 S1, it is between 40 and 60 mm/s. The values differ depending on the filament used.
The retraction speed should be set as high as possible without destroying the filament in the extruder or causing it to slip in the extruder. The faster the filament is pulled back, the more effectively stringing and the formation of blobs are prevented. It also reduces the amount of time the nozzle is at a standstill and slightly reduces the print time.
The retraction speed must be optimized individually for each 3D printer, in addition to the retraction length, printing temperature and flow rate. Also, like the other of these values, it differs from filament to filament and sometimes even between filaments from other manufacturers of the same type.
The best retraction speed for the Ender 3 S1 in Cura:
- PLA: 50 mm/s
- ABS: 60 mm/s
- PETG: 40 mm/s
Infill
Infill is independent of the 3D printer and, in addition to the wall thickness, determines the stability of the printed object. Roughly speaking, the stability increases with a higher infill density and decreases with a lower density. In addition, the individual patterns have an effect on stability due to their geometry. Some patterns can offer higher stability at the same density than other patterns.
High stability (for sturdy objects):
- Cubic
- Cube subdivision
- Octet
- Gyroid
Medium stability (for standard objects):
- Grid
- Triangles
- Tri-Hexagonal
Low stability (for decorative objects):
- Lines
- Zig Zag
- Lightning
Infill density has a complete range from 0 to 100%. 0% means that the object is hollow, 100% means that the object is solid. However, a density of 0% makes sense in the rarest of cases. Only for objects without a top layer does this make sense, in which case the vase mode can be used. For most objects, a density of 10-20% makes sense.
The best infill density for the Ender 3 S1 in Cura:
- Decorative objects: 0-15%
- Standard objects: 15-50%
- Stable objects: 50-100%
First Layer
The first layer often determines whether the 3D print will work or not. The print bed adhesion is particularly important here. If the first layer does not adhere properly to the print bed, you can stop the print immediately.
The print bed adhesion of the Ender 3 S1 is excellent. However, you can guarantee good adhesion with the following settings to make every print successful.
Layer Height of the First Layer
The thickness of the first layer influences the print bed adhesion. The thicker the layer, the slower the filament cools down. This gives the hot filament a longer time to form a bond with the print bed. Values between 100 and 200% of the normal layer height are common.
For the Ender 3 S1, 150% of the normal layer height has proven to be useful. So if you use a layer height of 0.2 mm, a layer height for the first layer of 0.3 mm makes sense.
Another advantage of a thicker first layer is the ability to level out unevenness in the print bed. A thicker first layer settles into these depressions and fills them. This is very rarely the case with glass print beds, as glass can be made very flat and smooth. However, with the thin flexible print bed of the Ender 3 S1, I have not noticed any unevenness so far either.
The best thickness of the first layer for the Ender 3 S1 in Cura:
- With perfect print bed adhesion: 100% of normal layer height
- Standard: 150% of the normal layer height (e.g. 0.3 mm with 0.2 mm layer height )
- In case of problems with print bed adhesion: 200% of normal layer height
Line Width of the First Layer
You can also improve the print bed adhesion with the line width of the first layer. The default value of the line width of the first layer is 100% of the normal line width.
If you want to improve the print bed adhesion, values up to 200% of the normal line width are possible. Again, the thermal inertia of the thicker filament strand is responsible for better print bed adhesion.
When increasing the first layer, however, be careful that a large difference between the line widths could result in a first layer that is too wide.
The best line width of the first layer for the Ender 3 S1 in Cura:
- Default: 100% of the normal line width
- In case of print bed adhesion problems: up to 200% of the normal line width
Printing Temperature of the First Layer
When the filament on the print bed is hotter, it bonds better with the print bed and thus forms a better print bed adhesion. So if your print bed adhesion is not optimal, you can increase the print temperature for the first layer by 5 to 10 °C. This will cool down the filament more slowly and give it more time to bond with the print bed.
Normally, the print temperature of the first layer is the same as the normal print temperature. Since you will probably very rarely have problems with print bed adhesion with your Ender 3 S1, you should start with the same print temperature for the first layer as for all other layers.
If you encounter problems with print bed adhesion, you can increase the print temperature of the first layer in 5 °C steps.
The best printing temperature of the first layer for the Ender 3 S1 in Cura:
- Default: Same printing temperature as the rest of the object
- In case of problems with print bed adhesion: 5-10 °C higher than normal printing temperature
Print Speed of the First Layer
The same principle applies to the print speed of the first layer as to the other settings for the first layer: the slower the 3D printer applies the first layer to the print bed, the longer the filament needs to cool down.
This will greatly increase the print bed adhesion. No matter what 3D printer you use, you should use a print speed for the first layer that is half the normal print speed.
The best printing speed of the first layer for the Ender 3 S1 in Cura:
- Default: 50% of normal print speed
- In case of problems with print bed adhesion: < 50% of normal print speed
Flow of the First Layer
Not only can the flow rate compensate for extrusion problems, it can also create better print bed adhesion. To fill the fine gaps between the individual lines of the 3D print on the print bed, you can slightly increase the flow rate of the first layer.
You must be aware, however, that this could result in the risk of extrusion-related errors such as stringing or over-extrusion. However, since the flow rate is only adjusted for one layer, the problems should be manageable.
The best flow rate of the first layer for the Ender 3 S1 in Cura:
- Standard: 100%
- For problems with print bed adhesion: 101-110%.
Calibrating the Cura Settings for the Ender 3 S1
It may well be that the values given in this article are perfect for your Ender 3 S1. Most of the time, however, certain settings require individual calibrations, as certain components of the 3D printer can differ even within one batch. Also, the combination of 3D printer and filament type is always a big influence on how the settings will affect you.
Therefore, it is especially important for the print temperature, the flow rate and the retraction to make test prints to find the perfect settings. For this purpose, there are calibration objects on portals like Thingiverse or in certain plugins in Cura. I myself use the “Calibration Shapes” plugin in Cura to calibrate my FDM 3D printers.
You can find the plugin in the Cura marketplace. It is free and offers a whole range of objects to calibrate your 3D printer optimally.

Read the full calibration guide:
3D Printer Calibration: Step-by-Step to Perfect Results
Calibrating the Printing Temperature
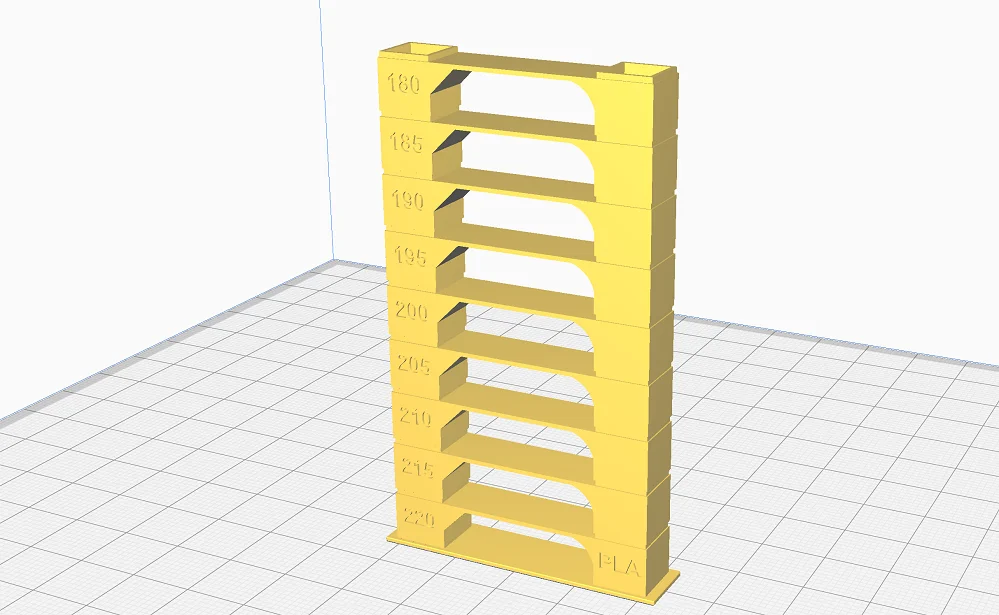
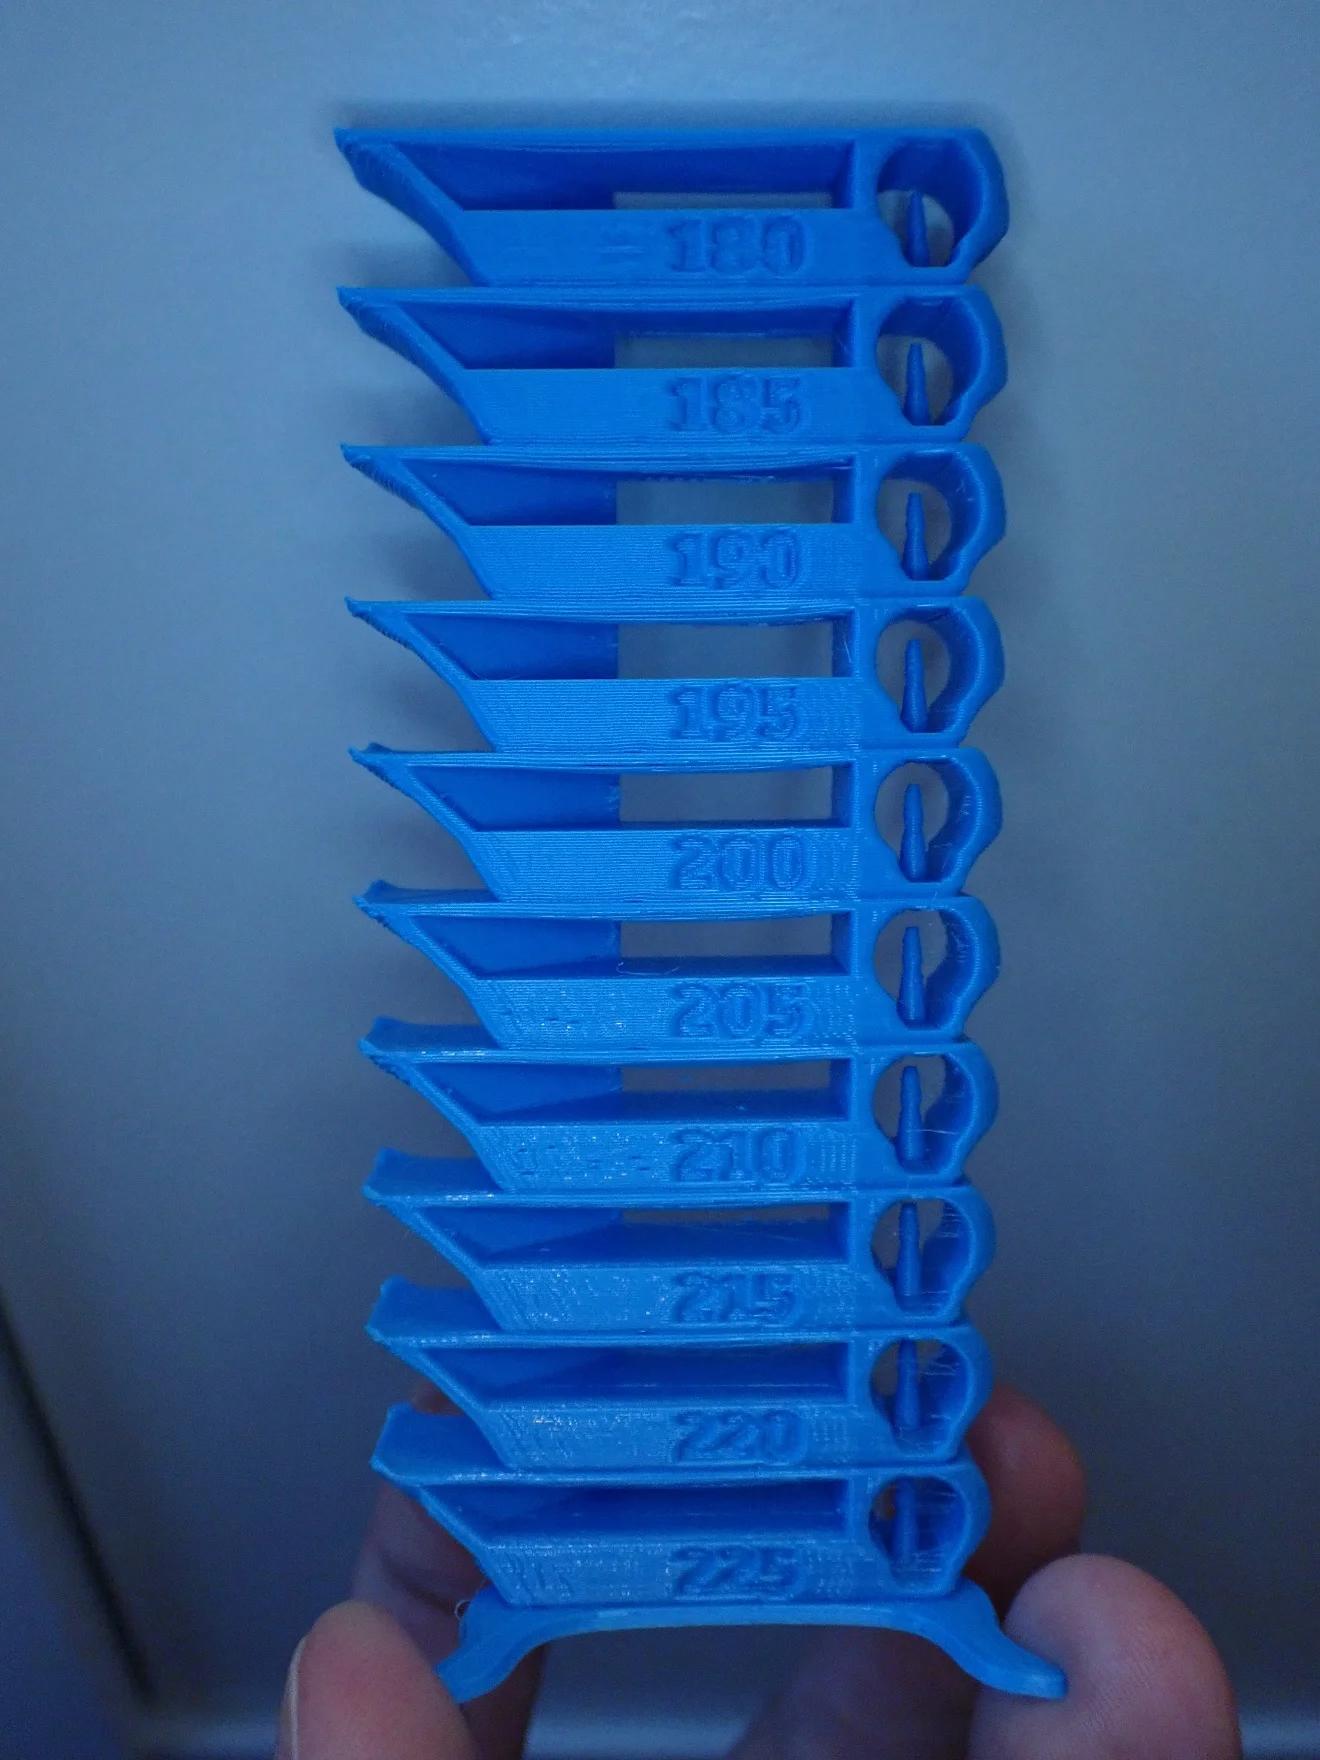
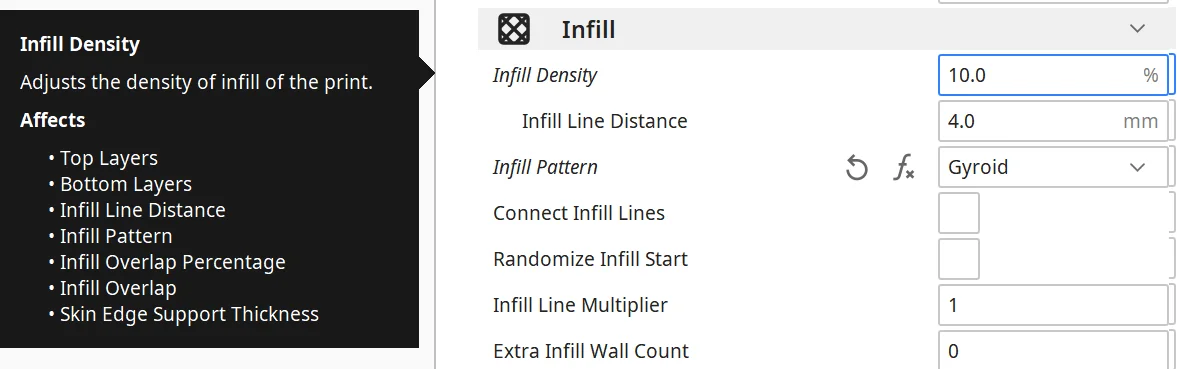
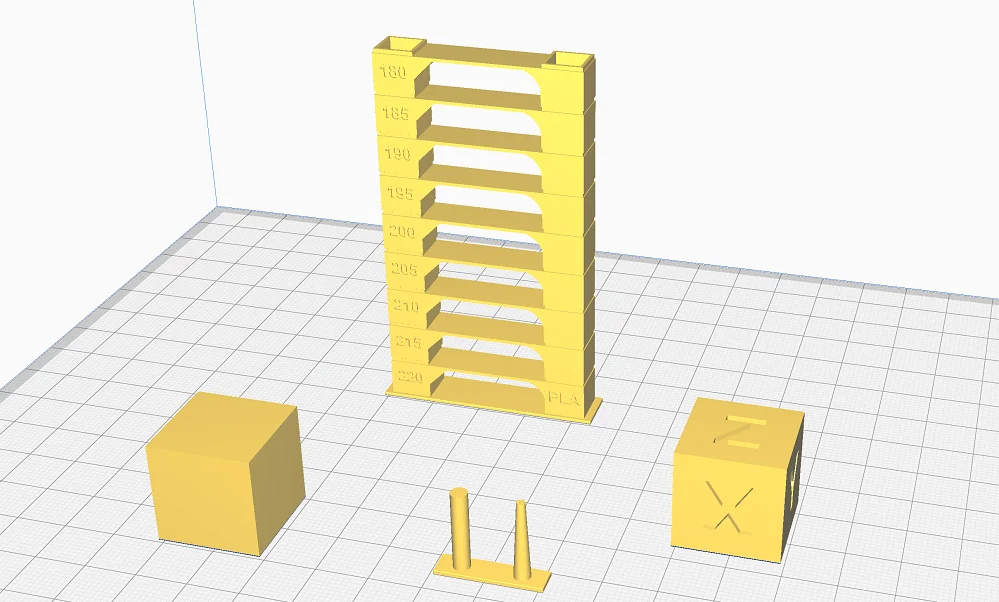
To calibrate the printing temperature for your Ender 3 S1, temperature towers are ideal. These objects have a recurring geometry that is repeated every few millimeters in height. This geometry challenges the 3D printer and encourages printing errors. With the right script, you can vary the temperature per given layer number with the height. So you can determine the perfect printing temperature.
If you have chosen the Calibration Shapes plugin, you will find the temperature tower under “Extensions” > “Part for Calibration”. Add the appropriate script under “Postprocessing” > “Change G-Code”.
When you have finished printing the tower, you can see at which height the printing temperature was best. Then you have already found the perfect printing temperature for your Ender 3 S1.
Sometimes the settings of the flow rate and the retraction can be so wrong that they can influence the result of the temperature tower. If this is the case, you will need to reprint the temperature tower after calibrating the other two values.
Calibrating the Filament Flow
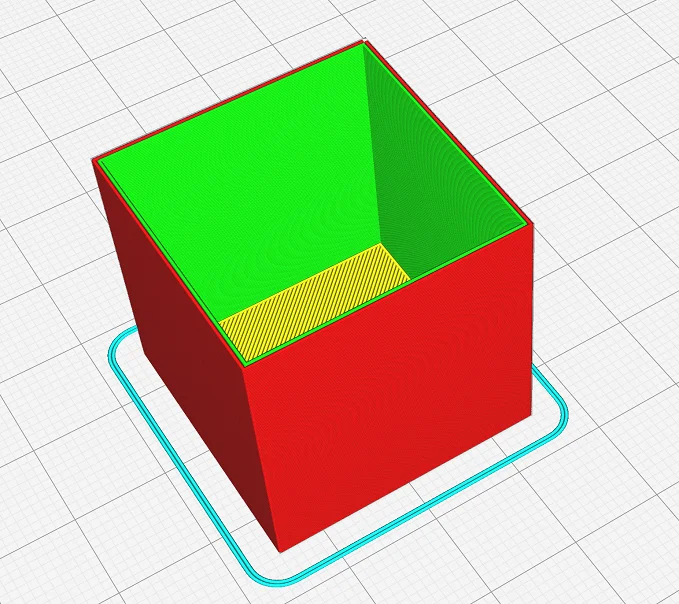
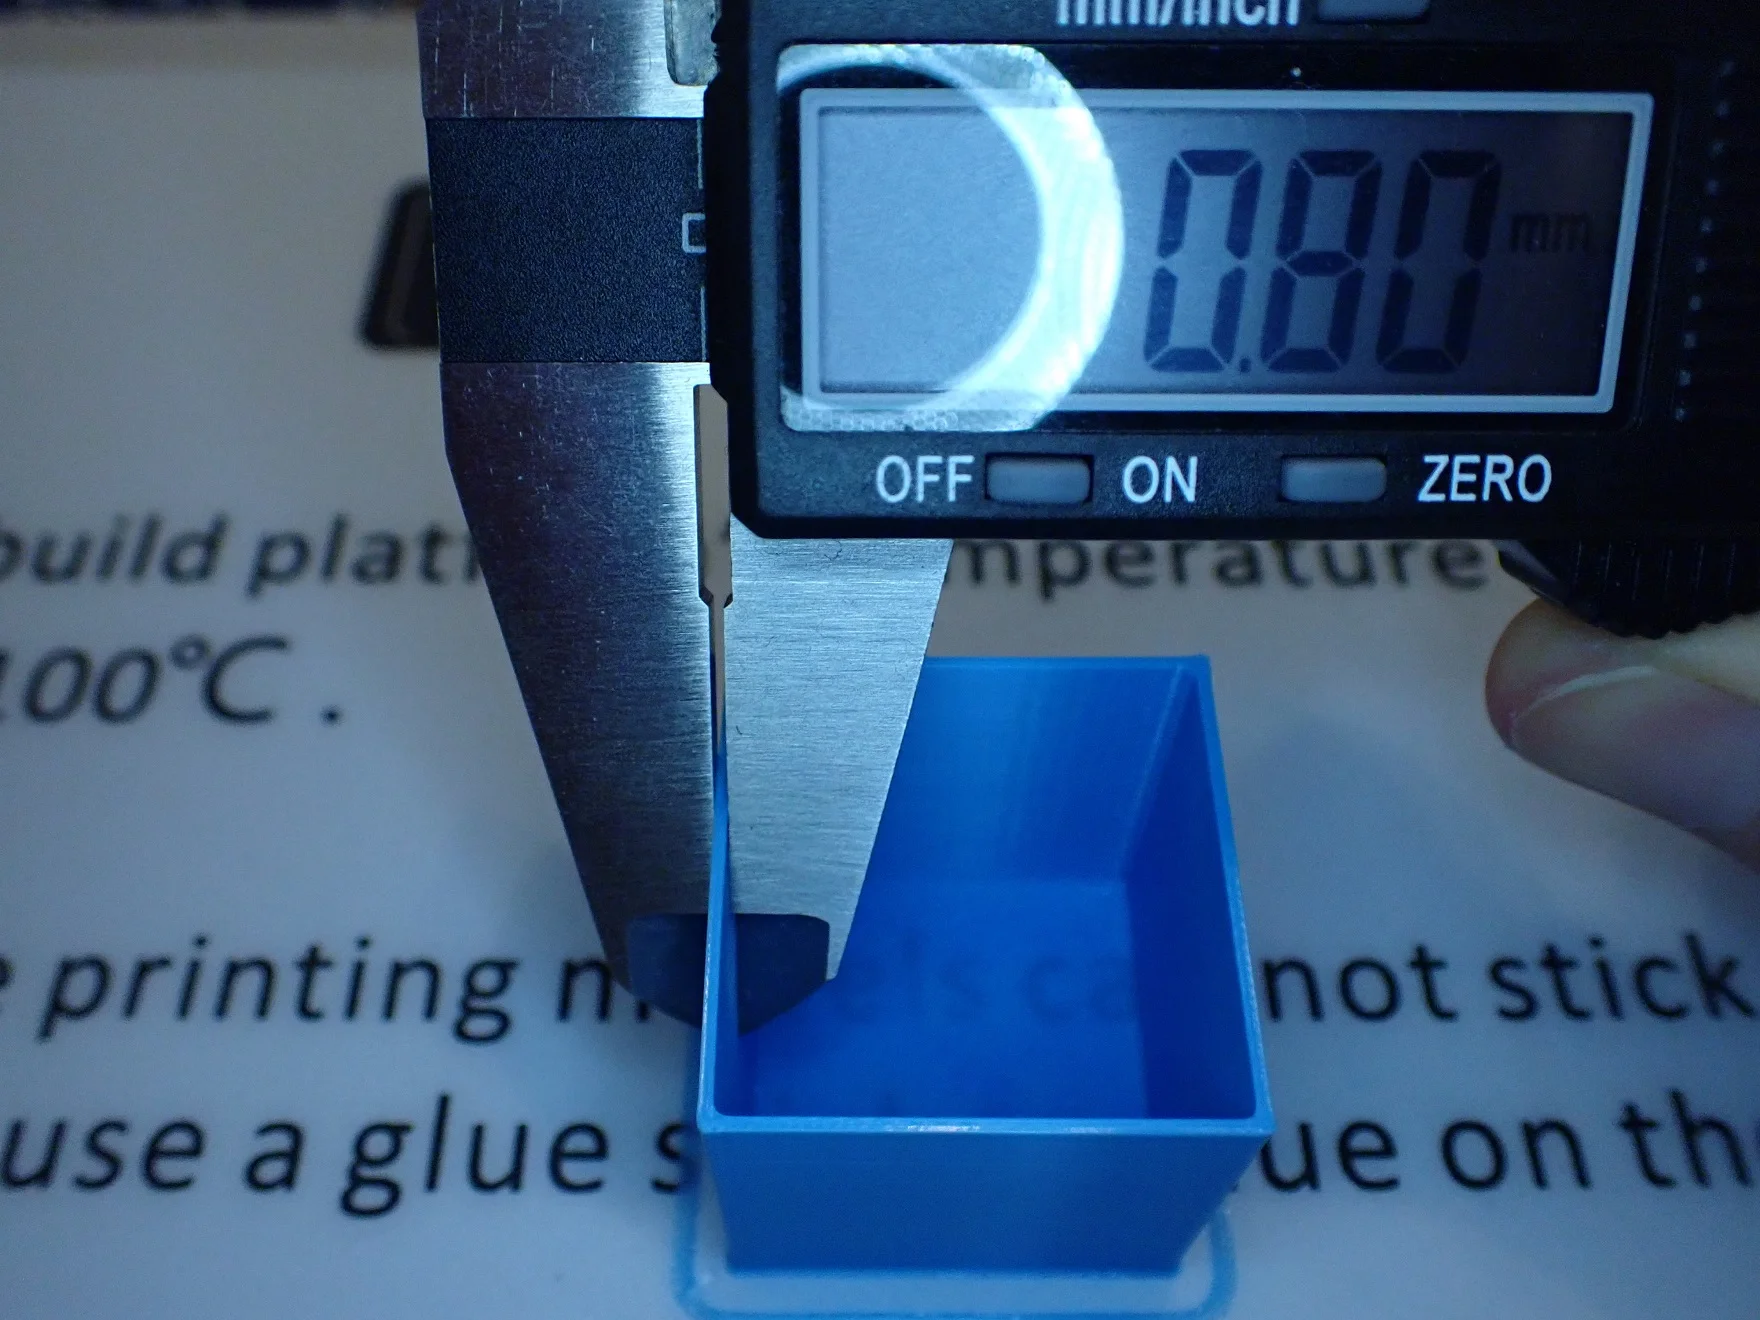
The flow rate is relatively easy to calibrate. To do this, print a cube without infill, without top layers and with 2 walls. Then print the cube and measure the wall thickness.
If the wall thickness is exactly 2 times your line width, your flow rate is already ideally set. However, if it deviates, you can adjust the flow rate to compensate.
- Example 1:
- Line width = 0.2 mm
- Number of walls = 2
- Measured wall thickness = 0.42 mm
- The flow rate is too high by 0.02/0.40 = 5%.
- New value for the flow rate = 95%
- Example 2:
- Line width = 0.2 mm
- Number of walls = 3
- Measured wall thickness = 0.59 mm
- The flow rate is too low by 0.01/0.60 = 1.7%.
- New value for the flow rate = 101.7%.
Calibrating the Retraction

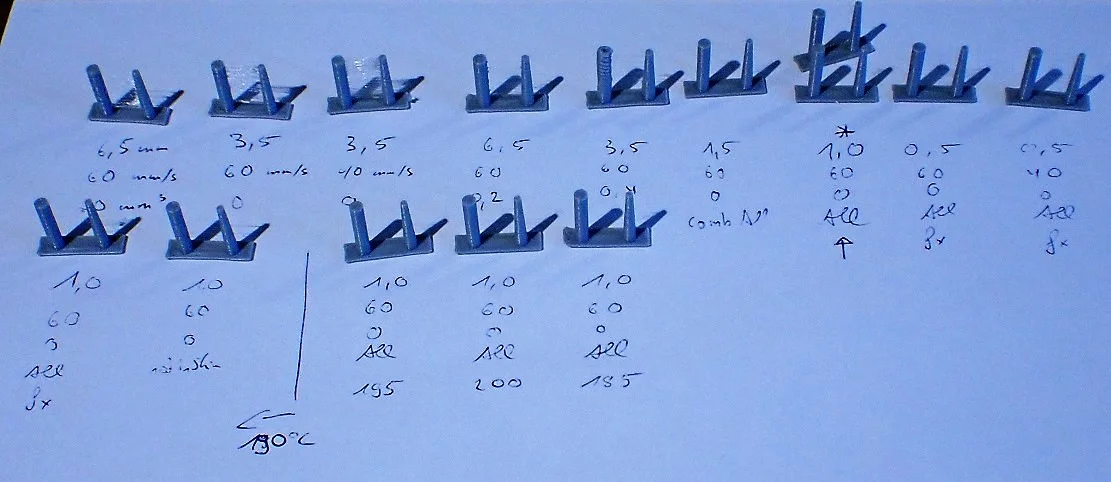
Calibrating the retraction is one of the first things I do with a new FDM 3D printer. This calibration is also a good thing to do with any new material.
Calibration is quick because the calibration object is very small and only takes a few minutes to print. So you can change the settings several times within a very short time to find the perfect value.
The best way is to start from the default settings explained above and change the retraction distance in small steps of 0.1 mm and the retraction speed in steps of 5 mm/s. But never change both values at once, because then you don’t know what caused the changes in the result.

The Ender 3 S1 is Perfect for Beginners
The Ender 3 S1 is very user-friendly, as it has many features that not only improve print quality but also handling. The user interface is very intuitive, the print bed adhesion is ideal and the direct drive extruder works very reliably. Therefore, the Ender 3 S1 is perfect for beginners.
However, what many beginners do wrong during the first test prints is that they don’t try to understand the settings. When a printing error then occurs, the question marks are large and frustration is close at hand.
So, in the beginning, familiarize yourself with the basic settings and the default profiles and know the functions of the most important settings and how you can optimize them. It is also important that you can adjust the settings depending on the purpose of the object. A decorative object with 70% infill is a waste of filament and a layer height of 0.08 mm is a waste of time when printing a doorstop.
If you are not sure, there is very good documentation about Cura on the official site and on this website in the category “Slicer Tutorials“.
Conclusion
With these settings in Cura, the Ender 3 S1 should have no problems. However, the settings only become perfect when you optimize them with suitable calibration objects. The perfect settings in Cura always depend on the individual device and the filament used.
Once you understand what the most important settings in Cura (printing temperature, print bed temperature, print speed, layer height, flow rate and retraction) do, you will always be one step ahead of print errors and can quickly turn them off if they do occur!
I hope you have as much success with this Cura profile for the Ender 3 S1 as I did and were able to learn something in this article.
Disclosure: This website is the property of Martin Lütkemeyer and is operated by Martin Lütkemeyer. Martin Lütkemeyer is a member of the Amazon Services LLC and other Affiliate Programs. These are affiliate advertising programs designed to enable websites to earn advertising revenue through advertising and linking to Amazon.com and others. Links marked with * are affiliate links.
