
- Wet Filament: Prevention, Symptoms & Drying - July 18, 2024
- Sovol SV08 – Best PrusaSlicer Settings & Profile - June 26, 2024
- Sovol SV08 – Best Orca Slicer Settings & Profile - June 26, 2024
Disclosure: Links marked with * are Affiliate Links. I earn from qualifying purchases if you decide to make a purchase through these links – at no additional cost for you!
In 3D printing, the layer height influences quality and time: finer layers for precise details (0.1 mm and smaller), thicker layers for faster printing and more robust parts (0.2 mm and higher).
In this article, you will learn in detail about the importance of layer height in the 3D printing process and how it affects the quality, strength and printing speed of your models. You will also find many practical examples that illustrate all these aspects.
Key takeaways:
- Layer height and print quality: Thinner layers improve the level of detail and surface quality, but increase the printing time.
- Layer height and strength: Thicker layers can provide a stronger bond between the layers, which increases the strength of the object.
- Nozzle influence: The diameter of the nozzle determines the maximum and minimum layer height (25% to 75% of the nozzle diameter) and influences the print quality and speed.
- Adaptive layer height: Some slicers allow layer height adjustments during printing to optimize detail and efficiency.
- Line width and extrusion: Line width affects material flow, print stability and surface finish, with a common range of 60% to 200% of nozzle diameter.
Table of Contents:
- 1 The Layer Height in 3D Printing
- 2 Optimal Layer Height for Different Projects
- 3 Setting the Layer Height in the Slicer
- 4 Layer Height vs. Quality
- 5 Layer Height vs. Printing Time
- 6 Layer Height vs. Stability
- 7 Layer Height vs. Nozzle Diameter
- 8 Layer Height vs. Line Width
- 9 FAQ – Frequently Asked Questions
- 10 Summary
The Layer Height in 3D Printing
The layer height plays a key role in 3D printing. It refers to the height of a single layer that a 3D printer creates when building an object. This measurement is given in millimeters. The layer height has a significant influence on the print quality, printing time and strength of the printed part.

A lower layer height, often in the range of 0.1 mm, leads to higher resolution and finer details on the surface of the model. This is particularly important when it comes to complex or very detailed parts, such as intricate models or components with fine structures. However, a lower value for the layer height also means longer printing times, as more layers have to be printed to complete the object.
Larger layer heights make it possible to print faster. This is an advantage if time is an important factor and the level of detail plays a subordinate role. However, too high a layer height can affect the strength of the part, as the individual layers may not adhere optimally to each other.
Finding the right balance between layer height and other print parameters such as infill pattern, wall thickness or nozzle diameter is crucial to achieve optimal print results. Every print is an interplay of different factors, and layer height is a key aspect that significantly influences both the quality and efficiency of the 3D printing process.
Optimal Layer Height for Different Projects
The choice of layer height is crucial in order to achieve optimal results for different projects. The layer height setting should always be considered in the context of the project, the materials used, the 3D printer and the desired end goal.
Detailed Models and Complex Geometries

For projects that require high-resolution details and fine surface structures, a lower layer height is ideal. For detailed 3D models, such as miniatures or complex art objects, it is recommended to work with layer heights of around 0.1 mm or even less.
This enables a higher resolution that emphasizes the smallest details and textures. However, you should note that finer layers lead to longer printing times and require precise calibration of the 3D printer.
Fast, Functional Prints
Larger layer heights can be used for projects where speed and functionality are paramount. For components that are less detailed or mainly fulfill structural purposes, layer heights of 0.3 mm or more are appropriate.
This setting speeds up the printing process considerably as fewer layers are required. However, this can lead to visible layer formation on the surface of the object. For functional parts, such as brackets or tools, this is often an acceptable compromise.
Balance Between Aesthetics and Efficiency
In many cases, especially with everyday objects or prototypes, it is important to find a balance between aesthetics and printing efficiency. Medium layer heights, typically around 0.2 mm, offer a good compromise.
They allow for acceptable detail and print speed. This setting is ideal if you value both appearance and reduced printing time.
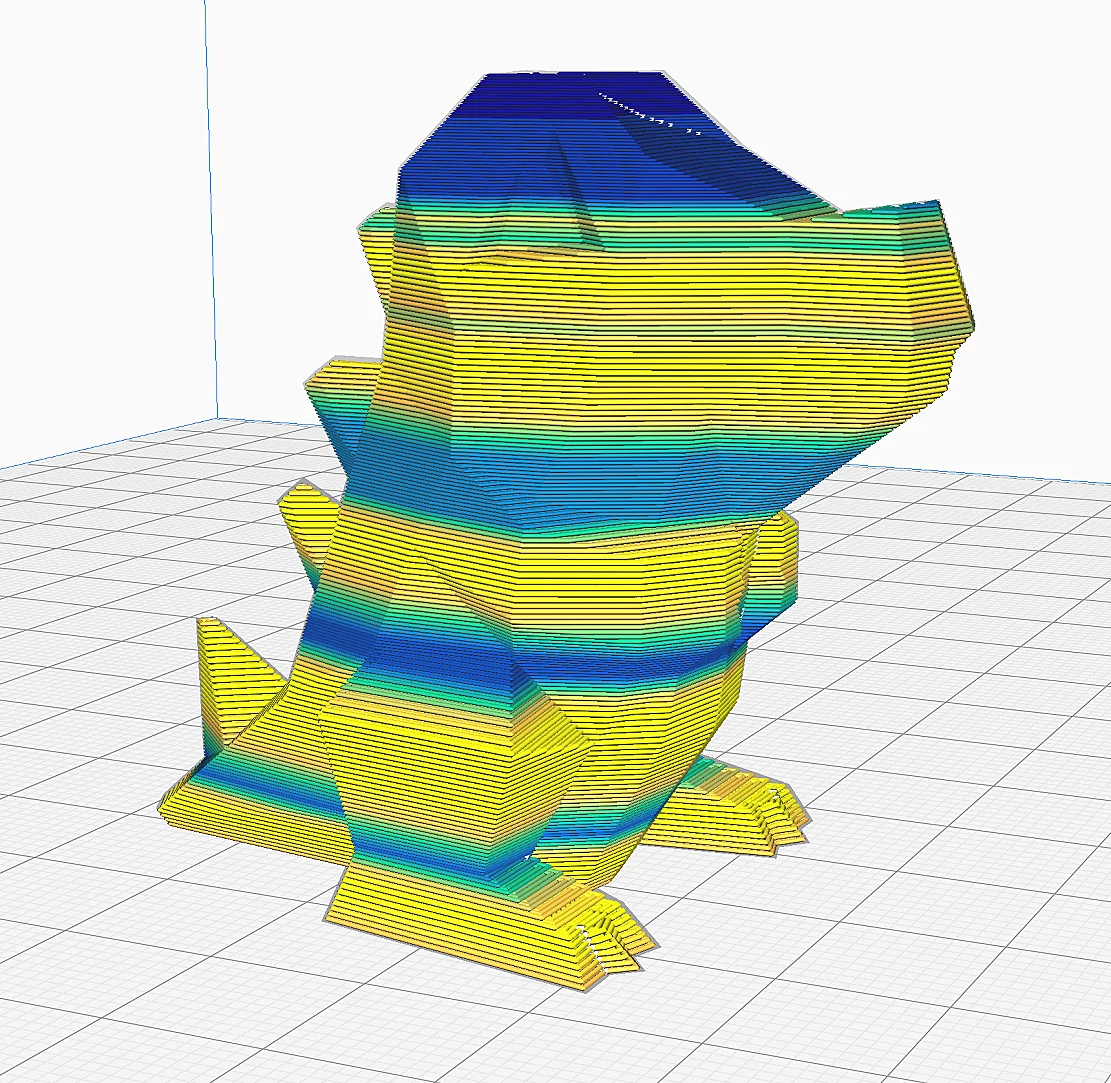
Setting the Layer Height in the Slicer
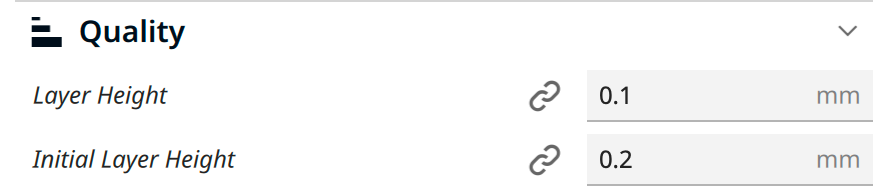
In most slicers, you have the option of adjusting the global layer height and the layer height of the first layer separately. Some slicers also offer dynamic layer heights that adapt the layer height to the geometry of the object.
Global Layer Height
The global layer height defines the height of each layer of your 3D model. It is a key parameter that influences the level of detail, printing time and strength of the finished part.
A lower global layer height leads to higher resolution and detail, while a higher layer height speeds up the printing process, but possibly at the expense of fineness. The setting should be made based on the 3D model, the desired result and the material used.
Layer Height of the First Layer
The thickness of the first layer is particularly critical for adhesion to the print bed. A slightly thicker first layer can help to achieve better adhesion, as a larger filament cross-section allows the filament to cool down more slowly. This gives the liquid filament more time to bond to the print bed.
If you have difficulties with adhesion to the print bed, it may make sense to increase the thickness of the first layer. As a rule, this is set slightly thicker than the subsequent layers to create a solid foundation for the entire print.
Adaptive Layers
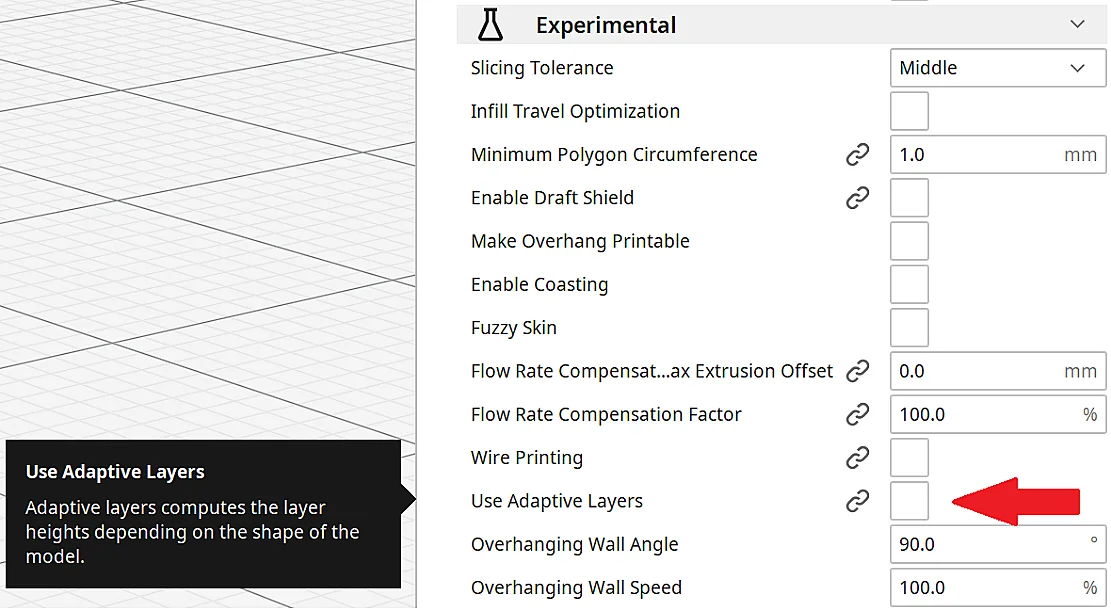
Adaptive layers can be found in some slicers such as Cura. They allow the slicer to dynamically adapt the layer height to the geometry of the 3D model.
In areas where a high level of detail is required, the slicer uses thinner layers, while thicker layers are used in less detail-intensive areas.
This optimizes print quality without unnecessarily increasing the overall print time. Adaptive layers are particularly useful for complex models with varying surface detail. They represent an effective compromise between print speed and detail fidelity.
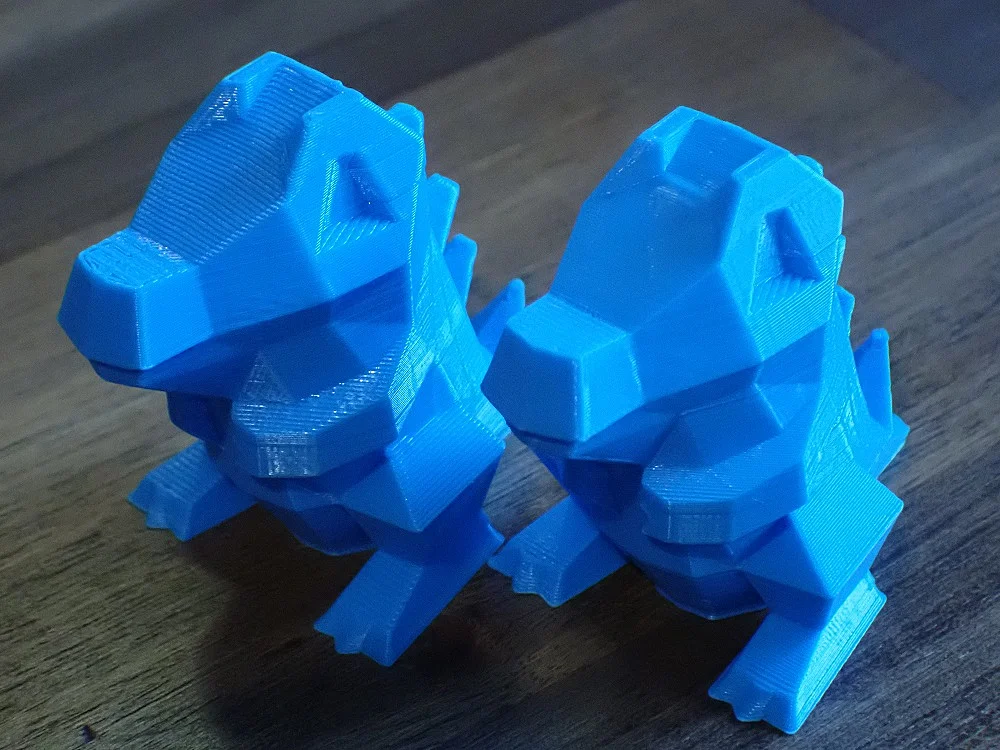
Layer Height vs. Quality
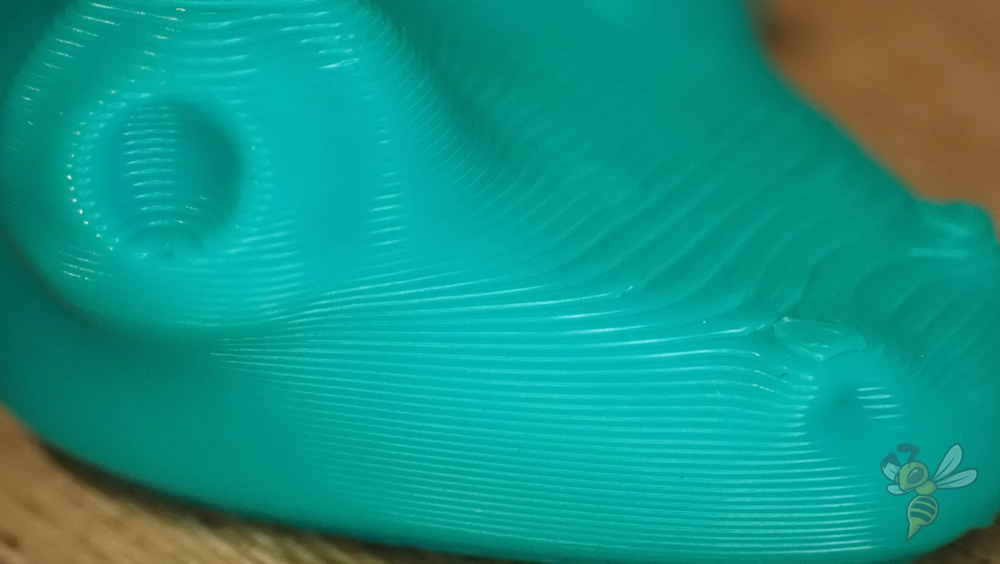

The layer height has a direct influence on the quality of your 3D print. A lower layer height results in higher accuracy and finer details on the surface of the model. This is particularly beneficial for complex or ornate 3D models where precision and fine textures are important. With thinner layers, you can bring out subtle contours and fine lines more clearly, making the final product more visually appealing.
However, a thinner layer height also has disadvantages. As well as longer print times, it can also lead to a weaker bond between the layers, which can compromise the structural integrity of the part. This is an important aspect in the production of components that have to withstand mechanical stress.
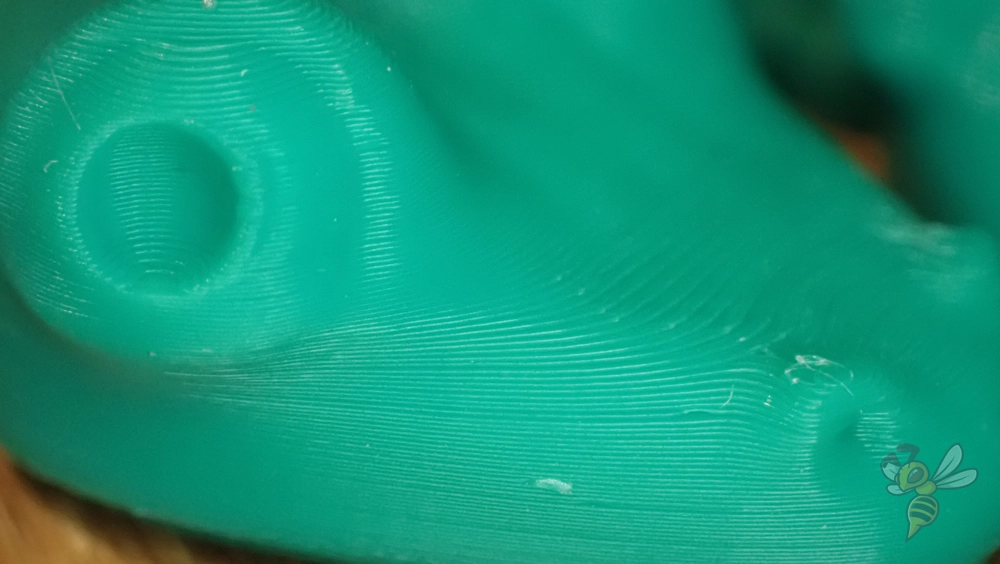
In contrast, thicker layers allow for faster manufacturing and often provide better layer bonding, which improves the strength of the part. However, details can be lost and the surface appears less smooth. The choice of layer height therefore depends heavily on the purpose and requirements of the printing project. Careful consideration between the desired resolution and the required strength of the part is crucial to the success of your 3D print.
Layer Height vs. Printing Time
The layer height in the 3D printing process has a significant influence on the overall duration of the printing process. A finer layer height, although it ensures a higher level of detail, leads to a significant increase in the overall printing time. This is because more layers are required to build up the object.
On the other hand, thicker layers allow for a significant reduction in printing time, ideal for projects where time is critical.
Finer layer heights:
- Increase the detail of the model.
- Extend the printing time due to the larger number of layers.
Thicker layer heights:
- Reduce the level of detail, but are practical for less complex objects.
- Shorten the overall printing time as fewer layers are required.
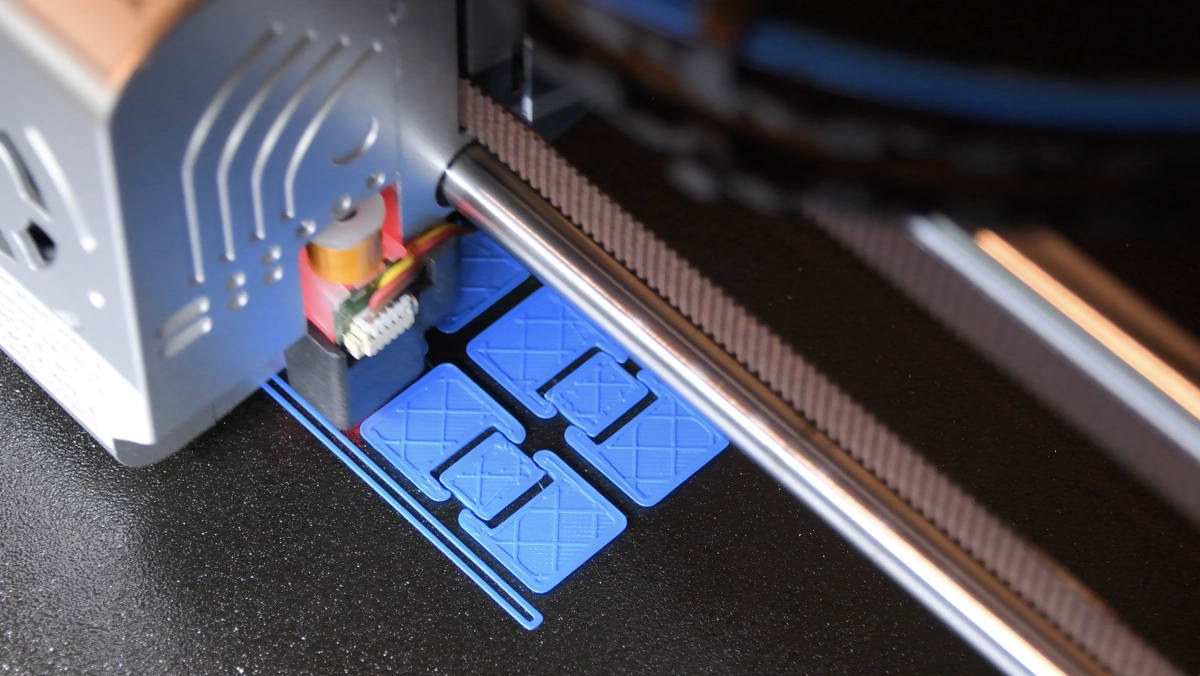
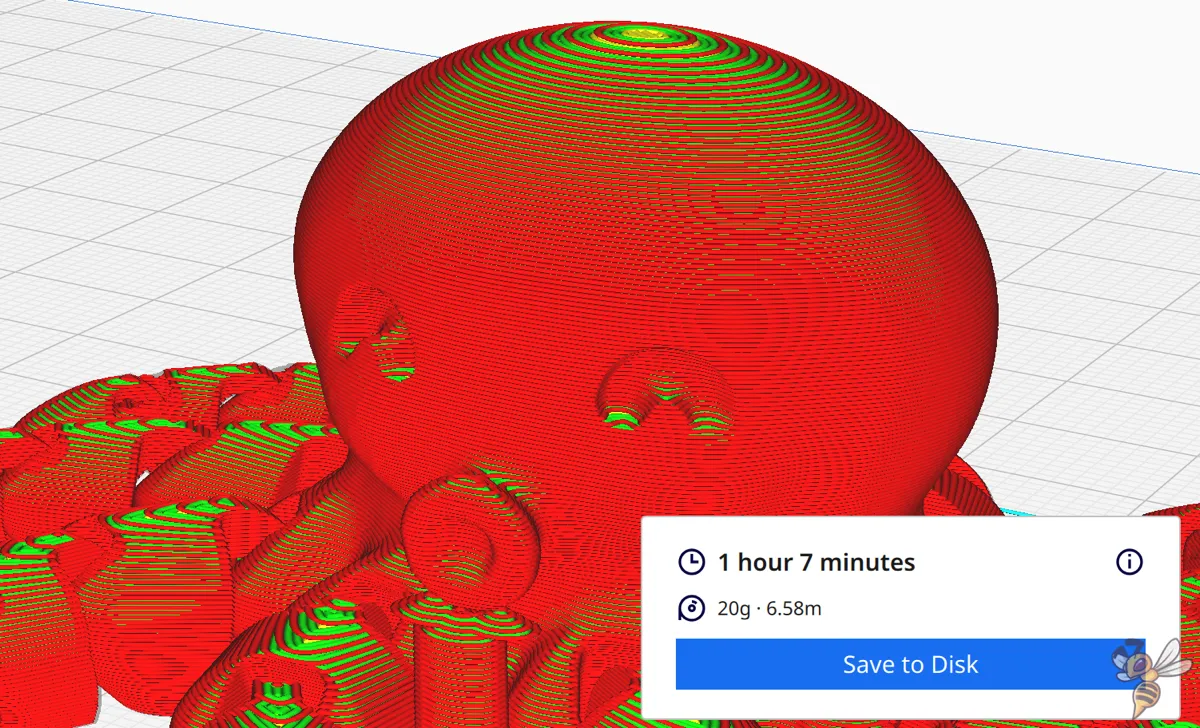
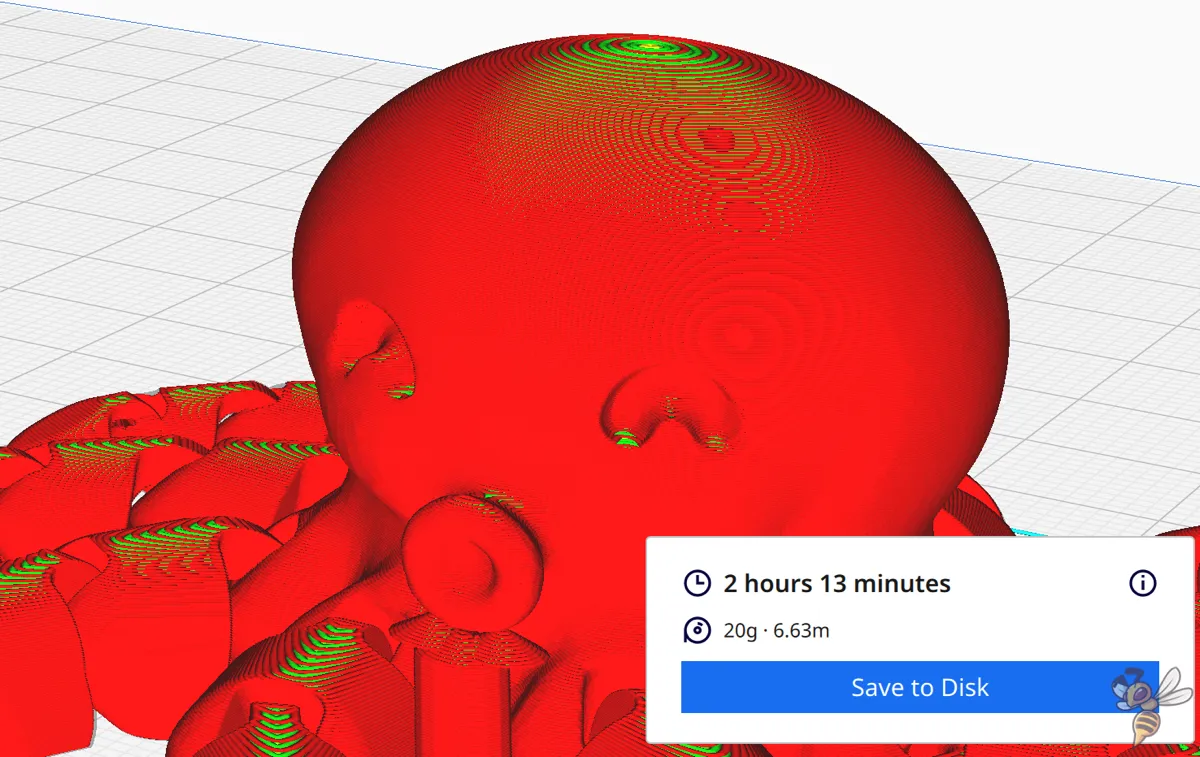
Example “Cute Mini Octopus“:
- 0.1 mm = 2 hours 13 minutes
- 0.2 mm = 1 hour 7 minutes
When choosing the layer height, you should therefore consider the relationship between the required level of detail and the available printing time. For prototypes or functional parts that need to be produced quickly, a thicker layer height may make sense, while a finer layer height is preferred for highly detailed models or presentation objects.
Ultimately, the decision depends on the specific requirements of the 3D printing project in question, but also on the nozzle used (more on this later).
Layer Height vs. Stability
The layer height influences the stability of your 3D print. A thicker layer can improve homogeneity and tensile strength. This means your part can be more uniform and resistant to tensile forces (Cahyati & Furqon, 2022). Conversely, a lower layer height, i.e. thinner layers, can lead to increased strength (Le Duigou, Chabaud, Matsuzaki, & Castro, 2020).
Layer Height vs. Nozzle Diameter
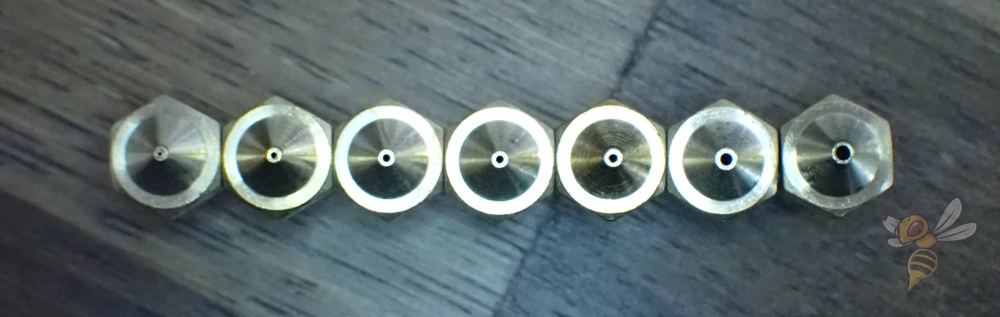
The diameter of the 3D printer nozzle sets a limit for the minimum and maximum layer height. In general, the maximum layer height should be around 75% of the nozzle diameter, while the minimum layer height can be around 25%.
There are several reasons for this rule:
Filament flow behavior: if the layers are too thick, the filament cannot flow and adhere properly, which can lead to uneven layers and weak bonding between layers.
Precision and detail: Too thick a layer in relation to the nozzle diameter can affect the accuracy and detail of the print. Fine details and textures can be lost.
Print stability: The stability of the print depends on an even and consistent layer height. Correctly matching the layer height to the nozzle diameter ensures optimum adhesion and stability.
Adaptation to the print object: Different layer heights are required for different projects. A larger nozzle diameter is better suited for robust, less detail-oriented prints, while a smaller nozzle allows for finer details.
Layer Height vs. Line Width
Line width in 3D printing, often referred to as extrusion width, is another important aspect that influences the quality and properties of the printed object. It is closely related to the diameter of the nozzle and can vary between 60% and 200% of the nozzle diameter, with the usual range being between 100% and 120%.
Accuracy vs. speed:
- Smaller line widths (e.g. 60% of the nozzle diameter):
- Increase accuracy and allow for finer detail.
- Increase print duration due to the higher number of print paths.
- Larger line widths (up to 200% of the nozzle diameter):
- Increase the stability and structural integrity of the part.
- Reduce print time as fewer print paths are required.
Material flow and print quality:
- The choice of line width affects how the filament flows and bonds.
- Lines that are too narrow can lead to poor layer adhesion, while lines that are too wide can cause over-extrusion.
Effects on surface quality:
- An adjusted line width can improve surface finish, especially for visible layers.
Practical application:
- When producing detailed models or art objects, a finer line width is beneficial to emphasize the fine details.
- When producing functional or structural parts, such as tool holders, a wider line width is recommended to increase the strength and speed of the printing process.
The selection of the correct line width therefore depends on the requirements of the specific printing project. Careful matching of the line width with the layer height and nozzle diameter is crucial to achieve the best balance between detail accuracy, printing speed and structural strength.
FAQ – Frequently Asked Questions
What influence does the layer height have on the strength of my 3D printed object?
The layer height directly affects the strength of your printed part. Thicker layers can lead to better bonding between the layers, which increases strength, while thinner layers offer higher detail but possibly lower strength. The optimal layer height depends on the material and the desired application of the part.
How does the nozzle diameter affect the print quality?
The diameter of the nozzle determines the maximum possible layer height and therefore influences the print quality. A larger nozzle enables thicker layers to be printed, which leads to faster printing times but can be at the expense of detail accuracy. Conversely, smaller nozzles allow for finer detail but require longer print times.
Can I change the layer height during printing?
Yes, some slicer programs allow you to dynamically adjust the layer height. This feature, often known as “Adaptive Layers”, allows you to print with thicker layers in areas that require less detail and move to thinner layers where finer detail is required. This saves time while maintaining quality in the detailed areas of the model.
Summary
In 3D printing, the choice of layer height is a key factor that significantly influences the quality, strength and printing speed of an object.
Thinner layers increase the level of detail and surface quality, but require longer print times and can lead to weaker bonding between layers. Thicker layers offer faster production and often better layer bonding, which improves the strength of the part but can come at the expense of fine detail.
Disclosure: This website is the property of Martin Lütkemeyer and is operated by Martin Lütkemeyer. Martin Lütkemeyer is a member of the Amazon Services LLC and other Affiliate Programs. These are affiliate advertising programs designed to enable websites to earn advertising revenue through advertising and linking to Amazon.com and others. Links marked with * are affiliate links.
