
- Wet Filament: Prevention, Symptoms & Drying - July 18, 2024
- Sovol SV08 – Best PrusaSlicer Settings & Profile - June 26, 2024
- Sovol SV08 – Best Orca Slicer Settings & Profile - June 26, 2024
Disclosure: Links marked with * are Affiliate Links. I earn from qualifying purchases if you decide to make a purchase through these links – at no additional cost for you!
Hidden among the experimental settings in Cura are many useful features. Like many of these settings, the Adaptive Layers can optimize accuracy and print time.
Adaptive Layers in Cura dynamically adjust the layer thickness. Depending on the setting, the layer thickness is reduced in critical areas of the object for higher accuracy and increased in non-critical areas for faster print time.
Find out where to find the setting, how it works, and what effect each setting has on the object and print time in this detailed article on Adaptive Layers.
Table of Contents:
Where can I find the Adaptive Layers in Cura?
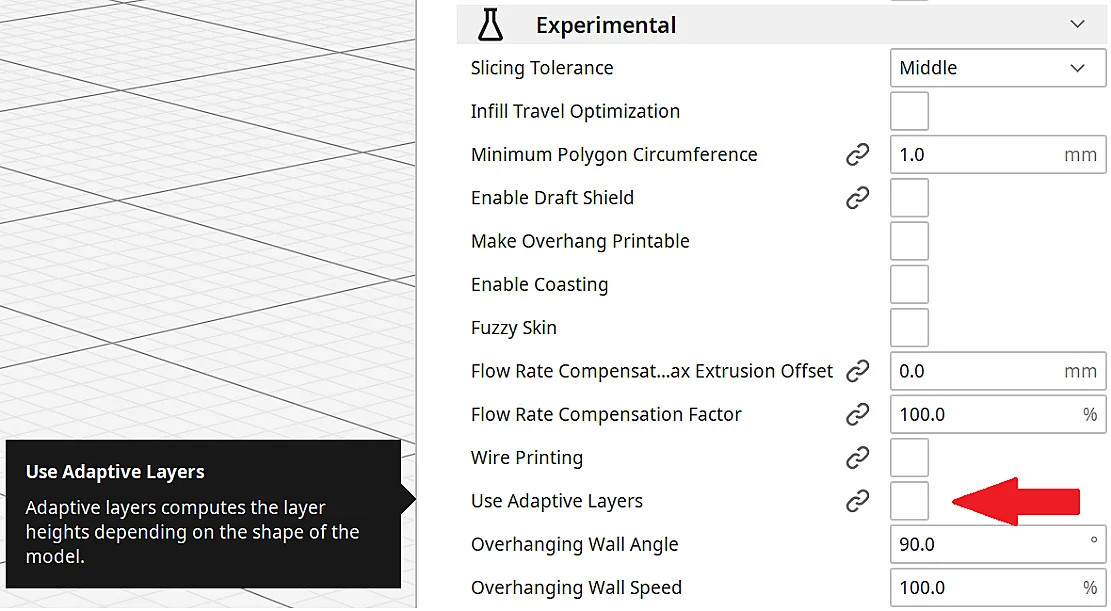
You can find the Adaptive Layers in the experimental settings of Cura. If you can’t see the setting, you need to enable its visibility in the options. You can do this either from the menu bar or from the options icon in the experimental settings tab.
Once you enable the option, three new settings will appear:
- Adaptive Layers Maximum Variation
- Adaptive Layers Variation Step Size
- Adaptive Layers Topography Size
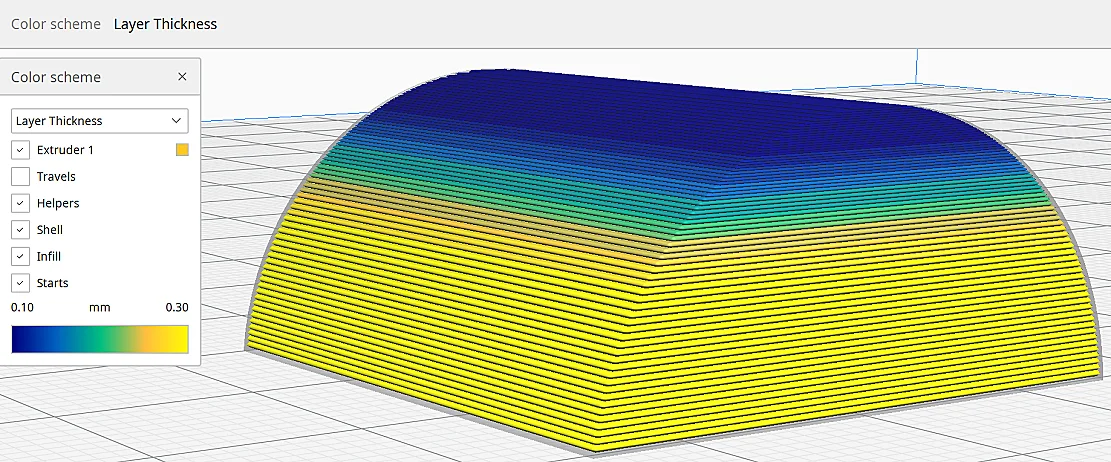
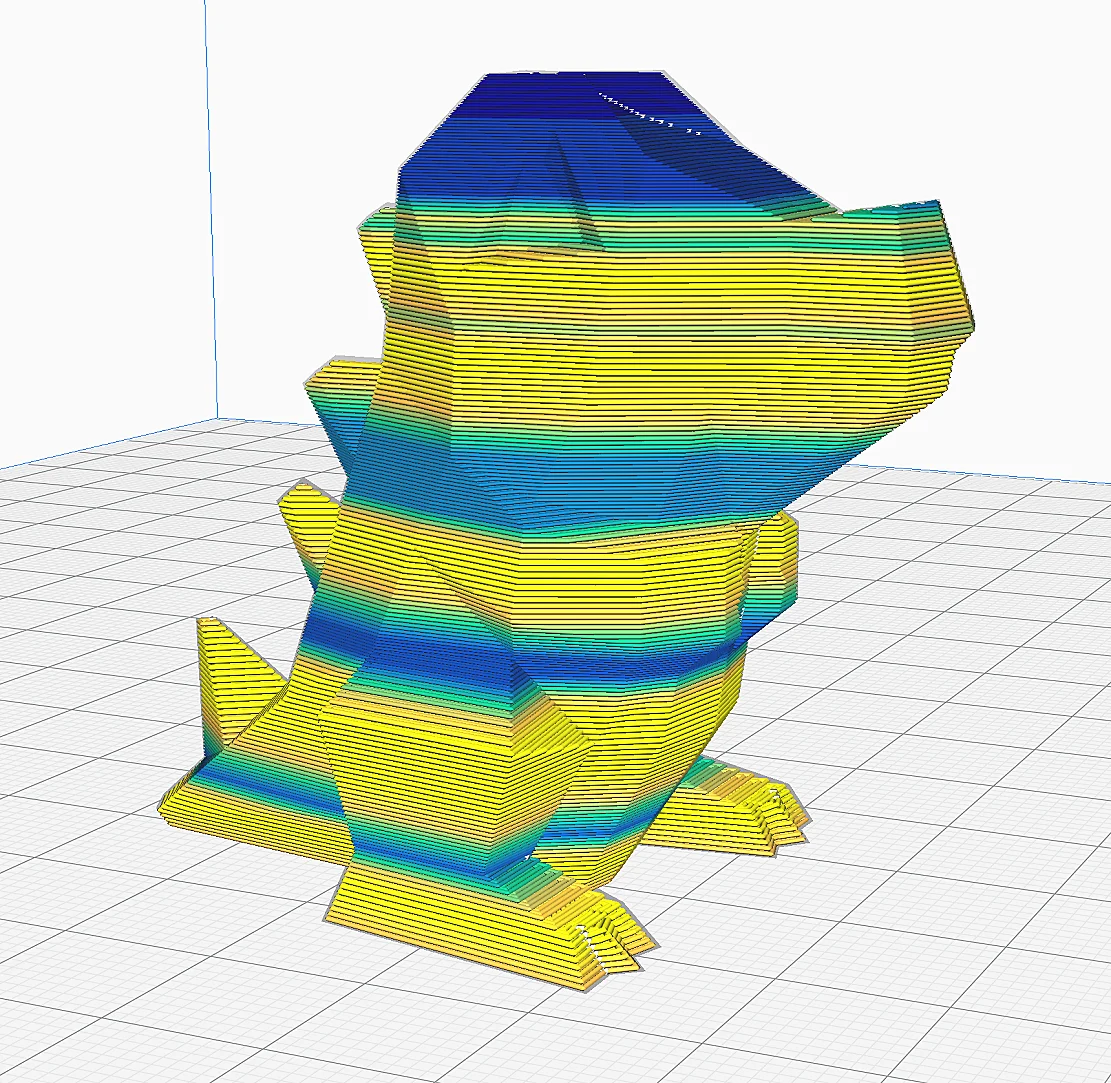
You can set the preview color scheme to “Layer Thickness” to see the effects of the setting.
How do Adaptive Layers work in Cura?
In 3D printing, the layer thickness defines the accuracy or how smooth the surface will be. In some places of the object it is more important that the layer thickness is small than in other places.
For straight, vertical walls, it is not so important how thick the layers are to get a uniform and accurate result. But for overhangs and slopes, it is more important that the layer thickness is small in order to increase the accuracy at these points.
Adaptive Layers in Cura adjust the layer thickness along the Z axis of the object. Depending on the setting, sections are printed with thicker or thinner layers than the standard layer thickness. This can save a lot of printing time and increase accuracy.
However, you don’t always save time with Adaptive Layers. Depending on how you adjust the settings, it can also be that the object takes longer to print than without this setting. To help you understand the effects of each setting, I’ll explain them one by one. You can see examples further down in the article.
Adaptive Layers Maximum Variation: With this value, you specify the range of the layer thicknesses. With a high value, thinner and thicker layers can be printed, with a smaller value, the layer thickness remains close to the normal layer thickness.
For example, if you have a standard layer thickness of 0.2 mm and enter a value of 0.1 mm here, the layers will be between 0.1 and 0.3 mm thick.
This setting is therefore extremely important for the final result and defines the strength of the effects of the Adaptive Layers.
Adaptive Layers Variation Step Size: With this setting, you adjust the largest possible difference of layer thicknesses of adjacent layers. With a small value, the transitions become smoother (gradual changes in layer thickness), with a large value the layer thickness changes more abruptly. However, abrupt changes in layer thickness may result in over- or under-extrusion.
So for the best results, you should not set this value too large.
Adaptive Layers Topography Size: You will adjust this setting more often than the other two. It defines the maximum horizontal distance between the edges of two layers. This has a direct effect on the layer thickness. The larger this value, the thicker the layers can be. With this setting, you can extremely influence the accuracy and the print time.
Reduce Print Times with Adaptive Layers
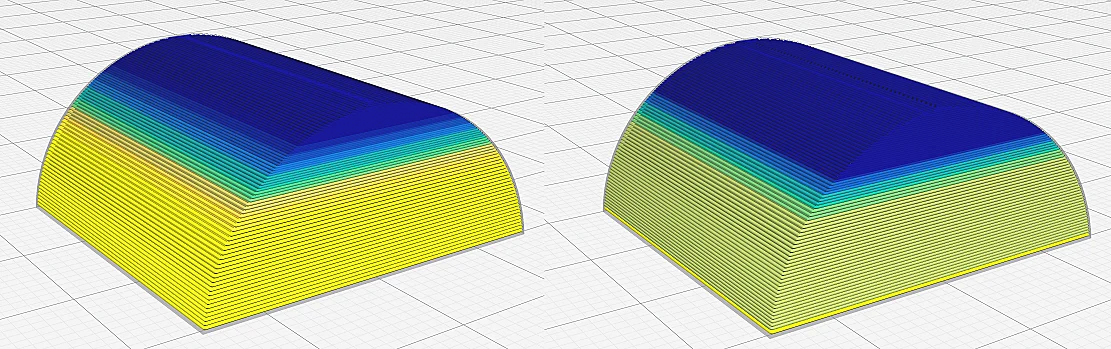
To give you some examples of how each setting affects the print time, I sliced the low-poly Totodile with different settings.
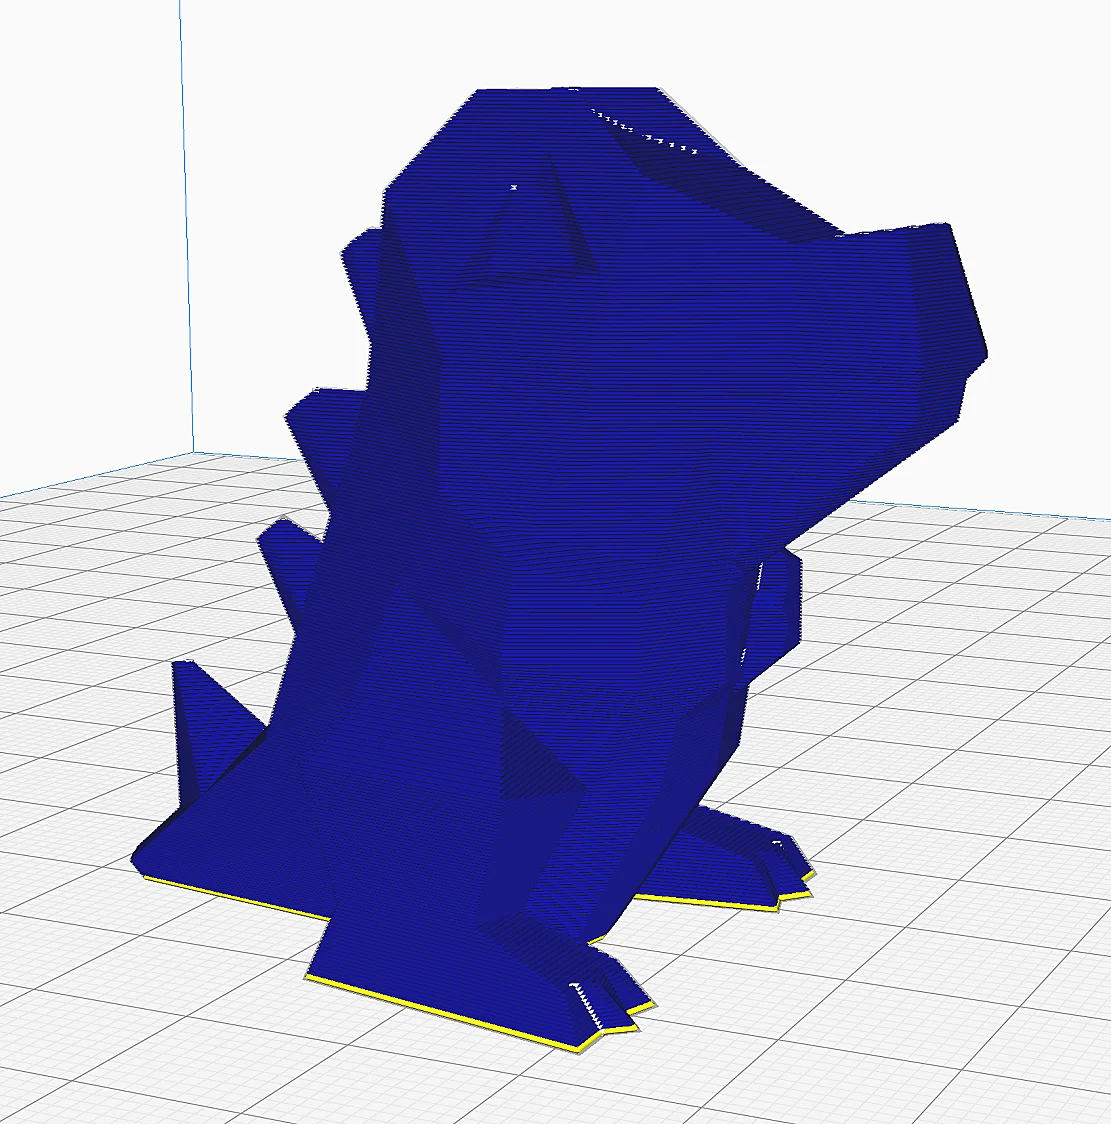
- Adaptive Layers: Disabled
- Maximum Variation: Disabled
- Variation Step Size: Disabled
- Topography Size: Disabled
- PRINT TIME: 00:51 (hh:mm)
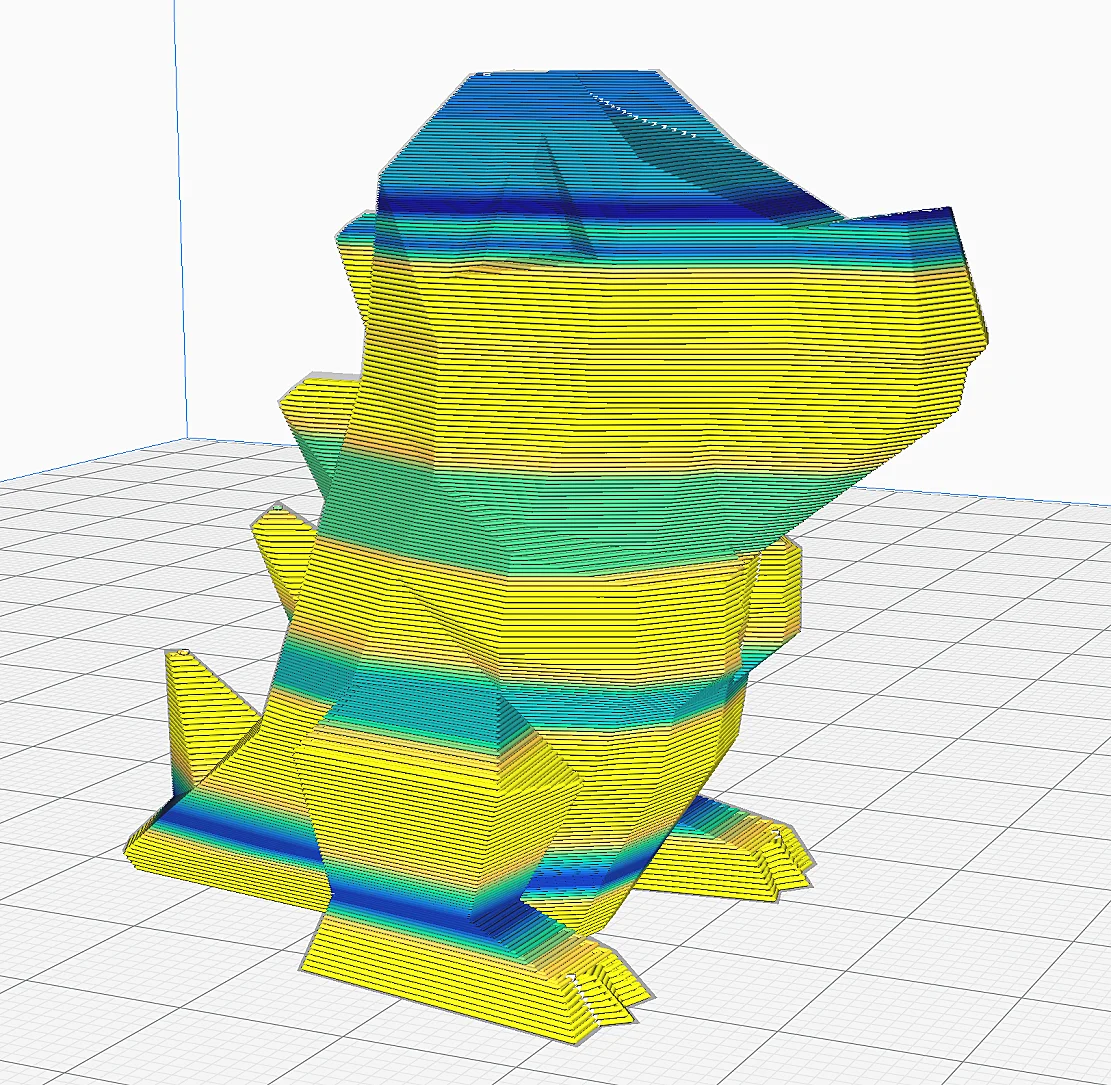
- Adaptive Layers: Enabled
- Maximum Variation: 0.1 mm
- Variation Step Size: 0.01 mm
- Topography Size: 0.4 mm
- PRINT TIME: 00:46 (- 10%)
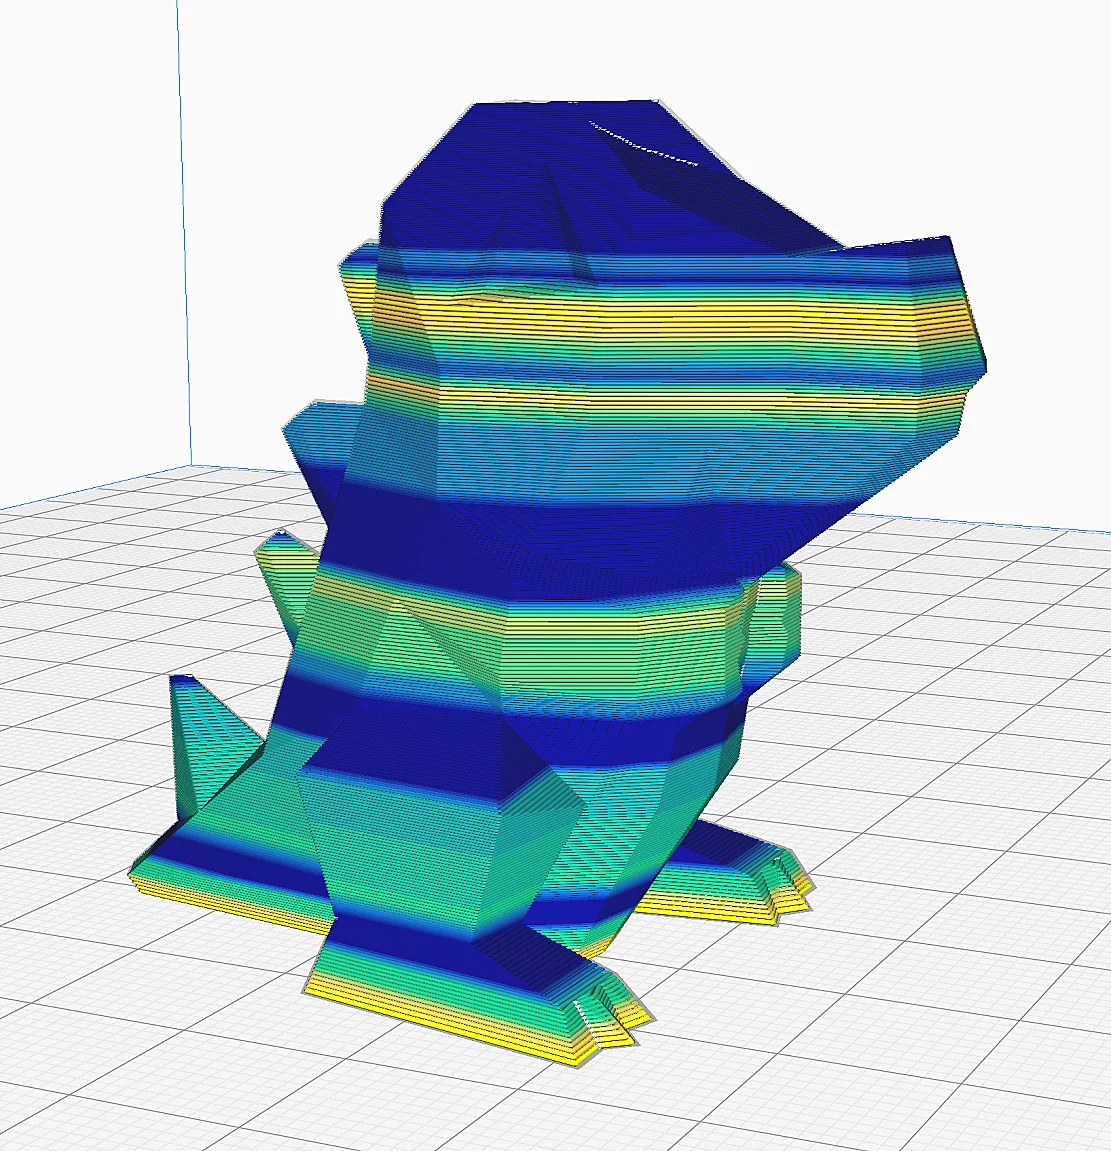
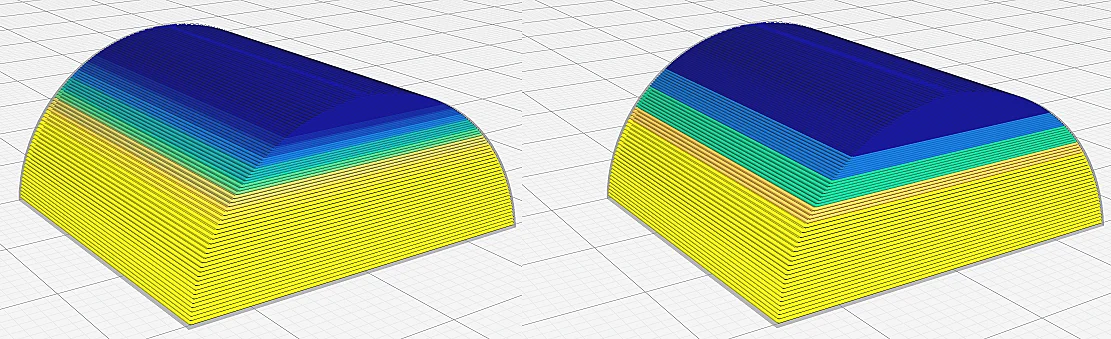
- Adaptive Layers: Enabled
- Maximum Variation: 0.1 mm
- Variation Step Size: 0.01 mm
- Topography Size: 0.2 mm
- PRINT TIME: 01:03 (+ 24%)
- Adaptive Layers: Enabled
- Maximum Variation: 0.15 mm
- Variation Step Size: 0.01 mm
- Topography Size: 0.4 mm
- PRINT TIME: 00:41 (- 20%)
As you can see, the default settings are often not the best way to reduce printing time. However, the quality of individual sections is improved. However, if you strongly adjust the topography size of the Adaptive Layers, you will see a significant reduction of the printing time. In return, however, the accuracy of individual sections is reduced.
So for each object, you have to consider which sections are important and which are not. You can then adjust the individual settings to optimize the print time and accuracy for the object in question.
Obviously, this setting is mainly worthwhile for large objects or for objects that you want to print very frequently. Reducing the printing time is very important, especially in the professional field, because “time is money”. If the accuracy is even improved, all the better!
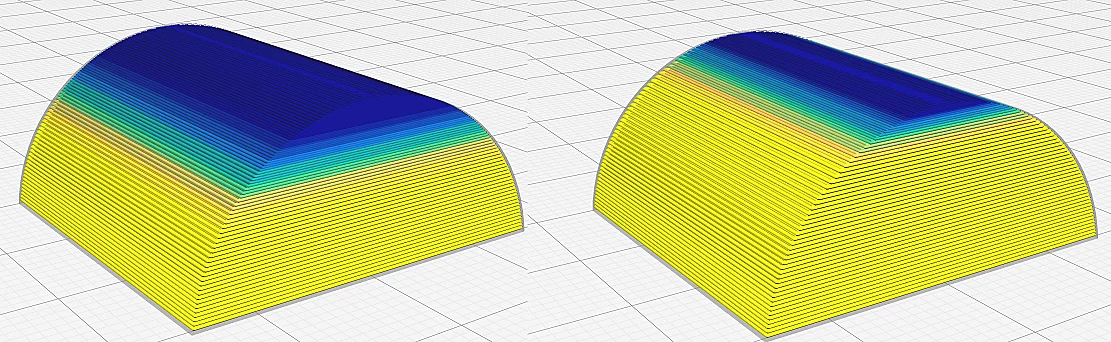
Comparison With/Without Adaptive Layers
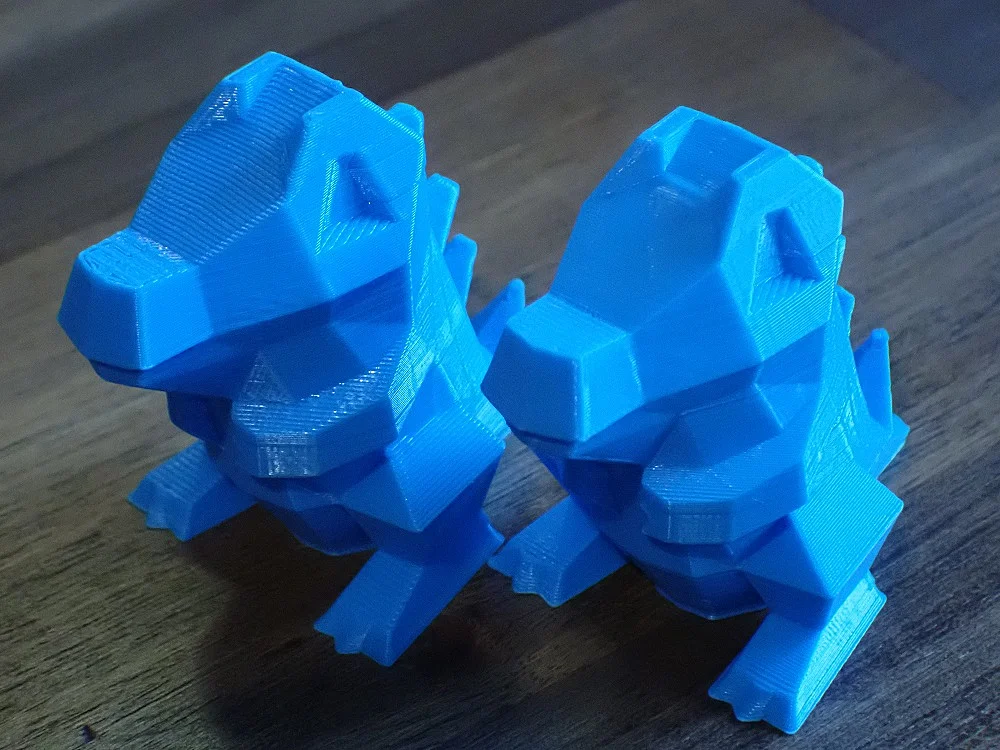
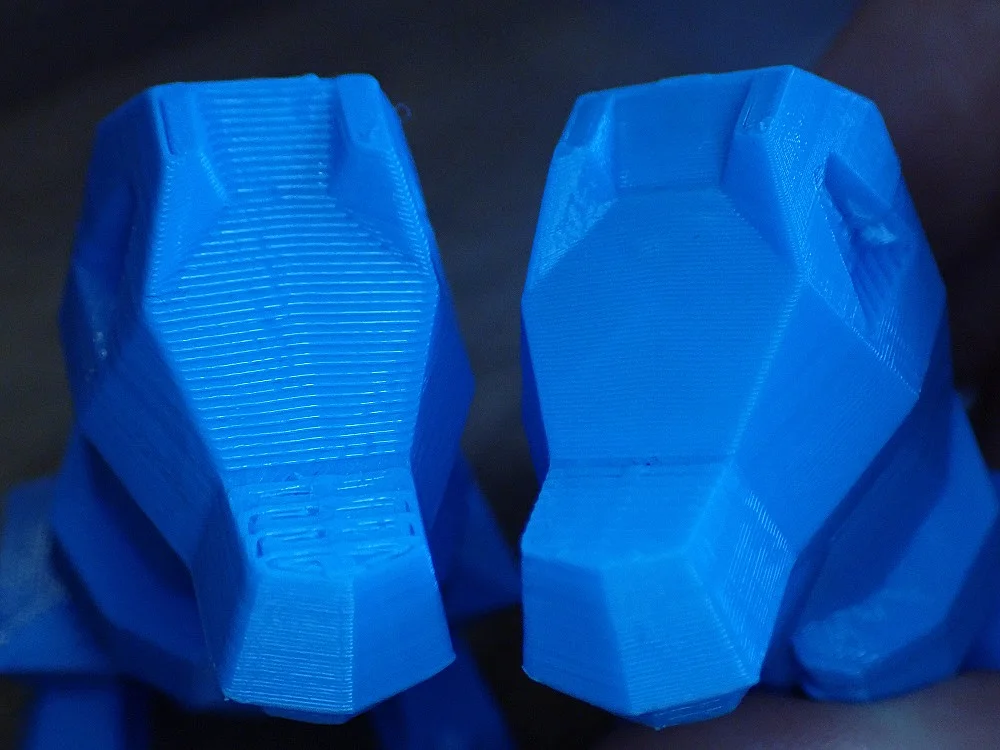
The printed result of the model with and without Adaptive Layers clearly shows how the setting affects the surface quality. Especially on the slopes that point upwards, the quality is much better, since a smaller layer thickness was used there. In straight areas, the layer thickness was bigger and saved some printing time.
Overall, Adaptive Layers can provide excellent improvements in accuracy and print time. Like many other 3D printing users, these settings are part of my standard settings and are used regularly. This is not the only reason why Cura is my favorite slicer for FDM printers.
Disclosure: This website is the property of Martin Lütkemeyer and is operated by Martin Lütkemeyer. Martin Lütkemeyer is a member of the Amazon Services LLC and other Affiliate Programs. These are affiliate advertising programs designed to enable websites to earn advertising revenue through advertising and linking to Amazon.com and others. Links marked with * are affiliate links.
