
- Wet Filament: Prevention, Symptoms & Drying - July 18, 2024
- Sovol SV08 – Best PrusaSlicer Settings & Profile - June 26, 2024
- Sovol SV08 – Best Orca Slicer Settings & Profile - June 26, 2024
Disclosure: Links marked with * are Affiliate Links. I earn from qualifying purchases if you decide to make a purchase through these links – at no additional cost for you!
I’ve done extensive hands-on testing of the Voxelab Aquila D1* and can tell you if it’s worth it. It’s packed with features that improve its usability and print quality. Unlike many entry-level 3D printers, you can print with a high quality and error-free (almost) out of the box!
What drew me to test this 3D printer is whether it can really print cleanly at high speeds due to the linear rails on the x and y axes. Is this a feature that will catch on? I did some tests to find out!
PRO:
- High print speed
- Direct drive extruder
- Can also process flexible filaments
- Perfect print bed adhesion
- Automatic print bed leveling
- Double z-axis
CON:
- Linear rails must be free of dust and dirt to avoid layer shifts
- Filament can only be loaded/unloaded via menu (manually very difficult)
Who should buy the Aquila D1?
If you don’t want to buy an entry-level 3D printer that requires more tinkering instead of printing, the Aquila D1 is for you. It offers excellent print quality right out of the box with minimal calibration required.
Table of Contents:
Technical Specifications
- Technology: FDM
- Operation: 4.3″ color touch screen
- Extruder: Direct drive extruder
- Printtemperature: max. 300 °C
- Print bed temperature: max. 110 °C
- Print volume: 235 × 235 × 250 mm
- Print bed material: PEI-coated spring steel, magnetic, flexible
- Print bed leveling: Manual & automatic at 25 points
- Print speed: Maximum 180 mm/s, standard 100 mm/s
- Nozzle: 1 × 0.4 mm
- Printing accuracy: ± 0.2 mm
- Layer height: 0.1 to 0.4 mm
- Filament: 1.75 mm PLA, ABS, PETG, TPU
- Filament Sensor: Yes
- Resume Print: Yes
- File transfer: MicroSD card, USB
- Slicer: VoxelMaker, Cura, Simplify3D

Check Price at:
Scope of Delivery & Unboxing
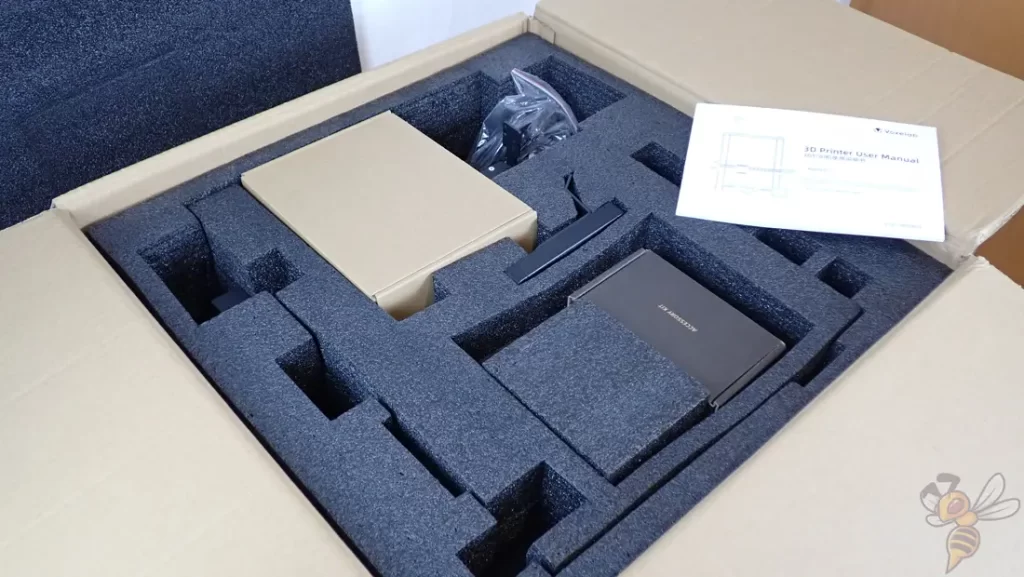
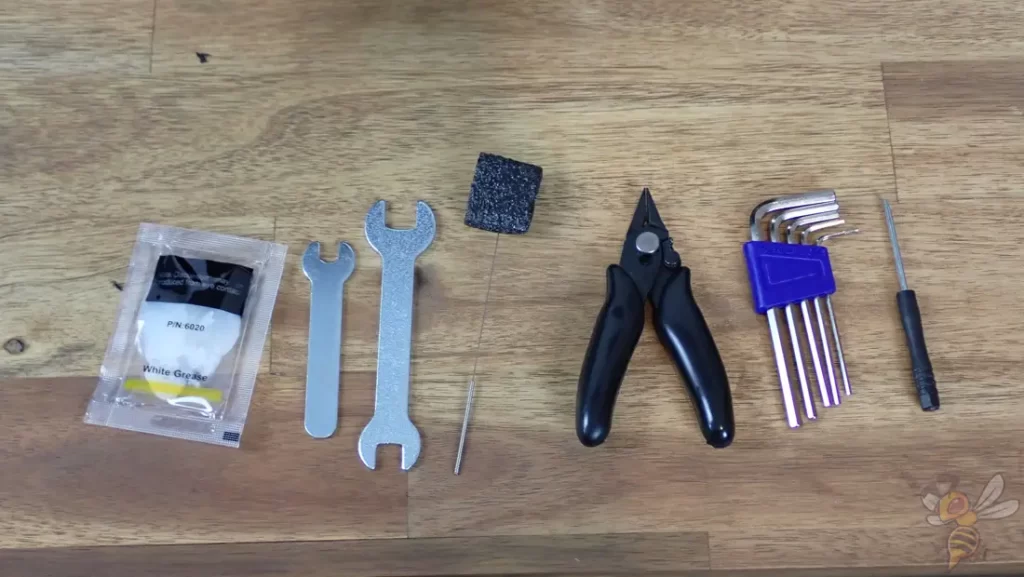
The Aquila D1 comes partially pre-assembled, with all the necessary tools for assembly. Some accessories, like a glue stick and a spatula are also included, though you won’t need either with this print bed.
The only thing you should think about when buying is to buy more filament. Included is only a small sample of PLA filament, which is just enough for one or two test prints. I tested the Aquila D1 mainly with PLA filament from Eryone.
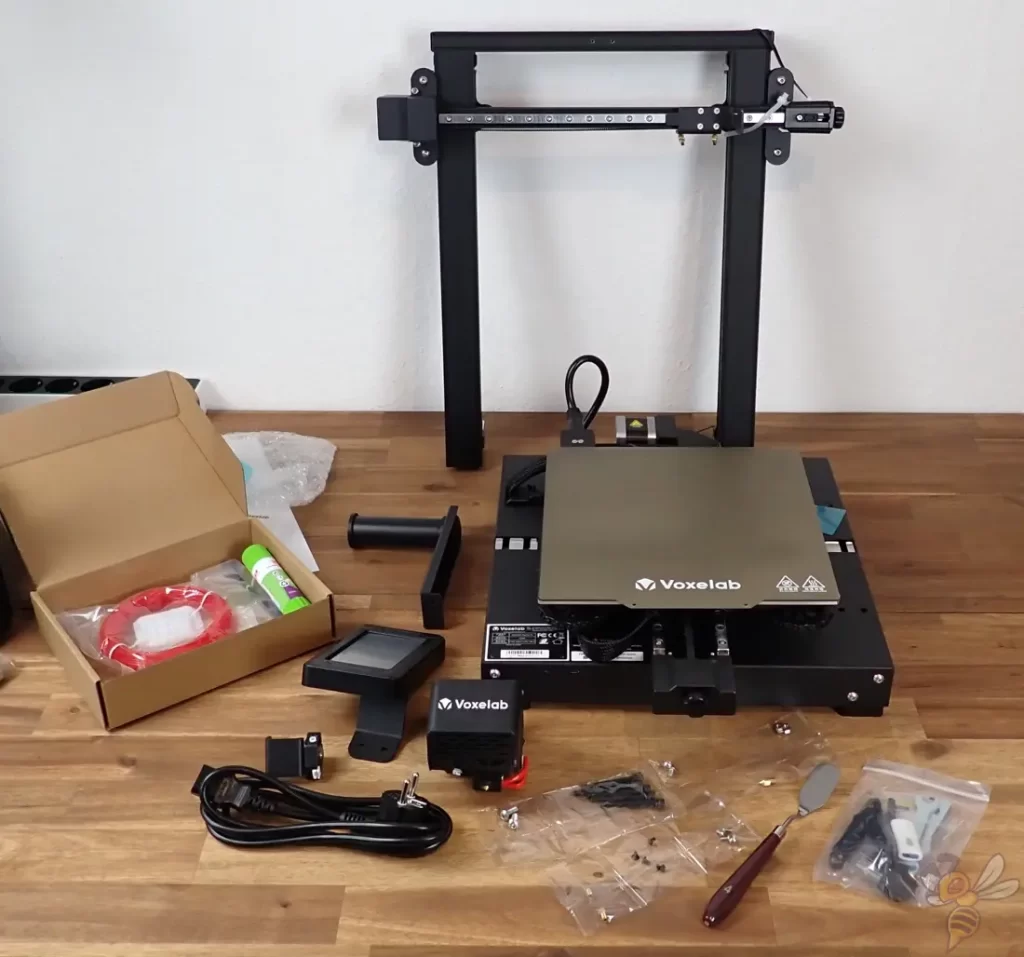
Assembly
The assembly is done quickly within 10 to 15 minutes. Here are the steps of assembly:
- Attach the frame to base
- Mount screen
- Mount filament holder
- Mount print head and screw on housing
- Attach filament sensor to frame
- Connect cables
- Tension the toothed belt
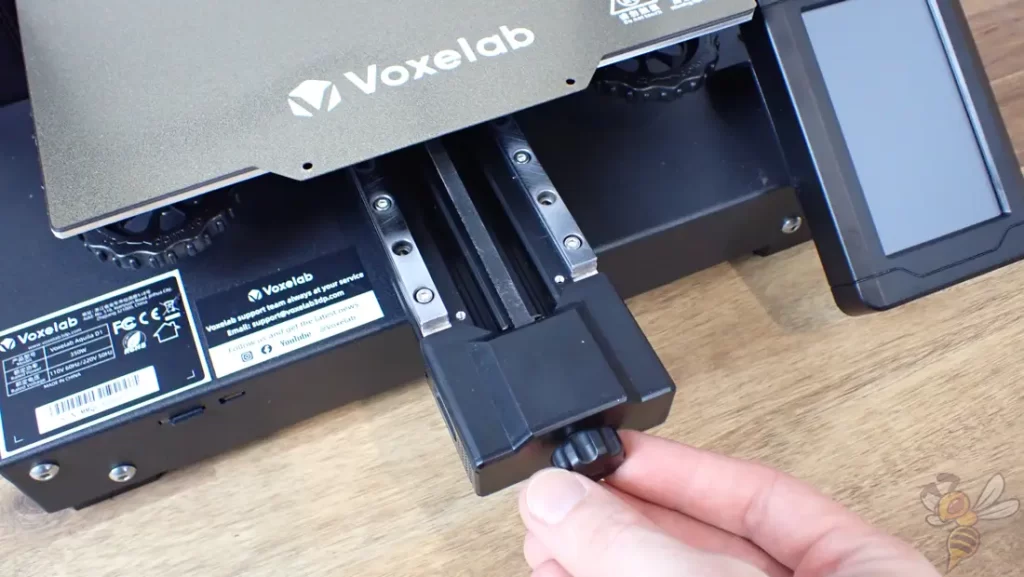
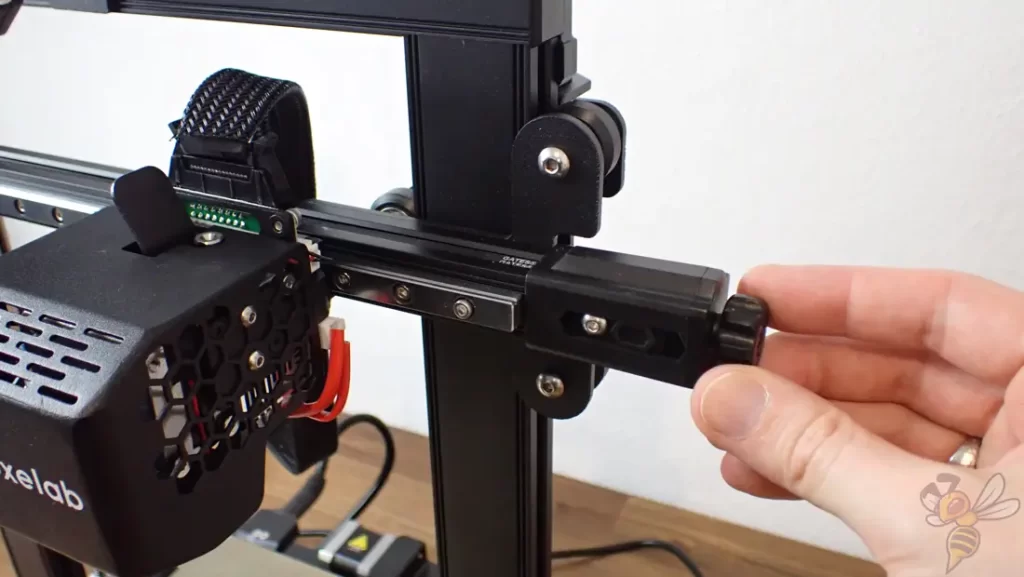
The last step, tensioning the toothed belts, is made easier for you by the toothed belt tensioners of the respective axes. The toothed belts must not be too loose and not too tight. Due to transport, they are usually a bit too loose and need to be tightened a bit.
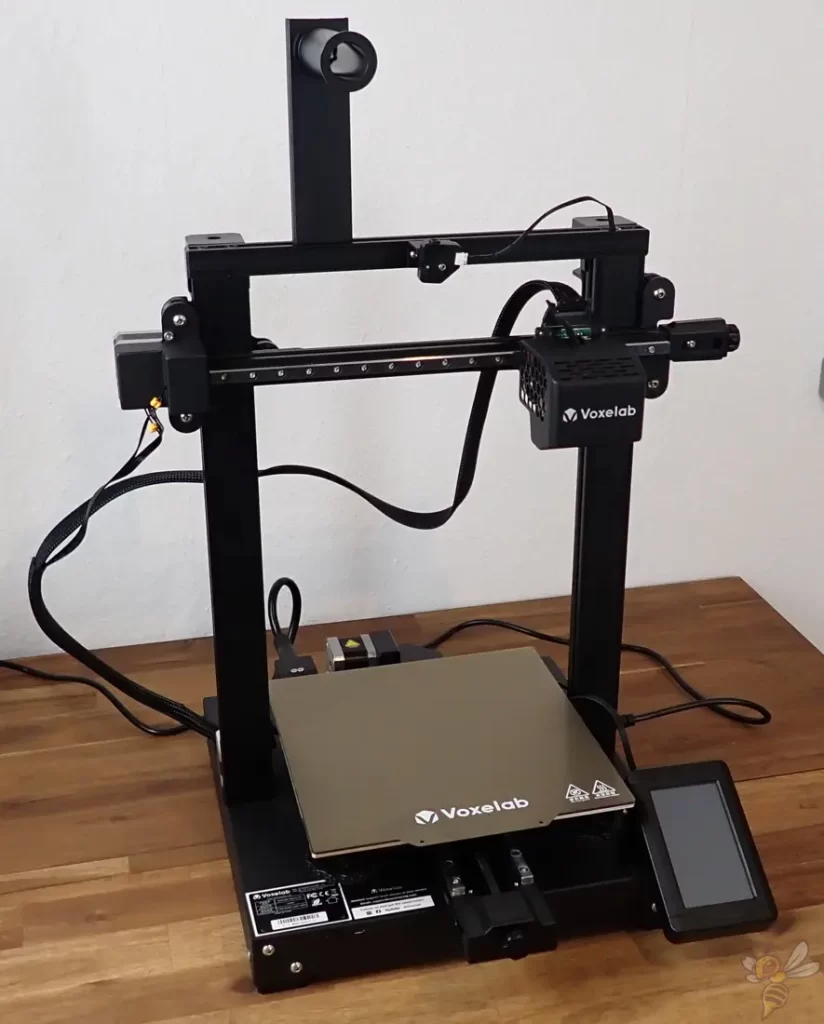
Design
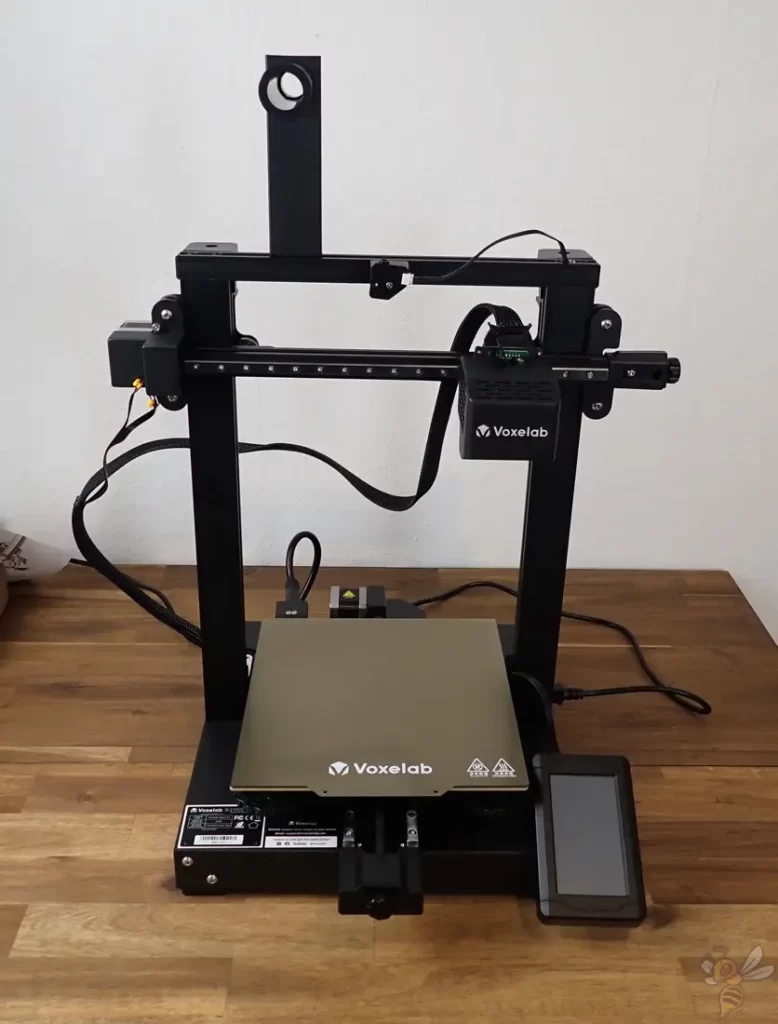
At first glance, the Aquila D1 looks like an overpriced Ender 3 clone. At second glance, however, you can see that the price is absolutely justified! It is full of features that have now been adopted by many 3D printers and greatly improve the print quality and operation.
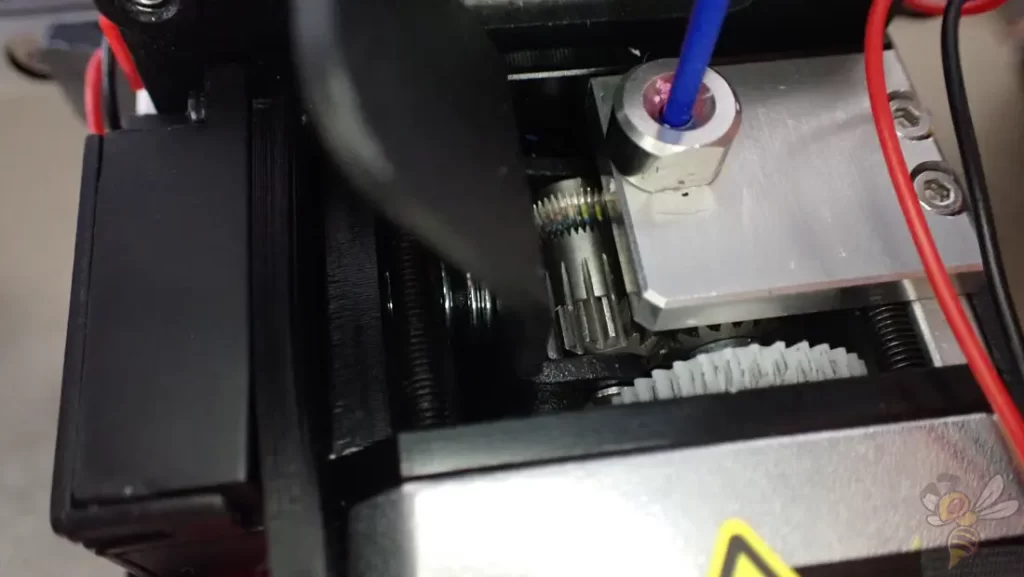
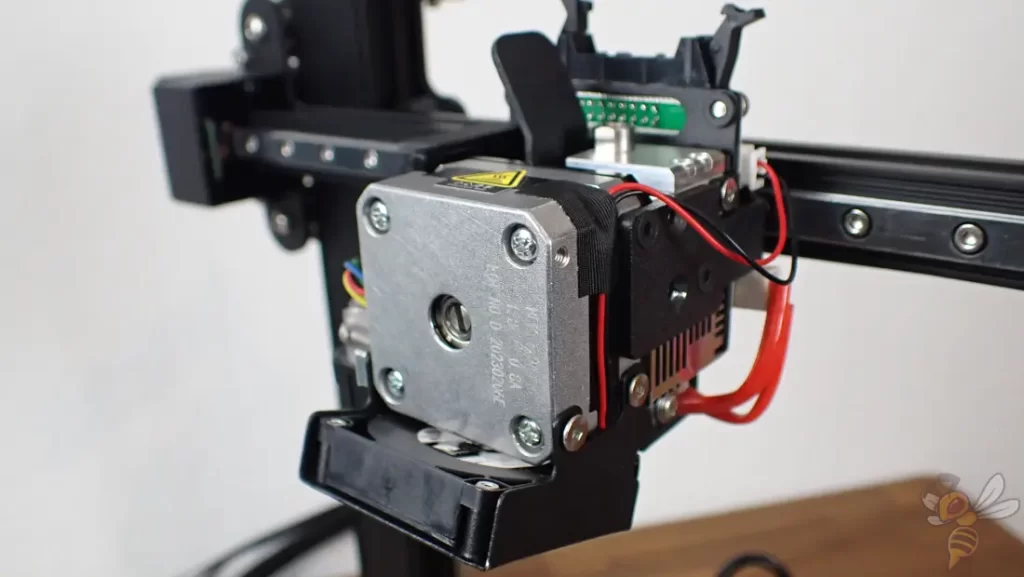
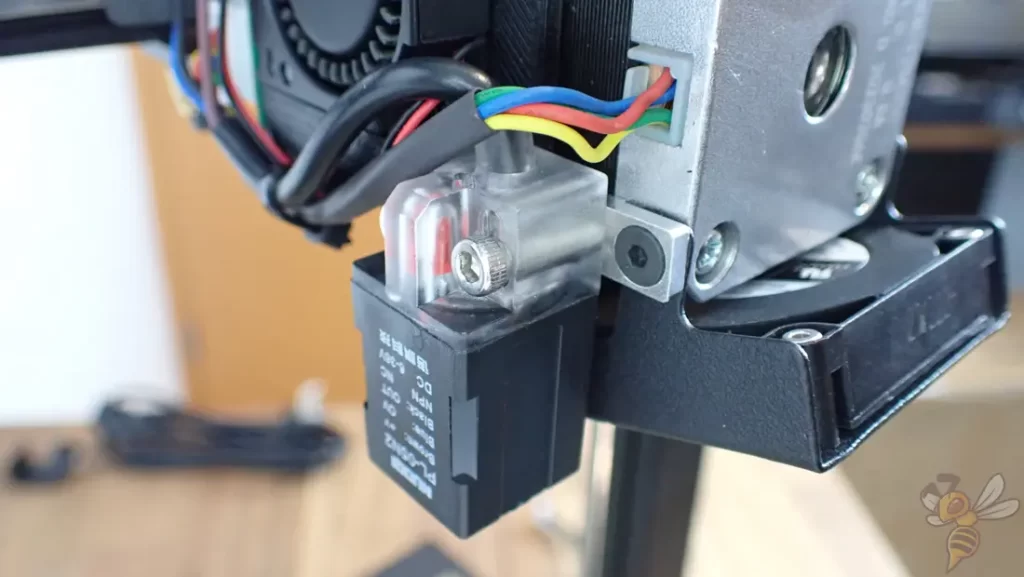
The dual-gear direct drive extruder built into the print head with up to 70 N feed force extrudes the filament precisely even at high speeds and can also process flexible filaments like TPU flawlessly.
I usually always load the filament manually by preheating to print temperature, decoupling the extruder and simply pushing the filament through. Unfortunately, this is not possible with the Aquila D1. Instead, automatic loading via the menu is very effective and works every time.
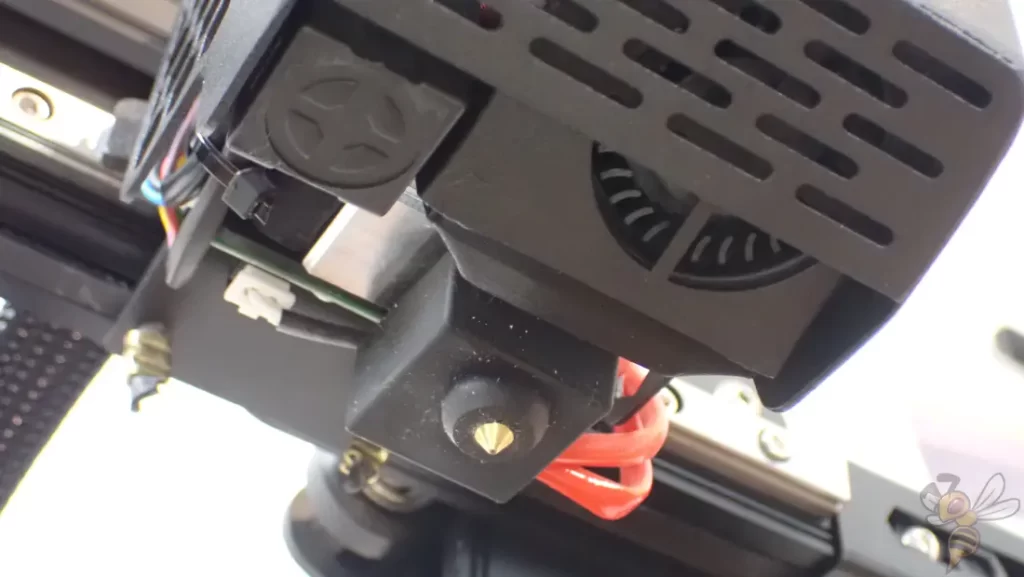
The hotend can be heated up to 300 °C and is effectively cooled by two fans in the print head. This allows you to print demanding filaments like ABS, PETG or even some PC filaments.
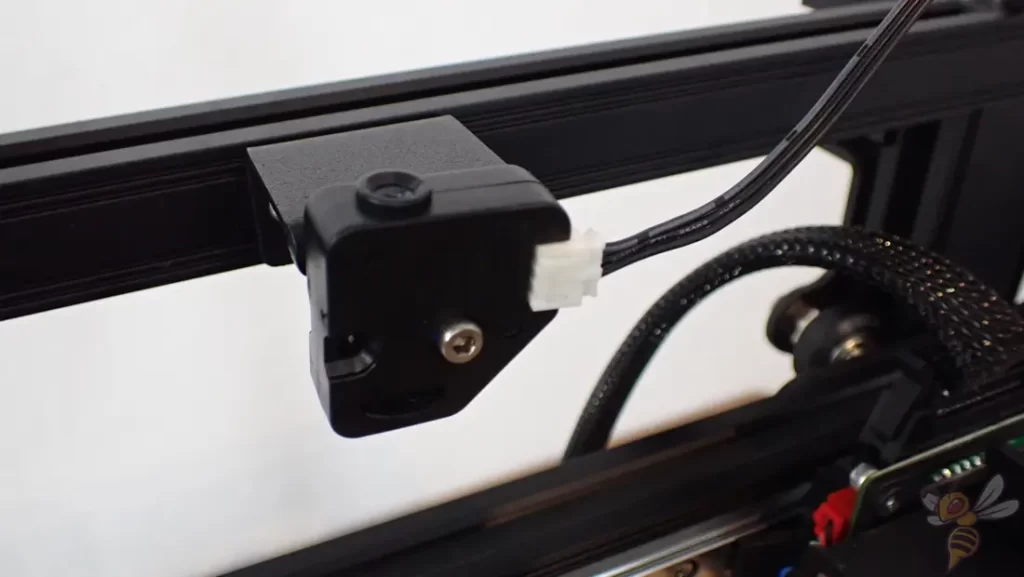
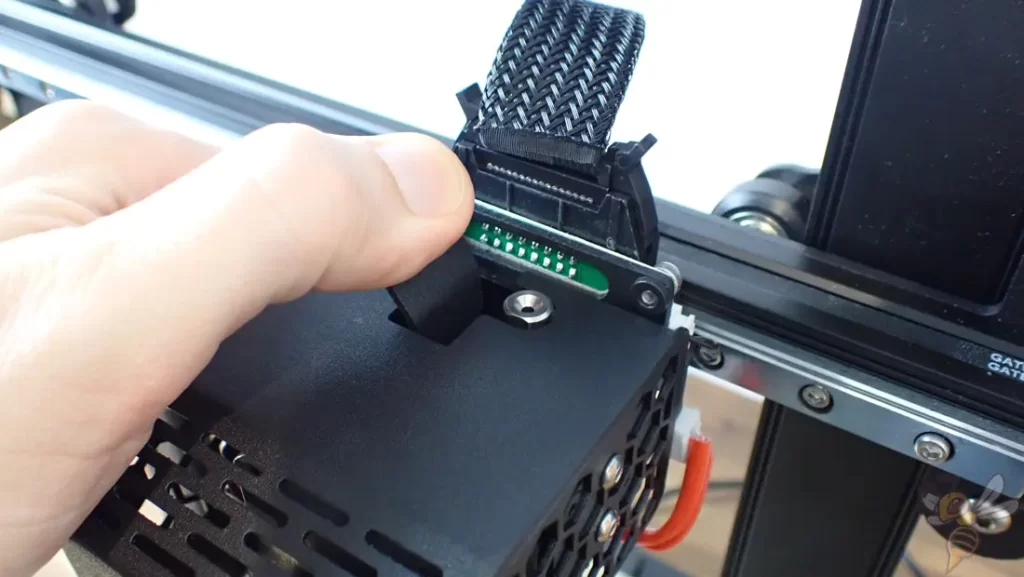
The print head also has a sensor for automatic print bed leveling. In the picture above, you can recognize it by the circle with a cross in the middle. How the leveling works exactly, I will show you later.
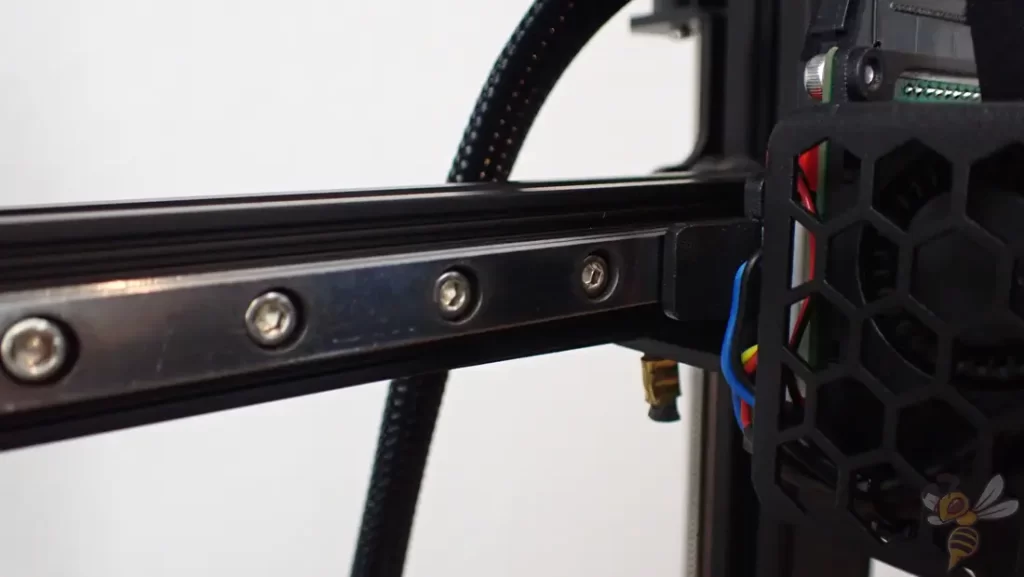
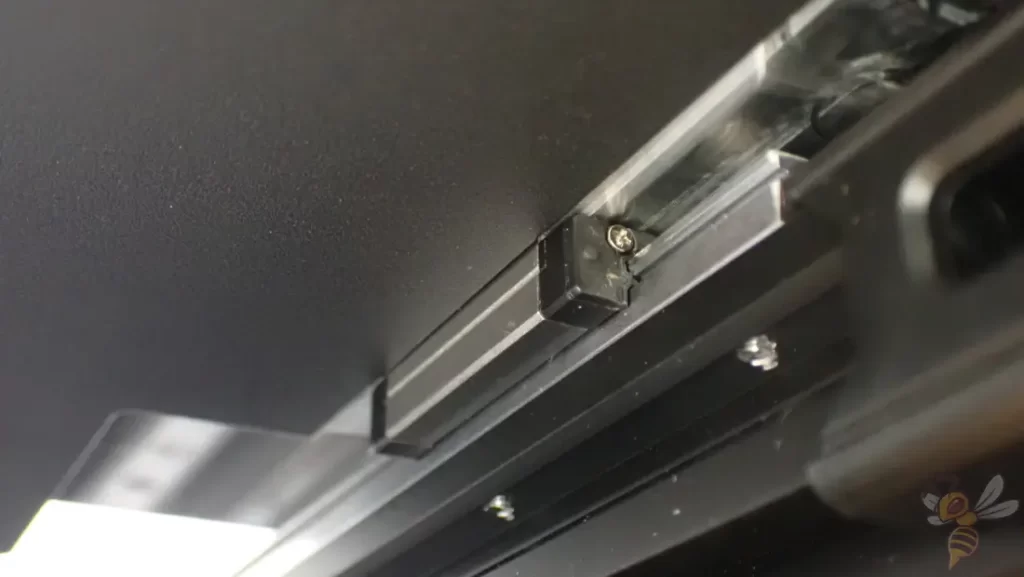
The linear rails on the x and y axis were the first thing that caught my eye. This is a feature you see relatively rarely on FDM 3D printers. Normally, there are V-section aluminum profiles with POM wheels.
These linear rails are usually only found on resin 3D printers on the Z-axis. They generally have higher positioning accuracy than traditional rails, but are more expensive.
Using these rails on an FDM 3D printer promises higher accuracies and less vibration at high speeds. And that’s exactly the case with the Aquila D1.
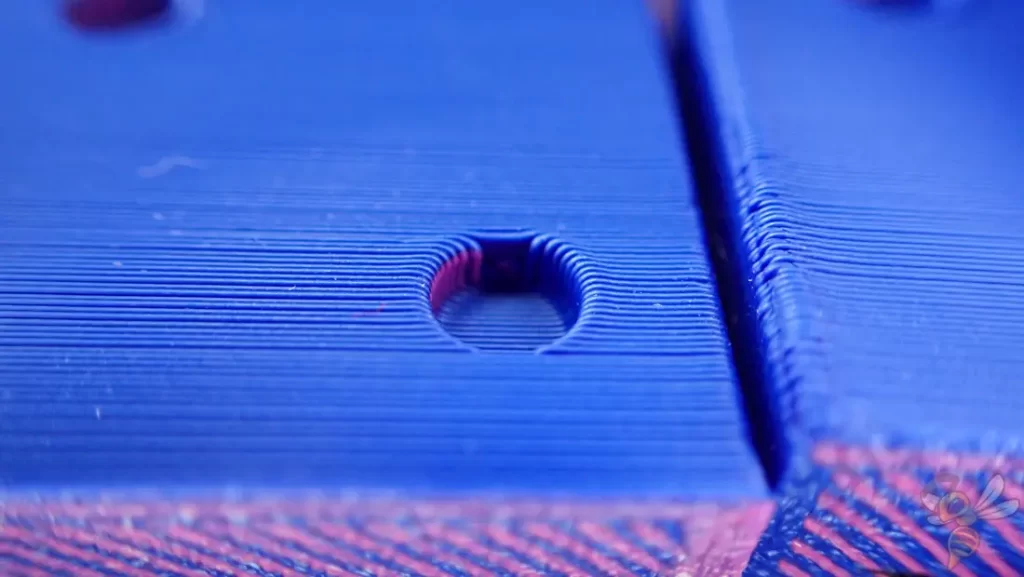
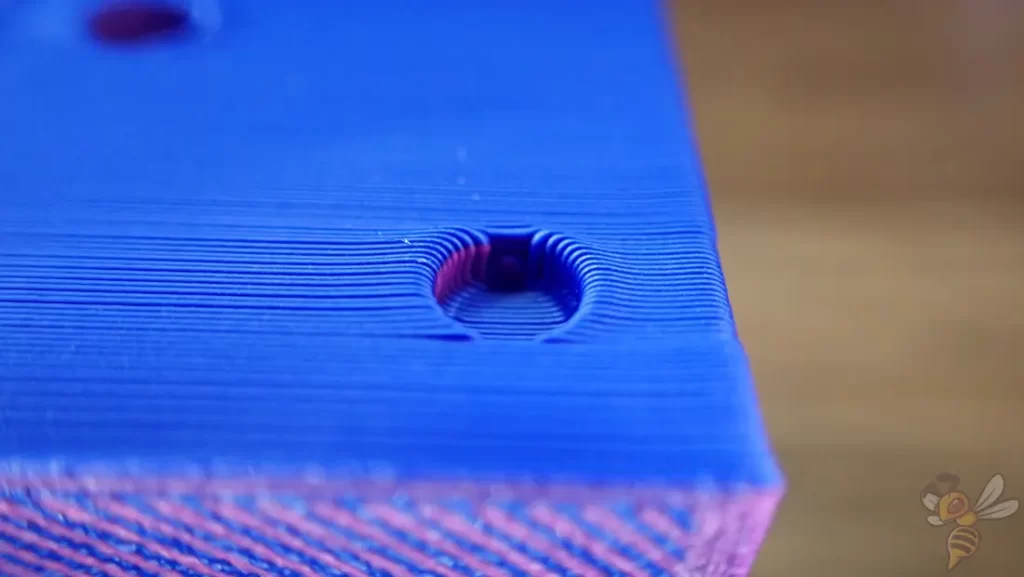
The big disadvantage of these rails, however, is that they have to be clean. If there is too much dust or small filament residue on the rail, it can cause layer shifts.
I had 2 prints affected by this during my test. There is also some grease included to re-grease the rails after cleaning.
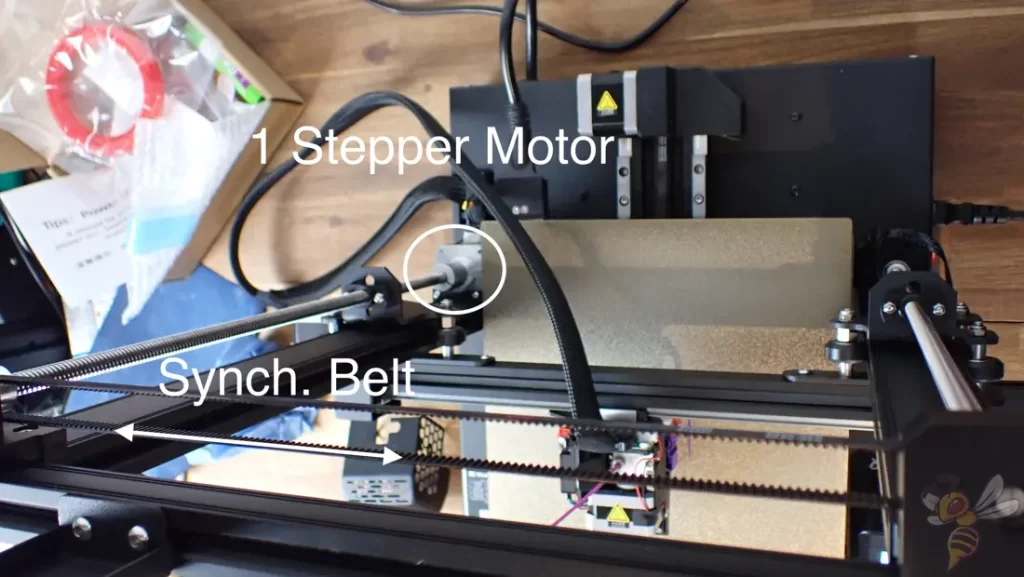
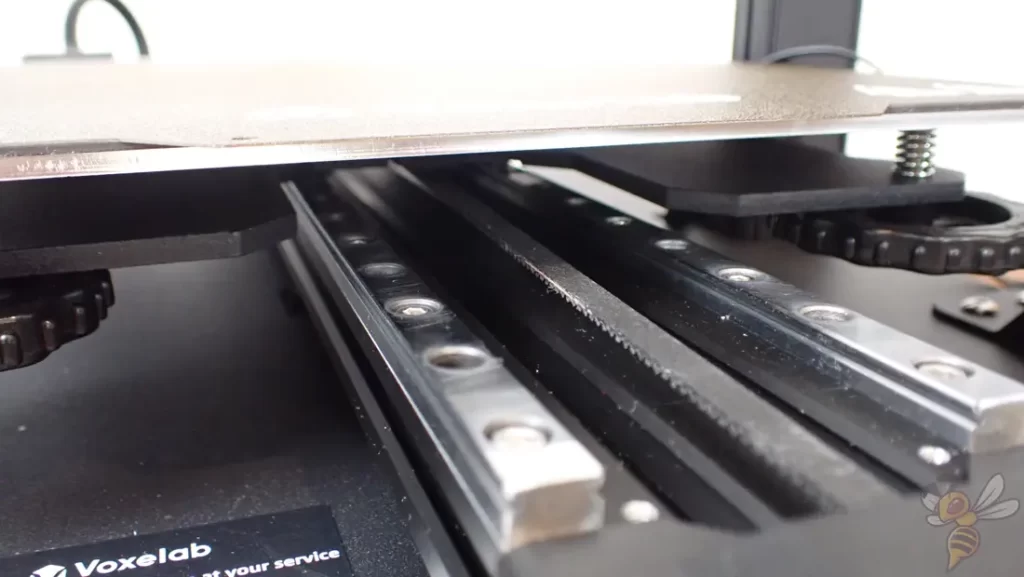
The Aquila D1 has a quasi double z-axis. The two z-axes are connected by a synchronizing toothed belt so that both ends of the x-axis move in the same way. However, there is only one stepper motor. Therefore, it is not a true dual z-axis like other, usually larger, 3D printers. However, this is absolutely sufficient for the Aquila D1’s printing volume.
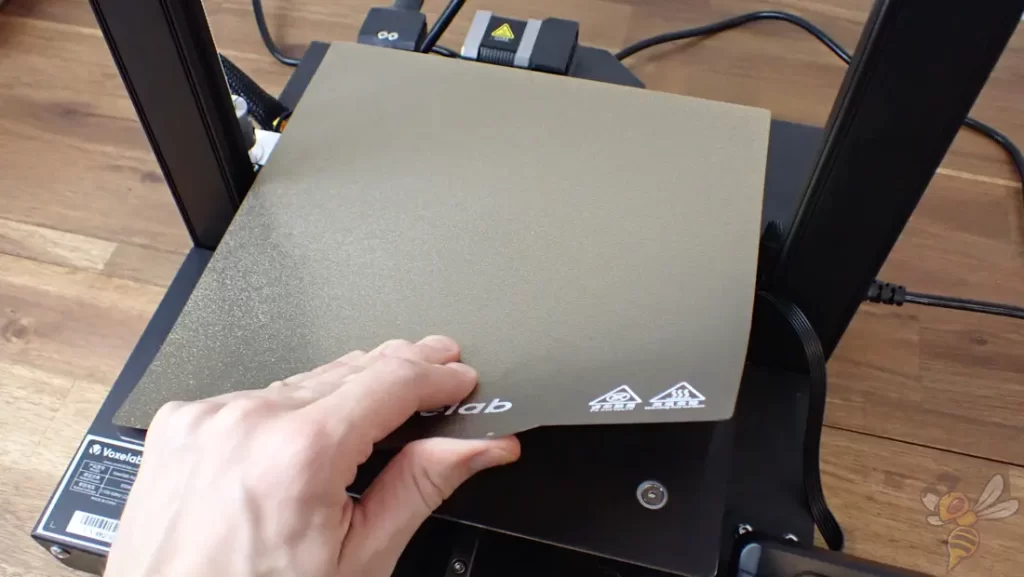
One of the features that makes operation much easier is the PEI-coated print bed made of flexible and magnetic spring steel. Adhesion on this print bed is perfect for most filaments. Once printing is complete and the print bed has cooled, you can remove it from the print plate and flex it. The print object will then release all by itself. You no longer need a spatula to release your objects from the print bed!
Another advantage of the print bed is the very robust cable protection. High currents are required to heat the print bed. Therefore, it makes sense to avoid cable breaks as much as possible.
Without such protection, the cables would eventually break at this point due to the frequent movements of the print bed, become exposed and pose a hazard.
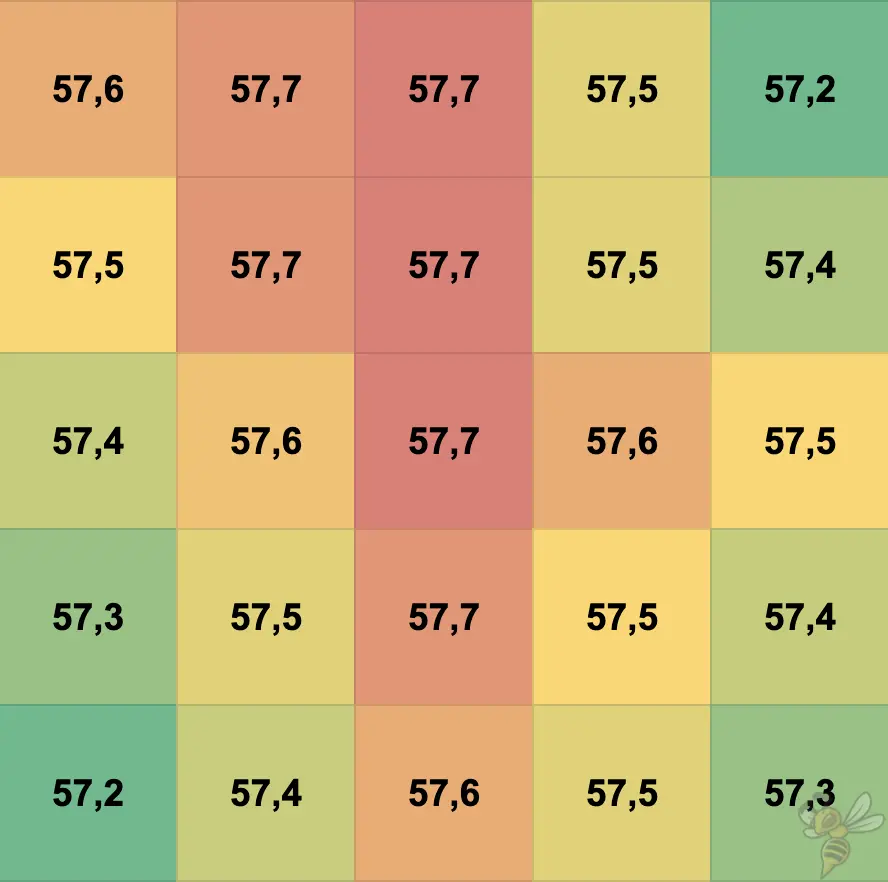
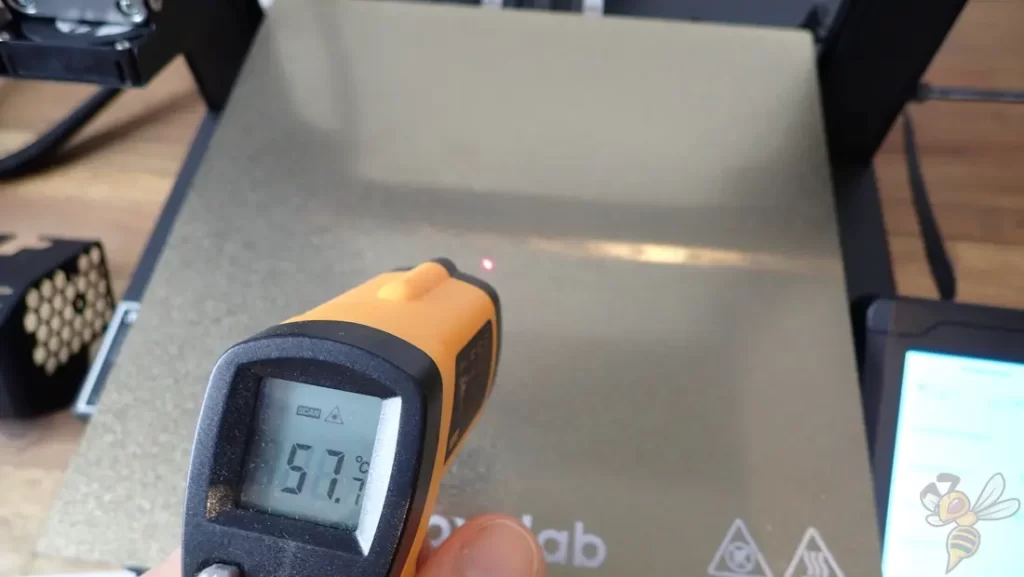
The homogeneity of the temperature distribution on the print bed is excellent. The deviation between the highest and lowest values is just half a degree.
On the other hand, the absolute temperature is more than two degrees away from the nominal value. This is not a problem with most filaments, especially because the print bed adhesion is so good on the PEI-coated print bed. Otherwise, you can just raise the temperature a few degrees.
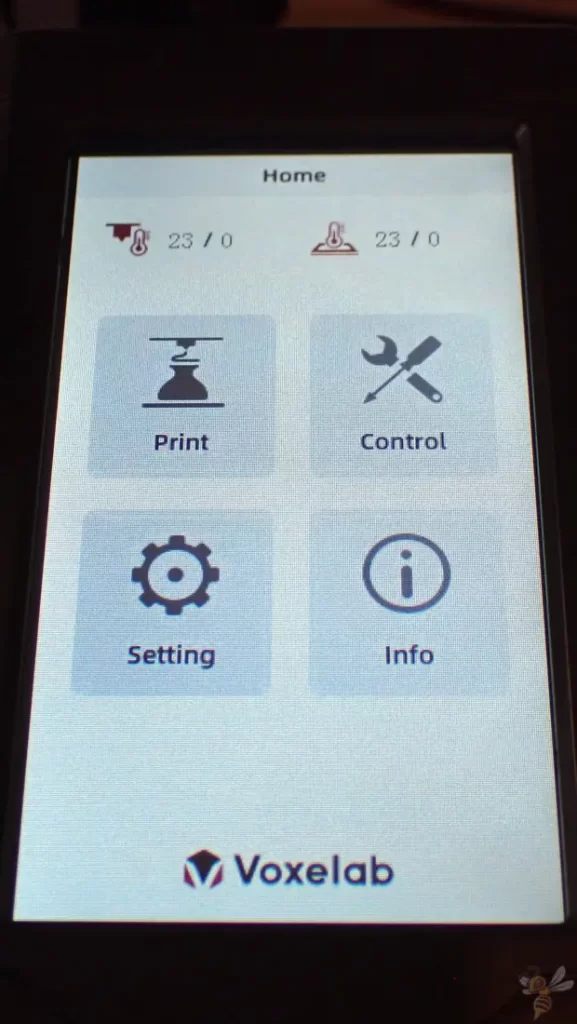
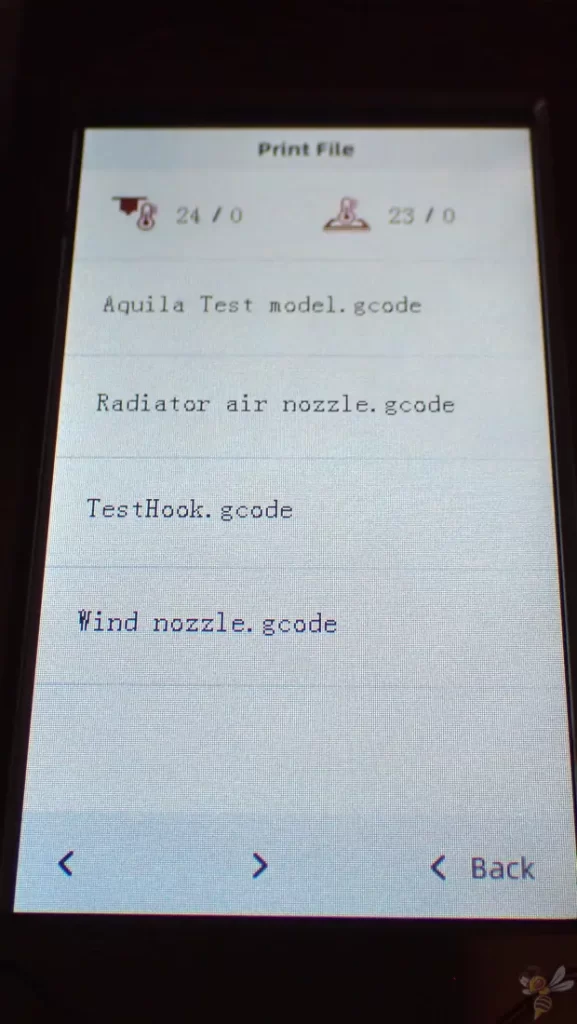
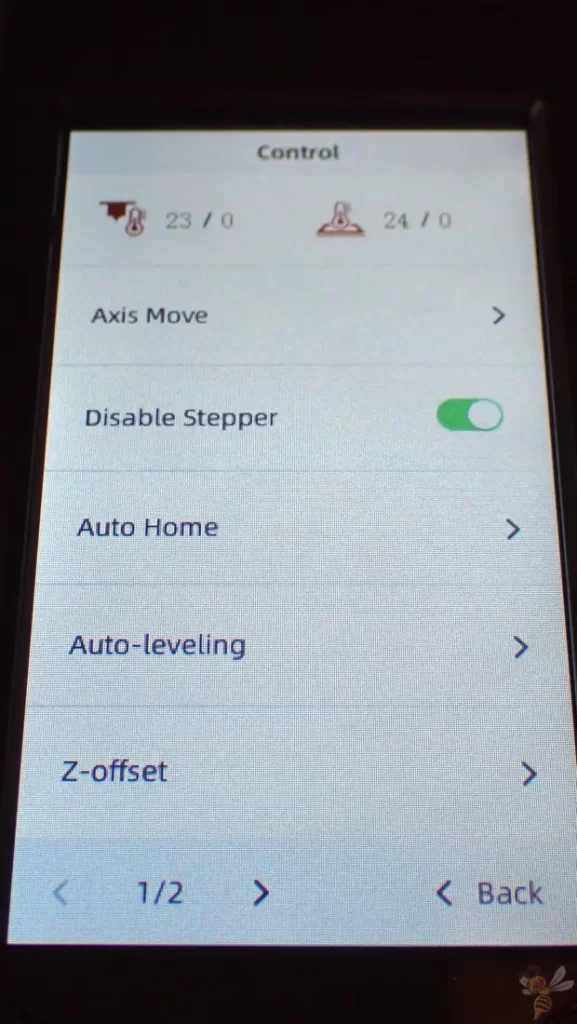
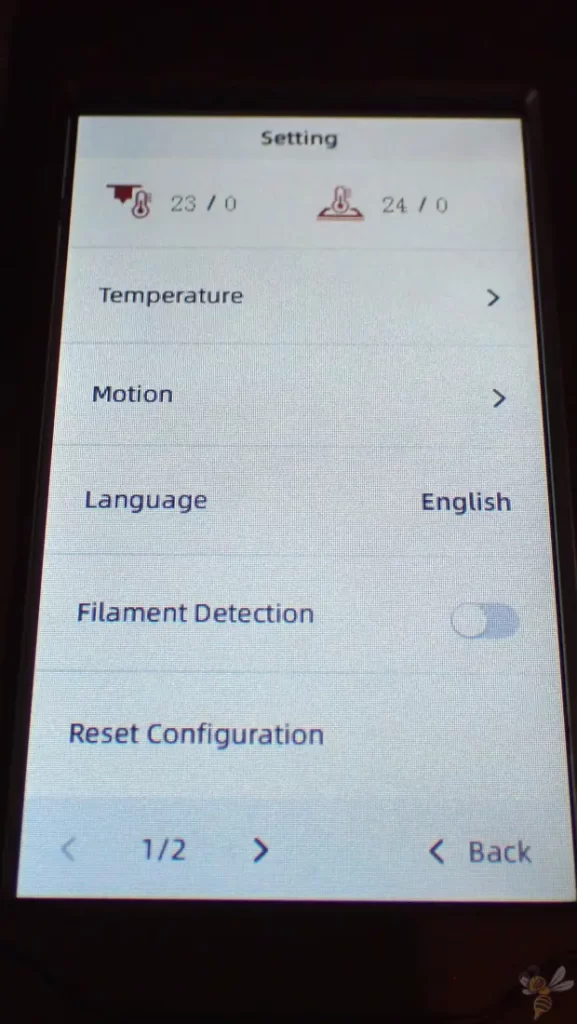
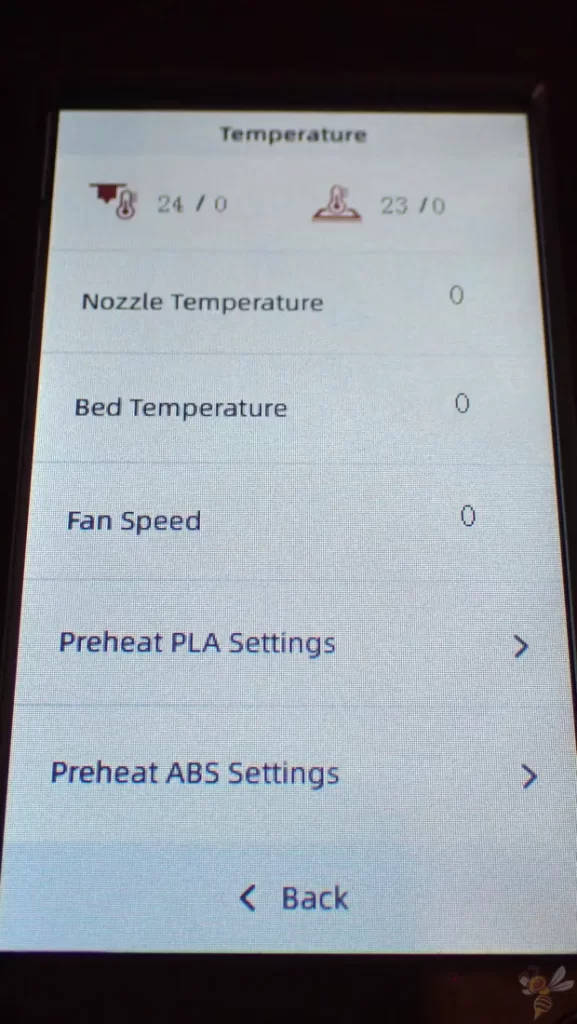
Also standard now is the 4.3″ color touchscreen with a simple menu. Located at the front right of the 3D printer’s base, it responds quickly and reliably to the touches of your fingers, and the menu quickly guides you to the most important settings.
There are also preset default temperatures for filaments, which heat up the nozzle and print bed to the right temperatures at the same time.
Unlike its predecessor, it has a larger print volume of 235 × 235 × 250 mm. This print volume is rather small to medium compared to other 3D printers in its price range. In return, it is packed with the above-mentioned features that most devices in its class do not have.
Of course, what a modern 3D printer should not be without is the filament sensor and the resume print function.
The sensor pauses printing as soon as the filament is empty. This means that you can reload new filament at any time and do not have to estimate before printing whether the remaining filament on the spool is sufficient for the print.
If there is an unforeseen power outage during printing, as soon as the printer has power again, it will resume printing at the exact point where it was interrupted.
Check Price at:
Print Bed Leveling
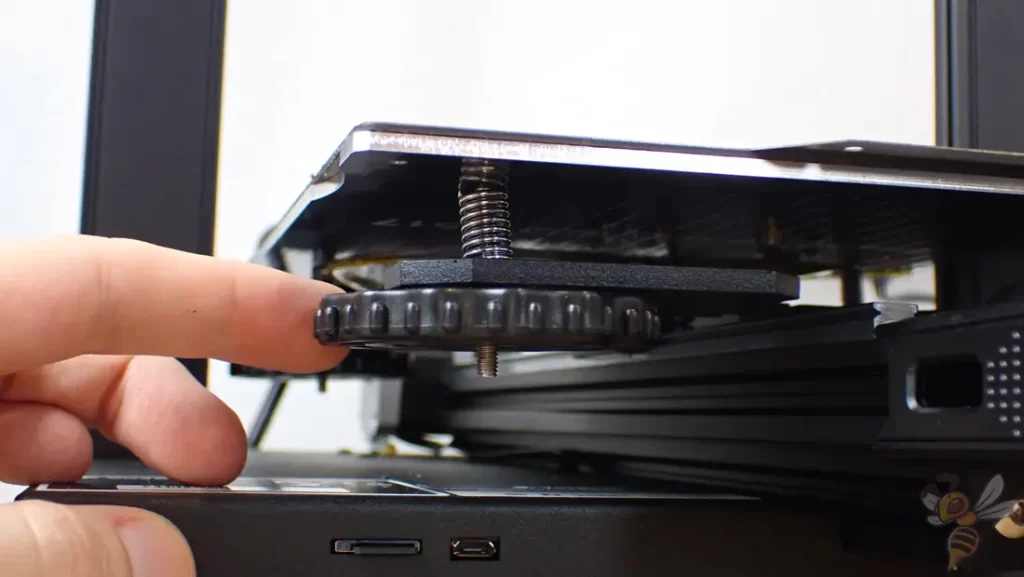
After setup, the print bed of the Aquila D1 has to be leveled manually. After that, automatic print bed leveling can be performed, which should be done regularly.
Manual leveling only needs to be performed if there is a collision or if the printer is misaligned.
Manual leveling is done as usual using the paper method. You adjust the distance between the nozzle and the print bed at the four corners so that a piece of paper can still be moved between the nozzle and the print bed with a little friction.
You start the automatic leveling via the menu by pressing a button. Everything else after that is completely automatic and you don’t have to do anything else.
The only thing you have to do manually is to adjust the z-offset. Again, you use a piece of paper and set the distance between the nozzle and the print bed in the middle of the print bed.
Slicer
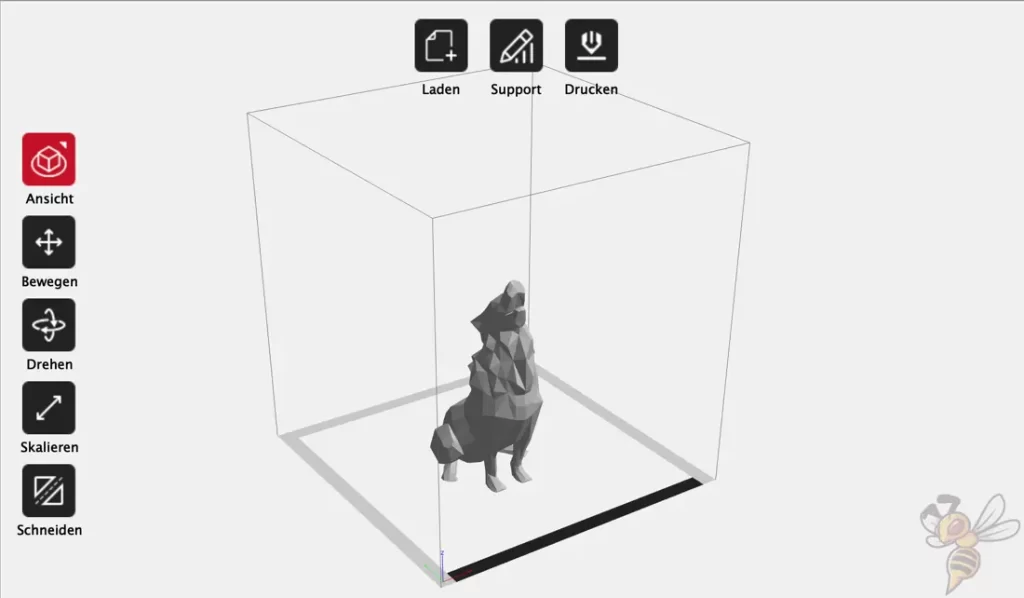
The Aquila D1 can be operated via Cura, Simplify3D, with the in-house VoxelMaker slicer and many other slicers.
I have used it with both Cura and VoxelMaker. The advantage of the in-house slicer is that it comes with predefined settings for the Aquila D1.
In Cura you have to create your own profile. In this article, I’ll show you how to do that and also share my calibrated settings: Voxelab Aquila D1 – List of Cura Settings for Perfect Prints
Loading Filament
As mentioned above, it is not really possible to load the filament manually. With other 3D printers, I prefer to push the filament up to the nozzle myself. With the Aquila D1, this is difficult and therefore really only possible via the menu. But it works very well.
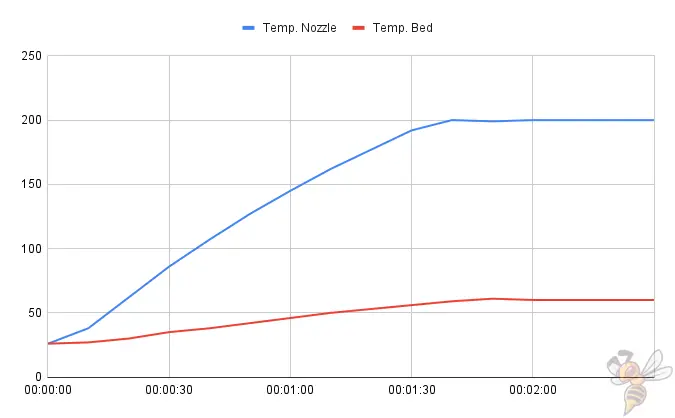
Due to the small print bed and the effective hotend, the heat-up times of about 2 minutes to PLA temperatures are relatively fast.
Printing

After the basic calibration, what interested me most was how the Aquila D1 behaved at high speeds. The higher the printing speed, the stronger the vibrations in the print head due to the fast changes in the direction of movement. The lateral accelerations cause corners of the object to be over-emphasized and create echoes on the surface (ringing/ghosting).
I was very surprised that the print quality is still almost optimal even at 100 mm/s and practically no ringing appears. Only the acceleration values in the slicer would have to be adjusted somewhat so that the corners are also printed cleanly.
So, the linear rails really help to ensure high print quality even at high print speeds!
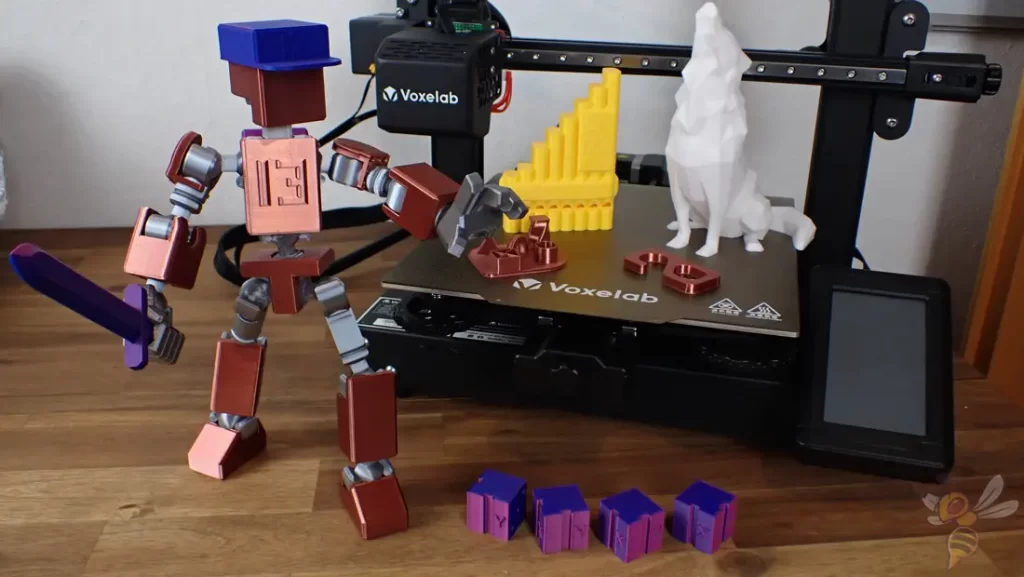
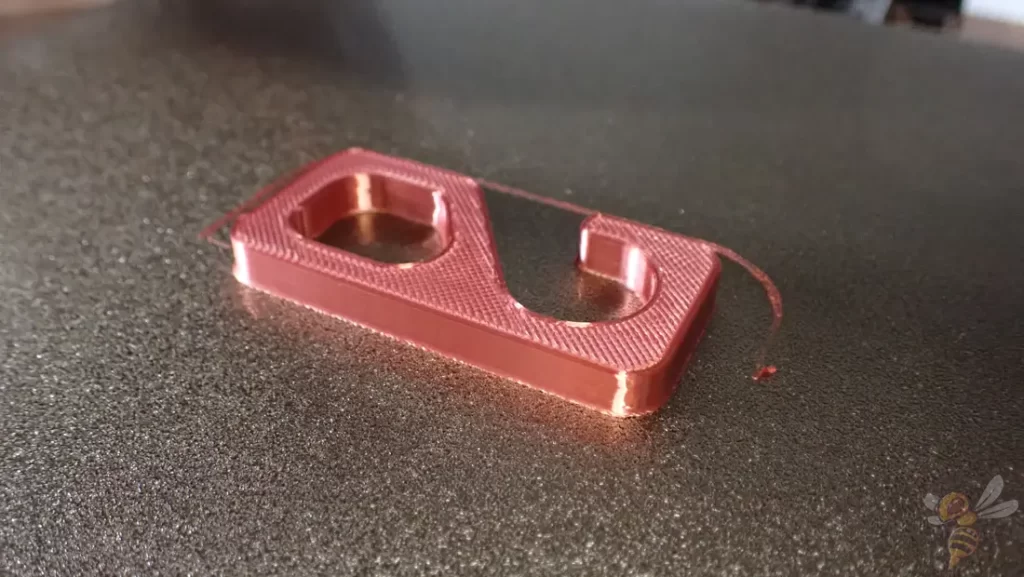
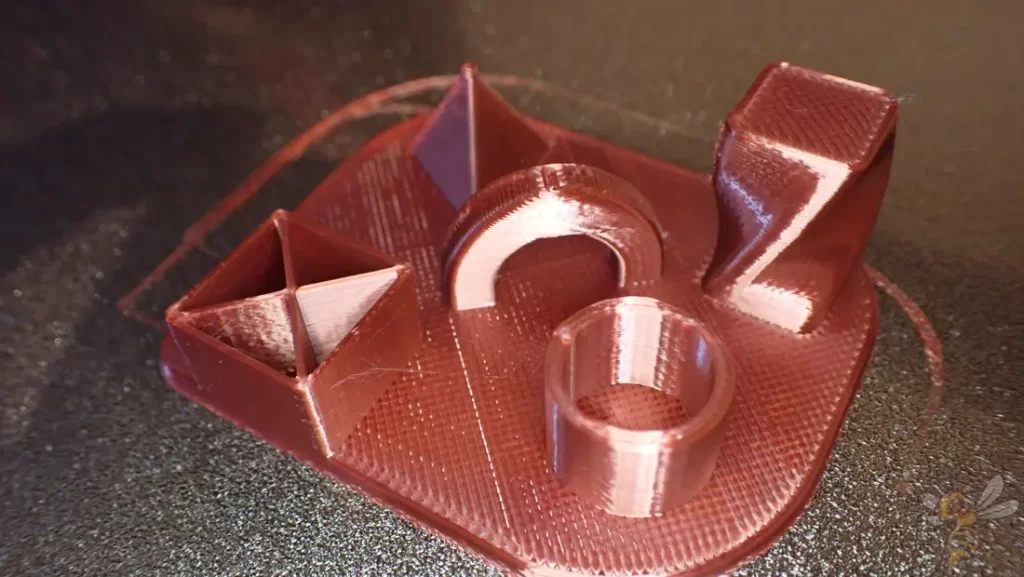

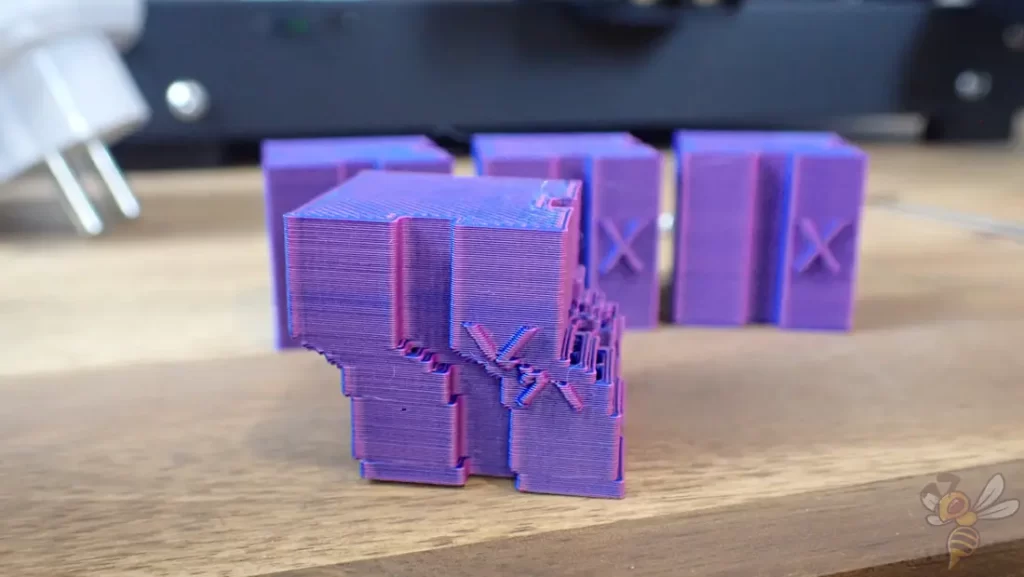
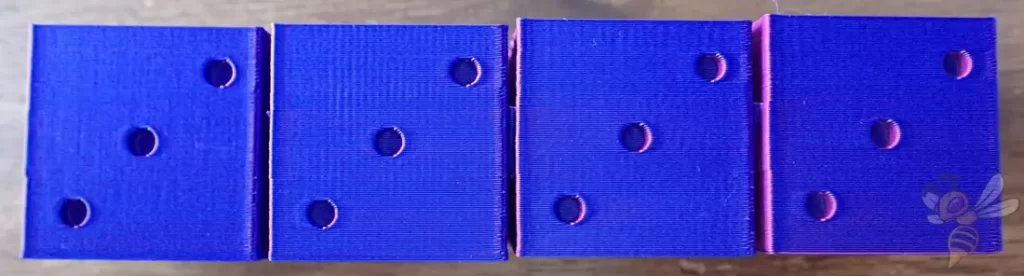
The Aquila D1 delivers high print quality without having to do much tweaking of the settings. I printed all the models shown above with a layer height of 0.2 mm.
Of course, the most fun was the “MINI 13” action figure (link to file). I scaled it to 300% because why not?
Except for the two misprints where there were layer shifts, all prints went flawlessly. I was particularly pleased with the speed of all the prints. I printed all parts at 80 mm/s. The print bed adhesion was also ideal.
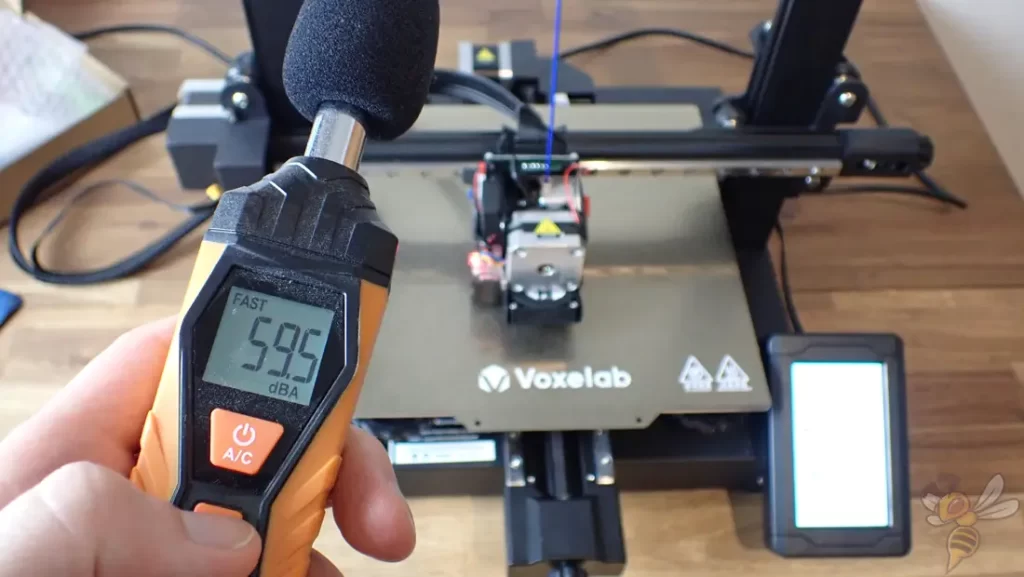
With a noise level of about 60 dB, the Aquila D1 is not one of the quietest 3D printers. Unlike, for example, the Neptune 3 series 3D printers (Standard, Pro, Plus, Max), which average around 40 decibels, the Aquila D1 is actually a bit loud.
Although the Aquila D1 has a silent motherboard, the linear rails and especially the fans in the print head are to blame for the high noise level. Quieter fans would definitely be worthwhile as an upgrade here!
Is the Aquila D1 worth it?
The conclusion of my test of the Voxealab Aquila D1* is that while the use of the linear rails require a bit more attention in terms of regular cleaning, they do allow for a very high print speed.
That being said, the other many features of the Aquila D1 are definitely worth the money. You can get started with it right out of the box and print objects with a high-quality finish!
Check Price at:
If you’re interested in the device, I’d love for you to purchase it through my links*. I will then get a small part of the purchase price as commission, without it becoming pricier for you. The device was provided to me, but this did not influence my evaluation in any way.
Disclosure: This website is the property of Martin Lütkemeyer and is operated by Martin Lütkemeyer. Martin Lütkemeyer is a member of the Amazon Services LLC and other Affiliate Programs. These are affiliate advertising programs designed to enable websites to earn advertising revenue through advertising and linking to Amazon.com and others. Links marked with * are affiliate links.
