
- Wet Filament: Prevention, Symptoms & Drying - July 18, 2024
- Sovol SV08 – Best PrusaSlicer Settings & Profile - June 26, 2024
- Sovol SV08 – Best Orca Slicer Settings & Profile - June 26, 2024
Disclosure: Links marked with * are Affiliate Links. I earn from qualifying purchases if you decide to make a purchase through these links – at no additional cost for you!
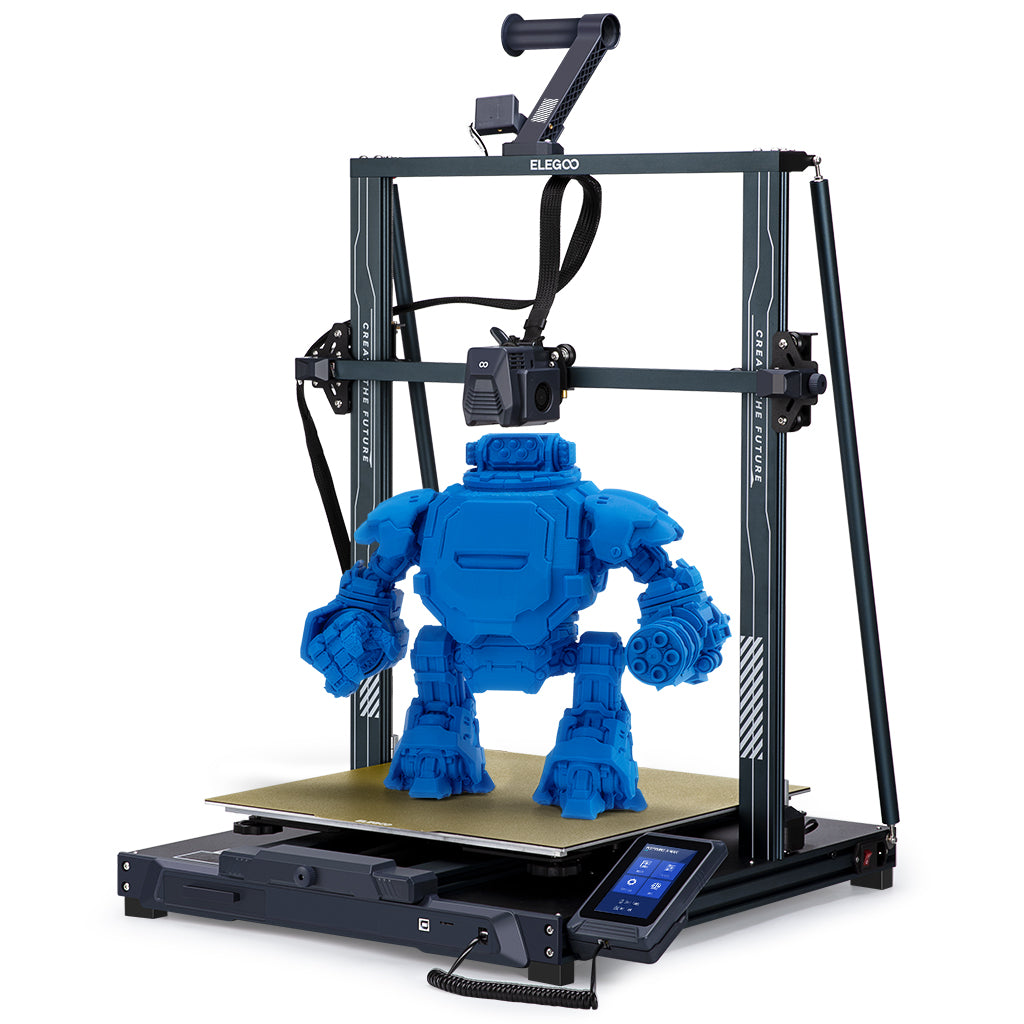
The Neptune 3 Max* is a huge 3D printer from Elegoo that allows you to print large objects in one piece or many small parts at once. Especially for cosplay or in a professional context, large projects can be realized quickly and easily.
With the Neptune 3 Max, I have now tested every 3D printer in the Neptune 3 range (Original, Pro, Plus). It was therefore clear to me beforehand that this will be a remarkable device. In this hands-on review, you’ll find out if this 3D printer is worth it for you and why I’m so excited about it.
By now, there is already a successor. Here is the review for it: Elegoo Neptune 4 Max Review: It’s Huge and Fast!
Check Price at:
PRO:
- Huge print volume
- Can also process flexible filaments (Direct Drive Extruder)
- Excellent print bed adhesion
- High accuracy
- Simple operation
- Very quiet
- LED strip
- Removable display with intuitive operation
CON:
- Hardly any upgrades available (because it is already almost perfect!)
Who should buy the Neptune 3 Max?
The Neptune 3 Max is worthwhile for anyone who wants to print large objects in one piece, with little effort and without printing errors. It provides all the features you could want in an FDM 3D printer for high accuracy and ease of use. The Neptune 3 Max is also an ideal choice for beginners who need a large print volume right away.
Table of Contents:
Technical Specifications
- Technology: FDM
- Operation: 4.3″ touch screen, detachable, magnetic
- Extruder: Direct Drive Extruder
- Print temperature: max. 260 °C
- Print bed temperature: max. 100 °C
- Print volume: 420 × 420 × 500 mm
- Print bed material: PEI coated spring steel, magnetic, flexible
- Print bed leveling: Automatic at 63 points
- Print speed: Maximum 180 mm/s, standard 60 mm/s
- Nozzle: 1 × 0.4 mm
- Print accuracy: ± 0.1 mm
- Layer height: 0.05 to 0.35 mm
- Filaments: 1.75 mm PLA, ABS, PETG, TPU, PC, ASA, HIPS, etc.
- Filament Sensor: Yes
- Resume Print: Yes
- LED lighting: Yes
- File transfer: MicroSD card, LAN
- Slicer: Cura
Scope of Delivery & Unboxing
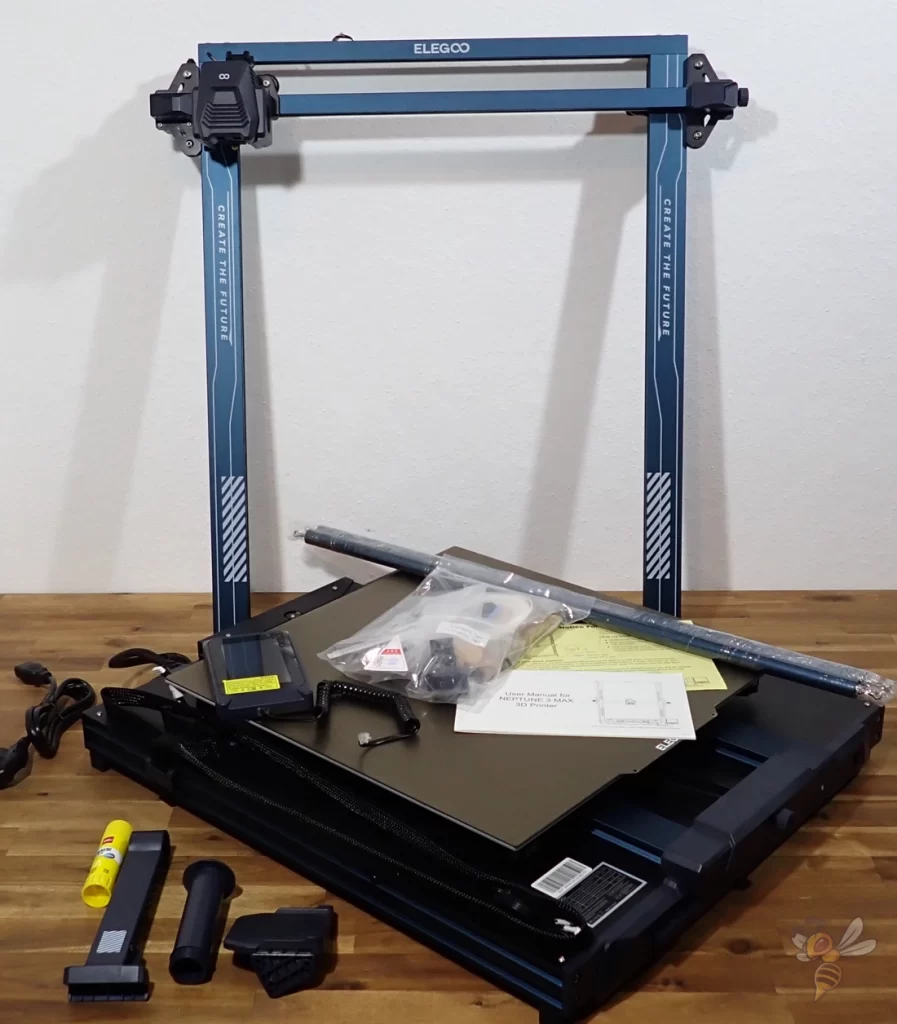
As usual from Elegoo, everything is included in the scope of delivery of the Neptune 3 Max to start directly with the first prints. The necessary tools are also available for assembly.
Of course, the package it comes in is also a bit larger than what you’re used to with other 3D printers. Still, it’s not so big or heavy that you need two people to lift it. The individual parts and pre-assembled components of the Neptune 3 Max are very cleverly packed inside with foam to save space.
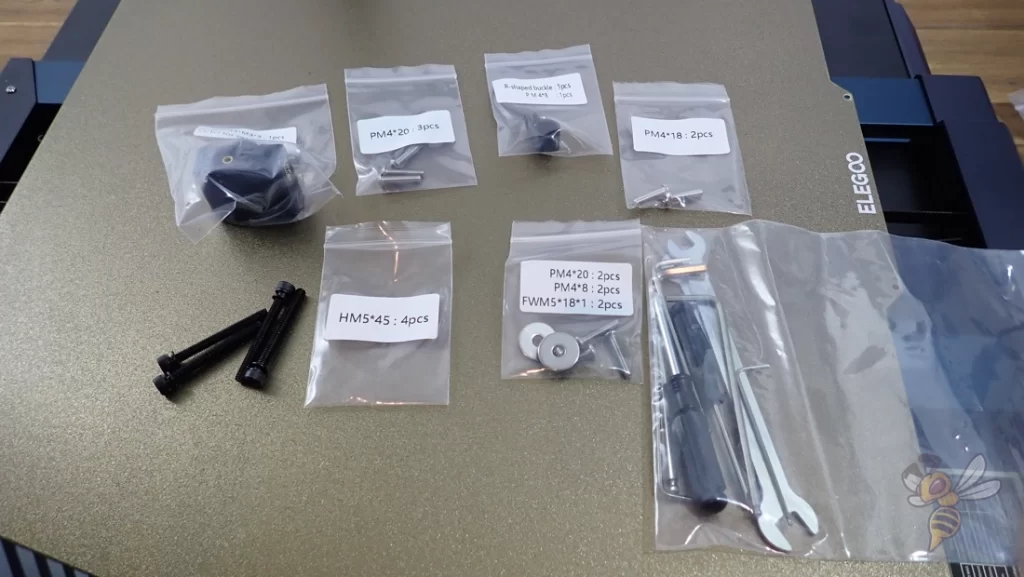
The scope of delivery includes the following things:
- Instruction manual and a cheat sheet for print bed leveling.
- The individual components of the 3D printer (base with print bed, frame with print head, touch screen, filament holder, filament sensor, diagonal struts of the frame, power cable).
- The tools needed for assembly, including screws
- Side cutter for filament
- Plastic spatula to detach objects from the print bed (which is actually not necessary, because the print bed is bendable)
- USB cable
- Cable tie
- Needle for nozzle cleaning
- Adhesive for the print bed (also not necessary, since the print bed provides good adhesion for most filaments)
- One sample PLA filament
- Spare parts (2 nozzles and one PTFE tube)
- USB to MicroSD adapter
- MicroSD card with digital instructions, assembly video, software and ready models for printing
I would definitely recommend you to buy more filament with the Neptune 3 Max. If you are new to 3D printing or just want to print decorative objects, I would definitely recommend PLA filament (this is the one I have had good experience with the Neptune 3 Max). PLA is the easiest filament to print.
Assembly
Despite its size, the assembly of the Neptune 3 Max is done within 15 to 20 minutes. The individual modules are pre-assembled just like the other 3D printers in the Neptune 3 series and only need to be connected to each other. The only thing that is added to the Neptune 3 Max are the diagonal struts, which add even more stability to the huge print volume.
The assembly is done within a few steps thanks to the pre-assembled modules. You do not need extensive technical understanding or special tools.
Here are the steps of assembly:

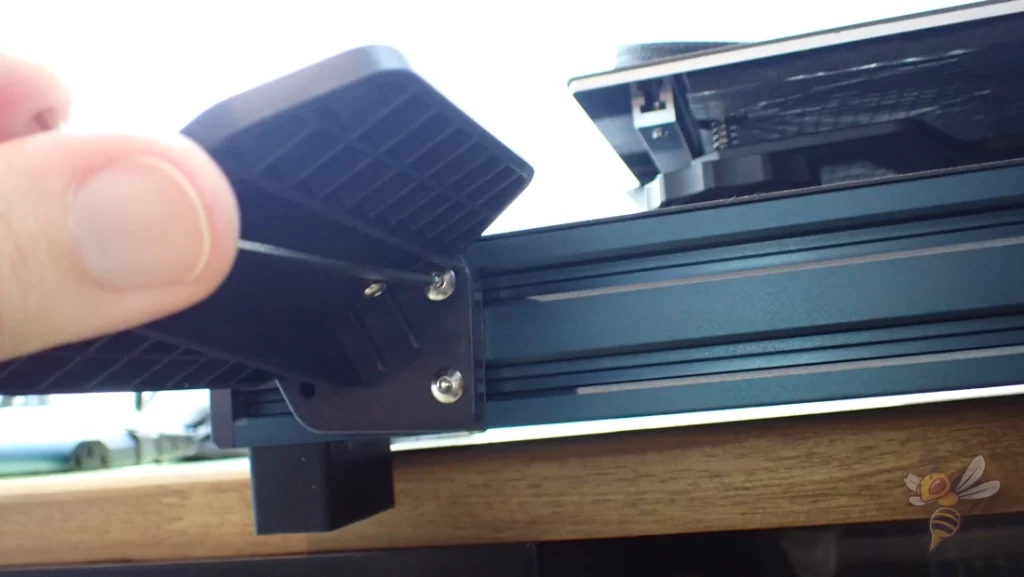
Connect the frame to the base: The first step is to mount the pre-assembled frame with the x-axis and the print head onto the 3D printer base. To do this, simply screw four screws from below through the base and into the frame. The easiest way to do this is to place the 3D printer on the edge of a table.
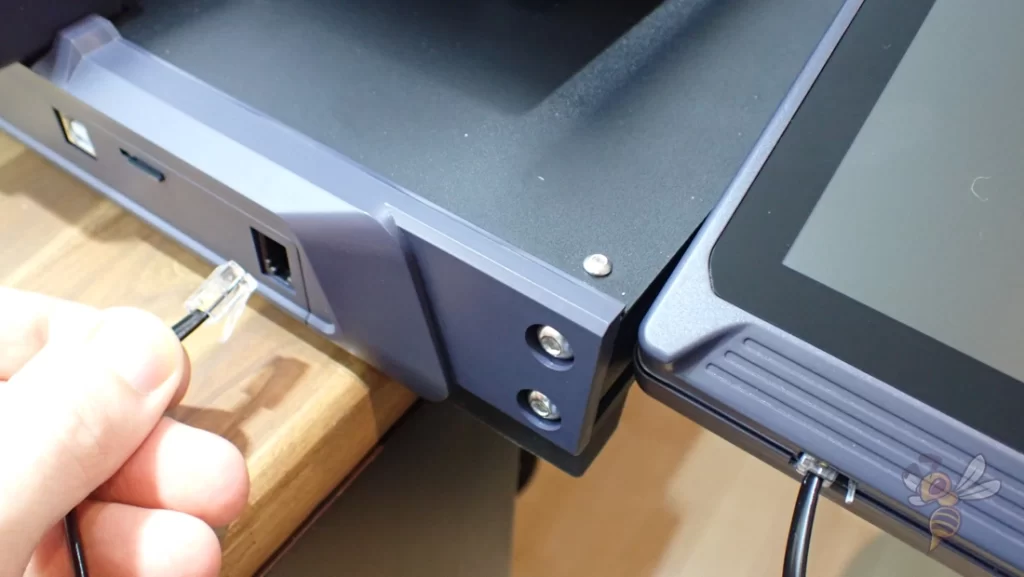
Mounting the touchscreen: The display consists of the touchscreen itself, a connection cable to the 3D printer base and the screen mount, which is screwed to the 3D printer base.


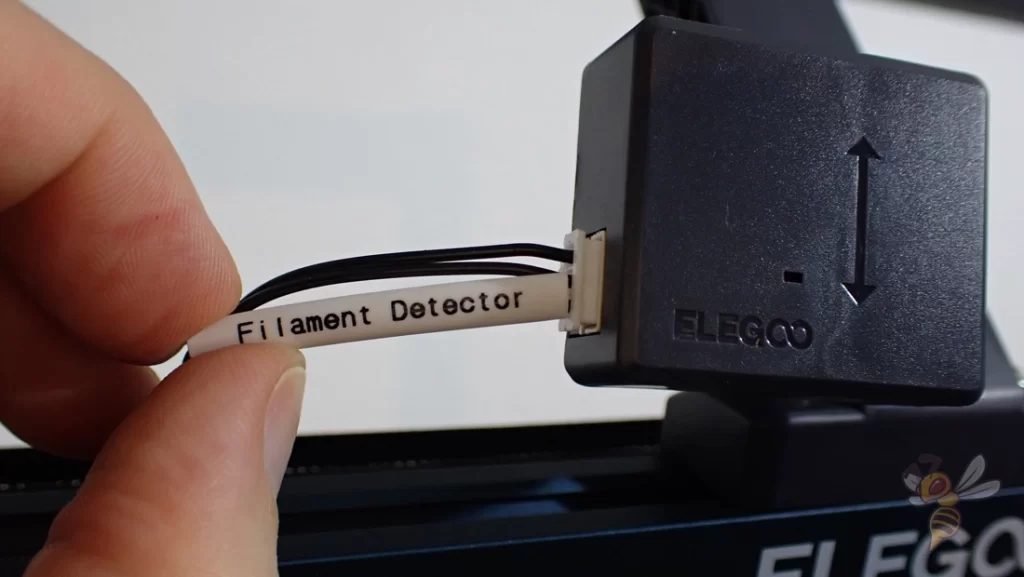
Mount the filament holder: The filament holder is mounted on top of the frame. The filament sensor is attached to the filament holder in a free-swinging manner to save weight in the print head.
Connect cables: Finally, all cables must be connected to each other with the individual components. There can be no mistakes here, as they have been laid in such a way that they can only fit into the corresponding slots. In addition, all cables are labeled.
Tighten the print head and print bed (optional): Sometimes the print head or print bed may have loosened due to transportation. Although the large print bed is secured by 3D-printed transport locks, the many vibrations can loosen the wheels. However, tightening them is quickly done, and the tool you need for that is also included.
And then the setup of the Neptune 3 Max is already done. Now all that’s missing is the print bed leveling to start printing. But before that, let’s take a look at its design in detail because it offers many ingenious features!
Design

The first thing you notice about the Neptune 3 Max is the huge print volume. It’s incredible how big it is compared to standard 3D printers. Its print volume of 420 × 420 × 500 mm is an impressive 650% larger compared to standard entry-level 3D printers like the original Neptune 3 at 220 × 220 × 280 mm!
This print volume allows you to print giant objects in one piece. For example, you can print a complete breastplate for a cosplay armor or a helmet in one piece. But this huge print volume could also be worthwhile in the professional sector to print large components in one piece or many small parts at once.
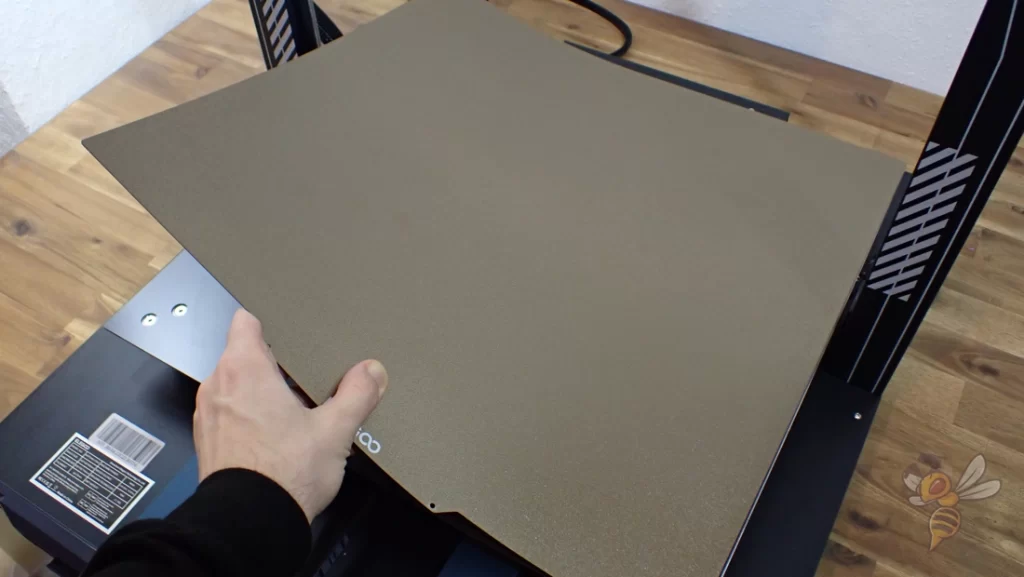
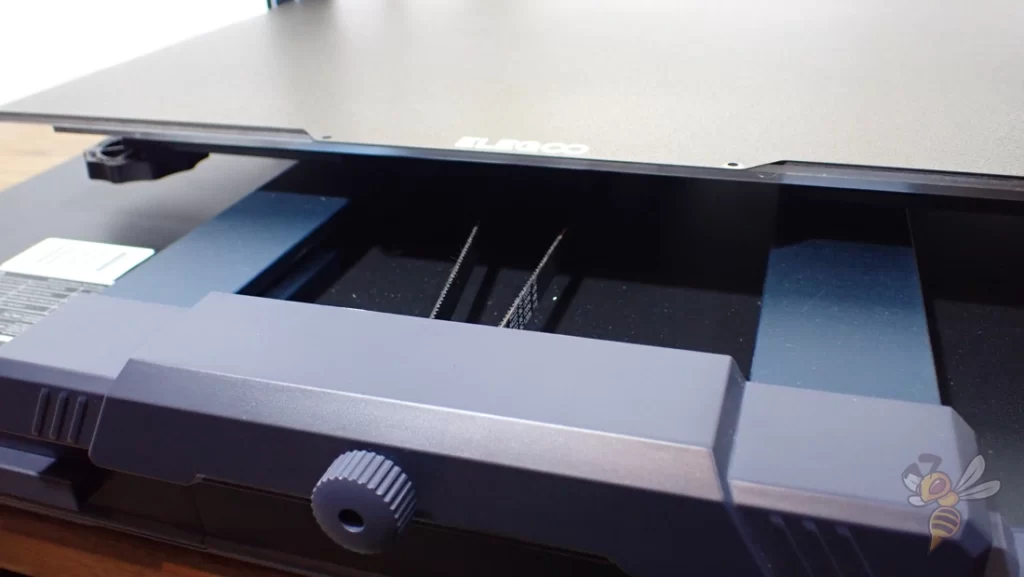
To realize the gigantic print volume, the Neptune 3 Max also has a gigantic print bed. It consists of a flexible and magnetic spring steel that is mounted on a magnetic plate. This allows you to remove it after printing, bend it and thus release the finished object effortlessly.
It also has a PEI coating that provides excellent adhesion for most filaments. As long as you follow the necessary steps for good print bed adhesion, you won’t need to use tools like rafts or adhesives here.

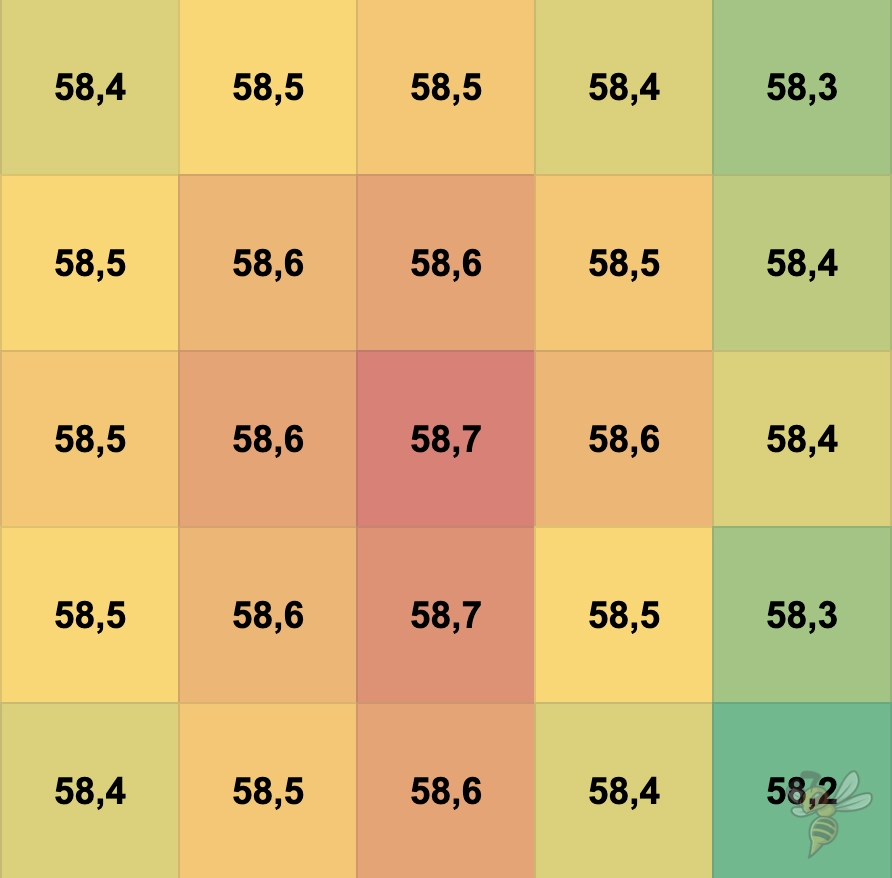
What surprised me about the large print bed was its homogeneous print bed temperature. I measured the temperature at a total of 25 points with a non-contact thermometer. Although the average temperature was about 1.5 °C below the set value, the difference between the highest and lowest temperature was only 0.5 °C. For such a large print bed, this is an excellent value!
Especially for objects with a large footprint, it is important that the print bed temperature is as homogeneous as possible. If it is several degrees less in one place than another, the object could peel and lead to failure. Especially with large objects, the costs of material consumption and printing time would be particularly high.
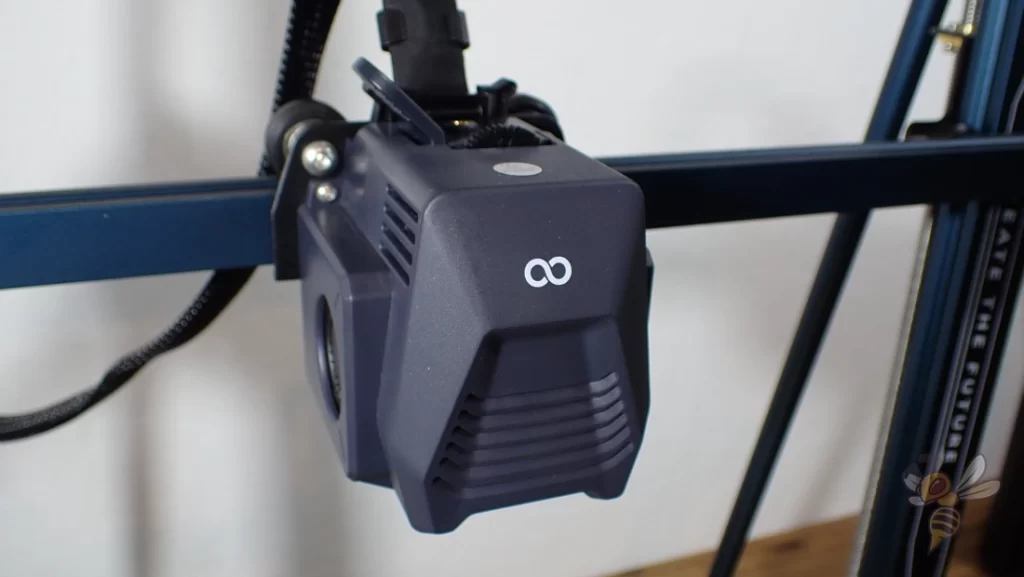
In contrast to the huge print volume and large print bed, the print head with direct drive extruder looks tiny. The small print head with the lightweight direct drive extruder has a low weight, which enables it to achieve high printing speeds. Disturbing vibrations that can cause print errors such as ghosting or ringing therefore only occur at higher print speeds.
Another big advantage of the direct drive extruder is the possibility to process flexible filaments as well. Since the distance between the extruder and the nozzle is minimal, the extrusion accuracy is much higher than with a Bowden extruder. The flexible filament has hardly any possibility to get tangled on the short path or to compensate the movements of the extruder by its flexibility.

A very lightweight sensor for automatic print bed leveling is also installed in the print head. The menu allows you to start leveling at 63 points on the print bed at the touch of a button. Although you have to manually level the print bed once after installation to compensate for significant tilts, you will then get along well with the automatic leveling.
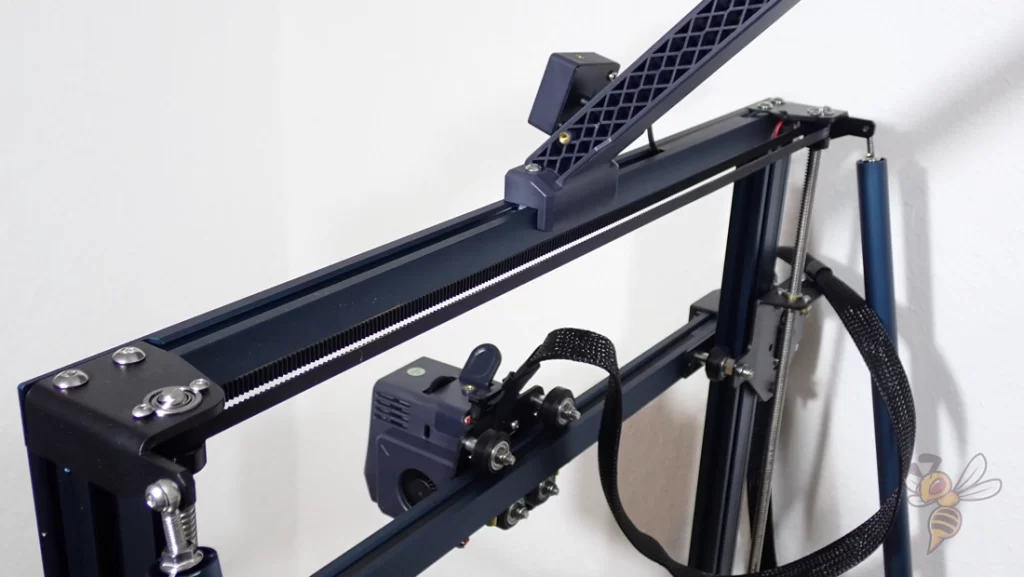

To ensure that the print head can be positioned accurately over the entire print volume, even at a high print speed, the design must be as stable as possible. To achieve this, the Neptune 3 Max has a double z-axis synchronized with a toothed belt and diagonal struts. These struts stabilize the frame and support it at the base.
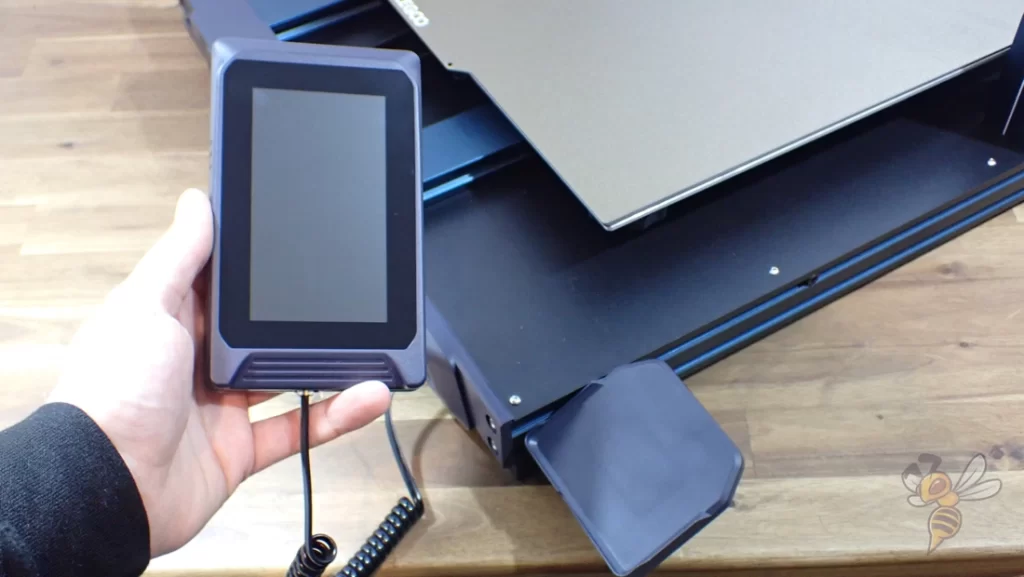
What I really like about the Neptune 3 Max and the rest of this model line is the removable touchscreen. Especially with such a large 3D printer, it is very convenient to be able to hold the menu in your hands. The menu is very intuitive and clearly laid out. You can find every setting with just a few clicks and there are predefined temperature settings for various filaments.

The Neptune 3 Max is so big that it blocks the entire work surface in my case. Therefore, it is even more practical that it has a tool drawer in its base. Here you can store the tools and spare parts and keep the environment of the 3D printer tidy.
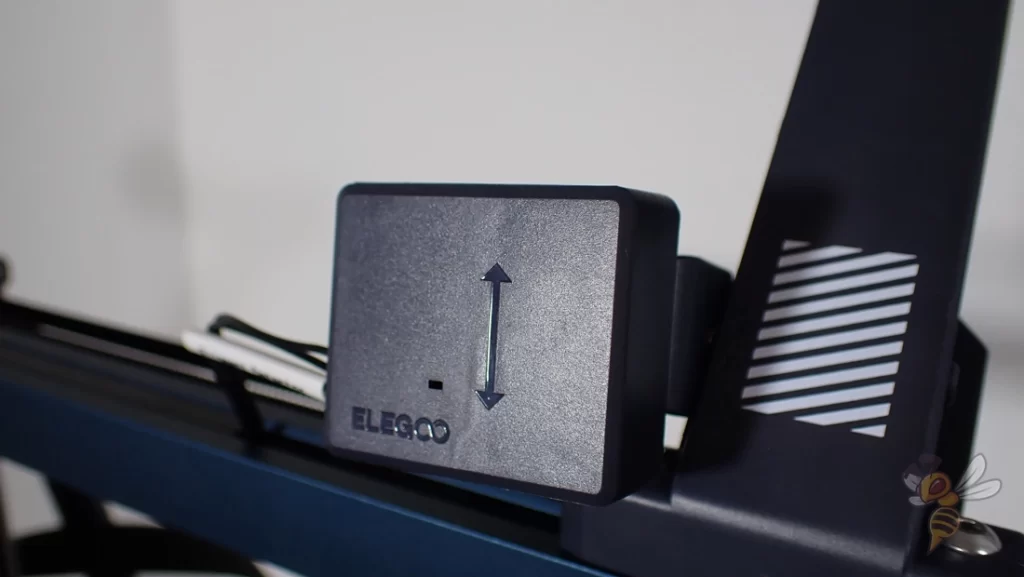
Since the print head of the Neptune 3 Max must be as light as possible, the filament sensor is attached to the filament holder. In a sense, it hangs free-swinging so that it can follow the path of the filament. As soon as it detects no more filament because it is either used up or broken, it pauses the print so that you can add new filament.
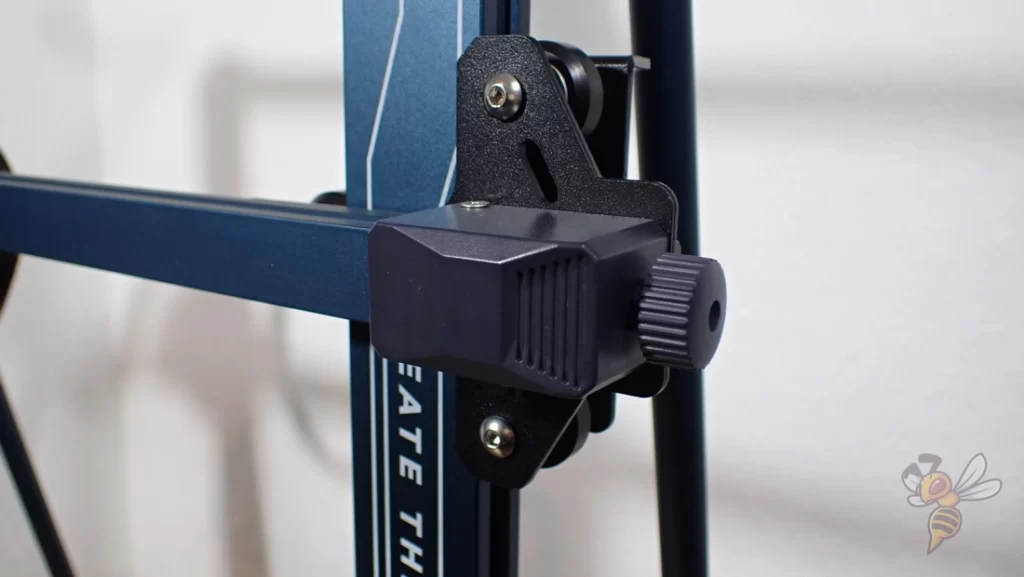
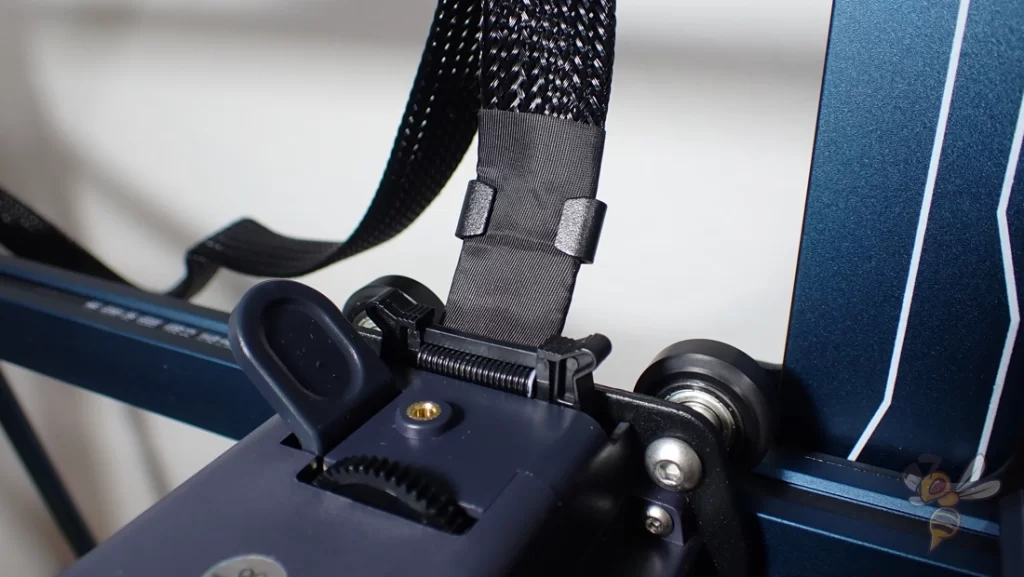
A feature that has become a must-have for new 3D printers is the toothed belt tensioner for the x- and y-axis. This allows you to tension the toothed belts within seconds. Especially after transport and assembly, it is usually necessary to check and adjust the tension.
After assembling and admiring its features, I leveled the print bed.
Check Price at:
Print Bed Leveling

The large print bed of the Neptune 3 Max has six adjustment screws to manually adjust its inclination. After assembly, the print bed leveling consists of coarse manual leveling and fine automatic leveling.
During use after assembly, you only have to manually level the print occasionally bed if you noticed large inclinations. Otherwise, the automatic print bed leveling is sufficient.
Included is a handy cheat sheet that explains the leveling at a glance. Basically, you manually adjust the z-offset (the distance between the nozzle and the print bed) with a piece of paper at 7 points on the print bed. To do this, you use the set screws under the print bed and change its height so that you can move the paper with a little friction between the nozzle and the print bed (here’s a guide on how to do this).
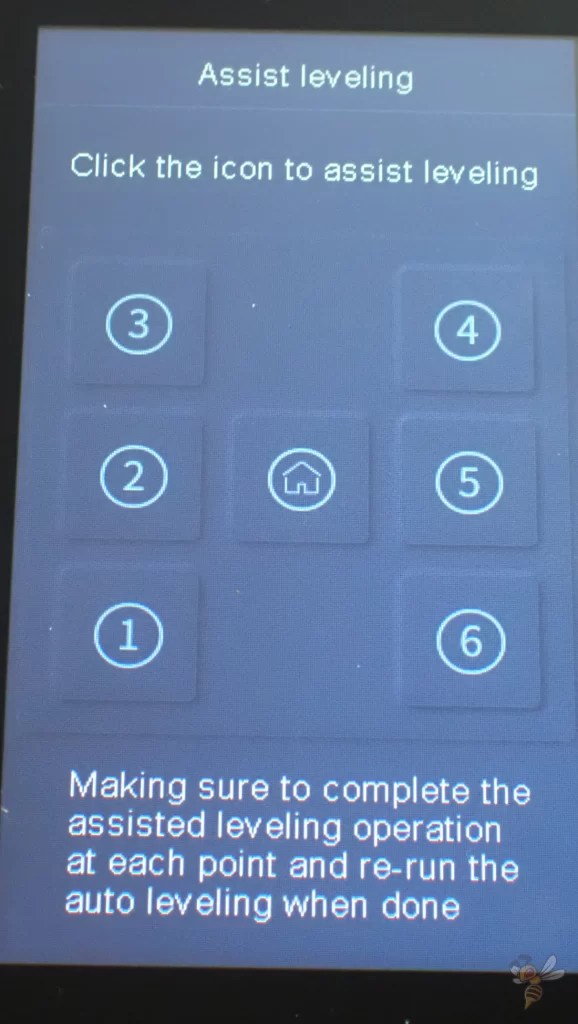
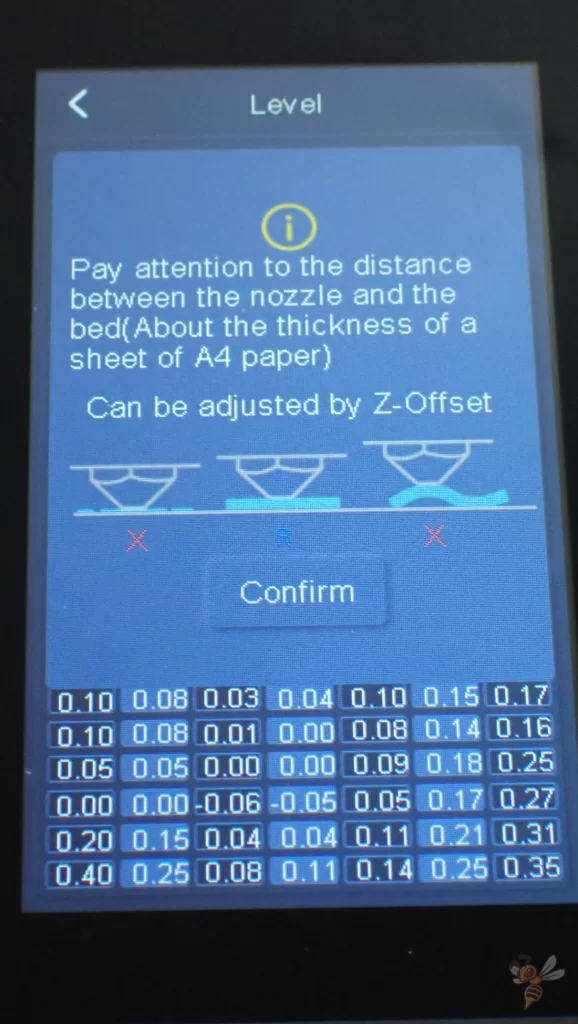
The complete process is supported via the menu. The 3D printer automatically heats the nozzle to 140 °C and the print bed to 60 °C for this process (you can also adjust the values in the menu). In the menu, you can move to the individual points on the print bed by pressing a button, adjust the inclination with the screws and confirm. After manual leveling, automatic leveling starts at 63 points.
I find this type of leveling very convenient because you still have the chance to adjust the tilt manually. Some 3D printers with a small print bed have a completely automatic leveling without adjusting screws. With such a large print bed, this is probably not technically feasible (yet?).
Overall, the print bed leveling process is completed within 10 to 15 minutes after assembly on the Neptune 3 Max.
Slicer
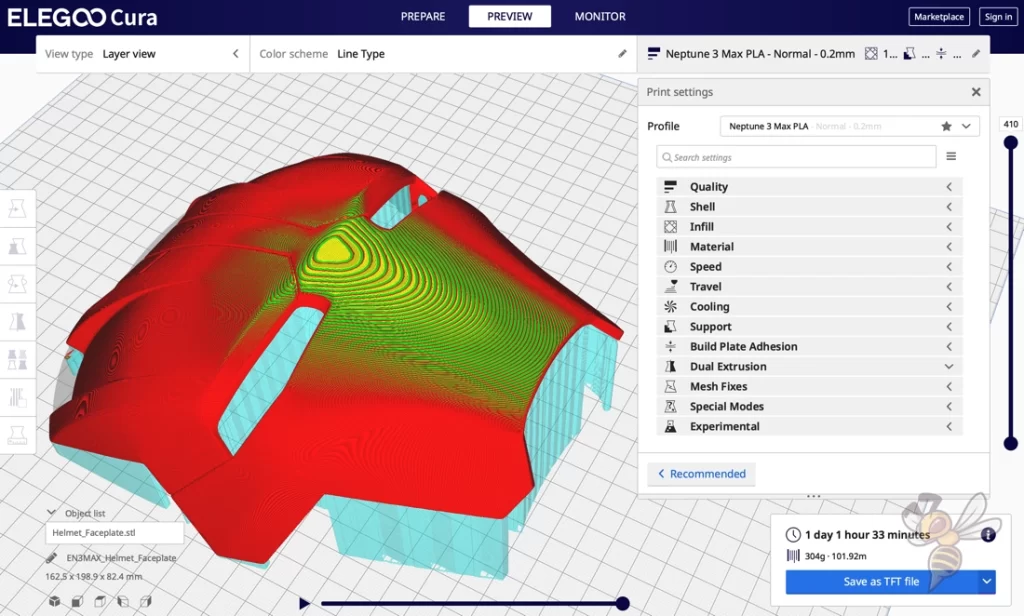
The best slicer for the Neptune 3 Max is Cura or its clones. Elegoo also has its own version of Cura, which is available on the included MicroSD card.
The advantage of the Elegoo slicer is that it has a pre-made profile with relatively good settings for the Neptune 3 Max. Cura only has a suitable profile several weeks or even months after the release of a 3D printer. Often, however, this profile is then also not as well-matched to the respective product as in the manufacturer’s slicer.
It is therefore useful to transfer the settings from Elegoo slicer to Cura when using the Neptune 3 Max. Cura has new features earlier than its clones and is one of the most popular slicers for FDM 3D printers. I have also used the Neptune 3 Max with Cura.
The Neptune 3 Max supports the display of thumbnails (small preview images) of the 3D object. To generate these thumbnails, the Elegoo slicer creates a TFT file. In Cura, this is only possible with a corresponding plugin.
Filament Loading

After you have prepared the 3D object in the slicer, you can load the filament. To do this, you must at least heat the nozzle to the respective temperature of the filament. In the menu of the Neptune 3 Max, there are predefined temperatures for different filaments.

The heat-up times are relatively slow on the Neptune 3 Max due to the large print bed. Although the nozzle only needs about 2 minutes to reach the necessary temperature, the print bed needs 5 minutes and more. However, this is absolutely justified for the large area that the 3D printer has to heat.
Once the temperature is reached, you can feed the filament through the filament sensor to the extruder at the top of the print head. Loading filament is easy on the Neptune 3 Max because you can uncouple the extruder with one hand and push the filament through to the hot nozzle with the other.
Unlike many other extruders and print heads, there are no annoying edges inside here for the filament to bump into and get stuck.
There is also a function in the menu that allows you to load and unload the filament at the touch of a button. In principle, you can set the speed and the length with which the extruder should advance or retract the filament. However, I always load the filament manually and push the filament in until it comes out again at the nozzle.
Check Price at:
Printing

The accuracy of the Neptune 3 Max is 0.1 mm. The quality is excellent and comparable to other modern FDM 3D printers.
I’ve been printing parts after a few objects to calibrate, both pushing its print volume a bit and testing its print quality.
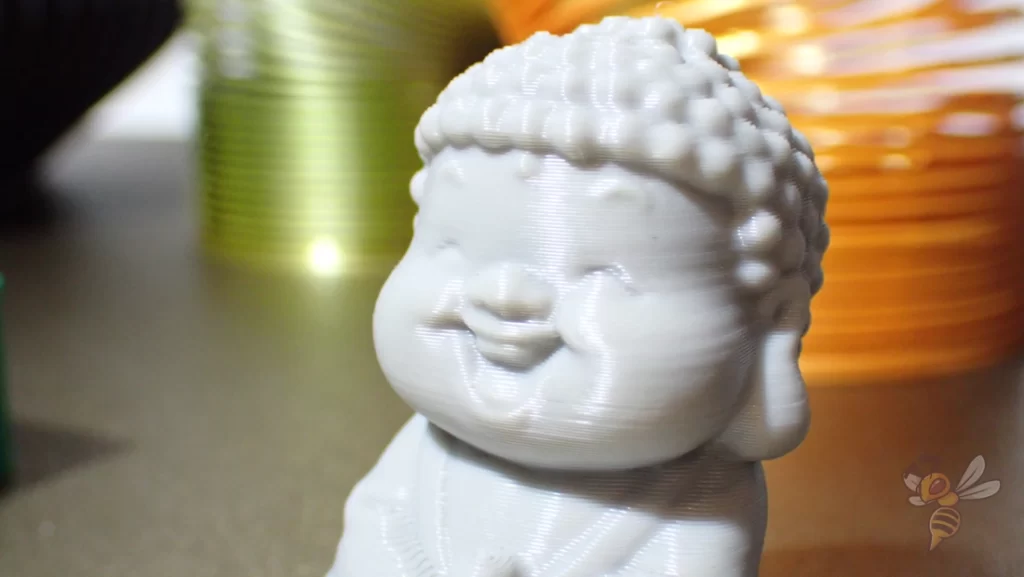

Overall, I am very satisfied with the print quality and the reliability of the results. After the calibration, which was done quickly because the preset profile is excellently matched to the device, I had no printing errors at all.
For the first layer, I set a print speed of 10 mm/s, which allowed me to achieve ideal print bed adhesion for each filament type. I had no problems with print bed adhesion, stringing or other printing errors throughout my test.

I was also pleasantly surprised by the low noise level during printing. Although I was used to this low noise level from the other 3D printers from the Neptune 3 series, an average volume of less than 40 decibels is still remarkable.
Intuitively, I would have thought that larger 3D printers would also produce more noise, but since the individual components are basically identical and only the axes and print bed are larger, this was probably wrong.

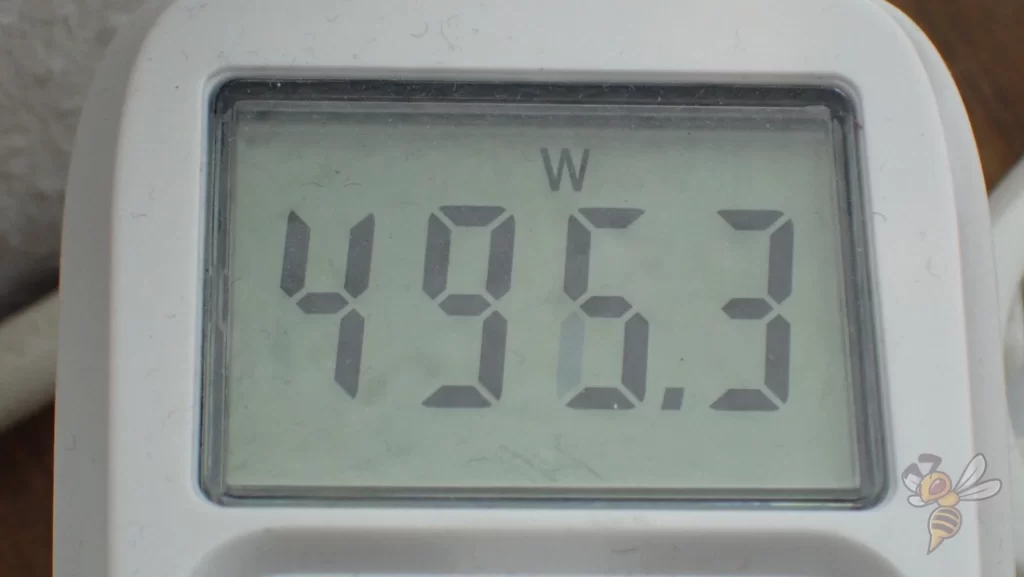
In terms of power consumption, the large print bed naturally drives up the average consumption. While the nozzle and the print bed are heating up, I measured values of up to 500 watts. However, these are normal values for the large print bed and acceptable.
During printing, of course, power consumption is much lower on average, since it takes less energy to keep the print bed at temperature than to heat it up. Ultimately, the electricity costs per printed object will be negligible.
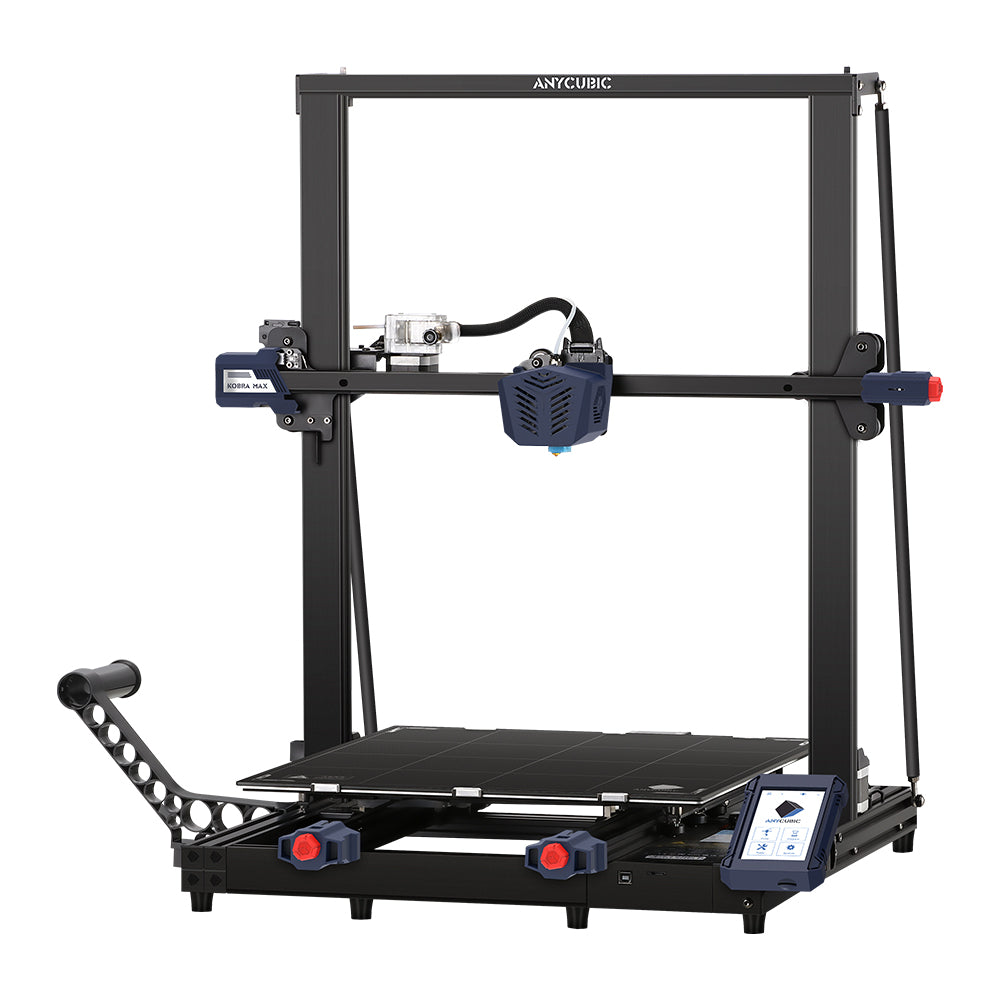
Elegoo Neptune 3 Max vs. Anycubic Kobra Max
Check Price at:
The most significant differences between the Neptune 3 Max and the Anycubic Kobra Max* are that the Neptune 3 Max has a larger print volume, reaches a higher print bed temperature, has a direct drive extruder and a PEI coated print bed.
| Neptune 3 Max | Kobra Max | |
|---|---|---|
| Print volume | 420 × 420 × 500 mm | 400 × 400 × 450 mm |
| Max. hotend temperature | 260 °C | 260 °C |
| Max. print bed temperature | 100 °C | 90 °C |
| Extruder | Direct Drive | Bowden |
| Print speed | Maximum 180 mm/s, standard 60 mm/s | Maximum 180 mm/s, standard 80 mm/s |
| Display | 4.3 inch color & removable touch screen | 4.3 inch color touch screen |
| Driven Z axes | 2 | 2 |
| Print bed | PEI coated spring steel | Carborundum glass |
| Leveling | Automatically at 63 points | Automatically at 25 points |
| Filament sensor | Yes | Yes |
| Resume print | Yes | Yes |
| Belt tensioner | Yes | Yes |
| Tool drawer | Yes | No |
Print volume: Although the Anycubic Kobra Max is a very large 3D printer, the print volume of the Neptune 3 Max is over 20% larger. So if you’re looking for the largest print volume possible, the Neptune 3 Max is definitely better.
Extruder: Here, too, the Neptune 3 Max has the edge. It has a direct drive extruder, while the Anycubic Kobra Max only has a Bowden extruder. Therefore, the Neptune 3 Max can process a larger selection of filaments and prints somewhat more accurately.
Print speed: The advantage of the Anycubic Kobra Max’s Bowden extruder is that it makes the print head slightly more lightweight than the Neptune 3 Max. Therefore, the Anycubic Kobra Max can achieve slightly higher print speeds. Especially with large objects, this can pay off and save several hours of print time.
Print bed surface: I am a big fan of PEI print bed surfaces. They provide excellent adhesion for most filaments and the object is very convenient to remove from the print bed afterwards. However, there are users who prefer to use a glass print bed because it makes the underside of the object smoother. However, in my experience, the adhesion to glass is not quite as good as with PEI.
Print bed leveling: Both 3D printers feature automatic print bed leveling. The fact that the sensor on the Neptune 3 Max moves to more points on the print bed is irrelevant. With both 3D printers, you will get accurate and straightforward print bed leveling.
Is the Neptune 3 Max Worth It?
Check Price at:
It is easy to print gigantic objects with the Neptune 3 Max* without printing errors and with a high accuracy. Especially with large format 3D printers, the reliability of the results is essential. Otherwise, you waste a lot of filament and time.
The sum of the features make it almost a plug-and-play product, and the results you can get right after assembly are outstanding.
Therefore, if you are looking for a 3D printer with a large print volume, I can highly recommend the Neptune 3 Max – it is definitely worth it!
Disclosure: This website is the property of Martin Lütkemeyer and is operated by Martin Lütkemeyer. Martin Lütkemeyer is a member of the Amazon Services LLC and other Affiliate Programs. These are affiliate advertising programs designed to enable websites to earn advertising revenue through advertising and linking to Amazon.com and others. Links marked with * are affiliate links.
