
- Wet Filament: Prevention, Symptoms & Drying - July 18, 2024
- Sovol SV08 – Best PrusaSlicer Settings & Profile - June 26, 2024
- Sovol SV08 – Best Orca Slicer Settings & Profile - June 26, 2024
Disclosure: Links marked with * are Affiliate Links. I earn from qualifying purchases if you decide to make a purchase through these links – at no additional cost for you!
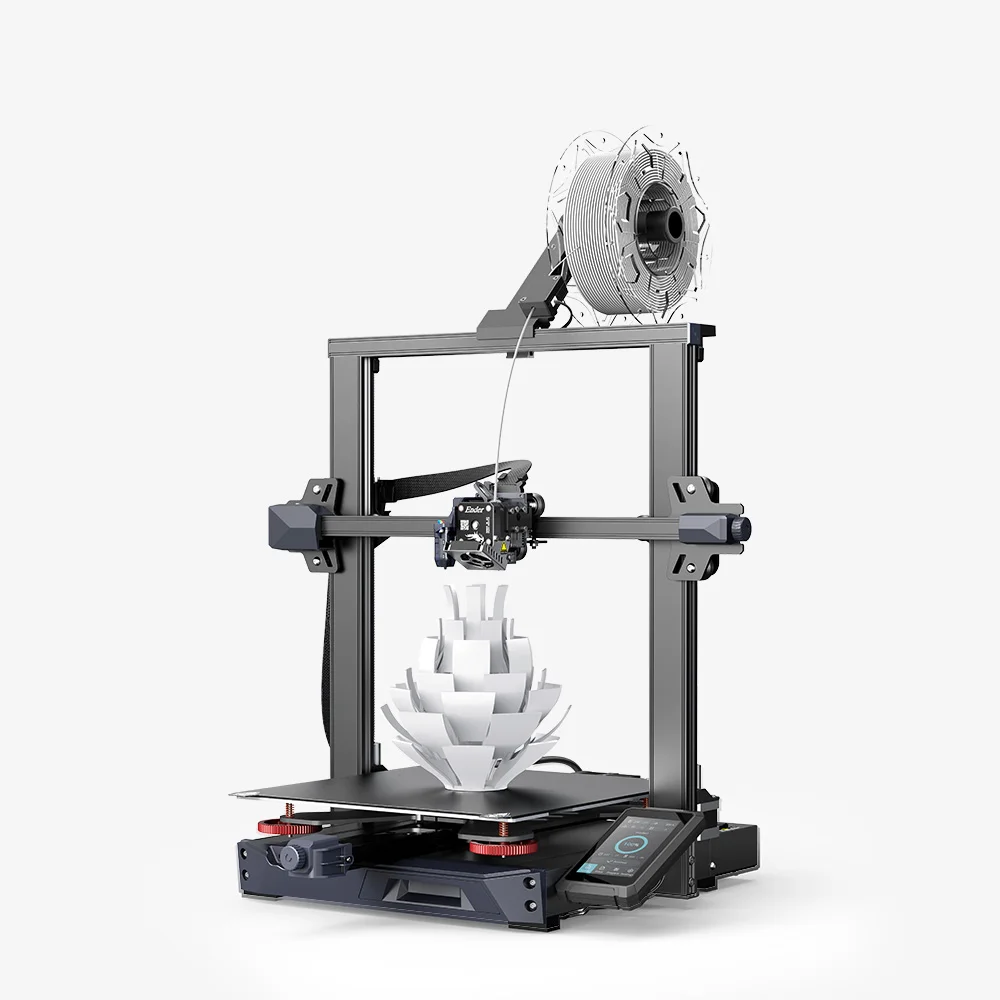
The Neptune 3 Plus from Elegoo* is not only the larger version of the Neptune 3, it also has a few more features that make it one of the best large format 3D printers.
The most important features of the Neptune 3 Plus are the large print volume of 320 × 320 × 400 mm, the automatic leveling, the PEI print bed and the direct drive extruder. This provides excellent print bed adhesion for most filaments and can also process flexible filaments without any problems.
In this hands-on review, I’ll test the Neptune 3 Plus, show you its key features and what print quality you can expect from it. Before we start, here is a brief summary of the most important information.

Check Price at:
PRO:
- Large print volume
- Can process flexible filaments
- Excellent print bed adhesion
- High accuracy
- Simple operation
- Quiet
- LED strip
CON:
- Hardly any upgrades available (because it already has everything…)
Who should buy the Neptune 3 Plus?
Anyone looking for a good 3D printer, but needing a little more print volume, will be well served by the Neptune 3 Plus. It offers all the essential features to deliver high quality. Its ease of use also makes it attractive for beginners.
Table of Contents:
Technical Specifications
- Technology: FDM
- Operation: 4.3″ touch screen
- Extruder: Direct drive extruder
- Print temperature: max. 260 °C
- Print bed temperature: max. 100 °C
- Print volume: 320 × 320 × 400 mm
- Print bed material: PEI-coated spring steel, magnetic, flexible
- Print bed leveling: Automatic at 49 points
- Print speed: Maximum 180 mm/s, standard 60 mm/s
- Nozzle: 1 × 0.4 mm
- Print accuracy: ± 0.1 mm
- Layer height: 0.05 to 0.35 mm
- Filament: 1.75 mm PLA, ABS, PETG, TPU, PC, ASA, HIPS
- Filament Sensor: Yes
- Resume Print: Yes
- LED lighting: Yes
- File transfer: MicroSD card, LAN
- Slicer: Cura
Scope of Delivery and Setup

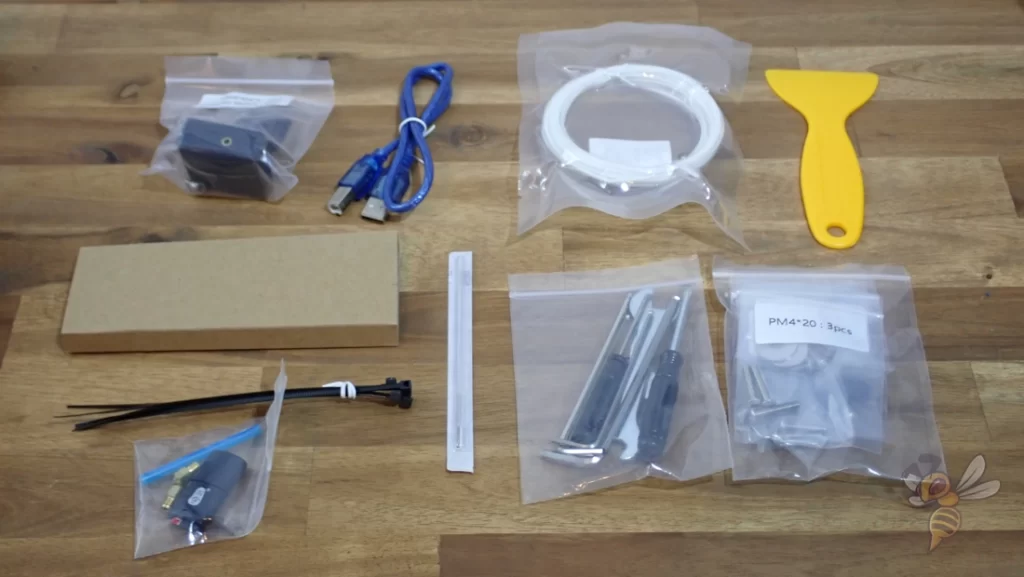
The scope of delivery of the Neptune 3 Plus contains everything needed for the assembly and the first test prints. Besides the necessary tools for the assembly, some PLA filament is also included. The assembly is done within 10 to 20 minutes.
Since the Neptune 3 Plus is a relatively large 3D printer, the package it comes in is also a bit larger than that of its little brother, the Neptune 3 for example. However, it is still small enough that it is not difficult to lift and carry the package alone.
Since the 3D printer is mostly pre-assembled, the assembly does not take very long. The included instruction manual explains all steps very simply and with pictograms.


The setup consists of only a few steps:
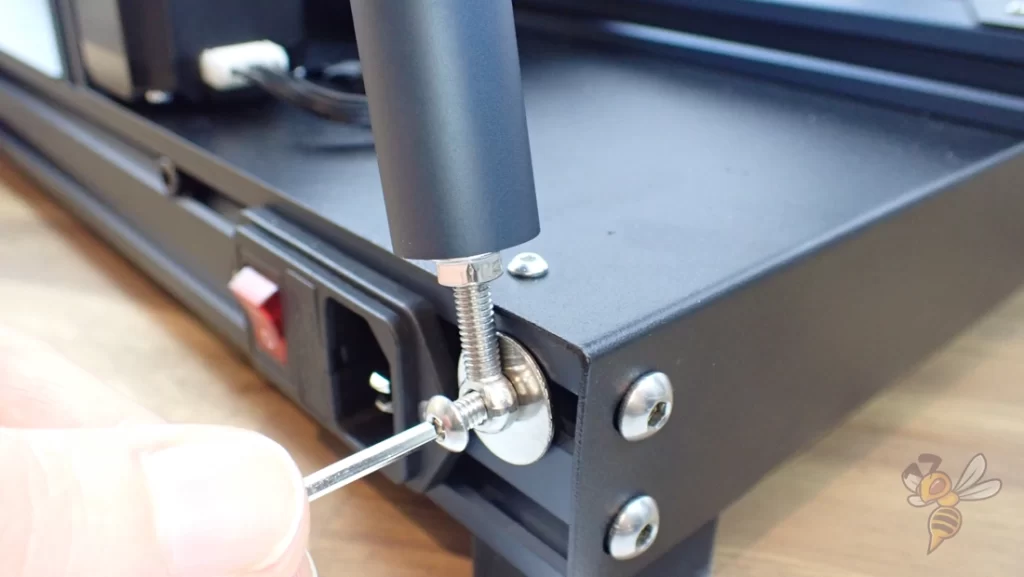
- Mount the frame on the 3D printer base
- Mount the screen
- Install the filament holder
- Plug in the cables
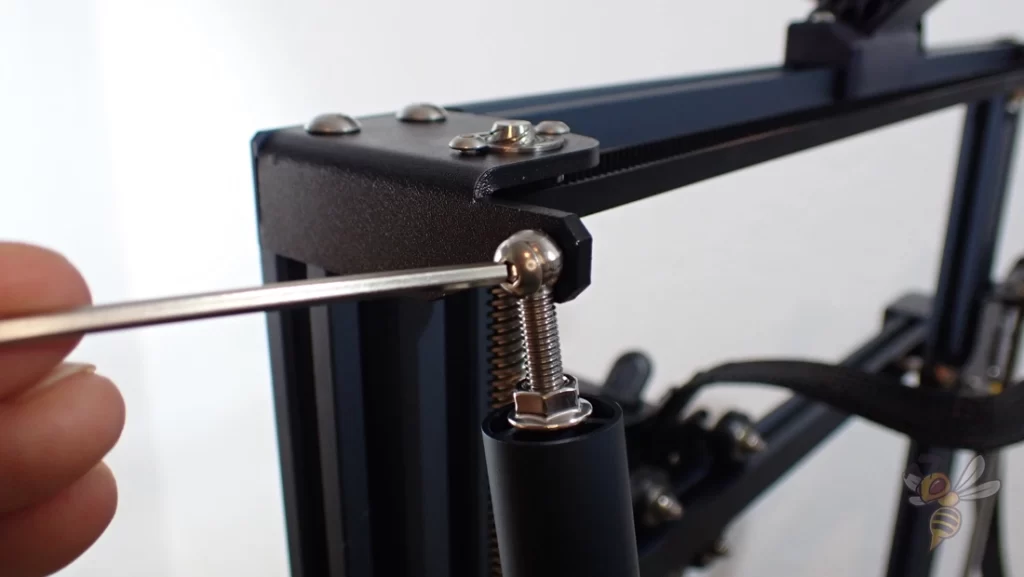
- Mount crossbars to stabilize the z-axis
After that, the print bed only needs to be leveled once manually and then automatically. The manual leveling is done via the paper method at 6 points and in the middle of the print bed.
Unlike most other 3D printers, the Neptune 3 Plus has six adjustment screws under the print bed, not just four. This is simply due to the size of the print bed and allows for finer tilt adjustment.
Features & Design
Large Print Volume
The large print volume of 320 × 320 × 400 mm allows you to print even large objects in one piece. Unlike its little brother, the Neptune 3 or Neptune 3 Pro, the print volume of the Neptune 3 Plus is almost 3 times larger!
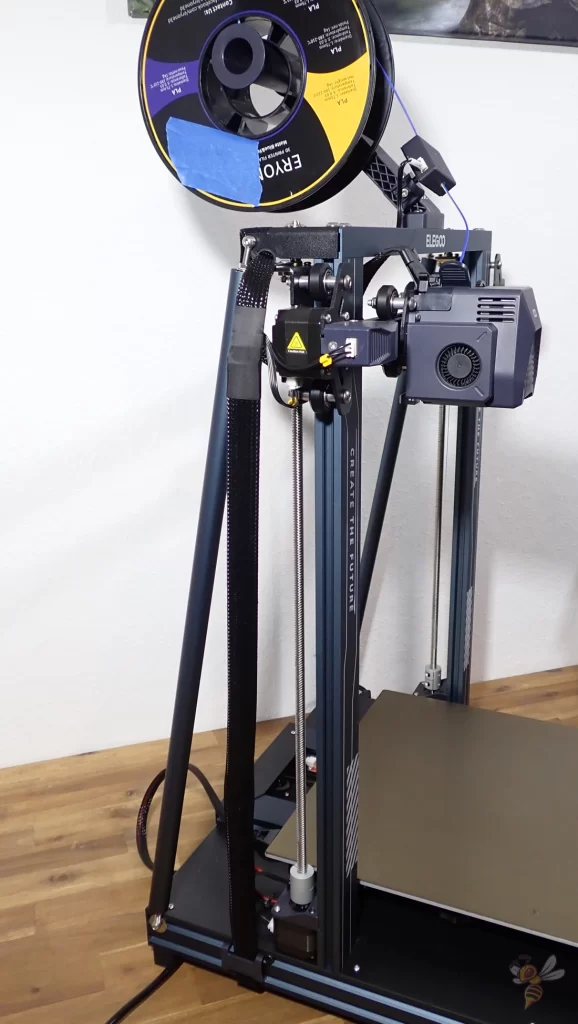
To prevent vibration and errors, such as ghosting or ringing from occurring over the large print volume, the Neptune 3 Plus has crossbars behind the z-axis. These bars stabilize the z-axis and prevent vibrations or other inaccuracies, even at the top end of the z-axis.
With such large 3D printers, it is also a must that the z-axis has a stepper motor on both sides. This improves positioning in the z-direction and prevents one side from reacting with delay.
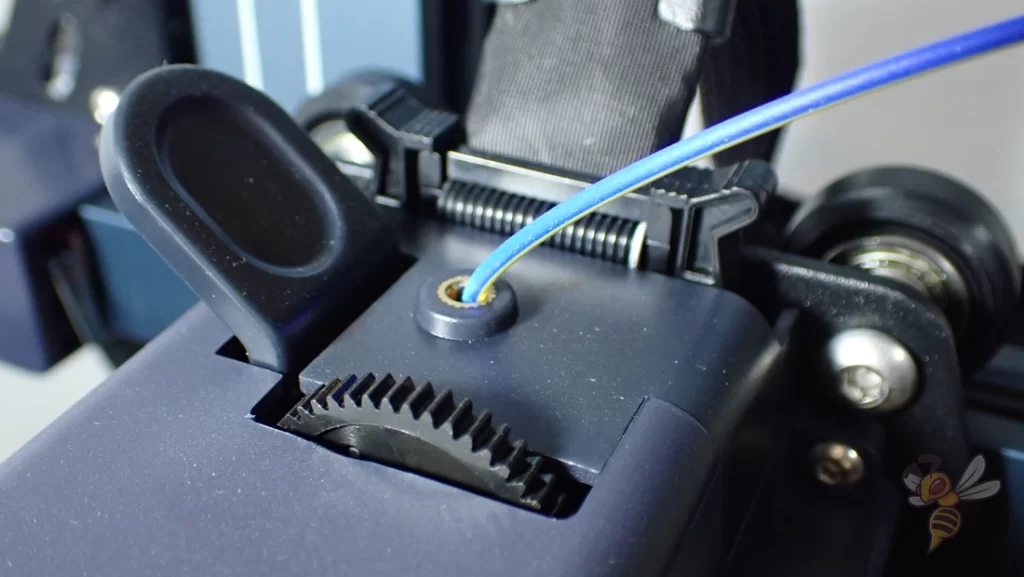
Automatic Print Bed Leveling


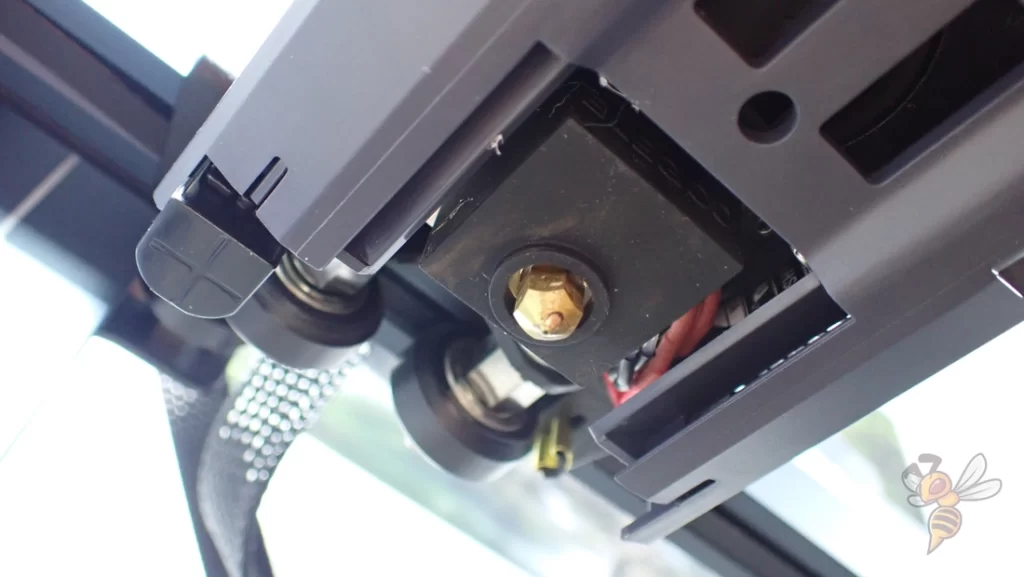
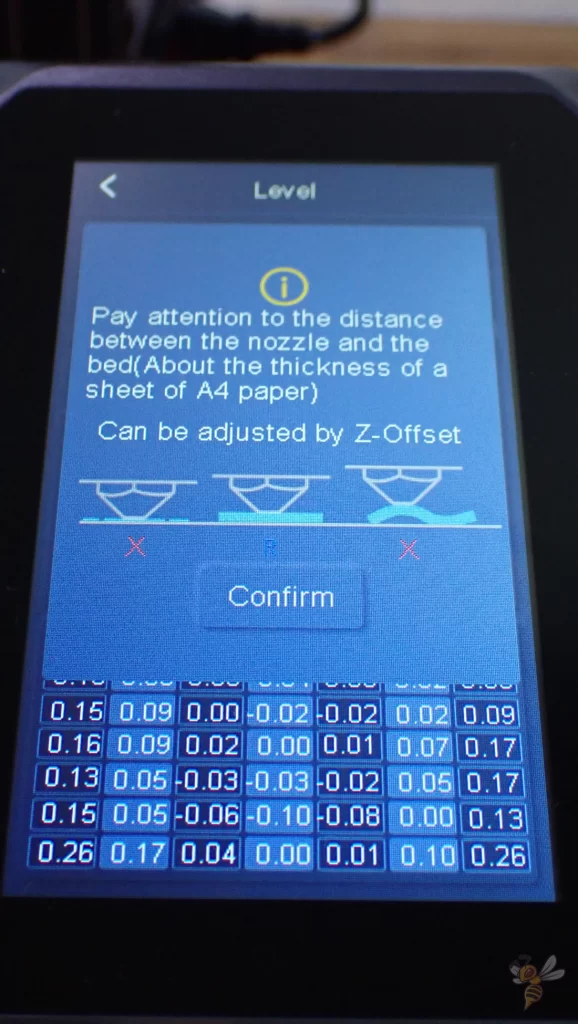
A sensor for automatic print bed leveling is built into the print head of the Neptune 3 Plus. This makes it possible to level the print bed automatically at the push of a button. Since the print bed is relatively large, the sensor levels the print bed at 49 points.
Before you can use the automatic print bed leveling, you have to level the print bed manually at least once. Although the sensor can perfectly compensate for minor inclinations of the print bed, the print bed must first be roughly leveled manually.
How to do this is described in the user manual. You can also read more about it in this article.
Manual print bed leveling is also supported via the menu. You can tap on the touchscreen where you want to set the z-offset next. When you have set all seven points, the 3D printer automatically starts the automatic leveling.
Direct Drive Extruder
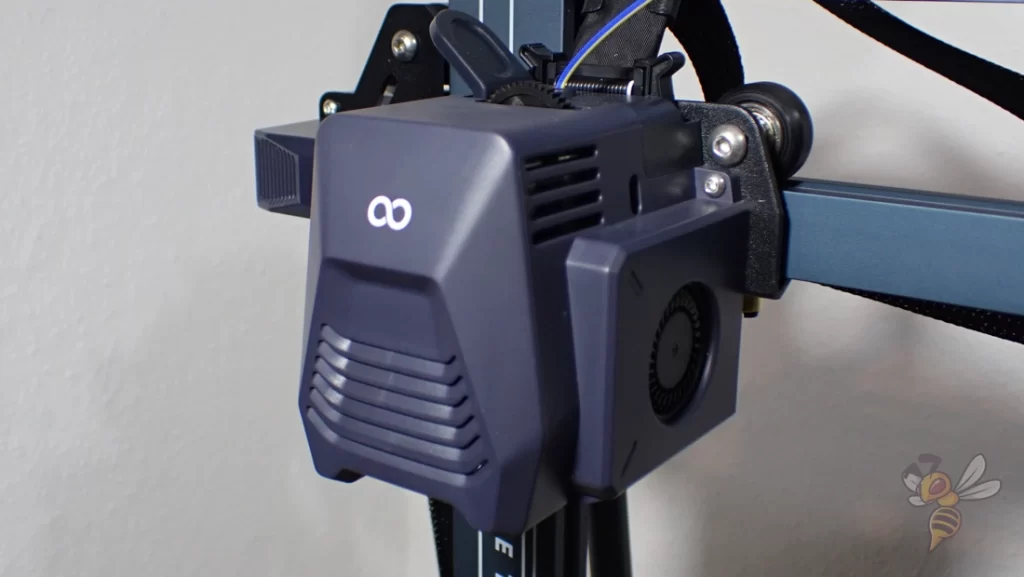
With the direct drive extruder, you can also process flexible filaments like TPU. The Neptune 3 has a Bowden extruder, its successors have fortunately switched to a direct drive extruder.
In a direct drive extruder, the distance between the extruder and the nozzle is so small that flexible filament cannot compensate for the movements of the extruder. In a Bowden extruder, the distance is so long that the filament in the long PTFE tube between the extruder and the print head can partially compensate for the movements through its flexibility.
Therefore, 3D printers like the Neptune 3 Plus with a direct drive extruder are much better suited for flexible filaments.
PEI Print Bed
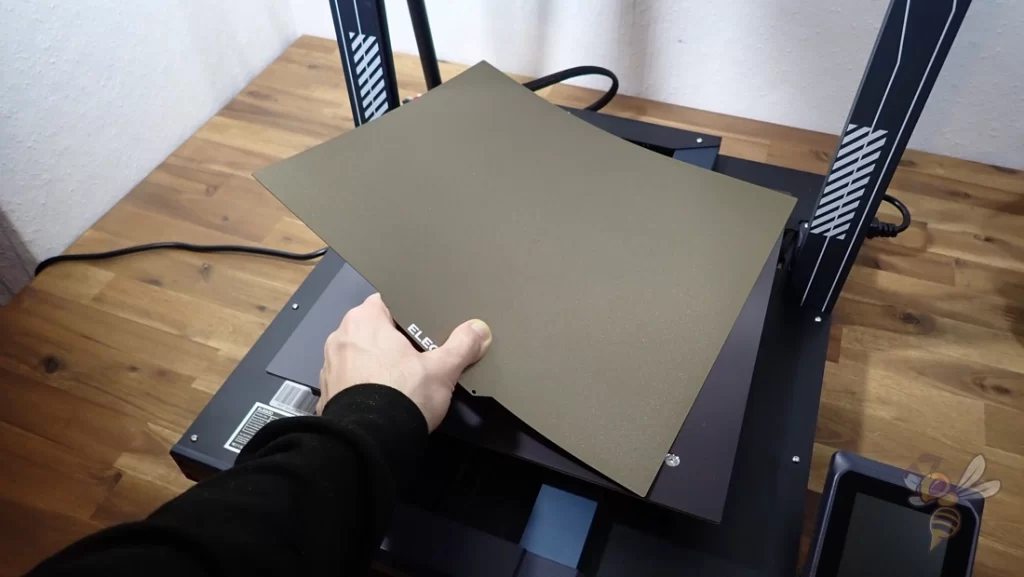

The large PEI print bed of the Neptune 3 Plus is flexible and can be removed from the magnetic print plate. This means that you can easily remove the printed object from the print bed after printing by bending the print bed. The enclosed spatula is therefore almost superfluous.
Many modern 3D printers have a PEI print bed, as it provides almost perfect print bed adhesion for most filaments. The rough surface provides enough grip for the hot filament.
So optimizing print bed adhesion is not too difficult with the Neptune 3 Plus.


I measured the temperature distribution at 25 points on the print bed with a pyrometer. Surprisingly, the temperature distribution is very homogeneous. The deviation between the maximum and minimum value was only 1.1 °C.
Only the absolute value is not as set in the menu. In my test, the print bed temperature was 5 °C less than set in the menu. Since the PEI print bed offers excellent print bed adhesion, this is not a problem with most filaments.
So if you’re having trouble with print bed adhesion, you can try raising the temperature a bit as a first step.
Check Price at:
4.3-Inch Detachable Touch Screen
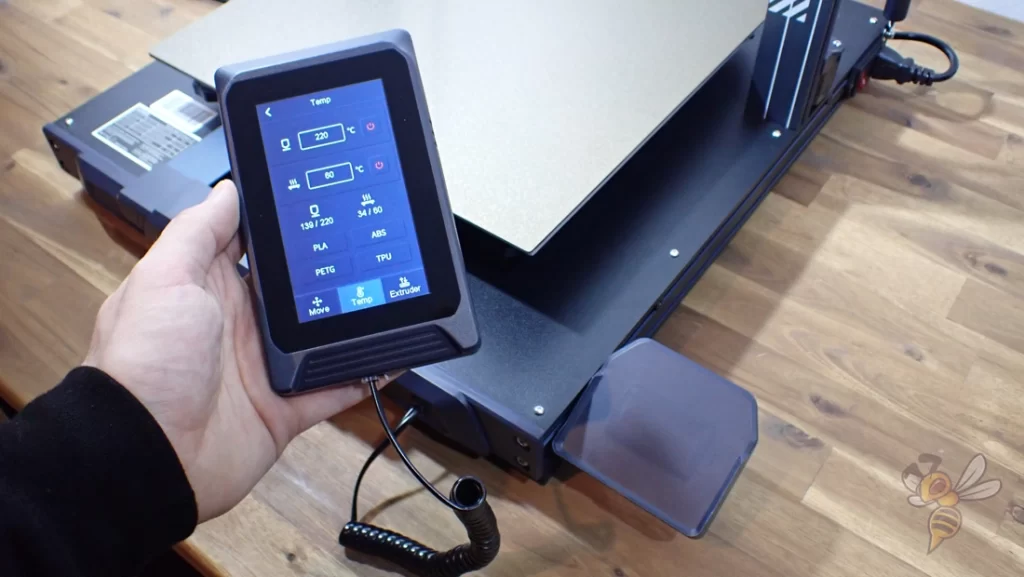
The touchscreen of the Neptune 3 Plus can be removed from its magnetic holder. The screen is connected to the 3D printer via a cable. Depending on where you place the 3D printer, this can be very handy to make it easier to use.
As with the other 3D printers from Elegoo, the menu is very clear and intuitive. You can find all important settings with a few clicks.
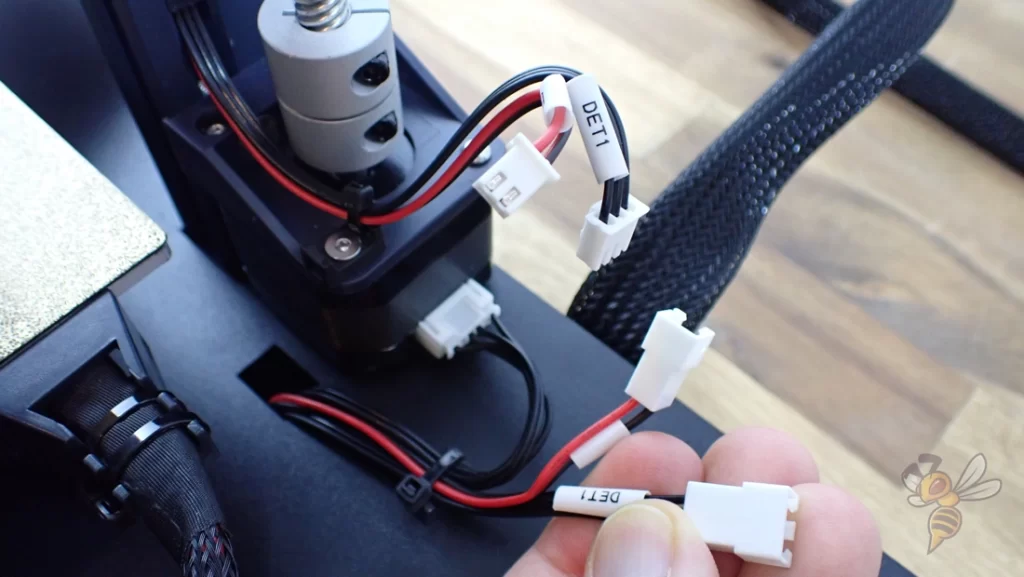
Filament Sensor

In order to keep the weight of the print head low, the filament sensor is located free-swinging under the filament holder. It is mounted in such a way that it can adapt to the movements of the filament.
The filament sensor detects whether the filament is used up or broken. As soon as there is no filament left in the sensor, printing is paused immediately. This is especially useful when printing larger objects and you are uncertain if there is enough filament left on the spool.
You can simply start printing and, if necessary, change the filament during the automatic pause.
Resume Print
Just as practical as the filament sensor is the resume print function. The 3D printer remembers the progress of the print if the power supply is suddenly interrupted.
If a power failure occurs, the Neptune 3 Plus will then continue to print in the same location after power is restored.
Belt Tensioner
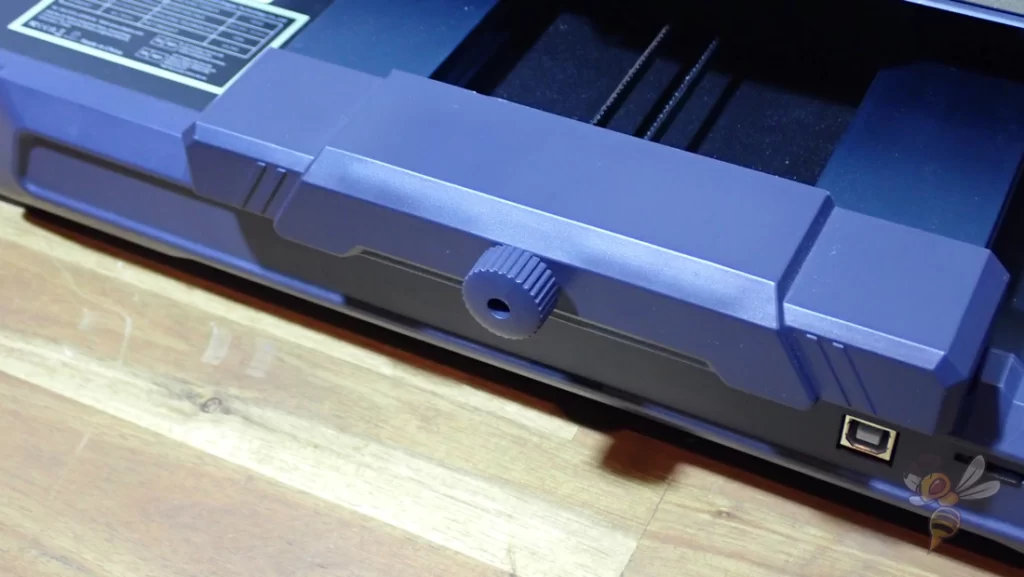
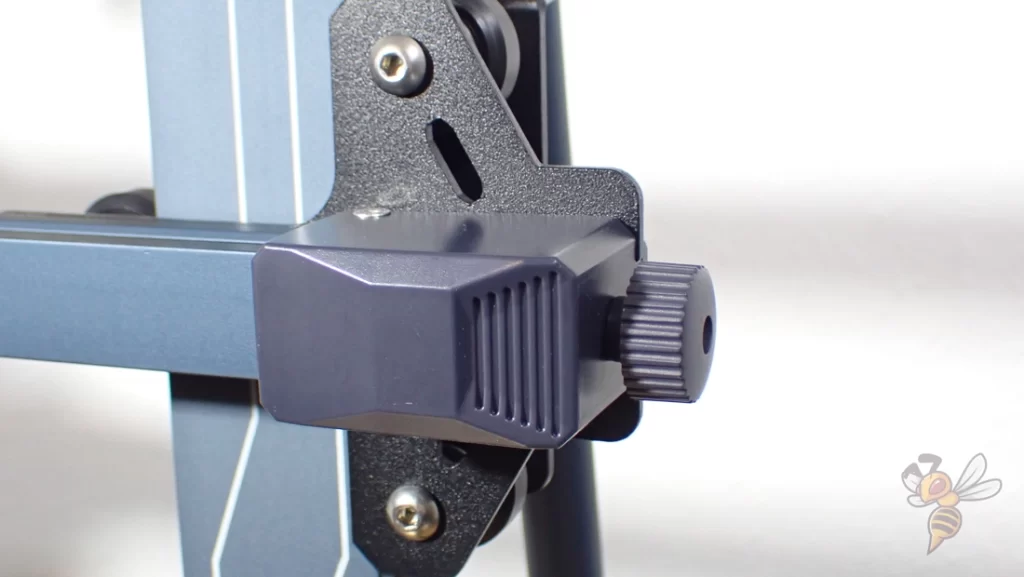
With the belt tensioners, you can easily change the tension of the timing belts of the x- and y-axis. They often need to be tightened slightly after delivery, as the tension can change slightly during delivery.
Heating Times
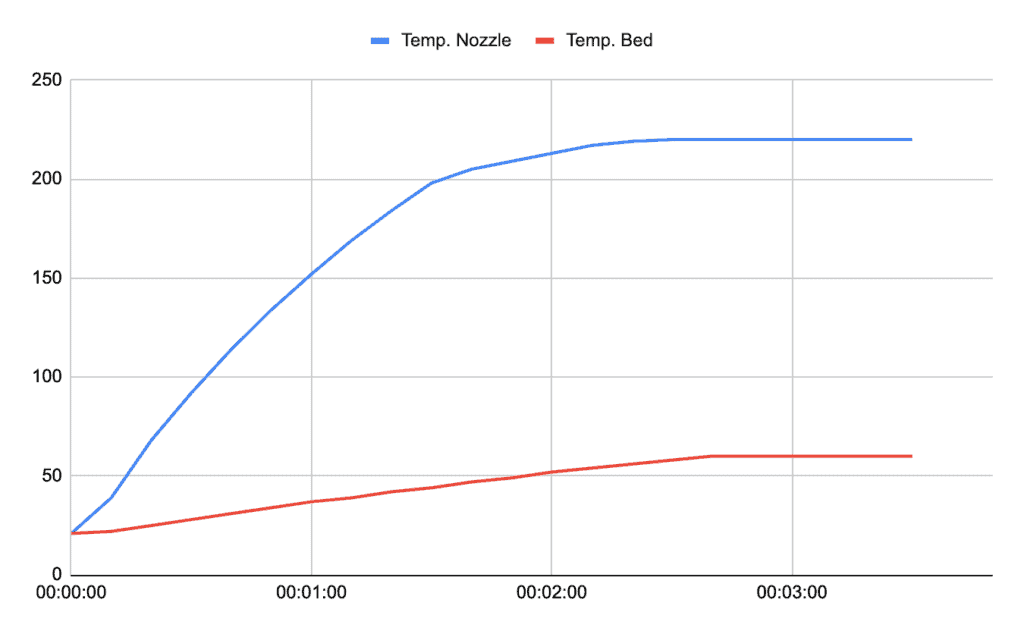
The Neptune 3 Plus is heated within two and a half to three minutes. This is relatively fast for the large print bed.
Similar 3D printers with such a large print bed take much longer to reach typical temperatures for PLA (60 °C).
Noise Level

The noise level of the Neptune 3 Plus averages around 41 decibels. While most modern 3D printers stay below 50 decibels, an average of 41 decibels is relatively rare.
With such a low volume, you can run the 3D printer in the same room you’re in. And if you run it in another room with the door closed, you won’t hear it at all.
Power Consumption
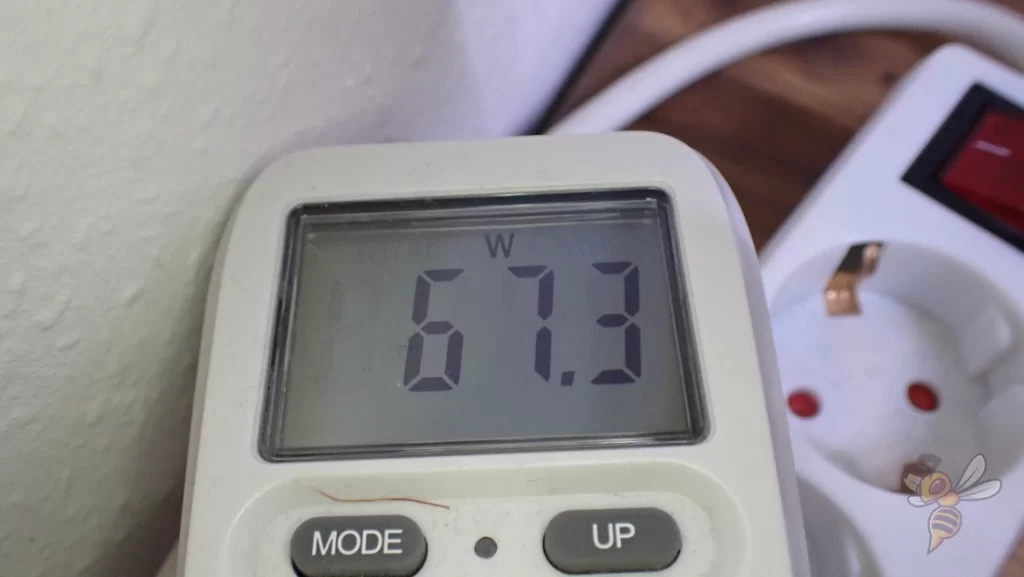
The power consumption of the Neptune 3 Plus is surprisingly low for its large print bed. During printing, I was able to measure a power of 65 to 70 watts. When heating up, the power consumption is of course much higher.
Slicer

The Neptune 3 Plus is best operated with the Cura clone from Elegoo. Also, the settings from this slicer can be imported into Cura.
As is the case with most FDM 3D printers, there was no suitable Cura profile when the Neptune 3 Plus was released. However, since there is a good profile in Elegoo Cura Slicer, you can simply copy the settings there and paste them into Cura.
While the settings are a good start, they are usually not optimal for the filament you are using. There are a few settings that you should calibrate to get the best results from the Neptune 3 Plus. These include the print temperature, retraction, and flow rate.
You can find the correct Cura settings in this article: Neptune 3 Plus | Cura Settings & Profile – Guide & List
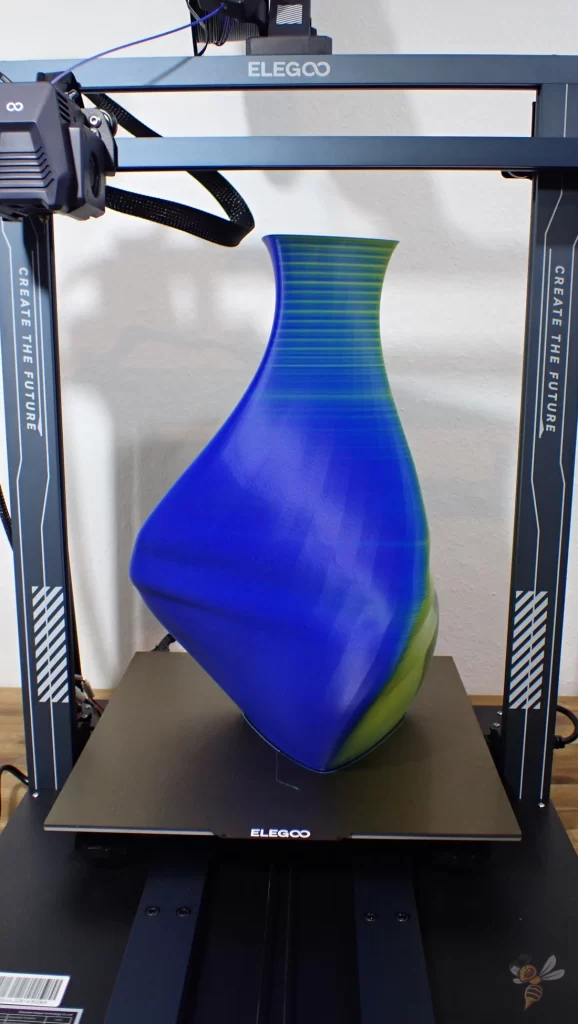
Print Quality
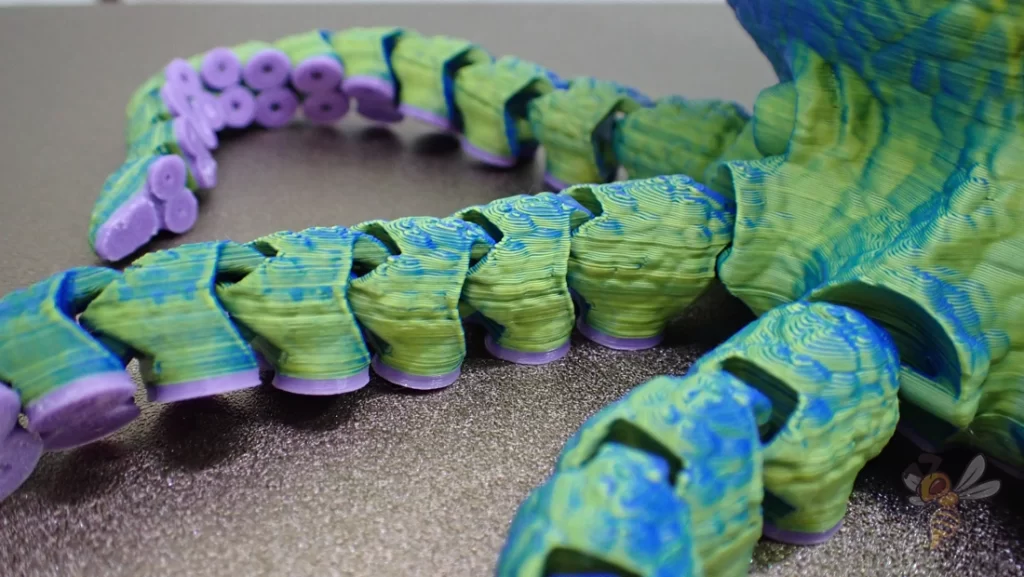

The theoretical print quality of the Neptune 3 Plus is 0.1 mm. However, due to the stable construction, the well-designed direct drive extruder and the precise stepper motors, the print quality is practically better and particularly reproducible.
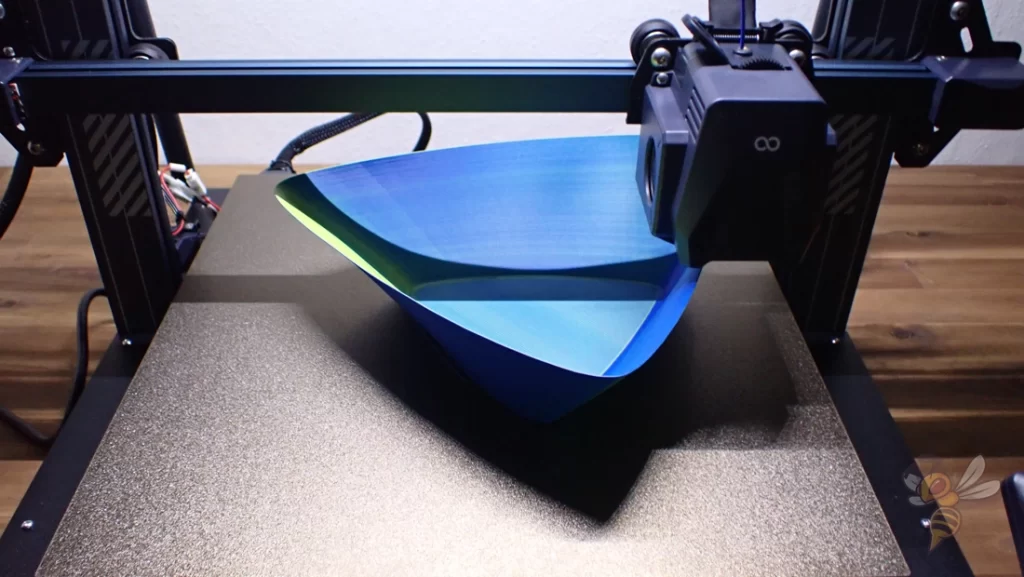
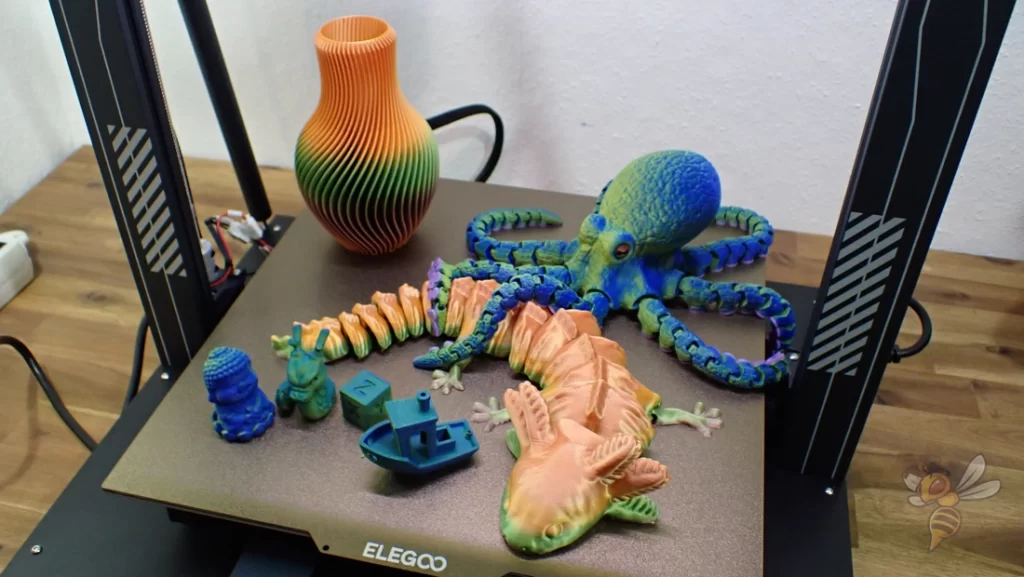
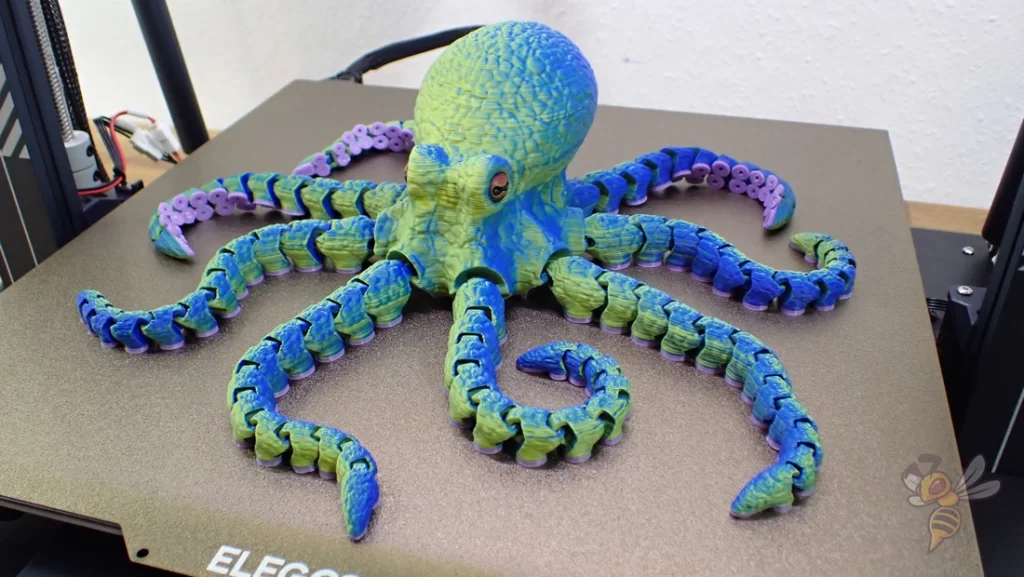
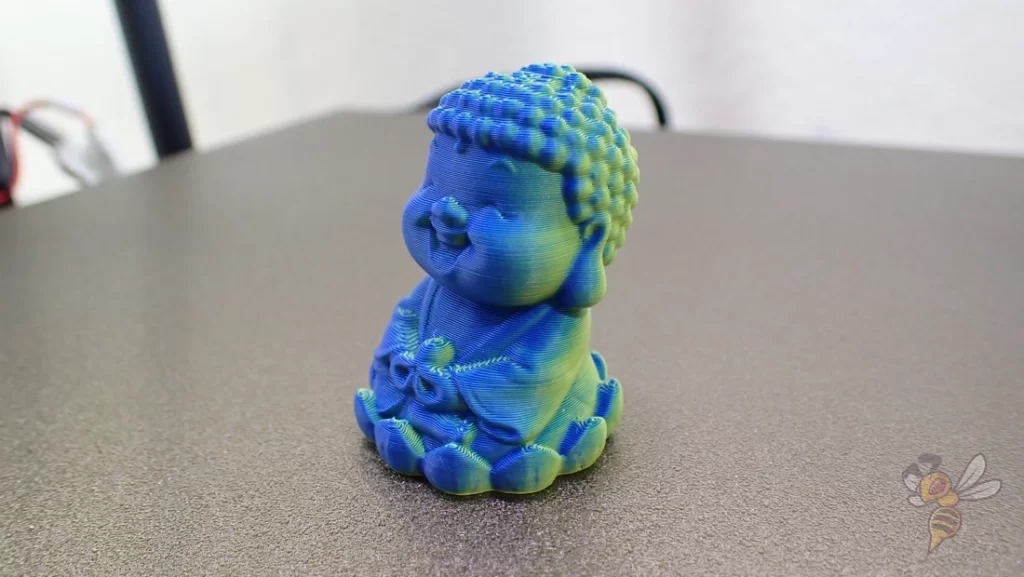
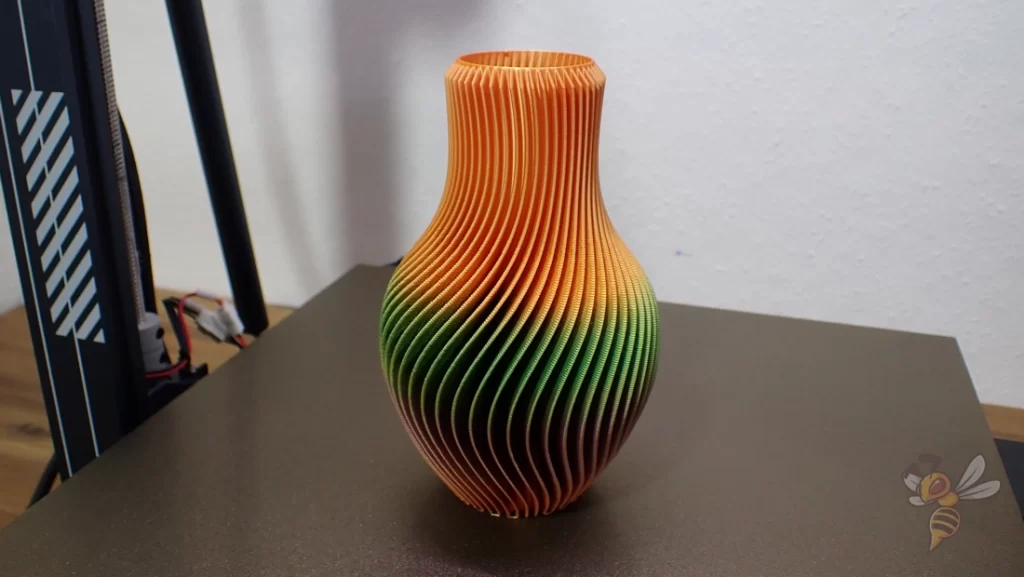
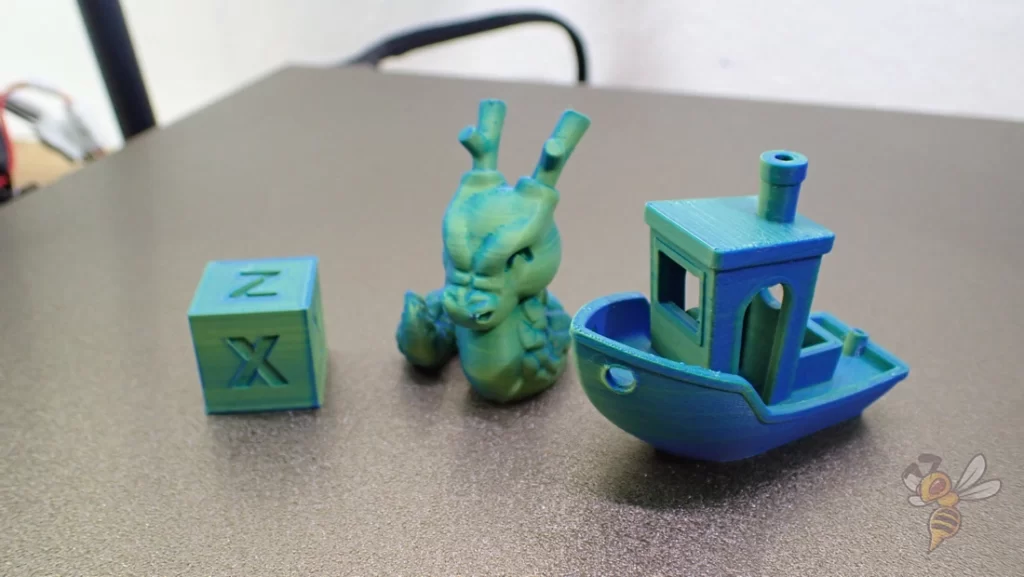
After calibration, I tested the print quality on different objects. I printed the two vases in Cura Vase Mode and the two articulated objects with enough infill to make them stable enough. Especially with the articulated objects with their many details, you can see the excellent quality.
All objects were printed with ERYONE PLA filament.
Neptune 3 Plus vs. Ender 3 S1 Plus
The Neptune 3 Plus and the Ender-3 S1 Plus* are very similar. The most significant difference between them is that the print head of the Ender-3 S1 Plus is lighter and thus slightly higher print speeds are possible. In return, the Neptune 3 Plus is much cheaper.
Check Price at:
| Neptune 3 Plus | Ender-3 S1 Plus | |
|---|---|---|
| Klipper integration? | No | Yes, with the Sonic Pad from Creality |
| Print volume | 320 × 320 × 400 mm | 300 × 300 × 300 mm |
| Max. hotend temperature | 260 °C | 260 °C |
| Max. print bed temperature | 100 °C | 100 °C |
| Extruder | Direct drive | Direct drive |
| Display | 4.3-inch color & removable touch screen | 4.3-inch color touch screen |
| Driven z-axes | 2 | 2 |
| Print bed | PEI-coated spring steel | PC-coated spring steel |
| Leveling | Automatic | Automatic |
| Filament sensor | Yes | Yes |
| Resume print | Yes | Yes |
| Belt tensioner | Yes | Yes |
| Tool drawer | No | Yes |
Similarities: If you’re looking for a large format 3D printer that can handle flexible filaments, automatically levels its print bed, has a flexible print bed, and comes from a reputable manufacturer, you’ll inevitably come across these two 3D printers.
They are extremely similar and share most features. However, there are a few differences that may influence your buying decision.
Klipper: The big advantage of the Ender-3 S1 Plus is that you can operate it easily with the Sonic Pad from Creality with Klipper. Klipper is a firmware that takes into account the accelerations of the print head.
The pad comes with an accelerometer that you can mount on the print head. This allows you to increase the print speed extremely without creating print errors. I have tested the pad myself and am very enthusiastic about it.
Print volume: Although the Ender-3 S1 Plus is a relatively large 3D printer, the print volume of the Neptune 3 Plus is still one and a half times larger. So if print volume is important to you and print speed is secondary, the Neptune 3 Plus is recommended.
Price: Usually, the Neptune 3 Plus is cheaper than the Ender-3 S1 Plus. Depending on where your priorities lie and which features are more important to you, the price can be decisive for your decision.
Is the Neptune 3 Plus Worth It?
The Elegoo Neptune 3 Plus* is worthwhile for everyone who is looking for a large format 3D printer with all essential features for a good print quality. It offers a direct drive extruder as well as excellent print bed adhesion due to the PEI print bed.
Operation is further enhanced by the removable display with its clear menu and flexible print bed.
Disclosure: This website is the property of Martin Lütkemeyer and is operated by Martin Lütkemeyer. Martin Lütkemeyer is a member of the Amazon Services LLC and other Affiliate Programs. These are affiliate advertising programs designed to enable websites to earn advertising revenue through advertising and linking to Amazon.com and others. Links marked with * are affiliate links.
