
- Wet Filament: Prevention, Symptoms & Drying - July 18, 2024
- Sovol SV08 – Best PrusaSlicer Settings & Profile - June 26, 2024
- Sovol SV08 – Best Orca Slicer Settings & Profile - June 26, 2024
Disclosure: Links marked with * are Affiliate Links. I earn from qualifying purchases if you decide to make a purchase through these links – at no additional cost for you!
The Ender-3 V3 is a worthy successor to the legendary Ender-3 series from Creality and is currently one of my favorite entry-level 3D printers.
By default, the Ender-3 V3 is operated with Creality Print as a slicer. However, if you pay attention to a few things, it is also compatible with PrusaSlicer.
I have been using the Ender-3 V3 intensively over the last few weeks and have printed numerous projects with it. I used it with PrusaSlicer and optimized all settings for it.
In this article, I’ll show you step by step how to add the Ender-3 V3 in PrusaSlicer and which of the most important settings are best suited for the standard filaments PLA, ABS, PETG and TPU.

Calibrated PrusaSlicer Profile
For optimal print quality with minimal effort, you can download my calibrated PrusaSlicer profile for this 3D printer and import it directly into PrusaSlicer. In it, all settings are perfectly adapted to this printer, like for the accelerations, jerk, supports and the first layer.
Table of Contents:
Step 1: Add the New 3D Printer
In the first step, we will create an entirely new profile for the Ender-3 V3 in PrusaSlicer. We will use an empty profile as a template.
This way you can create a new, empty profile:
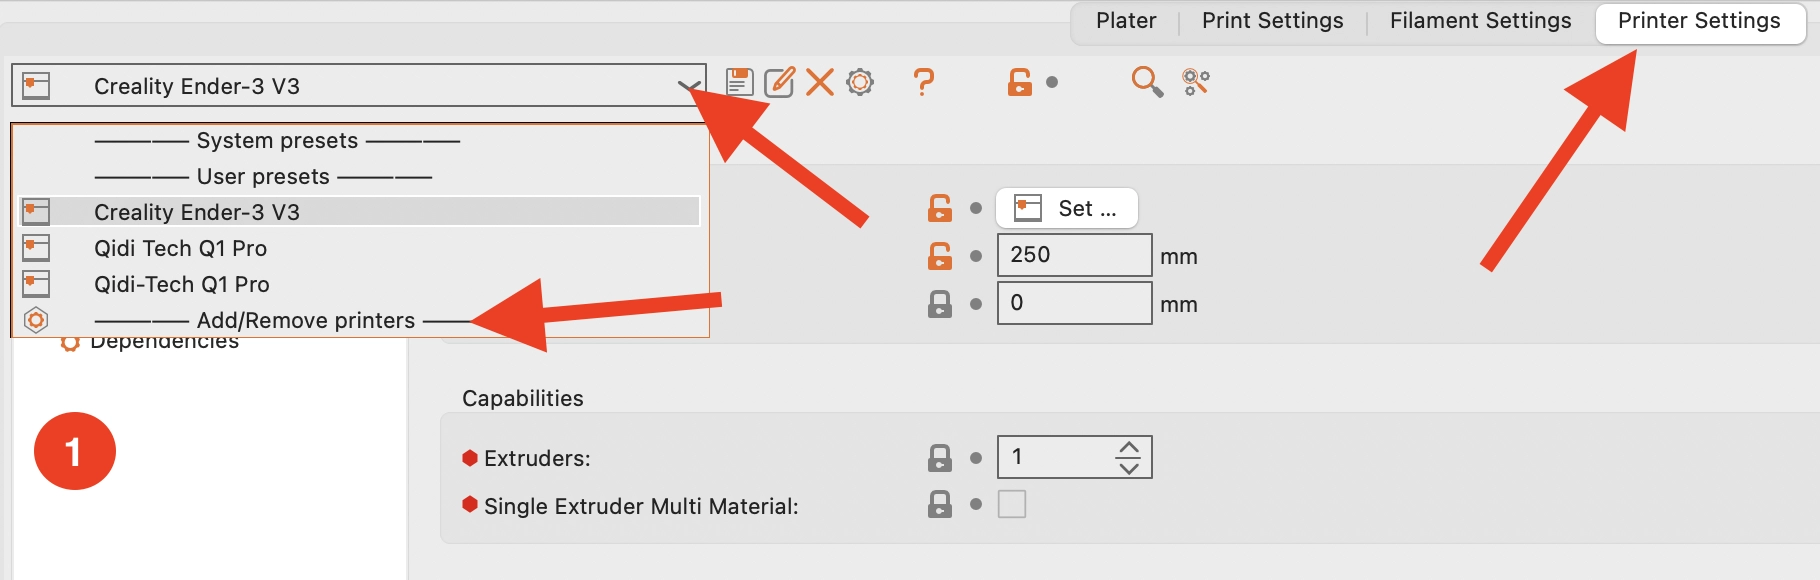
- In the printer settings, click on the active printer and then on“Add/Remove printers“.
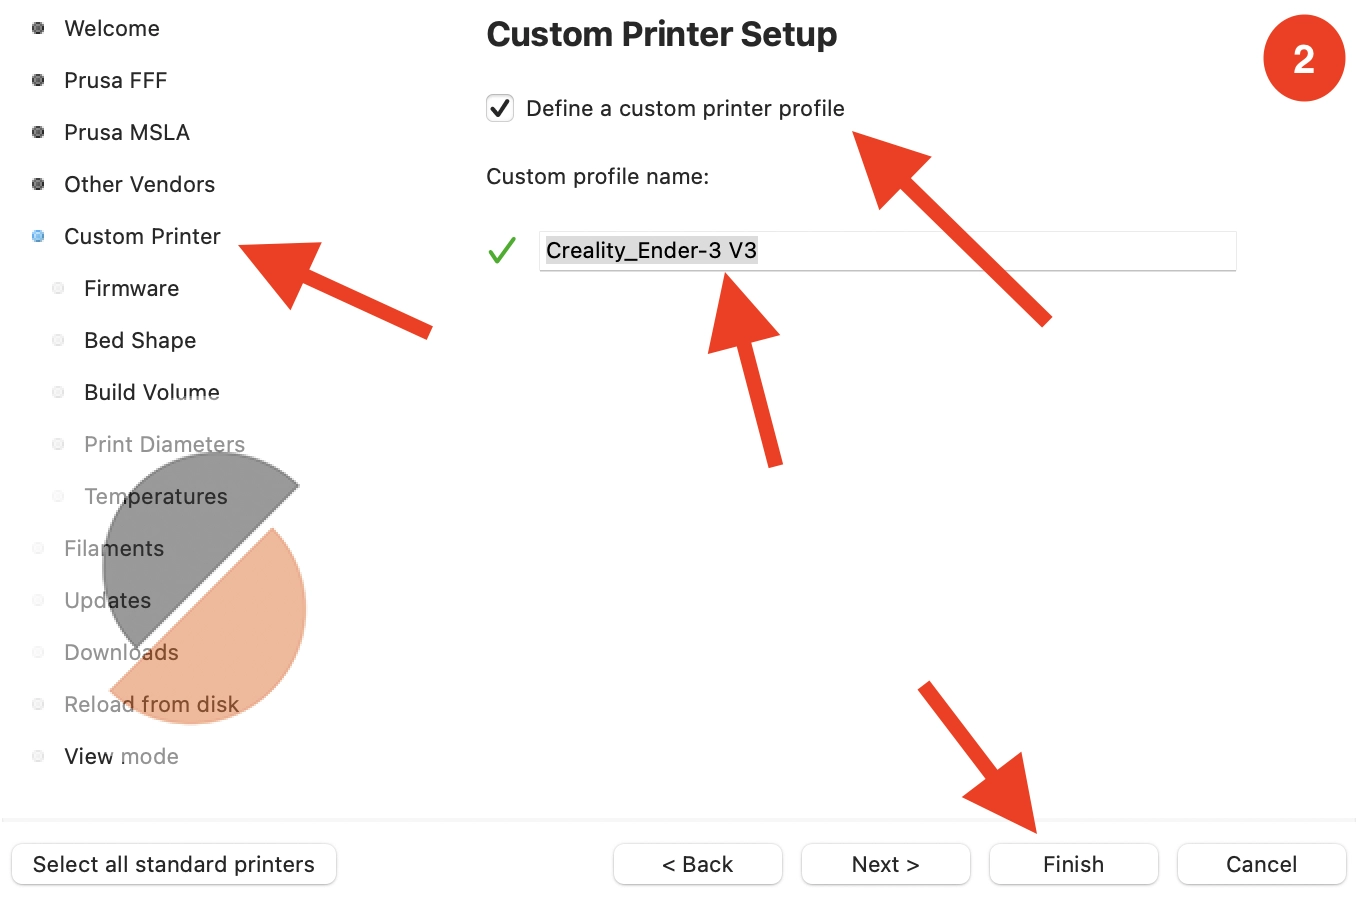
- Click on“Custom Printer“, activate the checkbox “Define a custom printer profile” and enter the name of the printer. Then click on “Finish” (we will adjust the other settings later).
And now you have created a new profile for your Ender-3 V3! However, we still need to define the printer settings for the hardware, create the most important filaments and adjust the print settings.
In the next step, we first define the correct printer settings.
Step 2: Define the Printer Settings
Before we adjust the settings, you should switch to expert mode. Only then will you see all the settings. You activate it by clicking on the red symbol labeled “Expert“:

These are the most important printer settings for the Ender-3 V3:
- Bed shape: 220 × 220 mm
- Origin: 0 × 0 mm
- Max print height: 250 mm
- G-code flavor: Klipper
- Start G-code:
M140 S0M104 S0START_PRINT EXTRUDER_TEMP=220 BED_TEMP=60
- End G-code:
END_PRINT
G-code is the programming language in which 3D printers speak. In these two fields, G-code snippets can be defined that are to be executed before and after each print.
In the Start G-code, for example, the print head is moved to the home position and the nozzle and print bed are heated up. In the End G-code, these are then cooled down again and the print object can be presented by moving the print bed forwards.
These code snippets are different for each 3D printer. Sometimes they are only a few lines long, but sometimes they are 10 to 20 lines long.
- Nozzle diameter: 0.4 mm
- Retraction length: 0.5 mm
- Retraction speed: 40 mm/s
The settings for retraction may need to be recalibrated for each filament.
🧠
Note: The slicer settings shown here will produce good but not perfect results. You need to calibrate them to your specific filament. You can learn how to do this in my comprehensive calibration guide or in my 3D printing course.
Step 3: Adjust the Filament Settings
Under the filament settings in PrusaSlicer, you can create different profiles for your filaments.
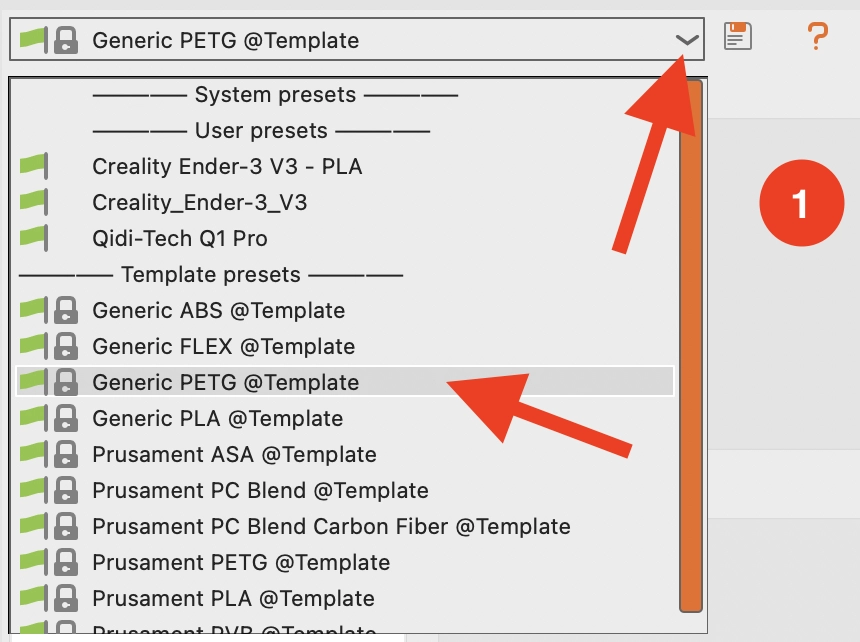
I always start with the generic templates and adapt the settings to the respective filament:
- Click on the active filament profile and select a suitable template.
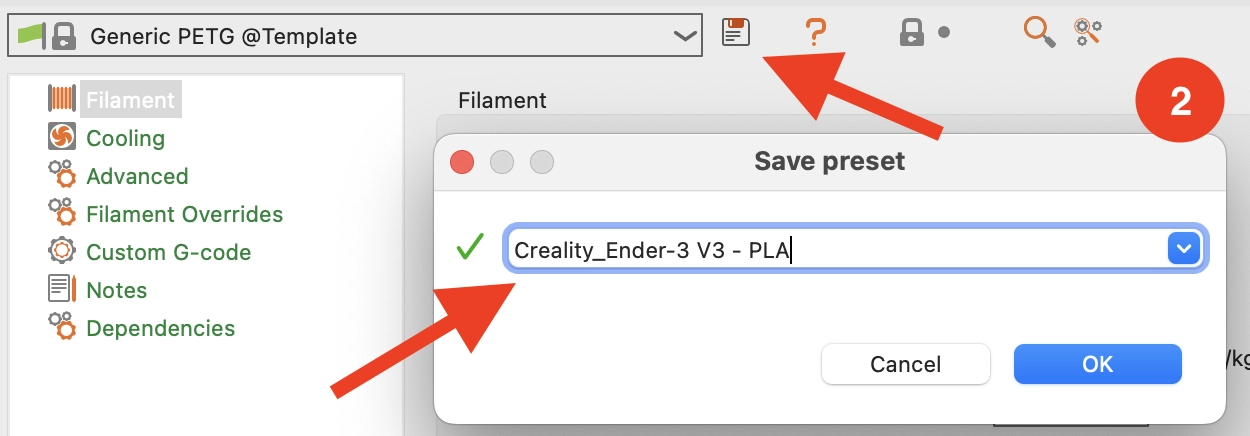
- Once you have changed the filament settings, you can save the new profile.
These are the most important filament settings for the Ender-3 V3:
- Diameter: 1.75 mm
- Temperature – Nozzle:
- PLA: 215 °C
- ABS: 260 °C
- PETG: 250 °C
- TPU: 225 °C
- Temperature – Bed:
- PLA: 60 °C
- ABS: 100 °C
- PETG: 70 °C
- TPU: 50 °C
The print temperature is one of the settings that should definitely be calibrated.
You can’t go too far wrong with the temperature of the bed, as the print bed of the Ender-3 V3 offers excellent adhesion for most filaments.
- Fan speed:
- PLA: Min. 100%, Max. 100%
- ABS: Min. 30%, Max. 50%
- PETG: Min. 100%, Max. 100%
- TPU: Min. 100%, Max. 100%
Cooling only needs to be reduced for ABS. ABS has a strong tendency to warp as it shrinks during cooling. As the Ender-3 V3 does not have a closed print volume, it can only process ABS to a limited extent. However, smaller objects are definitely possible.
If you cannot avoid drafts, a draft shield could be an option (you can find the draft shield under the skirt settings).
Step 4: Configure the Print Settings
After you have created the profile for the Ender-3 V3, PrusaSlicer creates a print profile with default values. However, many of these settings are unsuitable for the Ender-3 V3 and would lead to printing errors or print fails.
These are the most important print settings for the Ender-3 V3:
- Layer height: 0.1 mm
- Perimeters: 2-4
- Solid layers Top/Bottom: 4-8
- Seam position: Aligned
The layer thickness should be between 25% and 75% of the nozzle diameter. This means between 0.1 and 0.3 mm for a 0.4 mm nozzle.
The wall thickness mainly depends on how stable the object is to be. More walls = more stability.
- Fill density for decorative objects: 0-15%
- Fill density for standard objects: 15-50%
- Fill density for stable objects: 50-100%
The values given above are good guidelines for a wide range of projects. The infill settings are largely printer-independent and depend entirely on the desired stability of your project. You can find more information on how to adjust the infill settings to your project in this detailed guide.
- Loops: 1
- Skirt height: 2
- Brim type: No brim
As already mentioned, the print bed adhesion of the Ender-3 V3 is excellent. It is therefore only necessary to print a Brim or Raft in very few cases. The purpose of the Skirt is to stimulate the filament flow and remove excess material before the print. If the Skirt is two layers high, it is easier to remove from the print bed as soon as the print is finished.
- Perimeters, Infill: 250 mm/s
- Small perimeters: 50%
- First layer speed: 15
Reduce the printing speed to 100 mm/s if you are printing with flexible filaments. Otherwise, the filament could tangle and the print quality would suffer from the high speeds.
- Default extrusion width: 0.4 mm
- Infill/perimeters overlap: 10%
The extrusion width should be between 100% and 120% of the nozzle diameter. So for a 0.4 mm nozzle between 0.4 to 0.48 mm.
The small percentage of overlap between the infill and the walls helps to prevent translucent infill.
🧠
Hint: There are other print settings that need to be adjusted; however, it is beyond the scope of this article to talk about literally hundreds of print settings. A shortcut for you is my calibrated PrusaSlicer profile, which you can import with just a few clicks.
Disclosure: This website is the property of Martin Lütkemeyer and is operated by Martin Lütkemeyer. Martin Lütkemeyer is a member of the Amazon Services LLC and other Affiliate Programs. These are affiliate advertising programs designed to enable websites to earn advertising revenue through advertising and linking to Amazon.com and others. Links marked with * are affiliate links.
