- Z Seam | How to Hide & Avoid | Cura & PrusaSlicer - April 20, 2024
- Qidi Tech Q1 Pro – Best Orca Slicer Settings & Profile - April 9, 2024
- Creality Ender-3 V3 Review – Will CoreXZ be the New Trend? - March 27, 2024
Disclosure: Links marked with * are Affiliate Links. I earn from qualifying purchases if you decide to make a purchase through these links – at no additional cost for you!
The Magician range from Mingda gets yet another very high-quality 3D printer with the Magician Max* and this time with a very large print volume.
Having already tested its little brother, the Magician X, my expectations were high. Read this review and practical test to find out why my high expectations were largely met and what print quality you can expect.
Check Price at:
Table of Contents:
- 1 Key Takeaways
- 2 Who Should Buy the Magician Max?
- 3 Advantages & Disadvantages > Mingda Magician Max
- 4 Technical Specifications > Mingda Magician Max
- 5 Scope of Delivery > Mingda Magician Max
- 6 Setup and Leveling > Mingda Magician Max
- 7 Features > Mingda Magician Max
- 7.1 Large Print Volume
- 7.2 Automatic Print Bed Leveling
- 7.3 Glass Print Bed
- 7.4 Double Nozzle Cooling
- 7.5 Dual Gear Direct Drive Extruder
- 7.6 Double, Synchronized Z-axis
- 7.7 Almost “Plug & Play
- 7.8 Wide Range of Connection Options
- 7.9 3.5-Inch Touchscreen
- 7.10 Built-In Tool Drawer and SD Card Holder
- 7.11 Quiet Operation
- 7.12 Automatic Filament Feed
- 7.13 Filament Sensor, Belt Tensioner & Resume Print
- 8 Heating Times > Mingda Magician Max
- 9 Power Consumption > Mingda Magician Max
- 10 Slicer > Mingda Magician Max
- 11 Print Quality > Mingda Magician Max
- 12 Mingda Magician Max vs. Mingda Magician X
- 13 Mingda Magician Max vs. Creality CR-10 Smart Pro
- 14 Mingda Magician Max vs. Artillery Sidewinder X2
- 15 Conclusion – Is the Magician Max Worth It?
- 16 Similar 3D Printers
Key Takeaways
- Large print volume of 320 x 320 x 400 mm, stabilized by a double Z-axis.
- Due to the direct drive extruder, it can also process flexible filaments very well.
- The print bed leveling is completely automatic, the print bed is fixed without knobs under it.
- Adhesion to the glass print bed is good for most filaments at a low print speed for the first layer of 5-10 mm/s.
Who Should Buy the Magician Max?
Anyone who wants to print large objects in one piece with a reliably good print quality is well advised to use the Magician Max. It has all the features needed for most filaments to achieve good results.
Advantages & Disadvantages
> Mingda Magician Max
PRO:
- Large print volume
- Automatic print bed leveling
- Dual gear direct drive extruder
- Very quiet
- Professional design and neat cable management
- Double Z-axis
CON:
- No PEI print bed (would be a small upgrade for some filaments)
Technical Specifications
> Mingda Magician Max
DEVICE
- Technology: FDM (Fused Deposition Modeling)
- Assembly: Almost completely pre-assembled
- Size: 555 x 430 x 660 mm
- Weight: 10 kg
- Operation: 3.5-inch color touch screen
PRINTING
- Extruder: Direct drive, dual gears
- Print volume: 320 x 320 x 400 mm
- Accuracy: 0.1 mm
- Nozzle quantity: 1
- Nozzle diameter: 0.4 mm
- Max. nozzle temperature: 260 °C
- Max. print bed temperature: 110 °C
- Filaments: PLA, ABS, PETG, TPU
- Filament diameter: 1.75 mm
- Print bed: Textured glass print bed
- Print bed leveling: Automatic
- Resume print: Yes
- Filament sensor: Yes
SOFTWARE
- Connectivity: SD card, USB, USB-C
- Slicer: Cura (recommended)
Check Price at:
Scope of Delivery
> Mingda Magician Max
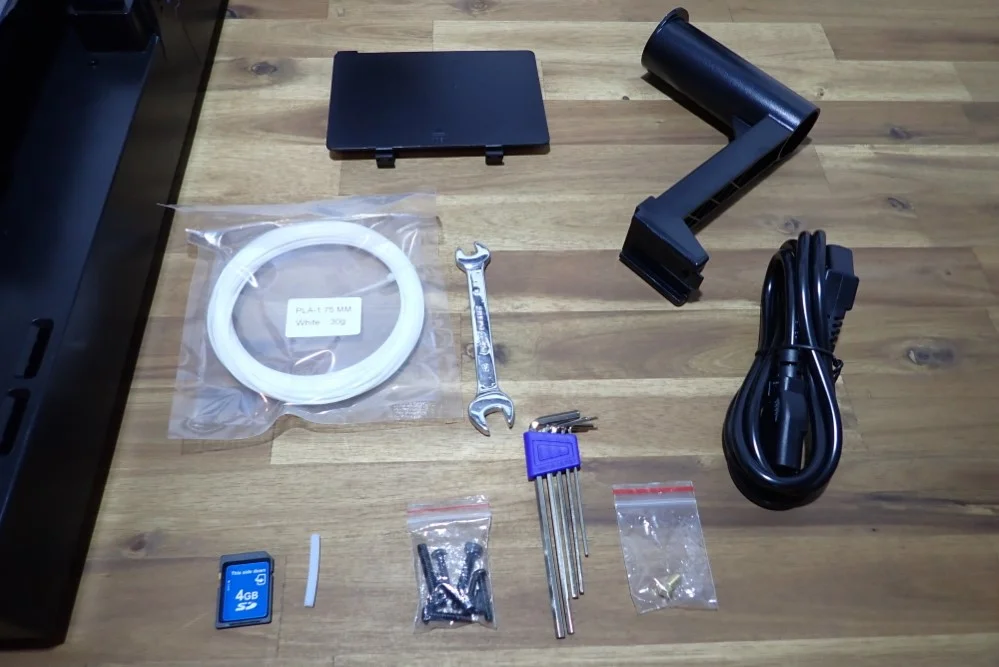
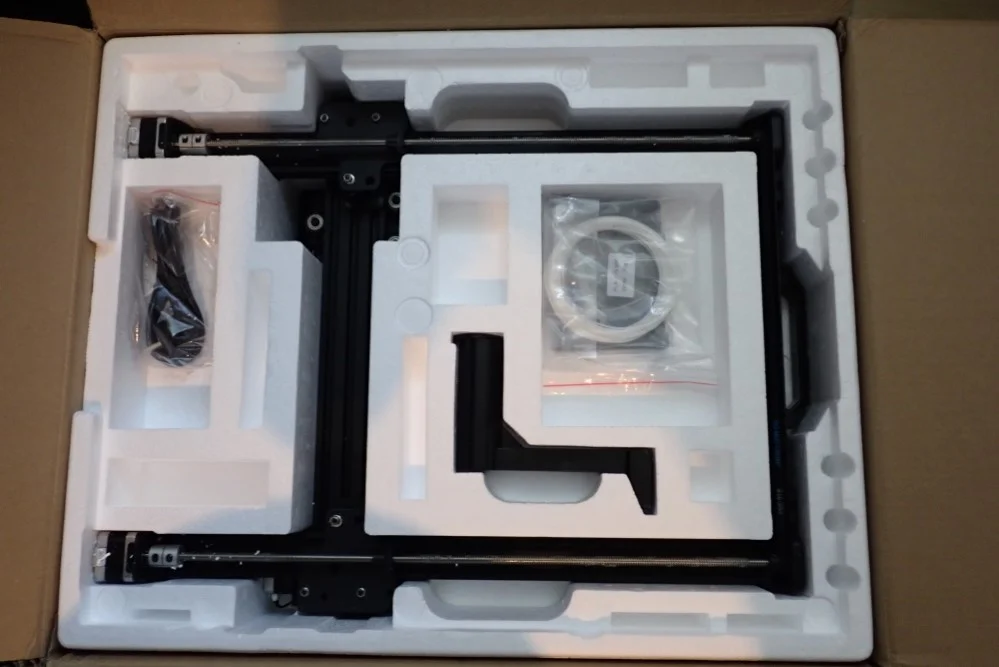
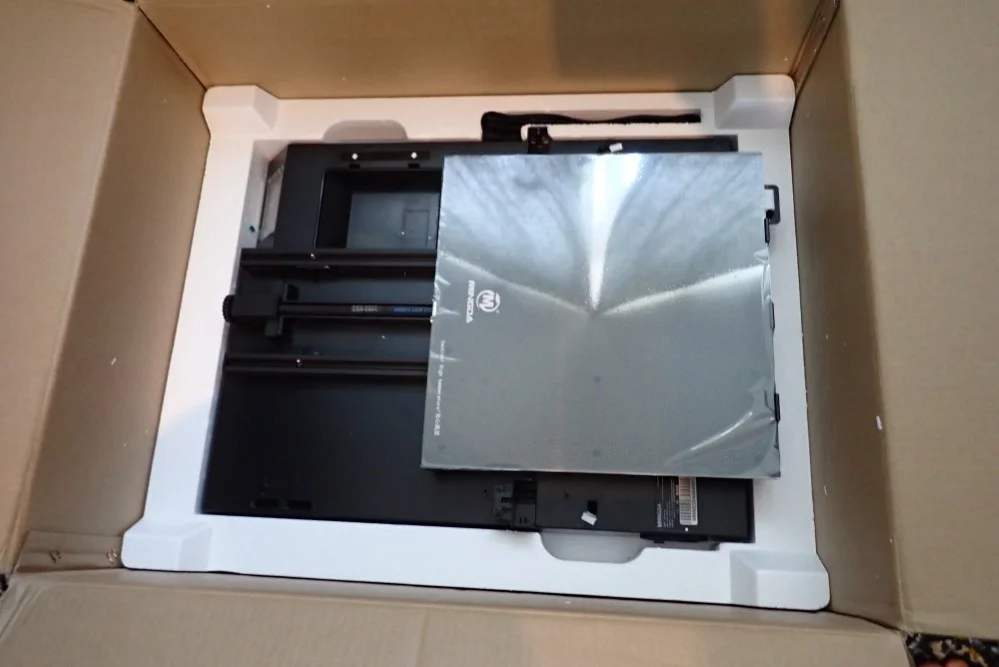
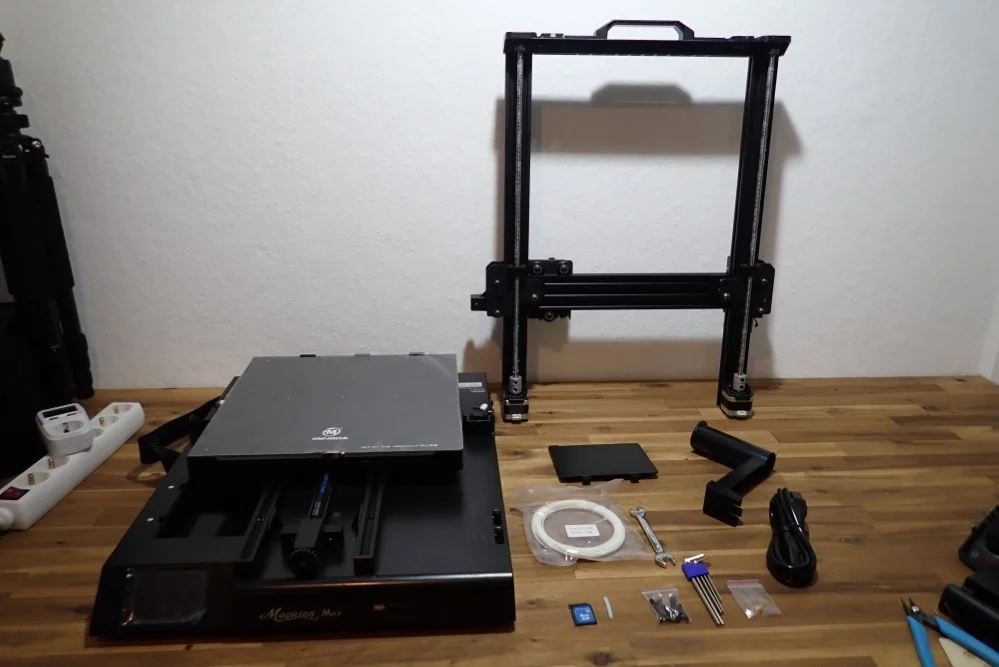
The Mingda Magician Max comes with everything you need to start your first test print in just a few minutes. In addition to all the necessary tools for the assembly is also a very clear and understandable user manual and an SD card that contains the digital version of the manual, a test model and the Cura Slicer.
Also included is a small sample of PLA filament so you can print your first test print with it. However, the filament won’t last much more than one or two test prints, so you should buy more filament directly with the printer.
For the size of the printer, the package it comes in is relatively small. Also, all the components inside the package are very well secured by styrofoam. Here, in the long run, a switch to a more environmentally friendly material like cardboard would be nice.
Setup and Leveling
> Mingda Magician Max
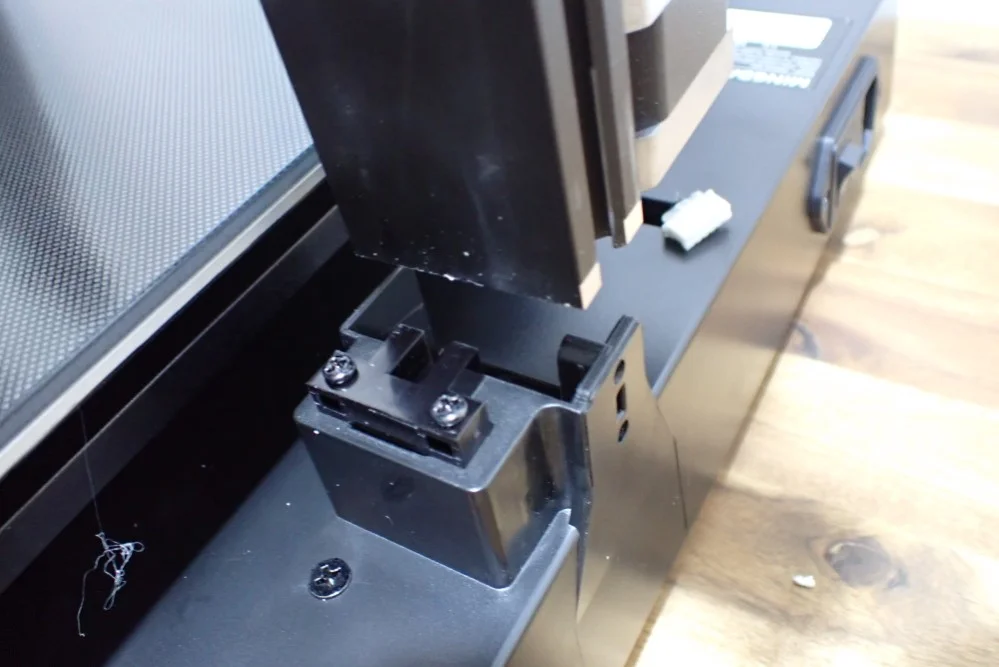
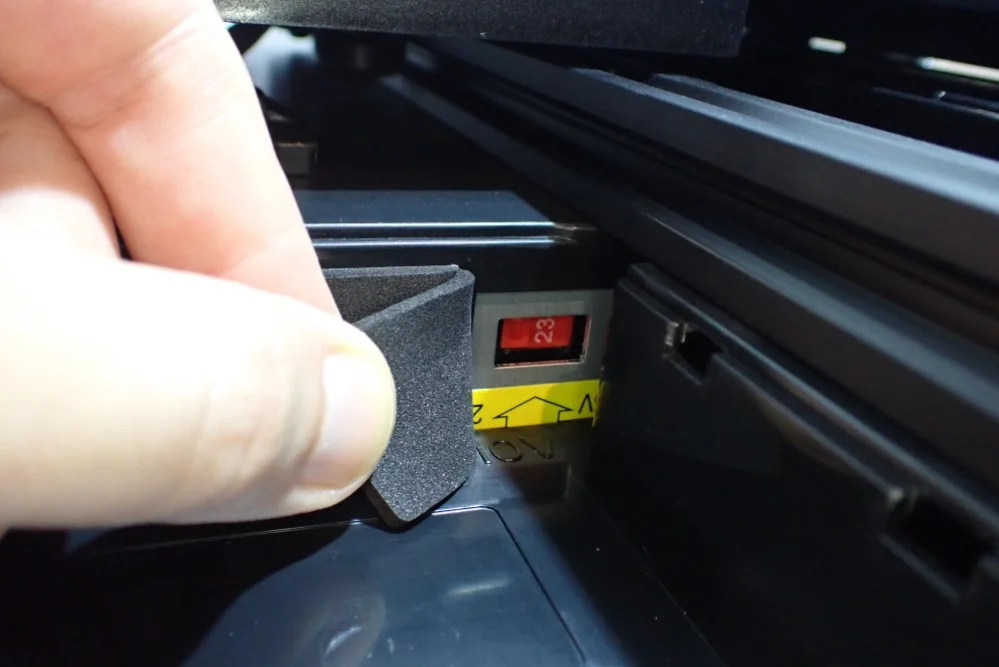
The assembly is done within a few minutes. Since the printer is delivered almost completely pre-assembled, the assembly consists of only a few steps. In addition, the mounting of the frame to the base is facilitated by mounting aids in which the frame is inserted.
Apparently, this construction is also stable enough to support the large print volume. Even with very high objects that exhaust the entire print volume, I could not detect any inaccuracies or vibrations.
The last steps of the assembly are now only to clip the filament holder to the frame and to connect the cables. There is no room for error when connecting the cables, as they have been routed so that they only fit into the slots provided.
The print bed leveling is completely automatic on the Mingda Magician Max. In the menu, there is a button called “Leveling”. As soon as you click on it, the printer automatically heats the nozzle to 150 °C and the print bed to 50 °C and starts to level the print bed in several places.
The only thing you have to do then is to adjust the Z-Offest with the so-called babysteps during the first layer for your next print. Adjust the spacing so that the first layer is lightly pressed onto the print bed and not loosely laid on top of it.
Check Price at:
Features
> Mingda Magician Max
The Magician Max has many features that simplify use and make 3D printing as error-free as possible.
Large Print Volume
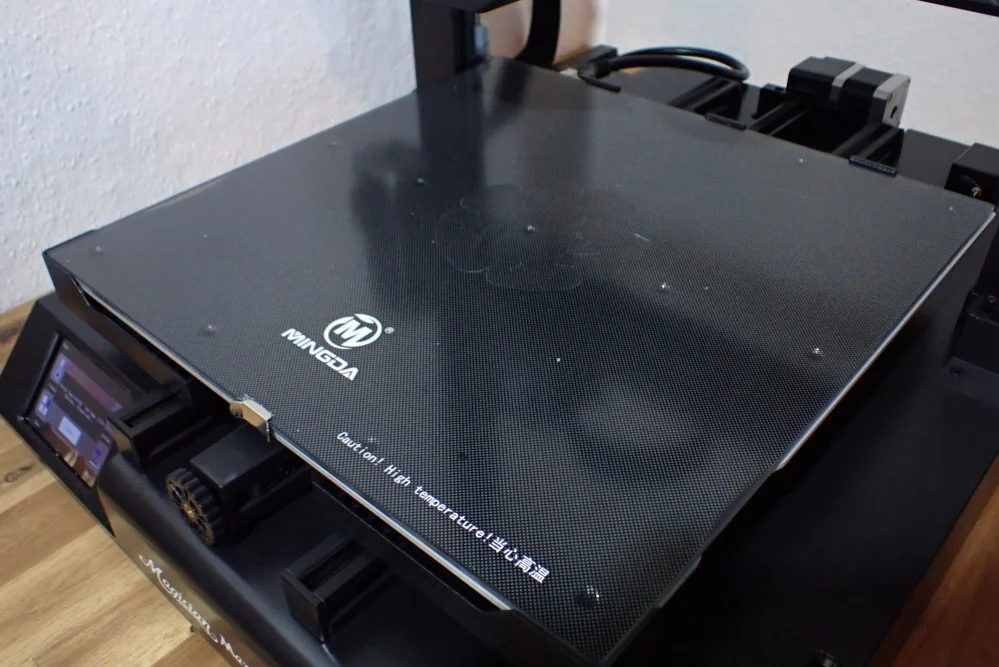
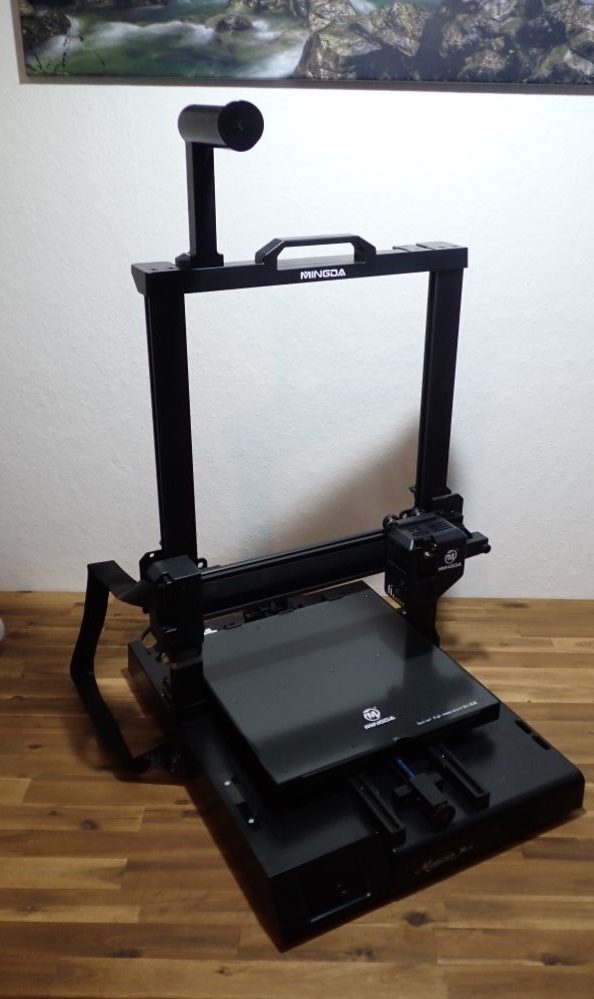
The Mingda Magician Max has a very large print volume of 320 x 320 x 400 mm. This means that even very large objects can be printed in one piece.
Note, however, that a print may take several days, depending on how fine you have set the layer height. With such large objects, you should make sure that you have enough filament available for the model. You don’t have to worry about running out of filament in the meantime, because it has a filament sensor and pauses the print as soon as the filament runs out.
The large volume is sufficiently protected from vibrations and positioning inaccuracies by the stable frame. Other 3D printers with a similar print volume like the Creality CR-10 Smart Pro use diagonal struts to stabilize the large print volume or the high frame. In my opinion, Mingda has implemented a slightly more elegant variant and strengthened the connection of the frame to the base. This way the frame has no chance to wobble or give way to the weight of the print head.
Automatic Print Bed Leveling
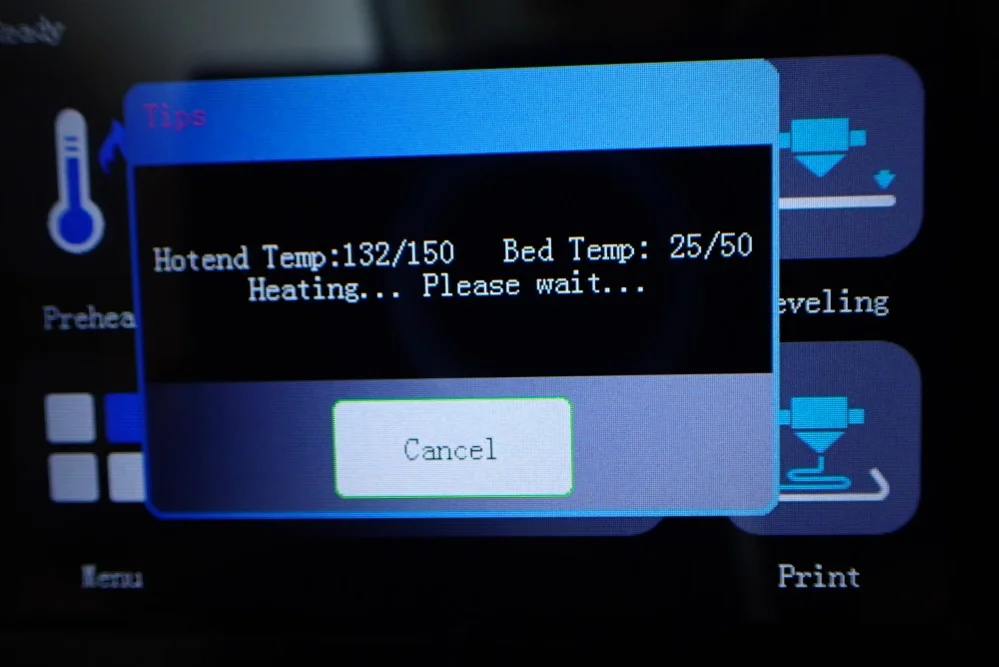
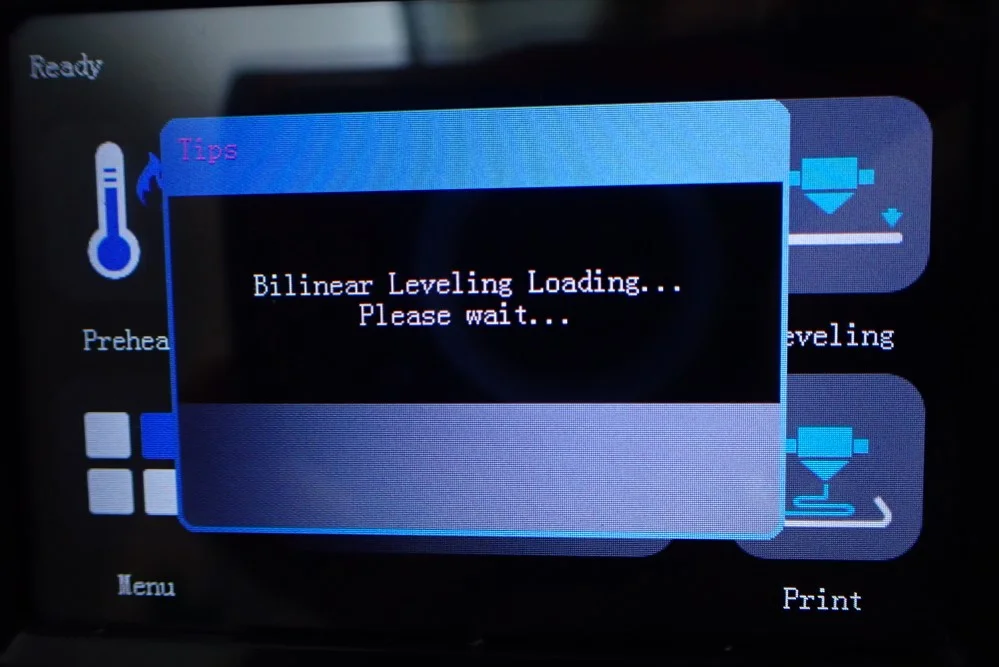
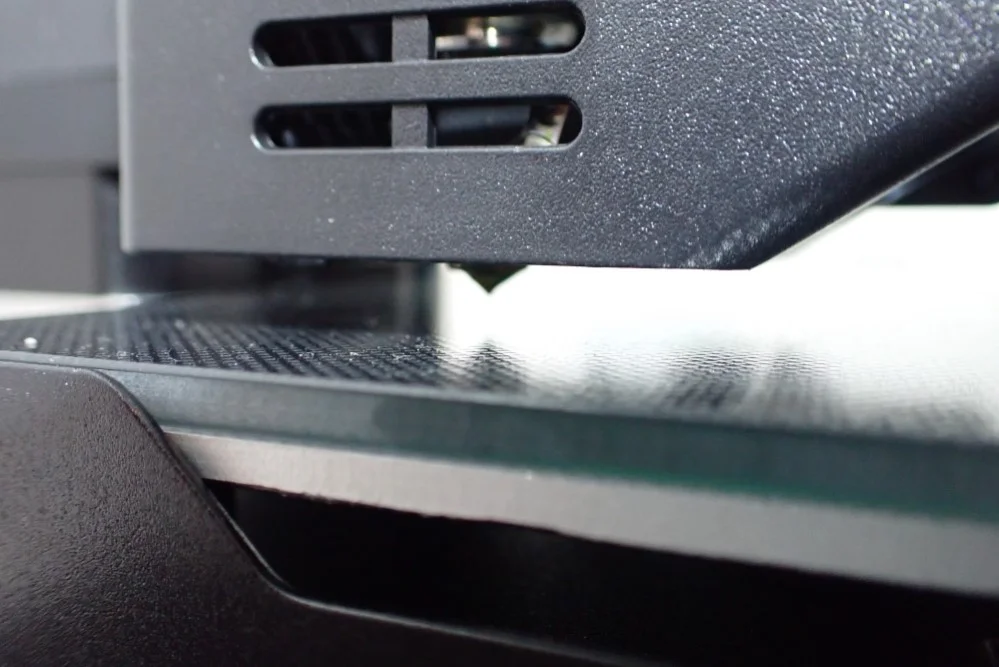
The Magician Max has an automatic print bed leveling at 16 points on the print bed. The leveling is started via the menu and is done after a few minutes.
Thanks to the stable construction of the print bed and the frame, leveling only needs to be repeated very rarely. The print bed does not have any turning screws to be able to adjust it manually. This fact alone sets the Mingda Magician Max apart from DIY kits and takes a lot of frustration and tinkering out of the equation.
The only thing you have to do is to set the Z-Offset. Mingda recommends setting the Z-Offset during printing. You can use the menu and the Z-axis to move up and down in small steps during printing to set and save the Z0-offset. Basically, while the printer is printing the first layer, you look at how it places the lines on the print bed. Depending on whether the lines are flattened too much or just loosely laid on top, you have to increase or decrease the distance.
Personally, I find this type of print bed leveling very convenient and practical because it is done very quickly and you don’t even need a piece of paper.
Glass Print Bed
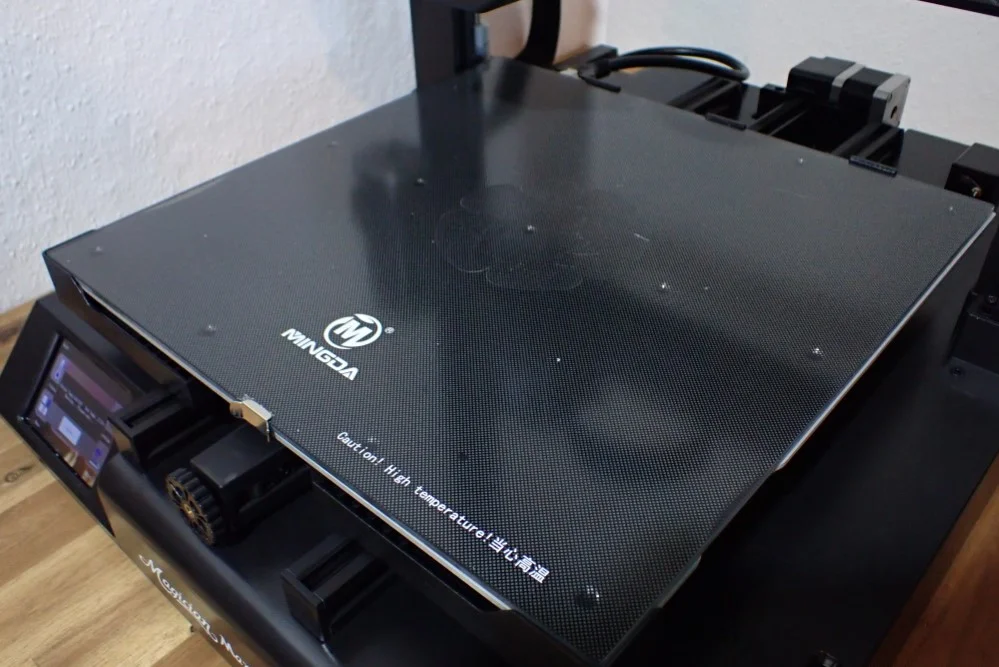
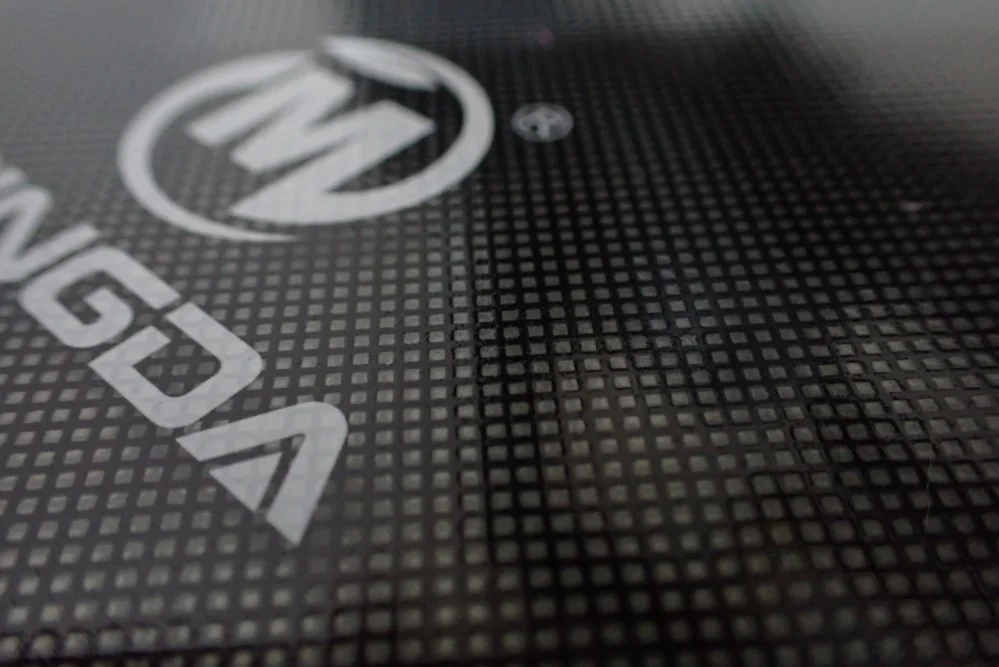
The Mingda Magician Max has a large glass print bed with a textured surface and a maximum print area of 320 x 320 mm. At low print speeds for the first layer, print bed adhesion is sufficient for all filaments.
The advantage of a glass print bed is the smooth underside of the printed object. In addition, it is very easy to remove the finished objects from the print bed once it has cooled down completely. The disadvantage of glass print beds, however, is the sometimes suboptimal print bed adhesion. Especially for very filigree first layers, it is very important to adjust the Z-offset correctly.
You should also reduce the print speed for the first layer. I usually play it safe and set the print speed for the first layer to 5-10 mm/s. Then everything adheres very well!
Double Nozzle Cooling
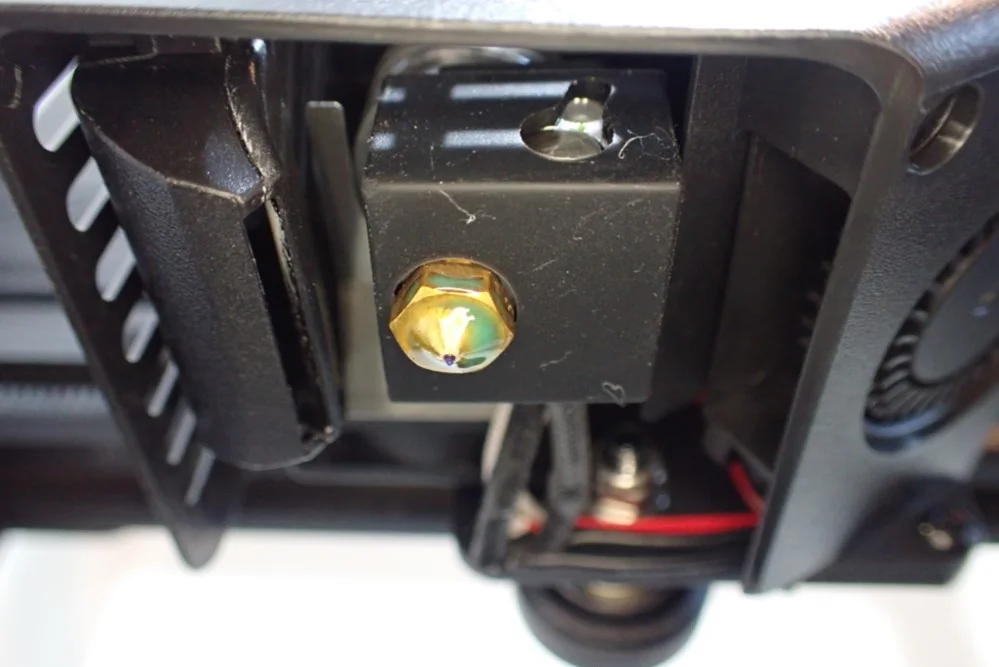
Two part fans are installed in the print head of the Mingda Magician Max. They effectively cool the nozzle and the printed part from two sides.
This double cooling allows you to achieve high print speeds with some filaments without sacrificing accuracy. However, for some filaments, such as ABS, you may want to turn off the cooling so that it does not crack when it cools so quickly.
Dual Gear Direct Drive Extruder
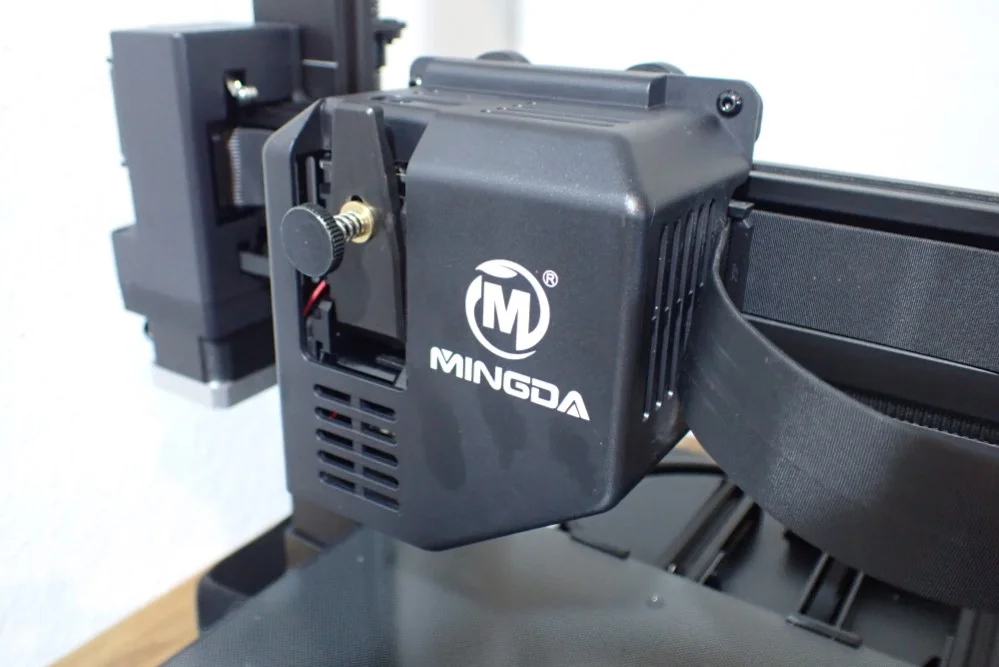
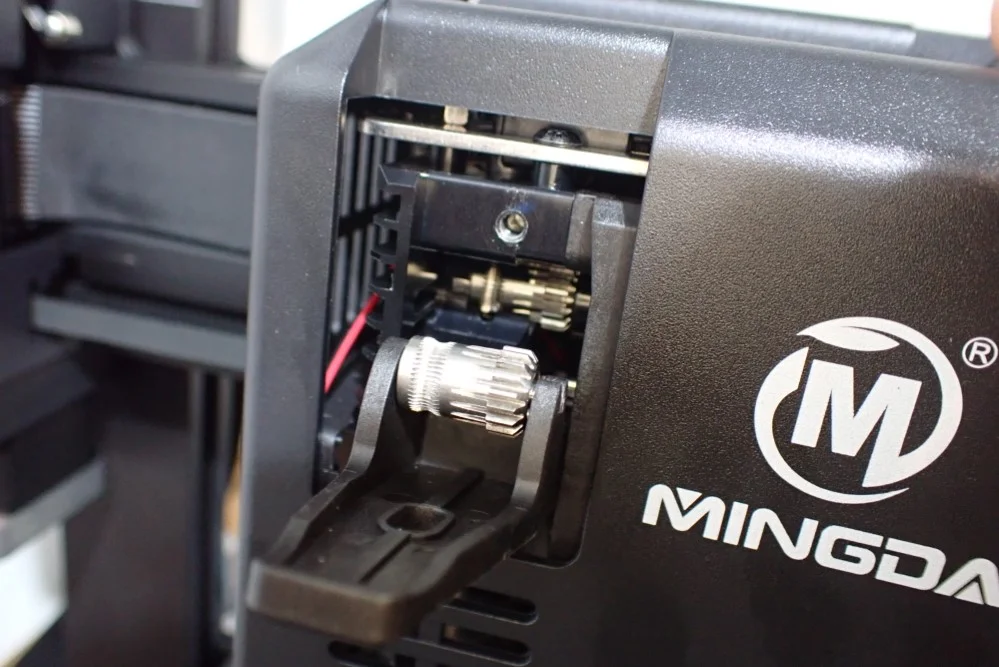
In the print head of the Magician Max, the direct drive extruder sits directly above the nozzle. It has two gears that feed the filament to the nozzle.
With many other 3D printers, the extruder is equipped with only one active gear, which can sometimes cause the filament to slip at high speeds, or the control over the filament is generally not precise.
By positioning the direct drive extruder directly above the nozzle, the distance the filament has to travel after the extruder is minimal, which is perfect for flexible filaments. These no longer have the chance to get tangled on the way to the nozzle or to compensate for the extrusion movements due to their flexibility.
Double, Synchronized Z-axis
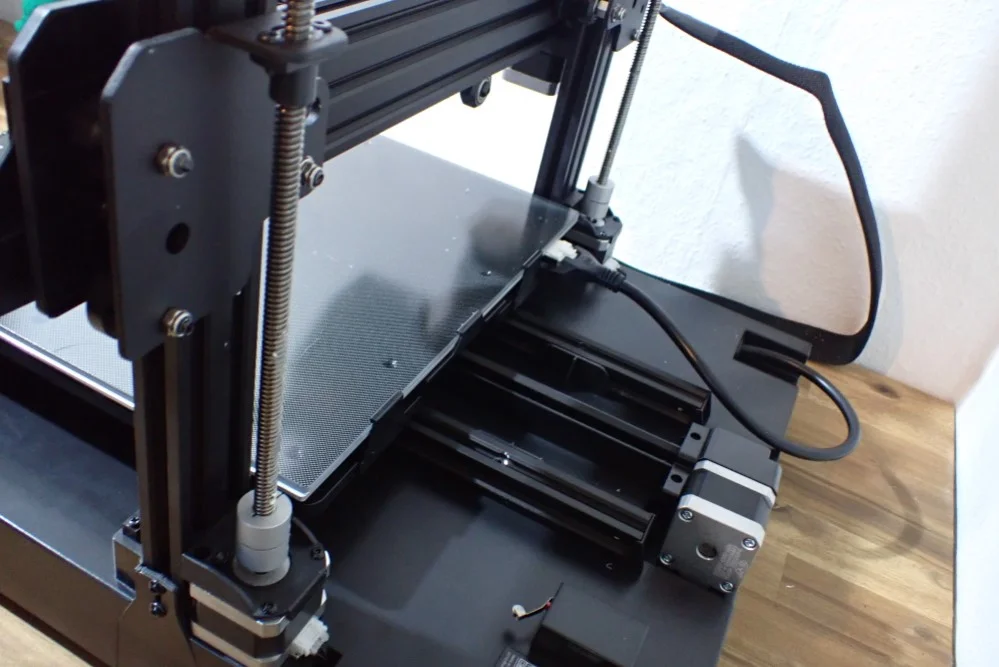
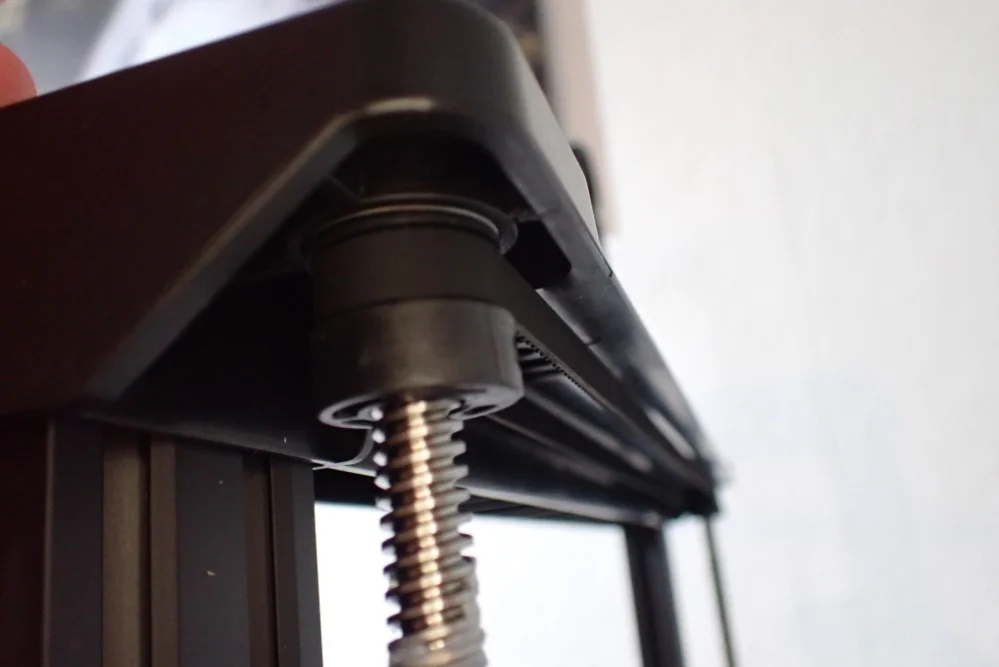
The large print volume of the Magician Max is stabilized by a double-driven Z-axis. This increases the positioning accuracy of the X-axis in the Z-direction and minimizes vibrations.
The two Z-axes, each driven by an independent motor, are additionally connected with a toothed belt at the upper end of the frame. This synchronizes them and stabilizes their movements even more.
At the top end of the frame is also a practical handle with which the 3D printer is relatively easy to move for its size. With its 10 kg, you still need a second hand to carry the weight of the base.
Almost “Plug & Play
The Magician Max has a modular design and is delivered almost completely pre-assembled. It is assembled and ready to use within minutes.
When I built my first 3D printer as a DIY kit a few years ago, the assembly was still an afternoon project and the next day it went on with the calibration. Meanwhile, the manufacturers of 3D printers have understood how they can extremely shorten the time between unpacking and the first test print.
Even beginners will be able to assemble the Magician Max within a maximum of 15 minutes. And thanks to the completely automatic leveling, it is also very easy to successfully complete the first test print.
Wide Range of Connection Options
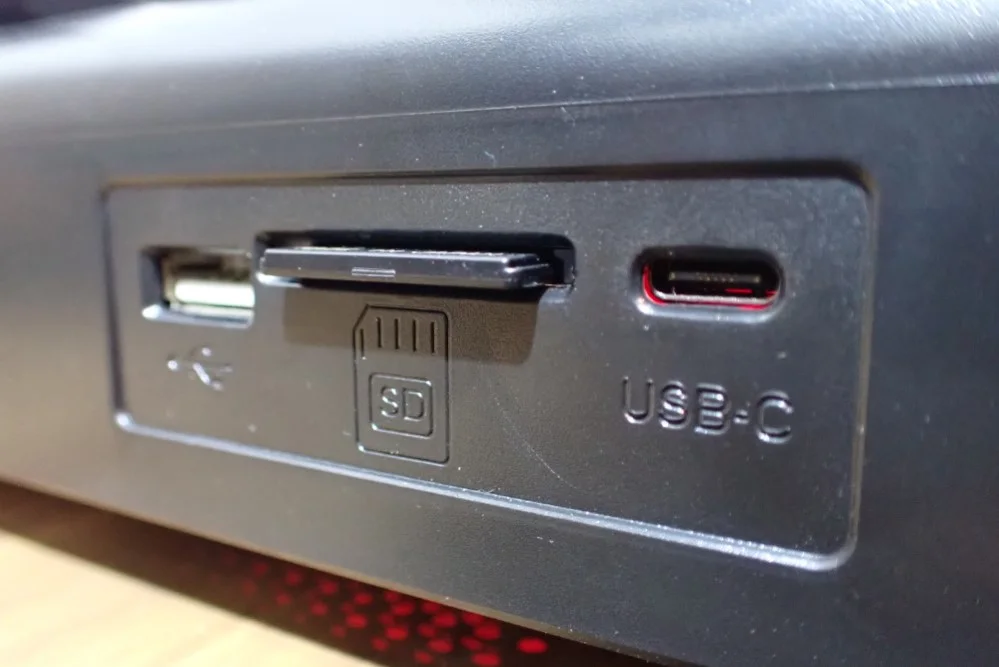
On the front of the Magician Max, there are various connection options for data media or for connection to a computer.
The Magician Max is delivered with an SD card. However, there is no slot for a micro SD card. I find it is generally more practical to handle with an SD card than with a micro SD card. The insertion and removal of the SD card in the printer and the USB adapter is much easier and not so fiddly.
3.5-Inch Touchscreen
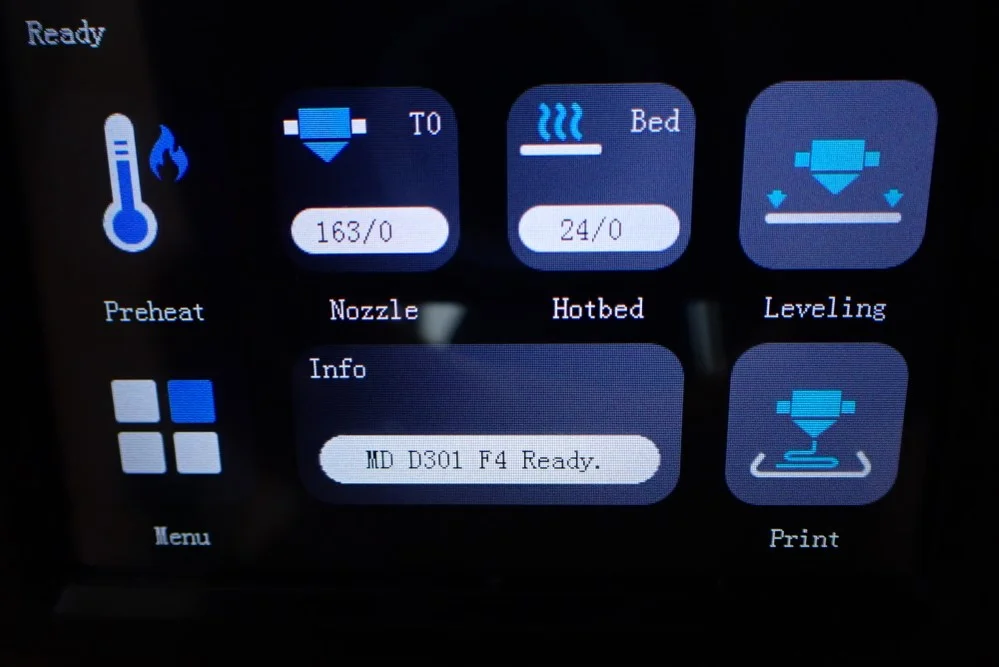
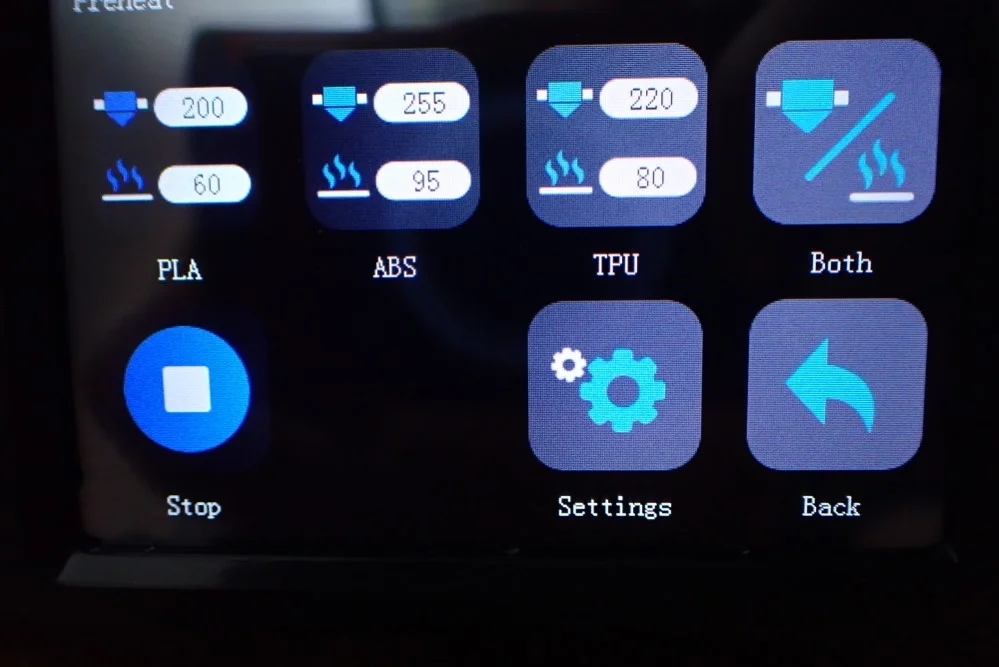
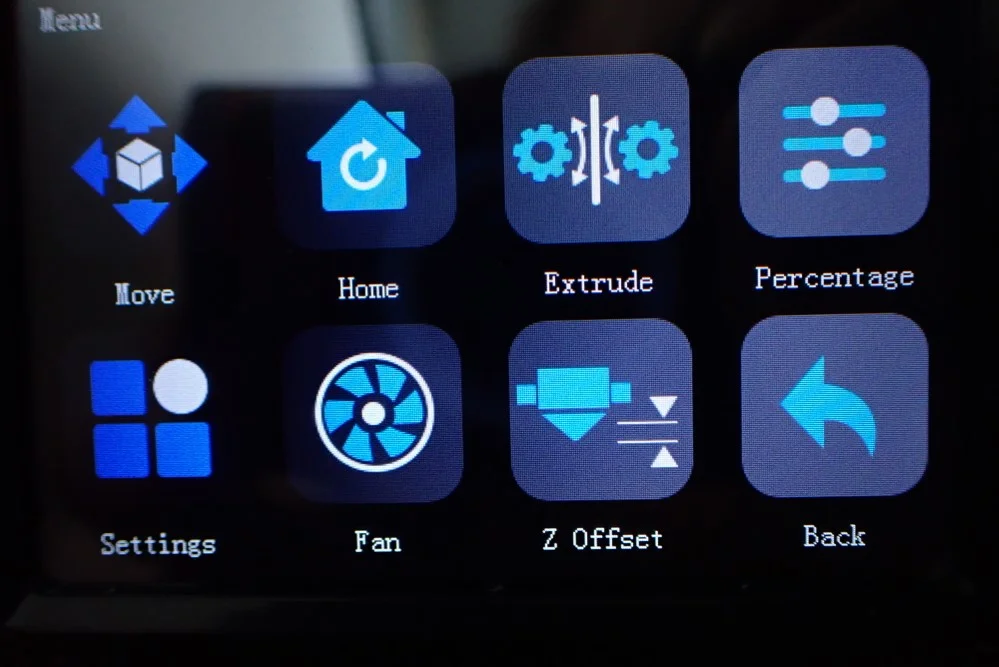
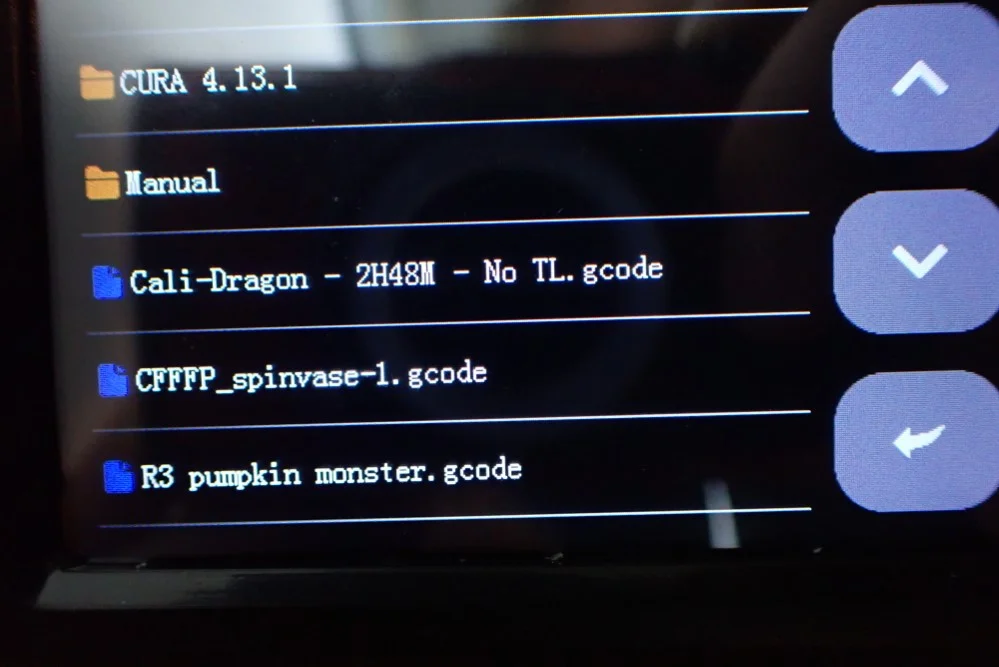
The Magician Max has a 3.5-inch touchscreen with a color display.
The menu is clearly structured and you will find almost all the settings you need for printing on the first page of the menu. The two-color design of the menu is very appealing and the touches on the touchscreen lead to precise inputs.
While the touchscreen could be a bit larger, I think its positioning at the base of the printer is just right to save space. The Magician Max is big enough in its own right and a display on the side of the 3D printer would be a waste of space.
Built-In Tool Drawer and SD Card Holder
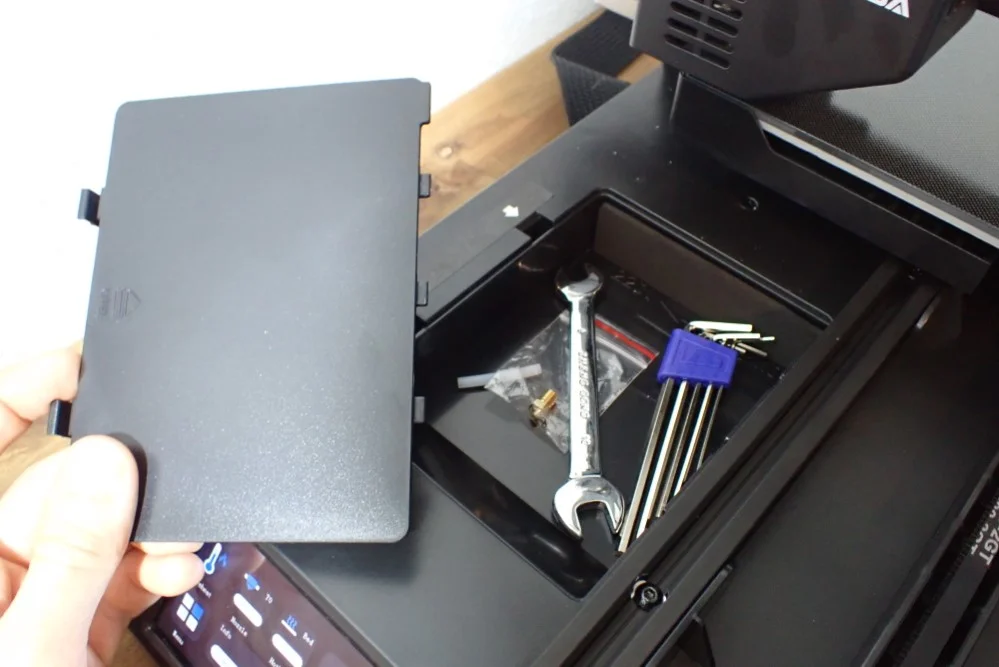
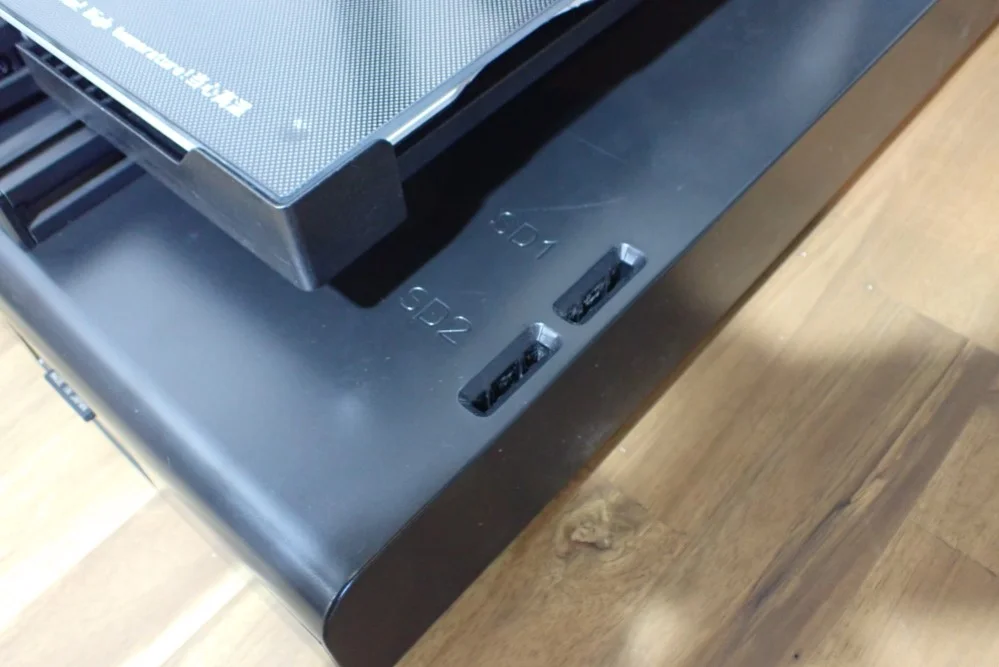
In the base of the Magician Max is a tool drawer and 2 SD card holders.
Although these are not really the most exciting features, they help to keep the workplace tidy. Especially the tools that you need less are well stored here and still handy.
Quiet Operation
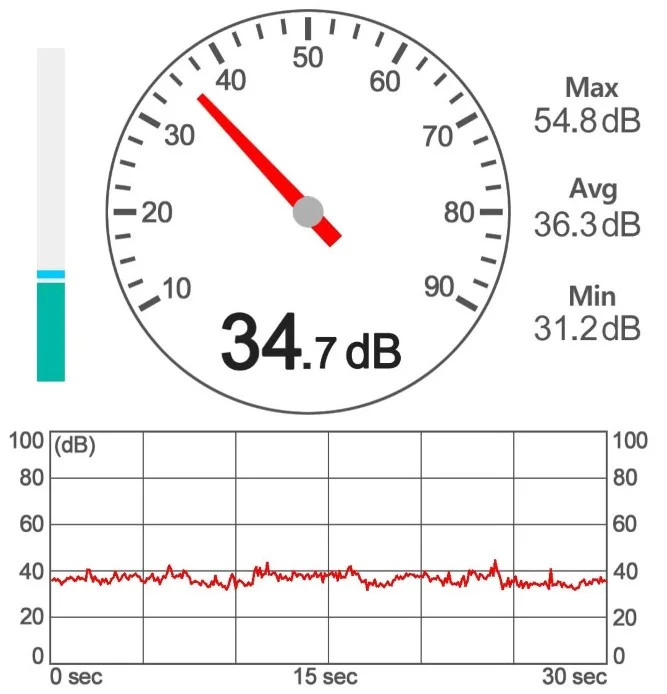
The Magician Max operates very quietly with an average volume of under 40 decibels. It reaches a maximum of 50 decibels.
The stepper motor drivers that are built into the motherboard are very quiet and inaudible. Thus, the movements are only slightly louder at very high speeds due to the movements of the axis. The installed fans are of acceptable quality and do not get noticeably louder even after my test phase.
Automatic Filament Feed
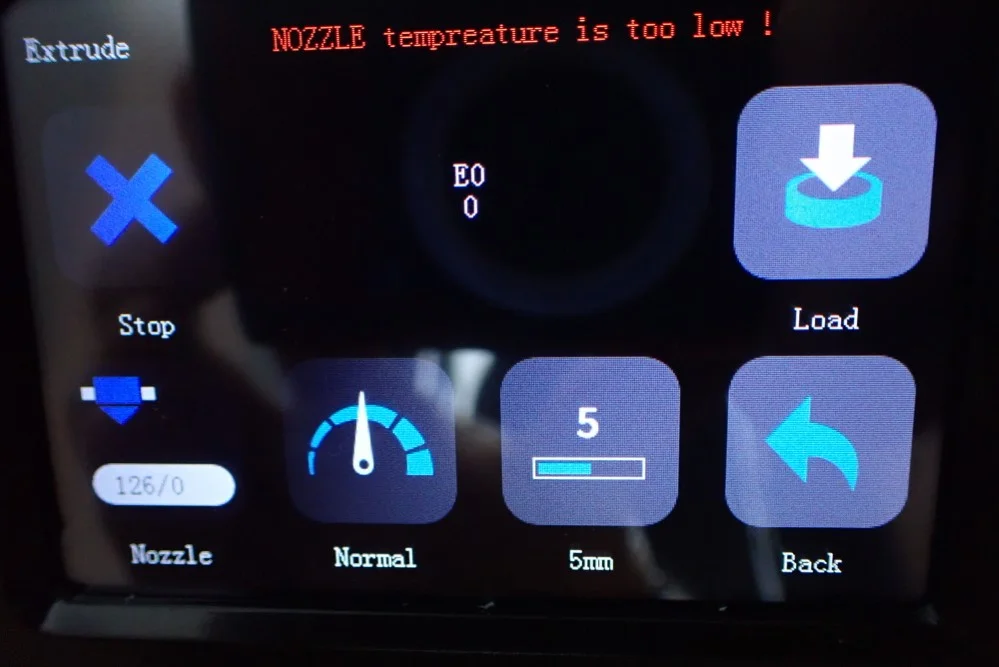
With the Magician Max, the filament can be loaded or changed either manually or via the menu.
If you choose the menu option, the 3D printer heats the hot end to the melting temperature of the filament and then delivers it to the nozzle at the push of a button. You still have to manually insert the filament into the beginning of the extruder so that it can grab it, but the rest works at the push of a button.
Filament Sensor, Belt Tensioner & Resume Print
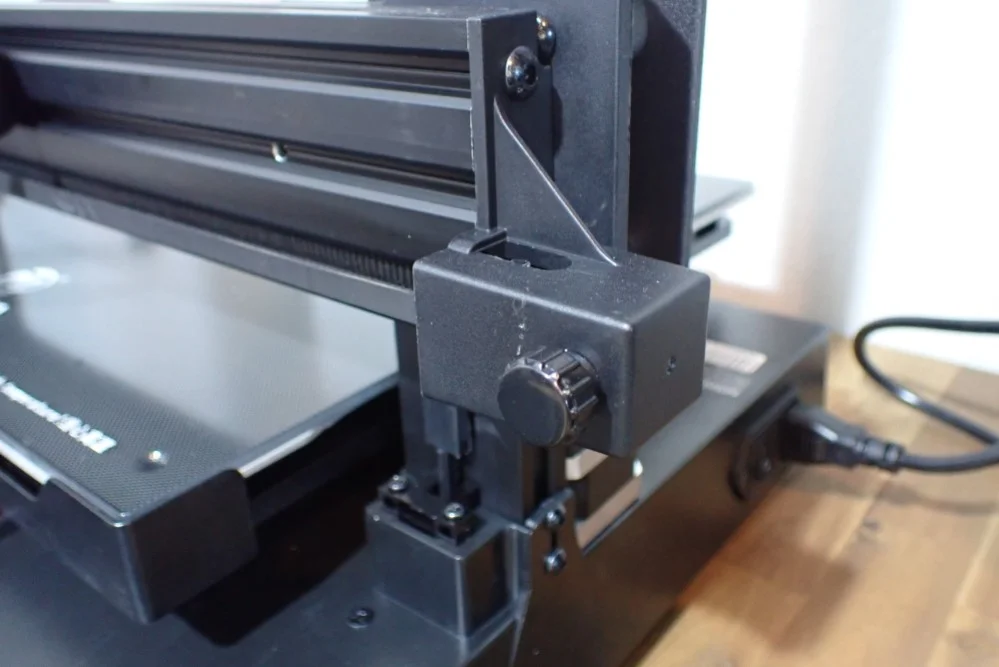
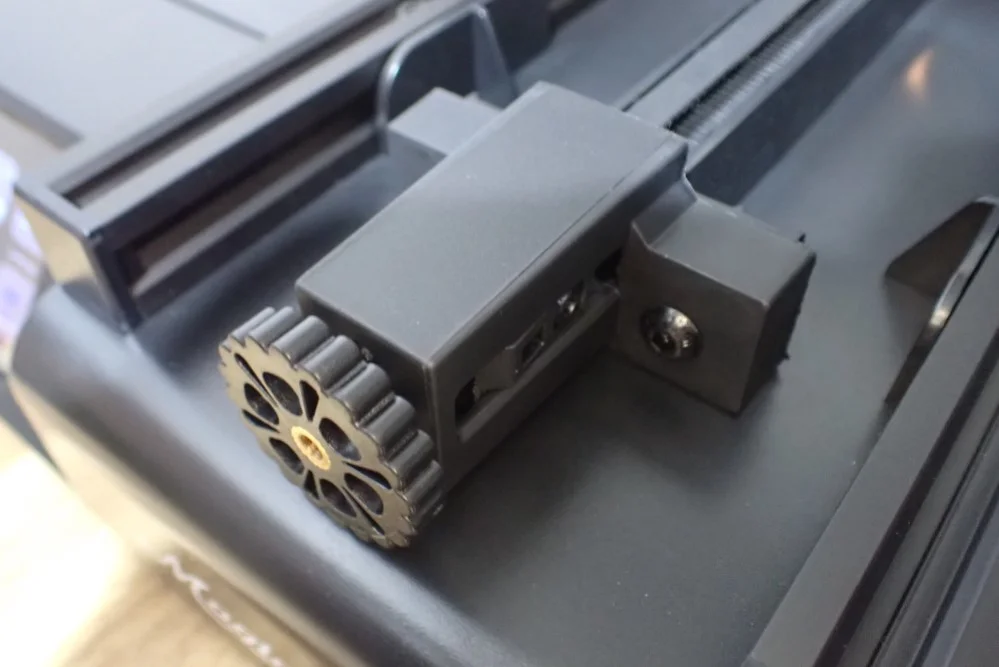
The Magician Max has a filament sensor in the print head, a belt tensioner for both the X and Y axes, and the Resume Print feature that resumes printing at the same point after a power failure.
These three features are now a must-have for new 3D printers and have therefore become a standard. I find it very practical that the filament sensor is built into the print head, as it saves a threading process. In other 3D printers, the filament sensor is located directly under the filament holder – e.g. in the newer direct drive 3D printers from Creality (Ender 3 S1, CR-10 Smart Pro, etc.). The variant from Mingda looks much more elegant and professional.
Also, the belt tensioners are very handy to adjust the tension properly after mounting. Most of the time they need to be tightened a little.
Check Price at:
Heating Times
> Mingda Magician Max
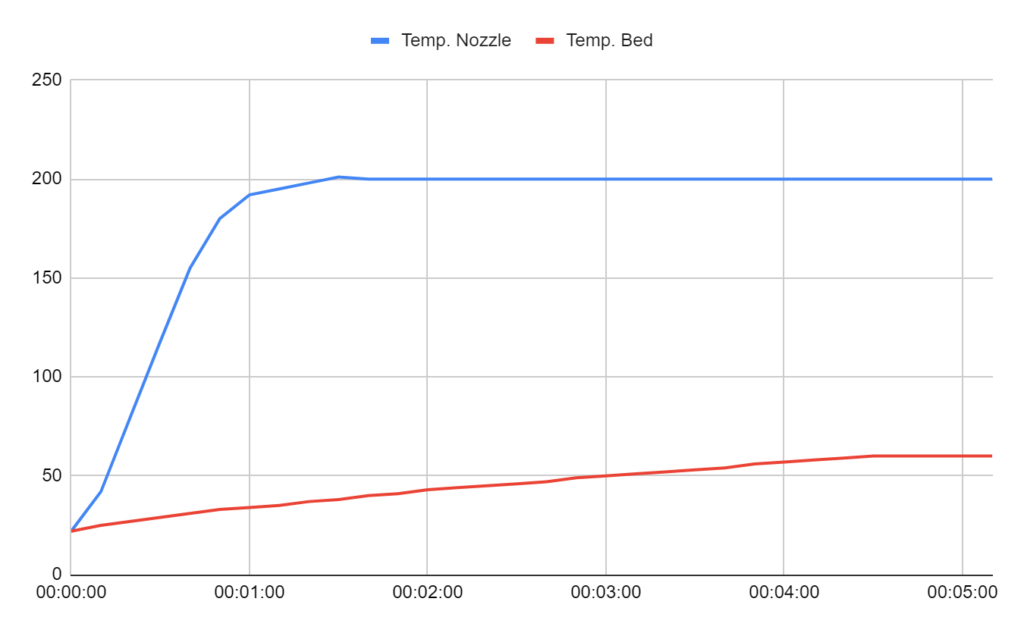
The Nozzle of the Mingda Magician Max heats up to 200 °C within 1.5 minutes. The print bed takes 5 minutes to reach 60 °C. The print bed temperature homogeneity is acceptable for such a large print bed.
Most mid-sized 3D printers have heat-up times of two to three minutes for PLA temperatures (200 °C for the nozzle and 60 °C for the print bed). The heat-up time for the print bed depends largely on its size and the material. The print bed of the Magician Max is very large and made of glass. This makes it take much longer to heat up than a thin PEI layer for example.
With a print bed as thick as this one, you should also wait a few minutes longer after the temperature has been reached. The temperature needs a bit to distribute itself homogeneously over the entire surface. I measured the temperature with a non-contact pyrometer at 25 points on the print bed.
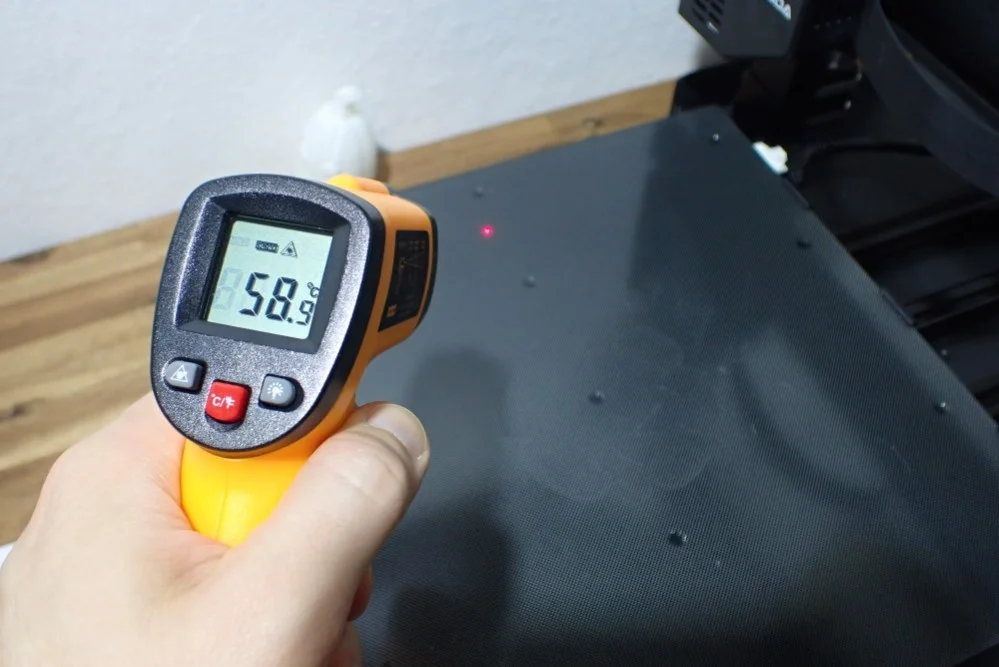
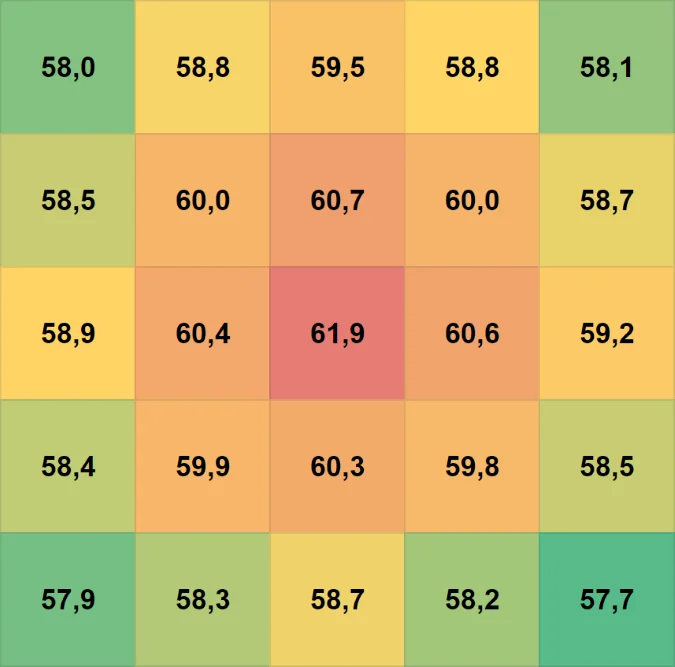
The highest temperature was 61.9 °C in the middle of the print bed. The lowest was in one corner at 57.7 °C. That’s a pretty big difference of 4.2 °C. If you print at a slow speed for large objects on the first layer, the print bed adhesion for most filaments should still be sufficient to compensate for this difference. It may be necessary to use some adhesive like Magigoo for filaments that contract like ABS.
Power Consumption
> Mingda Magician Max
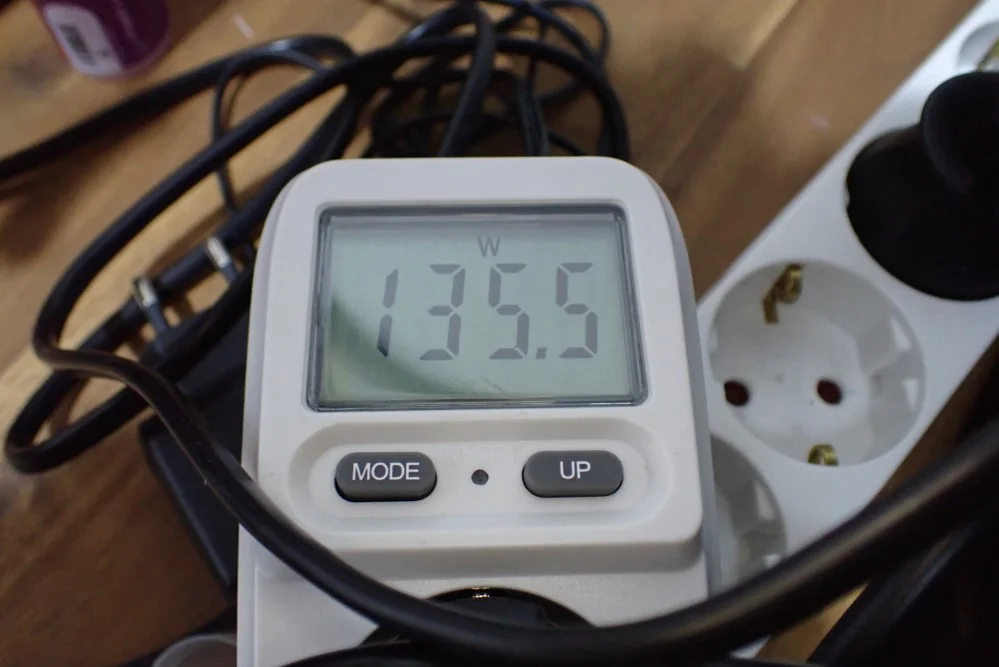
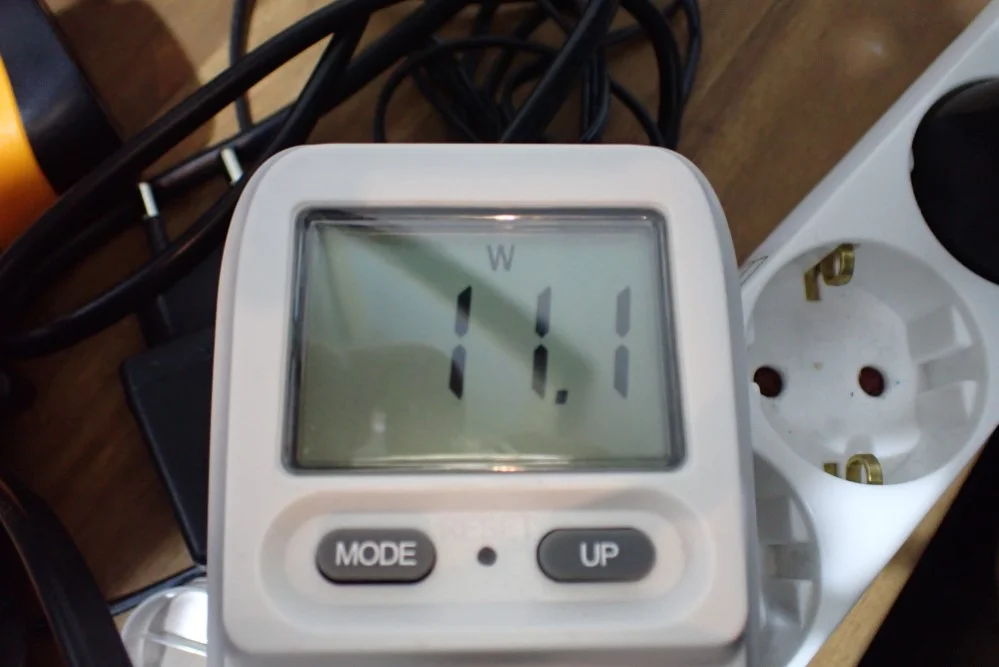
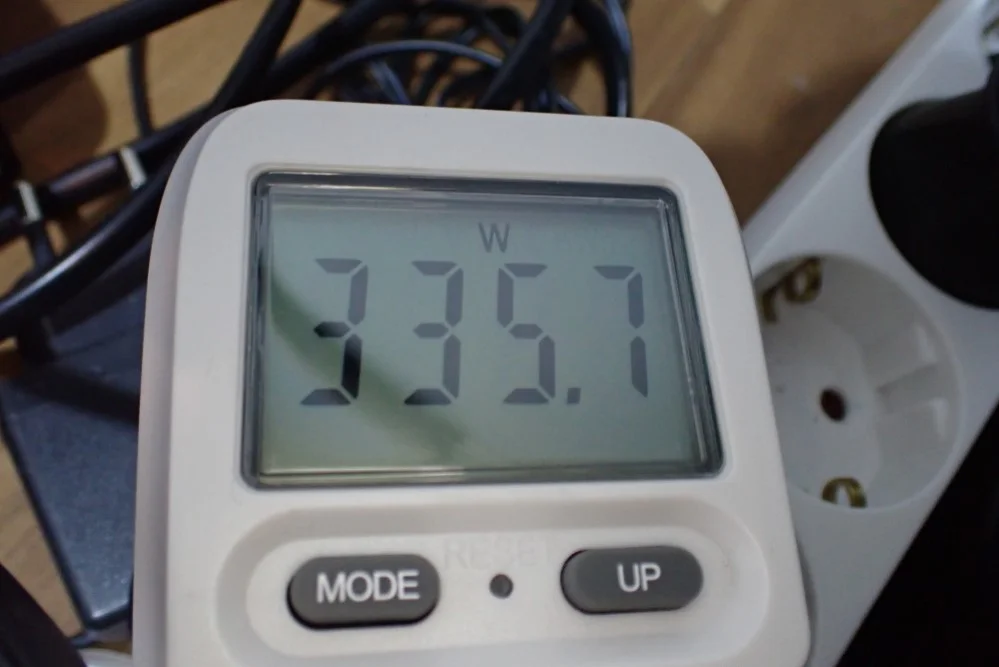
In standby mode, i.e. in the menu and without a heated nozzle or print bed, the Magician Max consumes only 11 watts. During the heating phase, it consumes over 300 watts due to the large print bed and 120 to 140 watts during printing.
These values are quite normal for such a large print bed. If you print large objects, you have to expect that you will have to run the printer for several days. Fortunately, the electricity costs are then kept within limits.
Slicer
> Mingda Magician Max
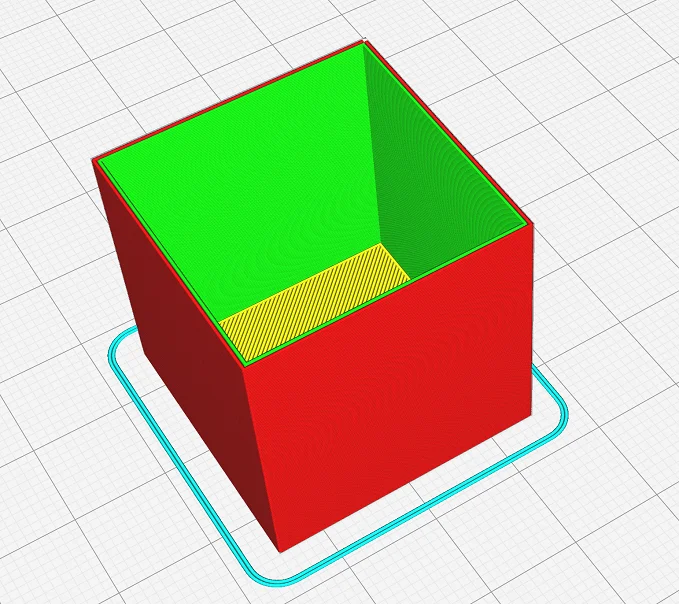
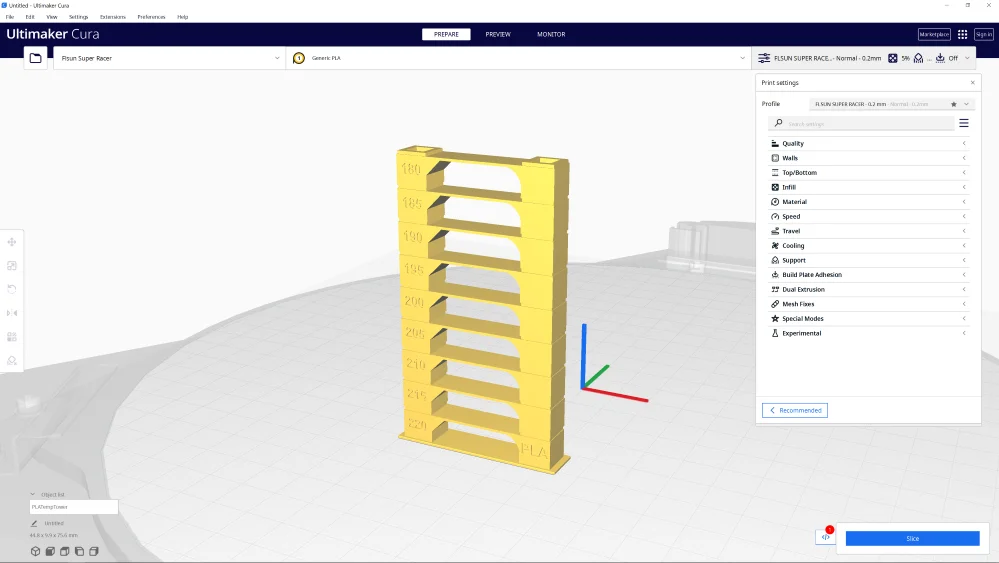
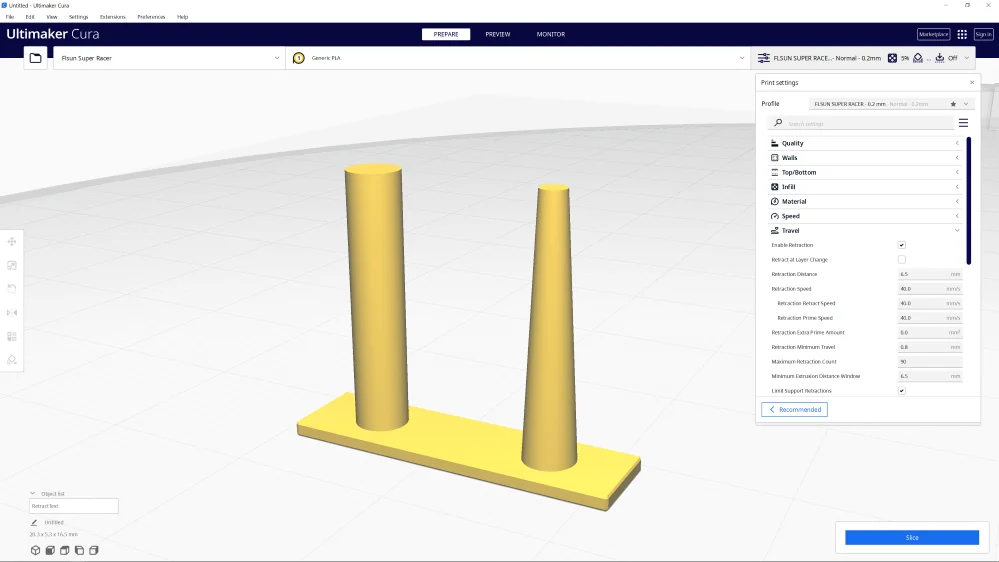
The recommended slicer for the Magician Max is Cura.
At the time of this review, there was no default profile for the Mingda Magician Max in Cura. It usually takes a few weeks or even months for a suitable default profile to be added. Until then, you’ll have to create your own profile.
Read the full guide:
Best Cura Settings & Profile for the Magician Max – Tested!
The included SD card contains profiles for different filaments, which provide a good starting point for further calibrations. The manual also describes which machine parameters you need to enter.
It is always a good idea to calibrate the most important parameters for the filament used with every new 3D printer. These are mainly the print temperature, the retraction and the flow rate. These three parameters are quite easy to calibrate and you only need a little filament and time for it.
I usually use the Calibration Shapes plugin in Cura. There are various calibration objects that you can call up directly without having to download anything online.
Print Quality
> Mingda Magician Max
The print quality of the Mingda Magician Max is 0.1 mm. The quality is very reliable and reproducible.
To test the print quality in practice I printed several models.
Test Object on SD card
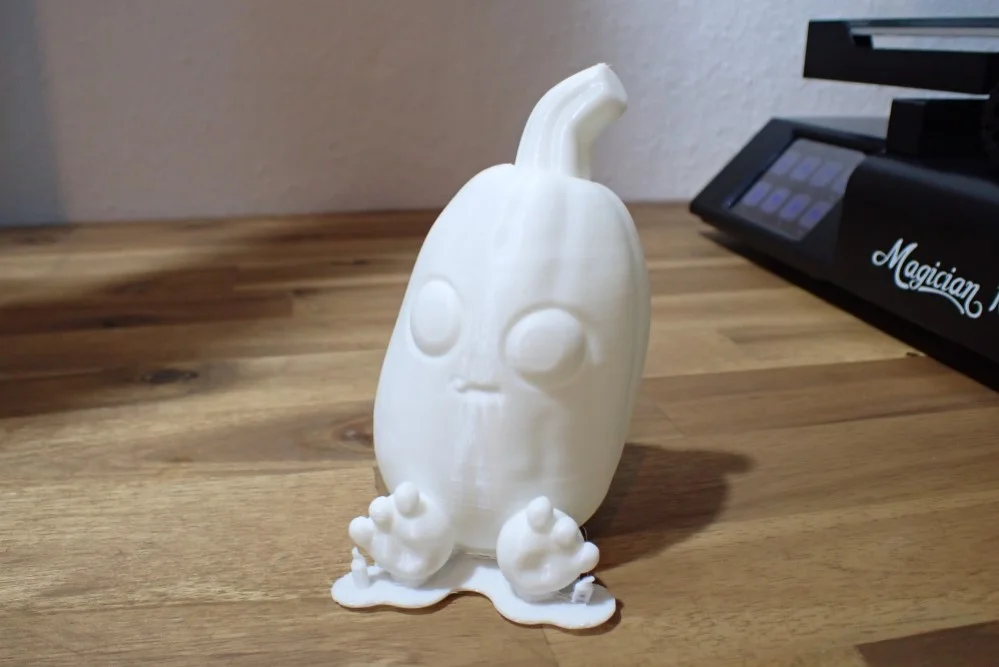
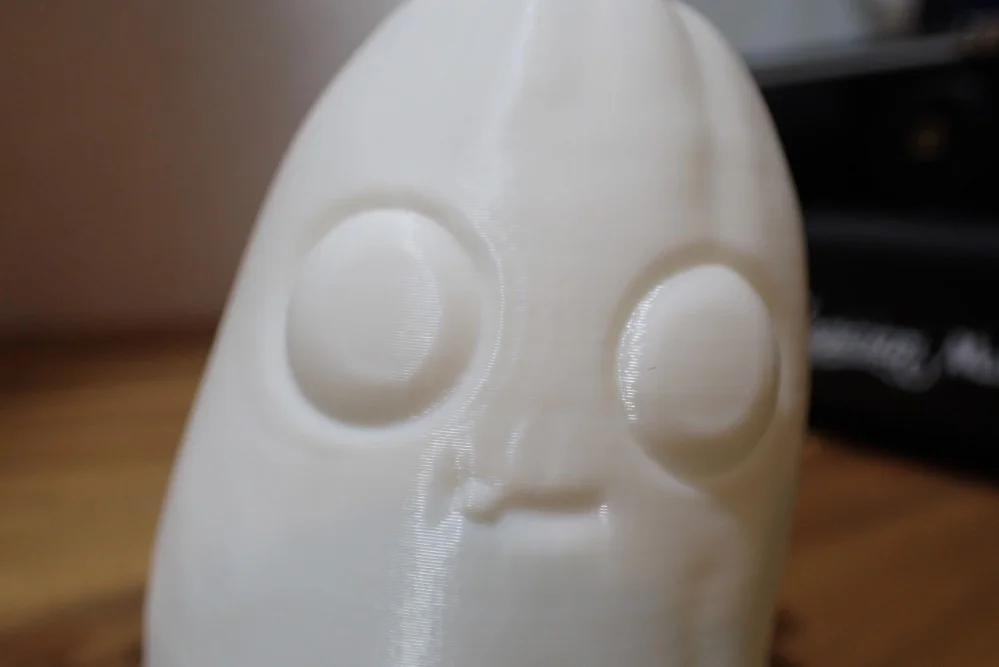
On the supplied SD card was a test object that was already sliced. As usual, the quality of such test objects is very good. Mingda obviously knows how to prepare files for the Magician Max. The only thing that didn’t work well here are the supports and the raft – you can hardly detach them from the object.
Cali Dragon
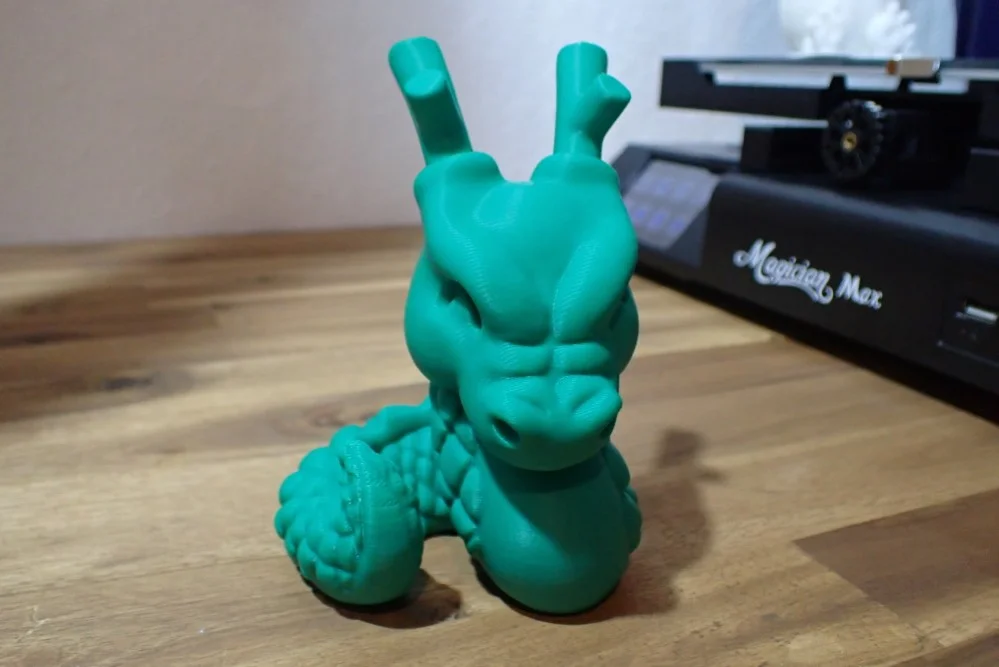
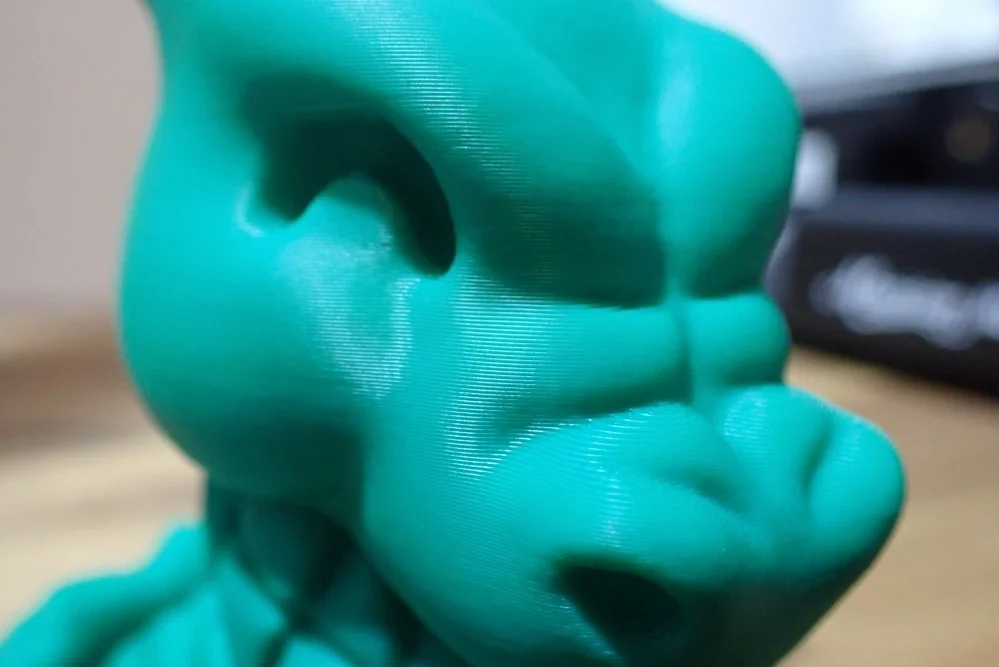
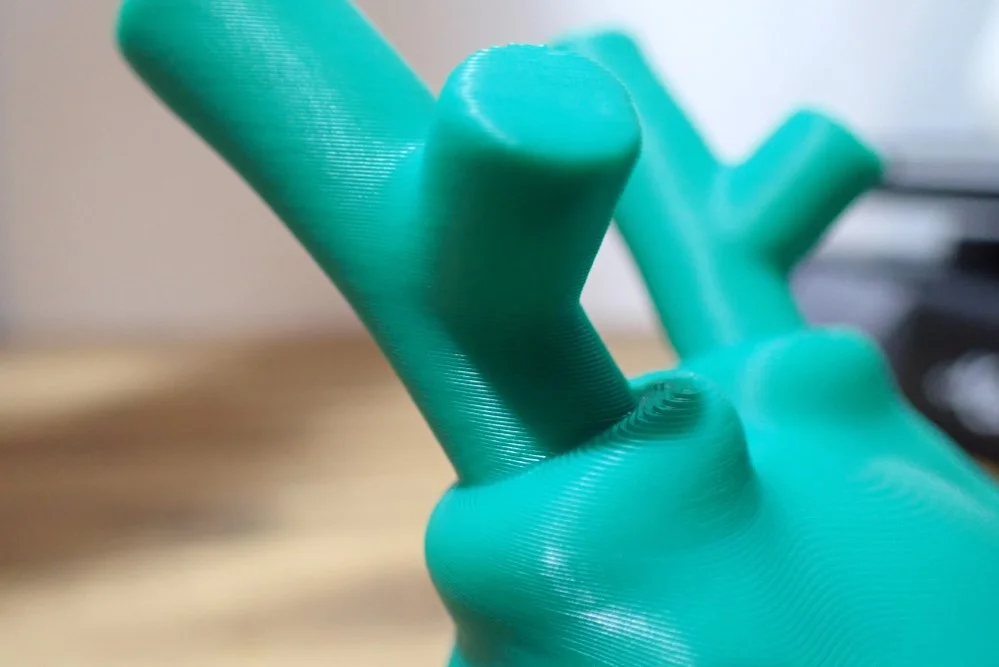
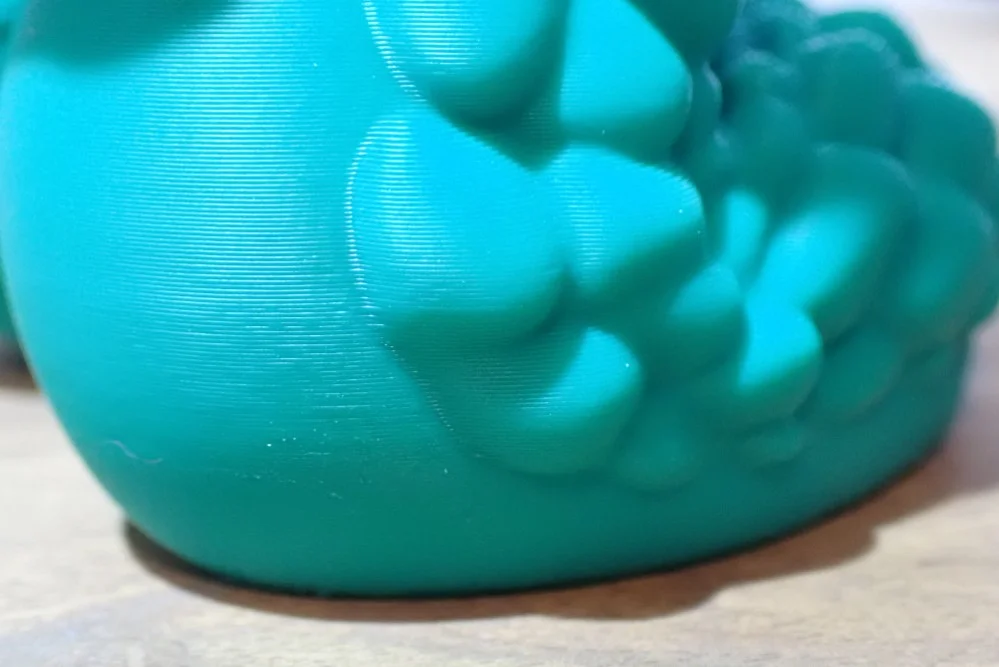
The Cali Dragon (link to object) is a very good calibration object. It provokes various print errors, so you can check your calibration with it. The result is very good and shows me that the 3D printer and slicer profile are ready for more complicated and larger models.
Articulated Fish
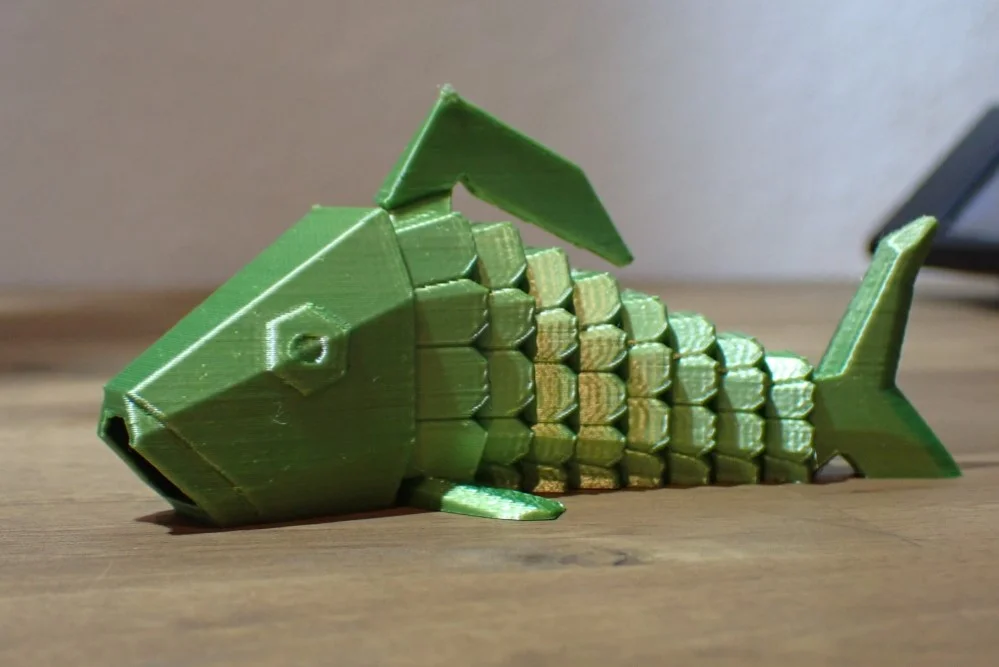
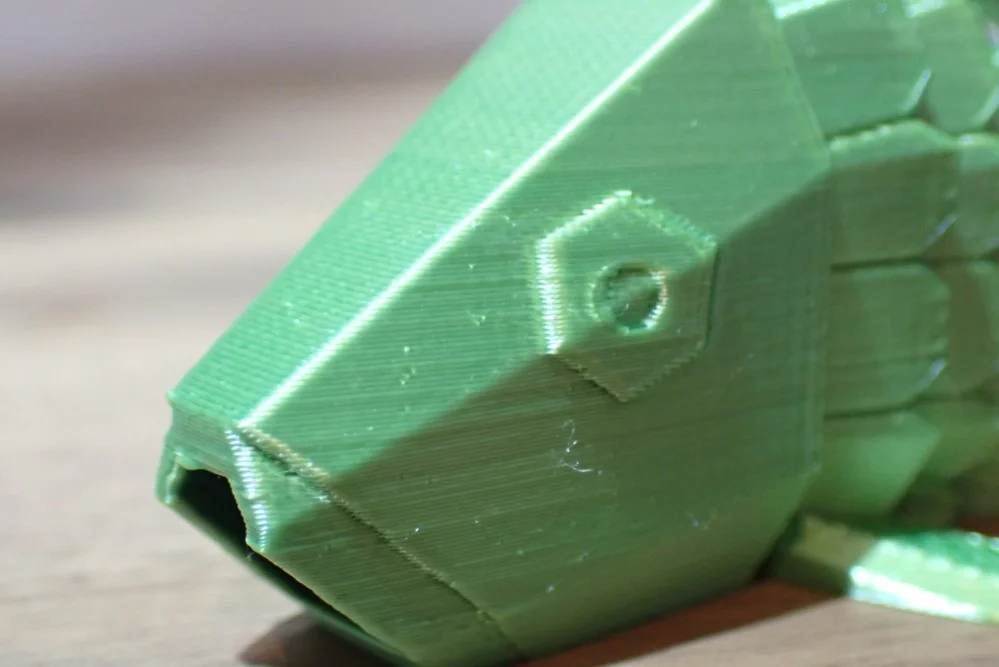
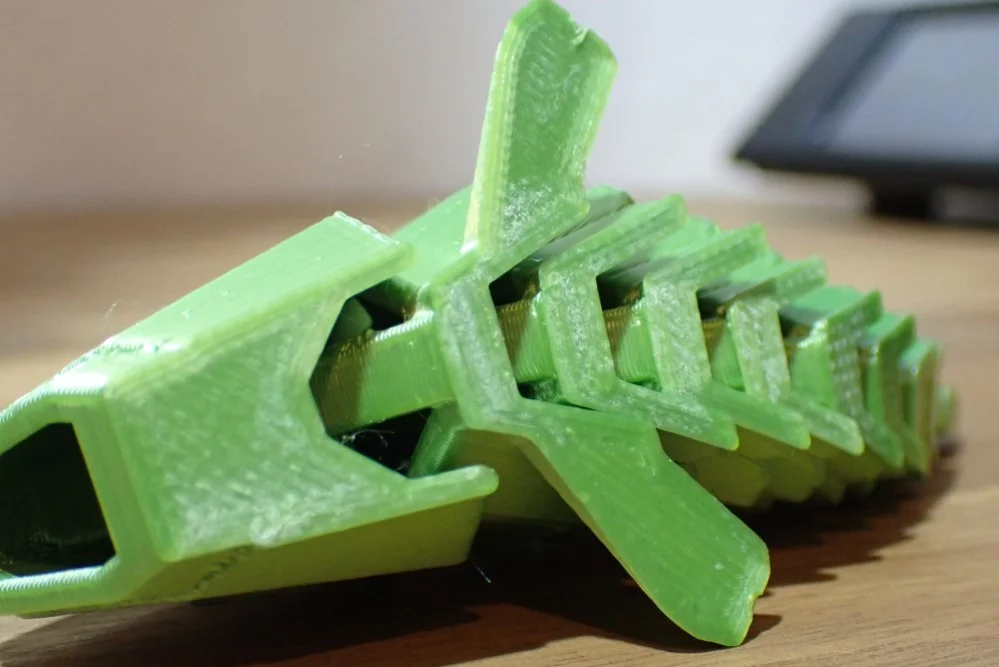
Print-in-place objects with moving parts show whether the flow rate is set correctly and if there are any other extrusion problems. If there are more severe extrusion problems, the movement would be restricted or impossible because the individual parts have been glued together.
I decided to print this fish first (link to the object). After printing, I only had to remove the prefabricated supports of the dorsal fin. The movement of the individual parts was immediately given without having to rework anything. I was also very happy with the print bed adhesion, and that despite the relative filigree first layer.
Articulated Tardigrade
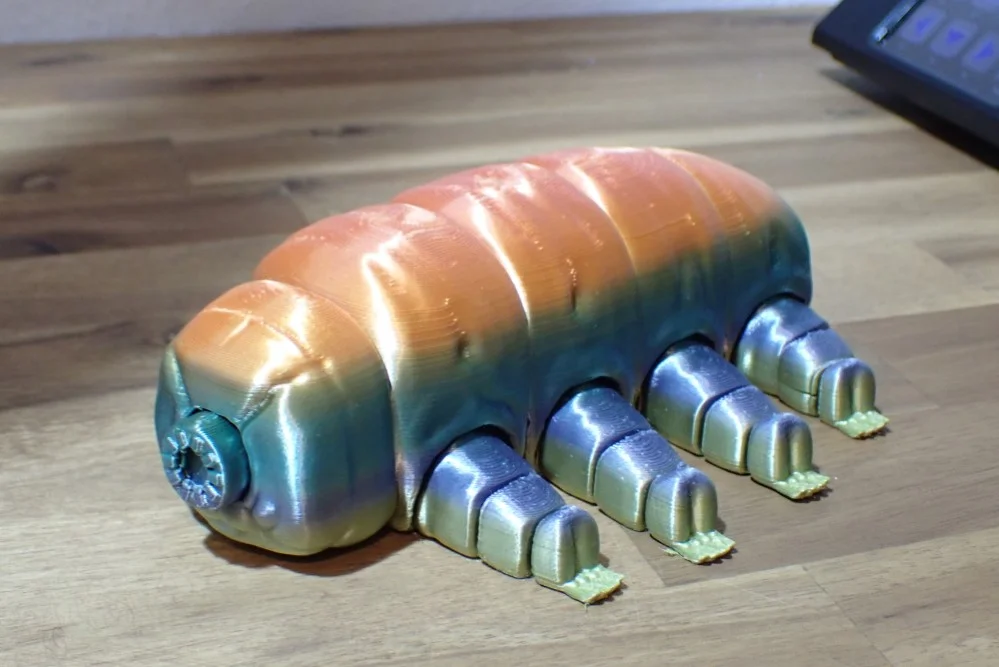
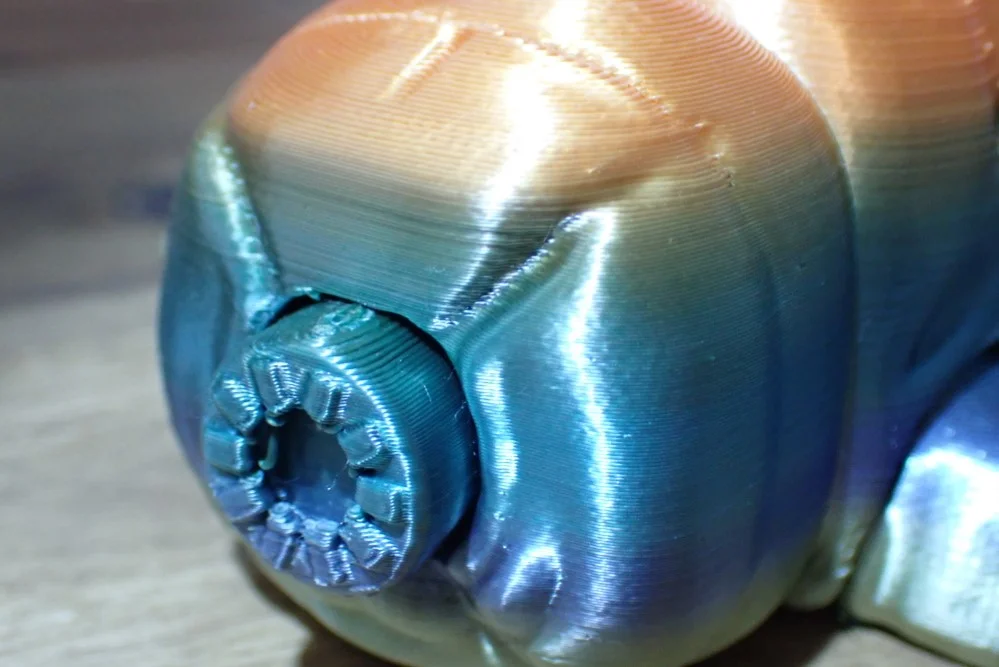
Next, I printed a slightly larger and more complicated model – the Articulated Tardigrade (link to object).
Since I had slowly worked my way up to this complexity with the previous objects, I knew beforehand that the print head would turn out well. All extremities can move freely and there were almost no printing errors. Also, the print quality in general is very good, the surface is very smooth.
The rainbow filament I used* creates another interesting optical effect.
Spin Vase
To take advantage of the large print volume of the Mingda Magician Max I printed this spin vase in the vase mode of Cura (link to the object).
For the first layer, I chose a printing speed of 5 mm/s to make the adhesion as good as possible. With such large models, it can otherwise often happen that the object can later detach from the printing plate and is thus destroyed. Fortunately, this did not happen in this case and the vase is more or less perfect. Also in the upper area of the vase, there were no errors that would indicate an unstable Z-axis.
Mingda Magician Max vs. Mingda Magician X
Check Price at:
The Mingda Magician Max basically has the same features as its little brother the Mingda Magician X. The only difference is that its print volume is much larger.
- Print volume of the Magician X: 230 x 230 x 260 mm
- Print volume of the Magician Max: 320 x 320 x 400 mm
Apart from that, the two devices are virtually clones of each other. Even the assembly is identical. The purchase decision between these two 3D printers is therefore made by the print volume. If you want to keep the possibility open to print larger objects in one piece, you should choose the Magician Max.
Mingda Magician Max vs. Creality CR-10 Smart Pro
Check Price at:
The biggest differences between the Mingda Magician Max and the Creality CR-10 Smart Pro are the print bed surface (Magician Max: glass; CR-10 Smart Pro: PEI flexible), the print temperature (260 °C vs. 300 °C) and a few luxury features of the CR-10 Smart Pro (camera, LED bar).
Print volume: The two print volumes of the two 3D printers are very comparable. The print bed of the Magician Max is 2 cm larger in both directions. The print volume of the Magician Max is 320 x 320 x 400 mm, the print volume of the CR-10 Smart Pro is 300 x 300 x 400 mm.
Print bed leveling: The print bed leveling on the Magician Max is, in my opinion, better than on the CR-10 Smart Pro. And by that I mean especially the ease of use. With the Magician Max, the leveling is completely automatic and you don’t need to adjust the print bed with screws. With the CR-10 Smart Pro, you can either level the print bed manually or have it level automatically with the CR Touch. Both methods result in very accurate leveling.
Print bed: In terms of print bed surface, the CR-10 Smart Pro is slightly ahead. It uses a spring steel print bed with a PEI coating. This allows it to be removed and bent after printing. This makes it very easy to remove the printed objects. Also, the heat-up time is faster and the print bed adhesion is slightly better than glass for most filaments. For the print bed adhesion to be good enough, with a glass print bed you have to reduce the print speed extremely for the first layer or sometimes even use adhesives like Magigoo.
Extruder: Both 3D printers use a direct drive extruder. The Magician Max even has the filament sensor built into the print head, while the CR-10 Smart Pro has it hanging under the filament holder. The Sprite Direct Drive Extruder of the CR-10 Smart Pro is well suited for most filaments and has already proven itself in many other 3D printers from Creality. But the Magician Max’s extruder also reliably and accurately processes all filaments, and especially flexible filaments. The big advantage of the CR-10 Smart Pro, however, is that its extruder can heat up to 300 °C. The Magician Max only reaches 260 °C.
Double Z-axis: Meanwhile, all 3D printers with such a large print volume have a double Z-axis. Otherwise it is not possible to guarantee a vibration-free movement and to keep the positioning accuracy also at the upper end of the Z-axis exactly.
Camera & LED Bar: Included with the CR-10 Smart Pro is also a small camera that allows you to monitor the print from anywhere via the Creality Cloud App. Especially for large objects, this is very handy to check if everything is going smoothly during the print or not. And so that you don’t have to leave the lights on in the room to see something with the camera while monitoring the print, it also has an LED bar that lights up the print room. The Magician Max does not have these features.
Operation: The operation of the CR-10 Smart Pro is more enjoyable than the Magician Max via the slightly larger touchscreen. It can also be operated and monitored via the Creality Cloud App.
Mingda Magician Max vs. Artillery Sidewinder X2
Check Price at:
The features and performance of the Mingda Magician Max and the Artillery Sidewinder X2 are very comparable. The workmanship and reliability of the Magician Max is slightly higher and the extruder has two metal gears, the Sidewinder X2 has its only weak point here. It has a plastic gear that must be replaced after a long runtime.
Print volume: The print volume of the Magician Max is 320 x 320 x 400 mm, the print volume of the Artillery Sidewinder X2 is 300 x 300 x 400 mm. While it’s unlikely that this small difference will influence your purchase decision, you can still print slightly larger objects with the Magician Max.
Print bed leveling: The print bed leveling of both 3D printers is done by a built-in sensor. I have used both 3D printers for quite some time and can’t find any difference in the accuracy of the leveling. The only major difference here is that you can also manually level the Sidewinder X2. Underneath the print bed, there are screws that you can use to adjust the tilt.
Print bed: Both 3D printers have a glass print bed. The surface is slightly textured to further increase the print bed adhesion.
Extruder: The Magician Max’s direct drive extruder uses two metal gears. However, in the extruder of the Sidewinder X2, one of them is made of plastic. After a certain amount of time, this gear wears out.
Dual Z-axis: The Sidewinder X2 also features a dual Z-axis to stabilize and keep the positioning and movement of the X-axis vibration-free, even at the top end of the Z-axis.
Operation: The Sidewinder X2 has a slightly smaller touchscreen than the Magician Max. It has a 2.7-inch touchscreen that is integrated into the printer base. In contrast, the Magician Max has a 3.5-inch touchscreen. I personally find the menu on the Magician Max to be a bit more intuitive and nicer.
Conclusion – Is the Magician Max Worth It?
I have been using the Magician Max* for some time now and can say that it is definitely worthwhile for anyone who wants to print large objects with a high degree of accuracy and little effort. The usability of the printer is really excellent and its ease of use makes it very suitable for beginners.
The only downside might be the lack of a PEI print bed. Many users swear by their PEI print bed for various filaments. As long as the print speed of the first layer is very low, there should be little problem with print bed adhesion. If you still can’t get along with the glass print bed, this might be worth an upgrade. PEI print beds are available as inexpensive upgrades.
Check Price at:
Similar 3D Printers
Creality CR-10 Smart Pro
The Creality CR-10 Smart Pro is a large format 3D printer with a print volume of 300 x 300 x 400 mm, a direct drive extruder and a flexible PEI print bed. It has various connection options and can also be operated via the Creality Cloud App and monitored via a camera.
Check Price at:
Artillery Sidewinder X2
The Artillery Sidewinder X2 has a large print volume of 300 x 300 x 400 mm, automatic print bed leveling, a glass print bed and a direct drive extruder. This makes it suitable for all standard filaments including flexible filaments.
Check Price at:
Disclosure: This website is the property of Martin Lütkemeyer and is operated by Martin Lütkemeyer. Martin Lütkemeyer is a member of the Amazon Services LLC and other Affiliate Programs. These are affiliate advertising programs designed to enable websites to earn advertising revenue through advertising and linking to Amazon.com and others. Links marked with * are affiliate links.


