
- Wet Filament: Prevention, Symptoms & Drying - July 18, 2024
- Sovol SV08 – Best PrusaSlicer Settings & Profile - June 26, 2024
- Sovol SV08 – Best Orca Slicer Settings & Profile - June 26, 2024
Disclosure: Links marked with * are Affiliate Links. I earn from qualifying purchases if you decide to make a purchase through these links – at no additional cost for you!
With the Magician X* 3D printer, Mingda has developed a device that delivers surprisingly good printing results for its price. Fortunately, you don’t have to tinker with the Magician X during setup either, because the installation is really simple.
But how much can you really expect from a device in this price range? What compromises do you have to make with the Magician X? What features can you expect and how is the device assembled?
In this hands-on review, you’ll learn everything you need to know about this 3D printer. It also explains the advantages and disadvantages of the device, its specifications and how it handles.

Check Price at:
Table of Contents:
- 1 Key Takeaways
- 2 Who Should Buy the Magician X?
- 3 Advantages & Disadvantages > Magician X
- 4 Technical Specifications > Magician X
- 5 Scope of Delivery > Magician X
- 6 Setup & Leveling > Magician X
- 7 Features > Magician X
- 8 Operation > Magician X
- 9 Slicer > Magician X
- 10 Print Quality > Magician X
- 11 Useful Accessories > Magician X
- 12 Mingda Magician X vs Anycubic Vyper
- 13 Conclusion > Magician X
Key Takeaways
- Print volume: 230 x 230 x 260 mm
- Accuracy: 0.1 mm
- Easy assembly
- Good workmanship
Who Should Buy the Magician X?
The Mingda Magician X 3D printer is a good choice for anyone looking for an affordable 3D printer that delivers high-quality prints. It is suitable for both beginners and experienced users and can print a variety of objects from different materials.
Advantages & Disadvantages
> Magician X
PRO:
- Excellent print results for its price range
- Simple setup that takes only a few minutes to complete
- Amazingly pretty design for a 3D printer
- Has auto-leveling (self-developed “one-touch leveling”)
- Easy to operate via integrated LCD touch screen
- Integrated compartment for storing accessories
- Very quiet
- Resuming printing after power failure
- Double gear extruder
CON:
- The manual is only a thin booklet, but still explains the operation very well through pictures
Technical Specifications
> Magician X
- Printing technology: Fused Deposition Modeling (FDM)
- Maximum print volume: 230 x 230 x 260 mm (L x W x H)
- Print resolution: +/- 0.1 mm
- Positioning accuracy: 0.0125 mm for X and y axis, 0.002 mm for z axis
- Nozzles: 1x 0.4 mm diameter
- Maximum printing speed: under 200 mm/s
- Recommended print speed: 60 to 80 mm/s
- Supported filaments: ABS, PLA, TPU
- Slicer software: Cura
- Input formats: .STL, .OBJ, .AMF
- Output format: GCODE
- Connectivity: SD card, USB stick, USB-C connection
- Input voltage: 100/240 Volt AC with 50/60 Hz
- Ambient operating temperature: 5 to 40 degrees Celsius
- Nozzle temperature: maximum 260 degrees Celsius
- Print bed temperature: maximum 110 degrees Celsius
- Dimensions: 46 x 41.5 x 54.6 cm
- Weight: approx. 7.4 kg
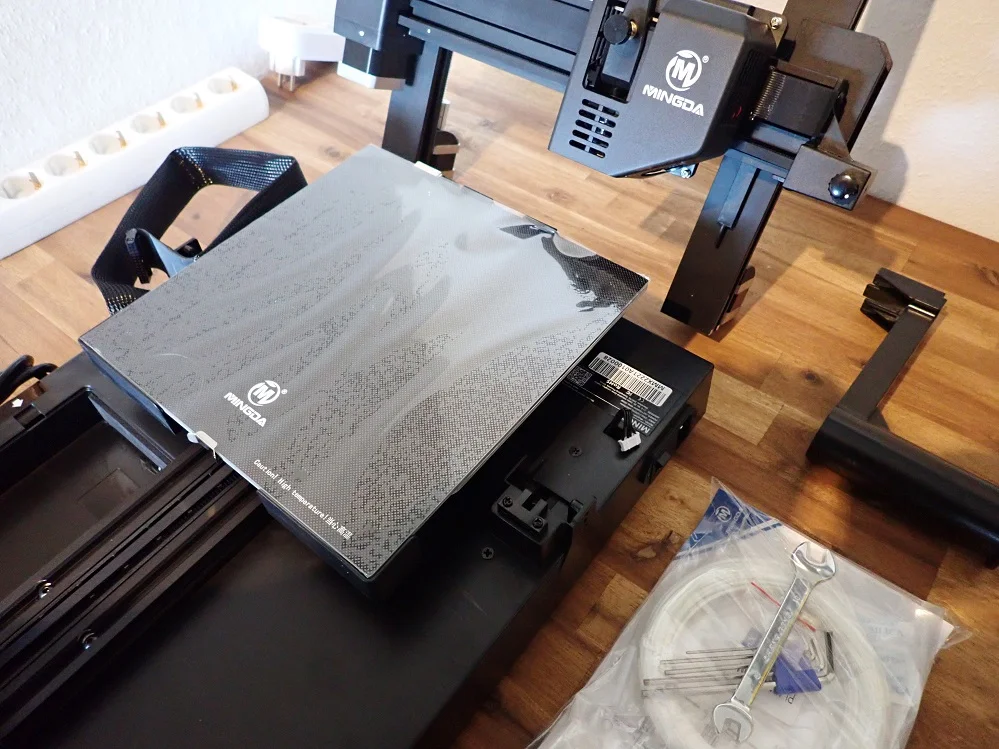
The Magician X has a 23 x 23 centimeter print bed that is equipped with a glass surface that can also be removed. In terms of height, the device prints models up to 26 centimeters tall.
Fused Deposition Modeling (FDM) is used as the printing technique. The extruder can work with the materials acrylonitrile-butadiene-styrene copolymer (ABS), thermoplastic polyurethane (TPU) and polylactide (PLA).
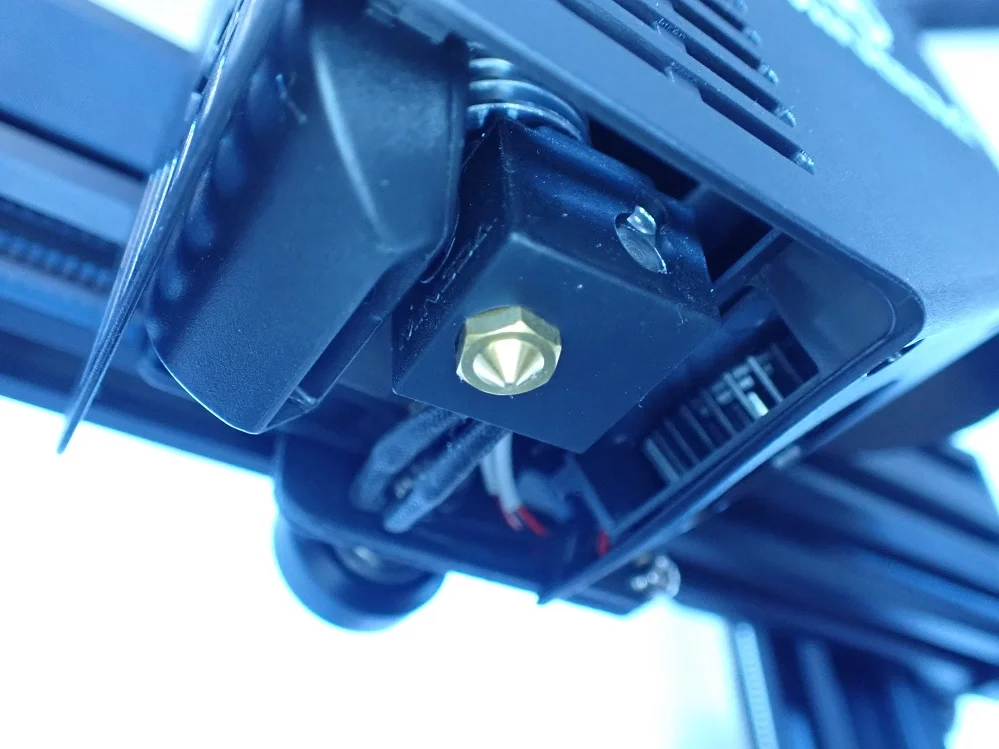
The nozzle of the Magician has a diameter of 0.4 millimeters and supports material diameters of 1.75 millimeters. With a print resolution of plus or minus 0.1 millimeters, the printer also allows you to produce models with very delicate details.
The positioning accuracy of the Magician X is also decent. The manufacturer specifies an accuracy of up to 0.0125 millimeters for the x-axis. The same applies for the x-axis, of course. For the z-axis, on the other hand, it is even only 0.002 millimeters of accuracy.
In terms of temperature, the Mingda Magician X supports an ambient temperature of 5 to 40 degrees Celsius. The nozzle can be operated at a maximum temperature of 260 degrees. And a maximum temperature of 110 degrees is provided for the hotbed or print bed.
Mingda does not have its own software for slicing, but includes the often used open source program Ultimaker Cura. The device supports GCODE instructions as usual, which can of course also be created with other slicer apps.
The manufacturer specifies 200 millimeters per second as the maximum print speed for the Magician X. However, 60 to 80 millimeters per second is recommended for good results.
The Mingda Magician X is supplied with power via a three-pin IEC cable. The power supply is thus integrated here and is supplied with the usual mains voltage of 240 volts.
The printer has a footprint of 46 x 41.5 centimeters and requires 54.6 centimeters of space in height. With a weight of only about 7.4 kilograms, the device is light enough for any shelf.
Scope of Delivery
> Magician X
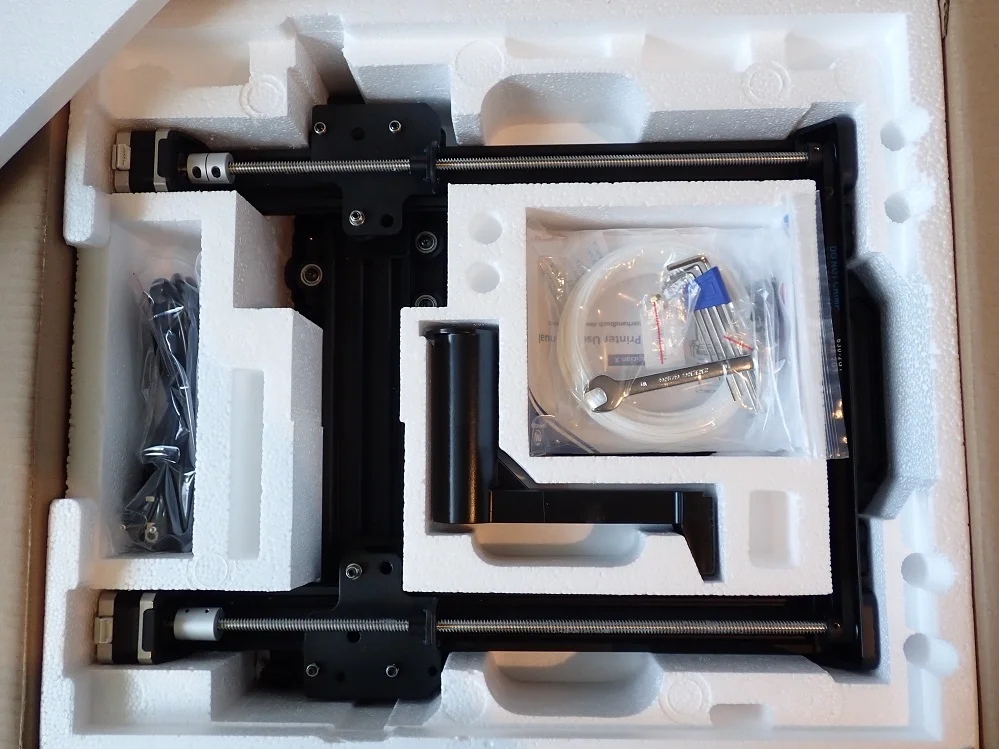
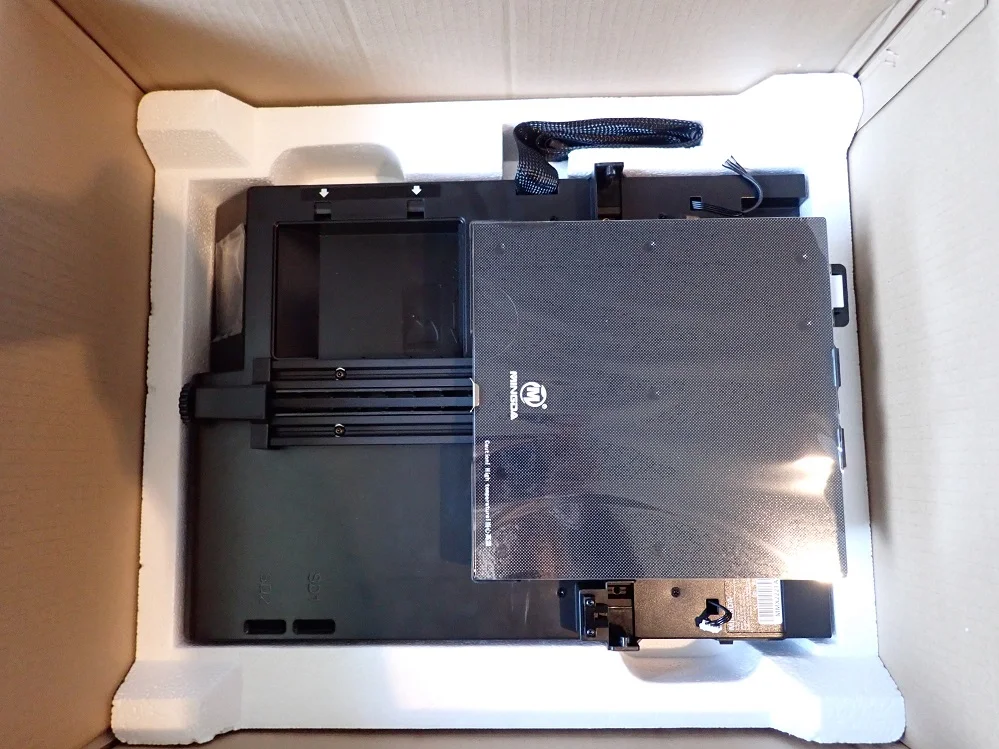
Already when unpacking the Magician X, it is noticeable that awkward tinkering is not necessary with the device. In fact, most of the printer is already assembled. Therefore, there are only two large parts in the package. The first is the station itself, which contains the basis and the print bed. The other is the gantry with the extruder and its linkage.
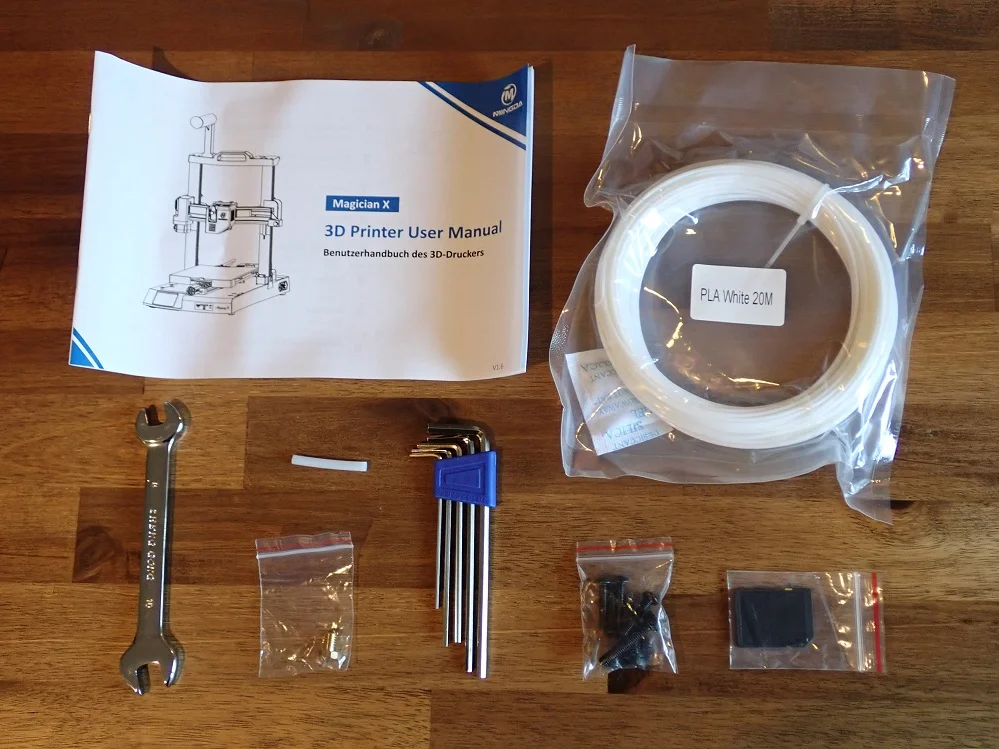
In addition to the two main parts, the package contains a matching power cable, a filament holder and the nozzle. Furthermore, matching screws are of course included, and a hexagonal wrench is also part of the package. Otherwise, a lid for the tool compartment integrated in the station is included for the setup.
The structure and operation of the Magician are explained in a clear and easy-to-understand manual.
In terms of accessories, the Mingda device is rather minimalistic. Besides a tiny roll of filament, only a (large) SD card is included. It contains the slicer software Cura and sample printer models. Unfortunately, a USB-C cable for connecting the device to a PC is not included.
In order to be able to use the device sensibly, you should also order a suitable filament. According to the manufacturer, the printer supports the materials ABS, PLA and TPU.
Setup & Leveling
> Magician X

If you’ve used other 3D printers before, you’ll probably be pleasantly surprised by the Magician X in terms of assembly. As already mentioned, almost everything is already assembled. This makes the assembly of the device really easy.
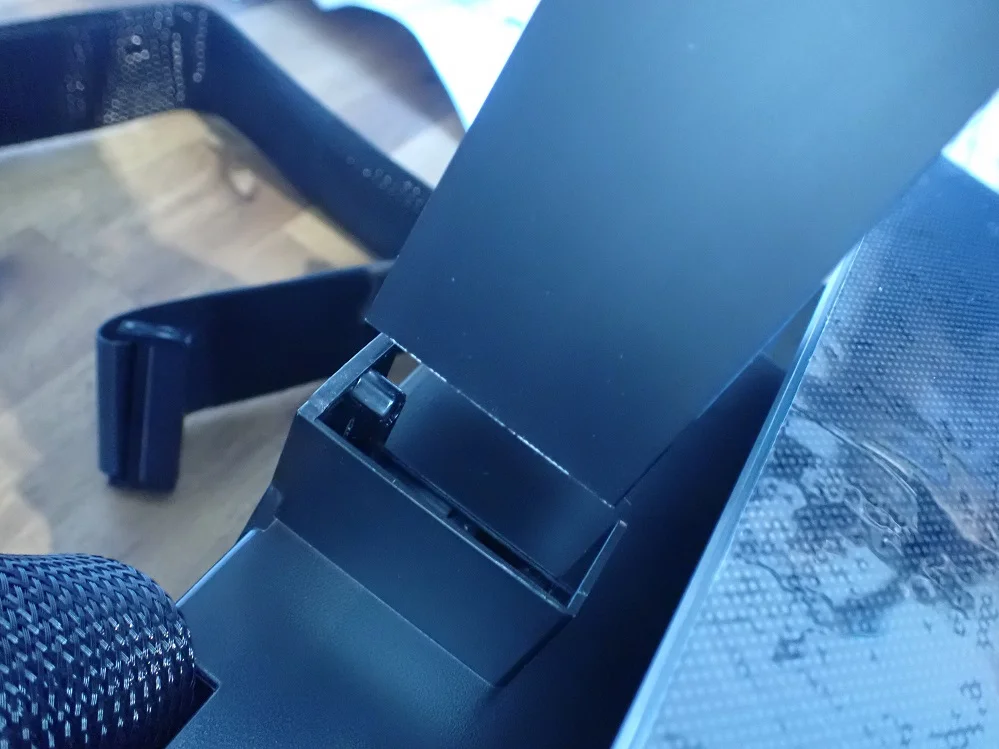
The first step in assembly is to attach the gantry (the u-shaped part with the print head / extruder) to the station. For this purpose, there are fixtures on the top side where the gantry can be inserted. Then you need to tilt the printer and attach the gantry from the bottom using two supplied screws and the hex keys.
Then you should attach the portal to the mounting plates from both sides with two screws each. Once the portal is well screwed in place, the next step is to attach the filament holder. There are two rails at the top of the portal for this purpose. Whether you attach the holder on the left or right is entirely up to you.
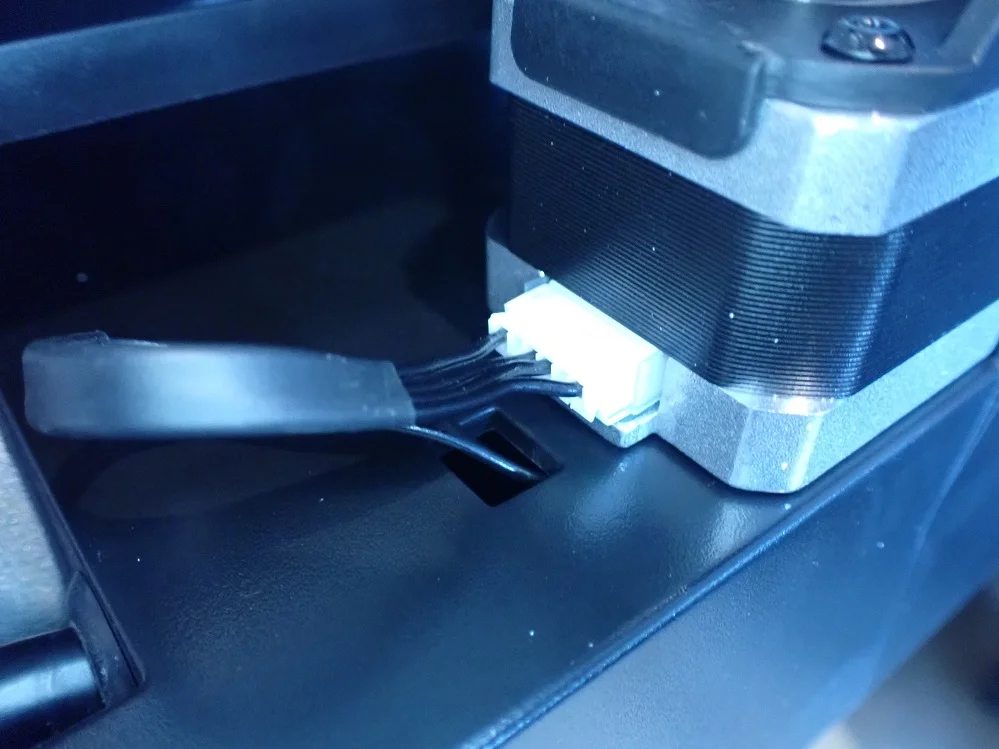
The last step is to connect all the cables. The first cable protrudes from the back of the device and is connected to the print bed (the plate) directly above it. The second cable on the left side connects the station to the gantry.
The last thing you do is plug in the two small cables for the Z-motors. These protrude from the station directly behind the gantry. That’s all, the printer is built.
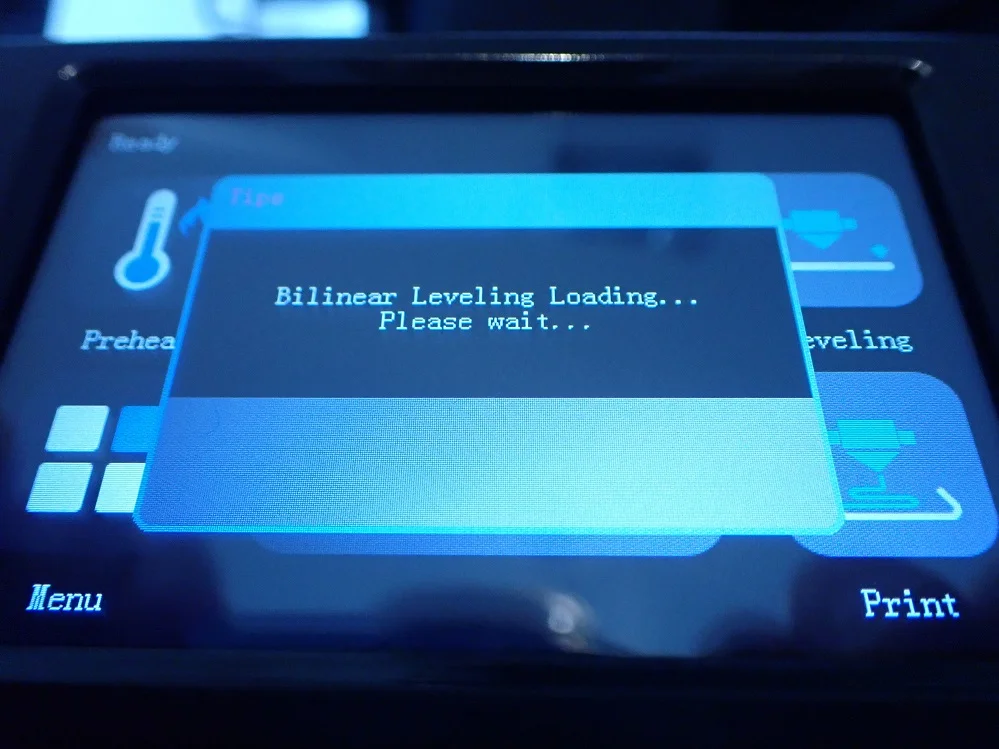
The next step is to level the print bed. The Magician X conveniently supports automatic leveling. Simply connect the power cable to the device and switch it on. Then tap “Level” on the touchscreen and the printer does the rest on its own.
Check Price at:
Features
> Magician X
The Magician X has many useful features that make your life easier when 3D printing.
Automatic leveling
As mentioned in the assembly section, Mingda’s Magician X is capable of automatic print bed leveling. With many other rather inexpensive 3D printers, you have to make these adjustments manually. The Magician takes a lot of the pain out of adjustment with this feature.
Filament Sensor
The Magician X has sensors on the extruder that automatically detect the status of the filament. If the filament is broken, for example, the device notices this in good time. Threading the filament into the extruder on the Magician X is also very simple. Simply hold the end of the filament in the opening on the extruder and tap “Load” on the touchscreen.
Built-in tool compartment and SD card holder
A really nice detail of the Magician X is its integrated tool compartment. Directly above the touchscreen is a small compartment where you can store all sorts of accessories. Even a pair of filament pliers should fit in here. However, you have to keep in mind that you cannot access the compartment during operation because the print bed moves over it.
The two SD card holders on the right side of the device are similarly practical as the tool compartment. Here you can store SD cards that you are not currently using. At first glance, you might almost think they are SD card slots, but the actual SD card slot is on the front.
Ultra silent operation
The Mingda Magician X is extremely quiet in operation. According to the manufacturer, the 3D printer only produces between 40 and 50 decibels during printing. To illustrate: 40 decibels is the usual volume in a library and 50 decibels is comparable to birds chirping or soft music from the radio.
Wide range of connection options
The Magician allows communication with its outside world via three different technologies. On the one hand, the device supports conventional SD cards (the big ones, not Micro SD). Secondly, it has a USB-A port that can be used to connect USB flash drives. Last but not least, the printer has a USB-C port that allows connecting directly to a computer.
3.5 inch touchscreen
The operation of the Magician X is pleasantly simple via a touchscreen on the front. This is a color display (LCD) that has an easy-to-use size of 3.5 inches (approx. 9 cm).
Operation
> Magician X
Handling the Magician X via the integrated touch display should not present you with any major problems. The menu navigation is mostly self-explanatory. After switching on, the display shows the main screen. It allows you to access the device’s essential functions via small tiles with icons.
The touchscreen interface
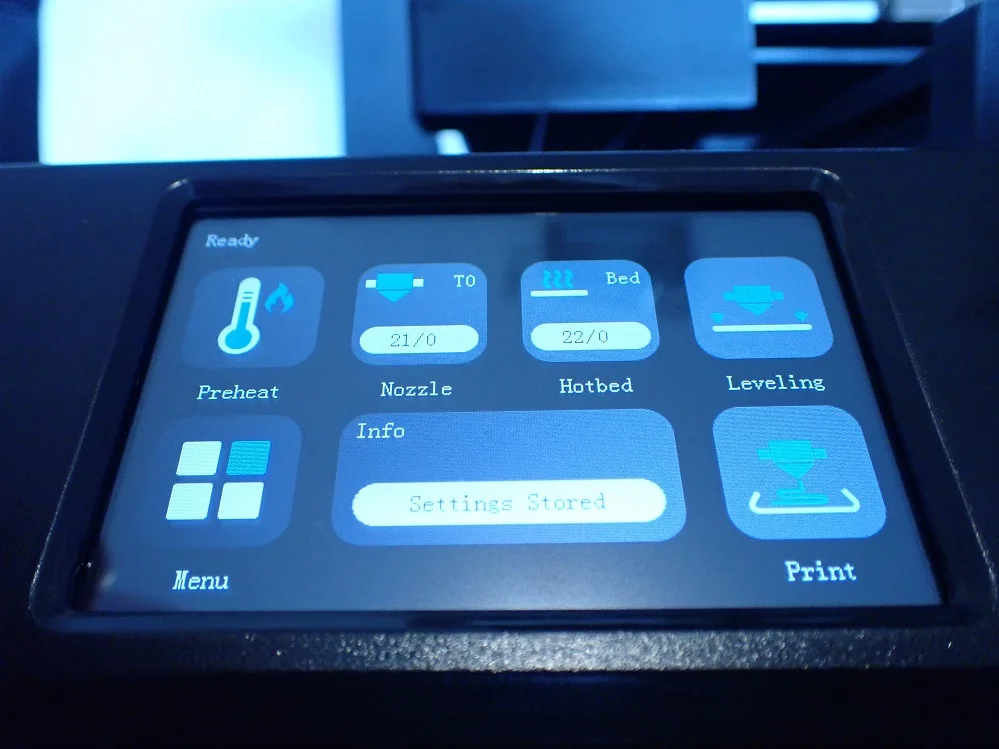

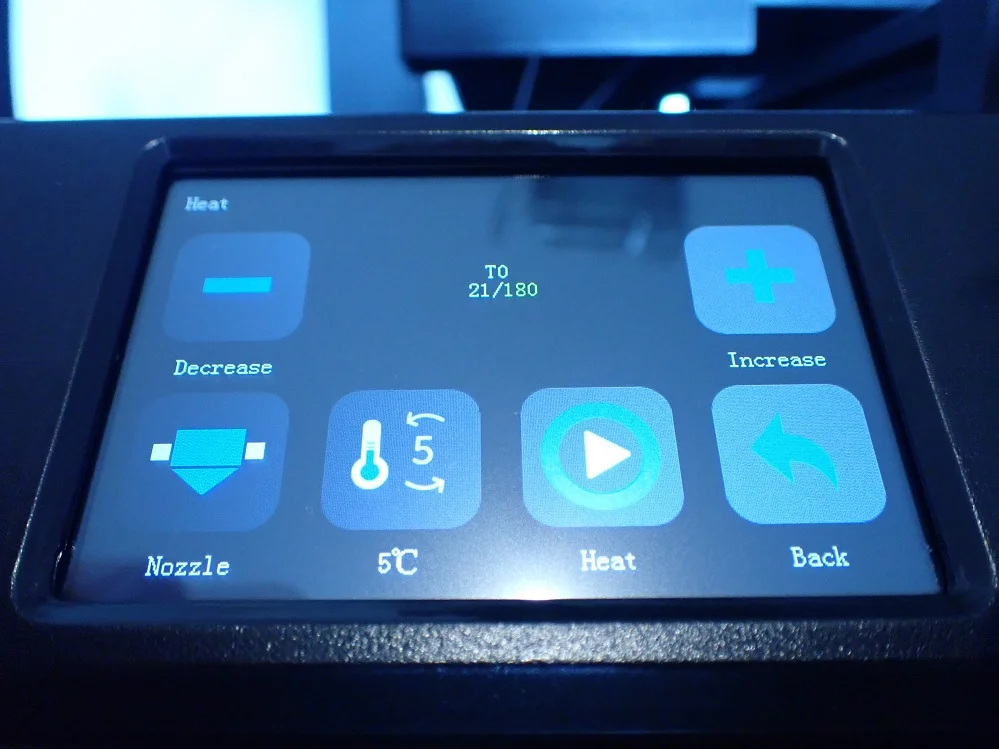
On the main screen (recognizable by the “Ready” in the upper left corner) you will find tiles that lead to detailed pages with settings. Under “Preheat” you can bring the print bed and the extruder to the right temperature. Here you can select suitable temperatures for PLA or ABS filaments.
Tapping on “Leveling” starts the automatic leveling of the print bed. The actual printing is started via “Print”. In addition, many other settings are hidden behind the “Menu” tile.
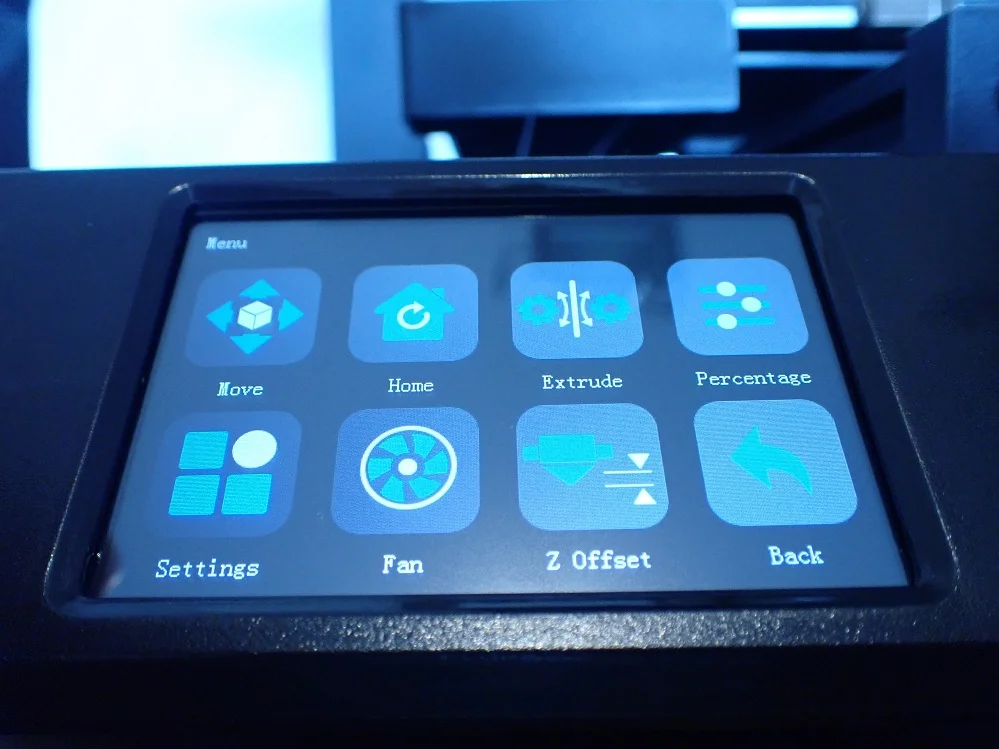
On the menu page, you will again find tiles that lead to detail pages. Here, the device allows you to move the extruder manually and change the print presets. You can also make settings for the extruder, adjust the Z offset and the fan behavior.
How to start a print
In the following, you will learn how to start a print with the Mingda Magician X.
First, of course, you need a model file. The Magician X uses GCODE files that contain instructions for the printer. For your first print, you can use a sample file from the included SD card if you don’t have your own GCODE file yet.
Turn on the device and insert the SD card with the GCODE file into the SD card slot on the front. Of course, you can also use a USB stick. Then press “Print” on the touchscreen in the main menu. The files on the SD card are then displayed.
Use the arrow keys on the right side of the screen to scroll up and down the files. Locate the GCODE file you want to print and tap its name. The printer will then begin preheating the print bed and extruder.
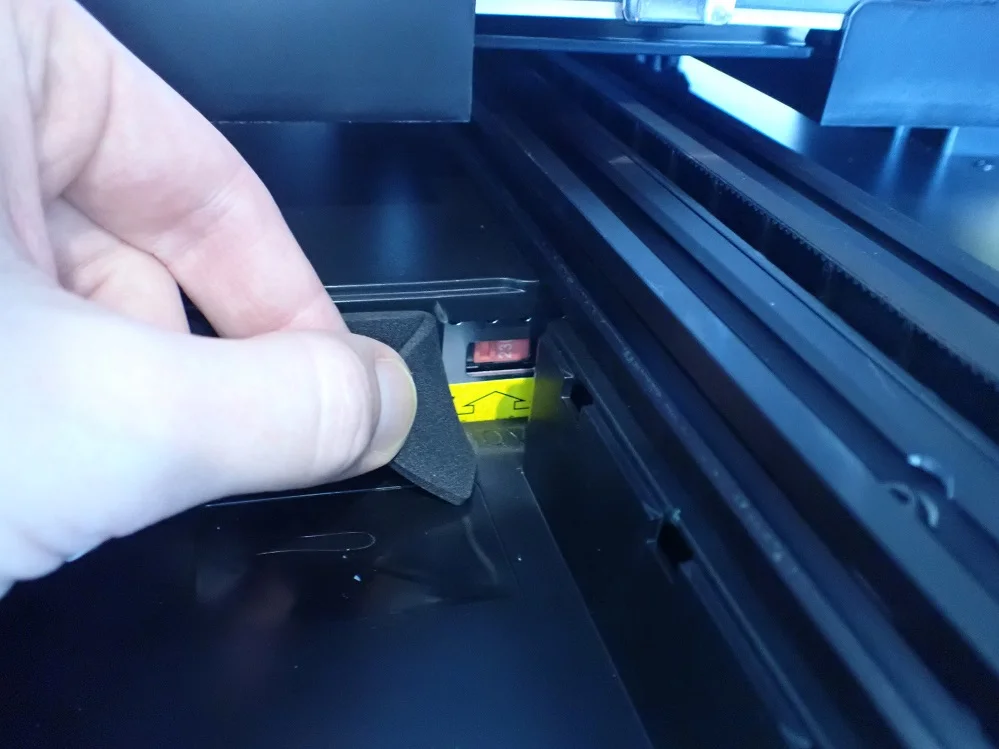
After preheating, the actual printing process begins. Once printing is finished, the result should actually be easy to remove from the print bed. Actually, because sometimes you do have to help the Magician X carefully with a spatula.
Slicer
> Magician X
The Mingda Magician X can in principle be used together with just about any slicer software. The manual mentions Cura, Simplify 3D and Repetier-Host by name. Mingda includes the slicer Ultimaker Cura with its printer. You will find an installation file for Windows on the included SD card.
When you add the printer to your slicer, you can use the following settings. The Magician X has a nozzle size of 0.4 mm and is compatible with a material diameter of 1.75 mm. For the print size setting, specify 260 mm for the z-axis and 230 mm for both the x- and y-axes.
In Cura you can then click “Settings” and “Configure Cura”. In the dialog that appears, click on “Profiles” and then on “Import”. Now you have to select the profile file for the Magician X. You can find it on the profile file included in the delivery. You will find it on the SD card included in the scope of delivery under the name “PLA+.curaprofile”.
For other printers, the manufacturer does not supply such a profile file. So you have to set everything yourself. If you are not yet familiar with it or if the Magician X is your first 3D printer, then it is best to stick with Cura for the beginning.
Check Price at:
Print Quality
> Magician X
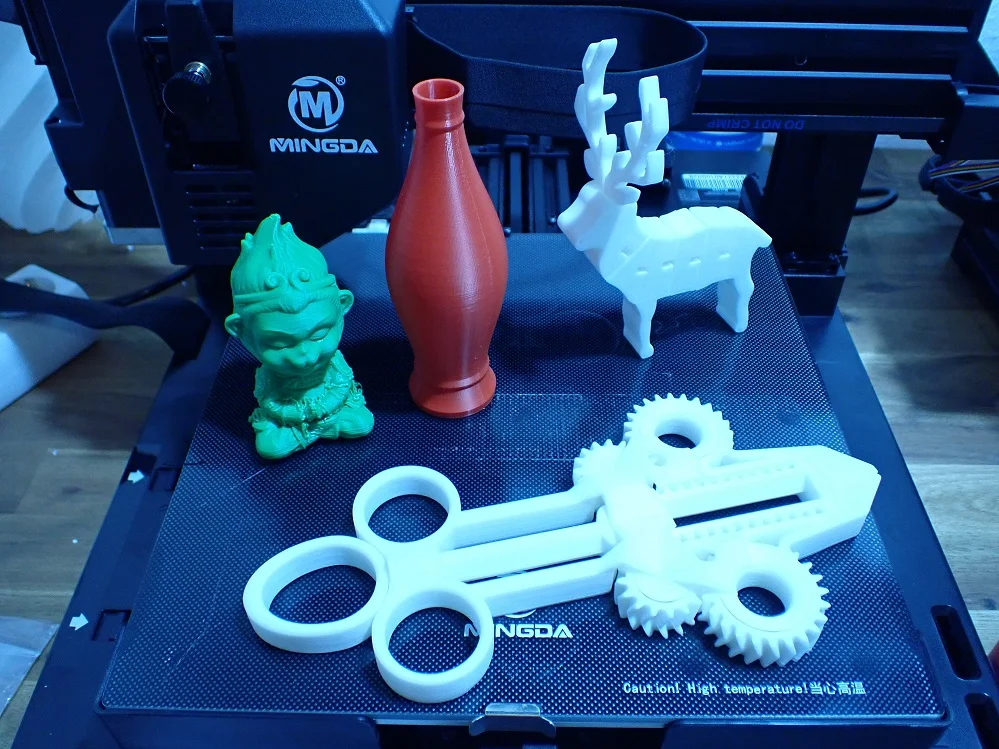
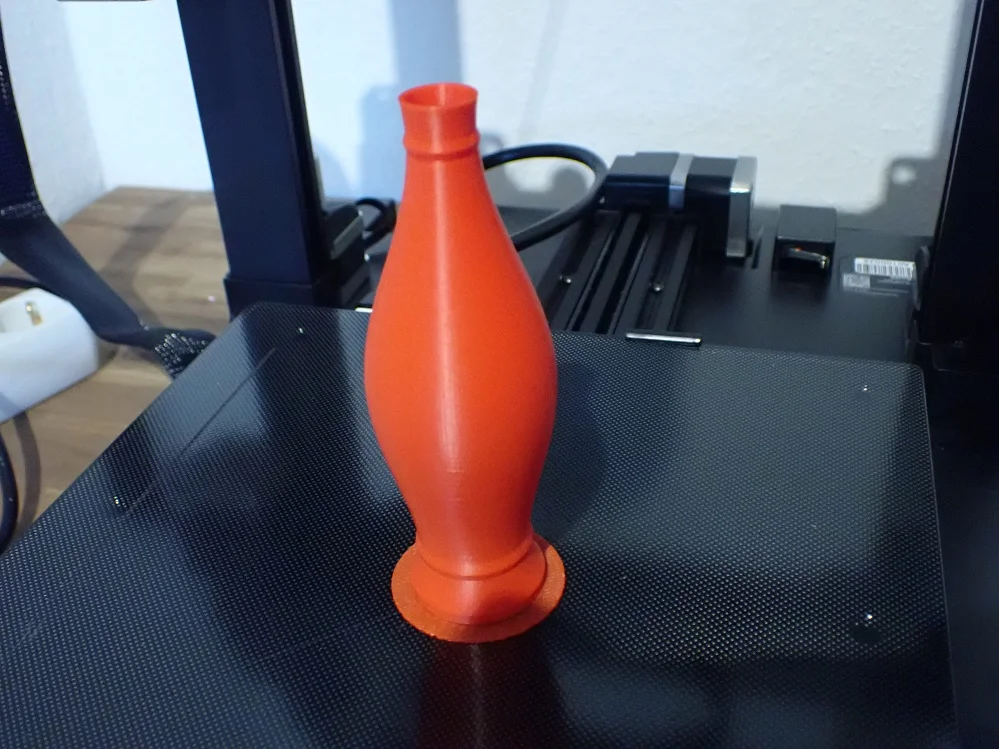

The print quality of the Mingda Magician X is really impressive. For a 3D printer in this price segment, the results are really good and, with small compromises, quite similar to what more expensive printers produce.
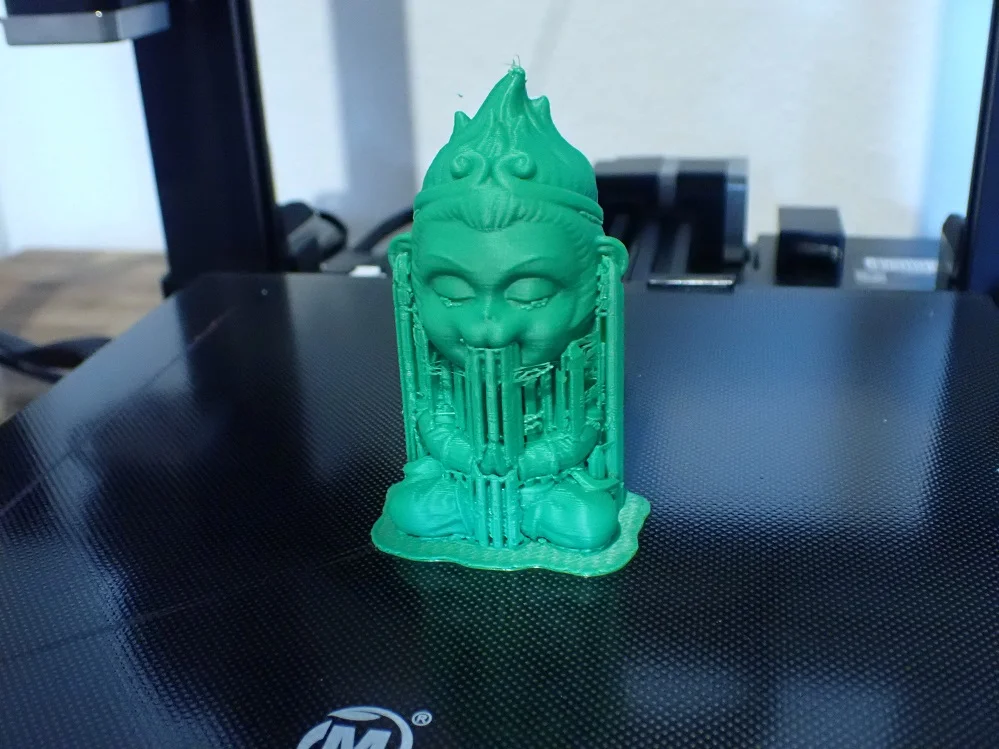
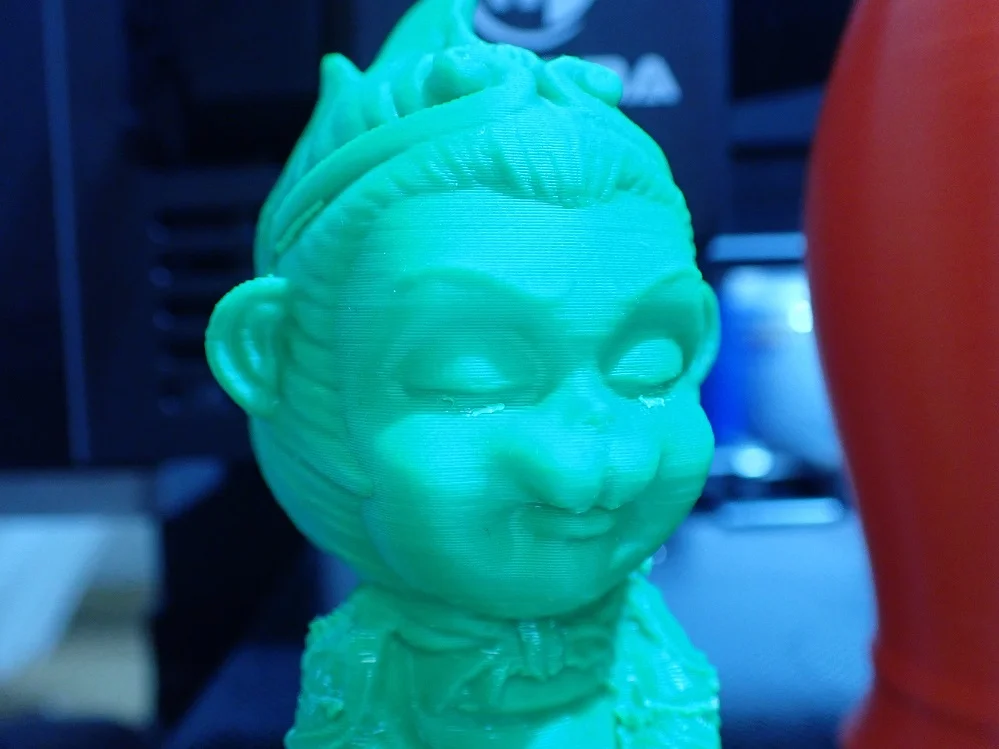
The surface quality of the print results is also very good. I printed various objects as a test, including the test files on the SD card. I was pleasantly surprised at how finely the surface was printed. I was particularly impressed by the sitting monkey, despite the supports that Mingda meant a bit too well and that were hard to remove.
Useful Accessories
> Magician X
The Magician X comes with almost no accessories. Some additional purchases are therefore quite useful and can make your work with the 3D printer easier.
This is especially true for filament pliers, which are unfortunately not included with the Magician. Filament pliers not only help you to cut the filament cleanly. It also allows you to remove any unattractive features such as overhangs or print-related auxiliary constructs after printing.
Another useful accessory is a self-healing cutting mat. If you want to work on your models with a craft knife or similar after printing, such a mat protects your work surface from scratches.
A finishing tool with interchangeable attachments is also practical for putting the finishing touches to your models. This allows you to work even finer than with filament pliers.
Mingda Magician X vs Anycubic Vyper

Check Price at:
A direct competitor to the Magician X* is the Anycubic Vyper*, which you should therefore also take a closer look at. The devices are almost identical in terms of specifications and the price of the Vyper is also in the same range.
Both devices offer you a handy auto-leveling feature that can save a lot of work and nerves when setting up the devices. Both devices advertise to work very quietly and use a 32-bit ARM Cortex chip internally.
However, Mingda’s printer is a bit ahead since it is equipped with a Cortex M4, while the Vyper still uses an M3. However, this should not make too much of a difference in practice.
Both devices also have a touchscreen, which makes it very convenient to use. However, the point here goes to the Vyper. At 4.3 inches (approx. 11 cm), the display of the Anycubic device is noticeably larger than the 3.5-inch screen of the Magician X from Mingda. A bit unusual, but not annoying: The touchscreen of the Vyper is in portrait mode and almost looks like a smartphone. Nevertheless, the menu in the Magician X is very clear.
The print bed is also a bit more generously sized on the Vyper, but not enough to really make a difference. The Vyper has dimensions of 245 x 245 mm here, the Magician X 230 x 230 mm. In terms of height, both devices print models up to 260 mm high.
The Vyper and Magician have exactly the same values for position accuracy and nozzle diameter. The positional accuracy of both is 0.0125 millimeters for the x and y axes and 0.002 millimeters for the z axis. The diameter of the nozzle is 0.4 millimeters for both.
The similarities become even more curious when you see that the temperature specifications are also exactly the same. Both devices specify a maximum nozzle temperature of 260 °C and a maximum print bed temperature of 110 °C.
Even the product websites of the two products match almost 1:1. I wonder who was inspired by whom?
Conclusion
> Magician X
With the Magician X*, Mingda has a 3D printer in its program that delivers good printing results at an affordable price. A particularly positive feature of the device is its auto-leveling, which saves time and nerves. The assembly of the device is quick and easy. You will also quickly learn how to operate it via the practical touchscreen.
The integrated tool compartment and SD card holders are a really practical addition. This way, you always know where the key is for readjusting the Magician X and where you can store your filament pliers. It would be desirable if other manufacturers would copy this from Mingda.
Who is the Magician X suitable for? Actually, for everyone who already owns one of the very inexpensive printers and is no longer satisfied with the handling or the print results. In this case, the Magician is a sensible upgrade for which you don’t have to dig too deep into your pocket.
For absolute beginners when it comes to 3D printing, the Magician X is also excellent. The setup of the device is very simple and the automatic leveling helps immensely.
Check Price at:
Disclosure: This website is the property of Martin Lütkemeyer and is operated by Martin Lütkemeyer. Martin Lütkemeyer is a member of the Amazon Services LLC and other Affiliate Programs. These are affiliate advertising programs designed to enable websites to earn advertising revenue through advertising and linking to Amazon.com and others. Links marked with * are affiliate links.
