
- Wet Filament: Prevention, Symptoms & Drying - July 18, 2024
- Sovol SV08 – Best PrusaSlicer Settings & Profile - June 26, 2024
- Sovol SV08 – Best Orca Slicer Settings & Profile - June 26, 2024
Disclosure: Links marked with * are Affiliate Links. I earn from qualifying purchases if you decide to make a purchase through these links – at no additional cost for you!
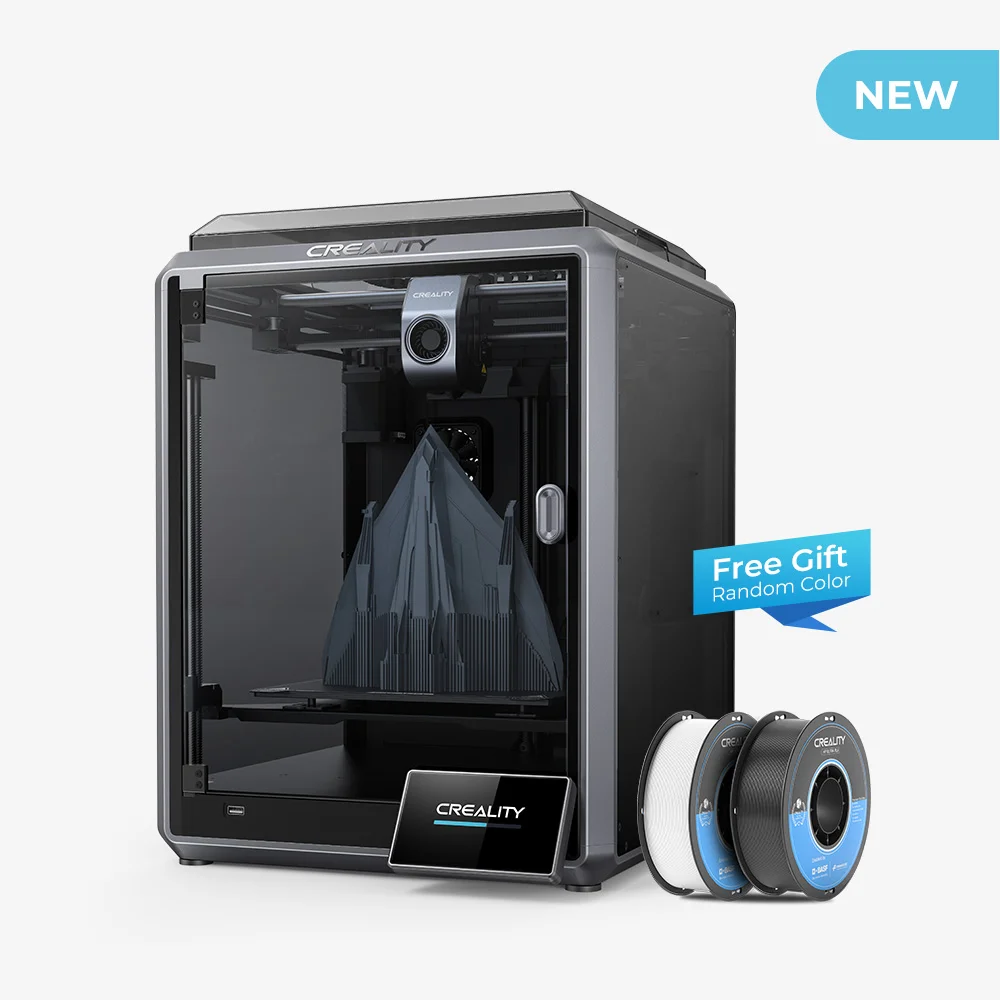
The Creality K1* reaches print speeds of 600 mm/s – that’s about 12 times the speed of standard 3D printers! For high print quality, the speed has to be reduced to about 400 mm/s, which is still extremely fast.
Besides the high print speed of up to 600 mm/s, the K1 also comes with many other features. It comes completely pre-assembled, levels automatically, has an acceleration sensor in the lightweight print head, and an effective cooling system.
I’ve tested the K1 extensively and in this review I’ll show you my results and share my experience with this high speed.
There is now the K1 Max, a larger version of the K1 with additional AI features. Click here for my detailed review: Creality K1 Max Review: Large Volume, High Speed
PRO:
- High print speed
- Low vibration
- G-Sensor
- High print quality
- No assembly necessary
- Automatic print bed leveling
- Flexible print bed with good adhesion
- Closed print volume
CON:
- Loud (up to 75 dB with open enclosure)
- Settings cannot be changed during printing
- Filament holder on back (looks nice, but is impractical)
Who should buy the Creality K1?
Anyone who wants to print objects at a high speed from a wide variety of filaments and with high quality is well advised to buy the K1. It just about satisfies all of your needs for an FDM 3D printer (except for the noise). If the print volume is too small for you, there is also the K1 Max*.
Check Price at:
Tip: To ensure the best print quality even at 600 mm/s, the Hyper-PLA from Creality* is best suited. It melts faster than regular filaments, allowing for smoother extrusion even at high print speeds.
Table of Contents:
Technical Specifications
- Technology: FDM
- Operation: 4.3″ color touch screen
- Extruder: dual gear direct drive extruder
- Print temperature: max. 300 °C
- Print bed temperature: max. 100 °C
- Print volume: 220 × 220 × 250 mm
- Print bed material: Coated spring steel, magnetic, flexible
- Print bed leveling: Fully automatic
- Print speed: Maximum 600 mm/s, standard 300-400 mm/s
- Nozzle: 1 × 0.4 mm
- Printing accuracy: ± 0.1 mm
- Layer height: 0.1 to 0.35 mm
- Filament: 1.75 mm PLA, ABS, PETG, TPU, PA, ASA, PC, PLA-CF, PA-CF, PET-CF
- Filament Sensor: Yes
- Resume Print: Yes
- LED: Yes
- File Transfer: USB, WLAN
- Slicer: Creality Print, Cura, Simplify3D, PrusaSlicer
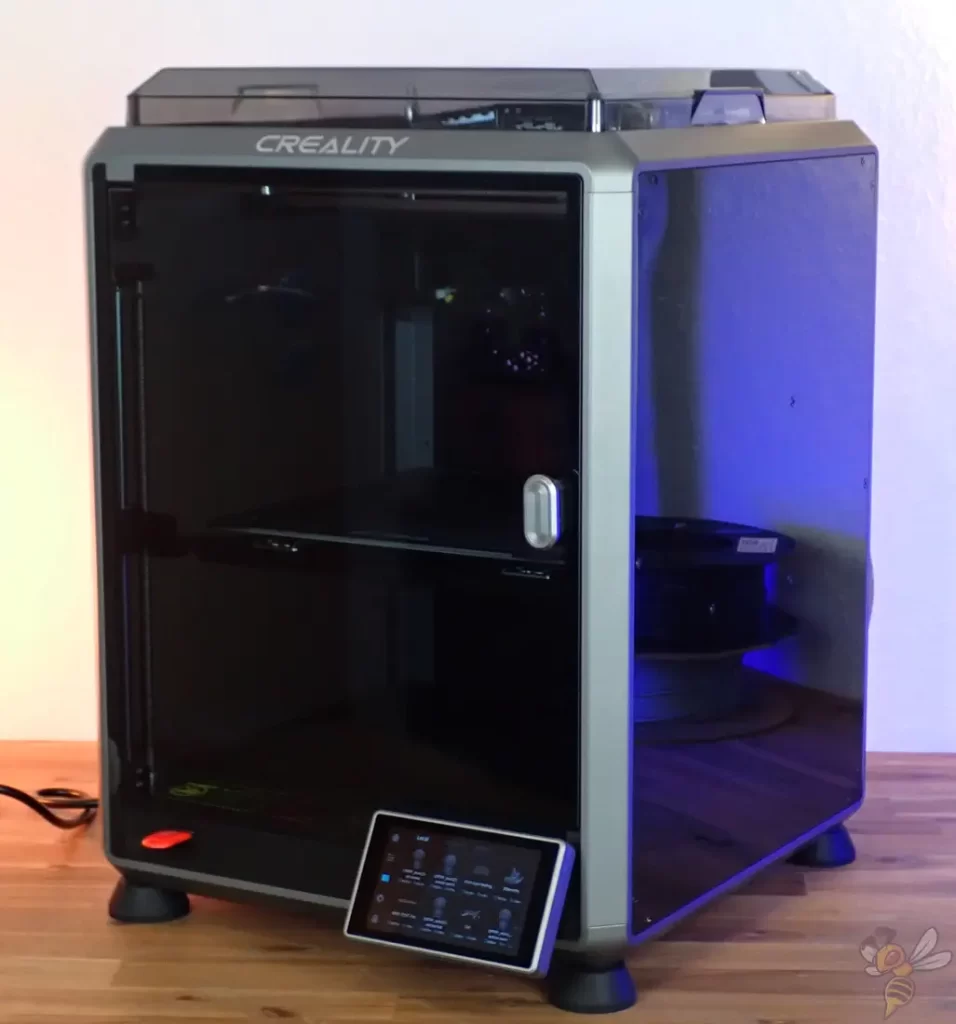
Unboxing
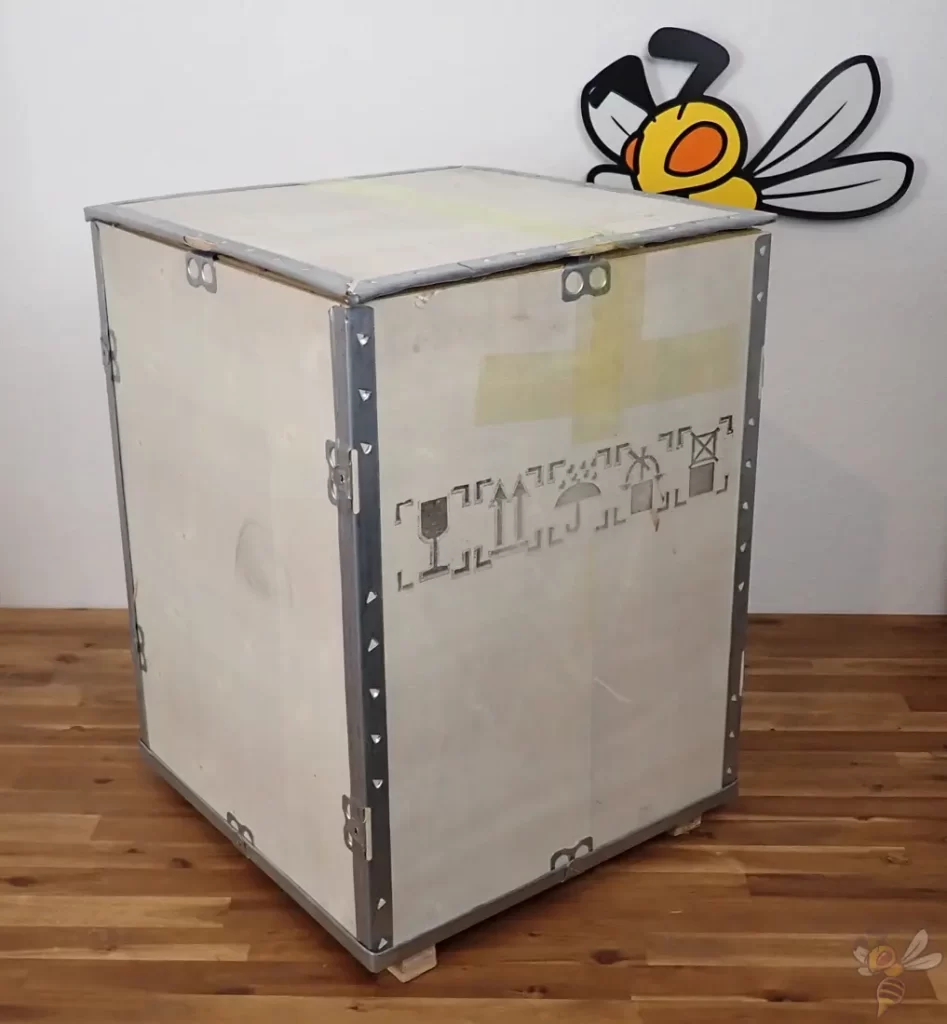
The Creality K1 comes completely pre-assembled in a sturdy wooden box. Inside the wooden box is another cardboard box and the printer itself, which is secured with many matching foam parts. Also, inside the 3D printer, all moving parts are secured so that they cannot move during transport.
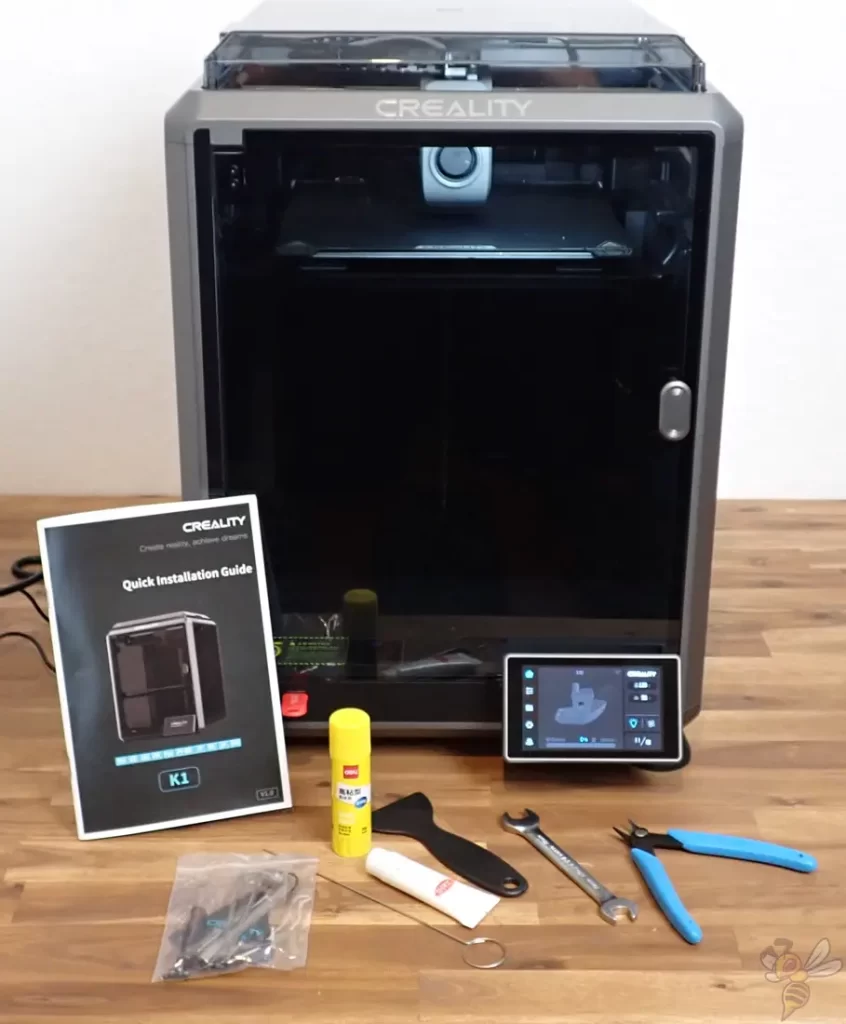
Included in the box are all the tools you’ll need to run the 3D printer. Also included is some Hyper-PLA. This filament melts faster than normal filaments and is therefore ideal for very high printing speeds.
Assembly
You don’t have to assemble the K1 yourself, just remove a few transport locks. After that, you can switch it on straight away.

After the 3D printer has been switched on for the first time, it checks its most important functions and calibrates its acceleration sensor and levels the print bed.
Especially the last two steps of the self-test take quite a long time. In total, the self-test takes 15 to 20 minutes. With other 3D printers, this time consists of assembly; with the Creality K1, it consists of waiting…. The best way to use this time is to look at the files on the included USB stick and install the software.
So, the assembly consists only of removing the transport locks and the self-test. Then the 3D printer is ready to use.
Design & Features
These are the main design elements of the Creality K1 to achieve such high printing speeds:
- Core-XY system
- Lightweight print head
- Acceleration sensor
- Effective cooling
- Hotend with high heating rate
These features allow the print head to move at an incredible acceleration of 20000 mm/s²! This allows the high print speeds to be applied to the majority of the object.
I was able to print my 3DBenchy in 12:52 with a good print quality.
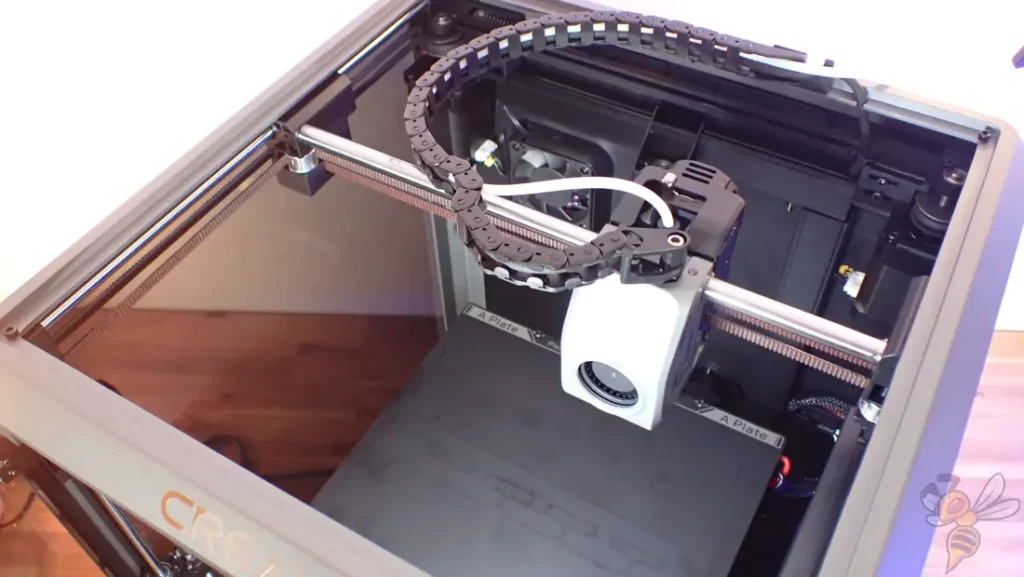
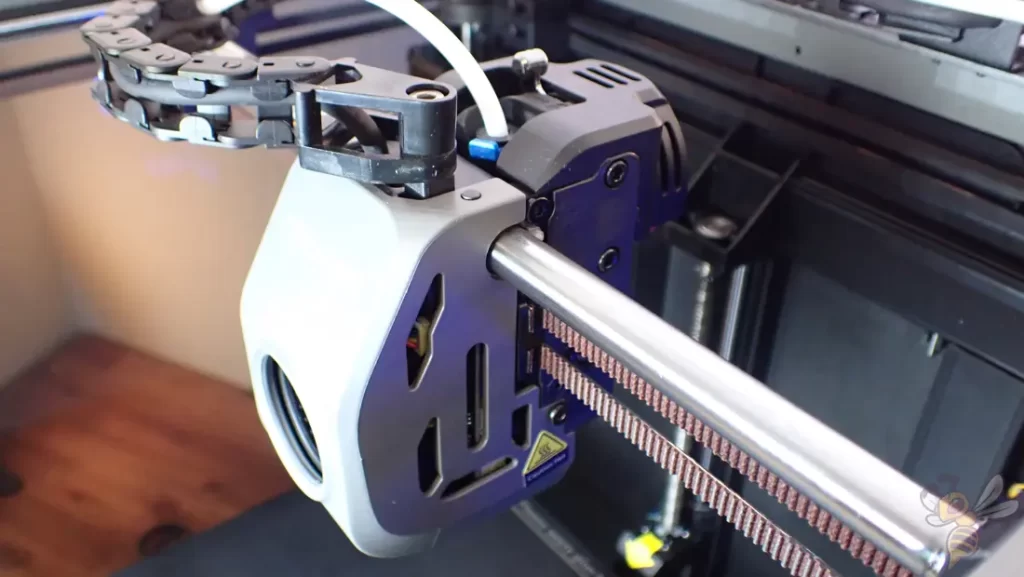
The K1 is a Core-XY 3D printer. This means that the print head moves along the x- and y-axis and the print bed moves along the z axis. The movement of the print head is realized by a complex system of stepper motors and belts.
The respective stepper motors are strong, precise and fast. They can move the lightweight print head (190g) quickly and with very little vibration. The few vibrations that occur during movement are detected by the acceleration sensor during the self-test. During printing, these accelerations are compensated, which means that printing errors such as ringing do not occur even at high printing speeds.
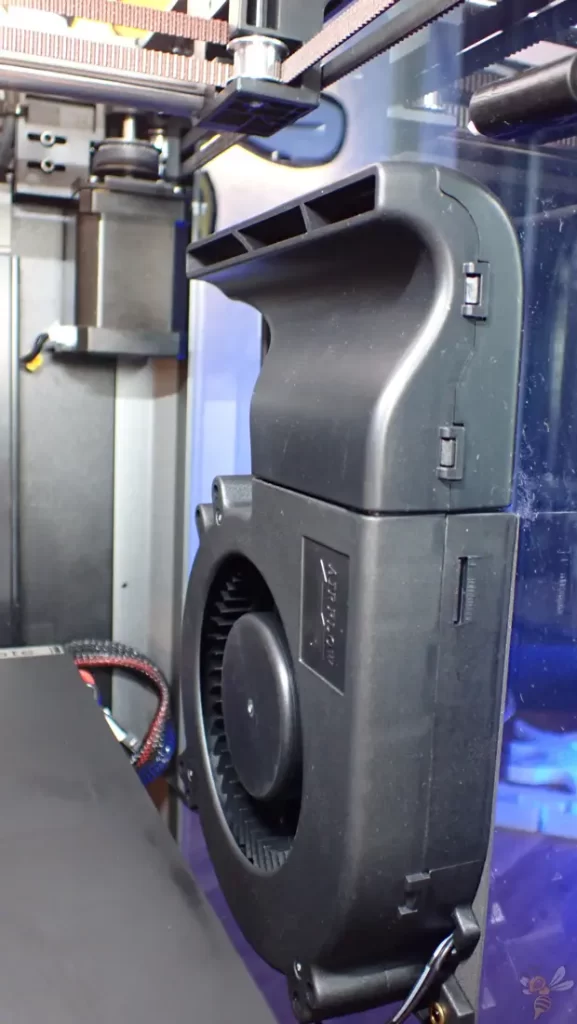
In addition to the fans in the print head, there is also a large fan in the enclosure. It always blows directly onto the layer that is currently being printed.
To turn the high printing speeds into a short printing time, the filament that has just been printed must cool down as quickly as possible so that the next layer can be printed on it immediately afterward. If the filament were still too hot when the new layer was printed on it, printing errors would occur.
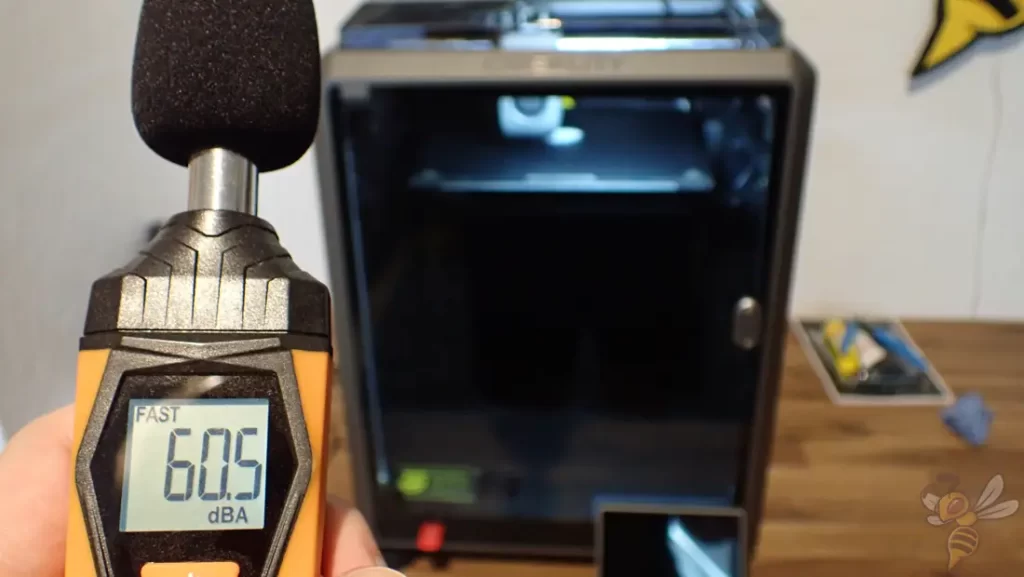
The only real drawback that bothers me with the K1 is the high noise level. The culprit, of course, is the powerful fans that need to cool down the filament as quickly as possible.
Although the enclosure reduces the noise level by 5 to 10 decibels, this still leaves the volume noticeably higher than other 3D printers.
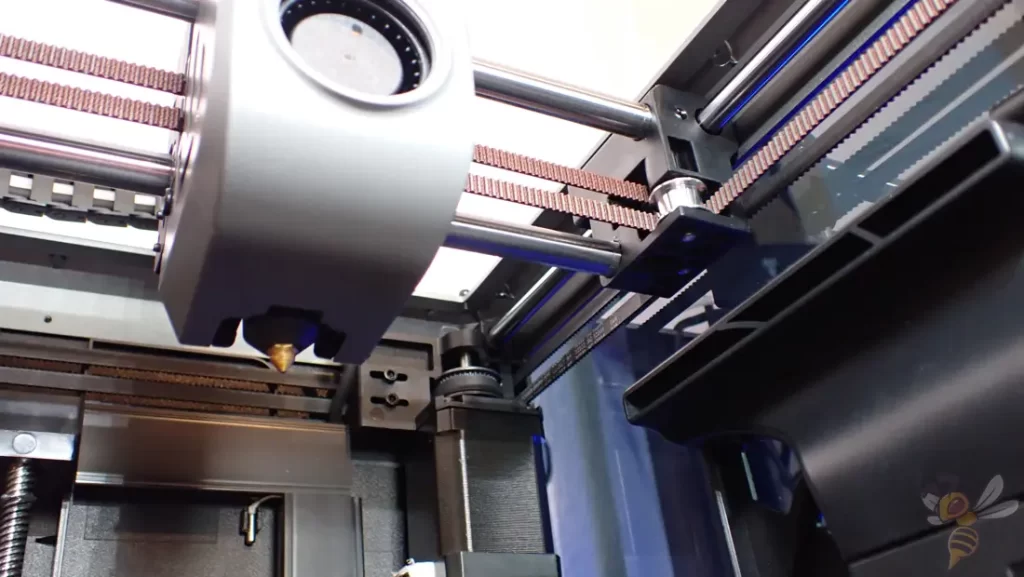
However, to realize the high printing speeds, the extruder also has to convey the filament with sufficient speed. The installed Dual-Gear Direct Drive extruder manages a maximum throughput of 32 mm³/s.
The challenge for such an extruder with the associated hotend is to melt the filament as quickly as possible. The hotend is heated up to 200 °C within 40 to 60 seconds, but can also transfer this temperature to the cold filament quasi instantaneously and melt it.
This also instantly melts filament that is pushed through the hotend at a very high throughput.
The extruder and the hotend convey and melt the filament so quickly that the maximum print speed no longer depends only on the 3D printer, but also on the filament itself.
In my test, I was able to achieve a very high print speed of 600 mm/s even with normal filament, but the print quality is better with Creality’s Hyper-PLA at such high print speeds.
This filament has better flow properties and can be melted faster. Printing errors occur much less here. At a print speed of 400 mm/s, however, I could (fortunately) not see any difference.
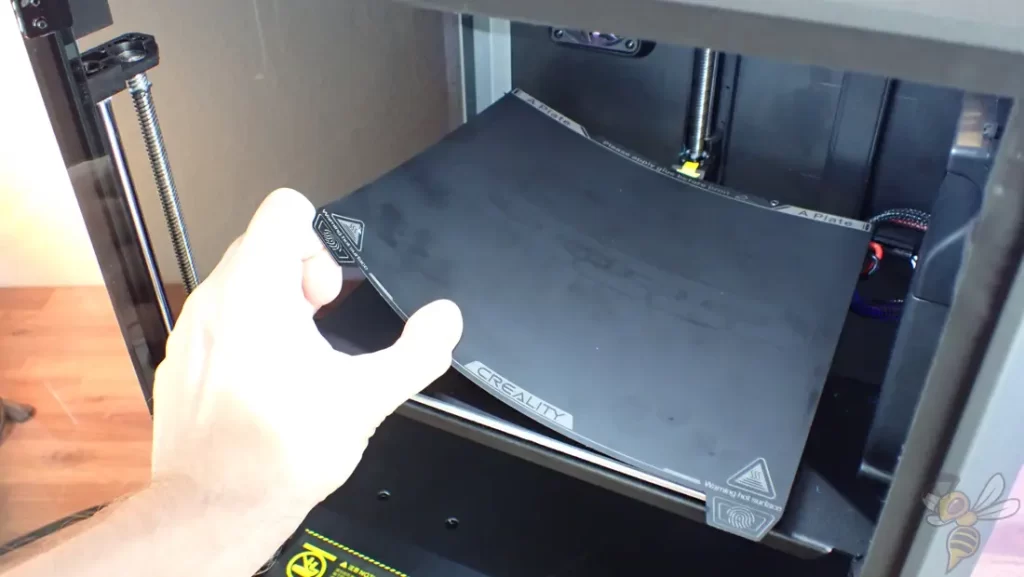
The flexible and magnetic print bed can be removed after printing and bent through. This makes it effortless to detach the finished printed parts.
I tested the K1 with different filaments and always had perfect print bed adhesion. Not a single print failed due to a poorly adhered first layer.
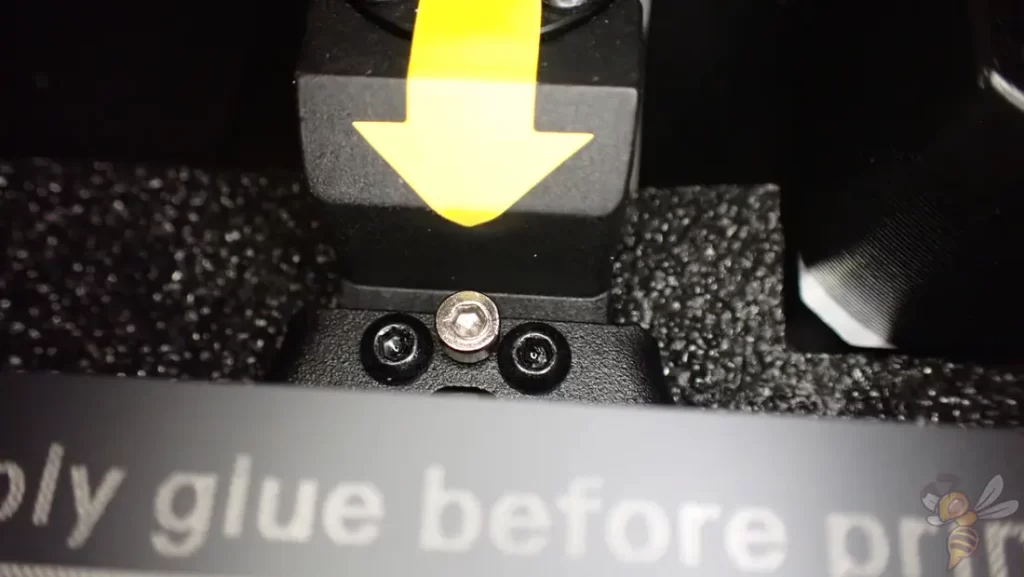
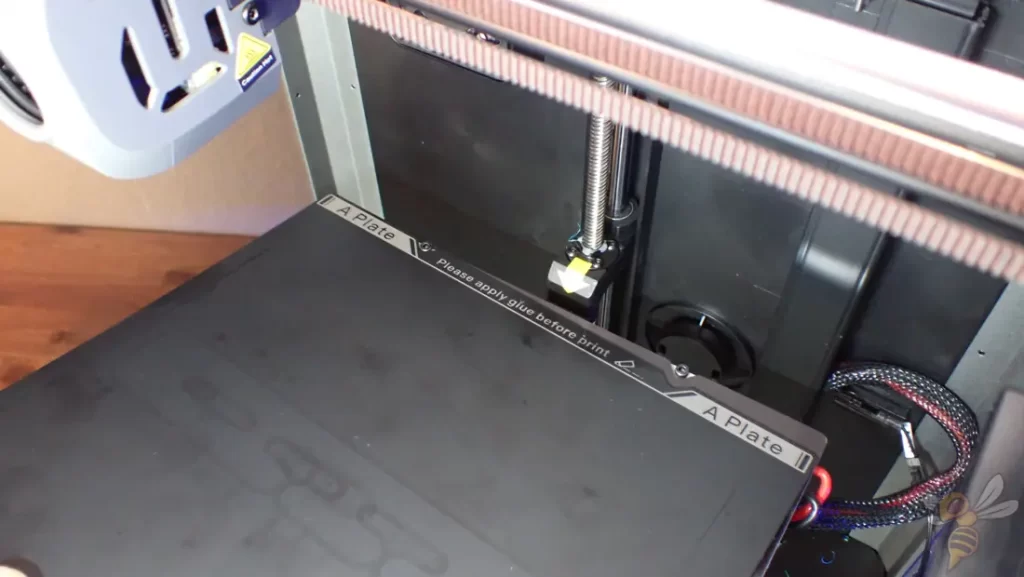
During my test, I did not have to use adhesive once to increase print bed adhesion. So, the little note at the back of the print bed may only be useful for exotic filaments.
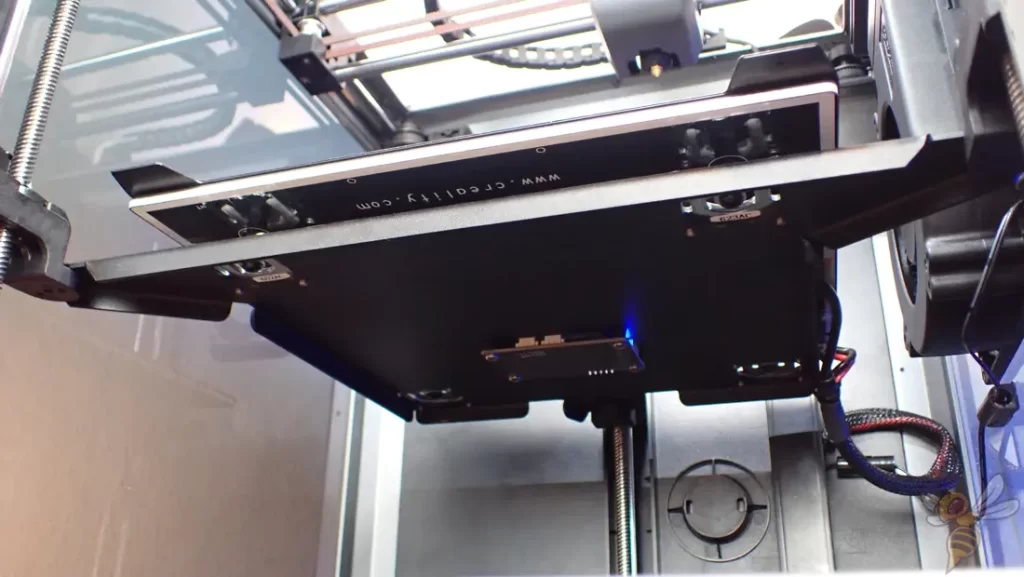
Very handy are the two small screws at the back end of the print bed. Here, the print bed can be snapped into place and easily positioned on the magnetic print plate.
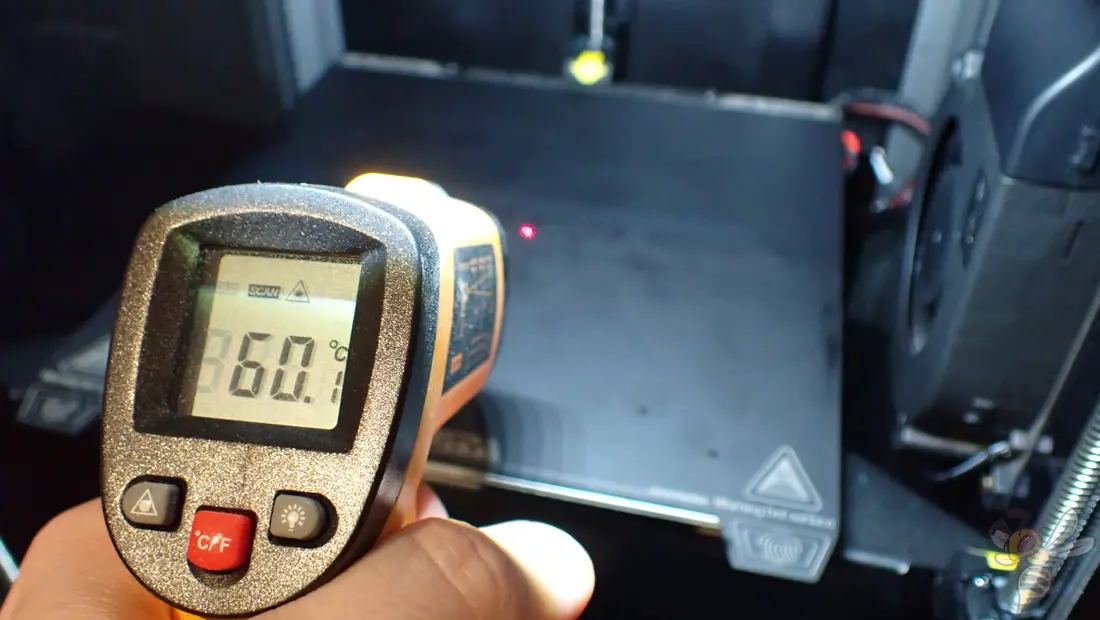
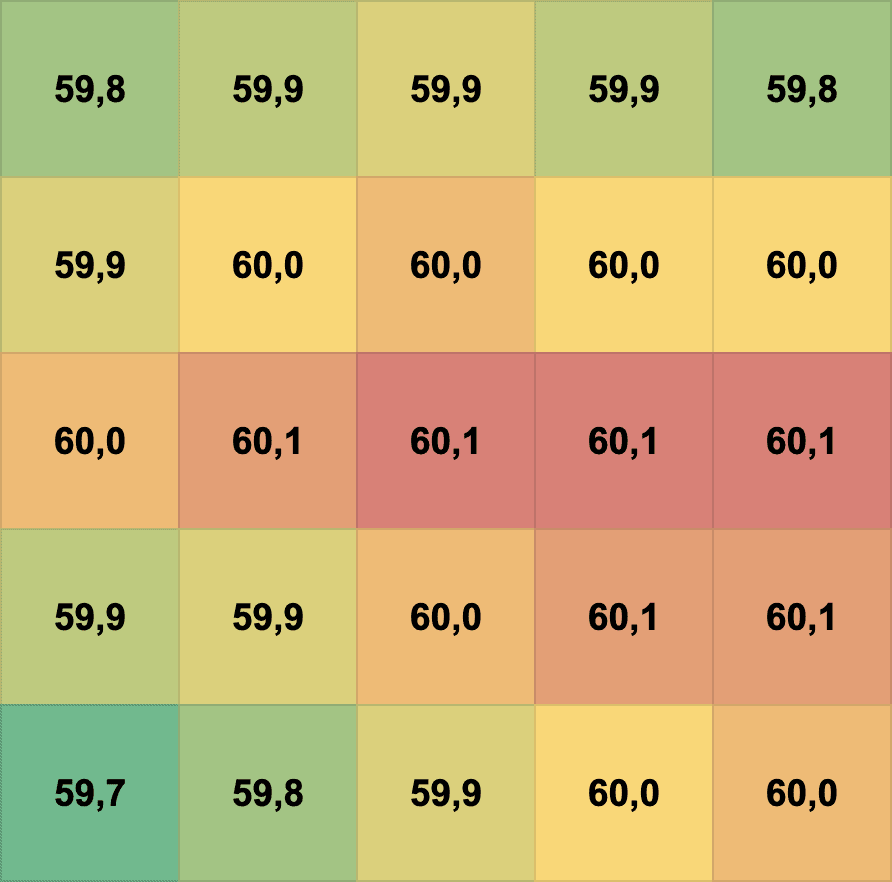
I was also positively surprised by the temperature distribution of the print bed. I measured the temperature after a few minutes at 25 points on the print bed. The temperature is very homogeneous, with a maximum deviation of 0.4 °C between the maximum and minimum values.
With such homogeneity and the closed print volume, you should have no problems with print bed adhesion with ABS or other filaments that are prone to warping.
The print bed has another advantage over other standard PEI print bed surfaces. It is also coated with PEI, but the surface is much finer. As a result, the underside of the printed object is much smoother. Print bed adhesion is nevertheless excellent.
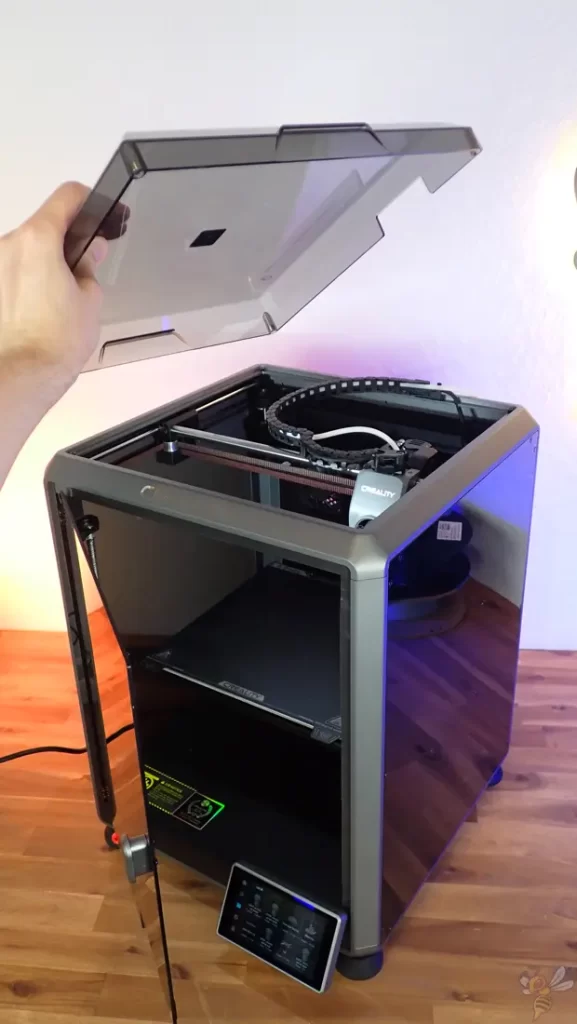
The print volume can be completely closed. Both the cover and the door are held in place by magnets.
If you are printing with filaments that do not require a closed print volume or higher ambient air, you can leave the cover open during printing. Then you still benefit from the fact that no cold air drafts can reach the object from the side and disturb the print.
The closed print volume allows you to keep the air inside constantly warm. This is especially important with filaments that have a high shrinkage rate (like ABS). By keeping the temperature inside the print volume constant and high, you prevent warping and cooling too quickly or prematurely.
Although there is a big fan inside the enclosure that blows on the layer that is currently being printed, it can be turned off if necessary. However, since it only blows specifically on the currently printed layer, it should not have a negative impact on printing sensitive filaments.
The enclosure cannot be heated separately. For this, there is a display for the temperature inside in the menu. Before you start printing ABS or similar filaments, you should bring the print bed to the necessary temperature and hold it there for a few minutes until the temperature in the print volume is constant.
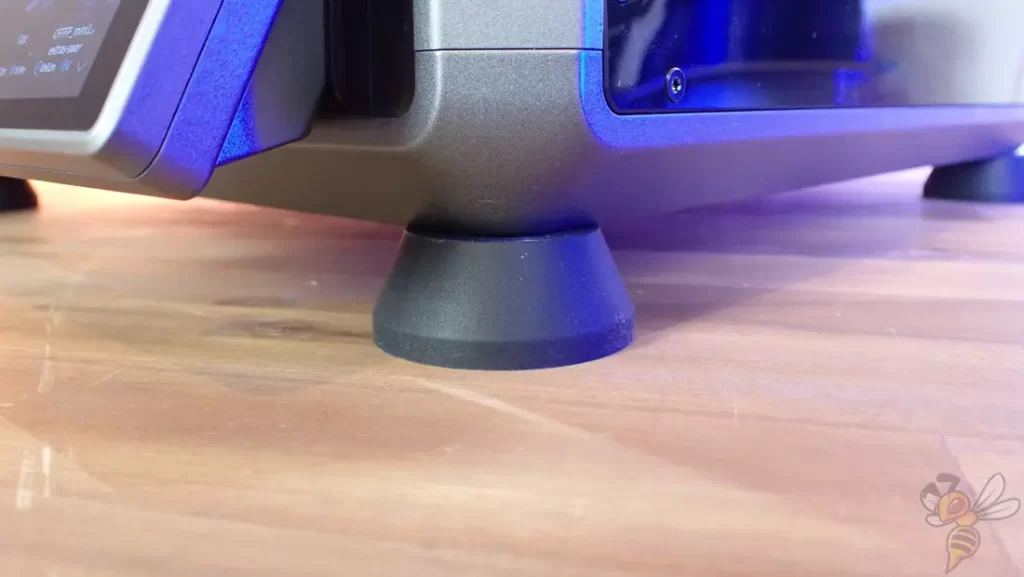
Also included are four rubber feet that you can place under the K1. This will absorb vibrations that can be distracting during printing.
It’s very spectacular when the K1 prints at 600 mm/s. It moves like a washing machine on spin cycle! With the rubber feet, this becomes a bit more accentuated, but the vibrations are not as hard as a result.
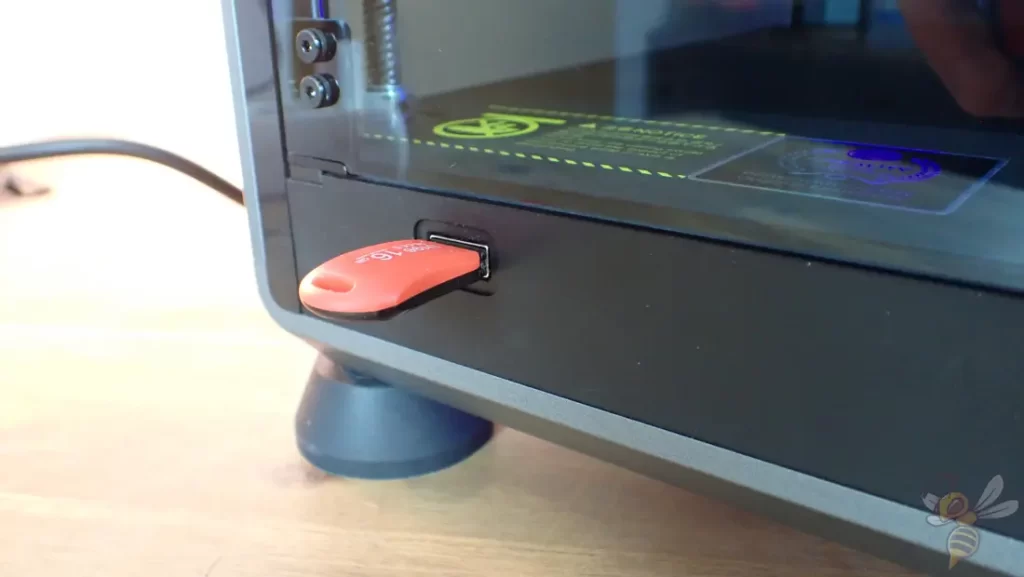
Instead of a small MicroSD card, you can feed the K1 with data using an included 16 GB USB flash drive. The slot is located on the front.
You can also connect the K1 to a WLAN. You can also connect it to the Creality Cloud.
Print Bed Leveling
The Creality K1 levels the print bed completely automatically. You don’t have to manually adjust the Z-offset either. So, you won’t find any screws under the print bed and no support for print bed leveling in the menu.
The advantage is that you don’t have to struggle with a piece of paper to find the accurate distance between the nozzle and the print bed. The downside is that you can’t reduce the distance any further if you have print bed adhesion issues.
In my experience, this is not really necessary because the print bed adhesion of the K1 is almost perfect. If you do have problems with it, you can always reduce the print speed of the first layer or use other methods to improve print bed adhesion.
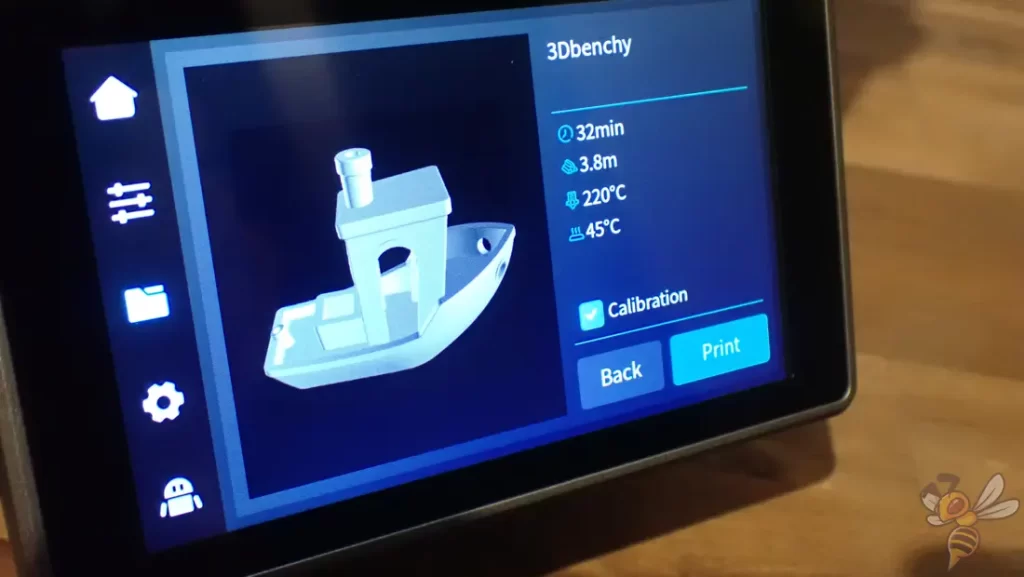
Automatic print bed leveling happens once right after assembly during the self-test and before each print if desired. Before you start a print, you can check or uncheck a checkbox. When checked, the K1 automatically levels the print bed and calibrates the accelerometer before printing.
This process takes a total of two to three minutes. After that, it starts printing directly without you having to do anything else.
Slicer
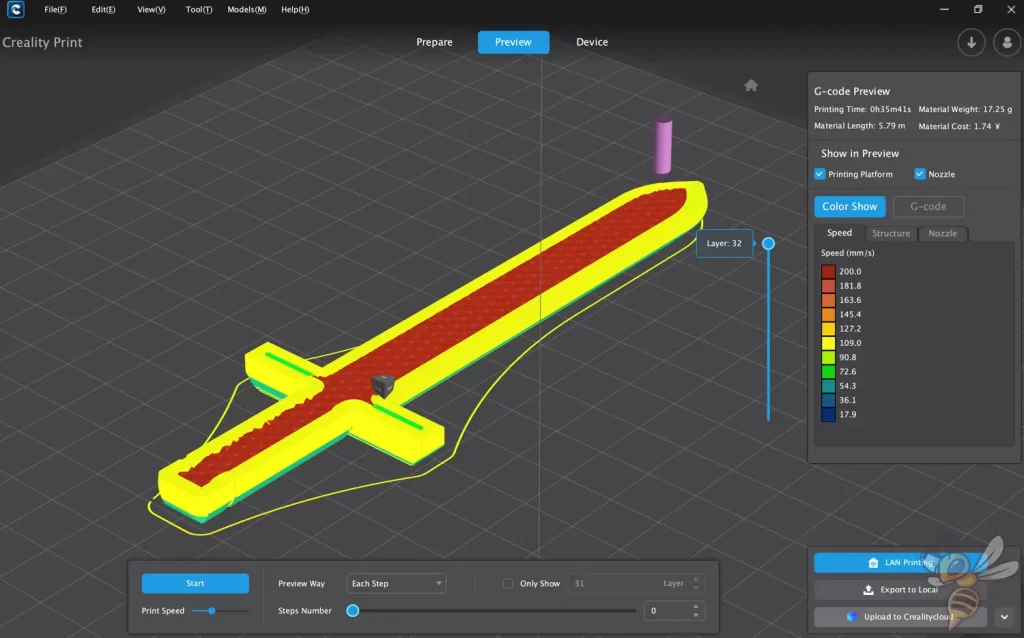
You can feed the K1 with files using the slicer from Creality (Creality Print), Cura, Simplify3D or PrusaSlicer. I have used both Creality Print and Cura.
And the advantage of Creality Print is that you’ll find a pre-made profile for the K1 there. You can start with it right away and don’t need to change any settings much to get good results.
Especially for Hyper PLA, the settings are already practically perfect. Only for normal PLA or other filaments, you should do the basic calibrations to improve the results – especially if you plan to use higher speeds of more than 200 or 300 mm/s.
Tip for Creality Print: disable the “Arc Configure Enable” in the quality settings. This setting frequently caused print errors for me. I had to search for a long time until I found the source of the error. But maybe this error was already eliminated with a newer update of the firmware.
Tips for high speeds:
- If you want to increase the speed a lot, you have to reduce the minimum layer duration under the cooling settings. Otherwise, the print speed will be reduced to reach this minimum duration.
- The faster you print, the higher the print temperature should be.
- Experiment with the acceleration and jerk control settings.
I have calibrated the K1 with different filaments and show you my Cura settings in this article: Creality K1 – Perfect Cura Settings for PLA, ABS, PETG, TPU
Loading Filament
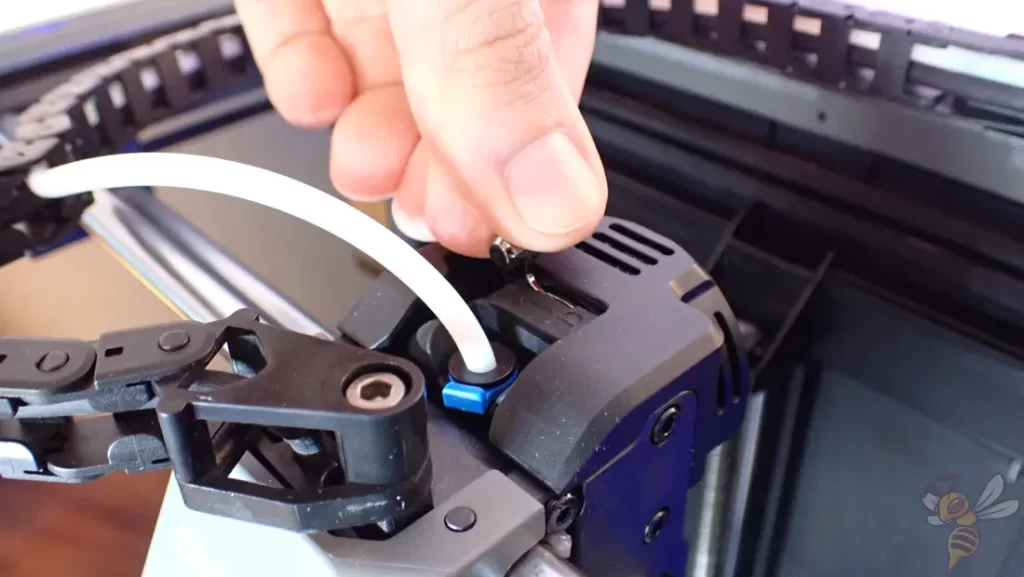
You can load and unload the filament completely manually. For this, there is a lever on the extruder that decouples it. However, automatic loading and unloading via the menu is much more convenient and works amazingly smoothly.
All you have to do is push the filament through the PTFE tube to the extruder and start the loading process in the menu. The extruder grabs the filament reliably. I didn’t have to manually help it once!
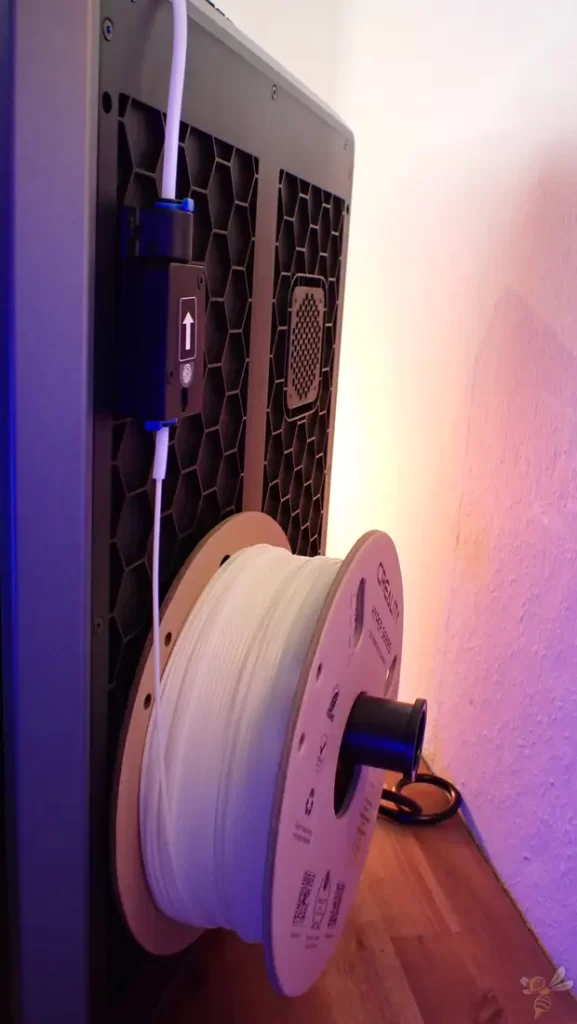
A bit impractical, on the other hand, is the positioning of the filament holder and the filament sensor. They are both located on the back of the 3D printer. The design benefits from this, but the practical handling suffers.
Depending on how you want to set it up, you’ll have to rotate it or reach awkwardly to the back to change the filament.
Check Price at:
Printing
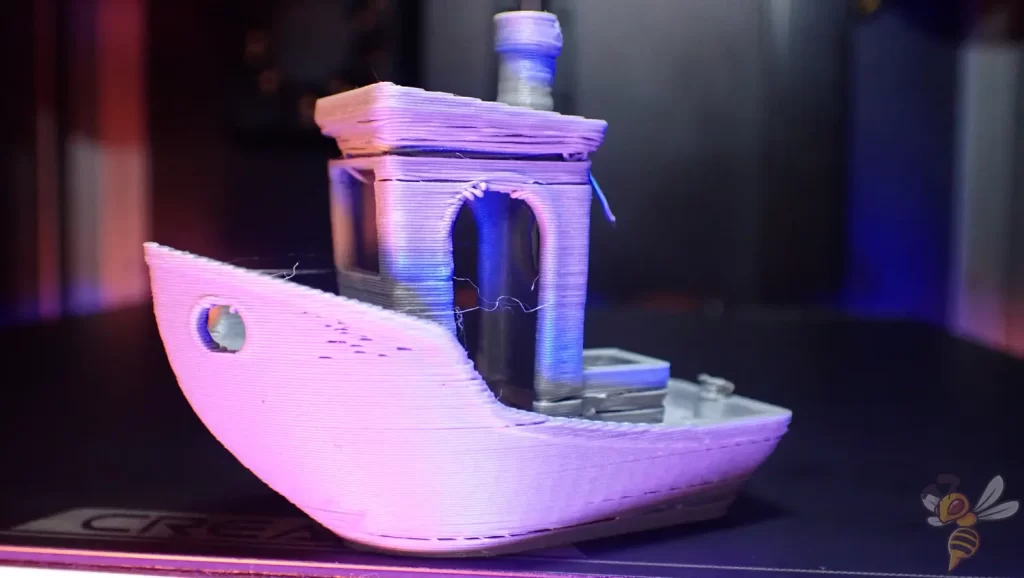
Of course, the first thing I was interested in was the print speed. So, I directly optimized the settings for the highest possible speed and printed a 3DBenchy.
I was able to achieve a print time of only 12:52.
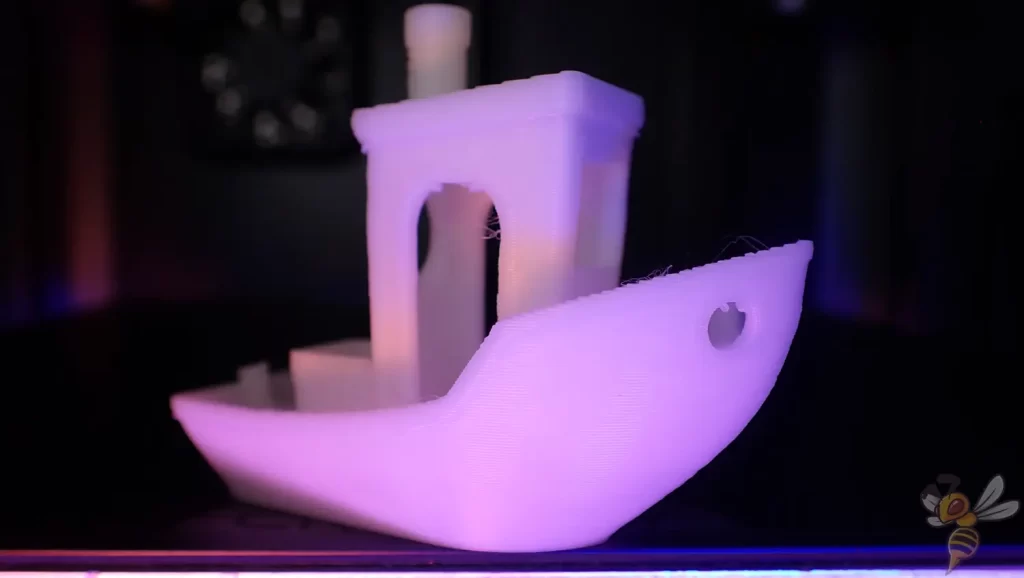
And that with a relatively acceptable print quality. Occasionally, some stringing can be seen and the overhangs didn’t turn out too nice. Still, this test print turned out better than quite a few other 3D printers with a much slower print speed.
(Unfortunately, I only had white Hyper PLA filament available, so I used some colored light to try to make the details visible)
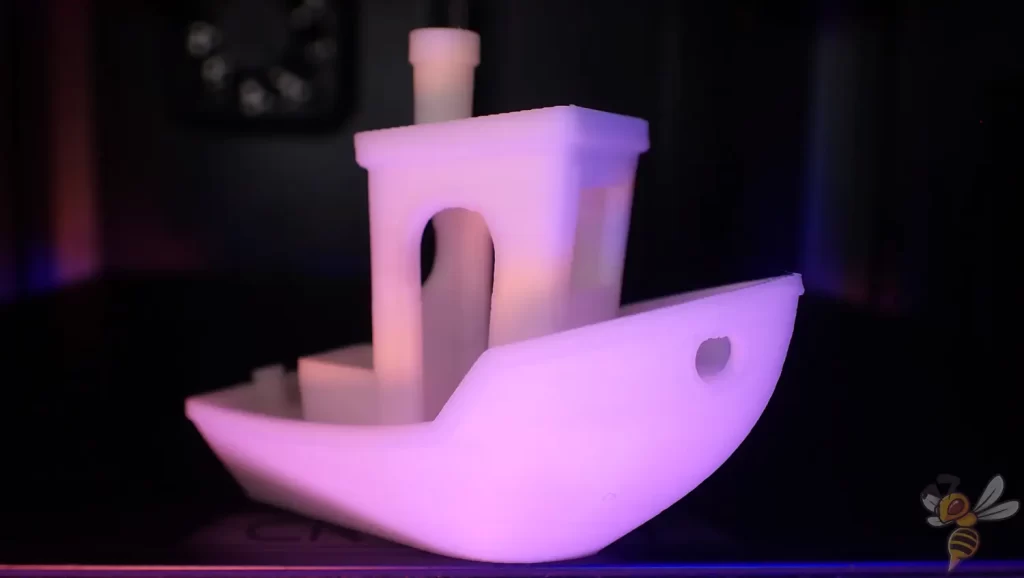
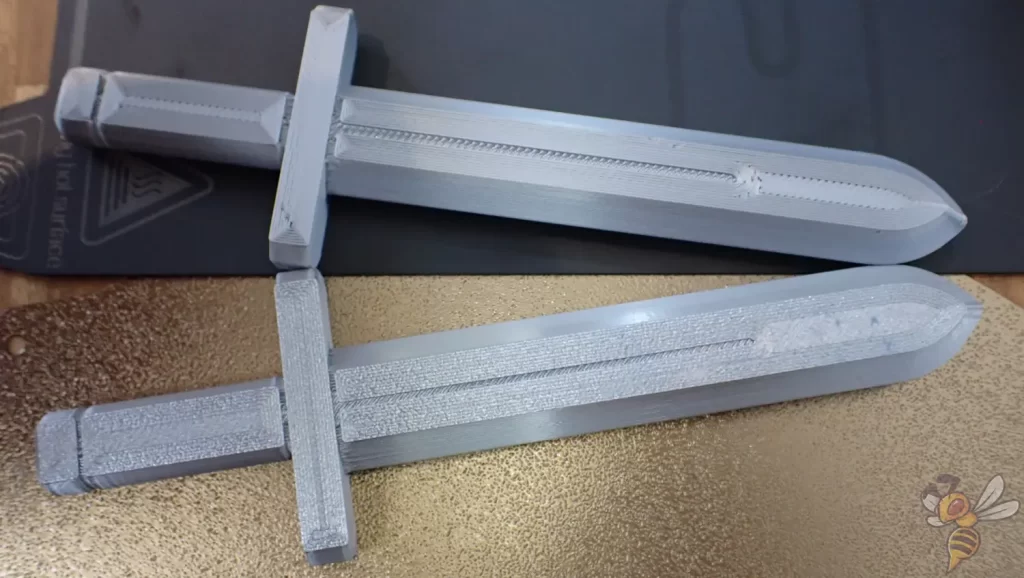
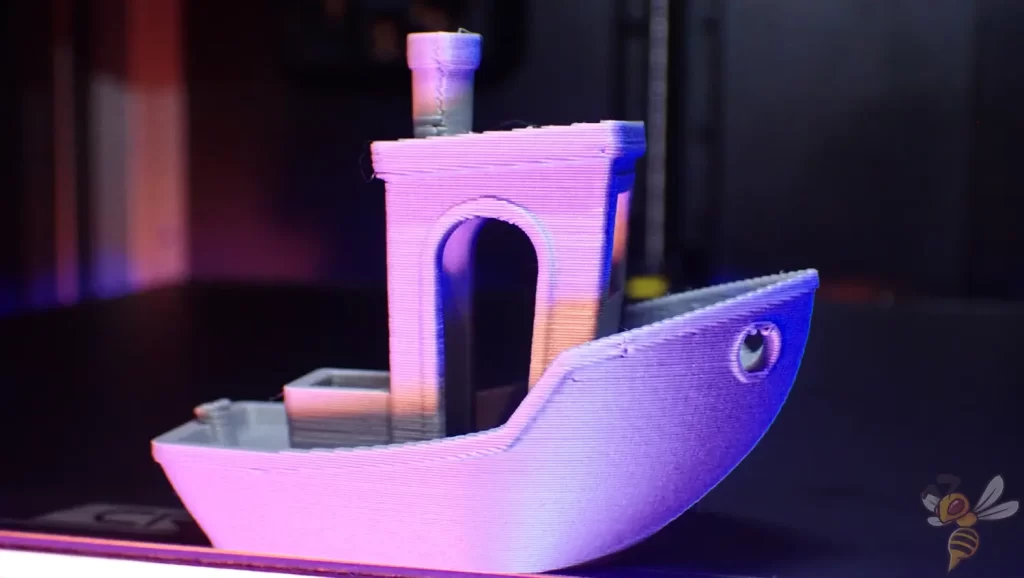
After optimizing the settings for a high print speed, I then aimed for the highest quality possible. With a slower print speed and a layer height of 0.1 mm, I was able to print the Benchy pictured above within 19:42.
The quality turned out really excellent. I could still refine the settings a bit for the overhangs.
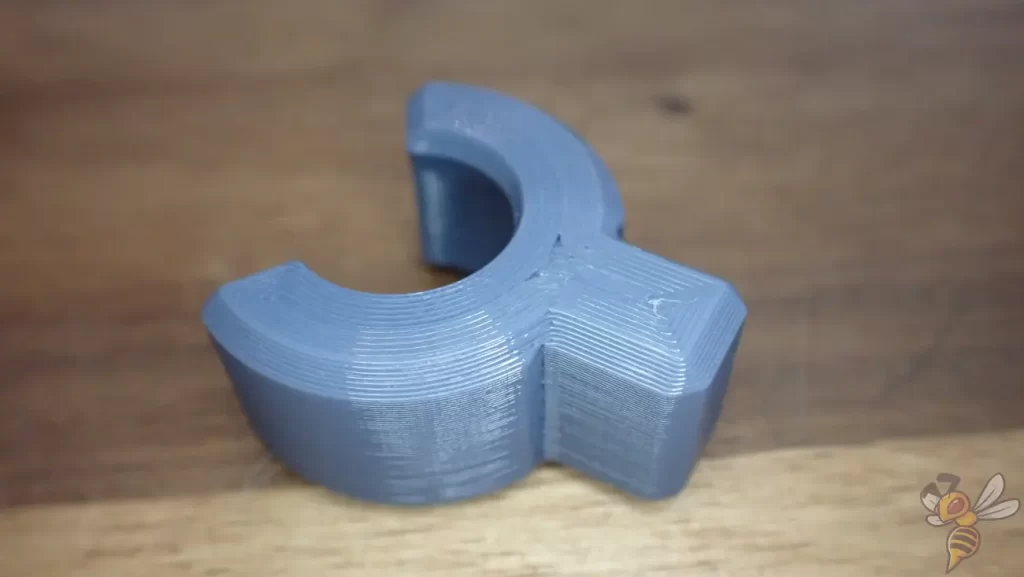
And after that, I wanted to try out if I could achieve the same results with normal PLA filament.
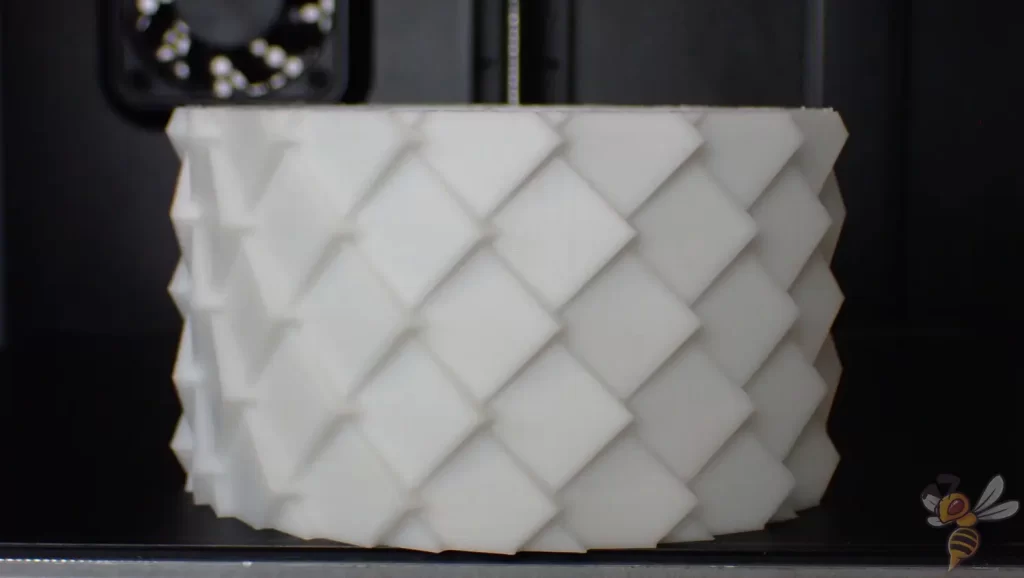
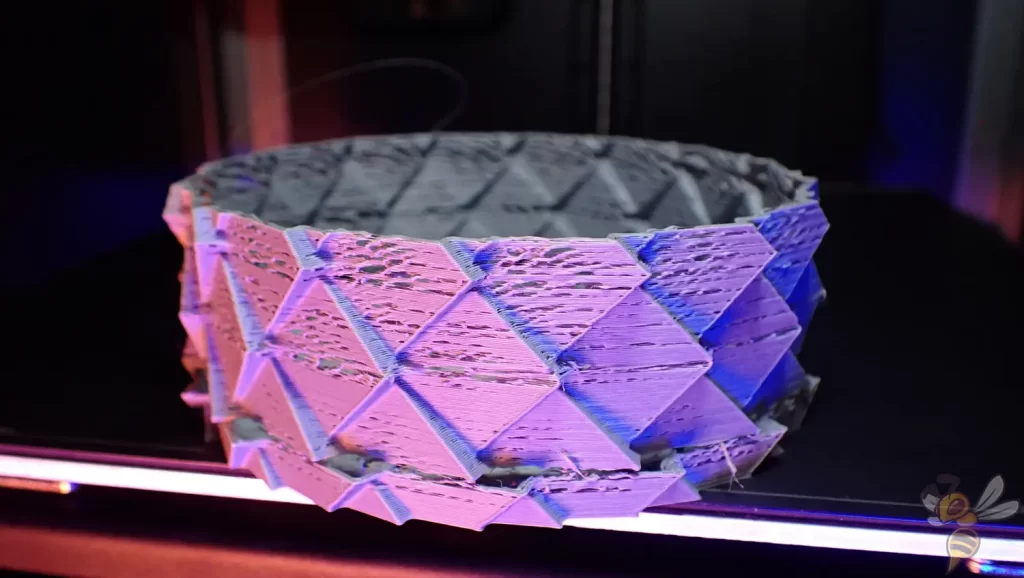
Without changing the settings, I loaded normal PLA filament and tried to print a vase. The result was disastrous.
Hyper PLA filament is designed to melt quickly and promote a high flow rate. Therefore, I knew roughly what settings I needed to change to achieve such results with regular PLA filament as well. Most notably, I needed to increase the print temperature and calibrate the retraction settings.
After much experimenting and calibrating, I have found the correct settings for the normal PLA filament. Although the print speed is lower than with the Hyper PLA, 15:43 is still a great result for a 3DBenchy.
Here is my blog post about this experiment: Can the Creality K1 print at 600 mm/s ONLY with Hyper PLA?
Maybe I could have reduced the print time a bit more if the nozzle could do more than 300 °C. For the normal PLA filament, I had to increase the print temperature more and more the faster I printed. Otherwise, under-extrusion occurred because the filament didn’t melt fast enough.
During these initial tests, I noticed that the K1 is much noisier than most other modern 3D printers. So, the high speed has a catch after all!
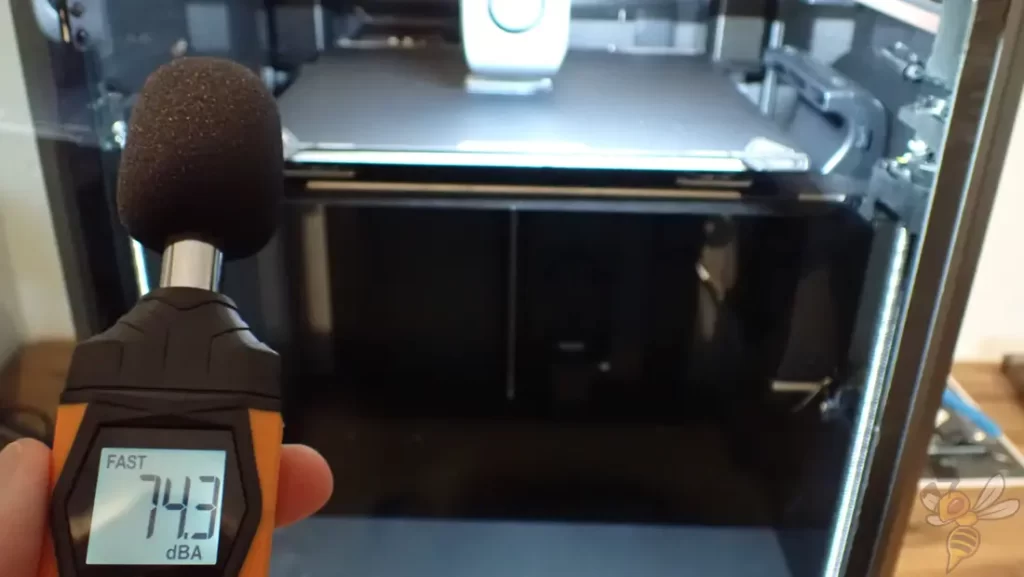
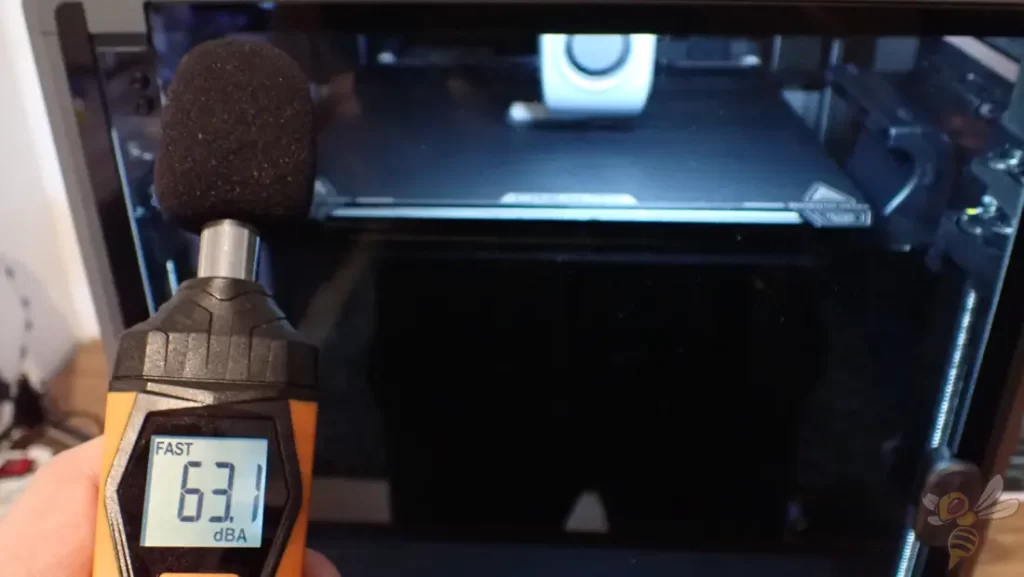
When printing with PLA and an open enclosure, there is a noise level of over 65 dB in the room. That’s pretty loud and annoying if you want to work or otherwise concentrate in the same room.
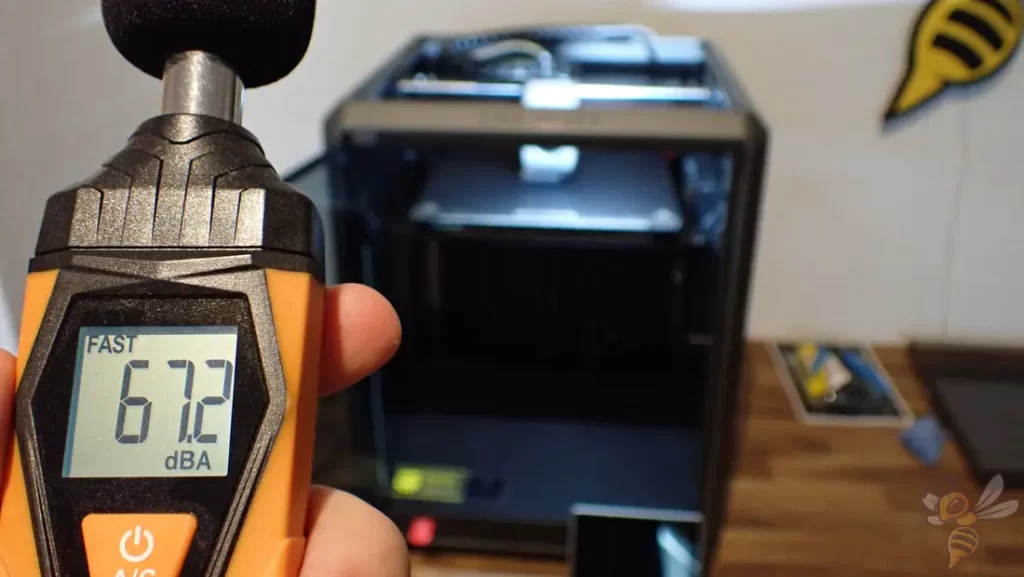
In comparison, the Neptune 3 Pro is pleasantly quiet at around 40 decibels. But in return, it’s also nowhere near as fast and doesn’t have a closed print volume.
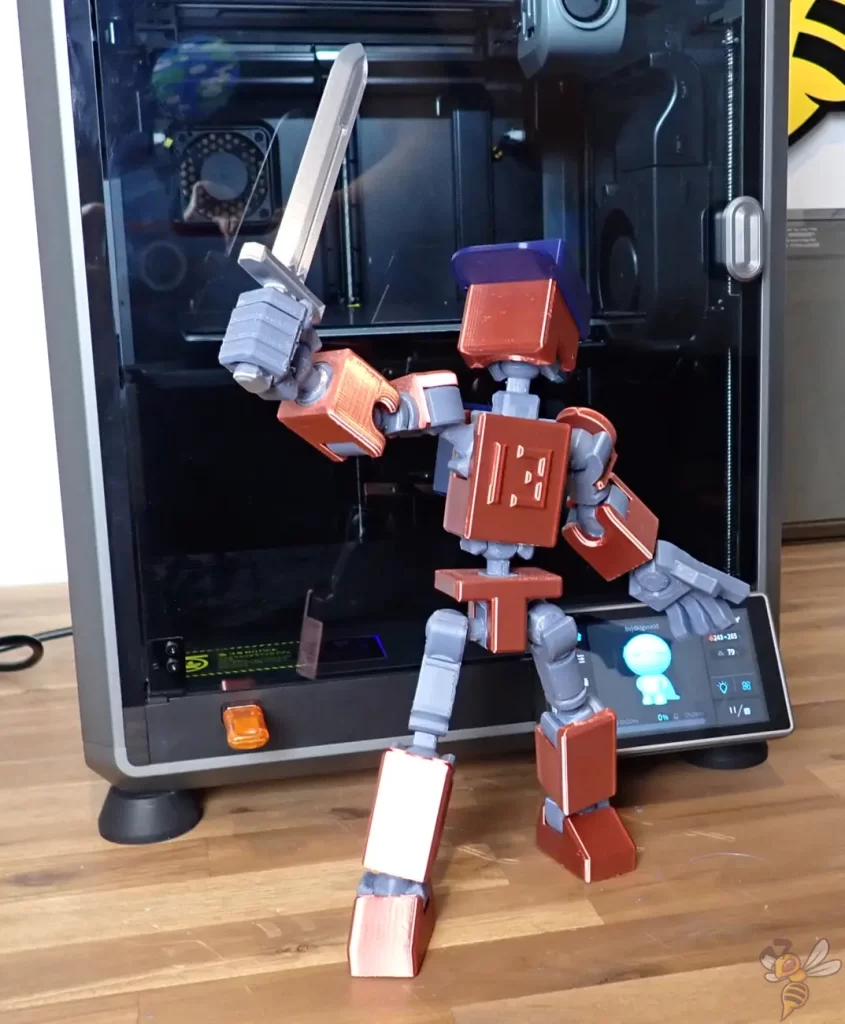
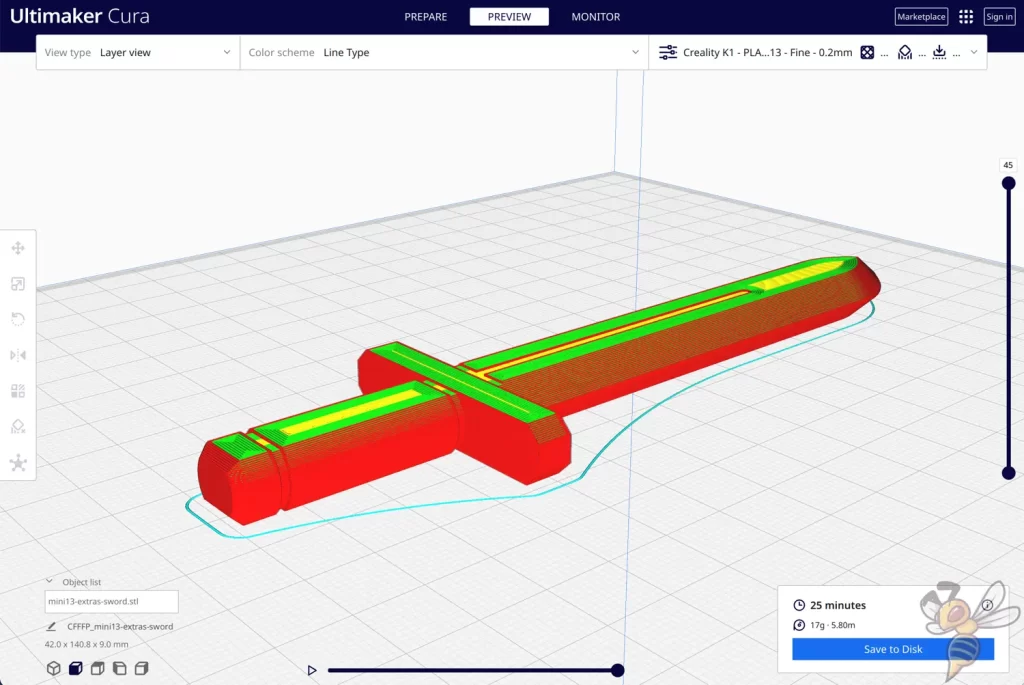
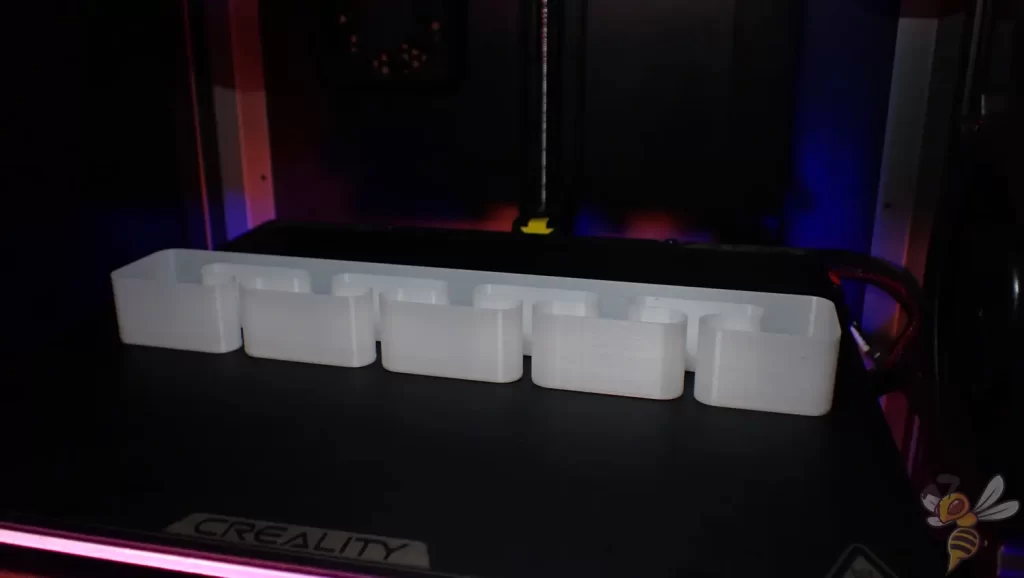
To test some other filaments, I scaled a MINI 13 action figure at 300% and printed it from multicolor PLA and PETG filament.
I am absolutely satisfied with the print quality and along with the short print time, I can tolerate the loud fan noise. With another 3D printer, it would have taken me at least twice as long to achieve the same quality.
The PETG parts were also easy to print. I didn’t have to calibrate much, as the retraction settings were basically identical and only the print temperature needed to be adjusted. As expected, print bed adhesion was excellent here as well.
Creality K1 vs. K1 Max

Check Price at:
Creality’s new flagship series comes in two sizes. The larger of the two is the K1 Max*. However, it’s not just bigger, it also has a few more features.
Especially, the built-in AI camera and LiDAR system complement the K1 Max. This allows it to automatically detect if the print has failed or is running properly.
Here is an overview of the features of the normal K1 and the K1 Max:
| Creality K1 | Creality K1 Max | |
|---|---|---|
| Print volume | 220 × 220 × 250 mm (≈ 12 liters) | 300 × 300 × 300 mm (≈ 27 liters) |
| Max. hotend temperature | 300 °C | 300 °C |
| Max. print bed temperature | 100 °C | 120 °C |
| Extruder | Direct Drive | Direct Drive |
| Printing speed | ≤ 600 mm/s | ≤ 600 mm/s |
| Acceleration | ≤ 20000 mm/s² | ≤ 20000 mm/s² |
| Display | 4.3-inch color touchscreen | 4.3-inch color touchscreen |
| Print bed | PC-coated spring steel | PEI-coated spring steel |
| Leveling | Completely automatic | Completely automatic |
| AI camera | No | Yes |
| AI-LiDAR | No | Yes |
| Air purifier | No | Yes |
| Filament sensor | Yes | Yes |
| Resume print | Yes | Yes |
Is the Creality K1 Worth it?
In my eyes, the Creality K1* is one of the best 3D printers recently. However, it is not just a “one-trick-pony” that can achieve high speeds exclusively with special filament. I have shown that this is also possible with normal filament.
Besides the high speed, of course, all the other features are top-notch and set new standards in the 3D printer market!
Check Price at:
If you are interested in the device, I would be happy if you would buy it through my links. I will then get a small part of the purchase price as commission, without it becoming more expensive for you. The device was provided to me, but this did not influence my evaluation in any way.
Disclosure: This website is the property of Martin Lütkemeyer and is operated by Martin Lütkemeyer. Martin Lütkemeyer is a member of the Amazon Services LLC and other Affiliate Programs. These are affiliate advertising programs designed to enable websites to earn advertising revenue through advertising and linking to Amazon.com and others. Links marked with * are affiliate links.

Grüße. Sie sagten, Sie hätten den K1 auch mit dem Cura-Slicer verwendet. Für einen Profi wie Sie ist das wahrscheinlich nicht schwierig, für mich jedoch schon, da Cura noch kein Profil für K1 enthält. Können Sie mir dabei helfen?
Mit freundlichen Grüßen Miklos