
- Wet Filament: Prevention, Symptoms & Drying - July 18, 2024
- Sovol SV08 – Best PrusaSlicer Settings & Profile - June 26, 2024
- Sovol SV08 – Best Orca Slicer Settings & Profile - June 26, 2024
Disclosure: Links marked with * are Affiliate Links. I earn from qualifying purchases if you decide to make a purchase through these links – at no additional cost for you!
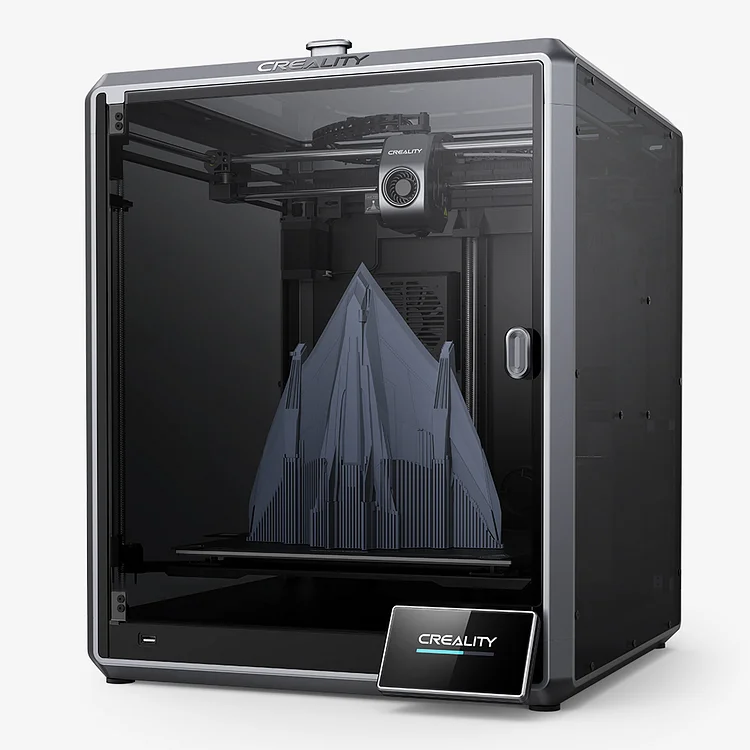
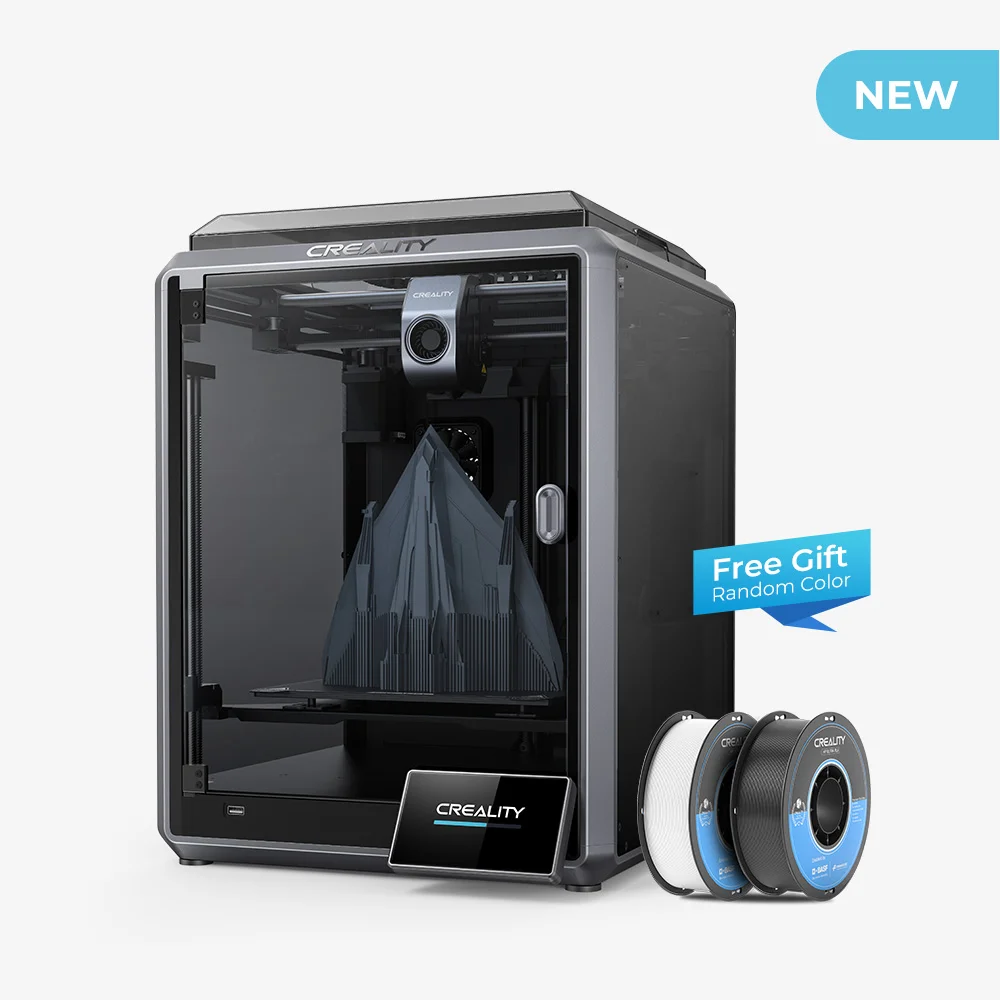
The Creality K1 Max*, an upsized successor to the impressive Creality K1, has a large print volume, can print at up to 600 mm/s and has an AI LiDAR system and an AI camera.
Naturally, the expectations are pretty high after reading these key features. This Creality K1 Max review will critically assess its performance, user-friendliness, and how the new AI enhancements shape the printing experience.
Who should buy the Creality K1 Max?
The Creality K1 Max is tailor-made for enthusiasts and professionals who need a blend of speed, large build volume, and smart features in their 3D printing projects. It’s an ideal choice for makers, educators, and small businesses looking to create large-scale models, rapid prototypes, or intricate designs without compromising on print quality.
The added AI functionalities make it a great fit for those seeking a more automated, efficient printing process, while still being user-friendly enough for serious hobbyists taking their 3D printing journey to the next level.
The Creality K1 Max is a bigger and smarter version of the original K1. The AI features ensure perfect leveling and error detection.
Build Volume: 300 × 300 × 300 mm
Speed: max. 600 mm/s
Extruder: Dual-gear direct drive
Print Bed: flexible, magnetic with smooth PEI coating
Leveling: Fully automatic
Nozzle Temp.: max. 300 °C
Bed Temp.: max. 120 °C
Connectivity: WiFi, Ethernet, USB Drive
Pros:
✓ Large Build Volume
✓ High-Quality Prints
✓ High Speed
✓ AI Features
Cons:
× Filament Holder on the Back
× 600 mm/s needs thorough calibration (naturally)
Table of Contents:
- 1 Unboxing & Initial Impressions
- 2 Setup
- 3 Technical Specifications
- 4 Bed Leveling & Print Bed Features
- 5 Print Volume & Frame Stability
- 6 Extruder
- 7 AI LiDAR
- 8 AI Camera
- 9 Touchscreen & Menu
- 10 Slicer – Creality Print
- 11 Print Quality
- 12 Print Speed
- 13 Conclusion
- 14 Creality K1 vs. K1 Max
- 15 Important Accessories for an FDM 3D Printer
Unboxing & Initial Impressions
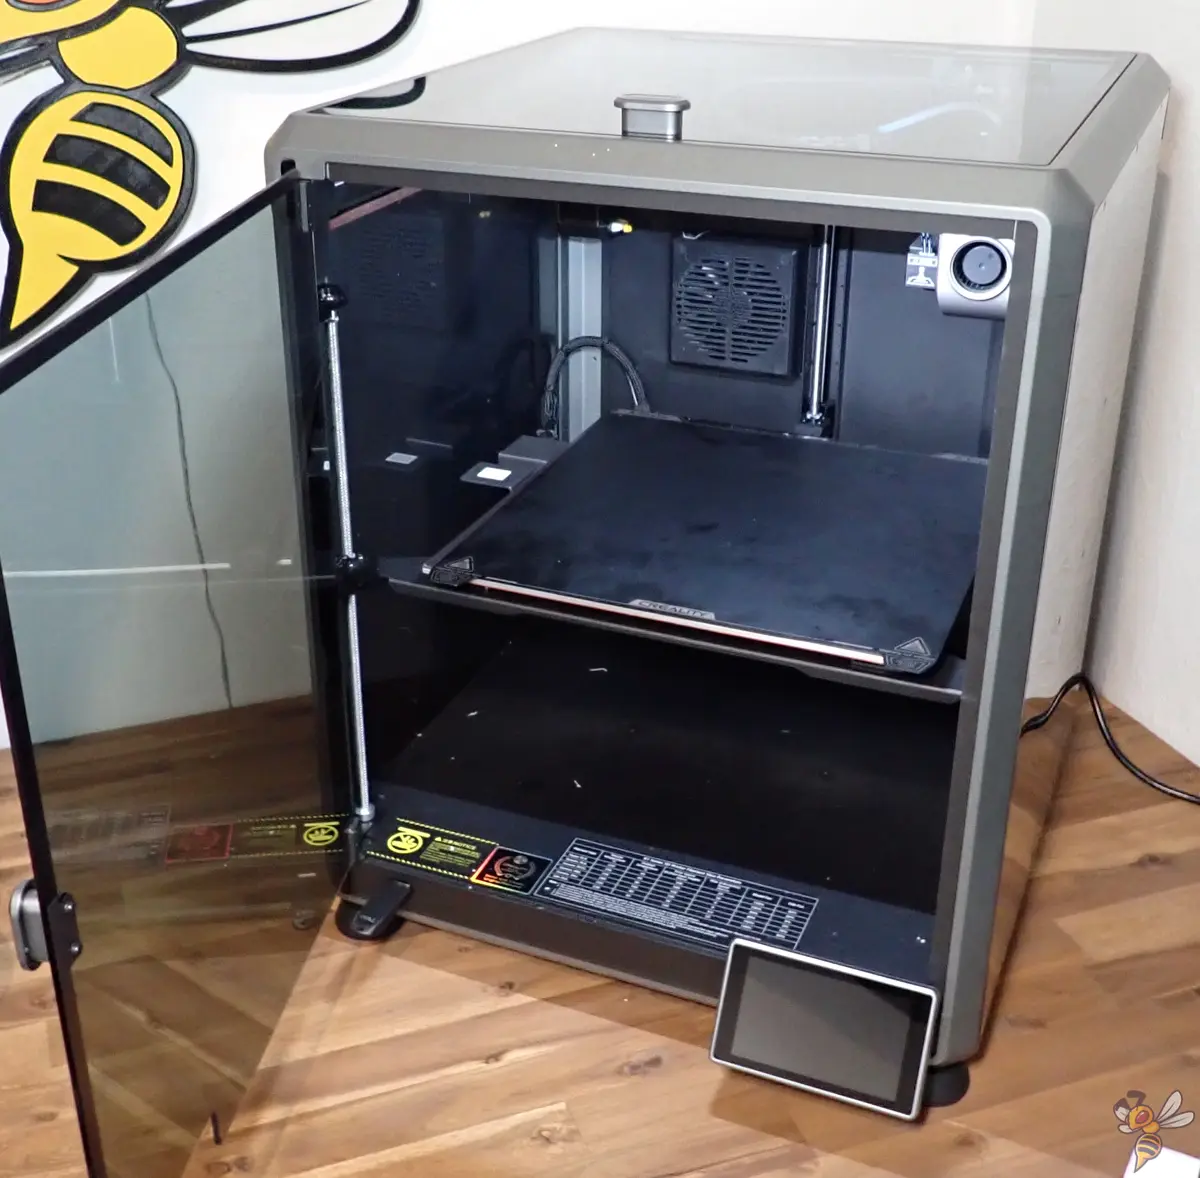
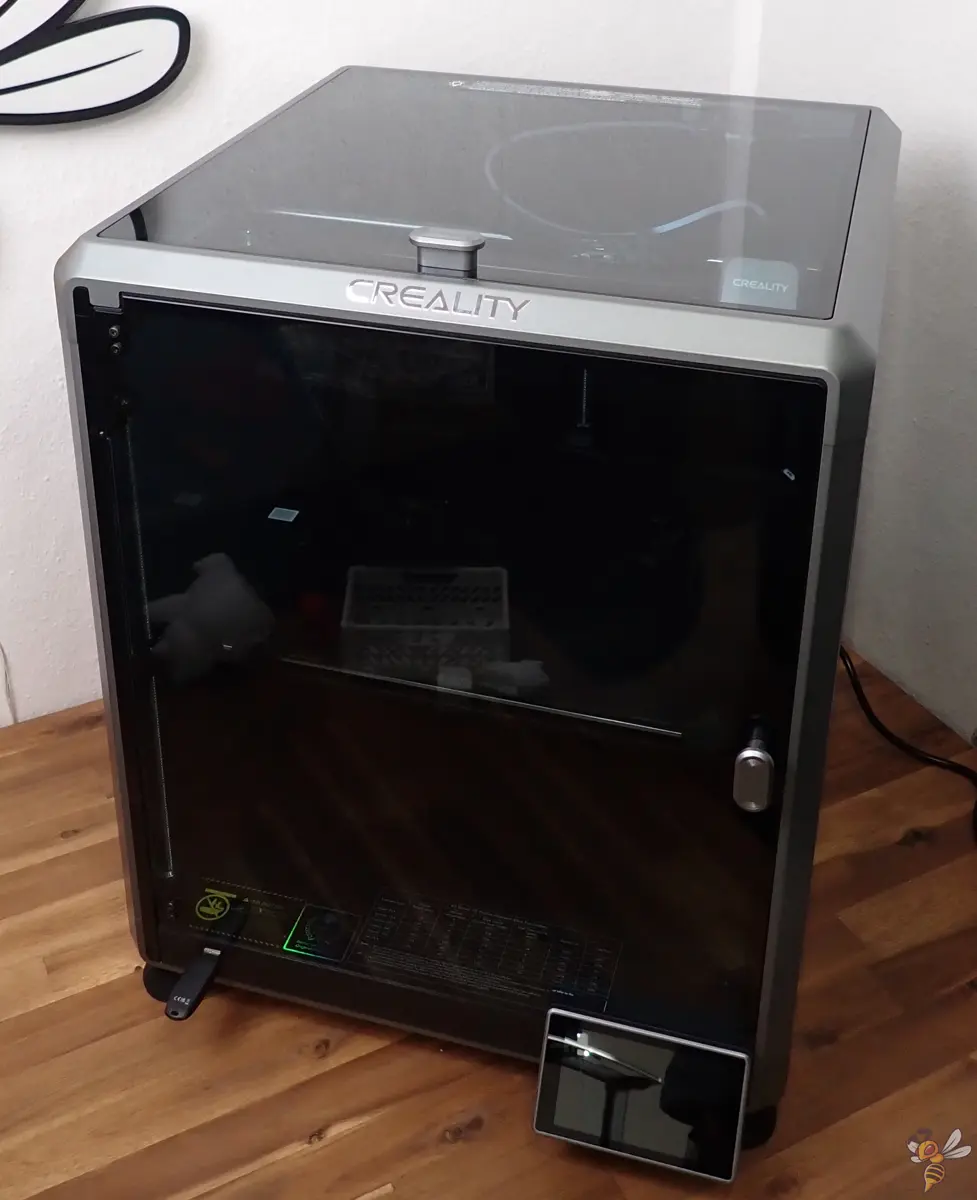
Unboxing the Creality K1 Max immediately gives off a sense of high-quality workmanship. The K1 Max feels robust and well-built, with a sleek, modern aesthetic that stands out.
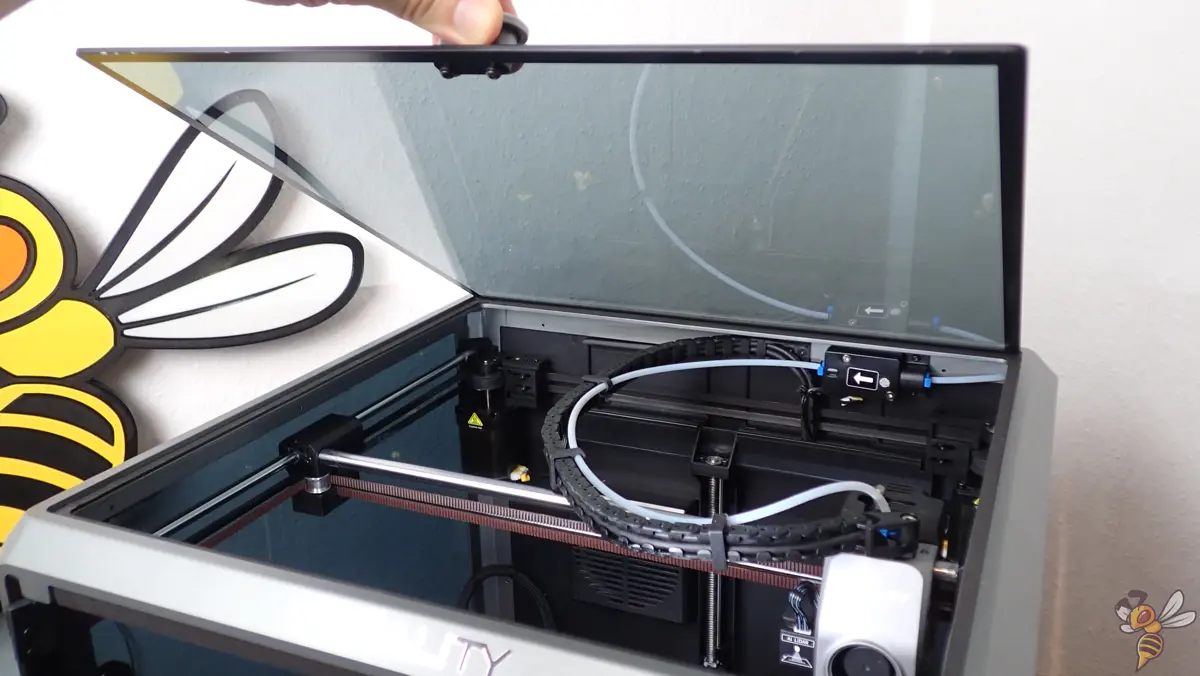
The first thing that caught my eye upon unboxing the Creality K1 Max was its sleek glass top cover. The cover not only adds to its aesthetic appeal but also plays a crucial role in maintaining a stable temperature environment for prints.
However, I was disappointed to see that, similar to its predecessor, the K1, the filament holder is positioned at the back, a design choice that, from a practical standpoint, can be quite inconvenient for easy filament changes.
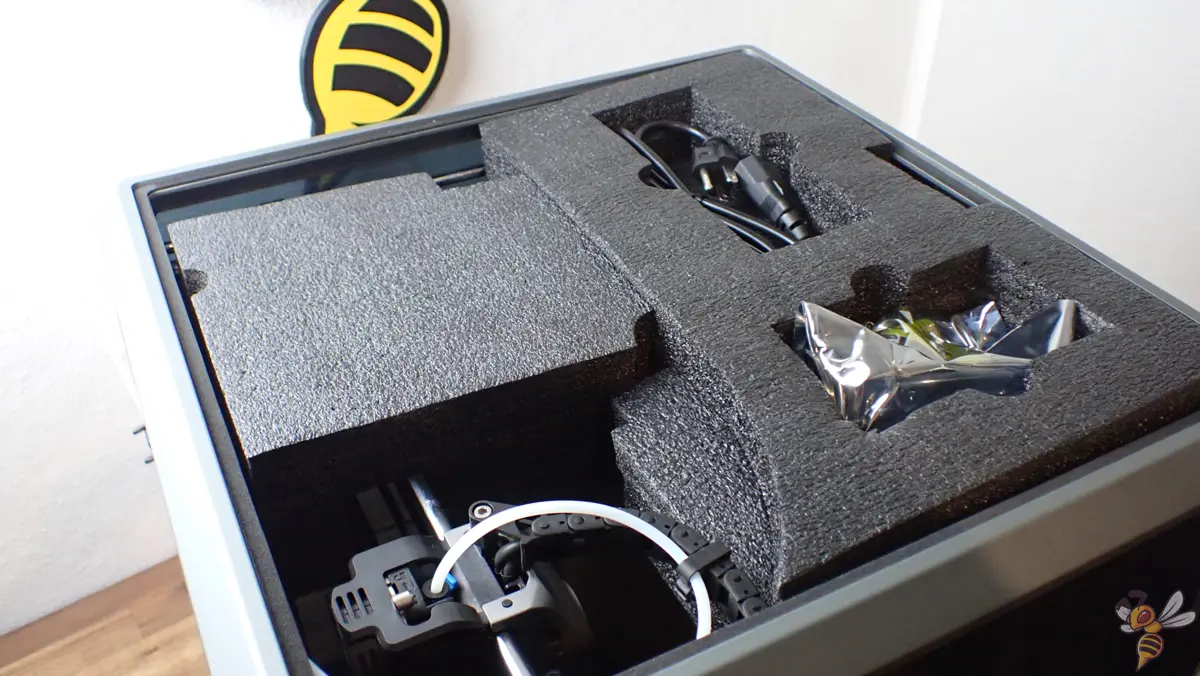
Included in the package is a comprehensive set of accessories and essentials, ensuring you have everything needed to start printing:
- Creality K1 Max 3D printer: Pre-assembled main unit.
- Anti-vibration feet: Placed at the four corners under the K1 Max.
- Spare hotend with nozzle: If you need to replace the original hotend.
- Filament: A bit of filament, usually PLA.
- USB stick: Loaded with user manual, test print files and software.
- Tool kit: Includes Allen keys, wrenches, a side cutter for the filament and screwdrivers for the setup, maintenance and adjustments.
- Scraper: For removing prints from the build plate.
- Glue stick: For exotic filaments that don’t stick too well on the PEI plate.
- Metal grease: For maintaining the axes for smooth movements.
- Power cable: For connecting the K1 Max to an electrical outlet.
- User manual: Detailed instructions for setup.
The Creality K1 Max is quite heavy, with a net weight of around 18 kg. But it is still manageable for one person to set it up properly because it is very sturdy and easy to hold on to.
Setup
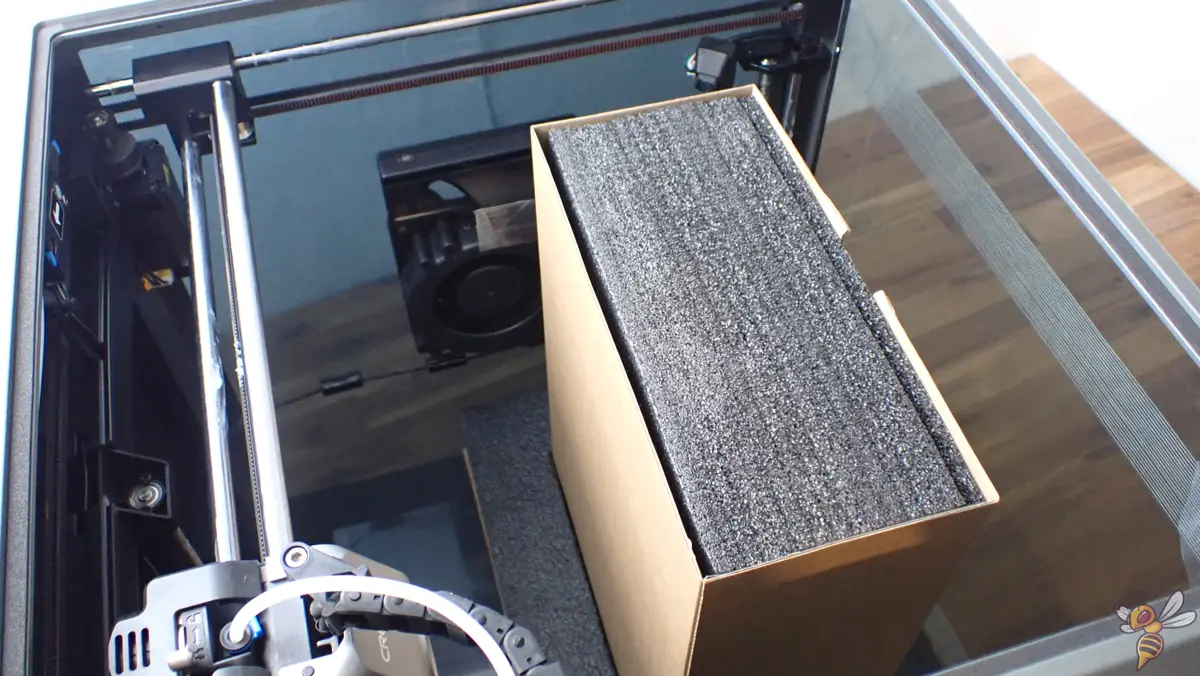
Assembling the Creality K1 Max 3D printer was refreshingly straightforward. Right out of the box, the K1 Max comes almost fully pre-assembled. This meant that within minutes, I had the machine up and running – a real time-saver for anyone eager to start printing without the hassle of a complex setup.
The only real thing you have to do is removing transport locks that keep everything in place.
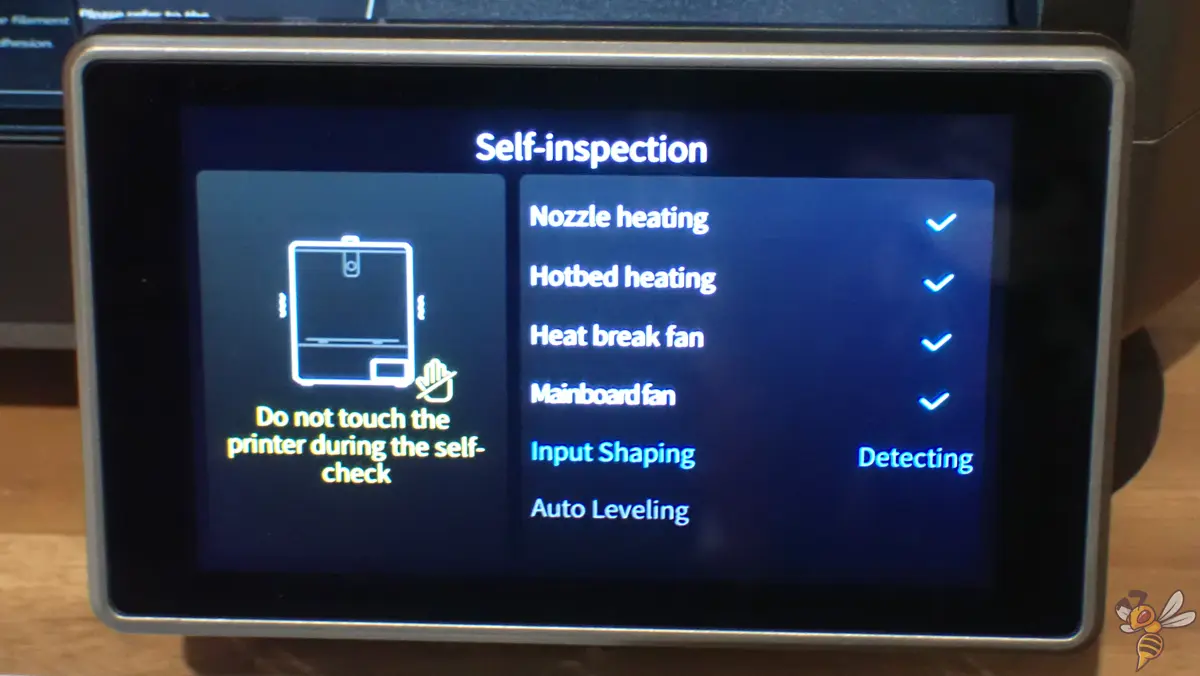
Upon its first boot, the K1 Max performed an automatic self-check. This process is crucial as it evaluates key functions like the hot end and hotbed.
What impressed me the most was its bed-leveling and vibration compensation calibration or input shaping. This feature ensures precision in prints from the get-go, which is often a challenge with other models.

However, I did have a minor gripe. The filament holder, positioned at the back, felt somewhat impractical. While it might enhance the aesthetics, in practical terms, it made changing the filament a bit cumbersome. It’s a small trade-off, but worth noting for those who prioritize function over form.
The Creality K1 Max 3D printer features an internally placed filament runout sensor, a design choice that improves accessibility and convenience. This sensor can be easily accessed from the front of the printer, enhancing the user experience compared to previous models.
Technical Specifications
- Print volume: 300 × 300 × 300 mm
- Extruder type: Dual-gear direct drive extruder
- Print bed: Flexible, magnetic, PEI and aluminum
- Max. print temperature: 300℃
- Max. print bed temperature: 120 °C
- Speed: max. 600 mm/s
- Filaments: PLA, ABS, PETG, TPU, PC, PLA-CF, PET-CF, and more.
- Display: 4.3″ Color Touch Screen
- Connectivity: WiFi, Ethernet, USB Drive
- Slicer: Creality Print, Creality Cloud App, Cura, Simplify3D, PrusaSlicer
- Net weight: 18 kg
Bed Leveling & Print Bed Features
- Automatic Bed Leveling: The K1 Max simplifies the bed leveling process with its array of sensors that enable multipoint detection. This automatic process eliminates the need for manual adjustment of screws under the bed or using the traditional paper method to set nozzle-to-bed distance, which can be particularly challenging for beginners.
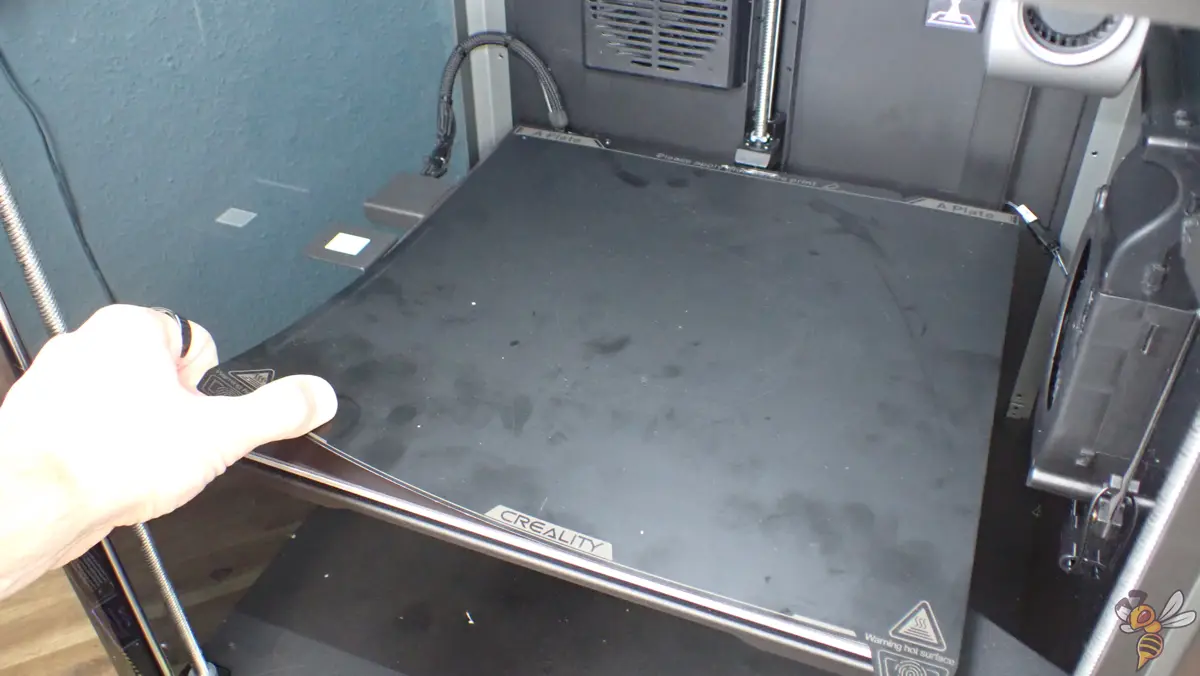
- Print Bed Adhesion and Quality: The printer’s aluminum alloy heated bed ensures uniform heat distribution, reaching 60°C in just 2-3 minutes. Its flexible panel, coated on one side with PEI, provides excellent adhesion for most filaments, ensuring prints stick well during the printing process and are easy to remove once cooled. This PEI coating also contributes to a smoother bottom surface of the printed objects, a pleasant surprise in terms of print quality.
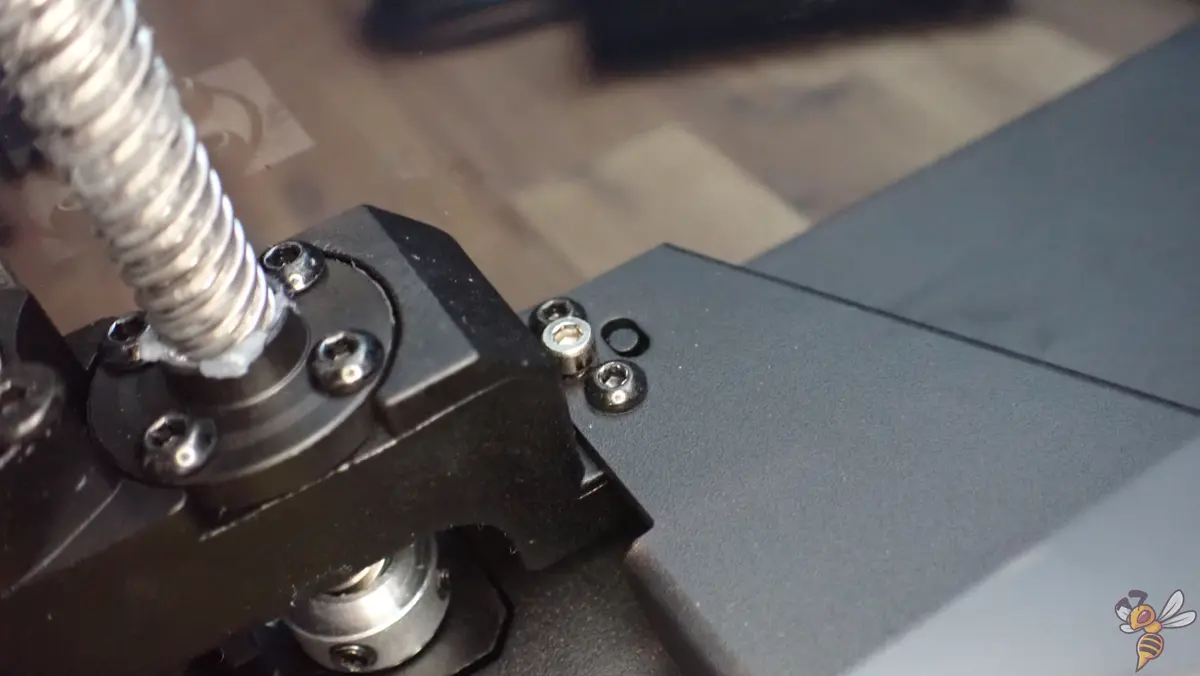
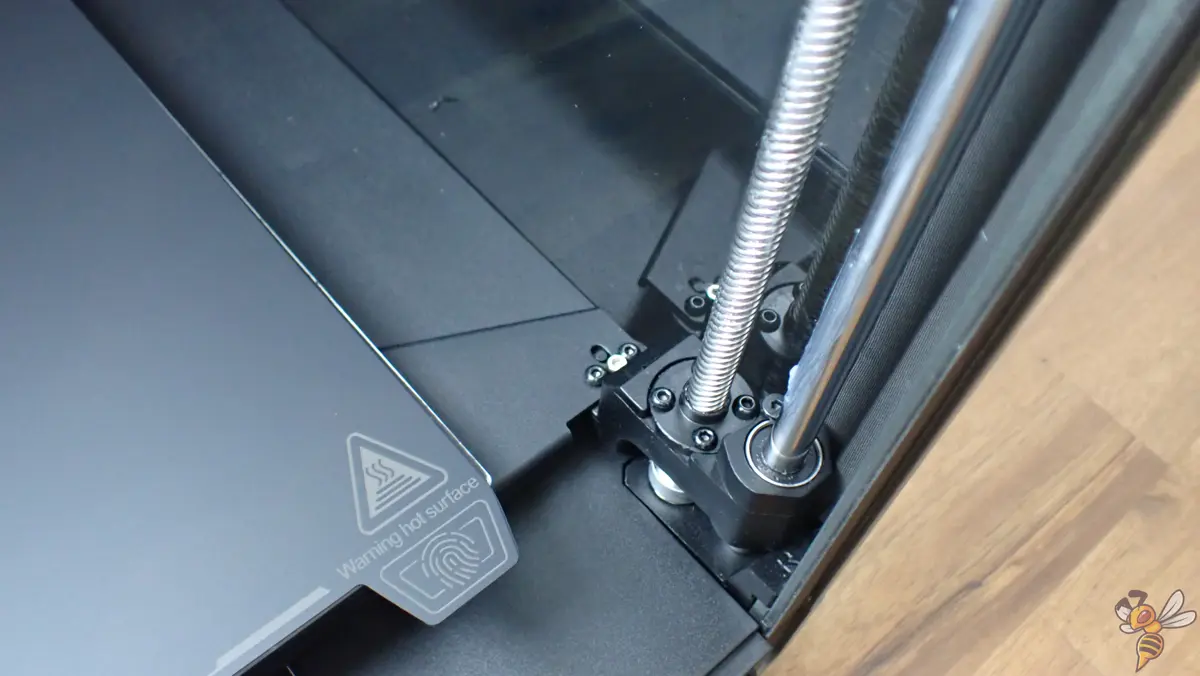
- Removable and Alignable Print Bed: The print bed is flexible, which is particularly convenient for removing finished prints. Notably, the magnetic print bed includes two small screw positions at the back, allowing for easy alignment and securing of the bed. This feature is handy for ensuring the PEI bed is correctly placed.
- Material Support and Stability: The K1 Max supports a wide range of materials, with temperatures up to 300°C. Its sturdy unibody die-cast frame contributes to the printer’s stability, which is essential for maintaining high-quality at high speeds (up to 600mm/s).
Print Volume & Frame Stability
The Creality K1 Max 3D printer impresses with its 300 × 300 × 300 mm print volume, allowing for larger projects. Its sturdy aluminum alloy frame, crafted via CNC machining, ensures stability and quality, even at high speeds.
Despite noticeable shaking at these speeds (!), the frame’s design maintains print precision and quality. Here the vibration calibration comes in and minimizes the print errors that you can get with such vibrations.

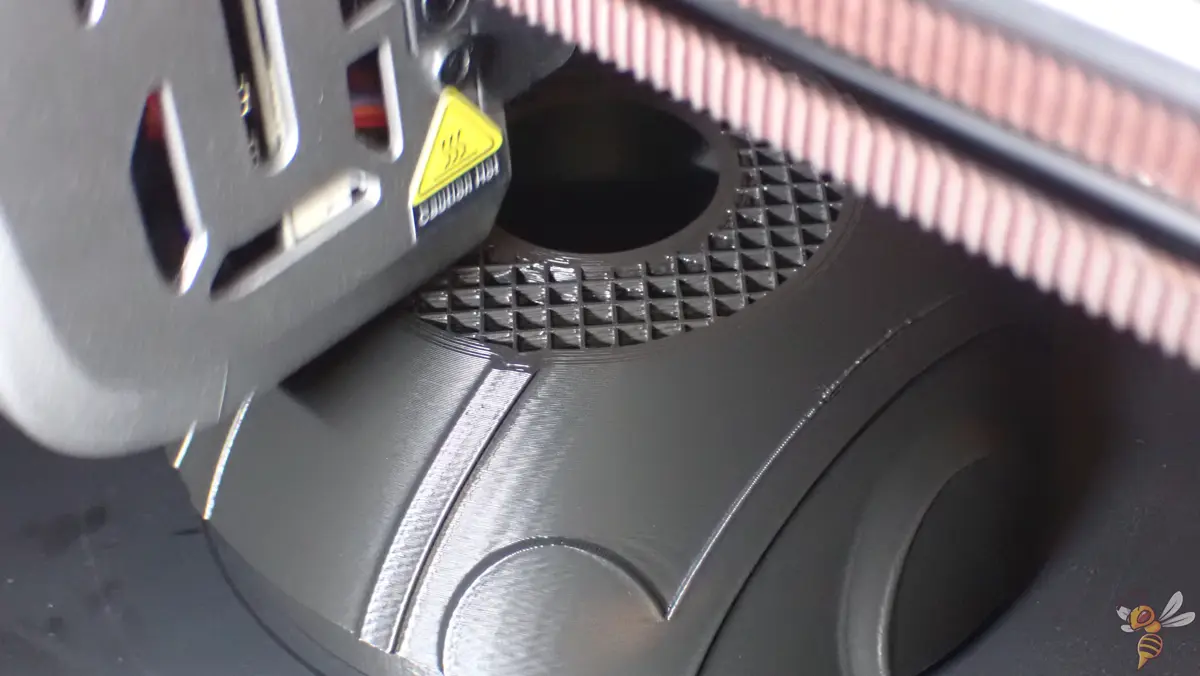
Inside the print volume is the powerful layer fan with a very effective cooling effect on the current layer. At high print speeds, the current layer has to cool down quickly. Otherwise, the nozzle would print the next layer on too hot filament and cause print errors. Especially for filaments like PLA, high print speeds are only possible with this fan.
Extruder

The Creality K1 Max’s extruder brings some interesting aspects to the table. It has a dual-gear direct extruder, providing a strong extrusion force. This feature helps in consistent filament feeding, crucial for quality prints. The hotend, equipped with a titanium alloy heatbreak and a hardened steel nozzle, can handle temperatures up to 300 ℃.
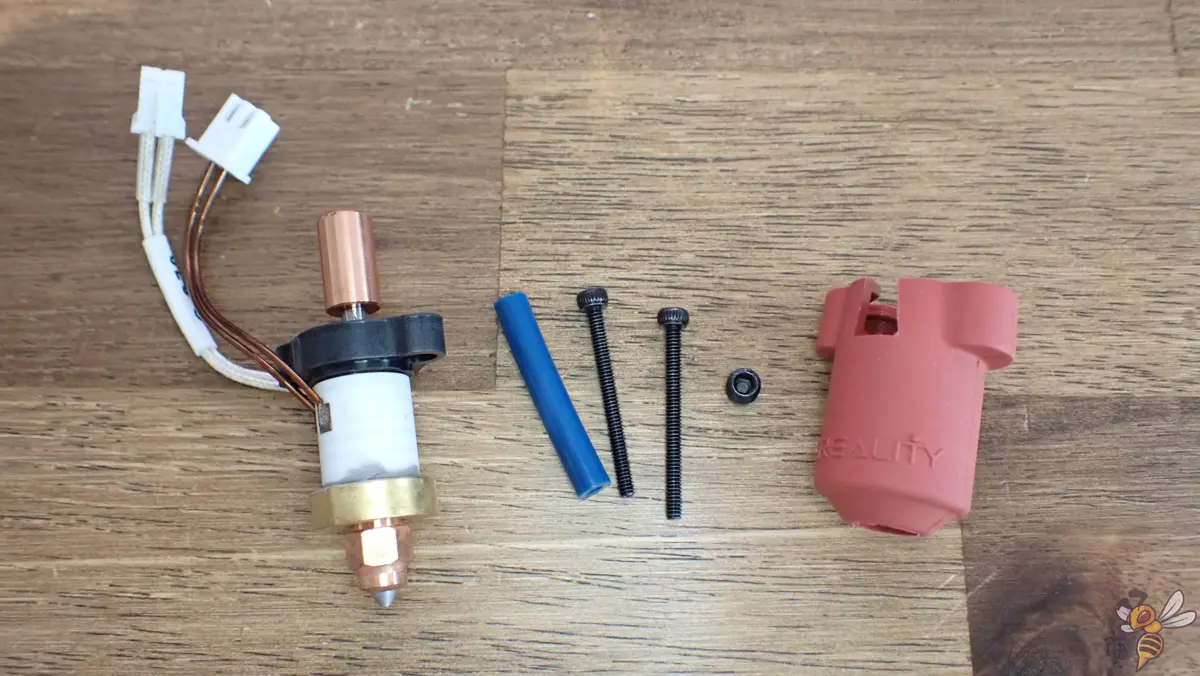
Creality has included a spare hotend with the K1 Max, a thoughtful addition. It seems like a response to previous issues with the K1 hotend, showing a focus on long-term maintenance and user convenience.
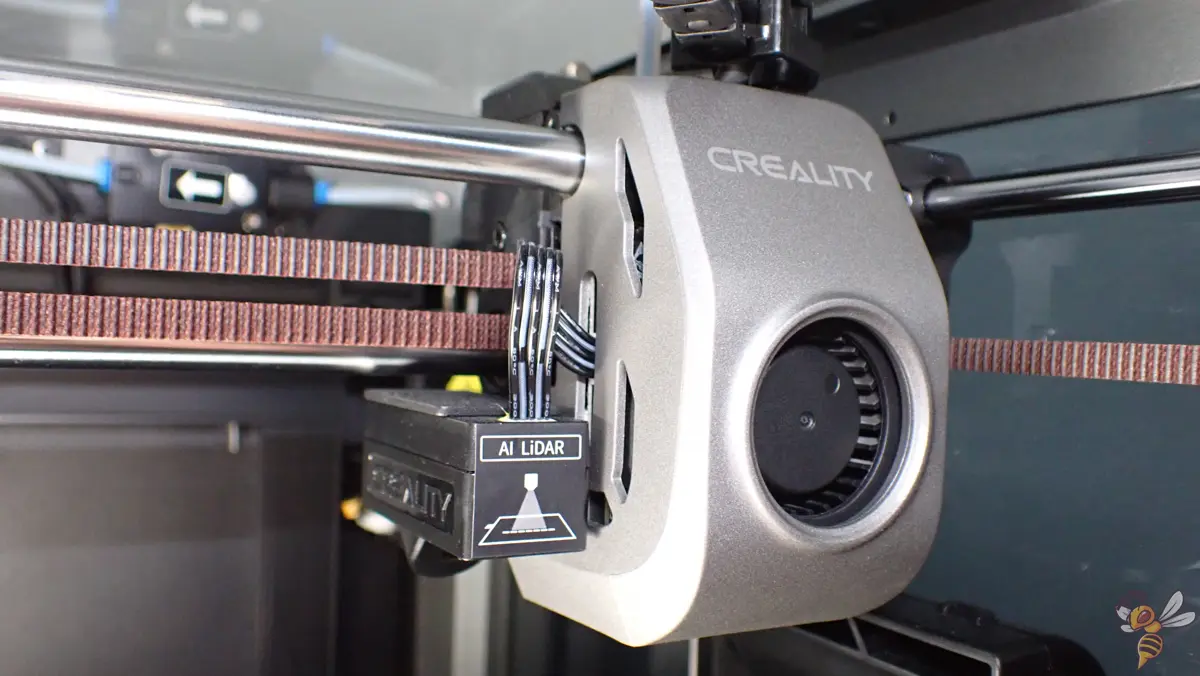
AI LiDAR
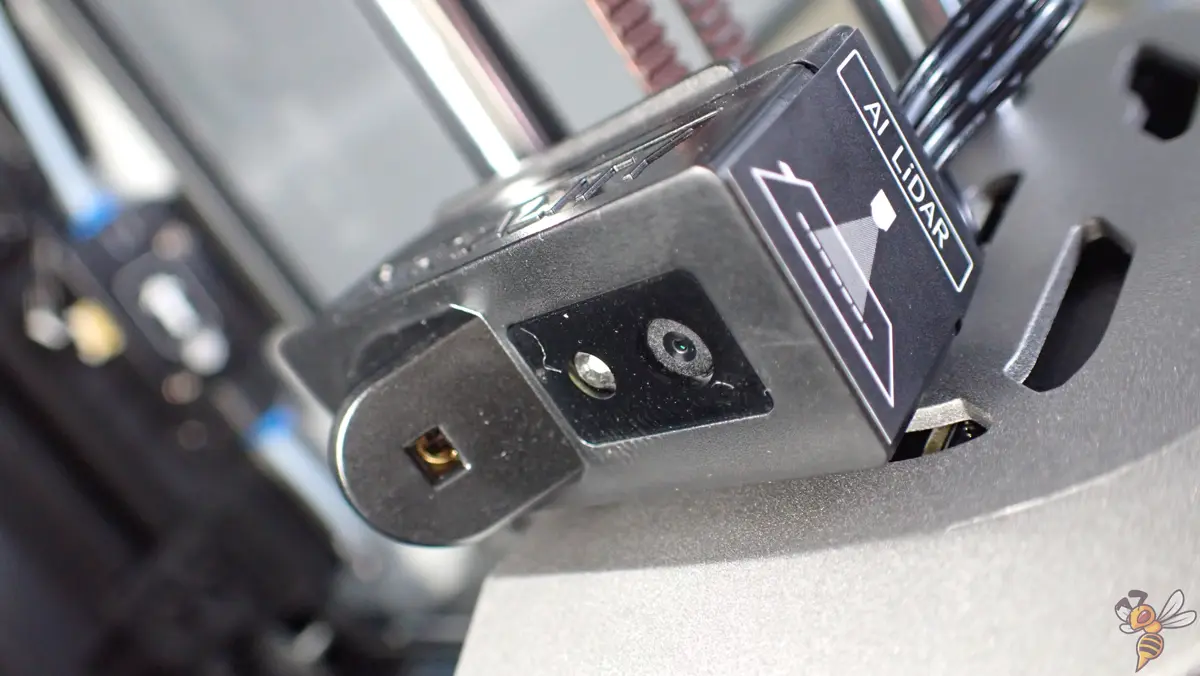
The AI LiDAR technology on the Creality K1 Max 3D printer marks a significant advancement in 3D printing. It enhances the printing process with a 1μm resolution scan of the first print layer, identifying issues like the dreaded spaghetti error or other debris. This feature, coupled with an AI camera, allows for live monitoring and error detection, greatly improving print reliability.
This technology also plays a key role in leveling the magnetic bed. It scans the bed tilt at millions of points for precise leveling, crucial for optimal print bed adhesion. The heated magnetic bed, equipped with strain sensors, provides hands-free leveling, further simplifying the process. It heats up rapidly, reaching 60 °C in just 2 to 3 minutes.
In my experience, the AI LiDAR’s impact is subtle yet significant. Its automatic operation improves the leveling process, ensuring a reliable first layer. And the best thing is, you don’t even notice it because it’s completely automatic.
AI Camera
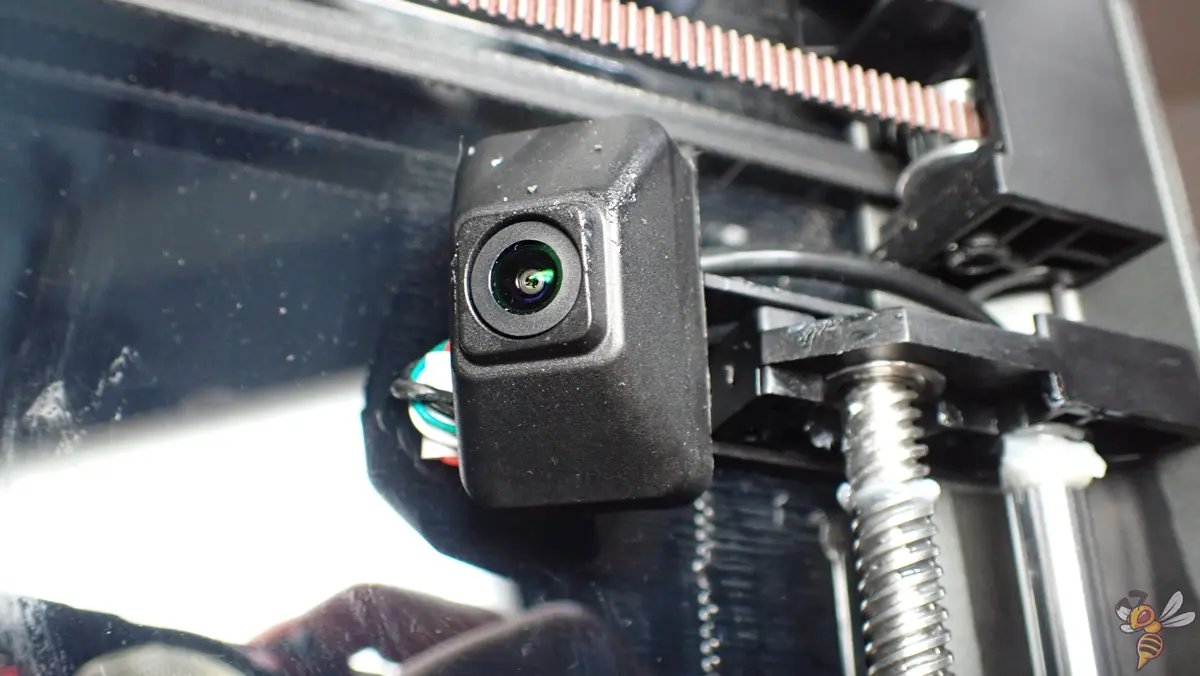
Quality-wise, the AI camera of the K1 Max delivers high-resolution videos, capturing every detail of the process. This is great for identifying issues in real-time. Additionally, the camera boasts an AI detection system to prevent collisions and damage by scanning for foreign objects before and during printing. Yet, it’s worth noting that this system can sometimes miss errors, as my experience showed.
One cool aspect is the time-lapse video feature, allowing you to document and share your printing journey effortlessly. At the top of the frame, there is a lighting kit to help the camera see in an otherwise dark print chamber.
Touchscreen & Menu
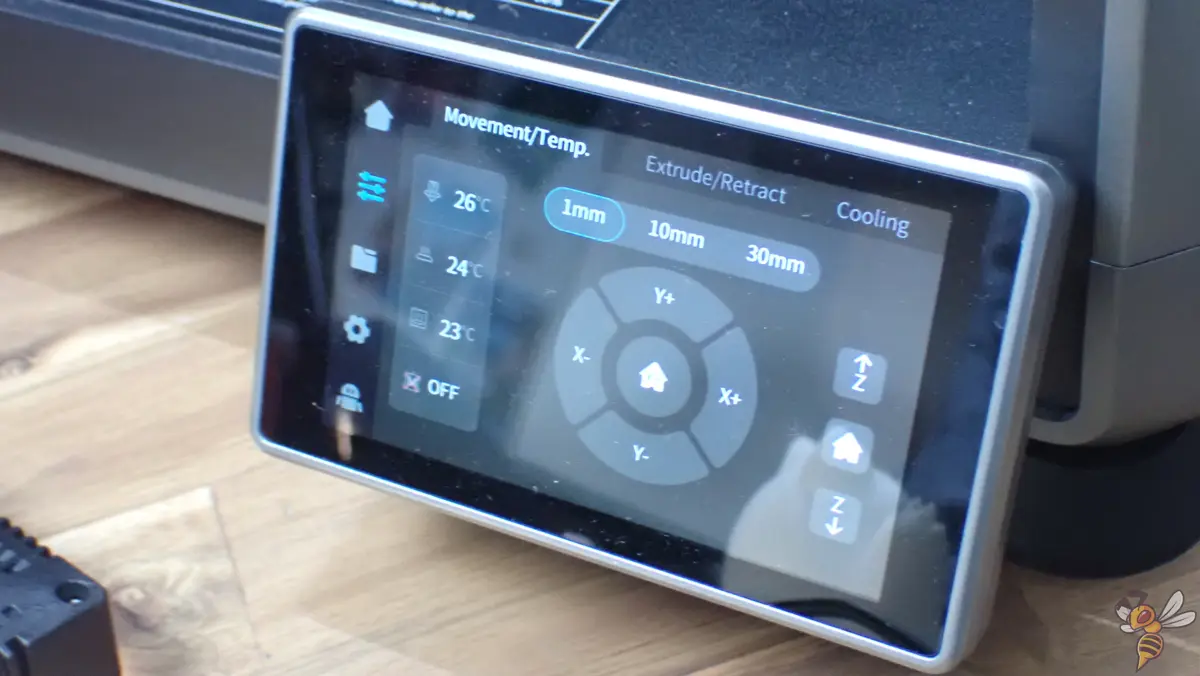
Exploring the touchscreen and menu of the Creality K1 Max was quite a familiar experience for me, given its similarity to the original K1. The K1 Max is outfitted with a 4.3-inch color LCD screen, known for its appealing design and responsive touch capabilities. This screen makes it straightforward to navigate various printer functions like axis movements, temperature and fan controls, and filament operations. I found the interface clean and intuitive, which is especially beneficial for beginners.
The screen’s layout includes a home screen for setting and monitoring nozzle and bed temperatures, as well as controlling fans and the LED. The printer’s dual-core 1.2GHz processor and 8GB of storage ensure smooth operation. A prepare menu allows for controlling the print head and filament, with a file menu and settings offering further configuration options. A support menu is also included, providing additional help as needed.
Comparing the K1 Max to the original K1, while the core interface remains largely the same, the K1 Max introduces a slightly larger and more user-friendly touchscreen. This enhancement contributes to a more seamless interaction and a refined user experience. The continuity in interface design between the K1 and K1 Max ensures a familiar environment for existing Creality users, while also improving upon user-friendliness and interaction quality.
Slicer – Creality Print
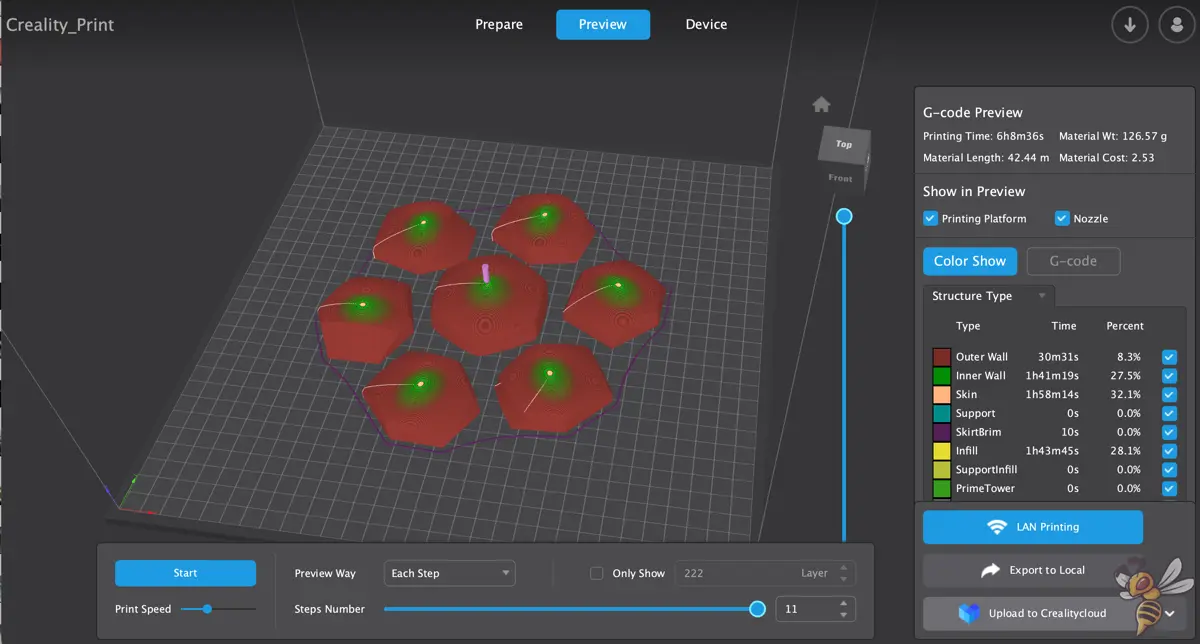
When I first got my hands on the K1 Max, I was keen to see how its slicing software, Creality Print, would fare. This proprietary software is an optimized version of the open-source Cura, tailored for Creality 3D printers. What I appreciated most was the ease of setting parameters and the optimized profiles for various materials. This made slicing and printing straightforward, especially with the pre-installed printer profiles that were well-tuned for the K1 Max.
In my experience, the default printing speed for the K1 Max was set to an impressive 300 mm/s. However, after noticing some ringing on my prints, I adjusted the speed down to 250 mm/s, which helped improve the surface quality. This minor calibration tweak was all it took to achieve good results.
Creality Print’s interface is notably simple, and it automatically detects your printer on the local network. The built-in profiles for Creality’s Hyper PLA and other materials like PETG, TPU, ABS, and PC offer a great starting point for printing.
The camera integration in Creality Print is very useful. It enables monitoring of the print process, which is quite handy. I was able to oversee my prints with ease, thanks to the camera that’s perfectly set up to view the entire bed. Moreover, the printer records time-lapses of the prints, accessible via the Creality Print application, adding a nice touch to the printing experience.
For those who prefer alternatives, the K1 Max is compatible with other slicers like Cura. You don’t have to switch to Creality Print and can use the newest features of Cura with the K1 Max. In this article, I share my Cura settings for the K1 Max: Creality K1 Max – Perfect Cura Settings for PLA, ABS, PETG, TPU
And you also have the possibility to use the Creality Cloud. The Creality Cloud is a platform that offers easy access to models, slicing, and remote printer management.
Print Quality
In my hands-on experience with the Creality K1 Max 3D printer, I’ve found its print quality to be impressive, especially after making a few adjustments. When I initially started printing at speeds over 300 mm/s, I noticed some ringing, a common issue with 3D printers where vibrations cause imperfections in the print. By reducing the speed to 250 mm/s, these errors were eliminated.
I printed everything with a 0.2 mm layer height. This layer height is a good balance between print speed and detail resolution, suitable for a variety of prints.
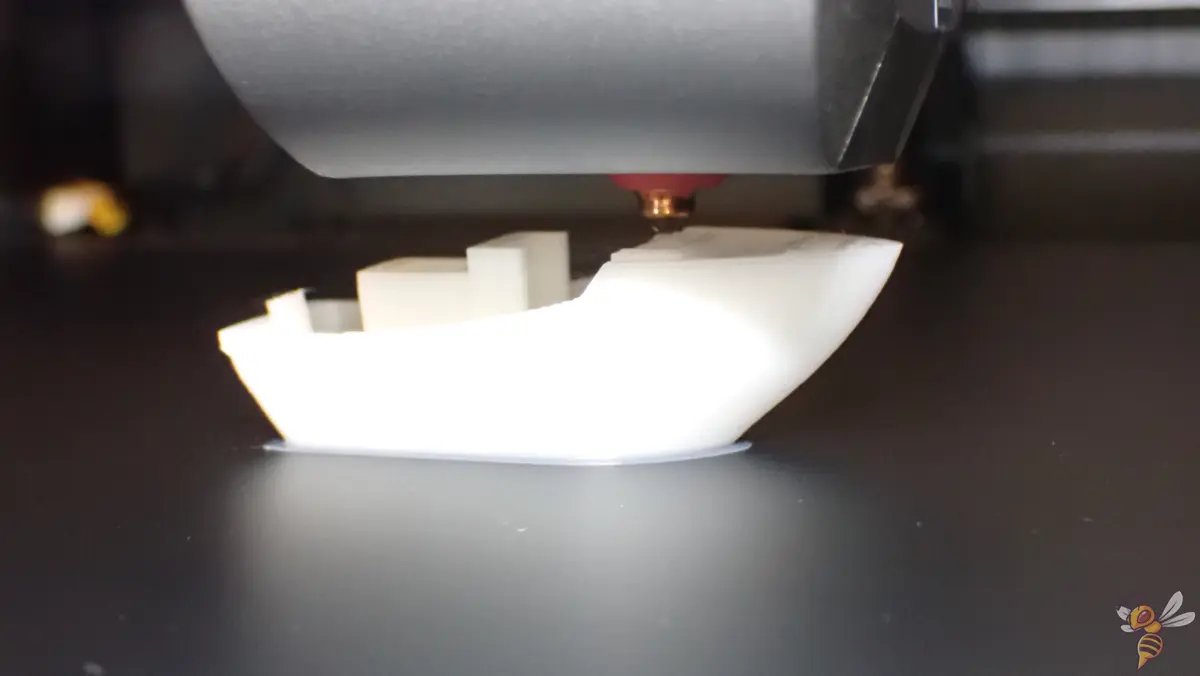
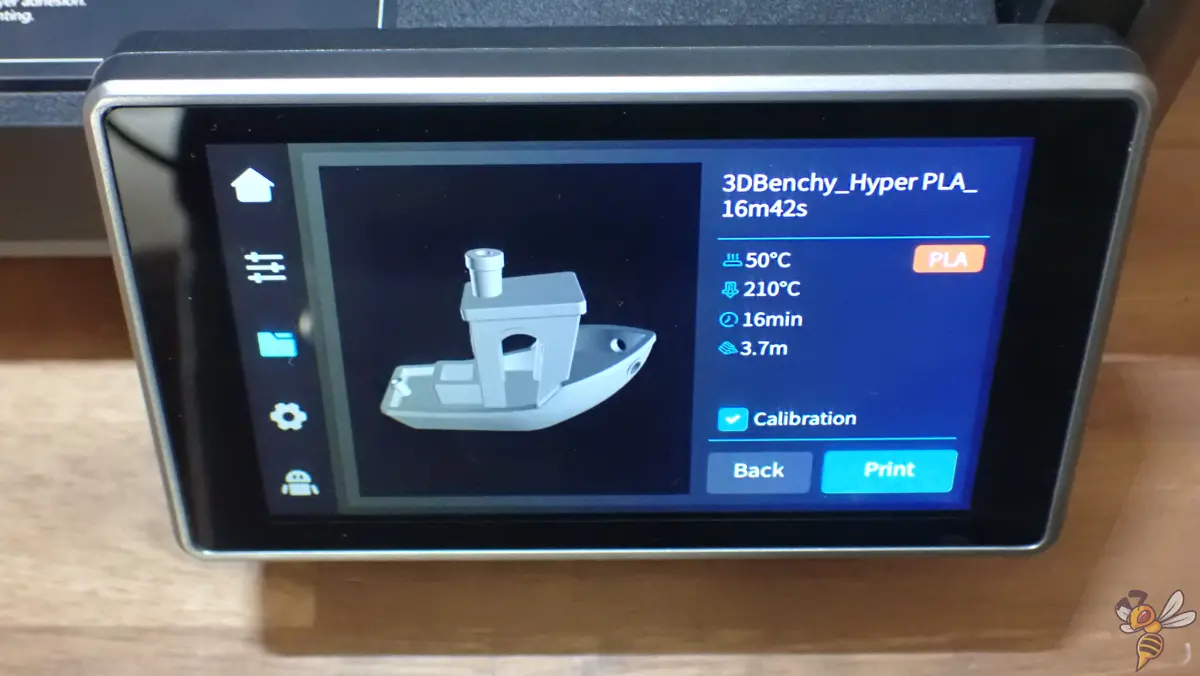
My first print with the Creality K1 Max was the 3DBenchy, a popular benchmark model. It’s impressive how the K1 Max completed this in just 16 minutes, a stark contrast to standard FDM printers that take an average of one hour to print this small boat! The surface quality was quite good, though some ringing on the surface was noticeable.
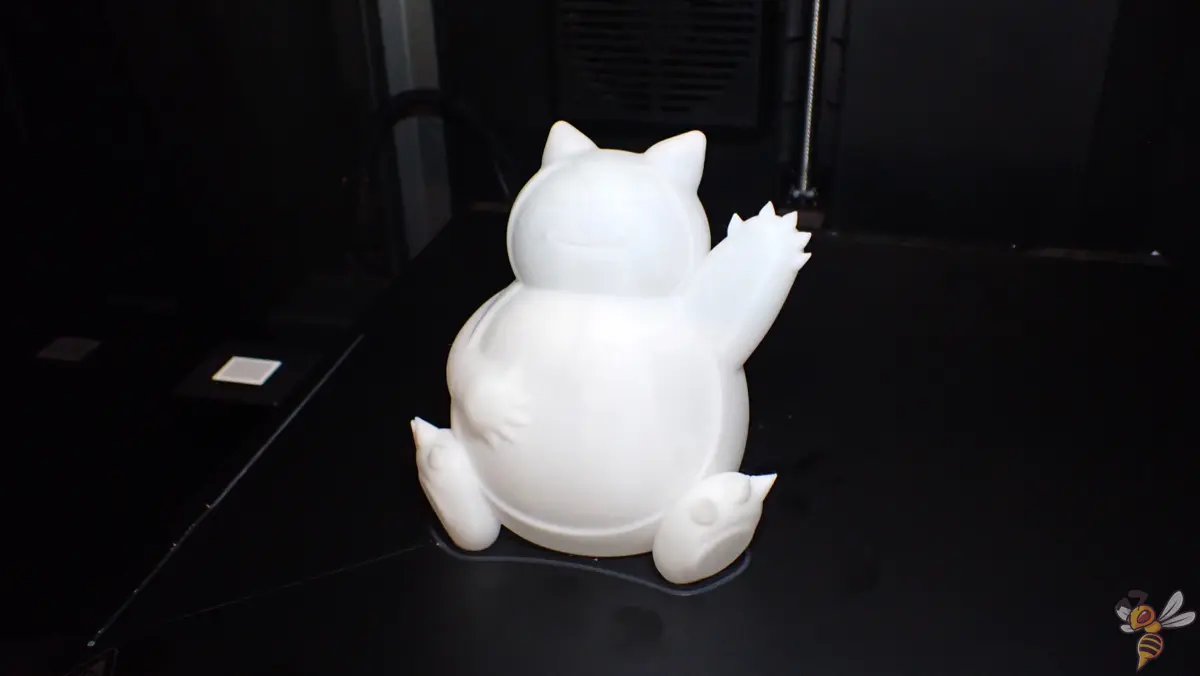
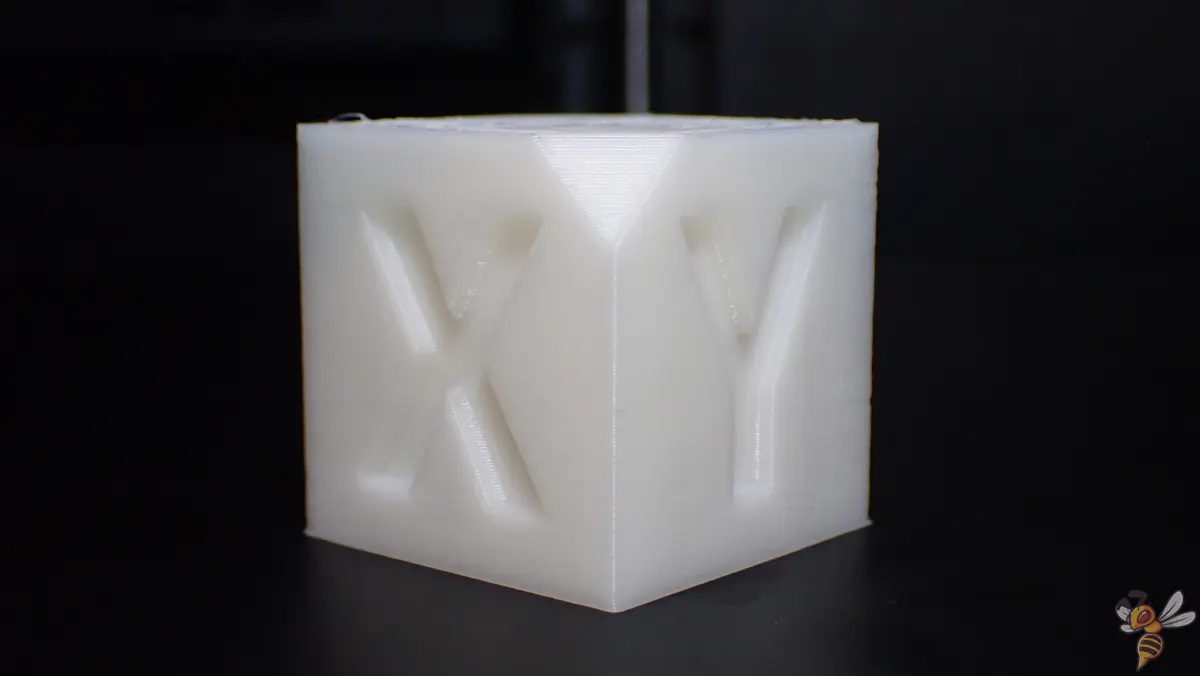
After adjusting the speed to 250 millimeters per second, I printed a calibration cube and a Snorlax model. The K1 Max handled these beautifully, producing perfect quality prints without the ringing seen in the 3DBenchy test.
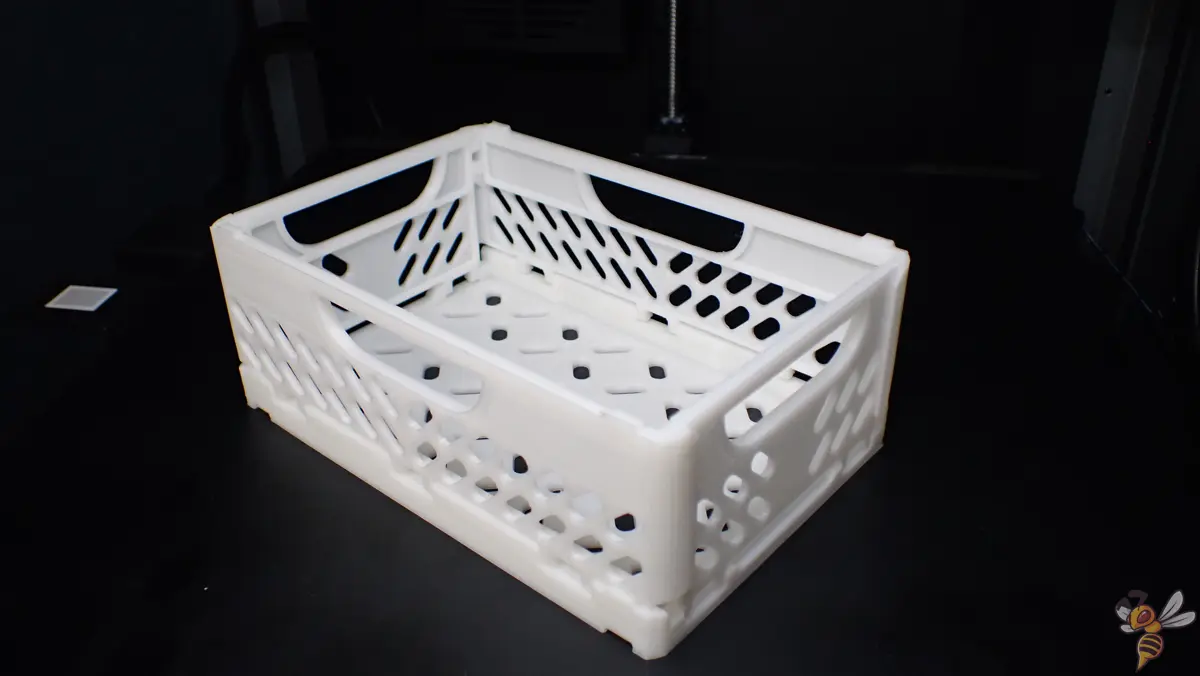
Next, I printed a foldable crate to test the printer’s dimensional accuracy for practical, mechanical purposes. This test was crucial to assess how the K1 Max handles prints that require precise dimensions for functional use.
The result was perfect. Apart from the flawlessly printed surfaces, the dimensions seem to be spot on.
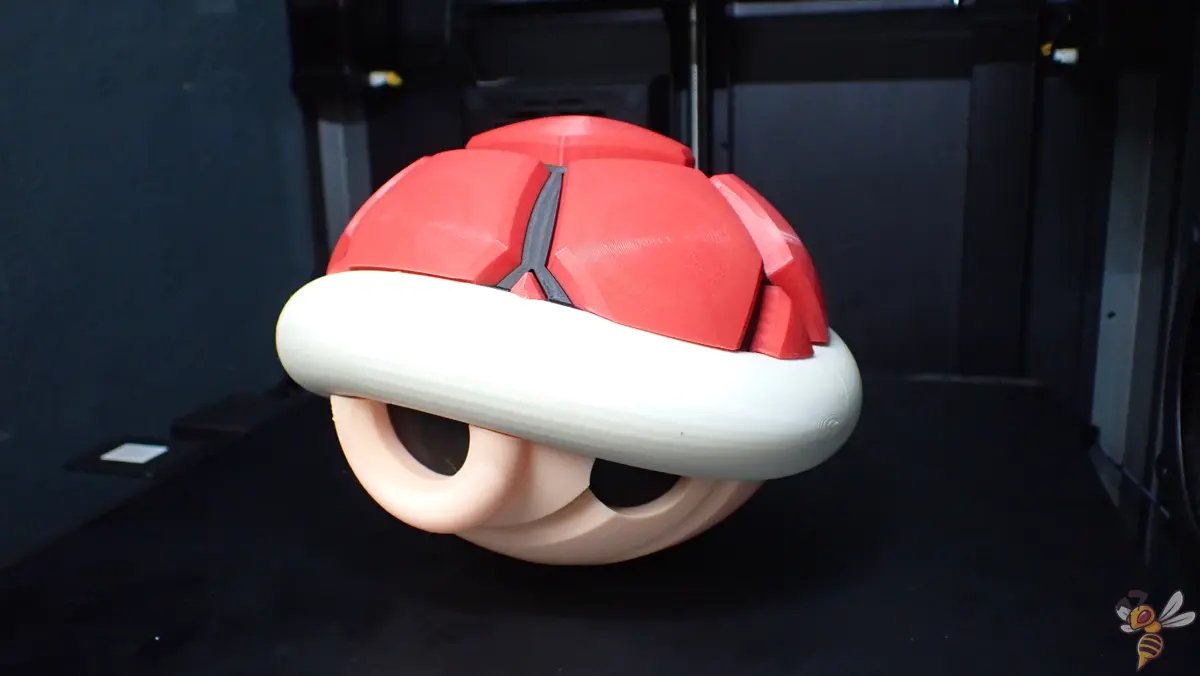
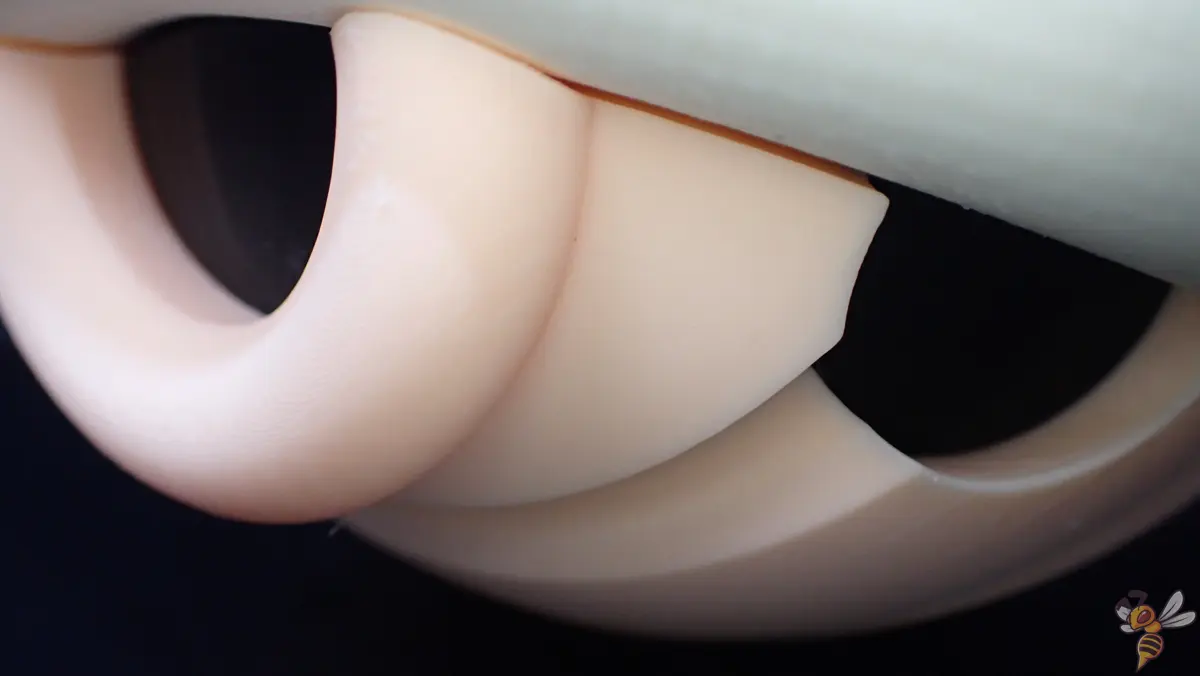
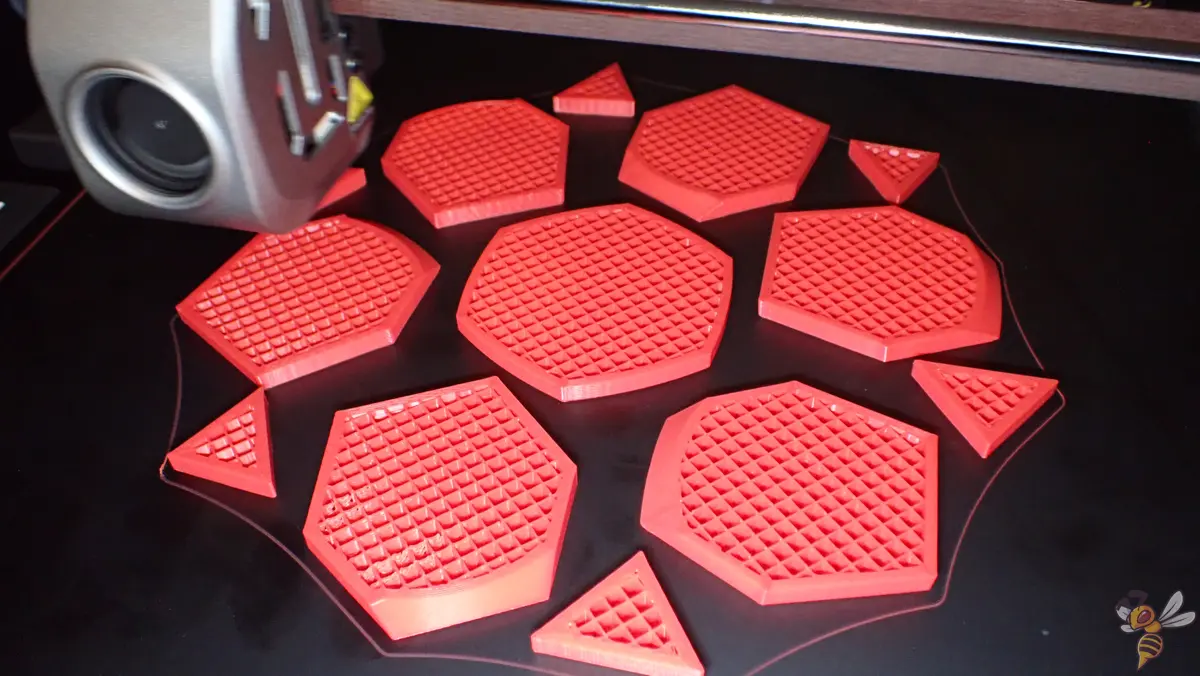
For a more ambitious project, I printed a red turtle shell from Super Mario, consisting of multiple objects using different types of PLA from SUNLU:
I really like the finished and assembled turtle shell. The quality is so good, you’d think it’s a store-bought item!
Print Speed
When it comes to the Creality K1 Max’s print speed, it’s a game changer. The printer boasts the ability to reach speeds up to 600 mm/s, a feat I personally tested on its predecessor, the original K1. However, while the K1 Max can technically achieve these high speeds, there’s a catch: maintaining print quality at such a speed is tricky.
In my experience, pushing the K1 Max to 600 mm/s results in a significant challenge in calibration. To maintain a balance between speed and quality, I’ve found sticking to speeds below 300 mm/s to be more practical. This is still impressively fast, especially compared to traditional FDM 3D printers, which typically operate around 60 mm/s.
For those looking to fine-tune their print speed, I recommend using a calibration object. Gradually increase the speed until you notice signs of ringing and ghosting (I like to use this cube). This approach helps identify the sweet spot where speed meets quality, ensuring the best possible output from your Creality K1 Max.
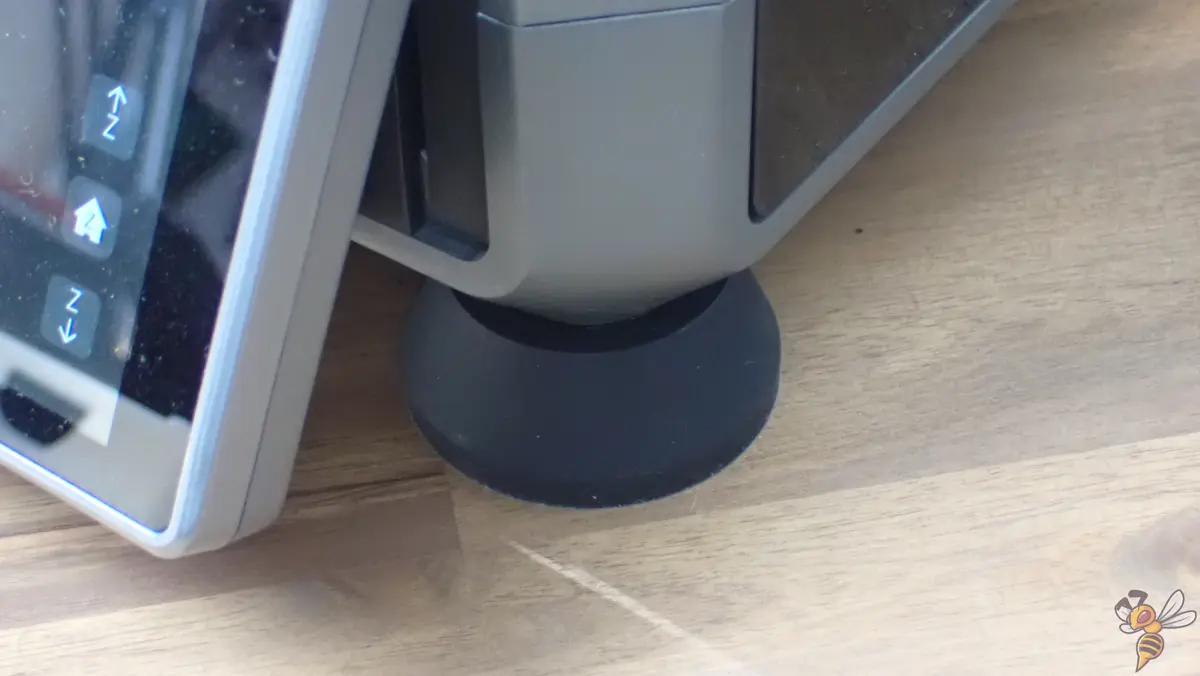
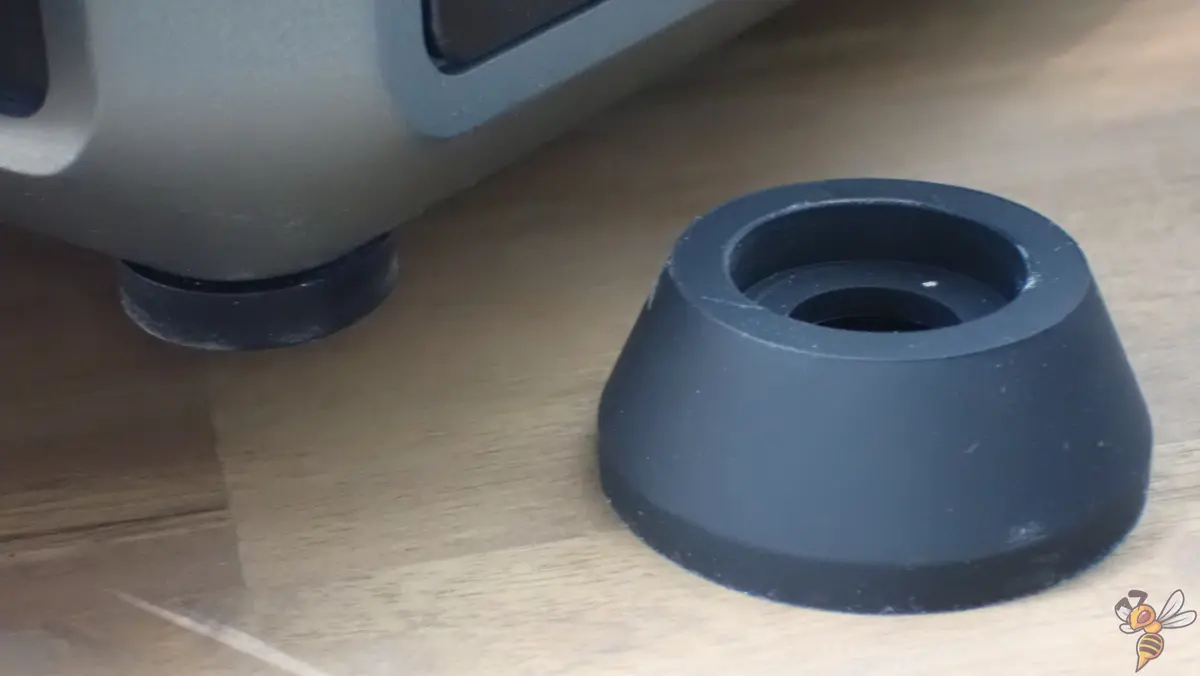
In the scope of delivery are 4 separate anti-vibration feet that fit under the four corners of the printer. With these, issues from vibrations can be reduced. You should definitely use them.
Conclusion
What I really liked about the Creality K1 Max:
✓ Large Build Volume: The 300 × 300 × 300 mm print volume is perfect for large-scale projects.
✓ High-Quality Prints: When calibrated correctly, it delivers excellent print quality.
✓ Speed: Capable of reaching up to 600 mm/s, making it significantly faster than many FDM printers.
✓ AI Enhancements: Features like AI LiDAR and camera for real-time monitoring and error detection.
✓ User-Friendly Setup: Almost fully pre-assembled with easy bed-leveling and vibration compensation calibration (input shaping).
✓ Versatile Material Support: Handles a wide range of materials, thanks to its high-temperature hotend and direct drive extruder.
✓ Flexible and Removable Print Bed: Makes removing prints easy, with a PEI coating for good adhesion.
✓ Sturdy Construction: The robust frame maintains stability even at high speeds.
Potential for improvement:
× Filament Holder Placement: Positioned at the back, making filament changes “slightly” inconvenient.
× Print Speed vs. Quality Trade-off: While it can reach high speeds, quality may be compromised beyond 300 mm/s without thorough calibration.
In conclusion, the Creality K1 Max* stands out as a robust and versatile 3D printer, ideal for both enthusiasts and professionals. Its substantial build volume, high printing speeds and advanced AI features, such as the AI LiDAR and camera, make it a top choice for large-scale, intricate projects.
While it excels in speed and print quality, some trade-offs, like the awkwardly placed filament holder, are notable. However, its user-friendly setup, automatic bed leveling, and the quality of prints, especially after minor adjustments, more than compensate for these shortcomings.
I had a lot of fun testing this printer and can recommend it 100% if you are looking for a closed volume 3D printer that can print a wide variety of filaments at high speeds and with an outstanding print quality!
The Creality K1 Max is a bigger and smarter version of the original K1. The AI features ensure perfect leveling and error detection.
Build Volume: 300 × 300 × 300 mm
Speed: max. 600 mm/s
Extruder: Dual-gear direct drive
Print Bed: flexible, magnetic with smooth PEI coating
Leveling: Fully automatic
Nozzle Temp.: max. 300 °C
Bed Temp.: max. 120 °C
Connectivity: WiFi, Ethernet, USB Drive
Pros:
✓ Large Build Volume
✓ High-Quality Prints
✓ High Speed
✓ AI Features
Cons:
× Filament Holder on the Back
× 600 mm/s needs thorough calibration (naturally)
Creality K1 vs. K1 Max
The Creality K1 and K1 Max share a reputation for reliability, user-friendliness, and versatility. Both models are fully assembled upon delivery, featuring automatic calibration, an aluminum alloy heated bed, power loss recovery, advanced filament sensors, and dual cooling fans.
Check Price at:
The K1 has a generous build volume of 220 × 220 × 250 mm, offering impressive speed up to 600 mm/s, significantly faster than many standard 3D printers. It’s designed with modularity, allowing upgrades like AI camera and lidar, which are not standard. The K1’s user interface is straightforward, compatible with various slicers, and it’s known for delivering detailed and accurate prints.
In contrast, the K1 Max steps up with a larger build volume of 300 × 300 × 300 mm, accommodating bigger projects. It features a glass top cover for better visibility and temperature control, and an internally placed filament runout sensor for easier access. Unique to the K1 Max are AI laser radar and a built-in camera for remote monitoring and precise leveling, a carbon filter for a safer printing environment, Ethernet connectivity for seamless integration into networks, hardened steel nozzles for extended durability, and a wide-voltage power supply with an 800W AC heated bed for rapid heating.
While both printers offer high-quality printing, the K1 Max delivers enhanced features for larger, more complex projects, superior monitoring and safety, and greater ease of use. However, the K1 remains a cost-effective choice for those prioritizing speed and versatility in a more compact size.
Important Accessories for an FDM 3D Printer
Hydroscopic filaments such as PETG or nylon absorb water from the air. This results in printing errors. A filament dryer dries the filament before printing.
Most filaments need to be stored dry to avoid printing errors such as stringing. Vacuum bags with desiccant are perfect for this.
Filament Storage Vacuum Bags:
Desiccant Silica Gel Packs:
Disclosure: This website is the property of Martin Lütkemeyer and is operated by Martin Lütkemeyer. Martin Lütkemeyer is a member of the Amazon Services LLC and other Affiliate Programs. These are affiliate advertising programs designed to enable websites to earn advertising revenue through advertising and linking to Amazon.com and others. Links marked with * are affiliate links.
