
- Wet Filament: Prevention, Symptoms & Drying - July 18, 2024
- Sovol SV08 – Best PrusaSlicer Settings & Profile - June 26, 2024
- Sovol SV08 – Best Orca Slicer Settings & Profile - June 26, 2024
Disclosure: Links marked with * are Affiliate Links. I earn from qualifying purchases if you decide to make a purchase through these links – at no additional cost for you!
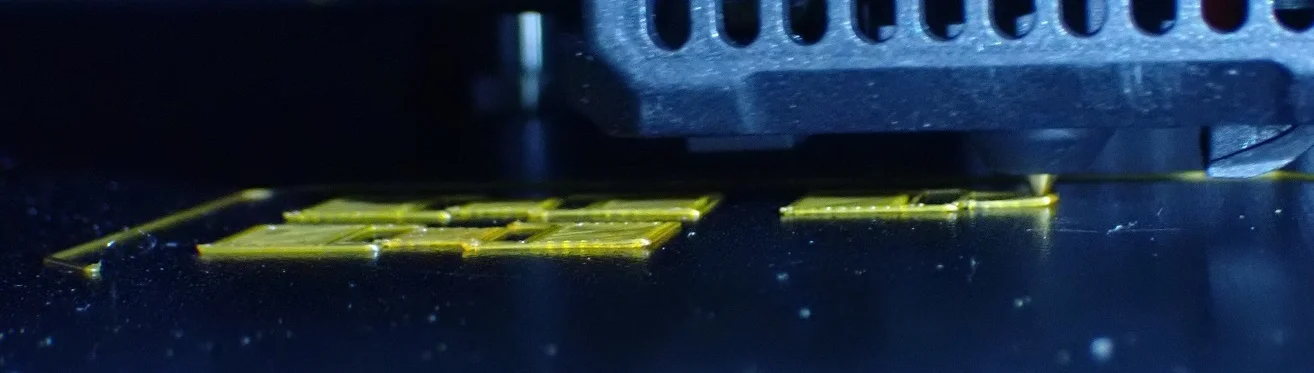
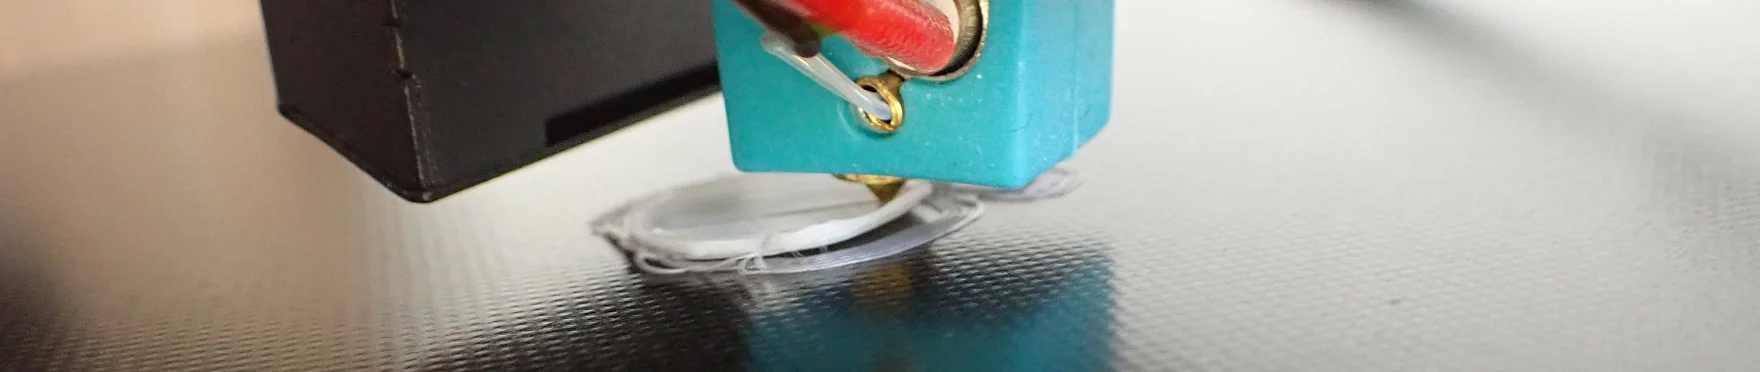
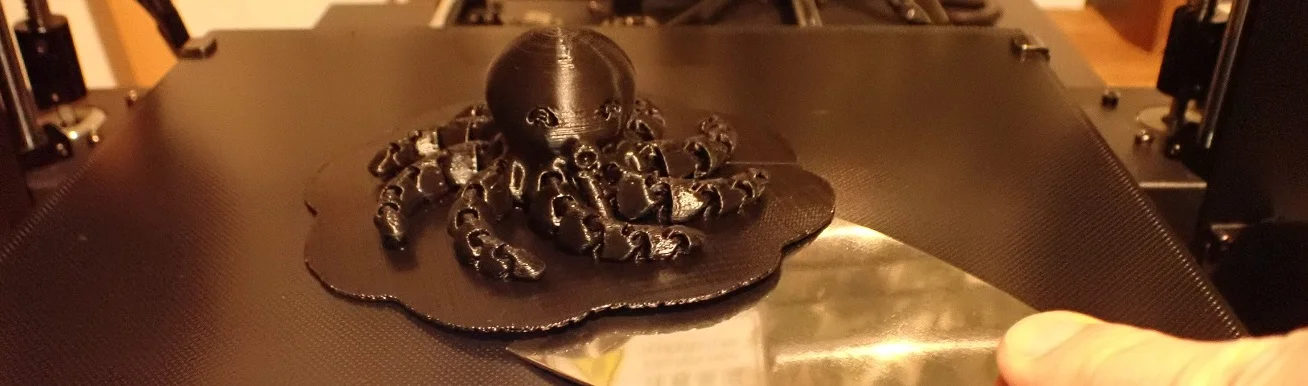
If a PLA 3D print cools too quickly and unevenly, parts of the print can detach from the print bed and curl upwards. This effect is called warping.
To avoid warping with PLA, the print bed should be properly leveled, the distance between nozzle and print bed should not be too far, the print bed temperature should be high enough, the print bed adhesion should be good enough and the ambient temperature should be as homogeneous as possible.
In this article, you’ll learn all about the causes of PLA warping and what methods have been proven to prevent it.
Table of Contents:
What Causes PLA Warping?
Warping is caused by an inhomogeneous temperature in the printed object. The temperature differences create mechanical forces that can warp the warm filament. Homogenous temperatures prevent warping and good print bed adhesion can prevent the filament from lifting off the print bed.
3D printing filaments are melted, printed and then become solid again. Like most other materials, filament expands when heated and contracts when cooled.
Since the melting and cooling processes blend smoothly in 3D printing, mechanical forces are created by the solidifying filament during printing. The greater the temperature difference between the solidifying filament and the liquid filament, the greater the forces.
In order to reduce these mechanical forces and thus avoid warping, you must ensure that this temperature difference is as small as possible. If the entire print object had the same temperature from the first to the last layer during printing, this would be ideal and no warping would occur.
There are some filaments where warping is more likely than others. Although it is common with PLA, it is even more likely with other filaments such as ABS. Nevertheless, the same principles and methods apply.
In the following you will learn all methods to avoid PLA warping. The order determines the priority with which you should apply the methods.
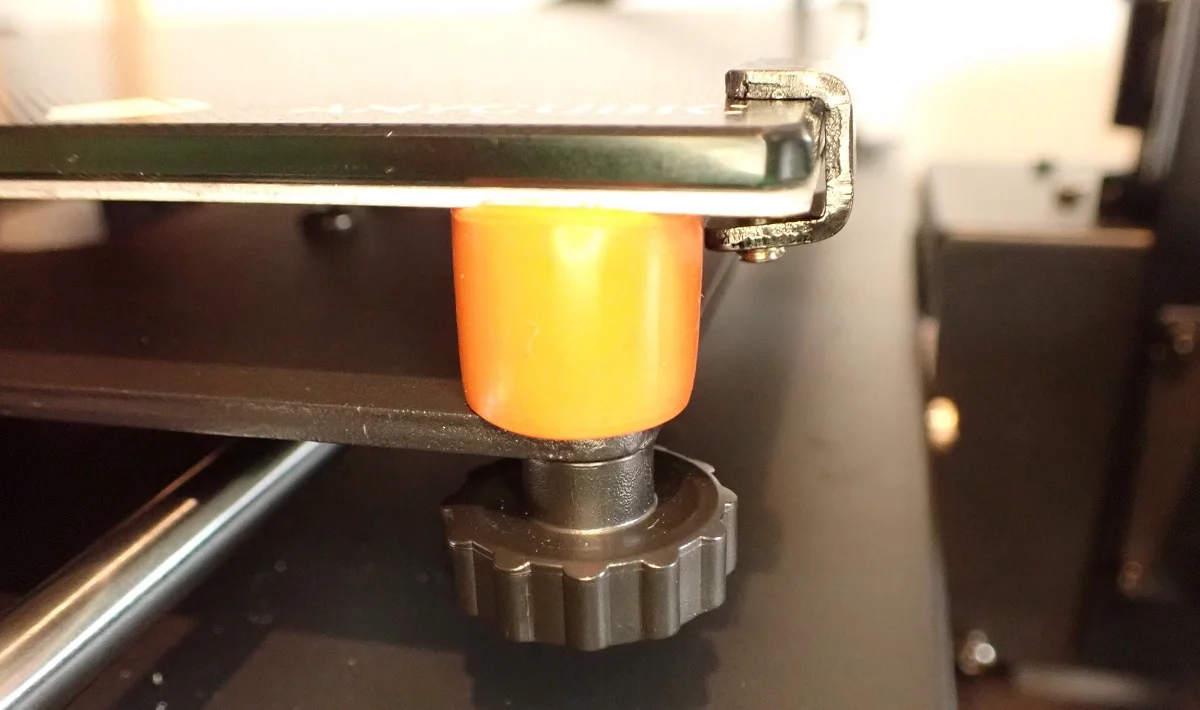
Step 1: Level the Print Bed
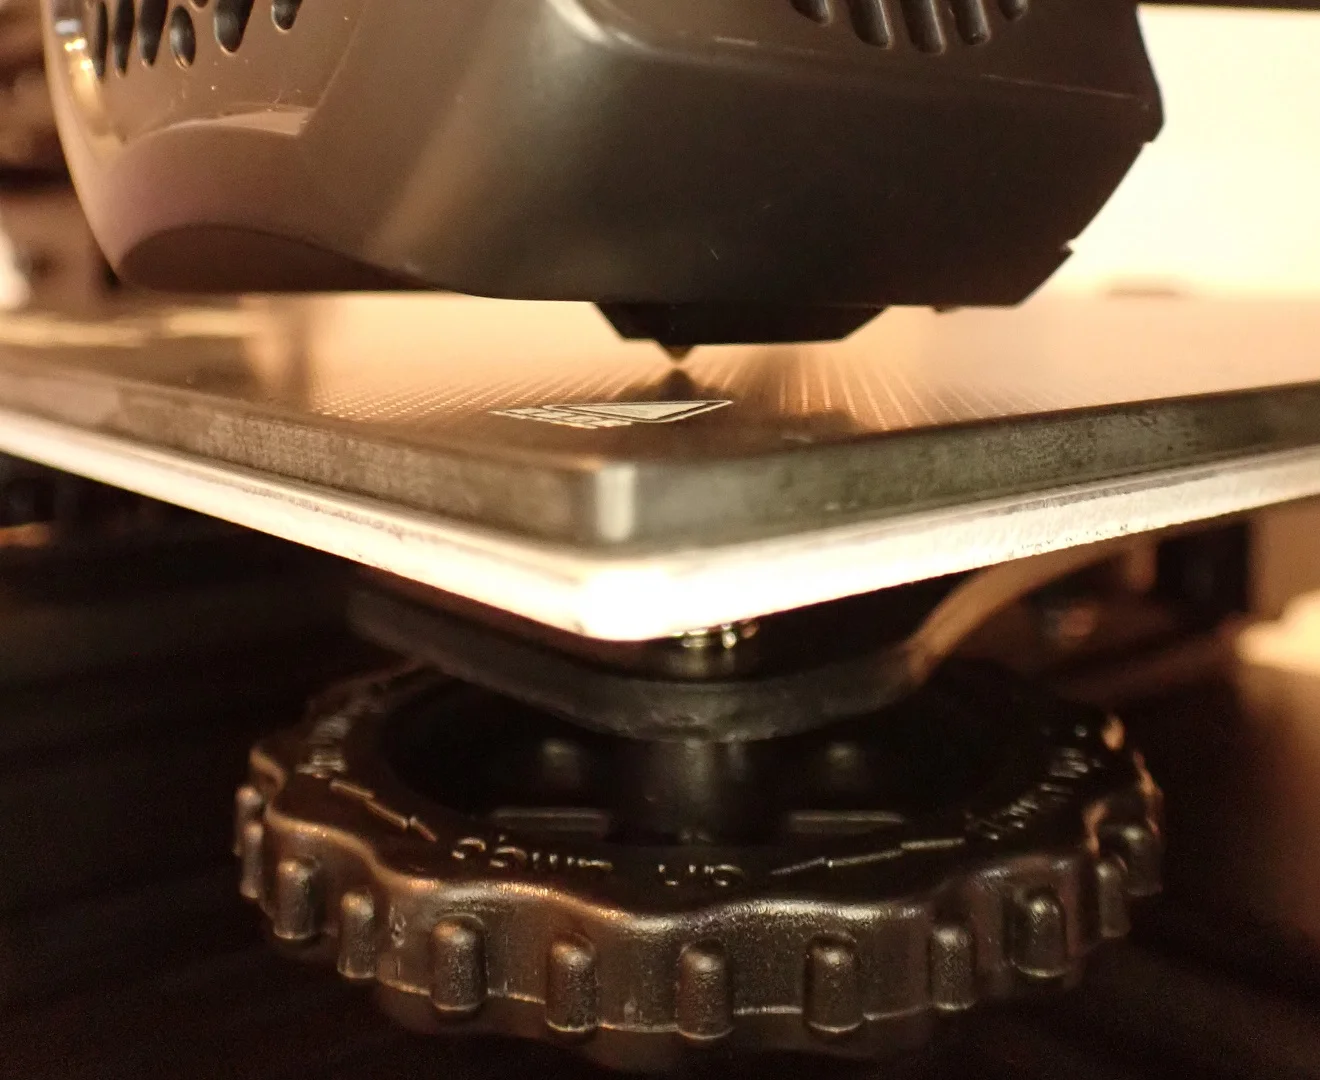
Whenever you have problems with your first layers, you should re-level your print bed. An incorrectly leveled print bed can produce a whole range of print errors. Therefore, it is important to eliminate this cause of error first.
A strong indication of an improperly leveled print bed combined with warping in PLA is when not all corners of the object warp evenly. If only one or two corners warp, an unwanted tilt in the print bed is the most likely cause.
If you need to manually level your 3D printer, do it at least at all four corners and check the center. If your 3D printer has automatic print bed leveling, you should control it by leveling it manually from time to time.
Depending on how your plate is mounted and how you handle it, you will need to repeat the print bed leveling at regular intervals. Careful users do this every 5-10 prints. Most of the time, however, it is sufficient to level the print bed as soon as you encounter print errors. The print bed leveling is always the first cause you should rule out in case of print errors.
RARE CAUSE – CURVED PRINT BED: In very rare cases, the print bed of the 3D printer may not be flat, but curved. If this is the case, you should have it replaced by the manufacturer or get a glass bed. A glass print bed is extremely rarely warped and will not warp during printing.
Step 2: Lower the Z-Offset
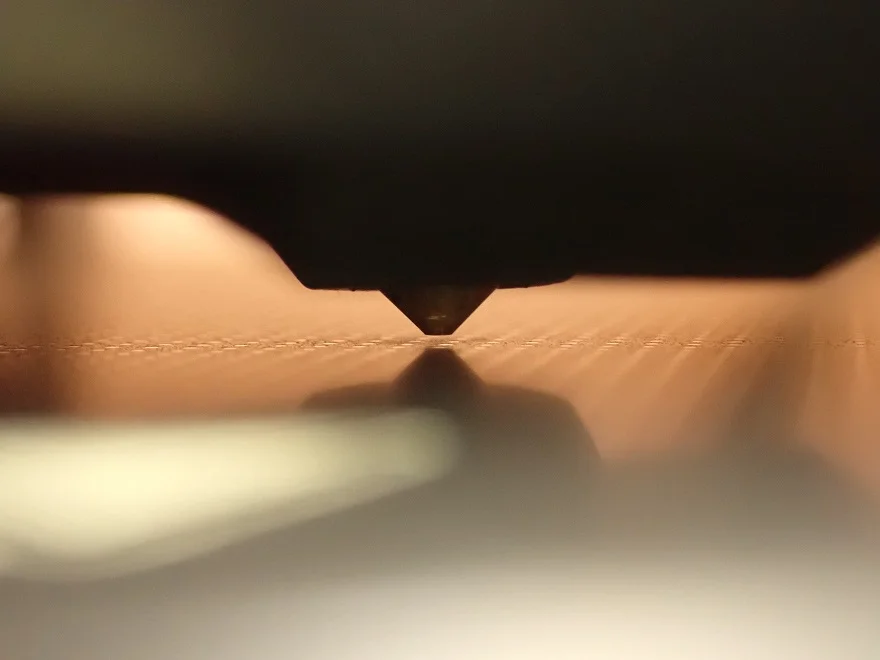

In addition to the tilt of the print bed, which you set during the print bed leveling, the Z-offset is also important. An optimal first layer is a key to avoiding warping with PLA.
If the distance between the nozzle and the print bed is too large, only a small part of the filament strand will adhere to the print bed and cool down too quickly on its way there. But if the distance is too small, the filament has too little space and has to escape to the sides – the result is an elephant foot (more about this at the end of the article or in this detailled guide).
You need to find the right distance between the nozzle and the print bed. If you have warping with PLA, it may well be that your distance is too large.
A good start to set the distance correctly is the proven paper method for print bed leveling. Use a piece of paper with a thickness of about 0.1 mm to adjust the distance between the nozzle and the print bed. If you can move the paper with some friction between the nozzle and the print bed, the distance is set correctly.
If you still observe warping with PLA, you can try to reduce the Z-offset by 0.05 mm.
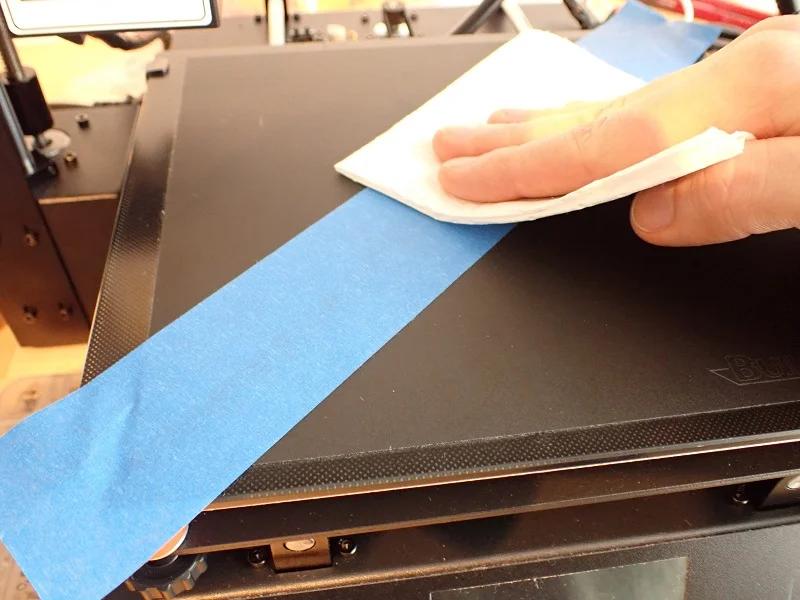
Step 3: Clean the Print Bed
Why a good print bed adhesion is important to avoid warping with PLA and how you can increase the adhesion, you will learn later in this article. If you have not cleaned your print bed well enough, the filament has no chance to bond with the print bed and create a good adhesion in the first place. Then warping is inevitable!
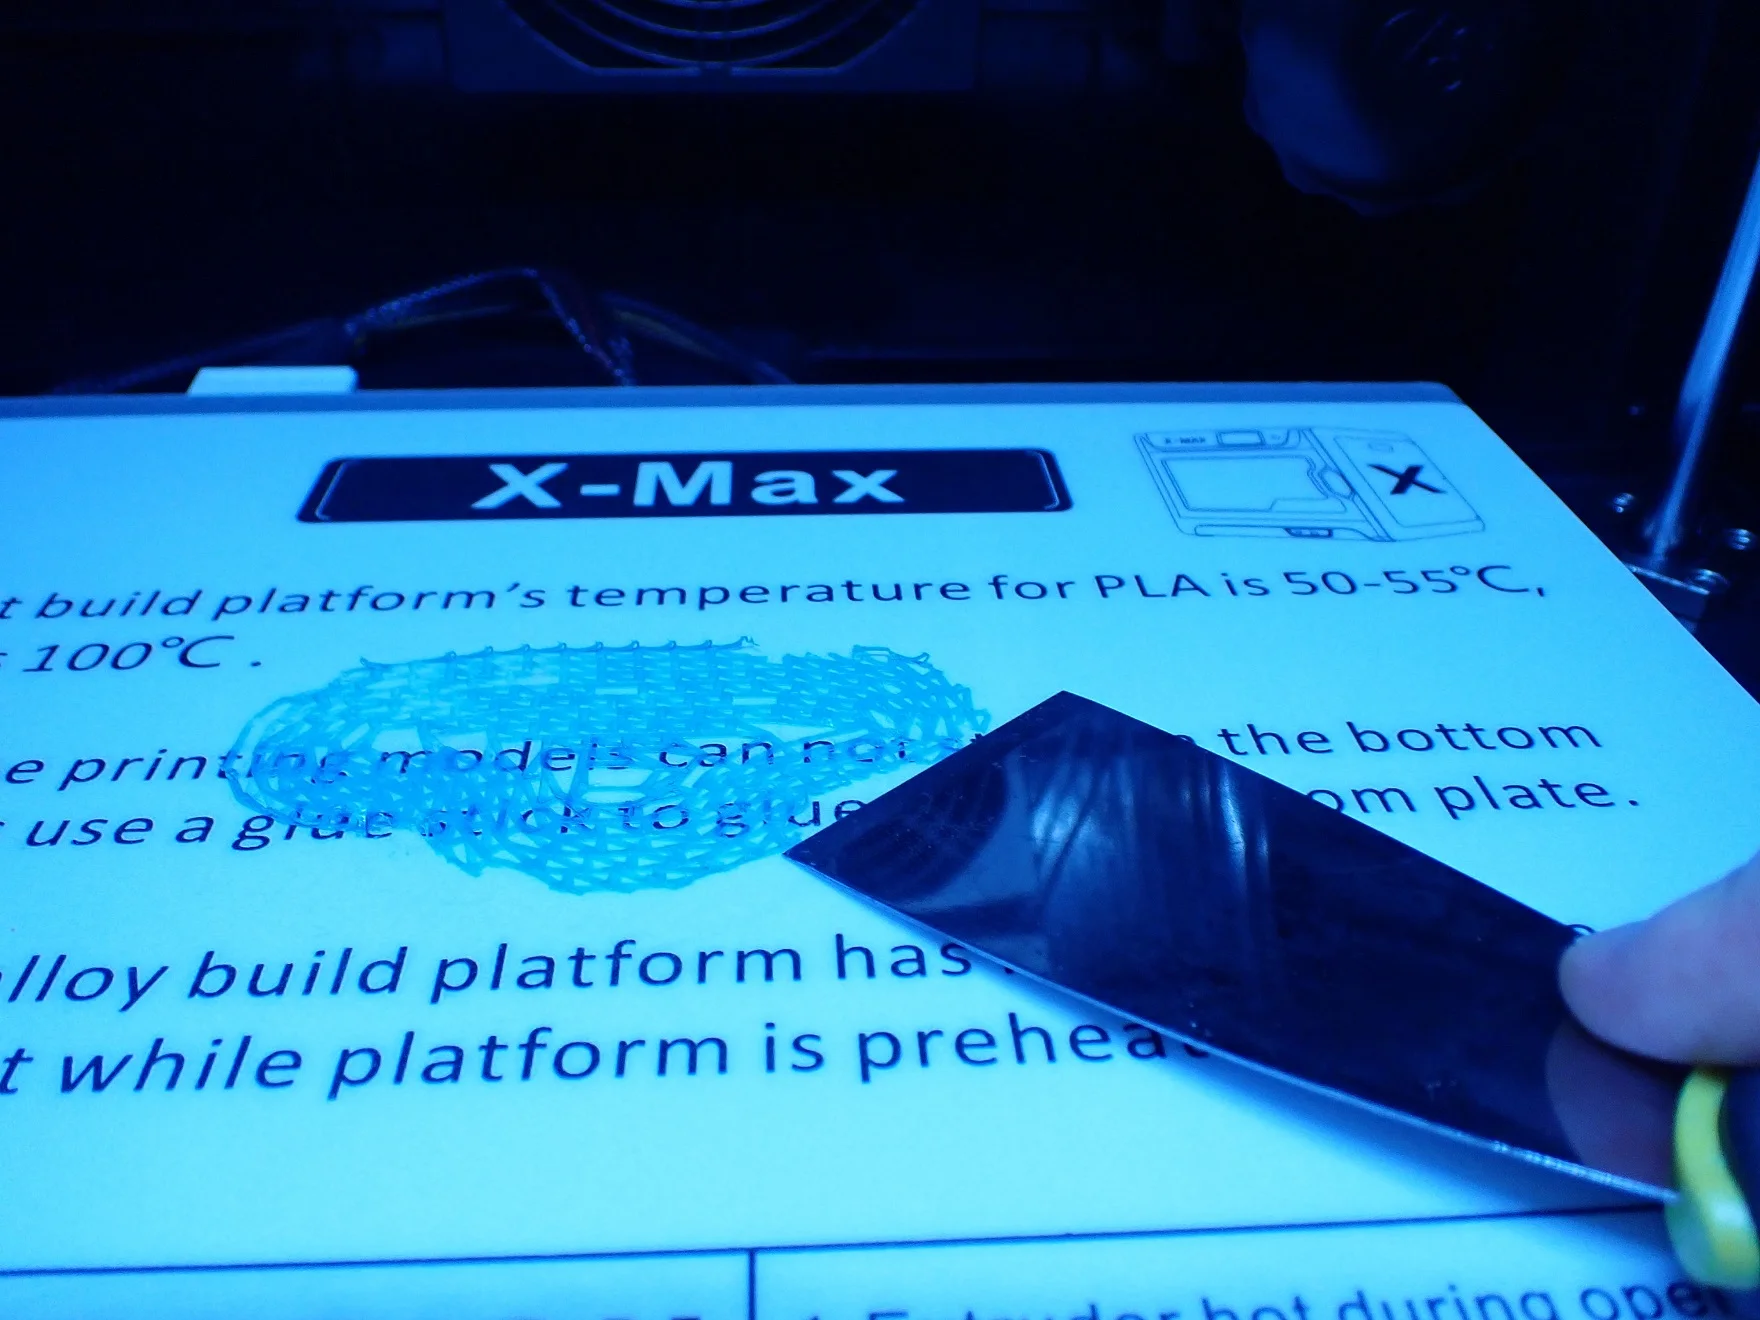
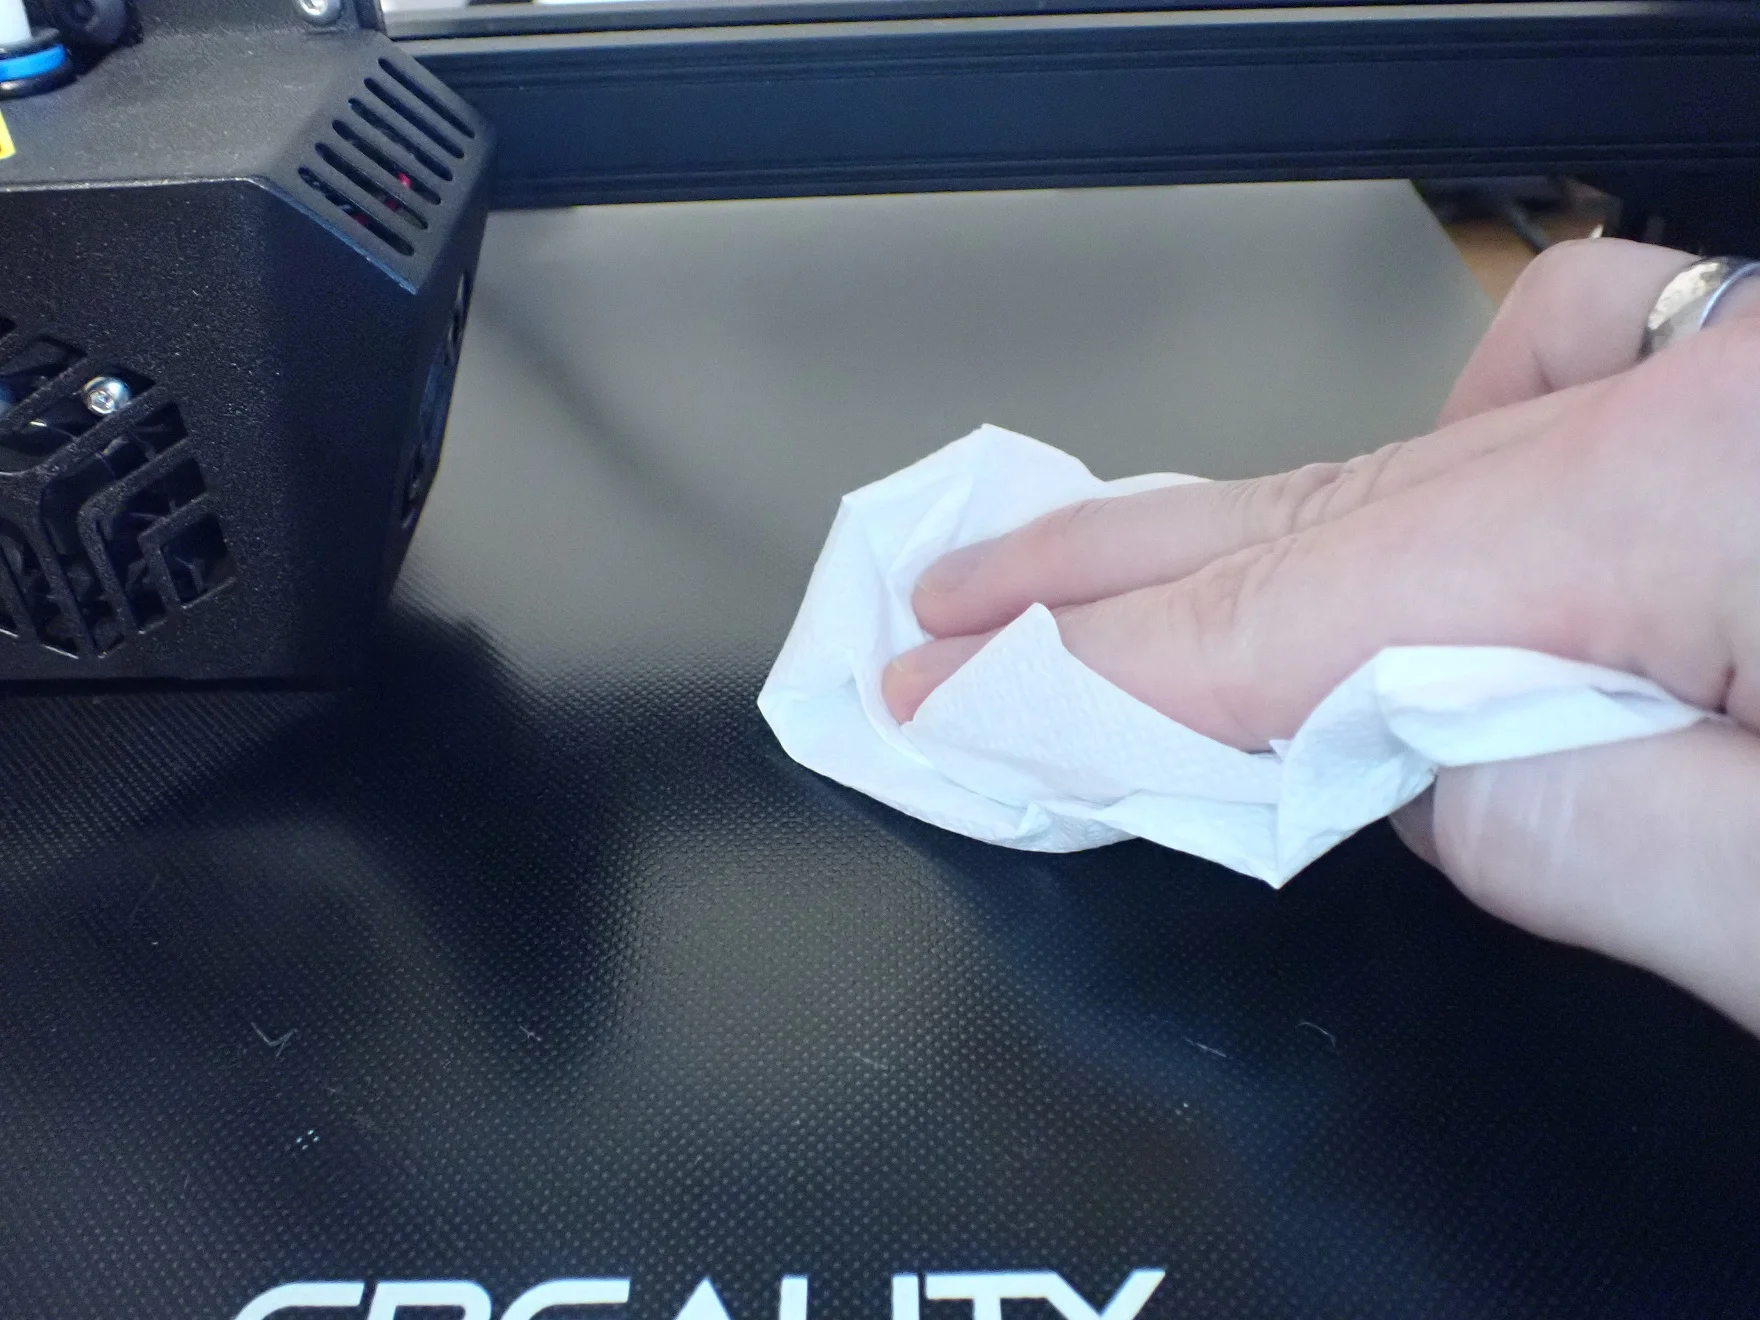
Clean the print bed from old filament residues, dust and other foreign objects. At the latest when you notice warping or other problems with the first layers, you should clean the print bed from grease with dishwashing liquid or isopropyl alcohol. Only then can a good print bed adhesion develop.
How you clean different print bed surfaces properly, you can read in this article: Print Bed Cleaning for 3D Printers: PEI, Glass, Spray, Tape
Step 4: Increase the Print Bed Temperature
A homogeneous temperature in the print object prevents warping. A heated print bed is the best way to make the temperature distribution homogeneous. If the print bed temperature and the adhesion are too low, individual corners or the entire object can detach from the print bed due to warping.
Nowadays, almost all 3D printers have a heated print bed. If you have an older model that doesn’t have a heated print bed built-in, a heated print bed would be a good investment and way to avoid warping with PLA and other filaments like ABS.
NOT TOO HOT: A heated print bed is not the miracle cure for PLA warping. If you set the print bed temperature too high, you could end up with an elephant foot. This causes the first layers to flow too far apart (more on this at the end of the article).
The correct print bed temperature is different for each filament and print bed surface. The best starting point for PLA is 60 °C. If you still detect warping and you don’t get an elephant foot, you can increase the print bed temperature further. If you do detect elephant foot, you should lower the print bed temperature.
HOMOGENOUS PRINT BED TEMPERATURE: If you notice that objects do not warp in a certain area of the print bed and do warp in another area, it could be that the temperature distribution of your print bed is not homogeneous. This is quite rare, and especially less likely with glass print beds.
WAIT: It is more likely that an inhomogeneous temperature distribution over the entire print bed will occur later than your 3D printer tells you. Many 3D printers start printing as soon as the temperature sensor reaches the set temperature. However, the temperature sensor is usually not located on the print bed, but underneath it.
It can take a few minutes for the temperature to come through a thick glass plate. To be safe, you should wait 5-10 minutes before you start printing after the temperature has been reached according to the 3D printer.
Step 5: Increase the Print Bed Adhesion
You can increase the print bed adhesion in different ways. Sometimes combinations of the individual solutions also lead to success. But the beginning is always the right print bed material.
For PLA, printing plates made of glass* have proven themselves. They are very smooth, extremely flat and do not warp over time. In addition, their temperature conduction is good but very slow, making their temperature distribution very homogeneous.
Between the individual manufacturers, the glass printing plates differ but sometimes significantly. Meanwhile, most glass printing beds are provided with a textured surface to further increase the print bed adhesion. Depending on how this surface is created, the print bed adhesion can be excellent or mediocre.
With the following methods you can increase your print bed adhesion even more:
PRINT SPEED OF FIRST LAYERS: Often it is sufficient to reduce the print speed for the first layers to increase the print bed adhesion. If the first layers are printed too fast, the filament will not have enough time to form a good bond with the print bed.
The print speed of the first layers should be about half of the normal print speed. You can also try to reduce the print speed in small steps to better understand the effect and to find the optimal speed.
RAFT: Printing a Raft is a proven method to increase print bed adhesion. A Raft is a thick first layer that has a larger diameter than your print object. This increases the surface area between your print bed and the print object, which increases surface tension and thus print bed adhesion.
In Cura, you can set the Raft to be larger, smaller, thicker or thinner and adjust the distance between the top layer of the Raft and your print object so that you can remove it more easily afterwards.
The disadvantage of a Raft is that you don’t get as smooth a bottom layer as you would without a Raft.
BRIM: A Brim is very similar to a Raft. However, a Brim is only on the outside of the print object and not underneath it. This means that the bottom layer of your model still adheres to your print bed and the Brim is printed on the outside of the first layers, increasing print bed adhesion.
While the bottom layer of your model will remain smooth as usual, it will be difficult, if not impossible, to remove the Brim completely from the first layers of your object. The surface will be relatively rough there if you don’t smooth it afterwards.
ROUND CORNERS: Just like a Brim, so-called mouse ears work as well. Basically, these are just round slices that you place under the corners of your object in the slicer.
Since especially sharp corners often suffer from warping, this is a good way to greatly reduce the likelihood of it. However, you have the same disadvantage as with Rafts or Brims: you have to remove the slices from your object after printing, which is sometimes not possible without leaving damage. Here you can find a model for mouse ears on Thingiverse.
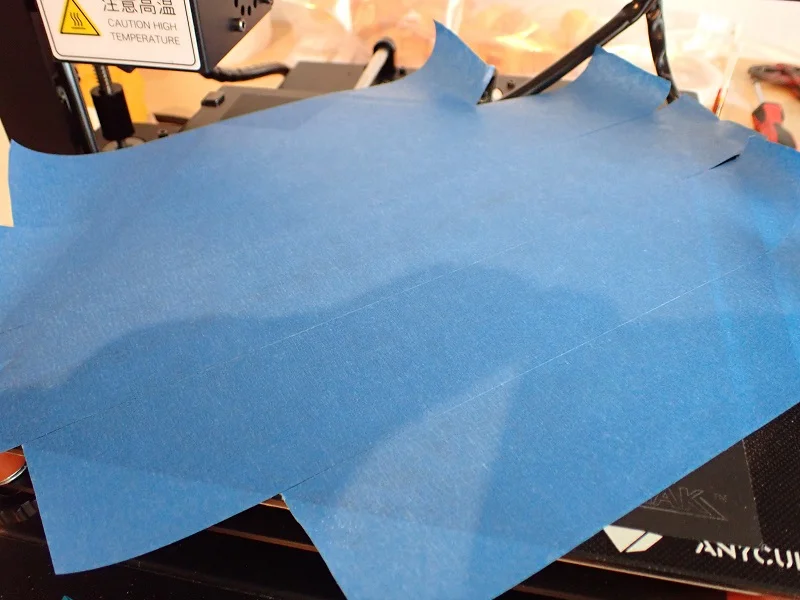
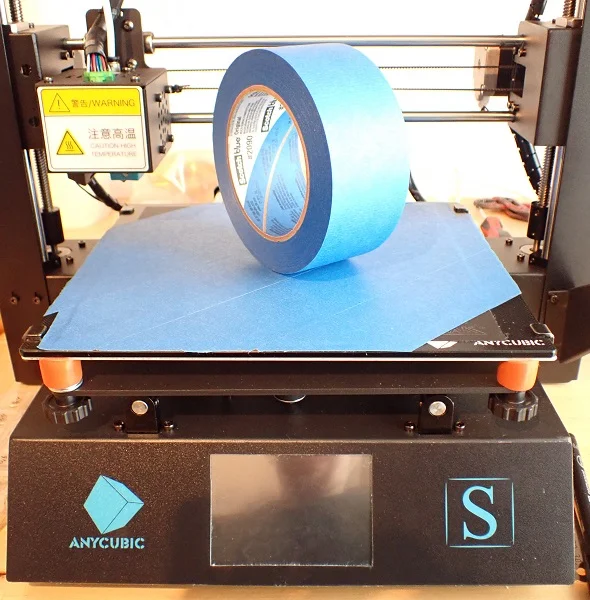
BLUE TAPE: The print bed adhesion of some 3D printers can be increased with Blue Tape. This is a special type of masking tape that is very popular in the 3D printing community. The backside of the tape has a rough surface that helps the filament to adhere. Especially for PLA, Blue Tape can be the right solution to increase print bed adhesion and prevent warping.
PEI FILM: PEI films* are self-adhesive films that you can buy in the right size for your print bed. The surface of PEI films favors the adhesion of liquid filament to the print bed. For PLA, PEI films work well, although you will need to recalibrate the Z0 position and set the print bed temperature a few degrees higher.
BUILDTAK: BuildTak films* are also special self-adhesive films that you can apply to your print bed. For standard filaments like PLA and ABS a BuildTak surface is very suitable. But also Nylon* and flexible filaments like TPU can be printed on BuildTak films. When gluing, make sure that you clean the print bed thoroughly beforehand and then re-level it.
HAIR SPRAY: If you don’t want to wait for a new print bed surface, you can resort to improvised methods. One of them is hairspray. Hairspray is quite sticky to do its job. When you spray it on the print bed, you can take advantage of this stickiness to increase the print bed adhesion. Hairspray must not get inside the 3D printer. If you have a removable print bed, you should take it into another room and spray it there.
GLUE STICK: Just like hairspray, a glue stick is one of the more improvised methods. However, glue sticks can quickly provide the solution for poor print bed adhesion. A normal household glue stick will do, but there are now specialized glue sticks for 3D printers* that work even better. As you can imagine, the big disadvantage of glue sticks is that you have to clean the print bed as well as the printed object from glue residues after printing.
ABS JUICE: There are many users who swear by ABS Juice. This juice consists of a mixture of ABS filament and acetone. Acetone dissolves ABS, creating a sticky substance. Depending on how much acetone you add to the ABS filament, you either get ABS Juice or ABS Slurry. If you spread this liquid evenly on the print bed, you will get a very strong print bed adhesion. However, acetone is dangerous and difficult to handle, and cleaning the print bed and the printed object is time-consuming.
Step 6: Ambient Temperature & Cooling
Not only the print bed temperature is crucial to prevent warping. The ambient temperature is also extremely important to avoid this printing error.
If you could keep the object at a constant temperature during printing, warping would not occur with PLA. Therefore, various methods to ensure this are possible solutions.
PART COOLING FAN: Cooling the object is important to avoid stringing with PLA and to improve the bridging behavior. So you should not turn off the fan completely. Reducing the fan speed a bit might help to avoid warping in PLA.
You should turn on the fan only after the first few layers. If part cooling is disabled during the first few layers, the filament has a better chance of bonding to the print bed.
ROOM TEMPERATURE: One of the most important factors in ambient temperature is a constant room temperature. Cold airflow over the print object is often the cause of warping in PLA. During printing, you should make sure that the printer is protected from wind and that the room temperature does not change much during printing.
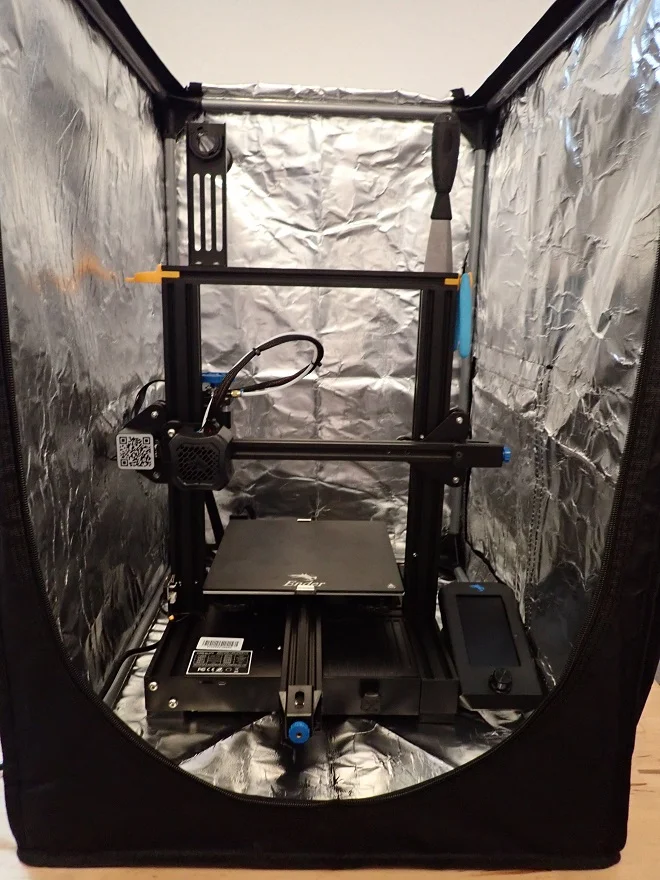
ENCLOSURE: To keep the ambient temperature of the print object constant, you can not only make sure that the room temperature remains constant, but you can also simply make the room smaller by using an enclosure. Keeping the temperature constant in an enclosure is much easier than keeping the temperature constant in an entire room.
You can find inexpensive enclosures for all 3D printer sizes*, or you can build one yourself.
ENABLE DRAFT SHIELD: As described above, cold air currents are one of the most common triggers for PLA warping. If the above measures have not eliminated the air currents, or you want to try a cheap alternative first, you can activate the draft shield in Cura.
With this option, your 3D printer will print a wall around the object that blocks air currents. Especially for PLA, this can be a fast and cheap measure to prevent warping.
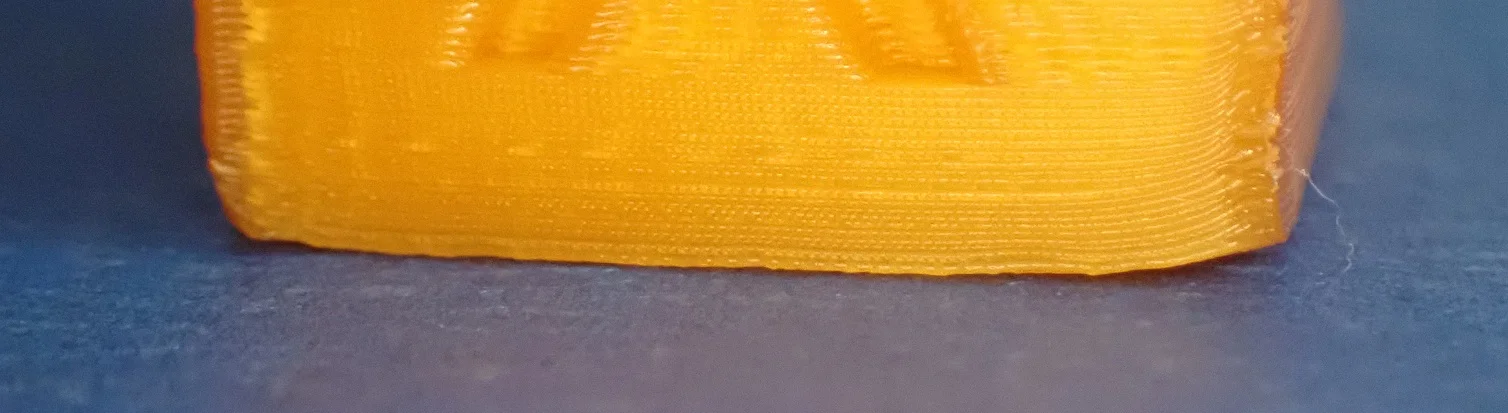
Avoid an Elephant Foot
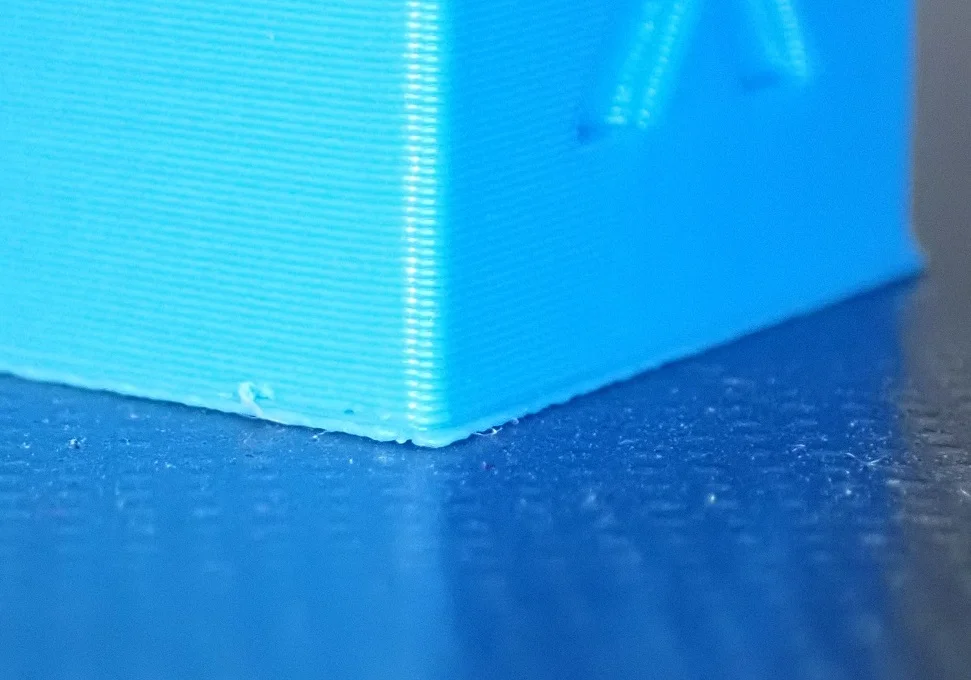
To prevent warping, the correct print bed temperature is important. If the print bed temperature is set too high, other printing errors can occur. One of these errors is the dreaded elephant foot!
An elephant foot in 3D printing is usually caused by the print bed temperature being too high and/or the object compressing the first layers with its own high weight. Reducing the print bed temperature and less infill can avoid elephant feet.
But there are a few other methods to avoid an elephant foot, especially with PLA. Here they are listed in order of priority:
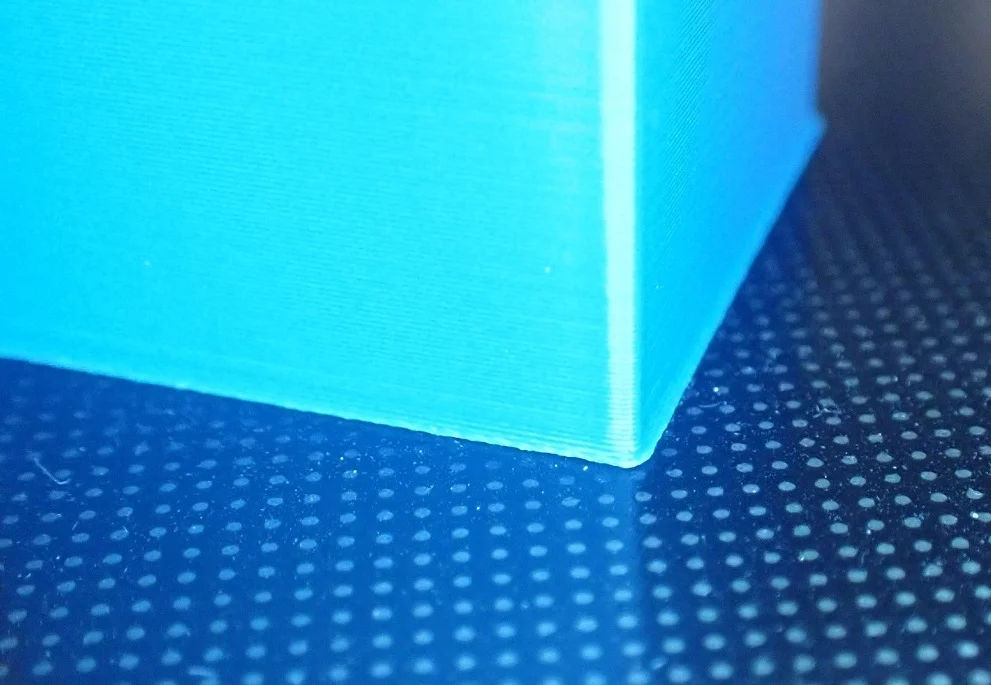
PRINT BED LEVELING: An elephant foot can also result from your print bed not being properly leveled and adjusted. Not only is the tilt important, but also the adjustment of the Z0 position.
If the tilt is not adjusted properly, the elephant foot can occur on a corner or side. If the Z0 position is too high, i.e. the nozzle is too close to the print bed, the elephant foot will appear on every side of the object. Then the filament has too little space and moves to the sides, causing an elephant foot.
So if you notice that you have an elephant foot on your objects, the very first thing you should do is re-level your print bed and check the Z0 position.
REDUCE PRINT BED TEMPERATURE: After an improperly leveled print bed, too high a print bed temperature is the leading cause of elephant feet. If leveling your print bed was not the solution, you should decrease the print bed temperature in small increments and test. Most cases of elephant feet can be eliminated by doing this.
RAFT: A Raft can help with elephant feet in two ways. Since you probably lowered the print bed temperature, the print bed adhesion will also be slightly worse than before. To compensate for this you could print a Raft.
Elephant feet affect the first layers of your object. With a Raft, you are effectively sacrificing the first layers of the Raft to absorb the unwanted expansion. This way, the actual first layers of your object are printed correctly.
REDUCE INFILL OR DIVIDE THE OBJECT: In rare cases, elephant foot can also occur because your object is simply too heavy. This is a particularly common problem with large format printers.
If all other methods that came before this point were not a solution, you could try reducing the infill density or splitting the object to reduce the weight.
CHAMFER ON THE FIRST LAYERS: The last method to deal with elephant feet is to construct a chamfer on the first layers. With such a chamfer, preferably with 45°, you compensate for the expansion caused by the elephant foot.
As you can imagine, this takes a few test prints until you find the perfect angle and height for the chamfer.

Detailled Guide:
How to Prevent an Elephant’s Foot in 3D Printing
Disclosure: This website is the property of Martin Lütkemeyer and is operated by Martin Lütkemeyer. Martin Lütkemeyer is a member of the Amazon Services LLC and other Affiliate Programs. These are affiliate advertising programs designed to enable websites to earn advertising revenue through advertising and linking to Amazon.com and others. Links marked with * are affiliate links.
