
- Wet Filament: Prevention, Symptoms & Drying - July 18, 2024
- Sovol SV08 – Best PrusaSlicer Settings & Profile - June 26, 2024
- Sovol SV08 – Best Orca Slicer Settings & Profile - June 26, 2024
Disclosure: Links marked with * are Affiliate Links. I earn from qualifying purchases if you decide to make a purchase through these links – at no additional cost for you!
Poor Bridging in 3D Printing is a very common error. Luckily there are some easy solutions to this problem.
Poor bridging in 3D printing is caused by too high print temperatures, flow rates and print speeds. Poor bridging can also be improved or fixed by better cooling of the printed part and adding support structures. In some cases, you can even prevent the need of bridging altogether by changing the orientation of the model in the slicer.
As you can see, poor bridging depends on many factors and is relatively easy to fix. In this article, you will learn how to change these print settings to fix poor bridging. If you tweak them and test the effects of your changes, poor bridging on your 3D printed objects will quickly become a thing of the past.
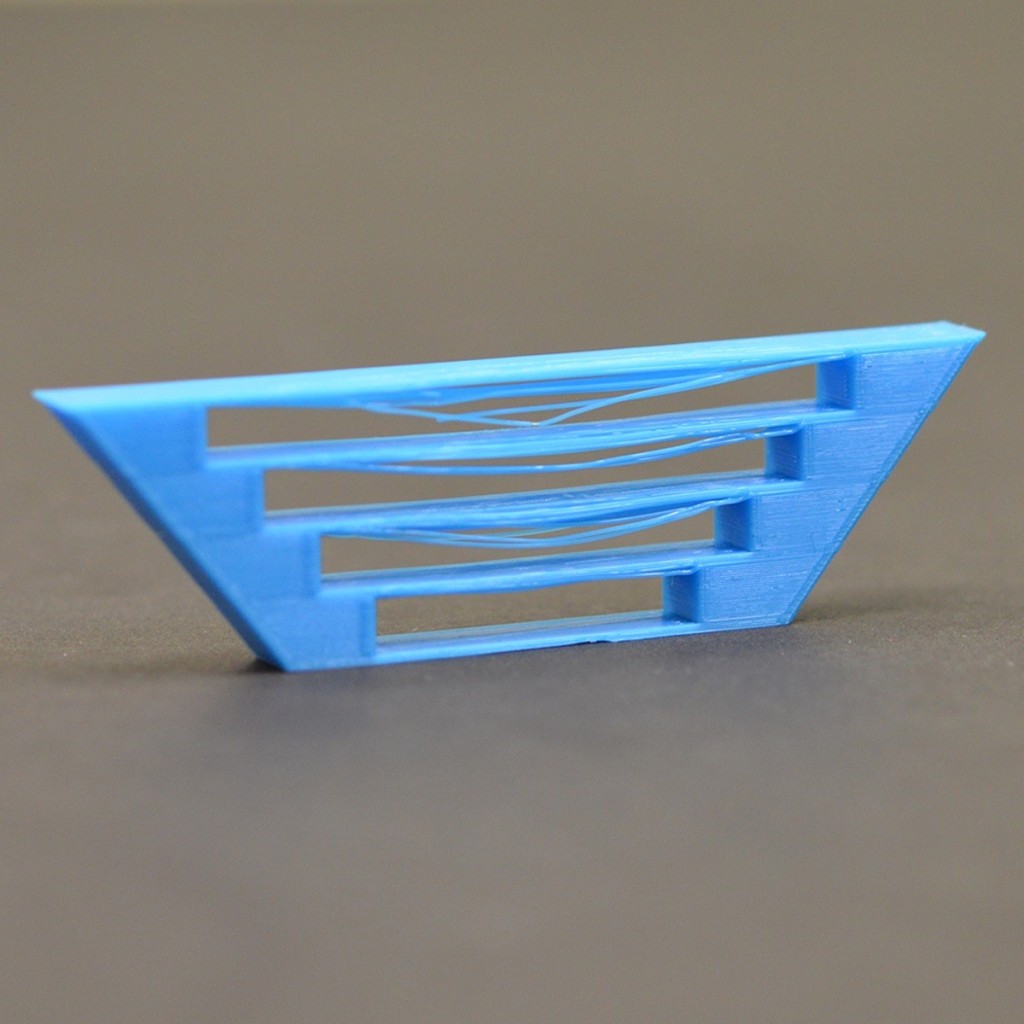
Table of Contents:
What is Bridging
Bridging means that your 3D printer prints between two points that have no connection to each other.
Normally, a 3D printer first prints the base layer, on which it builds up the object layer by layer. In contrast, there is no base layer between two points when bridging. Consequently, the 3D printer has to “print in the air” so that the gap can be bridged.
The most common problem is that this filament bridge tends to sag due to gravity.
Bridging Test
To test the effect of changing your printing parameters, there are special 3D models that are designed to test this. They are designed as a worst case scenario – if your printer prints this model correctly, you will have no problems with your other models.
On Thingiverse you can find many different designs. Among them, there are many models that test several things at once, but also special bridging tests.
My favorite test is this one.
The test is designed so that you can scale it in your slicer as you like. How big you scale it depends on the objects you want to print.
Most of the time it is enough if you can print good 200 mm long bridges.
Why is My Bridging Poor?
Poor bridging is a very common error in 3D printing. It always occurs when there is no support material or a lower layer of the object under the extruded filament and the print settings are not well-tuned.
Often people want to avoid using support structures because they cause more filament consumption and longer print times. Also, the support structure attachment often needs to be smoothed. If your printer handles bridging well, you can save yourself a lot of these supports.
The annoying thing about bad bridging is that it usually kills the entire object. This leads to a lot of frustration. Fortunately, there are simple solutions to the problem.
The main causes of poor bridging are badly calibrated print settings.
- too high print temperature
- too high flow rate
- too fast print speed
- too little cooling
- too few support structures
- bad alignment of the object
How to Fix Poor Bridging?
As soon as you notice that one section of your 3D printed model is sagging, you should stop printing to avoid further costs. Before you print the object again, you should optimize a few print settings and test them.
The following options are not only important for bridging. They can also prevent many other printing errors.
Decrease Temperature
A decisive factor is the printing temperature. If you heat the filament too much, the material tends to sag. It does not have enough time to cool down and solidify.
In general, you should set the printing temperature as low as possible when building bridges and overhangs. The problem with too hot filament is that it becomes very fluid and can therefore sag more easily.
Do not reduce the temperature too much as this may lead to under-extrusion.
The correct temperature to avoid bridging depends on the filament you are using. Since bridging is best prevented with lower temperatures, you should be in the lower range of the recommended printing temperature.
- PLA: 180-200 °C
- ABS: 210-230 °C
- PETG: 220-230 °C
- Nylon: 220-240 °C
- TPU: 230-240 °C
- PC: 265-280 °C
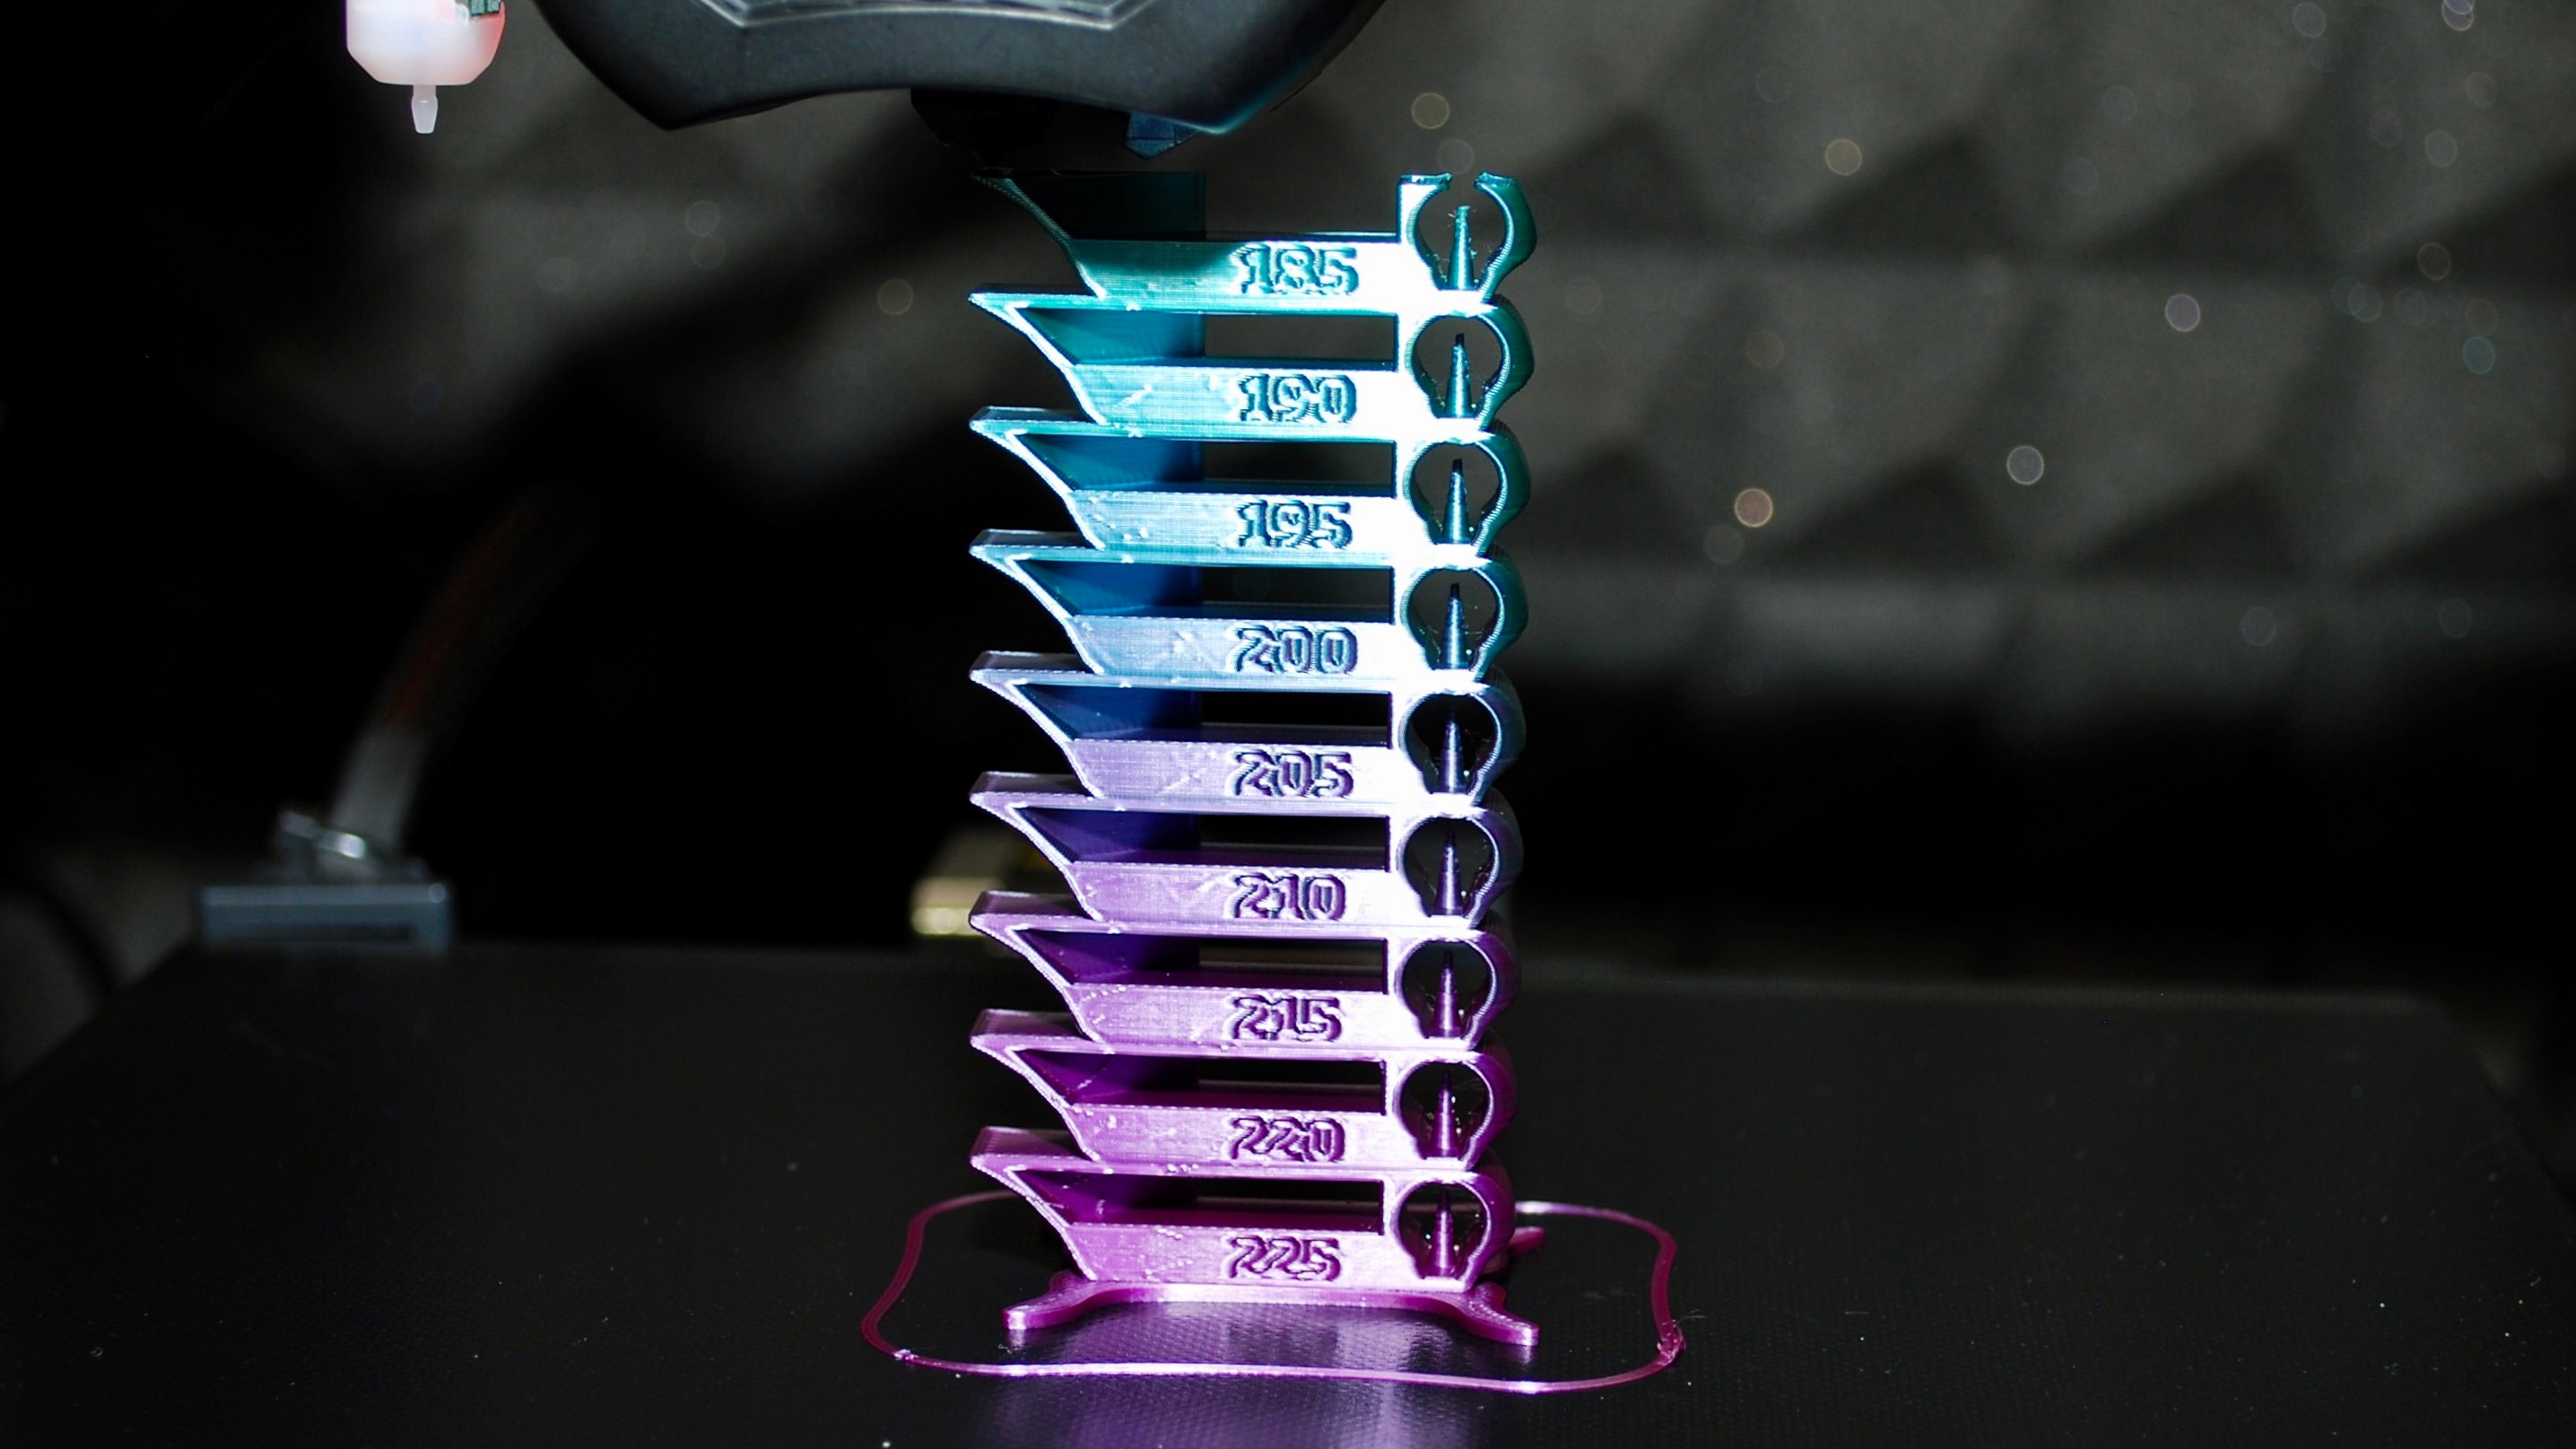
There are so-called temperature towers, which test the printing behavior of materials during the 3D printing of bridges and overhangs at various temperatures.
If you are looking for high print quality, you should do a temperature tower test with each new filament to find the perfect temperature setting.
Decrease Flow Rate
If the flow rate is set too high, the filament will not have enough time to harden. If you print a bridge and the flow rate is set too high, this can result in too much hot filament being extruded at once. The large mass of filament solidifies slower and has more time to be deformed by gravitation.
The correct setting of the flow rate therefore has an enormous influence on good bridging behavior.
High flow rates also often lead to over-extrusion. Over-extrusion is another printing defect that can not only destroy your bridges but also the rest of the object’s surfaces.
On the other hand, too low a flow rate can also lead to under-extrusion. So the right balance is important to get a good bridging behavior and avoid other extrusion problems.
It is best to approach the right value step by step and test it with a suitable test object (like this one).
Decrease Print Speed
Although it is difficult to give a generally valid recommendation, the printing speed is crucial when printing bridges. With some materials, printing results will be better if you set slower printing speeds, while other filaments require a higher printing speed.
When it comes to printing speed, you clearly benefit from experience. Experiment with test prints and try out different settings.
Decrease the print speed in small steps of 5 to 10 mm/s and see what happens. As with most other print parameters, you have to find the right balance between printing too slow and too fast. If you print too slow, the filament hangs in the air for too long and will start to sag on its own.
Increase Cooling
Cooling is one of the easier solutions when dealing with poorly printed bridges and overhangs. Hot, liquid filament solidifies more quickly and has less time to drip or sag when you cool it down quickly enough.
Set the part fan to the maximum level when printing bridges or after the first few layers.
However, make sure that the overhang or bridge is in the airflow of the fan. Only then is perfect cooling and rapid solidification of the liquid filament guaranteed.
Miracles can be achieved with a simple rotation of your print object. So make sure that the air stream always blows directly at your object.
If your 3D Printer does not have a sufficient cooling fan, you should upgrade it. Another option is a 3D printed fan duct which can bring the flowing air better to your object.
Sometimes too much cooling can cause the nozzle to clog. So during your first print with increased cooling, watch for signs of a clogged printer nozzle.
Add Supports
Support structures are a further adjustment option. You can generate these using your slicer. Supports fix your object from the outside and prevent the bridge from sagging.
The advantage of the supports is that your 3D printer is not forced to fight against gravity. When you use support material, the above-mentioned factors such as temperature, cooling, speed and flow rate play a minor role.
But there are some disadvantages of using supports on your bridges:
- higher filament consumption
- longer print times
- longer post-processing/smoothing
If you choose a supporting structure, the first filament layer of the bridge area is printed on the top layer of the supporting structure. A small distance is kept here. This tiny distance is usually enough to allow you to separate your print object from the support material easily. However, the touching spots will be rougher than the surrounding surface.
These disadvantages are sometimes smaller as the trouble of poor bridging.
With soluble support material, like PVA* or HIPS*, you can avoid even these minor disadvantages and print long and smooth bridges. However, this is only possible if your 3D printer can process two different materials at the same time – i.e. when it has a dual extruder.
Change Object Orientation
You can avoid bridging altogether by changing the orientation of the print object. If you turn the pint orientation, support structures are often no longer necessary.
This obviously only works with some models. If you print the letter T for example on its head, you don’t have to print supports (in this case tree supports in Cura).
Disclosure: This website is the property of Martin Lütkemeyer and is operated by Martin Lütkemeyer. Martin Lütkemeyer is a member of the Amazon Services LLC and other Affiliate Programs. These are affiliate advertising programs designed to enable websites to earn advertising revenue through advertising and linking to Amazon.com and others. Links marked with * are affiliate links.
