- Wet Filament: Prevention, Symptoms & Drying - July 18, 2024
- Sovol SV08 – Best PrusaSlicer Settings & Profile - June 26, 2024
- Sovol SV08 – Best Orca Slicer Settings & Profile - June 26, 2024
Disclosure: Links marked with * are Affiliate Links. I earn from qualifying purchases if you decide to make a purchase through these links – at no additional cost for you!
Geeetech brings with the Mizar S* another very good 3D printer with a medium print volume on the market. Due to its many premium features such as the automatic print bed leveling and the flexible print bed, it is also very well suited for beginners.
I have tested the Geeetech Mizar S myself and share my experiences with you in this detailed review. I’ll show you what kind of print quality you can expect, where its strengths and weaknesses lie and how it stacks up against its direct competitors. That way you can make the best buying decision.
Check Price at:
Table of Contents:
- 1 Key Takeaways
- 2 Who Should Buy the Geeetech Mizar S?
- 3 Advantages & Disadvantages > Geeetech Mizar S
- 4 Technical Specifications > Geeetech Mizar S
- 5 Scope of Delivery > Geeetech Mizar S
- 6 Setup > Geeetech Mizar S
- 7 Features > Geeetech Mizar S
- 7.1 Dual Gear Bowden Extruder
- 7.2 Automatic Print Bed Leveling
- 7.3 Supports PLA/ABS/TPU/PETG
- 7.4 Magnetic, Flexible Print Bed
- 7.5 Double Z-Axis
- 7.6 Automatic Filament Feeding and Removal
- 7.7 Filament Sensor
- 7.8 Resume Print
- 7.9 3.5-Inch Touchscreen
- 7.10 Belt Tensioner
- 7.11 32-bit silent motherboard with TMC2208 stepper motor drivers
- 7.12 LED Light Next to the Nozzle
- 8 Operation > Geeetech Mizar S
- 9 Heating Times > Geeetech Mizar S
- 10 Noise Level > Geeetech Mizar S
- 11 Power Consumption > Geeetech Mizar S
- 12 Print Speed > Geeetech Mizar S
- 13 Slicer > Geeetech Mizar S
- 14 Print Quality – Practical Test > Geeetech Mizar S
- 15 Geeetech Mizar S vs. Elegoo Neptune 3
- 16 Geeetech Mizar S vs. Creality Ender 3 S1
- 17 Is the Geeetech Mizar S Worth it?
- 18 Similar 3D Printers
Key Takeaways
- Mid-range 3D printer with very good price-performance ratio
- Premium Features: Automatic print bed leveling & flexible print bed
- Relatively large print volume, stabilized by a double Z-axis
Who Should Buy the Geeetech Mizar S?
The Geeetech Mizar S is ideal for advanced users and beginners alike. It offers a very good and reliable print quality with little calibration effort. Through its many features that increase the ease of use, such as the very good print bed adhesion and the automatic leveling, the entry into the 3D printer hobby is frustration-free.
Advantages & Disadvantages
> Geeetech Mizar S
PRO:
- Excellent print quality
- Nearly perfect print bed adhesion
- Automatic print bed levelling
- Double Z-axis
- Dual gear extruder
- Filament sensor
- Easy setup
- Belt tensioner
- Color touch screen
CON:
- No direct drive extruder
- Touchscreen is a bit small
Technical Specifications
> Geeetech Mizar S
DEVICE
- Technology: FDM (Fused Deposition Modeling)
- Assembly: Almost completely pre-assembled
- Size: 377 x 362 x 653 mm
- Weight: 8,9 kg
- Operation: 3.5-inch color touch screen
PRINTING
- Extruder: Dual Gear Bowden Extruder
- Print volume: 255 x 255 x 260 mm
- Accuracy: 0.1 mm
- Layer thickness: 0.1 – 0.2 mm
- Nozzle quantity: 1
- Nozzle diameter: 0.4 mm
- Max. nozzle temperature: 250 °C
- Max. print bed temperature: 110 °C
- Max. print speed: 150 mm/s
- Filaments: PLA, ABS, PETG, TPU
- Filament diameter: 1.75 mm
- Print bed: Mylar coating on spring steel, flexible, magnetic
- Print bed levelling: Automatic at 9 points
- Resume print: Yes
- Filament sensor: Yes
SOFTWARE
- Connectivity: Micro SD card, USB
- File formats: G-Code
- Slicer: Cura, EasyPrint, Repetier-Host
Check Price at:
Scope of Delivery
> Geeetech Mizar S
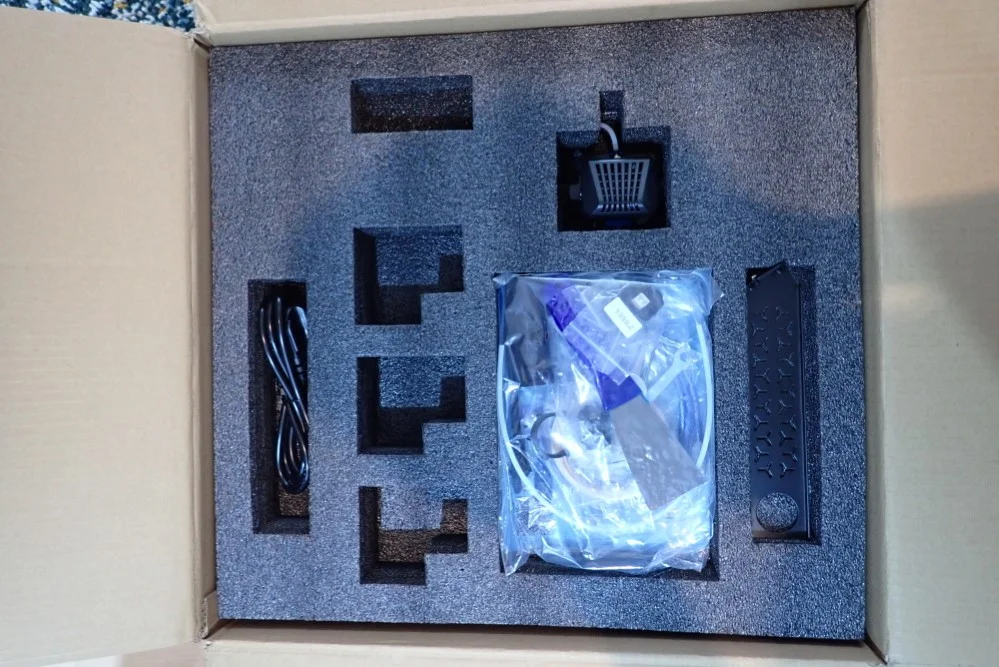
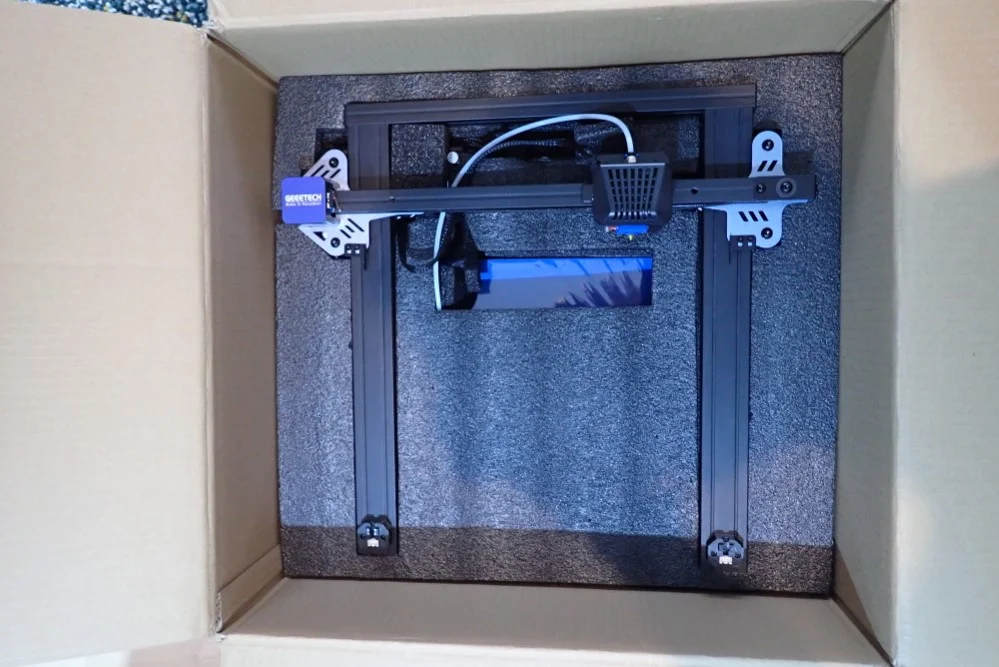
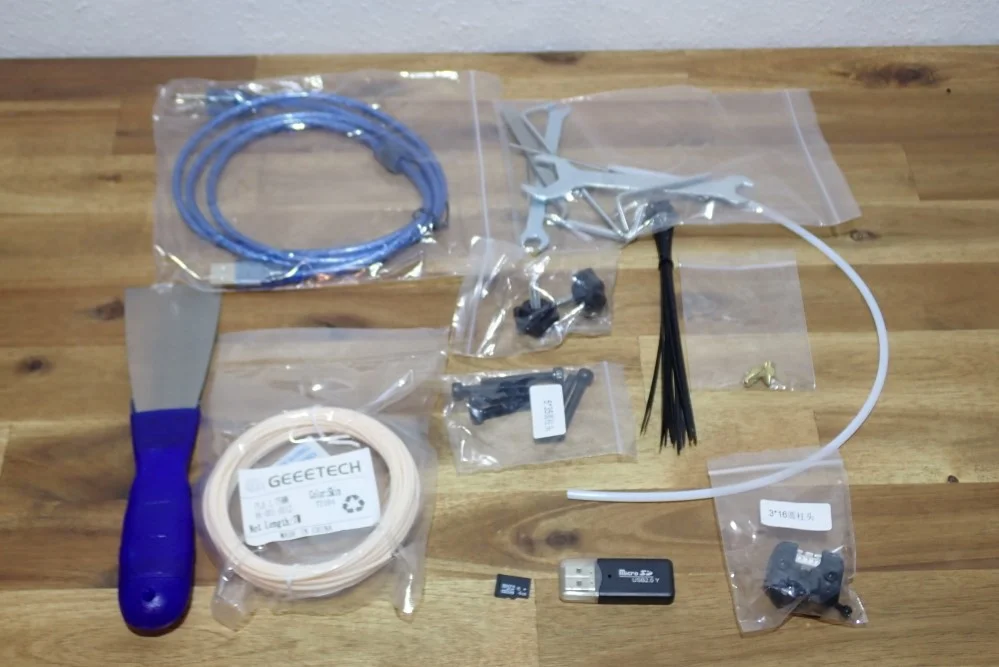
In addition to the printer and the tools needed to assemble it, you also get some filament and a micro SD card with a test object. This is great for beginners who may not have any experience with 3D printers. So the first test print is started only a few minutes after assembly.
The printer only comes with a small amount of PLA filament. So you should order more filament directly when you buy the printer. PLA filament is ideal for the beginning.
The following items are included with the Geeetech Mizar S:
- Pre-assembled 3D printer (base with print bed and display, XZ frame with print head and extruder, filament holder)
- Screws and tools for assembly
- Spatula for loosening print objects from the print bed (you will probably never need this, as the print bed is flexible and the objects come off better by bending the plate)
- A few spare parts
- Micro SD USB Adapter
- Micro-SD card with digital user manual, slicer software, drivers, troubleshooting guide, test models and instruction videos
Setup
> Geeetech Mizar S
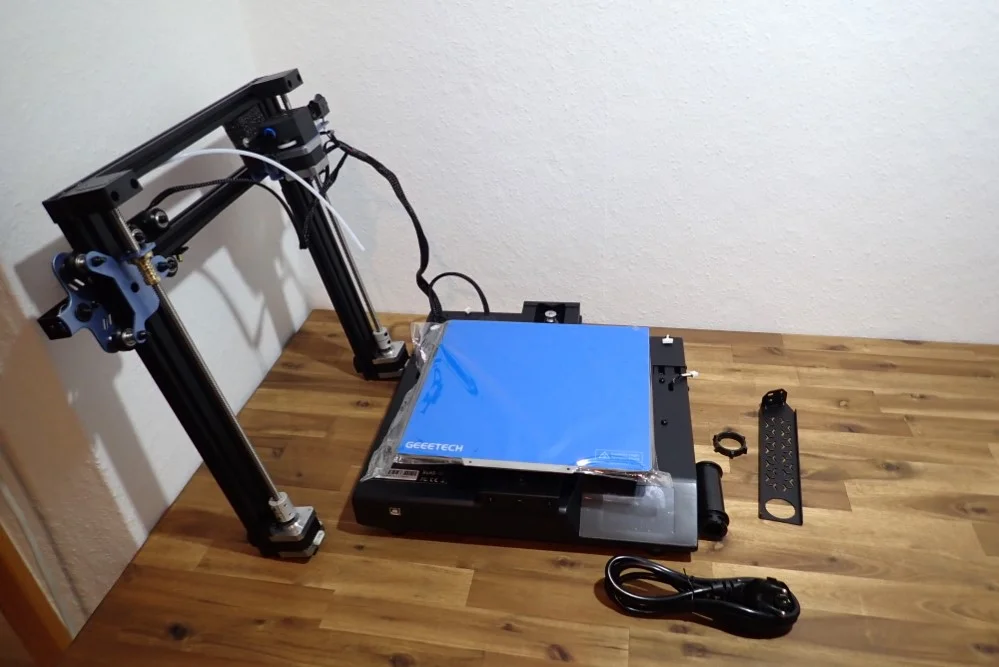
The setup of the Geeetech Mizar S is remarkably quick and easy thanks to the modular design and pre-assembled modules. The only thing that is difficult about the assembly is that the cables of the X-axis extruder are already connected to the motherboard, making it a bit awkward to lift both parts out of the package and place them on the bench or table.
Otherwise, the assembly consists only of mounting the frame to the base with four screws, screwing on the end stop of the Y-axis and mounting the filament holder. After that you only have to connect the remaining cables, which is simplified by the labeling of the cables.
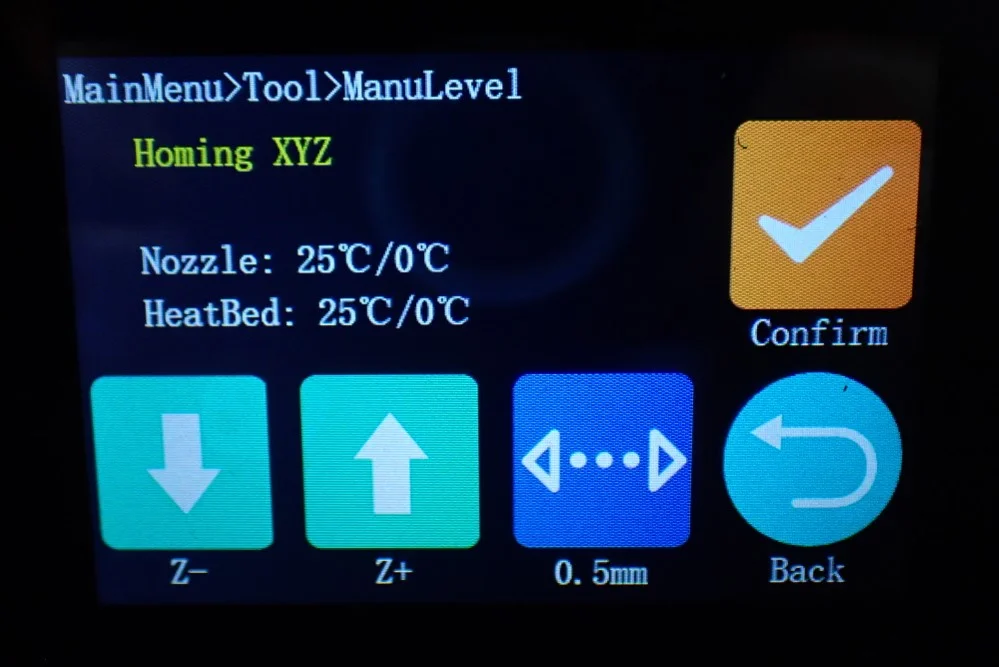
You can either level the print bed manually or automatically. With manual leveling, you also use the paper method, but you don’t have to adjust a screw under the print bed to find the correct tilt. Instead, you adjust the Z-offset at 9 points with a piece of paper. Basically, you try to adjust the distance via the menu so that you can move the piece of paper between the nozzle and the print bed with some friction (more about this in this article).
I myself have so far only used the automatic print bed levelling on the Mizar S and set the Z offset in the middle of the print bed with the paper method. In my case this was absolutely sufficient. I find this type of print bed leveling and design very convenient and perfect for beginners. Manual print bed leveling with rotary screws is often a source of frustration for those just starting out in the 3D printing hobby.
Check Price at:
Features
> Geeetech Mizar S
The Geeetech Mizar S is equipped with quite a few practical features which make the printing process extremely easy, especially for beginners. Especially the magnetic print bed with a very good print bed adhesion and the automatic print bed leveling should be mentioned. The only missing feature in my eyes is a direct drive extruder with which flexible filaments would be easier to print.
Dual Gear Bowden Extruder
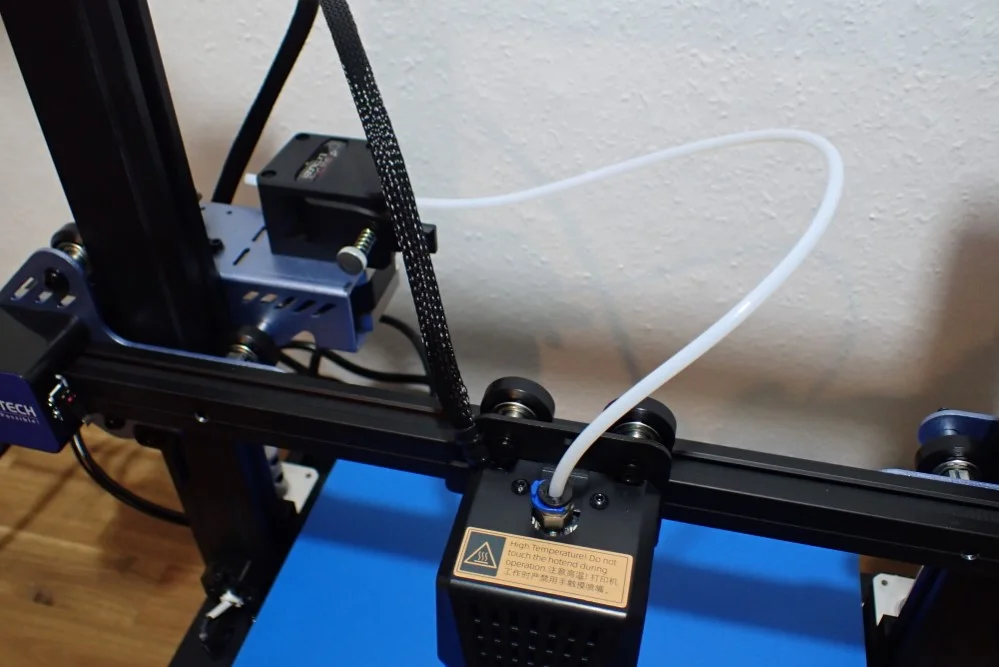
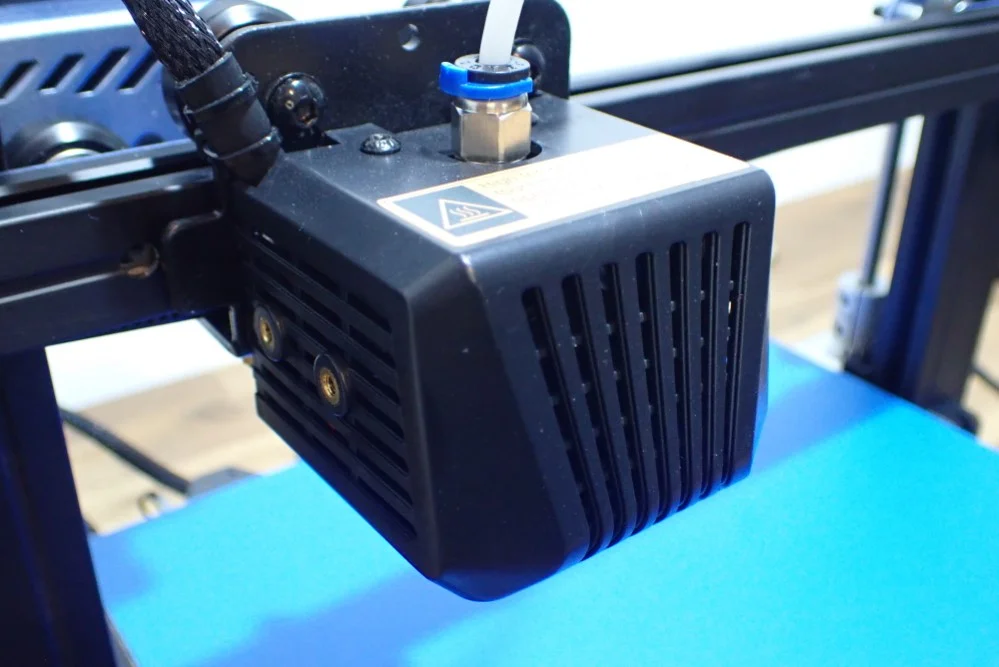
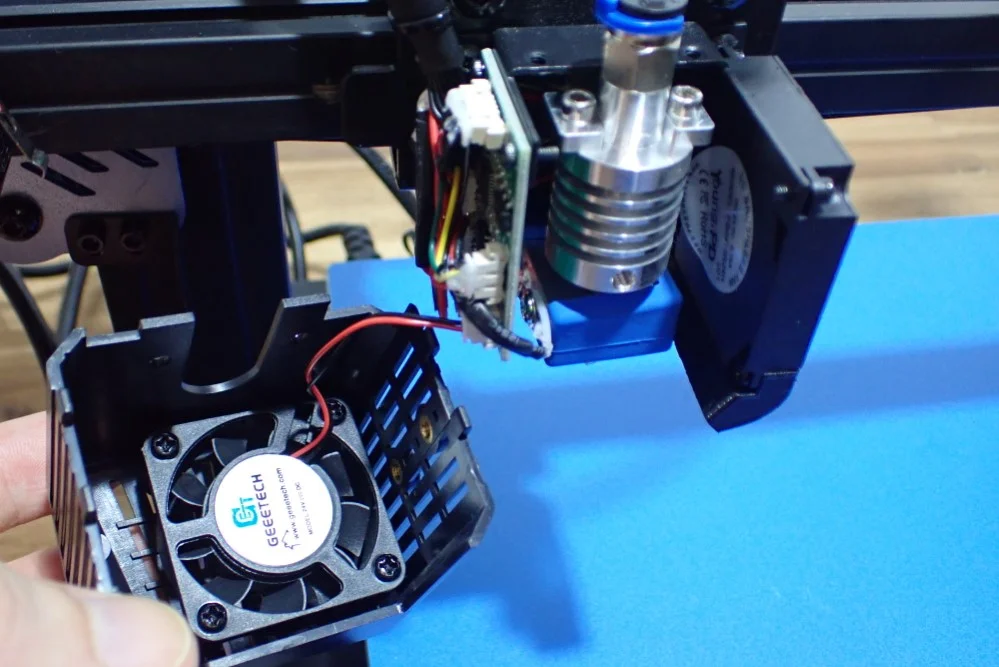
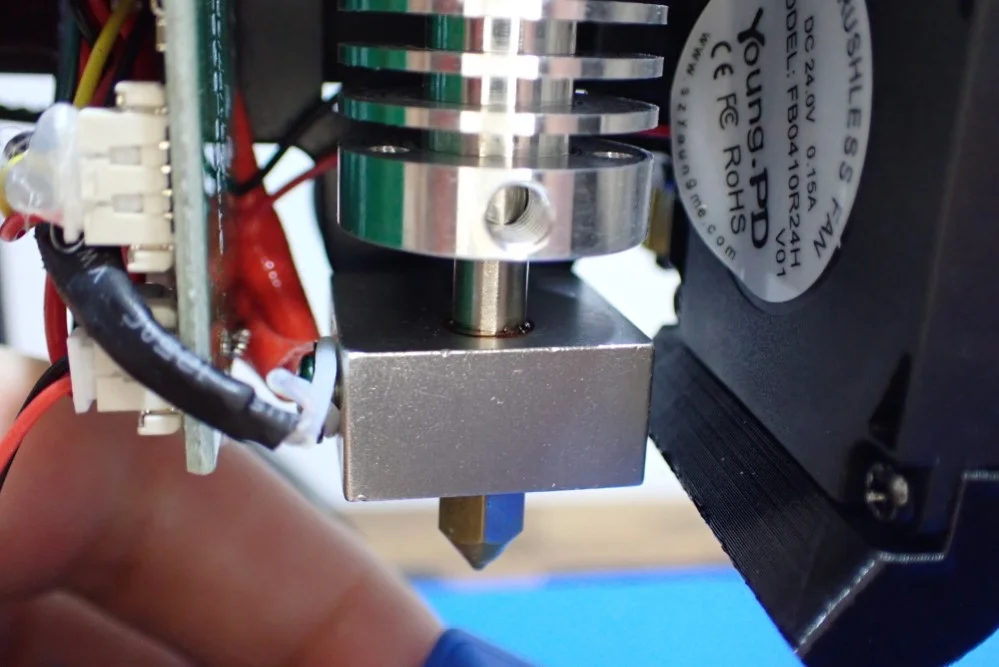
A Bowden extruder is a 3D printer extruder that uses a tube to transport the filament from the extruder to the hot end. This type of extruder is lightweight and compact in design.
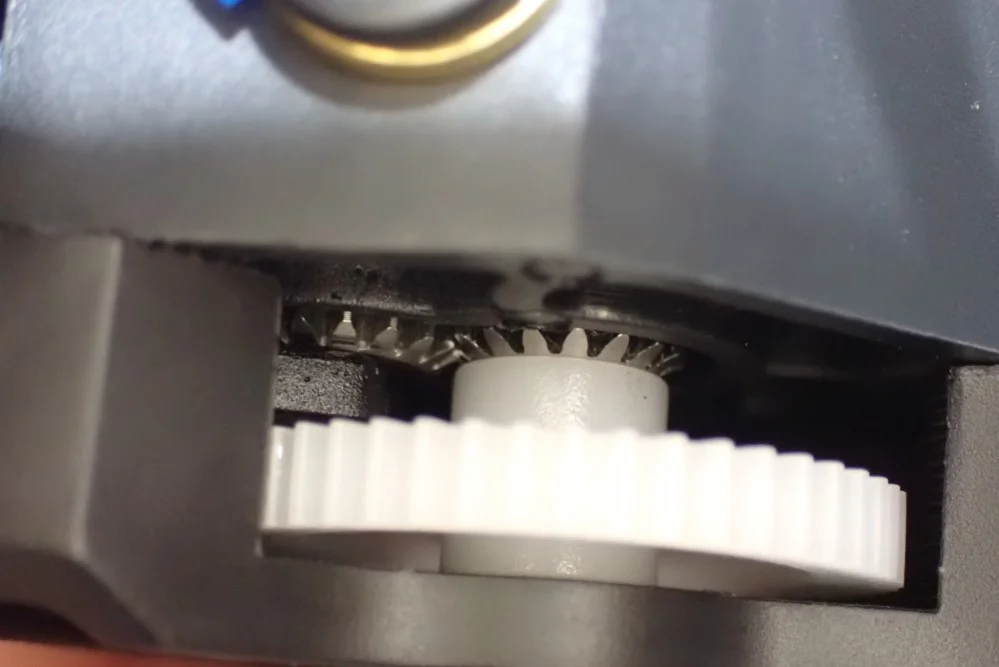
The advantage of these extruders is that the print head is very light, allowing higher speeds and generating less vibration. However, with most Bowden extruders it is very difficult to process flexible filaments as they can get tangled in the tubing on the way to the nozzle or the extrusion movement is not precise enough. The extruder of the Mizar S has two drive gears. This gives greater extrusion force and control over the filament than standard Bowden extruders with only one active drive gear.
It is somewhat easier to process flexible filaments, but not quite as well as with direct-drive extruders. In my eyes, it is not necessary that every 3D printer has a direct-drive extruder, because many users are very satisfied with PLA or PETG. Then the higher price for a direct-drive extruder would be wasted money.
Automatic Print Bed Leveling
The print bed of the Geeetech Mizar S doesn’t have any screws with which you can manually change the tilt. Instead, the print bed is mounted stationary and the print head has a built-in sensor that allows it to measure the distance to the print bed.
This gives you two ways to level the print bed:
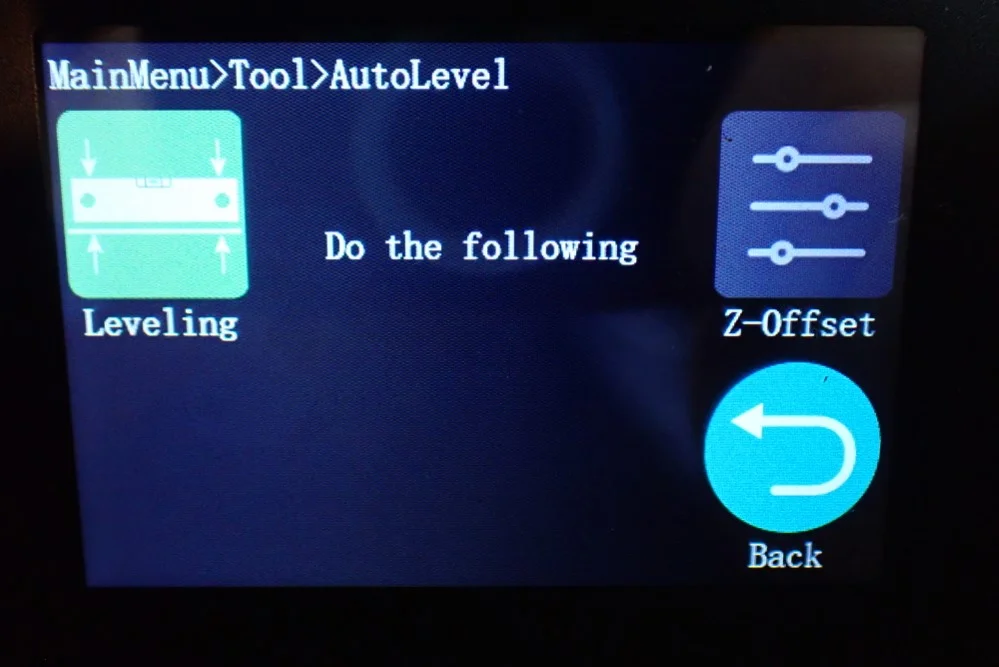
- Automatic leveling: The printhead automatically moves to 9 points on the print bed and independently measures the distance between the nozzle and the print bed.
- Manual leveling: The print head moves to 9 points on the print bed one after the other, where you manually adjust the distance between the nozzle and the print bed using a piece of paper.
Both methods allow the printer to remember the tilt of the print bed and automatically compensate for it when printing. Whether you use automatic or manual leveling, you must once again define the Z-offset in the center. This is also done with a piece of paper. The distance is set correctly if there is some friction between the nozzle and the print bed when moving the paper.
This type of print bed leveling is extremely simple and there is virtually no room for error. The only error that could occur is that you set the distance incorrectly in the Z-offset setting. You will notice this immediately with the print bed adhesion of the first layer. If the filament from the nozzle is only loosly placed on the print bed and not pressed, you will get a very poor adhesion. Then you have to adjust the Z-offset again and reduce the distance.
This print bed levelling is perfect for beginners and I myself find it very convenient as it is very fast and reliable. You also need to repeat the leveling very rarely, because the print bed is mounted immovable.
Supports PLA/ABS/TPU/PETG
Due to the excellent print bed adhesion it is also quite easy to print with most filaments. Only with flexible filaments you might have some problems here and there, because the Geeetech Mizar S only has a Bowden extruder and no direct drive extruder. This can cause extremely flexible filaments to get tangled in the Bowden tube between the extruder and the print head and/or the extrusion may become inaccurate due to the flexible nature of the filaments.
PLA: For PLA, the Geeetech Mizar S seems to be perfect. Since PLA is not flexible, the extrusion is accurate enough to achieve high surface details even with fine layer thicknesses. The print bed has a perfect adhesion for PLA and the release of the print objects is still easy thanks to the flexible magnetic print plate.
ABS: If you want to print often with ABS, you should buy a suitable 3D printer enclosure. The 3D printer tent from Creality should be just right. Since ABS warps during cooling and can also crack, it is important that the ambient temperature remains homogeneous and high during printing. You can achieve this with such an enclosure. Otherwise, you can still print smaller objects without an enclosure with the Geeetech Mizar S well from ABS.
PETG: You can heat the nozzle of the Geeetech Mizar S up to 250 °C. This is sufficient for most PETG filaments, so you can print PETG with the Mizar S very well. With PETG, however, pay close attention to the calibration of the retraction to avoid stringing (more on calibration later).
TPU: As mentioned at the outset, you may have difficulty printing TPU with the Geeetech Mizar S. TPU is relatively flexible, so there is a risk of it getting tangled in the tubing between the Bowden extruder and the print head, or compensating for extrusion movement due to its flexibility. This could make the extrusion inaccurate. That’s not to say you can’t process TPU with the Mizar S at all. I have not tried it with this 3D printer, but I have successfully printed TPU with Bowden extruders in the past. Just make sure that you reduce the printing speed a lot.
Magnetic, Flexible Print Bed
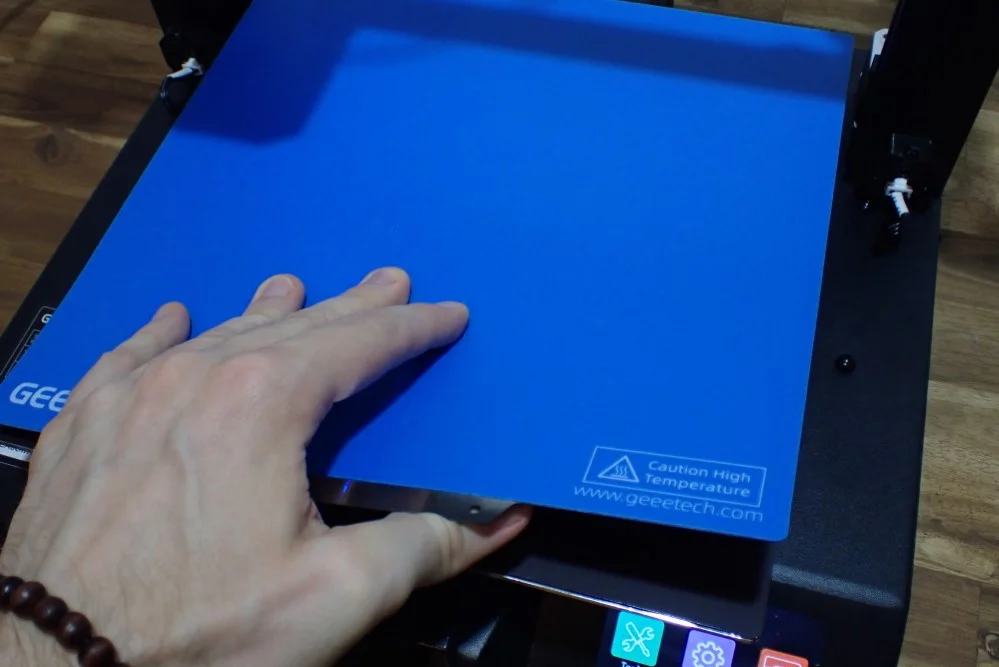
The print bed of the Geeetech Mizar S consists of a total of 4 layers:
- An aluminum hotbed, which is permanently mounted and heated from below
- A magnetic surface which was glued on the hotbed
- A spring steel plate which is flexible and attracted by the magnetic layer
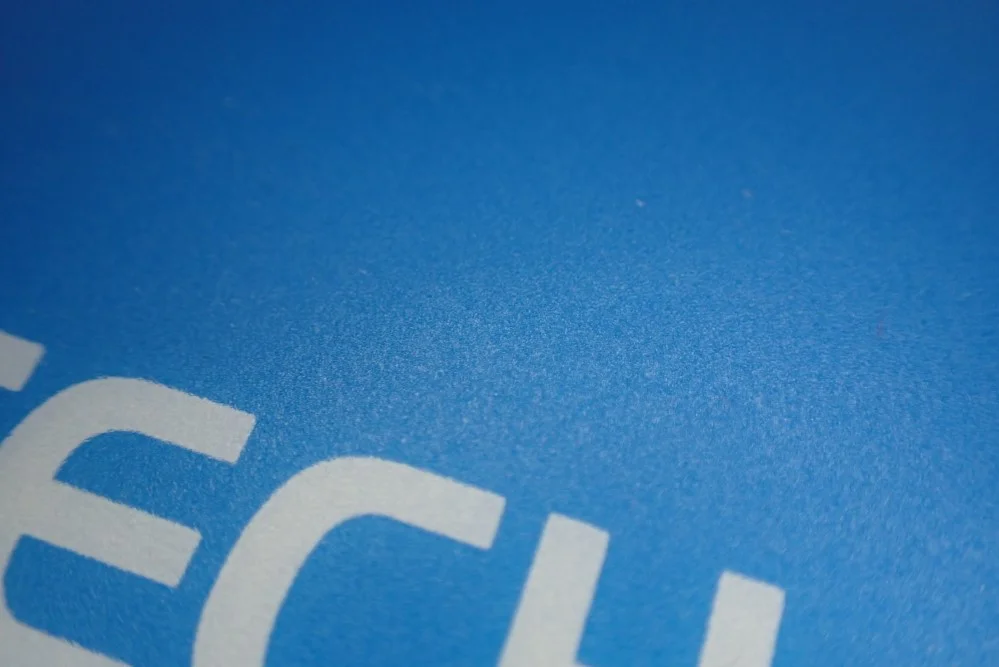
- Blue “Mylar” surface with excellent print bed adhesion for most filaments
Most 3D printers in this price range have textured glass surfaces as print beds. Usually, you only find flexible, magnetic print beds on more expensive devices. So it is a pleasant surprise that the Geeetech Mizar S has such a print bed.
I have used this 3D printer mainly with PLA and once with PETG and never had a problem with the print bed adhesion. With glass surfaces, I usually have to help with adhesives like Magigoo. But with the Mylar surface, the print bed adhesion is so strong that you wouldn’t be able to easily release the finished object if the print plate wasn’t bendable. The magnetic print bed is definitely one of the best features of the Mizar S!
Double Z-Axis
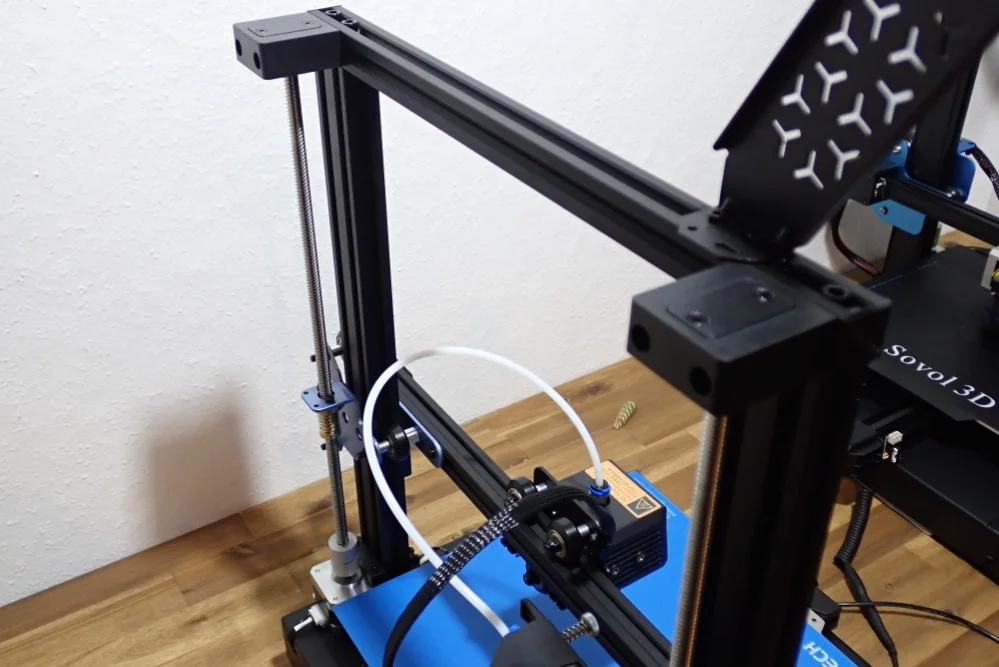
A dual Z-axis in a 3D printer increases accuracy because there is a stepper motor on each side of the Z-axis to move the X-axis in the Z-direction. This results in a more stable movement in the Z direction, which leads to higher accuracy when printing objects.
The Geeetech Mizar S has such a double Z-axis. This means that it is very accurate in the Z-direction and can also convert small layer thicknesses of 0.1 mm well.
Automatic Filament Feeding and Removal
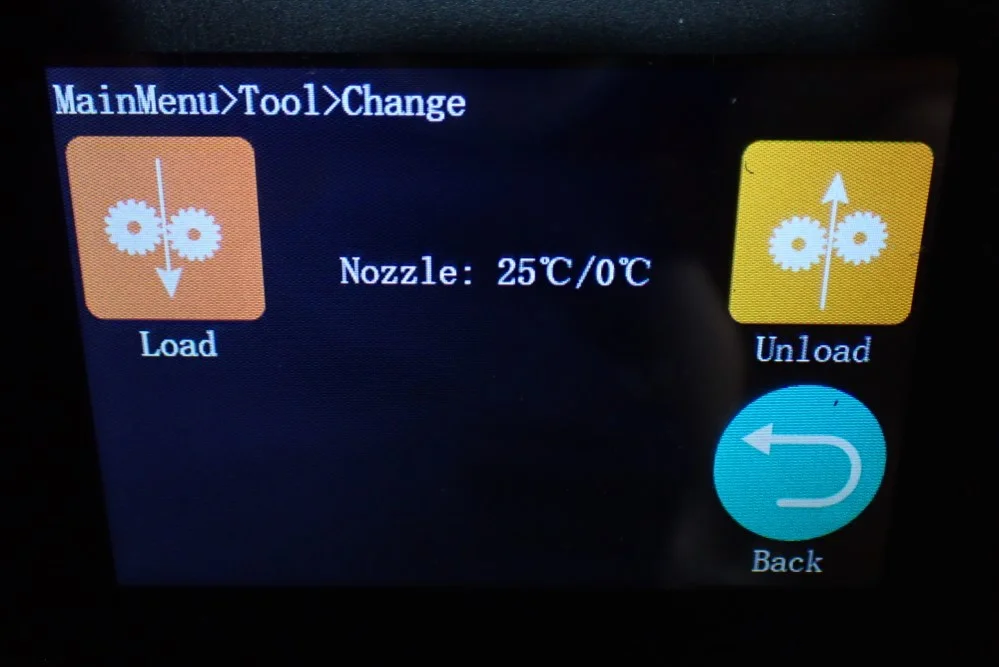

Filament loading and changing can be supported via the menu. You then only have to change the spool manually and thread one end of the filament into the filament sensor and the extruder. At the push of a button, the extruder will then feed the filament to the Nozzle. This menu allows you to adjust the temperature of the nozzle to the melting temperature of the respective filament.
For some users, this is quite a handy feature, but for many, it is rather superfluous, as they, like me, change and load the filament completely manually and set the temperature quite simply via the main menu.
Filament Sensor
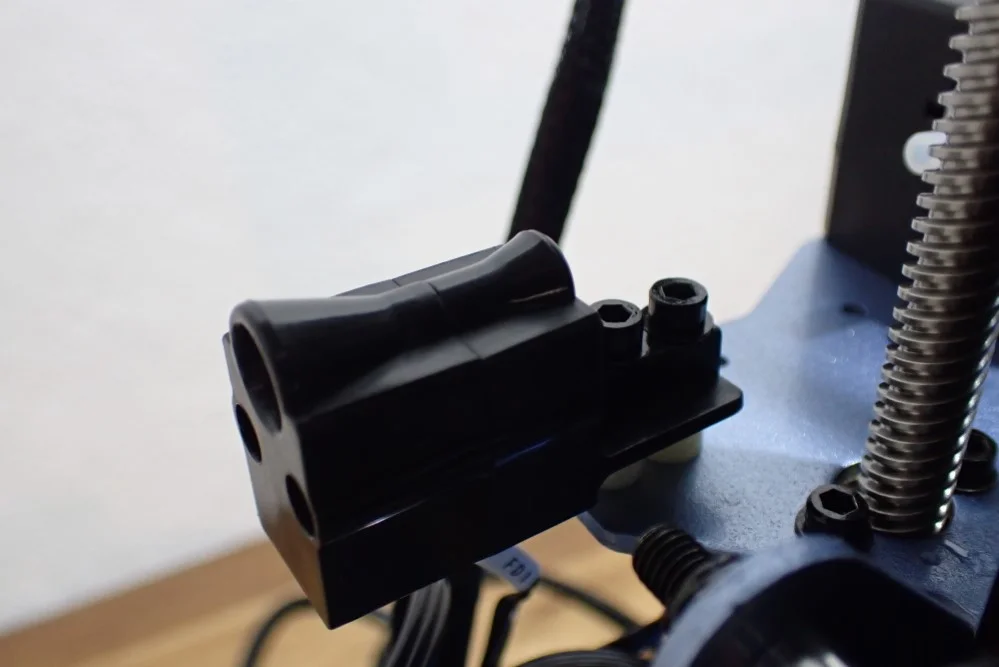
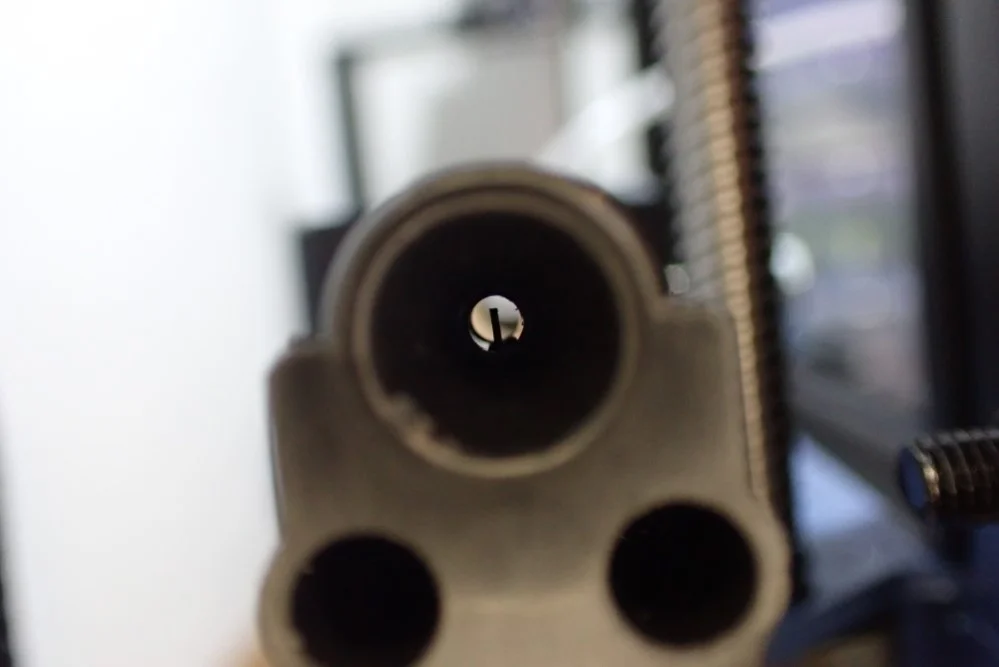
The filament sensor of the Geeetech Mizar S is placed directly in front of the extruder. Unlike other filament sensors, threading the filament is very easy and it cannot get caught inside.
The sensor continuously checks whether there is still filament available or not. As soon as the filament runs out, the printer pauses its job so that you can change the filament. This way you avoid a ruined 3D print where the printer eventually prints without filament in the air and you have no chance to reload new filament.
Resume Print
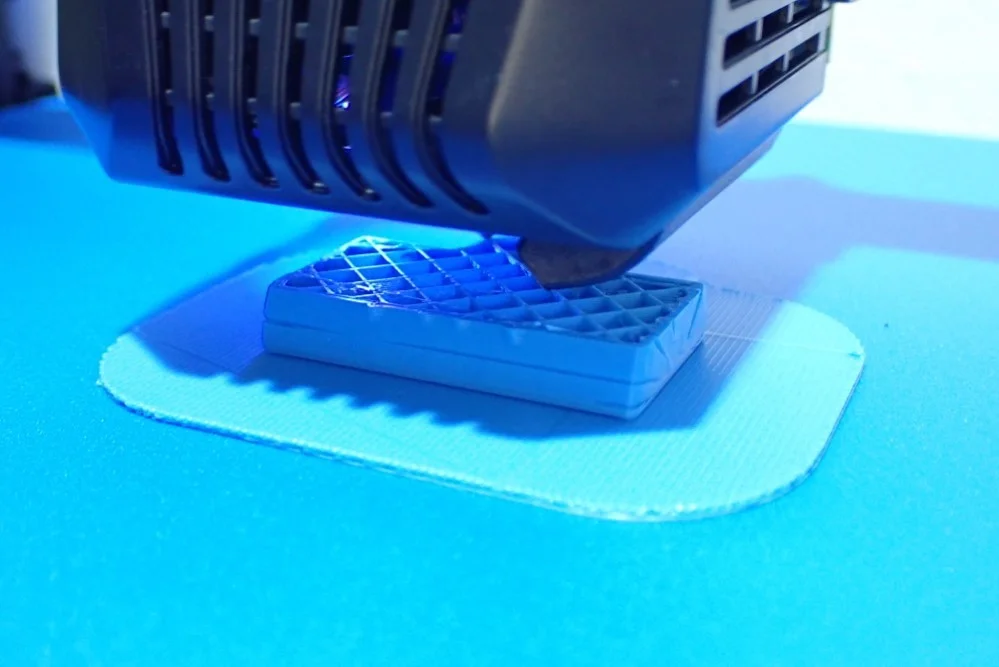
Fortunately, the resume print feature is now a standard feature on all newly released 3D printers. Through this feature, the printer pauses the job as soon as its power supply is no longer supplied with electricity. With the remaining power, it remembers the progress of the print and resumes it at the exact point where it was interrupted.
This way, your prints can no longer be ruined by unexpected power outages, which is especially beneficial in areas with an unstable power grid.
3.5-Inch Touchscreen
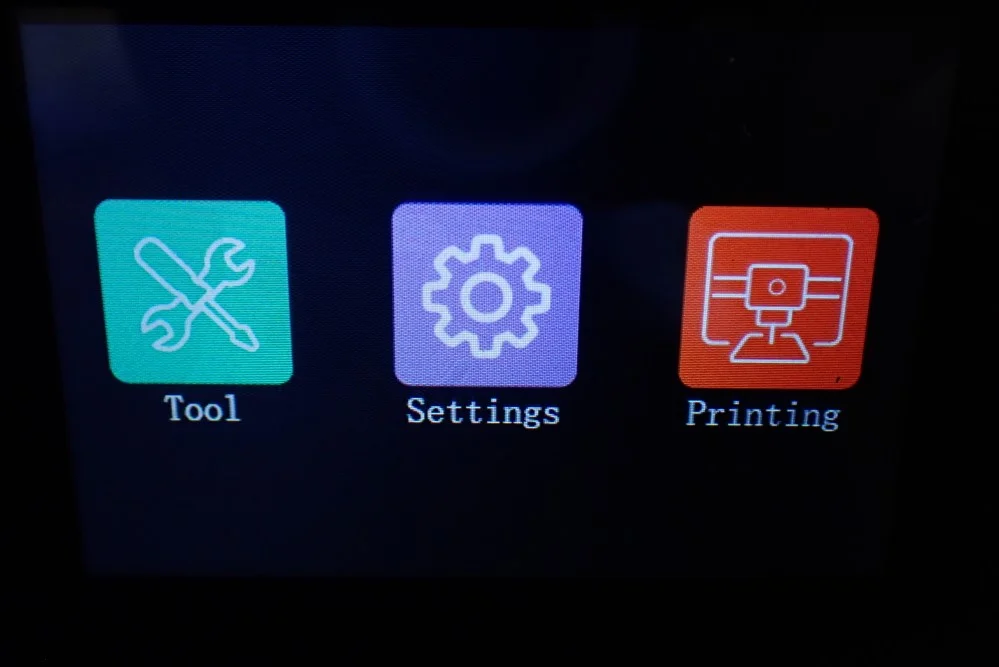
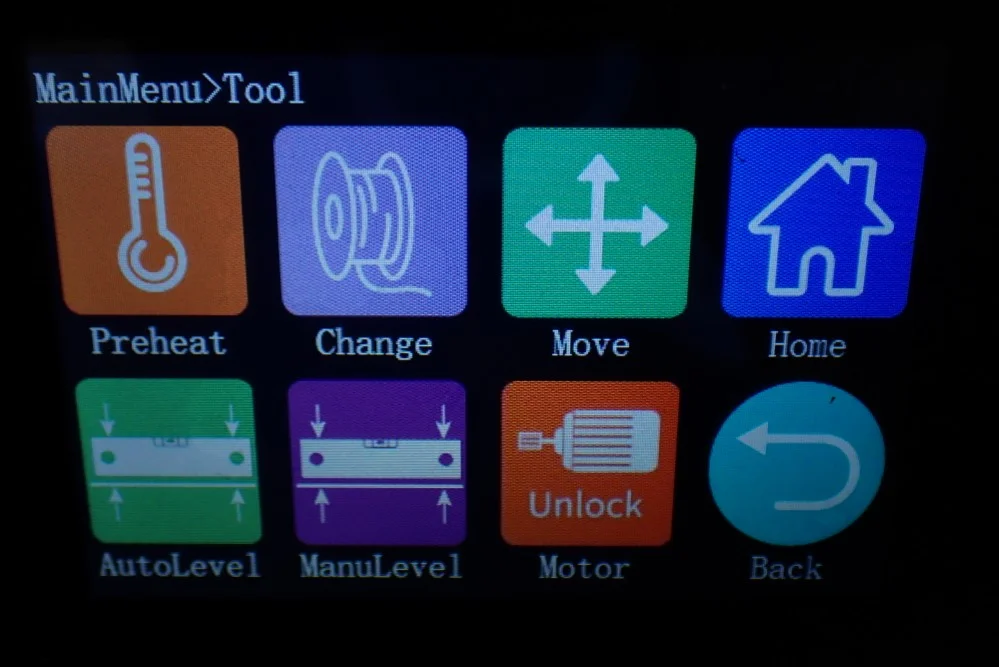
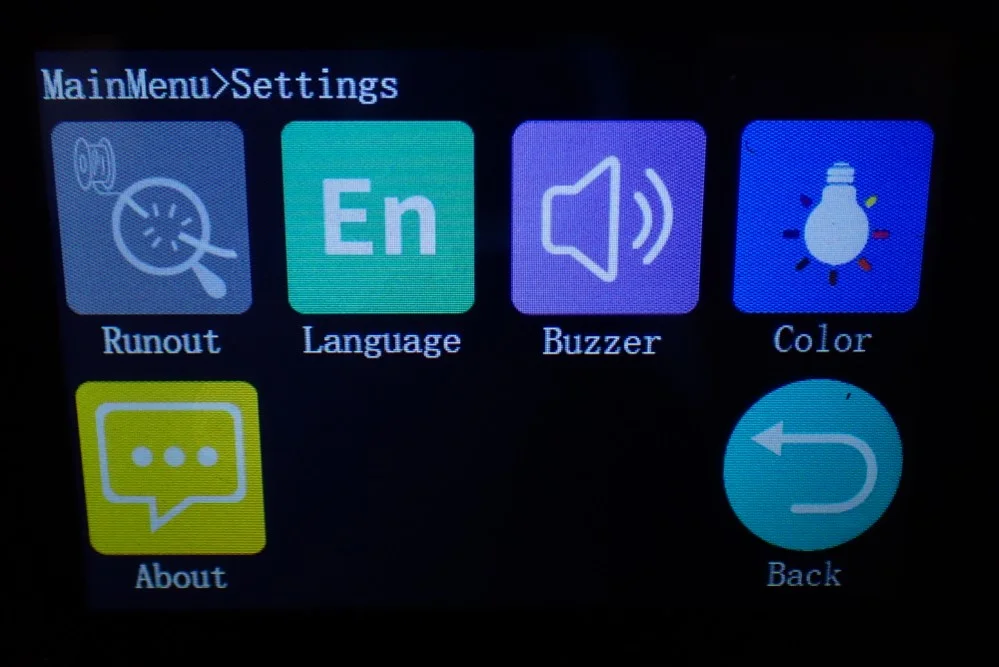
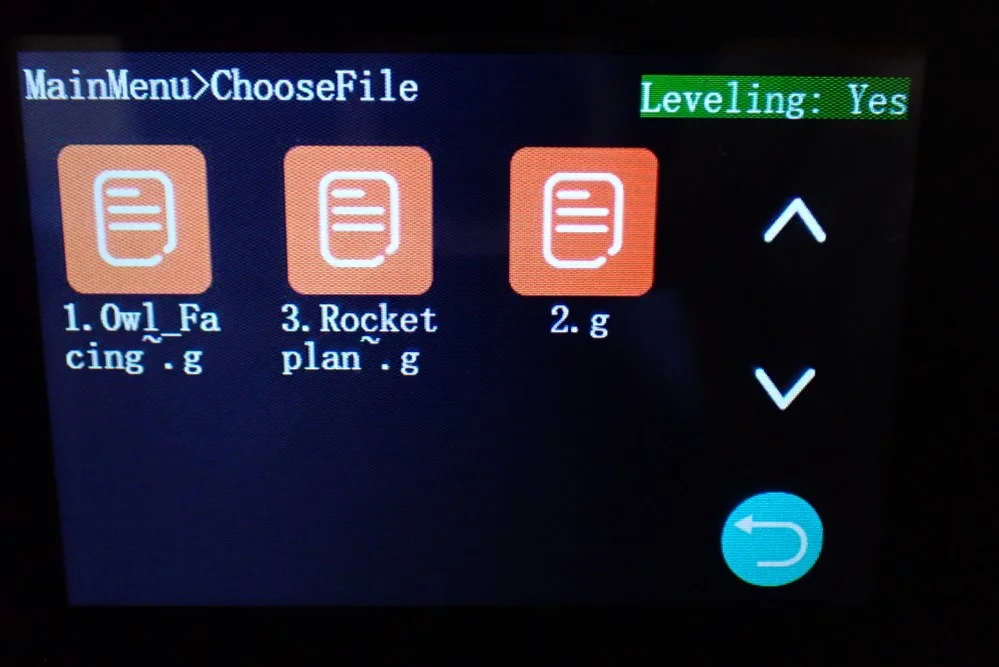
The touchscreen of the Geeetech Mizar S is fixed in the base of the 3D printer. Its size is sufficient to see all controls and texts in a comfortable size. In addition, the menu is very intuitive, so you can find all important settings within a few clicks or touches.
What would still improve the usability of the menu would be small thumbnails for the files to be printed. The Mizar S only displays icons for the files and the name, which is of course sufficient.
Belt Tensioner
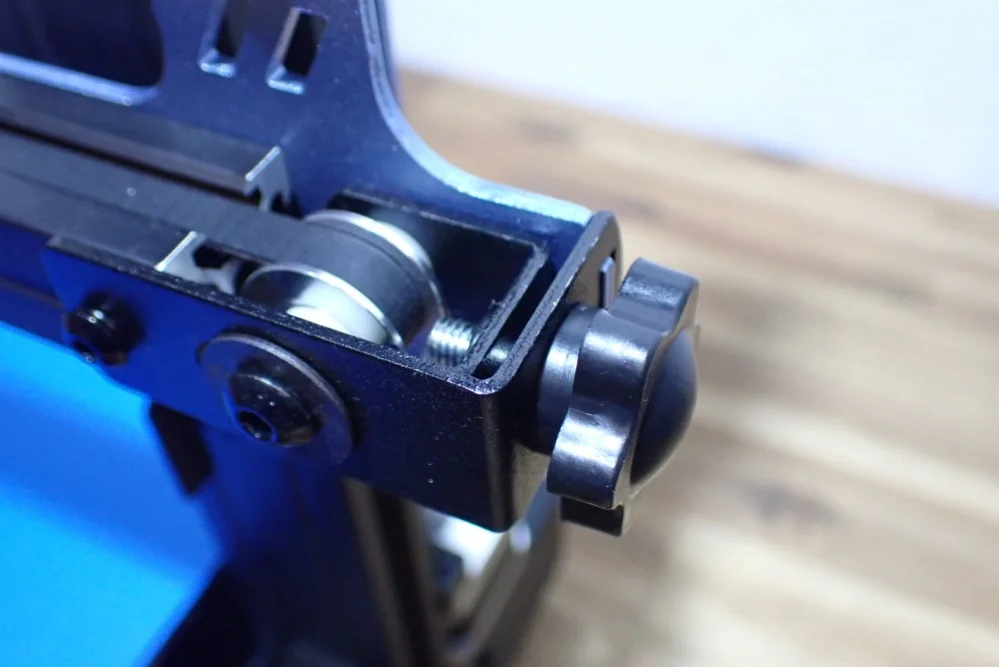
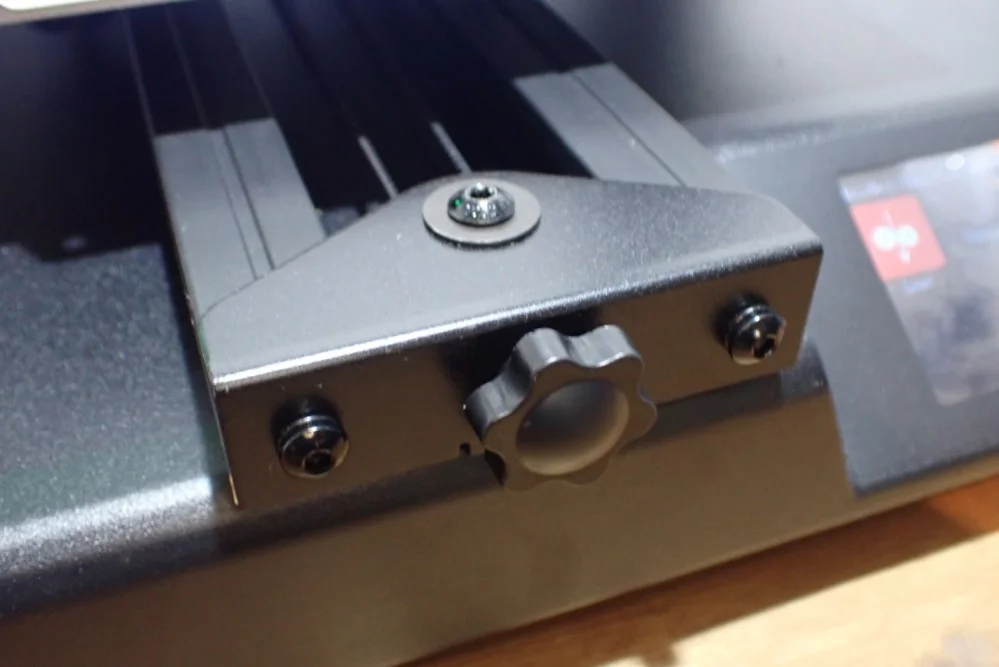
Like most other 3D printers in its price range, the Geeetech Mizar S also has belt tensioners for the Y- and X-axis belts. With low-budget 3D printers, you have to semi-disassemble the respective axis to re-tighten the belt. This is done within a few seconds due to the convenient turn screws.
However, the turn screws also tempt you to set the tension too high, leading to print errors and cracks in the belts. The correct tension is reached when the belt starts to make a high-pitched noise when you flick it with your finger like a guitar string.
32-bit silent motherboard with TMC2208 stepper motor drivers
The quiet 32-bit motherboard of the Geeetech Mizar S is also a must-have in this price range. With the quiet stepper motor drivers, the motherboard is inaudibly quiet. The only noise you’ll hear is the fans on the print head and the quiet movement of the print head during printing.
The powerful motherboard also allows a quick menu to be displayed on the touch screen and supports automatic print bed leveling.
LED Light Next to the Nozzle
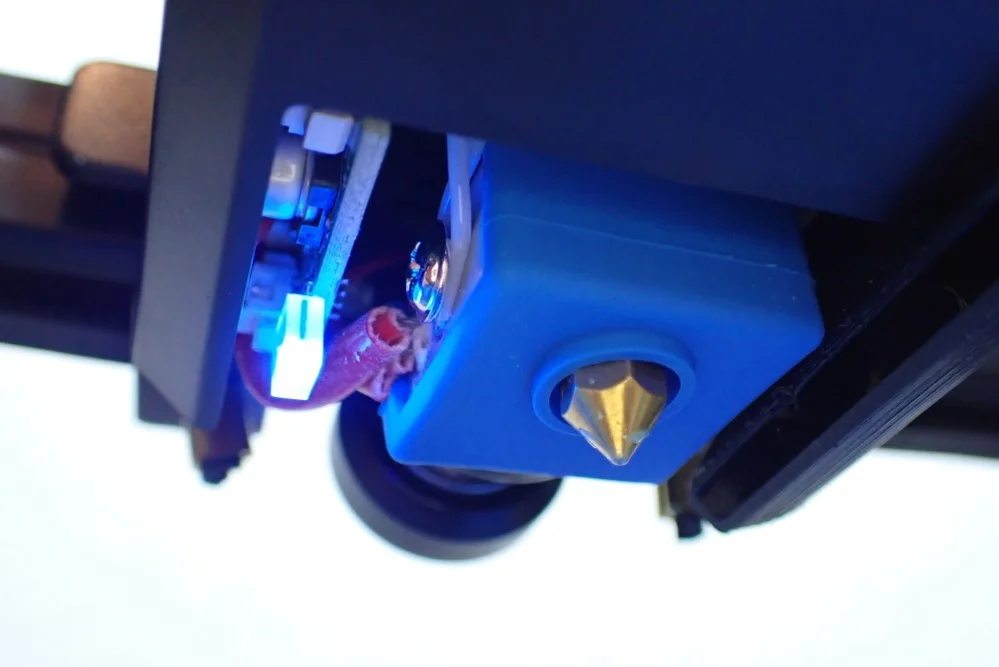
Besides the previously listed must-have features, there are a few nice-to-have features that the Geeetech Mizar S has in store. Among them is this LED light, which is installed directly next to the nozzle in the print head and illuminates the print. You can set the light to either a solid white light or alternating colors.
For monitoring the print, this is of course very practical, because it can often be very dark under the print head, especially with the first layer. So you can still see exactly whether the first layers were printed well or you still have to adjust something.
Check Price at:
Operation
> Geeetech Mizar S
User interface: The handling of the Geeetech Mizar S is greatly improved by the easy-to-use touchscreen. The operation is much more pleasant than with buttons and the touchscreen is very sensitive to your touches.
Printing: Printing with the Mizar S is a breeze. Once you’ve sliced your print object, all you have to do is load filament and you’re ready to go. With the excellent print bed adhesion of the Mylar surface and automatic print bed leveling, very little to no trial and error is required to get the first layer to adhere well.
Print bed adhesion: In all my tests, I never had to artificially increase the print bed adhesion with adhesives or other aids. Even with very small objects, the first layer adhered perfectly. You will rarely need a raft or brim here – even if the test object on the micro SD card has one.
Heating Times
> Geeetech Mizar S
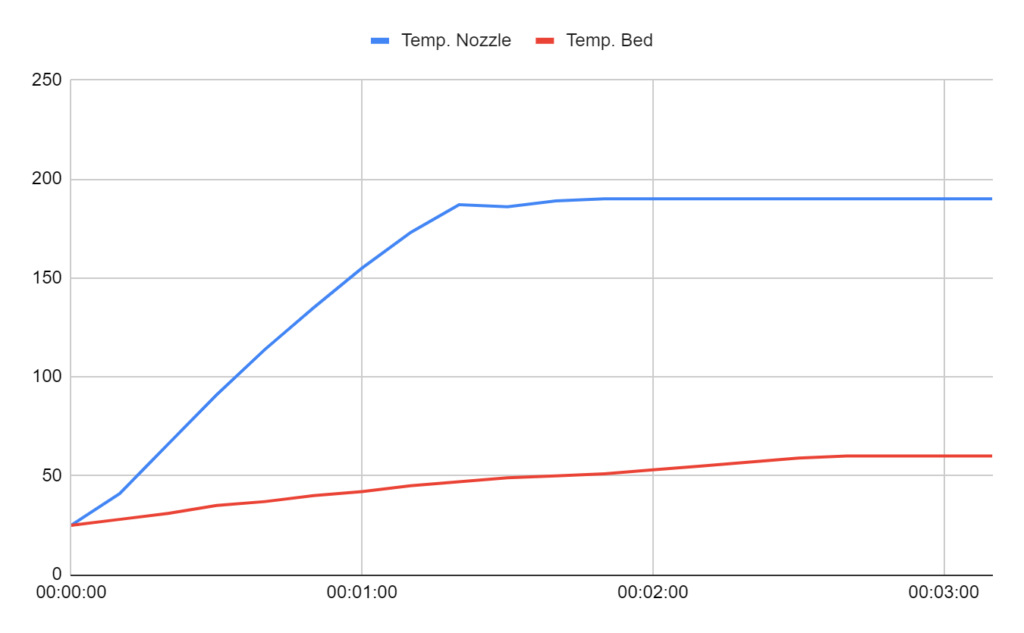
The Geeetech Mizar S reaches the standard temperatures for PLA (190 °C for the nozzle and 60 °C for the print bed) after about 2.5 to 3 minutes. This is not really slow or fast and quite normal for this type of print bed.
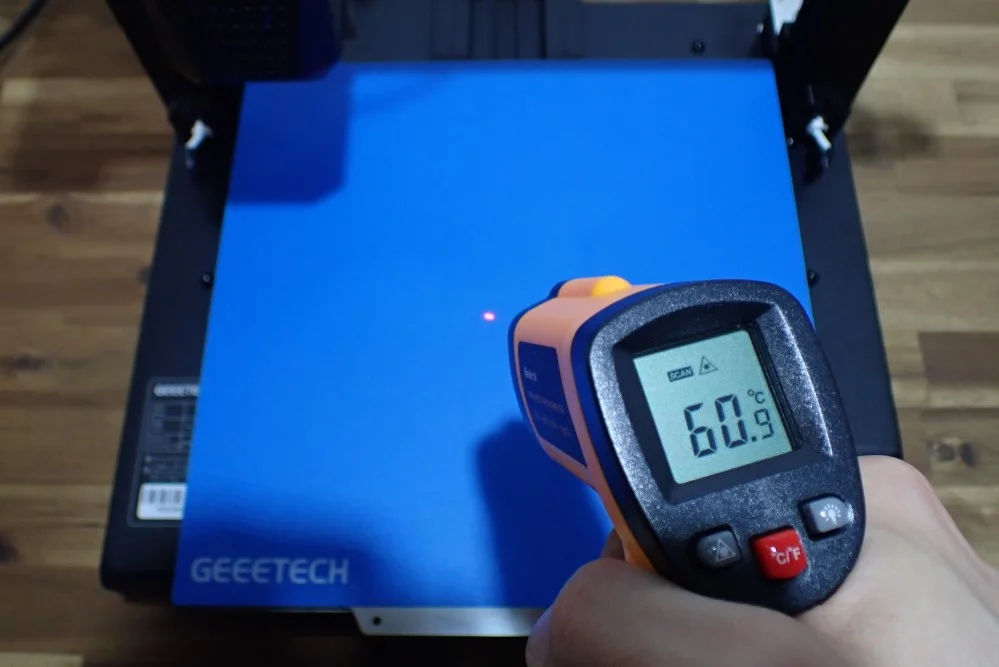
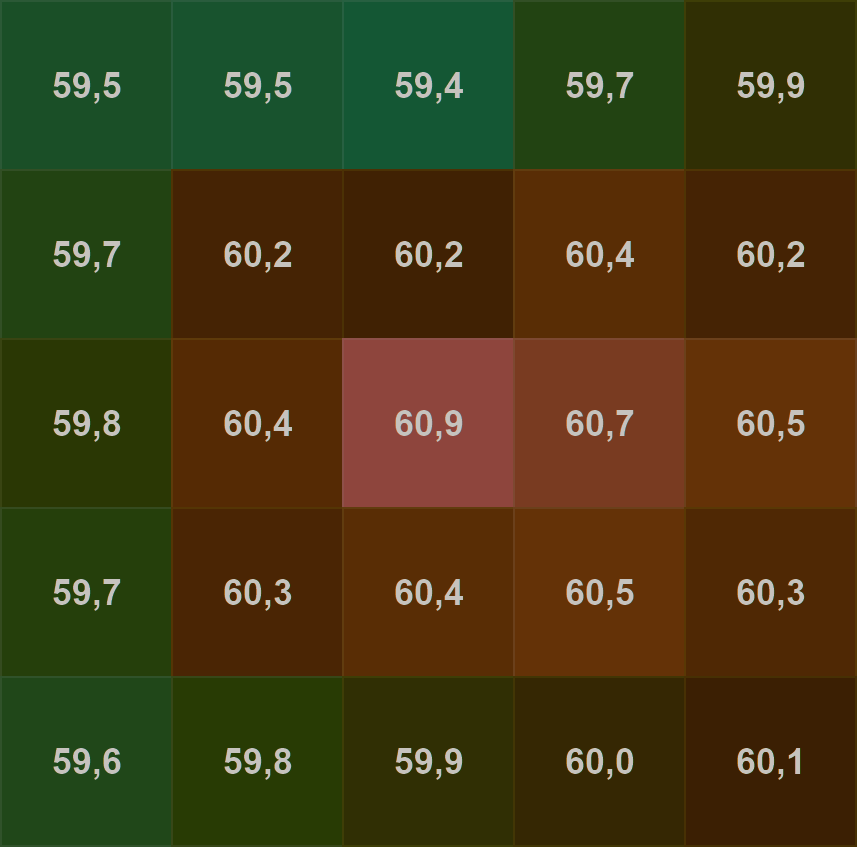
However, you should wait a few more minutes before printing, especially if you are printing with filaments that have difficulty with print bed adhesion. The temperature homogeneity of the print bed is relatively good, but the print bed needs some time to establish it. If you start printing too quickly, you may experience poor first-layer adhesion with filaments like ABS.
Noise Level
> Geeetech Mizar S
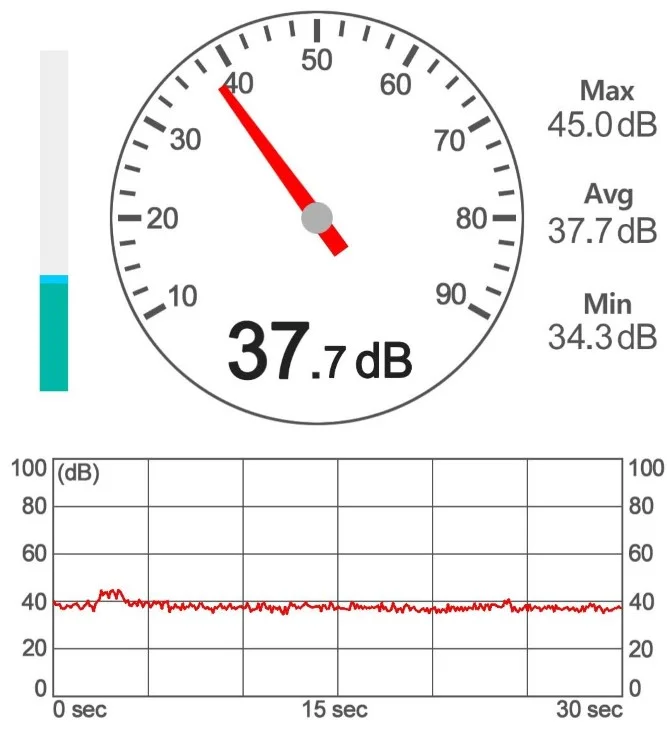
The Geeetech Mizar S is relatively quiet compared to other 3D printers in this price range. I measured the volume at a distance of about 30 cm from the print head with an average of 38 decibels. This is comparable to a quiet conversation at the other end of a room.
With this low noise level, you can set up the printer in your office and work at the same time without being disturbed. While this is not a good idea with most filaments because of the unhealthy particles and fumes that are released during printing, it is theoretically possible. Most importantly, this low noise level means that you won’t hear the printer when it’s working in another room.
Power Consumption
> Geeetech Mizar S
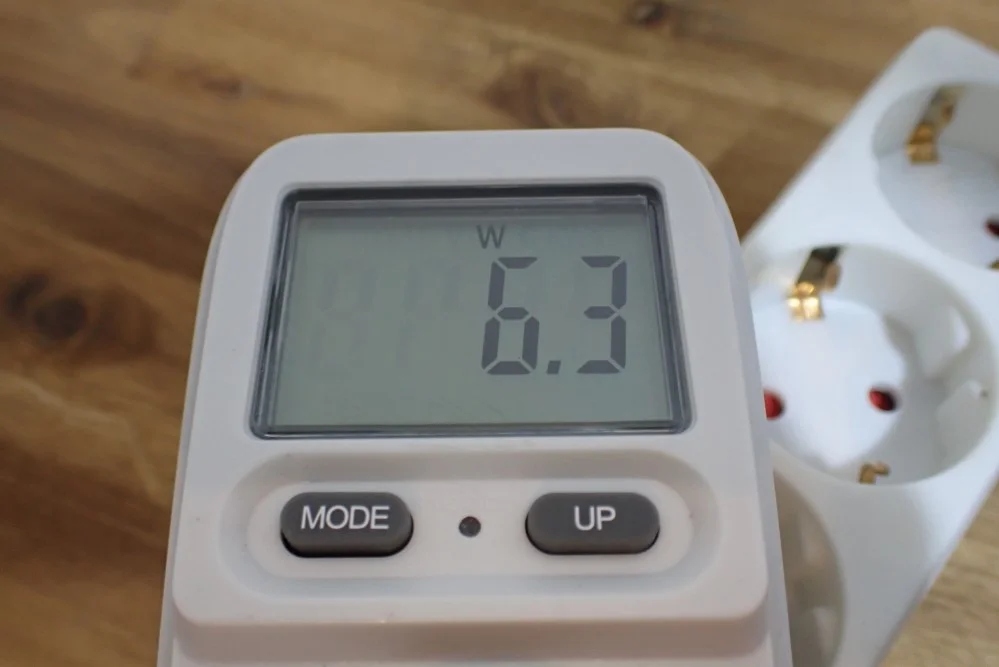
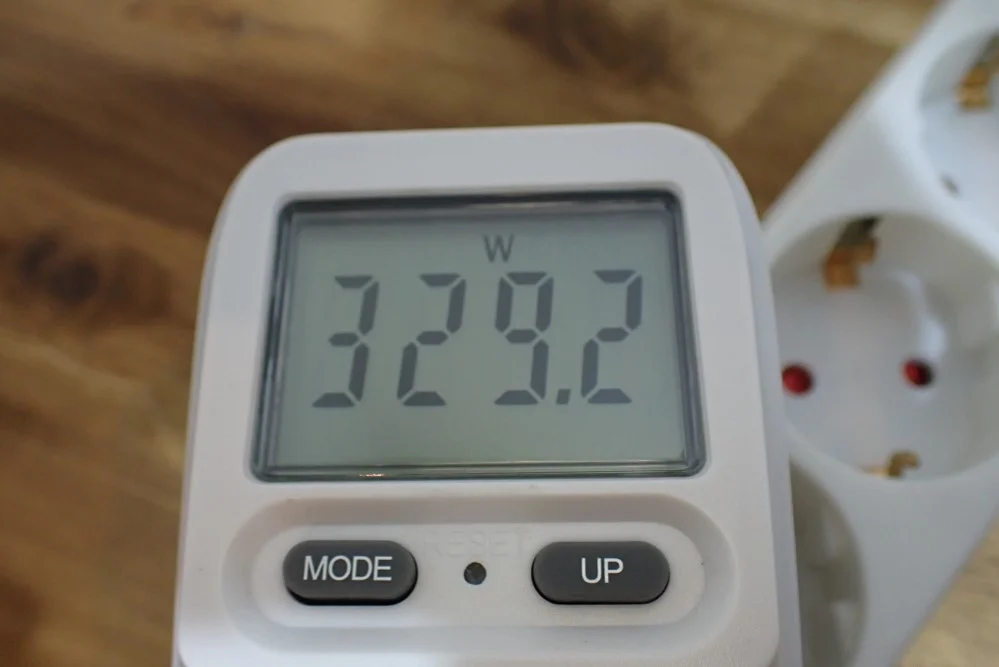
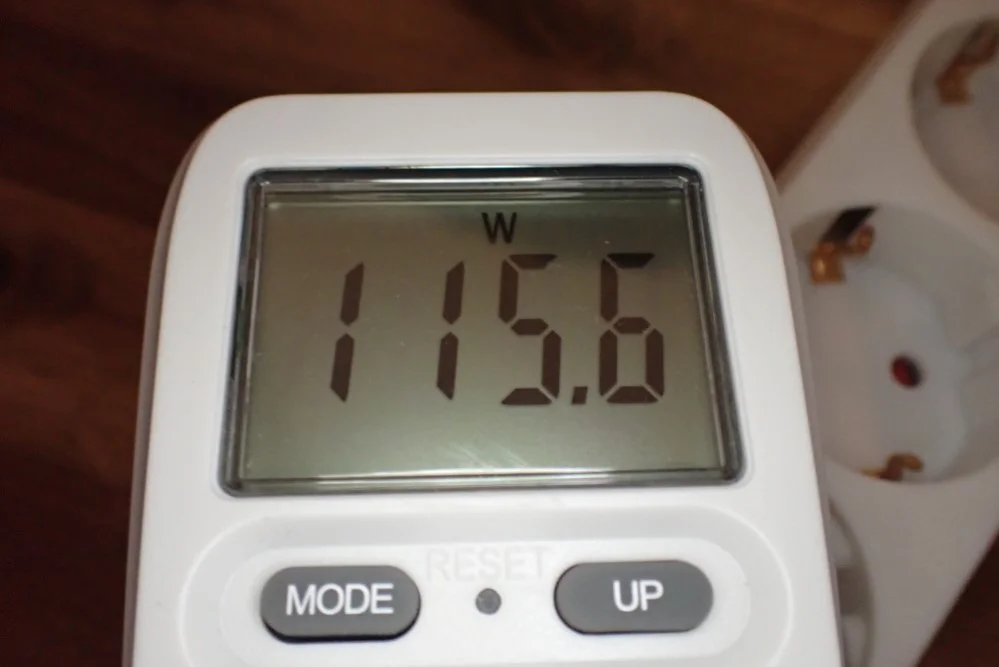
As with most other 3D printers, the power consumption during the heating of the nozzle and the print bed is quite considerable. The Geeetech Mizar S consumes over 300 watts when heating everything up. However, both components are heated up very quickly.
In standby mode, it consumes only 6 watts and during printing the power consumption varies between 90 and 120 watts. This power consumption is far below that of a toaster or coffee maker. It’s also less than most PCs use (150 to 250 watts). So if you use the printer frequently, and perhaps run it overnight, you won’t have to spend a fortune on the electricity bill.
Print Speed
> Geeetech Mizar S
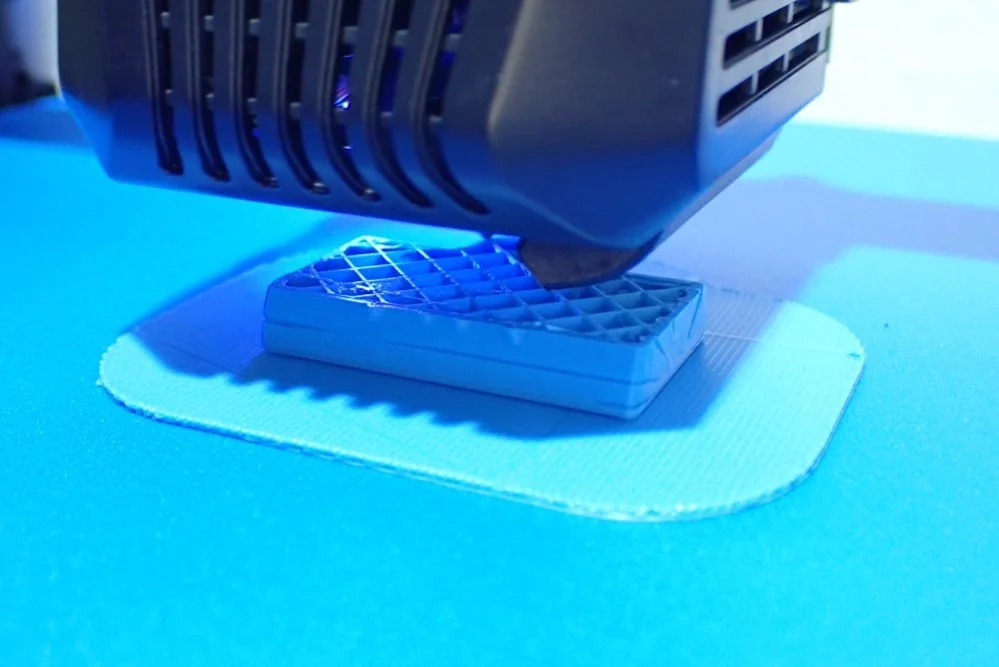
The Geeetech Mizar S uses quite common print speeds of 40 to 60 mm/s. However, the movement speed of the print head can be much faster. However, to avoid vibrations during printing, the print speed is always lower than the movement speed.
Due to the Bowden extruder, the print head is very light and can be moved quickly. So you can set the movement speed here quite high without getting disadvantages in the print quality.
Slicer
> Geeetech Mizar S
The Geeetech Mizar S is compatible with many slicers, including the popular and free Cura slicer. However, it is often the case that there is no pre-built default profile in Cura for the particular 3D printer being used. This doesn’t mean you can’t use the Mizar S with Cura! You can create your own profile and calibrate the most important print settings.
Temperature Calibration with the Geeetech Mizar S
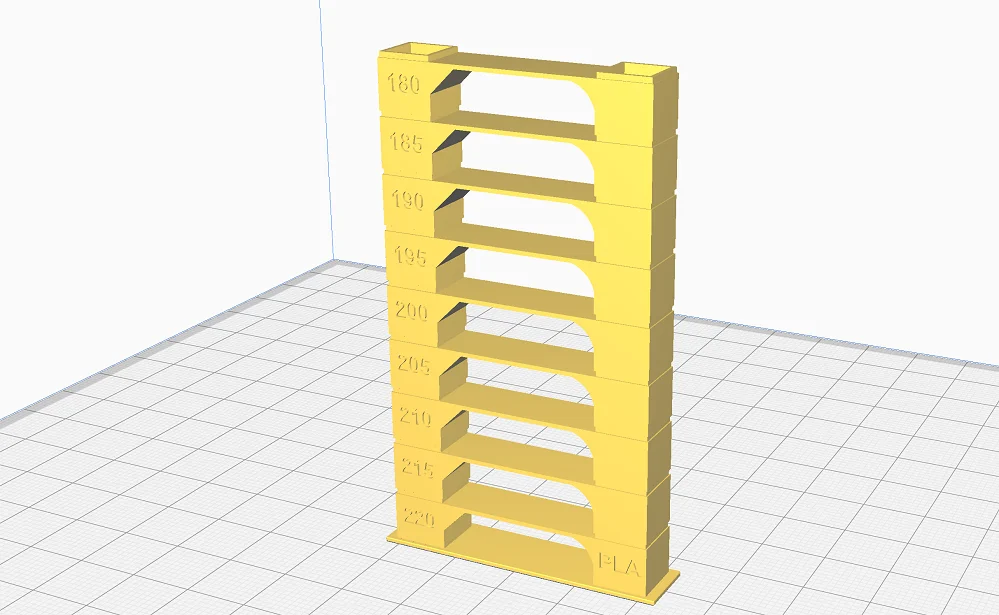
To calibrate the temperature of the Geeetech Mizar S, a temperature tower is the best choice. You can find several variations of these calibration objects on portals like Thingiverse. There is also the “Calibration Shapes Plugin” in Cura with many different calibration objects, including a temperature tower.
These towers are designed to provoke various printing errors such as stringing or bad bridging behavior. In addition, they are divided into several levels where the printer uses a different printing temperature depending on the height/level. You can see immediately after printing at which temperature the filament is best printed.
Flow Rate Calibration with the Geeetech Mizar S
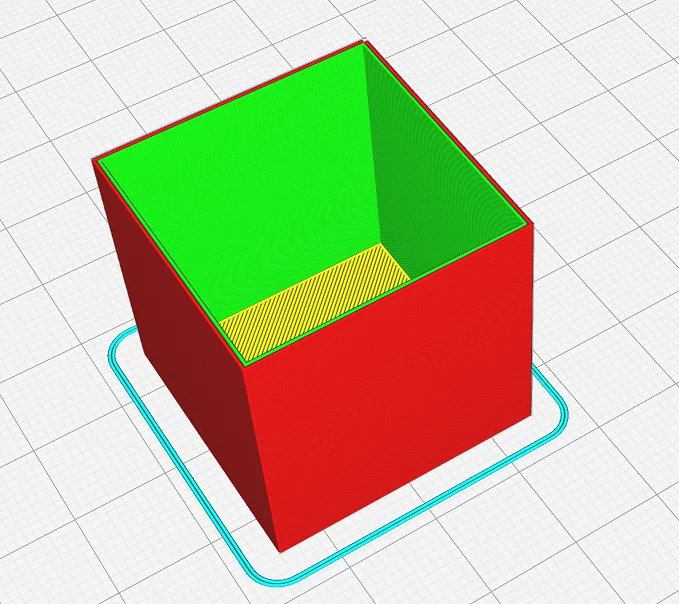
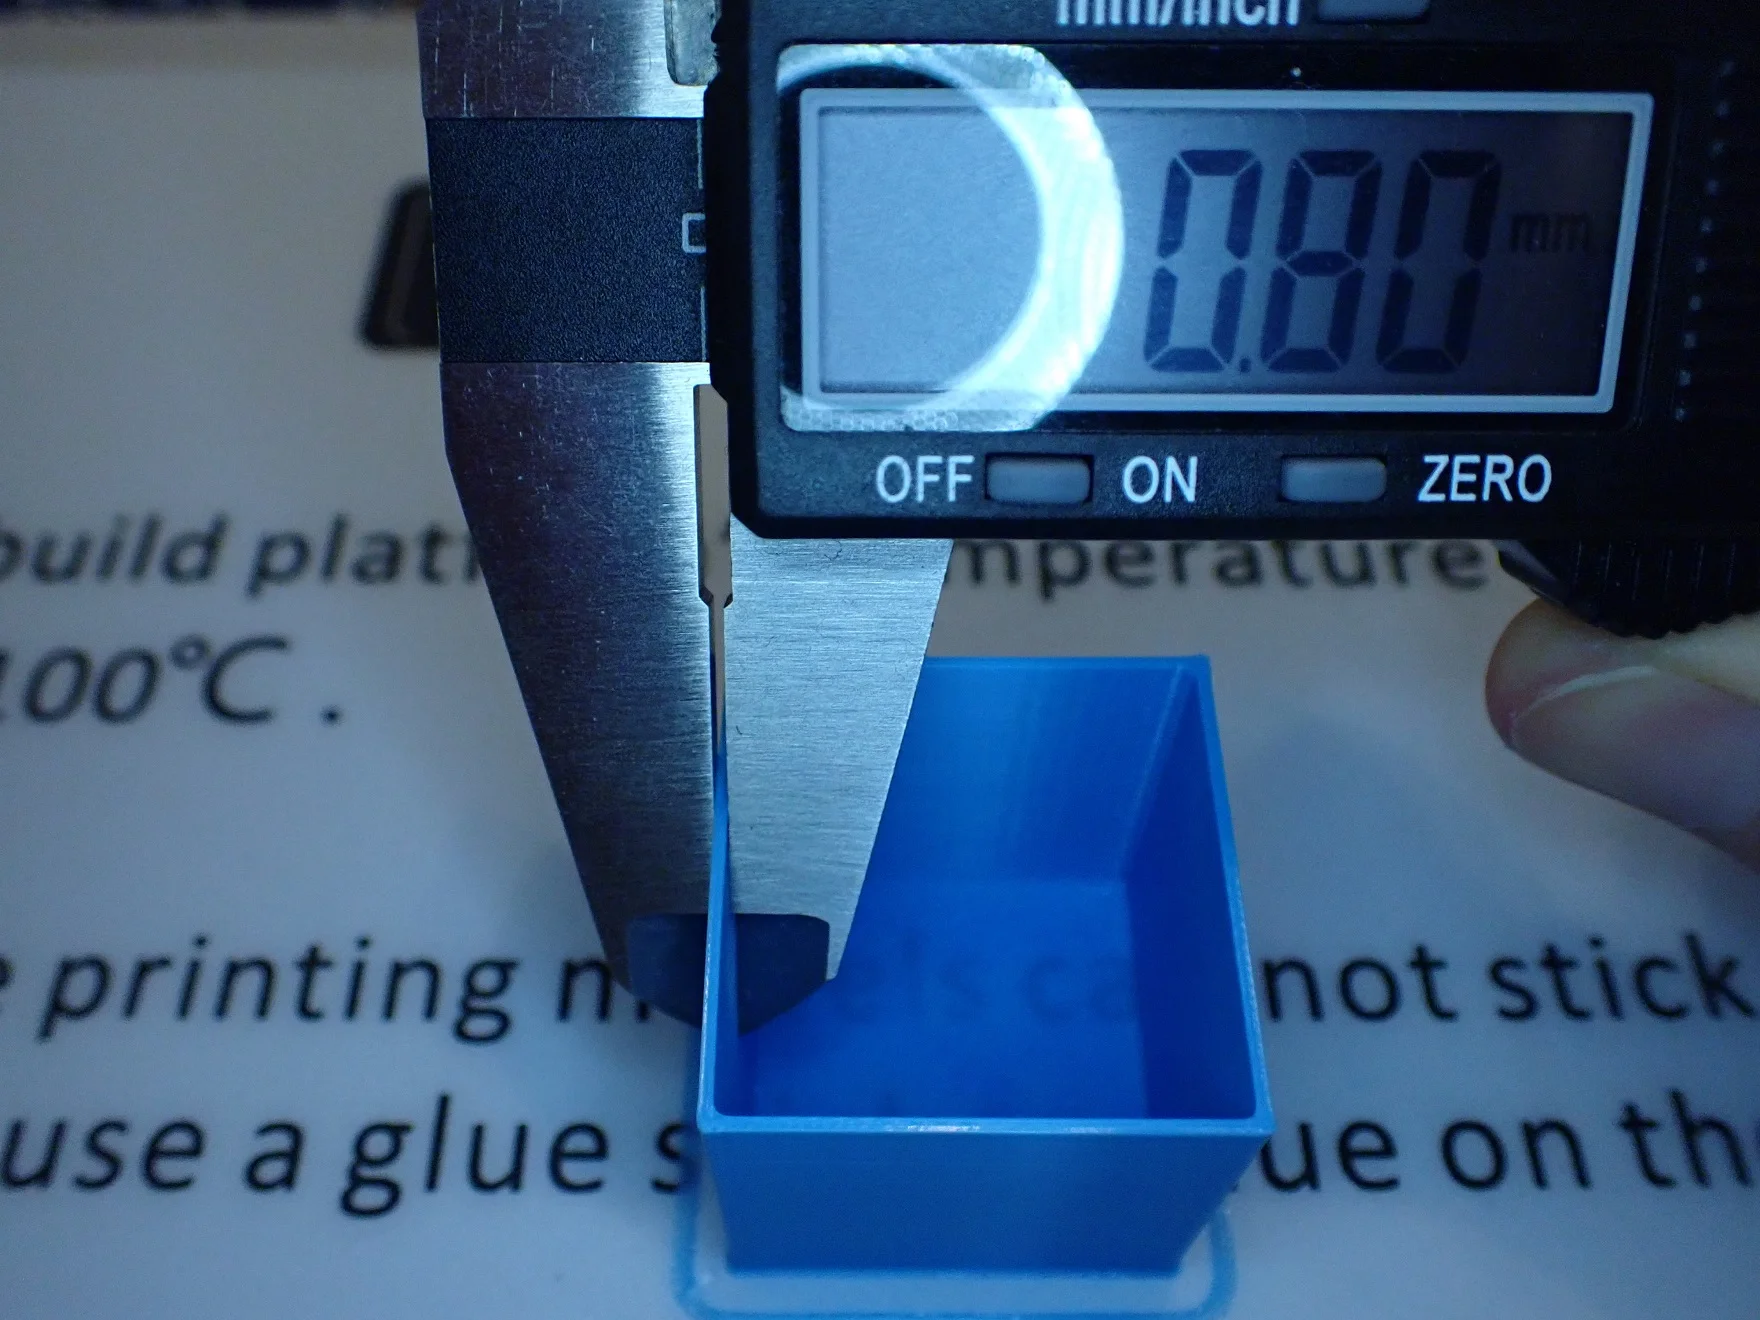
The flow rate is relatively easy to calibrate. All you have to do is compare the width of printed lines with the theoretical line width in the slicer. The best way to do this is with a hollow calibration cube. Just print it without infill and without top layers, so you can measure the wall thickness with a caliper afterward.
Depending on whether the wall thickness is too high or too low, you must then adjust the flow rate in the slicer. If you increase the flow rate, the lines will become wider, if you decrease it, they will become narrower.
Retraction Calibration with the Geeetech Mizar S
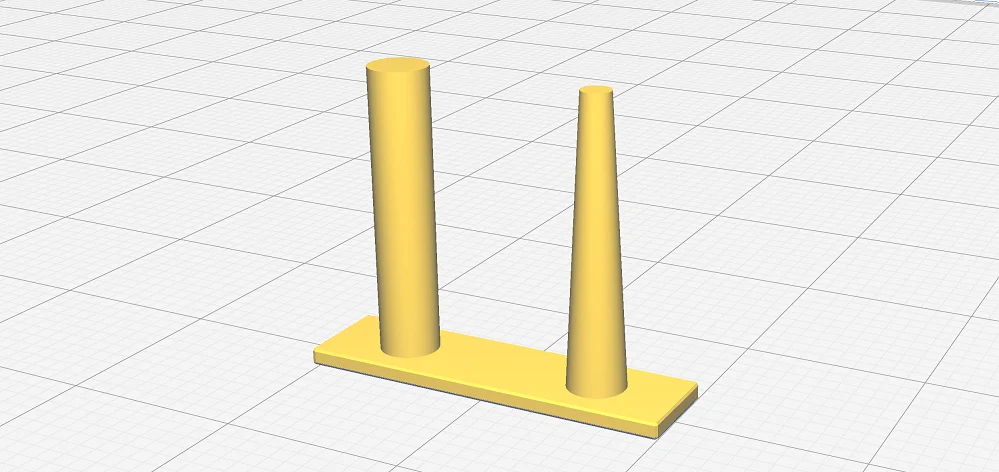
There is also a suitable calibration object for retraction in the Calibration Shapes plugin. It is very small and consists in principle only of two single columns that are printed simultaneously. If the retraction is not set correctly, stringing occurs between these columns or the columns are not printed correctly due to over- or under-extrusion.
The retraction settings are divided into the retraction distance and the retraction speed. You should only ever change one of these values and then print the object again. Since it’s so small and doesn’t use much filament, printing is done in a few minutes and calibration doesn’t take too long either. Once you find the right retraction settings, hopefully, you won’t see any stringing or other extrusion problems.
Check Price at:
Print Quality – Practical Test
> Geeetech Mizar S
To test the print quality of the Geeetech Mizar S I printed three objects from PLA and one from PETG. The Mizar S is made for these two filaments and I expected good results. This expectation was confirmed!
Owl
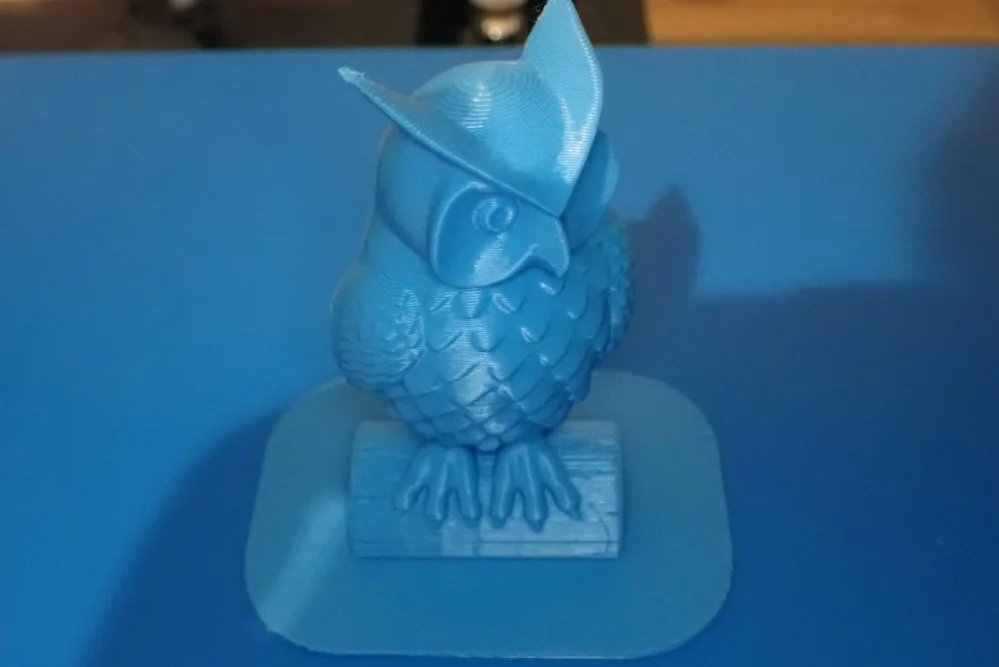
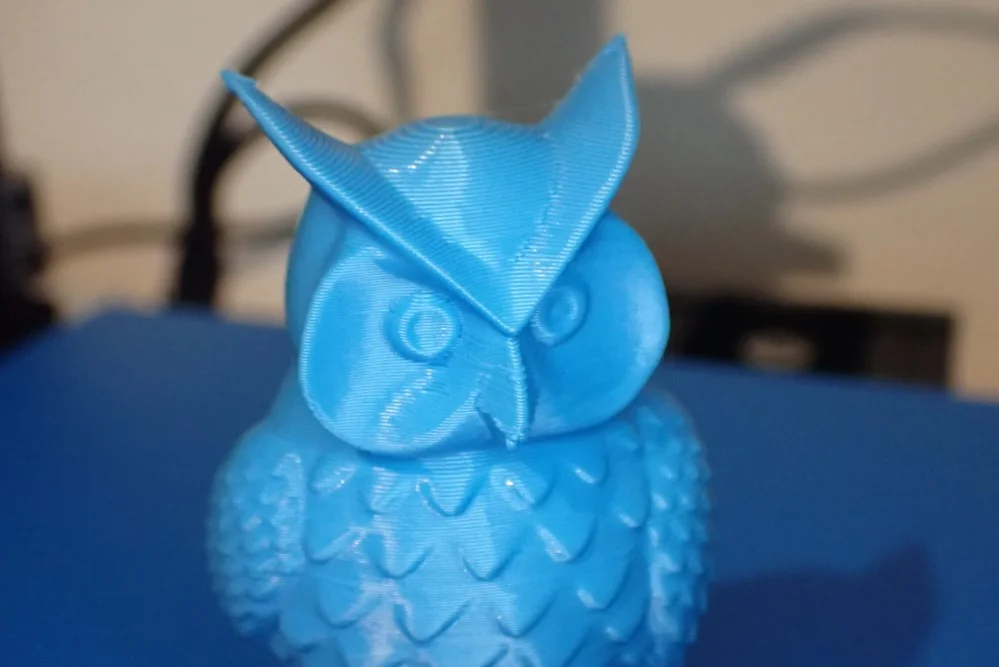
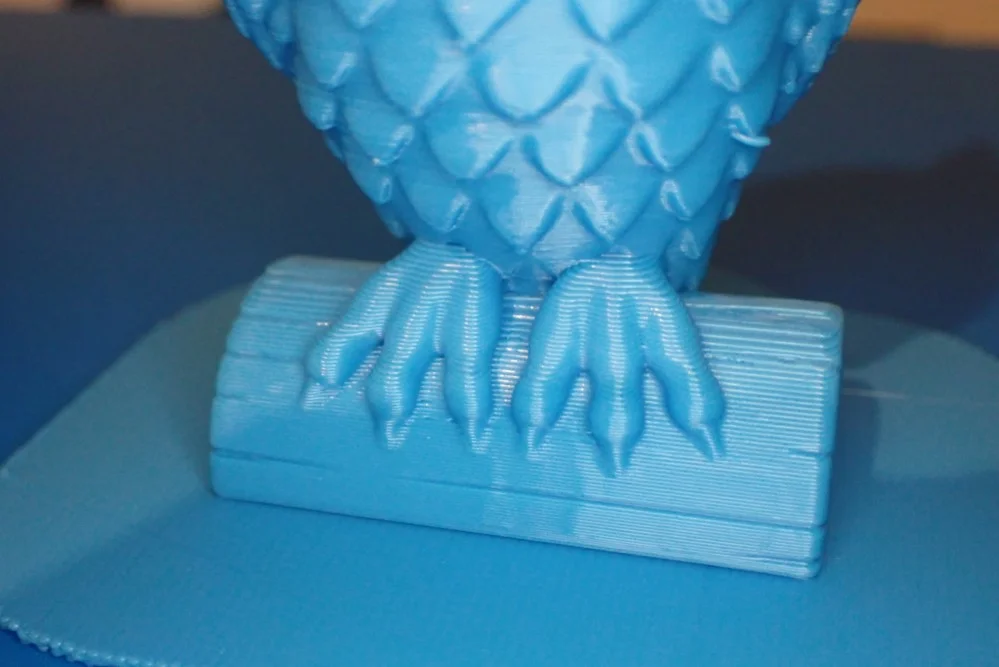
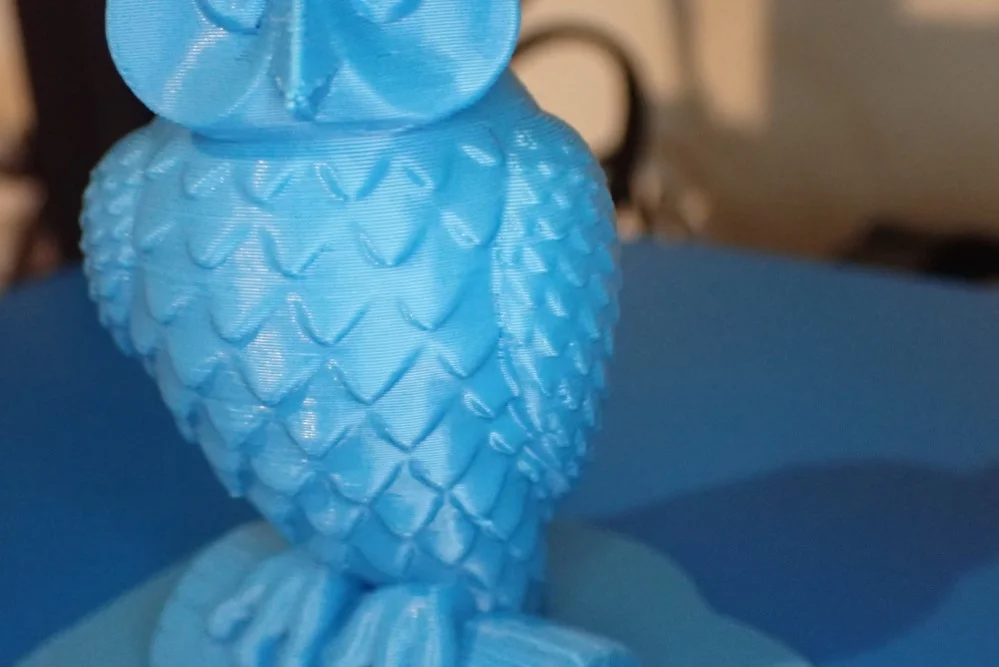
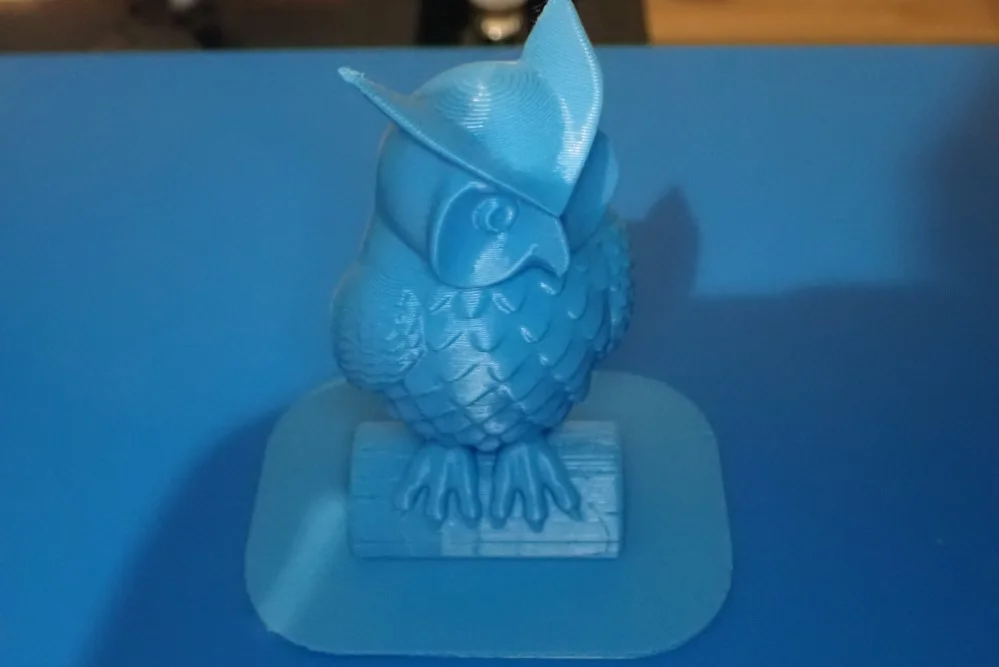
On the micro SD card that was included, was this owl that was already sliced. After assembly, I directly loaded filament and started printing. As is usually the case with finished models that are supplied, the print quality was excellent. So the manufacturer knows how to slice STL files correctly for the Mizar S. The details turned out very well and the print quality was excellent. The details are very good and there were almost no printing errors.
Cali Dragon
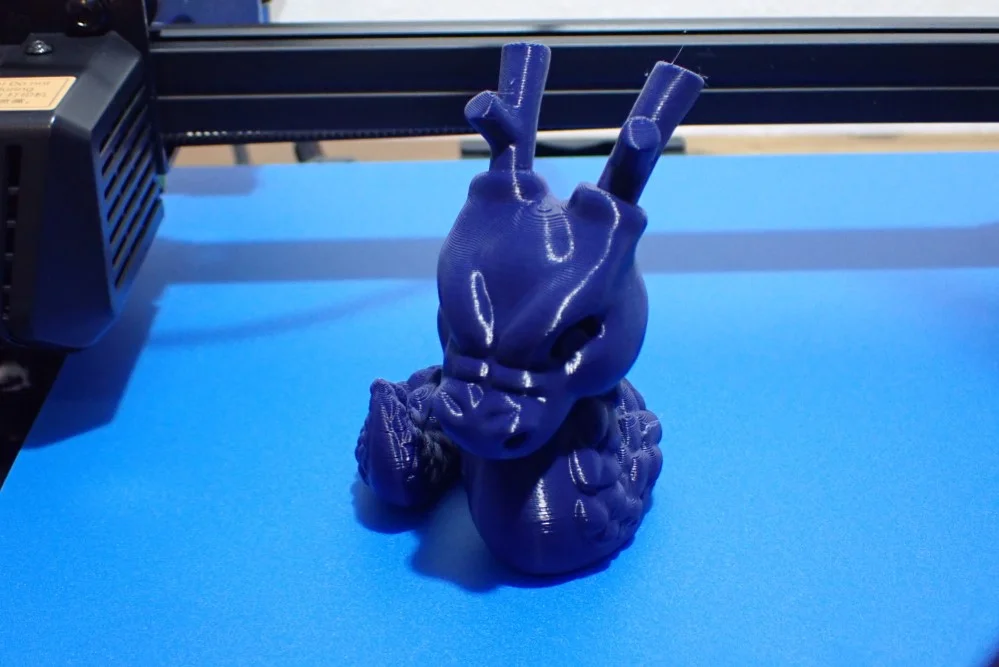
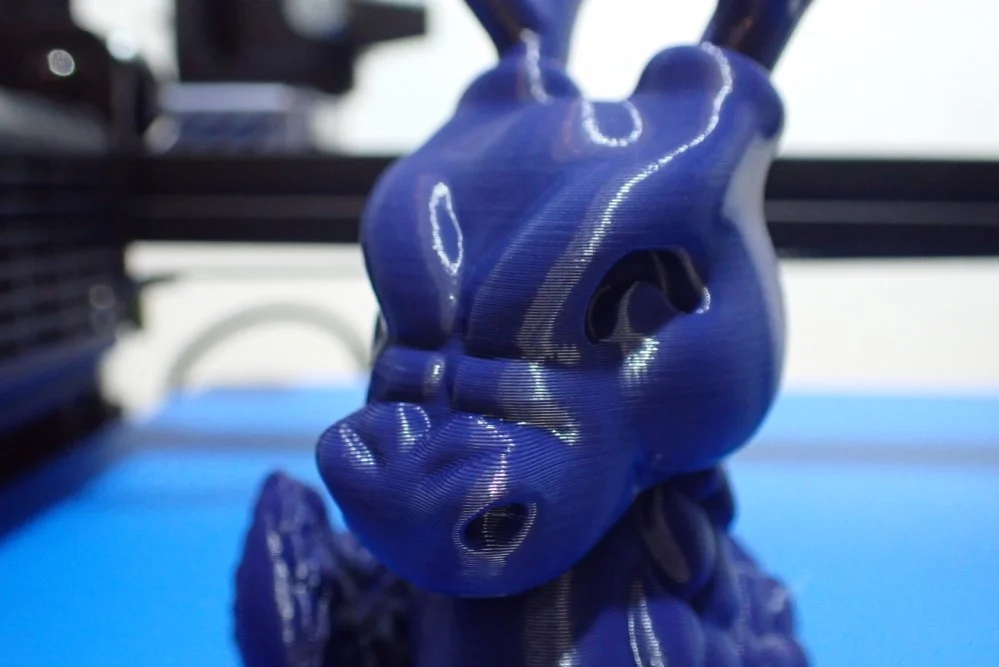
Next I printed the Cali Dragon out of PLA (link to the object). This object not only looks cool, it is also supposed to provoke various printing errors and is therefore suitable as an excellent test of the calibration. Thanks to the previous calibration, the print quality turned out really good and there was no stringing, over- or under-extrusion.
Low Poly Elephant
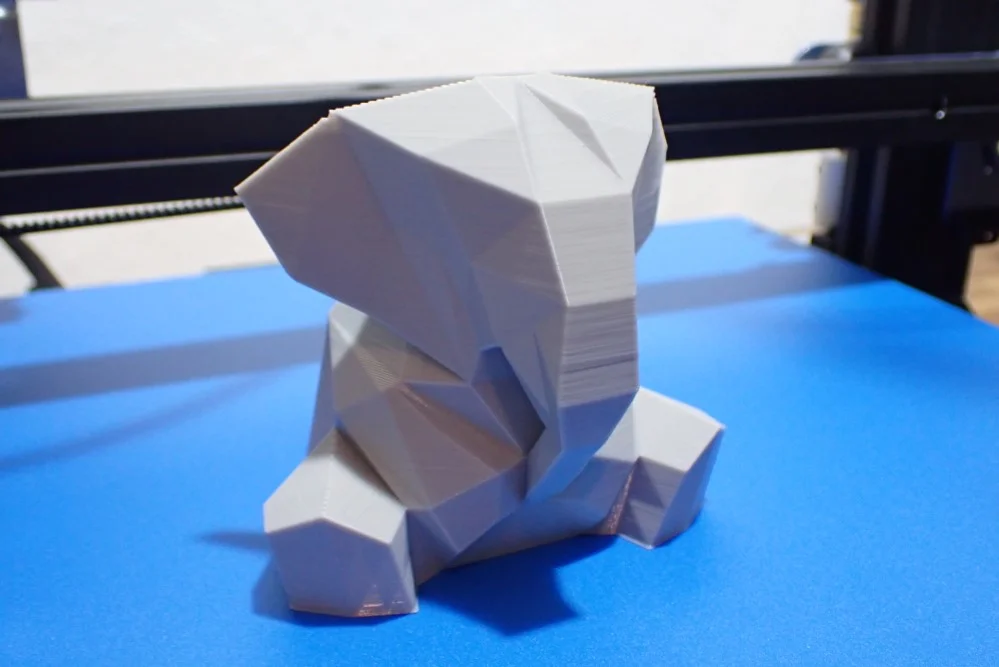
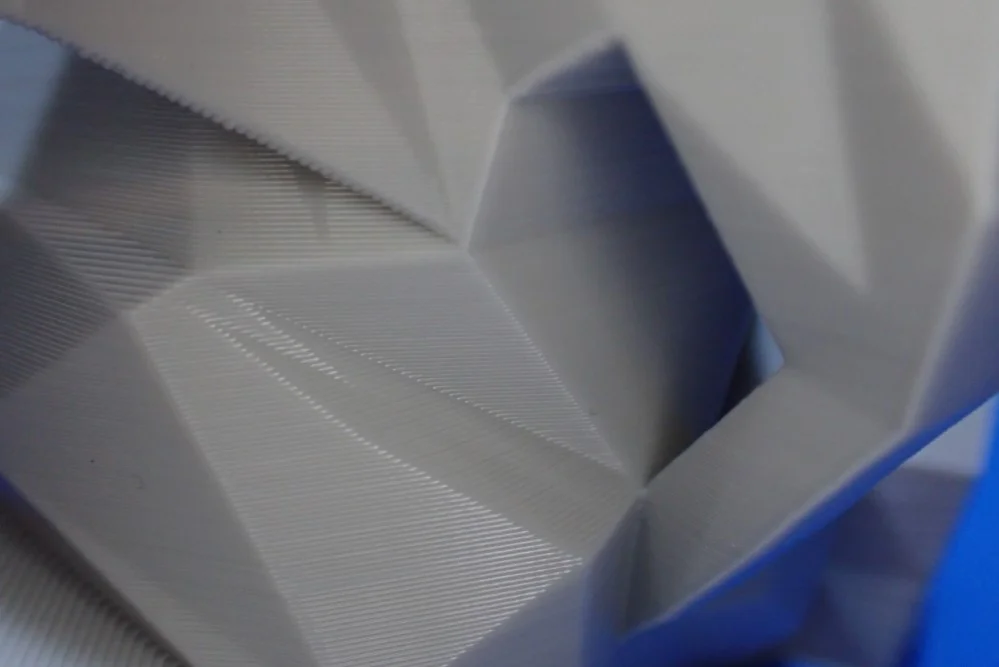
This Low Poly Elephant (link to object) was also printed from PLA without major defects and has a very smooth surface. The smooth surfaces and sharp edges are very good for making extrusion problems visible. In this case, everything went smoothly and the surface is pretty much flawless.
There was only one spot where there was a slight under-extrusion. Apparently this PLA filament requires a slightly higher printing temperature than the one I calibrated it with.
Flexi Starfish
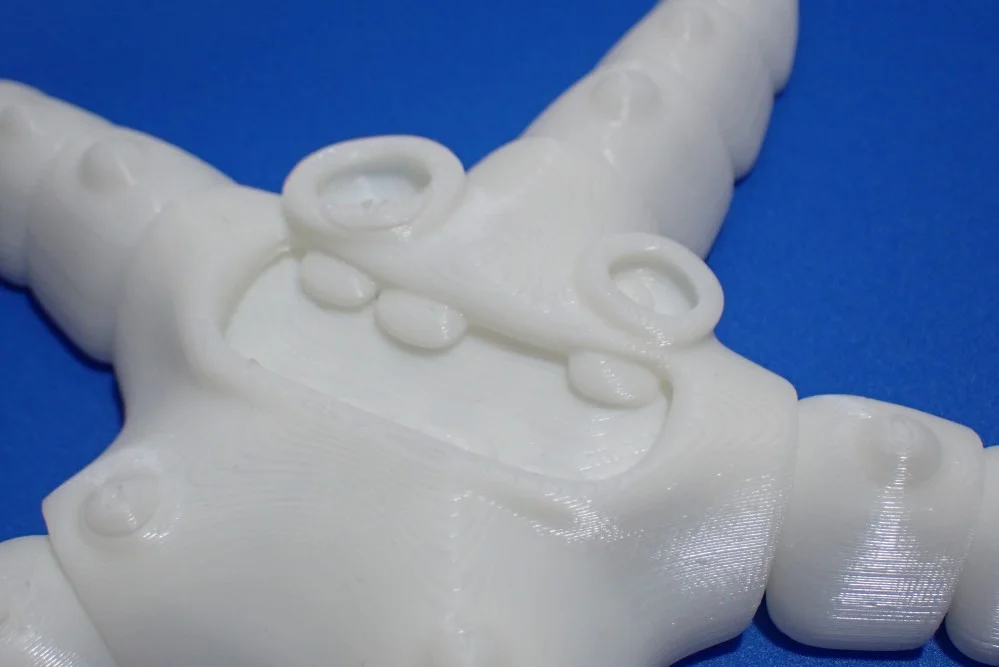
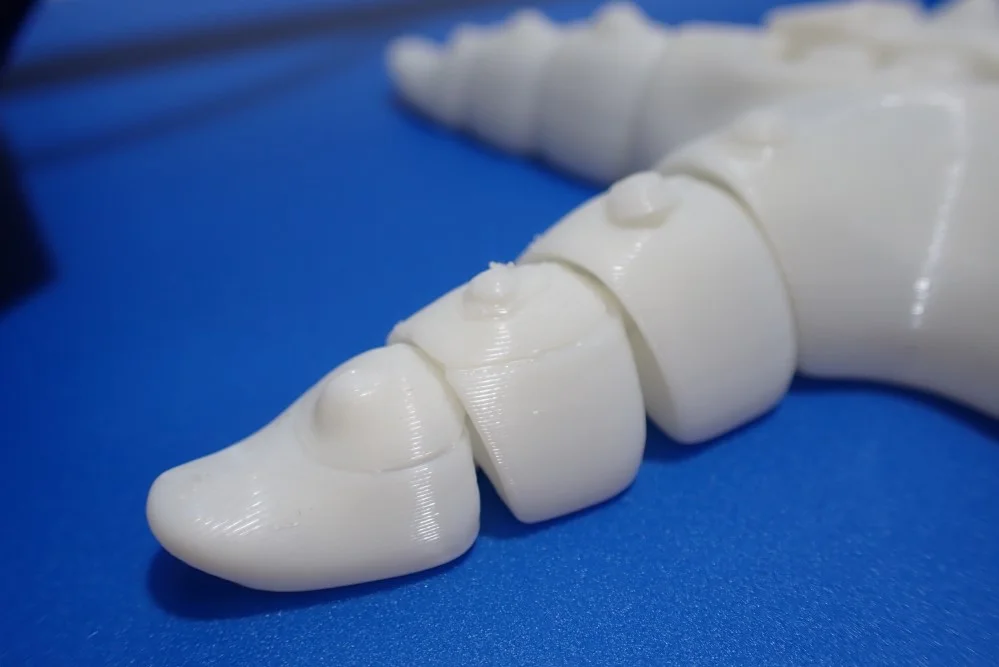
Besides PLA I also wanted to print with PETG to test the print quality at higher temperatures. For this I chose this Flexi Starfish (link to the object), where extrusion problems would lead more not only in a poor surface quality, but also to problems with the movement. The result is relatively good, but there was also some under-extrusion in a few places.
I had used the same settings for this filament as I did for another 3D printer, however, it seems that I should recalibrate the retraction and temperature for the Mizar S again.
Geeetech Mizar S vs. Elegoo Neptune 3
The main differences between the Geeetech Mizar S and the Elegoo Neptune 3 are the slightly different print volumes, the print bed surface, the double Z-axis on the Mizar S and the very small price of the Neptune 3.
Check Price at:
Direct Drive Extruder: Both 3D printers have a Bowden extruder and no direct drive extruder. This has advantages and disadvantages. The big disadvantage is that it is more difficult to print flexible filaments with a Bowden extruder, the advantage is that higher printing and movement speeds are possible without causing vibrations. So in this point, there is a tie between the Mizar S and the Neptune 3.
Print volume: The print volume of the Geeetech Mizar S is 255 x 255 x 260 mm, about 25% larger than that of the Elegoo Neptune 3 with 220 x 220 x 280 mm. So you can print larger objects in one piece with the Mizar S. If this is important to you, the Mizar S has the edge here. If you don’t need the size, the smaller volume of the Neptune 3 would actually be better for you, as you not only save space but also electricity costs, as the smaller print bed requires less power to heat up.
Automatic print bed leveling: The automatic print bed leveling of the Neptune 3 takes place at 16 points on the print bed. Just like the Mizar S, the print bed is fixed and cannot be adjusted with screws. The only thing you have to do manually is to calibrate the Z0 position in the middle with a piece of paper. The Mizar S has a very similar automatic print bed leveling, but here you still have the choice to manually adjust the print bed at nine points. The auto-leveling also only happens at nine points. I’ve worked with both 3D printers a lot and can’t see much difference between the accuracy of the leveling.
Magnetic, Flexible Print Bed: Both 3D printers have a spring steel print bed that is both magnetic and flexible. The print bed on the Mizar S has a Mylar coating, while the Neptune 3 uses a PEI coating. I am a very big fan of PEI print beds as the print bed adhesion is near perfect for most filaments. However, I have to say that the Mylar surface provides particularly good adhesion for PLA and PETG. Still, I would prefer the PEI print bed.
Double Z-axis: Unlike the Elegoo Neptune 3, the Mizar S had a double Z-axis. This further stabilizes the X-axis and increases the positioning accuracy in the Z-direction. There are even fewer vibrations, which means that even higher movement and printing speeds can be achieved.
Touchscreen: The Geeetech Mizar S has a 3.5-inch touchscreen, while the Elegoo Neptune 3 has a 4.3-inch touchscreen that can be detached from the 3D printer. You can hold it in your hand like a smartphone and operate the 3D printer with it.
32-Bit Silent Motherboard: Both 3D printers have a 32-bit silent motherboard, which greatly reduces the background noise. The only thing you’ll hear on both 3D printers are the fans on the print head and the movement of the axes. In fact, both 3D printers have an almost identical average noise level of just under 40 decibels.
LED light next to nozzle: The Elegoo Neptune 3 does not have this small feature. While this feature is irrelevant to print performance, it does allow you to better monitor the print. Sometimes it is difficult to see the first layer when the print head is still very close to it. This is easier with the LED light.
Filament Sensor, Belt Tensioner & Resume Print: Most 3D printers on the market today have these three features as standard. And that’s a good thing, because it can be pretty frustrating when one of these features is missing.
Price: Another big difference between these two 3D printers is their price. The Elegoo Neptune 3 is almost half the price of the Mizar S. Given the many similar features, this is a big advantage. Especially for beginners who are not quite sure if 3D printing will prove to be a worthy hobby, such a low price with such features is very attractive. Nevertheless, the price-performance ratio of the Geeetech Mizar S is still very good.
Geeetech Mizar S vs. Creality Ender 3 S1
The biggest difference between the Geeetech Mizar S and the Creality Ender 3 S1 is that the Ender 3 S 1 has the “Sprite” Direct Drive Extruder.
Check Price at:
Direct Drive Extruder: The Mizar S has only one Bowden extruder, which is not as good at processing flexible filaments as the Sprite extruder of the Ender 3 S1. This direct drive extruder is extremely lightweight and can therefore reach very high printing speeds without generating vibrations.
Print volume: The print volume of the Geeetech Mizar S with 255 x 255 x 260 mm is about 30 % larger than the print volume of the Ender 3 S1 with 220 x 220 x 270 mm.
Automatic print bed leveling: Both 3D printers have automatic print bed leveling. With the Ender 3 S1, you also have the option of manually adjusting the print bed with rotary screws under the print bed. The Ender 3 S1 has a CR Touch which does the automatic print bed leveling. I have had good experiences with both types of leveling. Both variants are also very well suited for beginners.
Magnetic, Flexible Print Bed: The Ender 3 S1 features a spring steel print bed that is flexible, magnetic and PC coated. Like the Mylar surface of the flexible print bed of the Mizar S, the print bed adhesion is very good for most standard filaments.
Double Z-Axis: Both 3D printers have a double Z-axis for higher stability. In both cases, 2 independent stepper motors are installed. However, the advantage of the Ender 3 S1 is that the two axes of the two Z-axes are synchronized with a toothed belt. This gives an even higher synchronization and stability than the Geeetech Mizar S.
Touchscreen: The Ender 3 S1 does not have a touchscreen but rather a 4.3-inch LCD screen that is operated with a knob. A touchscreen, like the Geeetech Mizar S has, would be more convenient, but it doesn’t make the operation slower or more cumbersome.
32-Bit Silent Motherboard: Both 3D printers have a 32-bit silent motherboard. This makes both 3D printers relatively quiet, whereby the Ender 3 S1 with an average of 34 decibels is even quieter than the Geeetech Mizar S.
LED light next to Nozzle: The Ender 3 S1 also has no illumination of its print volume. The small LED next to the nozzle on the Geeetech Mizar S is handy for monitoring the print. If this feature is important to you, you should also check out the Ender 3 S1 Pro, which even has a large LED bar above the print volume.
Filament Sensor, Belt Tensioner & Resume Print: The Ender 3 S1 does not lack these essential features either.
Price: Depending on which shop you look at, sometimes one and sometimes the other 3D printer is cheaper.
Is the Geeetech Mizar S Worth it?
The Geeetech Mizar S* is worthwhile for every user who mainly wants to print with PLA or PETG. It is also very suitable for beginners, as it has various features that increase the ease of use. Print bed leveling is done quickly and without frustration, the print bed has an almost perfect adhesion and the extrusion is very precise thanks to the dual gear extruder (at least for non-flexible filaments).
Check Price at:
Similar 3D Printers
Elegoo Neptune 3
The Elegoo Neptune 3 is one of the best 3D printers for beginners. It is very affordable and still has premium features like an automatic print bed leveling and a flexible PEI print bed.
Check Price at:
Creality Ender 3 S1
The Creality Ender 3 S1 is another 3D printer in the extremely popular Ender 3 series. It has a print volume of 220 x 220 x 270 mm, a direct drive extruder and a magnetic and flexible print bed.
Check Price at:
Disclosure: This website is the property of Martin Lütkemeyer and is operated by Martin Lütkemeyer. Martin Lütkemeyer is a member of the Amazon Services LLC and other Affiliate Programs. These are affiliate advertising programs designed to enable websites to earn advertising revenue through advertising and linking to Amazon.com and others. Links marked with * are affiliate links.


