
- Wet Filament: Prevention, Symptoms & Drying - July 18, 2024
- Sovol SV08 – Best PrusaSlicer Settings & Profile - June 26, 2024
- Sovol SV08 – Best Orca Slicer Settings & Profile - June 26, 2024
Disclosure: Links marked with * are Affiliate Links. I earn from qualifying purchases if you decide to make a purchase through these links – at no additional cost for you!
Cura is one of the most popular slicers for 3D printers and now supports almost all popular 3D printers on the market. However, the individual profiles can often be optimized and sometimes Cura’s own profiles are only available months after the product launch – like with the Ender 6.
For a long time there was no official profile for the Ender 6 in Cura. You either had to create your own profile or use the settings from the Creality slicer. Now there is a preset profile in Cura, which is a good starting point for further optimizations.
In this article you will learn all about the best settings for Creality’s Ender 6, how to find the right profile in Cura and how to create your own profile.
The perfect Ender 6 Cura profile for PLA:
- Layer thickness: 0,12 mm
- Printing temperature: 200 °C
- Print bed temperature: 55 °C
- Retraction: 10 mm at 25 mm/s
- Speed: 50 mm/s
- Infill: 20%
- Speed of the first layer: 25 mm/s
- Cooling of the first layers: 0%
Table of Contents:
- 1 Adding the Ender 6 in Cura > Ender 6 Cura Profile
- 2 Layer Thickness > Ender 6 Cura Profile
- 3 Printing Temperature > Ender 6 Cura Profile
- 4 Print Bed Temperature > Ender 6 Cura Profile
- 5 Retraction > Ender 6 Cura Profile
- 6 Speed > Ender 6 Cura Profile
- 7 Infill > Ender 6 Cura Profile
- 8 Initial Layers > Ender 6 Cura Profile
Adding the Ender 6 in Cura
> Ender 6 Cura Profile
You can add your Ender 6 in Cura in three different ways:
- Use Cura’s default profile
- Transferring the profile from Creality Slicer to Cura
- Create your own profile
Below I’ll show you each of these options and then you’ll learn how to optimize the settings.
Curas Ender 6 Standard Profile
The default profile for the Ender 6 in Cura is a very good starting point for further optimizations. With this default profile you skip many steps when creating a new profile from scratch.
You don’t have to enter the dimensions of the print bed and the print head yourself and the G-code is already available. Most of the print settings like print temperature, speed or retraction are already preset very well.
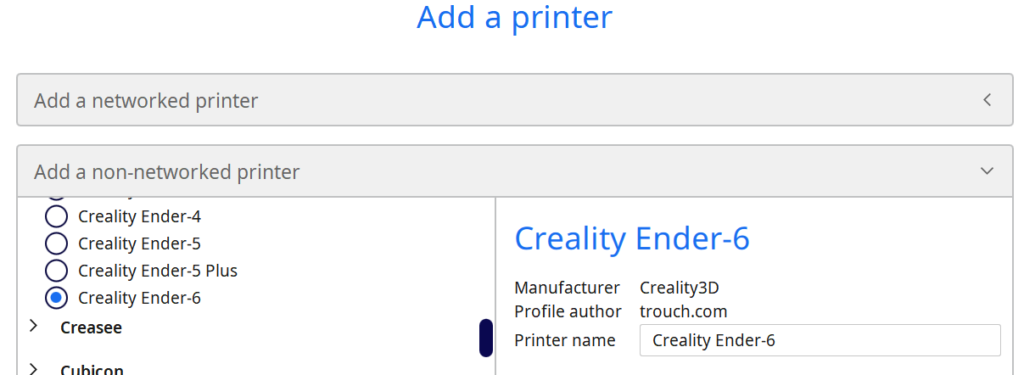
Here you will find the standard profile for the Ender 6 in Cura:
- In Cura’s menu bar: Settings > Printer > Add Printer…
- Select “Add an unnetworked printer”.
- Search for Creality3D and select the Ender 6
- Click on “Add“
- Click on “Next” in the device settings
Now you have loaded the default profile for the Creality Ender 6. It comes with various presets for different quality levels with layer thicknesses from 0.12 to 0.28 mm.
If you wonder why this preset layer thickness is a multiple of 0.04 mm, it is because of the so-called “magic number“. This number is the step size of the stepper motor and gives the best results.
Creality’s Ender 6 Profile
In Creality’s slicer there is also a predefined profile for the Ender 6, which you can transfer to Cura to use the manufacturer’s recommended settings.
Create Your Own Profile
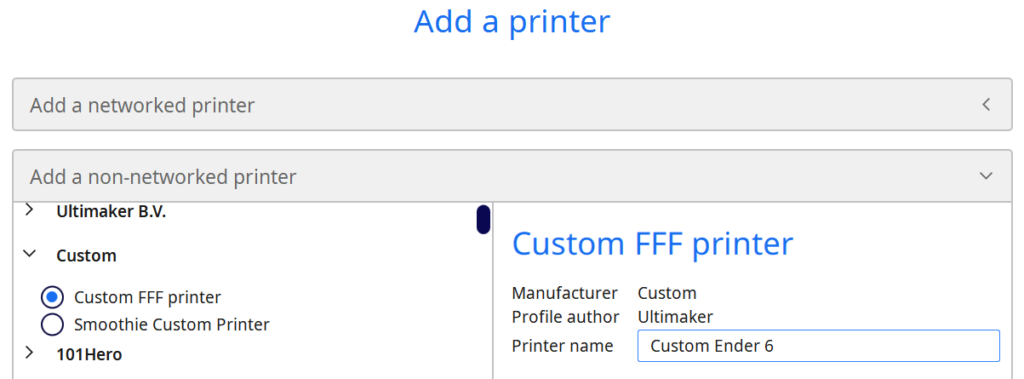
To create your own profile for the Ender 6, you have to select “Custom” and “Custom FFF Printer” and click on “Add“. Before that, you can give it a suitable name like “Custom Ender 6“.
On the next screen, you need to set up the individual printer settings. These include the dimensions of the print bed, whether it has a heatable print bed, what the start and end G-code should look like, how big the print head is and which extruder you are using.
The size of the print bed or the print volume is quite simple as it is listed under the specifications of the printer. The printhead settings are a bit more complicated, as you have to measure the printhead manually. You can read how to do that in this article.
The start and end G-code looks like this:
- START:
G28 ;Home
G92 E0 ;Reset Extruder
G1 Z2.0 F3000 ;Move Z Axis up
G1 X10.1 Y20 Z0.28 F5000.0 ;Move to start position
G1 X10.1 Y200.0 Z0.28 F1500.0 E15 ;Draw the first line
G1 X10.4 Y200.0 Z0.28 F5000.0 ;Move to side a little
G1 X10.4 Y20 Z0.28 F1500.0 E30 ;Draw the second line
G92 E0 ;Reset Extruder
G1 Z2.0 F3000 ;Move Z Axis up - END:
G91 ;Relative positioning
G1 E-2 F2700 ;Retract a bit
G1 E-2 Z0.2 F2400 ;Retract and raise Z
G1 X5 Y5 F3000 ;Wipe out
G1 Z10 ;Raise Z more
G90 ;Absolute positioning
G28 X Y ;Present print
M106 S0 ;Turn-off fan
M104 S0 ;Turn-off hotend
M140 S0 ;Turn-off bed
M84 X Y E Z ;Disable all steppers
The extruder settings include the nozzle size, compatible material diameter and special G-code.
But these were only the settings for the printer. The print settings for layer thickness, print temperature, retraction, etc. you must then further adjust. You can follow the default values of this guide and then further optimize them for your device.
You can find more information on how to create a 3D printer profile in Cura and what you need to pay attention to in this article: How to Create a Custom 3D Printer Profile in Cura
Layer Thickness
> Ender 6 Cura Profile
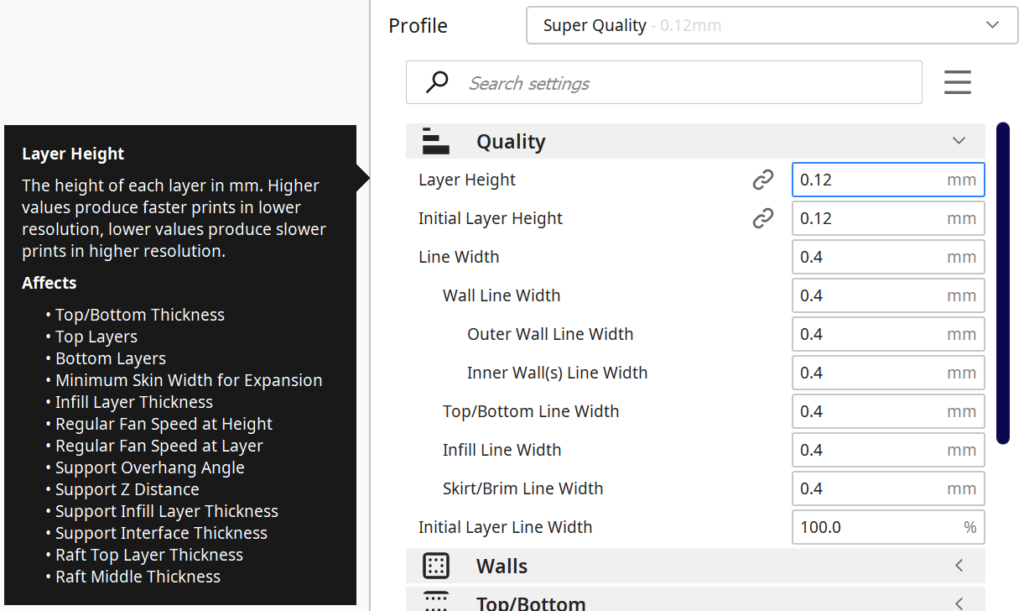
Besides the XY resolution of your 3D printer, the layer thickness is responsible for the accuracy. If you halve the layer thickness, the resolution in the Z-direction is doubled and delivers smoother surfaces.
However, you can’t arbitrarily choose a small layer thickness because it depends on the extruder, the material used, the stepper motors, and many other factors. Also, keep in mind that smaller layer thicknesses will give more accurate results, but will take much longer to print (see this article to learn how layer thickness and nozzle diameter relate to print time).
The ideal layer thicknesses are a multiple of the step width of the stepper motor in the Z-axis. With the Ender 6, the stepper motor of the Z-axis has a step width of 0.04 mm. This value is also called the “magic number” because the result magically gets better when you calculate with multiples of this number.
With this value you can achieve the following layer thicknesses with the Ender 6:
- 0.08 mm: Extremely fine quality, but at the limit of what is possible and very slow
- 0.12 mm: Fine quality, slow
- 0.16 mm: Good quality, rather slow
- 0.20 mm: Standard
- 0.24 mm: Coarser but faster
- 0.28 mm: Coarse and fast
Printing Temperature
> Ender 6 Cura Profile
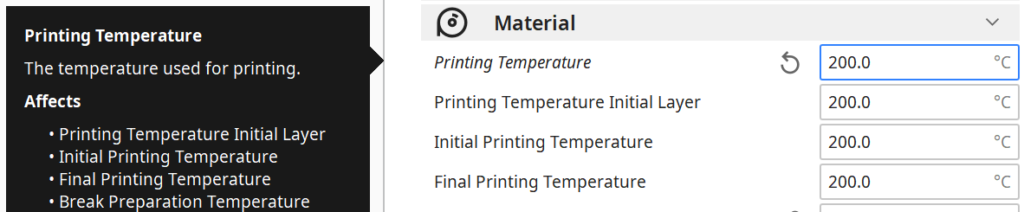
An incorrect printing temperature can lead to various printing errors (poor print bed adhesion, warping, over-extrusion, under-extrusion, blobs, etc.). The correct printing temperature depends on the material used.
For PLA temperatures between 180 and 220 °C are useful, for ABS between 220 and 250 °C and for PETG between 220 and 245 °C. The Ender 6 can also print other filaments.
A good starting point for the individual materials is as follows for the Ender 6:
- PLA: 200 °C
- ABS: 230 °C
- PETG: 240 °C
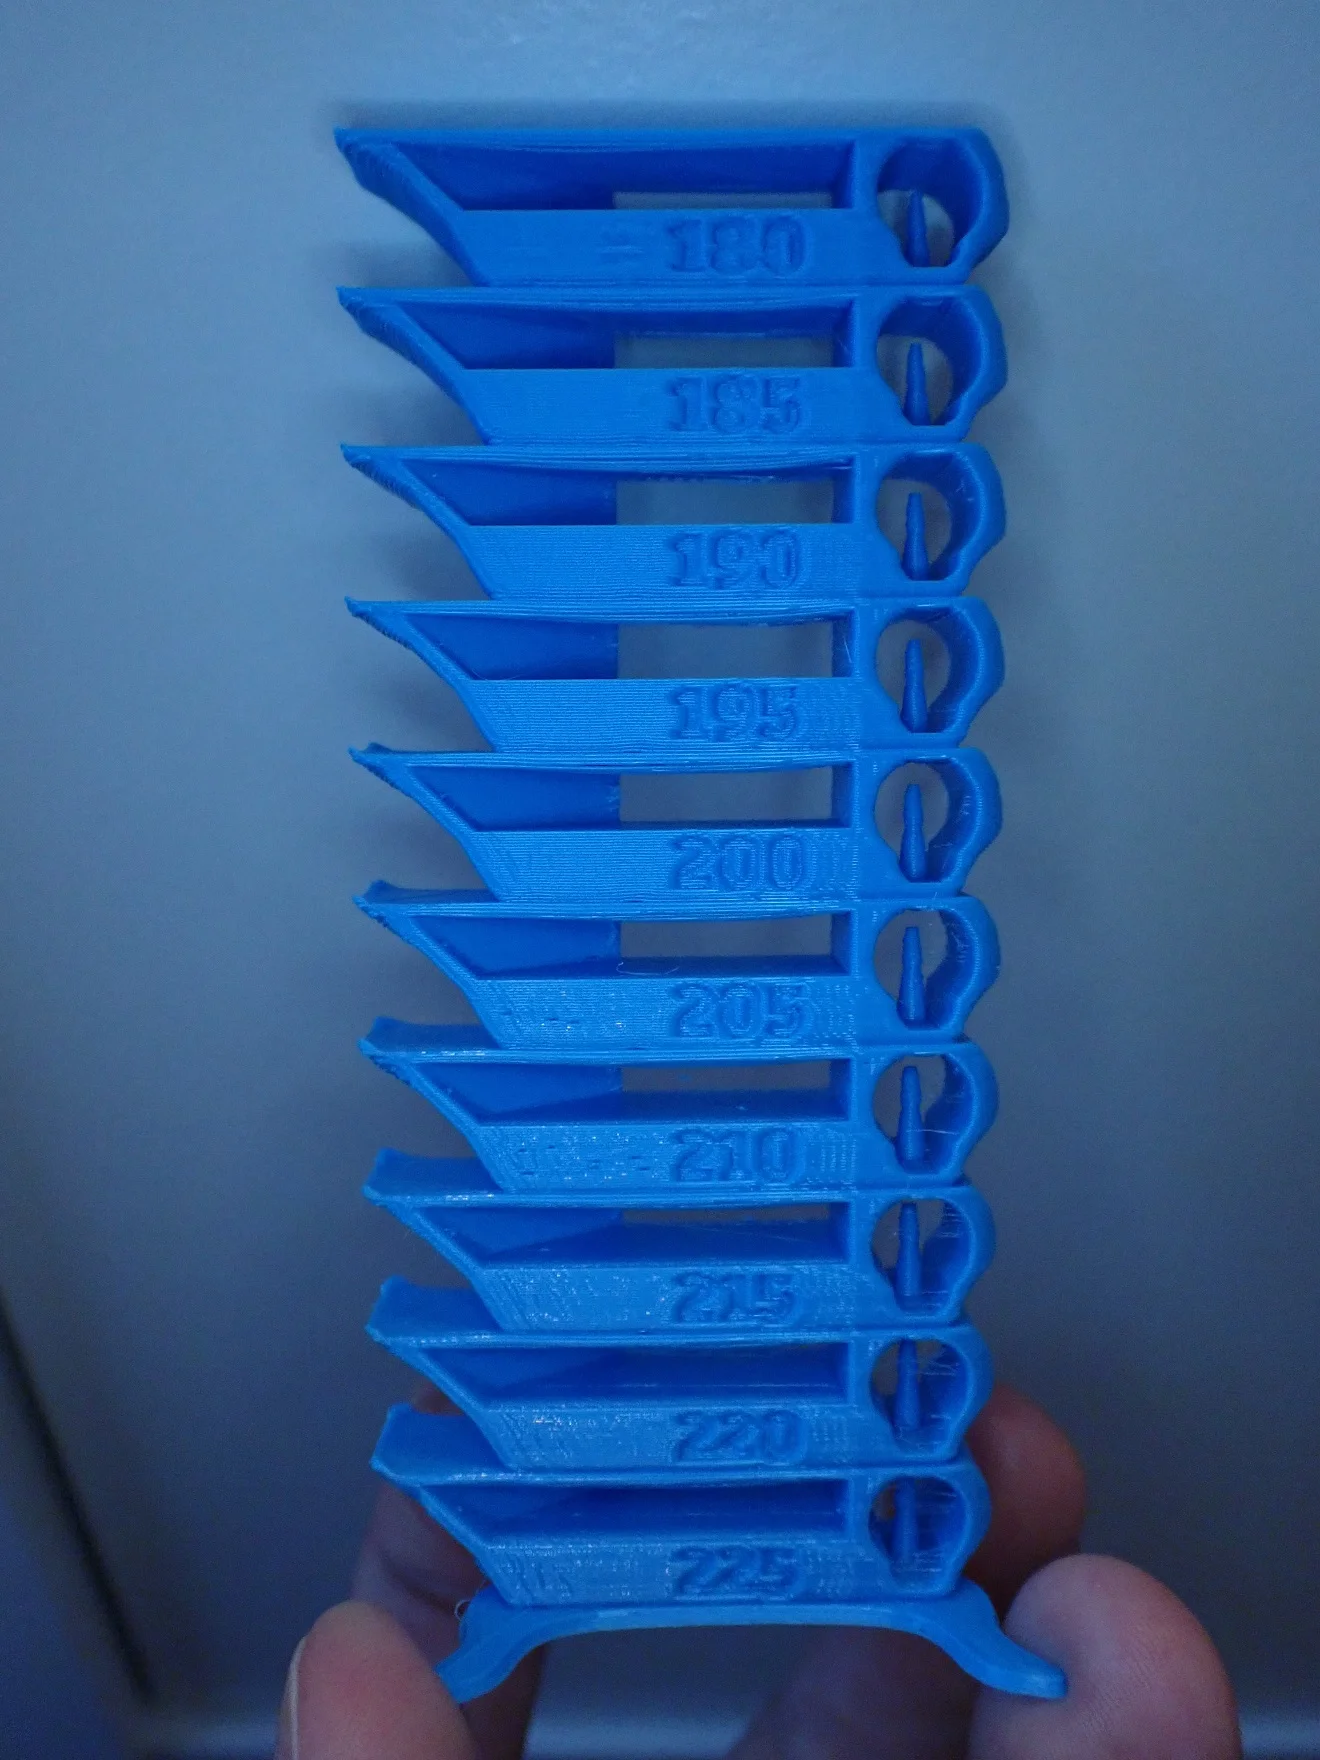
But also two filaments from the same material but from different manufacturers or sometimes even batches, may need a different temperature. Therefore, with each new filament, you should find the right temperature with a suitable calibration object.
There are so-called temperature towers with which you can easily find the right printing temperature for the respective filament. There are many good designs on Thingiverse (link to a very popular temperature tower).
Print Bed Temperature
> Ender 6 Cura Profile

Just like the print temperature, the print bed temperature depends on the filament you are using. The correct print bed temperature ensures good print bed adhesion and prevents warping.
The following values are standard guidelines that you can further optimize. They are usually sufficient for most filaments. If you have poor print bed adhesion you can increase the temperature slightly, if your first layers are compressed into an elephant foot you should decrease it.
Here are good default values for the print bed temperature of the Ender 6:
- PLA: 55 °C
- ABS: 110 °C
- PETG: 70 °C
Retraction
> Ender 6 Cura Profile
If the print head moves from one place to another without printing, excess material would come out of the nozzle without the retraction. This would then lead to stringing and unsightly blobs.
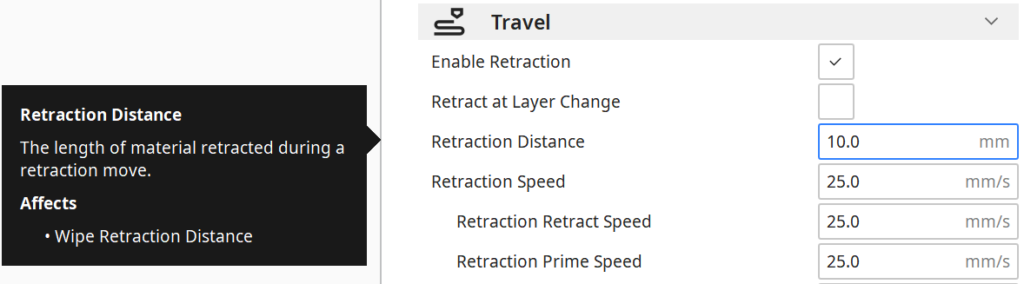
Finding the right setting for retraction is therefore extremely important for a high-quality result. The settings for the retraction are divided into the retraction length and the retraction speed.
These default retraction settings are a good place to start:
- PLA: 10 mm at 25 mm/s
- ABS: 10 mm at 35 mm/s
- PETG: 8 mm at 25 mm/s
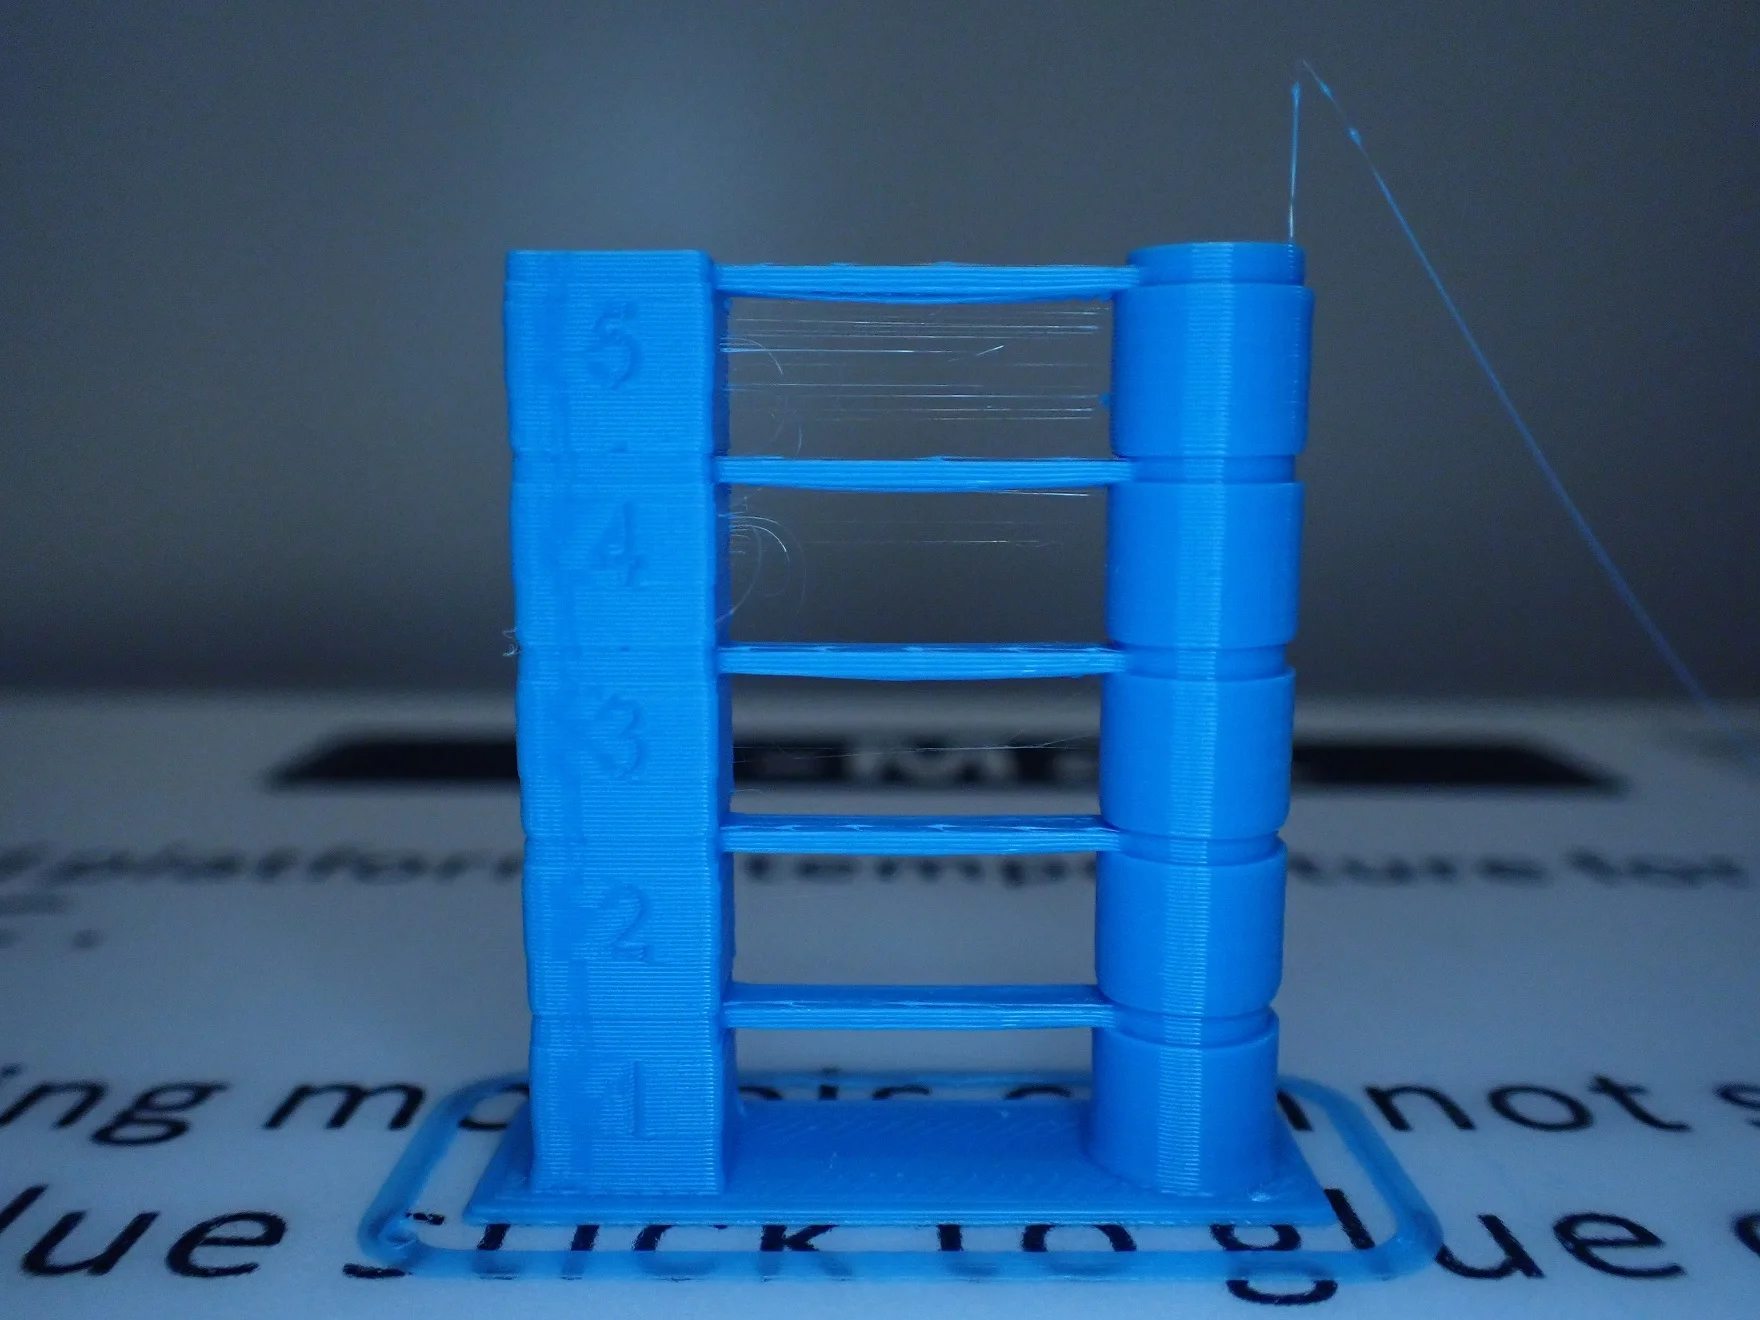
If you are seeing stringing, you should definitely print a calibration object and change the retraction length and retraction speed settings in small increments at a time to find the optimal setting (link to Thingiverse).
Note that you only ever change one value per test so that you can assign the effects to the correct change.
Speed
> Ender 6 Cura Profile
Even though the Ender 6 is advertised with extremely fast print speeds (up to 150 mm/s), lower values are better for getting better quality.
The promised 150 mm/s comes from the fact that the construction of the Ender 6 is extremely stable and there is hardly any vibration even at high speeds. However, since the Ender 6 uses the standard Creality nozzle, it also has comparable flow rates. The extremely high print speed would only be possible with very thin and flat print lines.
But even if you don’t want to go all the way to the maximum, you can print objects with lower accuracy at speeds of up to 120 mm/s. The faster you go, the less accurate the print.
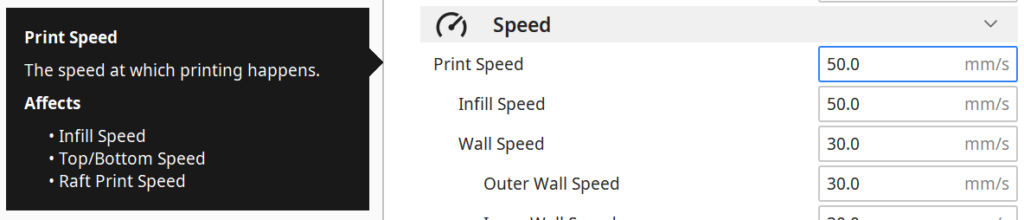
Otherwise, you are well-advised to use the following default values:
- PLA: 50 mm/s
- ABS: 50 mm/s
- PETG: 40 mm/s
- TPU or other flexible filaments: 30 mm/s
Infill
> Ender 6 Cura Profile
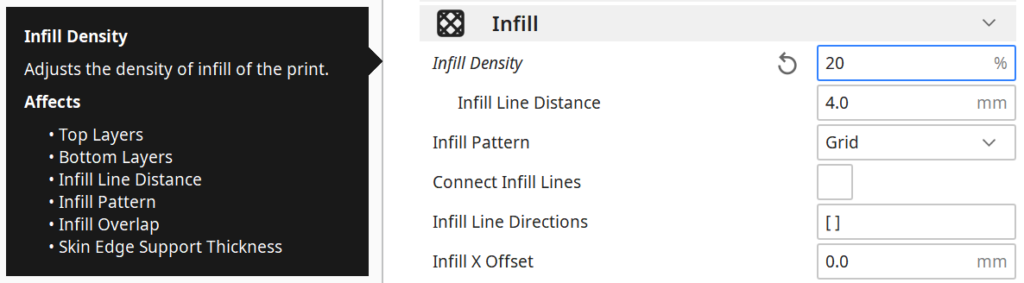
With the infill pattern and its density, you can influence the stability of your print object. A higher density makes the object more stable. The perfect infill density does not depend on the material used or the printer, it only depends on the purpose of the print object and how stable it has to be.
For decorative objects infill densities of 5% to 10% are suitable and for functional objects, e.g. which have to fulfill a mechanical purpose, 50% to 100% are suitable (100% means that the object is solid).
- Decorative: 5-10%
- Standard: 20%
- Sturdy: 50-100%
Which infill patterns are best for which purposes can be read in this article: 3D Printing Infill Guide | Basics, Patterns and Stability
Initial Layers
> Ender 6 Cura Profile
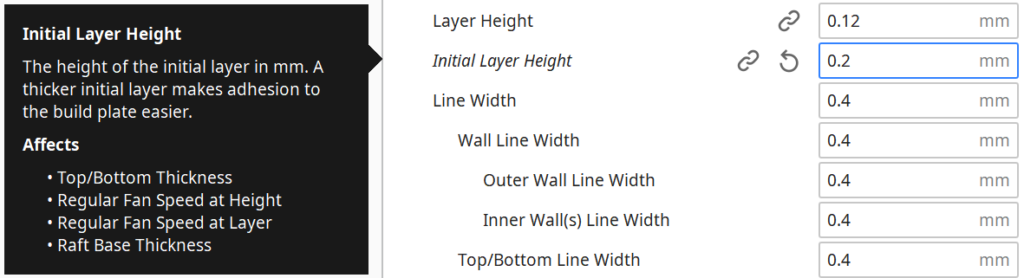
To create a good print bed adhesion, the settings for the first layers are crucial. The textured tempered glass print bed gives the Ender 6 very good print bed adhesion for most filaments.
Together with the correct print bed temperature, the following standard values for the first layers are usually sufficient to ensure good print bed adhesion:
- Initial layer height: 0.2-0.3 mm
- Initial layer speed: 30 mm/s or less
- Number of slower layers: 3-5
- Initial fan speed: 0%
With the Ender 6, it is very rare that you need to improve the print bed adhesion with tools like Blue Tape. With the right settings, you can achieve very good print bed adhesion with the high-quality print bed and the right temperatures.
If you have problems with print bed adhesion, the first thing you should do is reduce the speed of the first layer and increase the number of slow layers. Also, make sure that the initial fan speed is set to 0%, as cooling at that point will cause severe warping and lifts the object from the print bed.
Disclosure: This website is the property of Martin Lütkemeyer and is operated by Martin Lütkemeyer. Martin Lütkemeyer is a member of the Amazon Services LLC and other Affiliate Programs. These are affiliate advertising programs designed to enable websites to earn advertising revenue through advertising and linking to Amazon.com and others. Links marked with * are affiliate links.
