
- Wet Filament: Prevention, Symptoms & Drying - July 18, 2024
- Sovol SV08 – Best PrusaSlicer Settings & Profile - June 26, 2024
- Sovol SV08 – Best Orca Slicer Settings & Profile - June 26, 2024
Disclosure: Links marked with * are Affiliate Links. I earn from qualifying purchases if you decide to make a purchase through these links – at no additional cost for you!
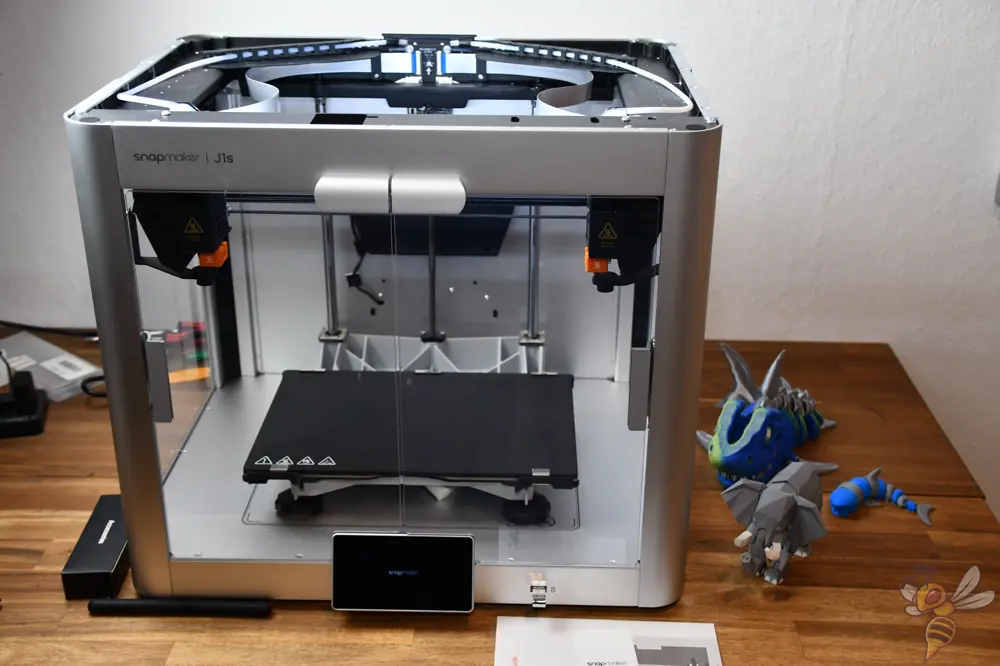
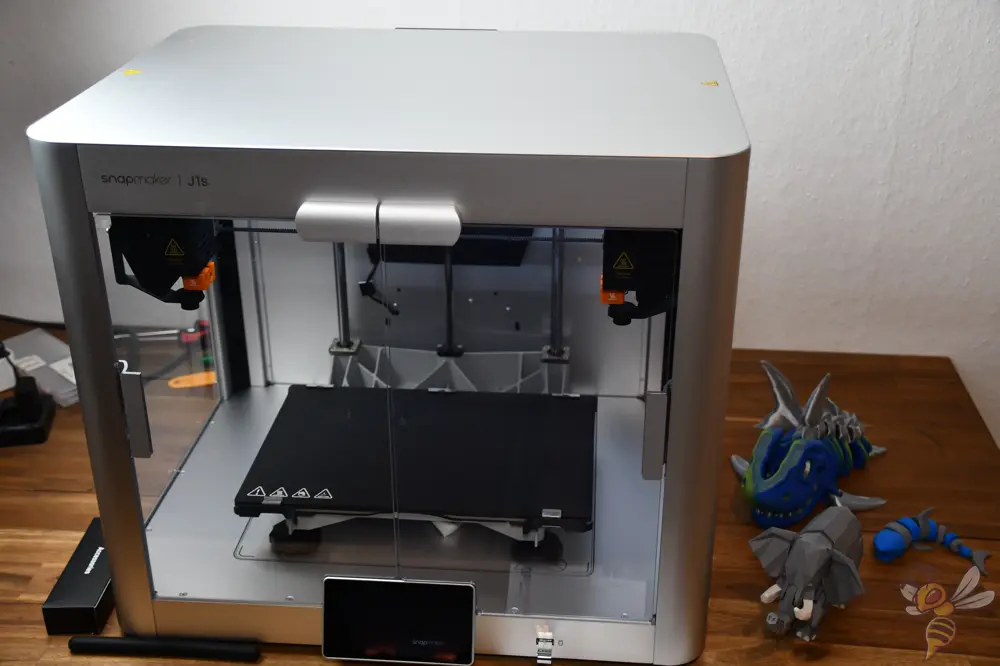
The Snapmaker J1s* is a high quality 3D printer with dual extruder (IDEX). I have tested it extensively and show you in this detailed review my results and my conclusion.
Besides the two extruders, it also has many other interesting features like vibration compensation, which promises a high print speed with a good print quality.
Once you calibrate it well to the filament you are using, the print results and the possibilities of the IDEX system with the Luban Slicer are really impressive. I’ll show you my results at the end of this article, but before that, we’ll go into a little more detail about its individual features.
Who should buy the Snapmaker J1s?
Snapmaker’s devices have a professional quality. However, that doesn’t mean it’s not good for hobbyists. On the contrary, for those with high demands and special printing projects that require two extruders or exotic filament, there is hardly a better choice than the Snapmaker J1s!

The Snapmaker J1/J1s is an IDEX 3D printer with vibration-compensation. This means that it can use two different filaments in one print with two extruders – and at a high print speed!
Build Volume: 300 × 200 × 200 mm³
Speed: 350 mm/s
Extruder: 2 × Direct Drive
Print Bed: PEI coated glass
Leveling: automatic
Firmware: Marlinbase
Nozzle Temp.: 300 °C
Bed Temp.: 100 °C
Connectivity: Wi-Fi, USB cable/stick
Pros:
✓ IDEX (2 extruders)
✓ Closed printing volume
✓ CoreXY construction
✓ Professional quality
✓ Fast
Cons:
× Tricky retraction calibration
Table of Contents:
- 1 A Quick Overview of the Snapmaker J1s
- 2 Packaging and Scope of Delivery of the Snapmaker J1s
- 3 How to Assemble the Snapmaker J1s
- 4 Print Bed of the Snapmaker J1s and Leveling
- 5 IDEX Calibration & Vibration Compensation
- 6 Print Volume of the Snapmaker J1s
- 7 The Enclosure of the Snapmaker J1s
- 8 The Snapmaker J1’s Two Extruders
- 9 Slicers Compatible with the Snapmaker J1s
- 10 Test Prints and Calibration of the Snapmaker J1s
- 11 Noise Level of the Snapmaker J1s During Printing
- 12 Print Speed of the Snapmaker J1s
- 13 Print Quality of the Snapmaker J1s
- 14 J1 vs. J1s
- 15 Is the Snapmaker J1s the Right 3D Printer for You?
- 16 Important Accessories for a FDM 3D Printer
A Quick Overview of the Snapmaker J1s

Vibration compensation is becoming increasingly popular as firmware for new 3D printers. This is mainly because it allows much higher print speeds with even better print quality. This software can compensate for the vibrations that occur in the print head at high print speeds. It was therefore only a matter of time before a good IDEX 3D printer with this feature came on the market.
So I was very curious to see what this combination could create. And since I had already tested the Snapmaker Artisan, I was sure it would be great!
The print volume of 300 × 200 × 200 mm³ is about mid-range. You can’t print large objects in one piece with the Snapmaker J1s. However, the volume is large enough for most projects.
Of course, I’m most interested in the speed at which the Snapmaker J1s can print with two filaments. With most other IDEX 3D printers I’ve used, a print has taken forever, compared to a print from just one filament. Of course, it also has to swap extruders in between, but with speeds up to 350 mm/s, the overall print time should still be much faster than IDEX 3D printers without vibration compensation.
What has always impressed me about Snapmaker so far, besides the high-quality workmanship, has been the user-friendly operation. Not only the screen on the printer itself, but also the in-house slicer (Snapmaker Luban) really stand out.
I’m especially excited about the function to prepare normal STL files for printing with two filaments! Namely, these can be painted with a smart brush. The painted areas are then assigned to the second extruder – very exciting and practical!
My brief assessment of the Snapmaker J1s is as follows:
I think the Snapmaker J1s* will be the best recommendation for a long time for users looking for a high quality dual extruder 3D printer. And if in addition exotic filaments are to be printed, which require a closed print volume and high temperatures, there is probably no way around the Snapmaker J1s for a long time!
And now to the practical part!
Packaging and Scope of Delivery of the Snapmaker J1s
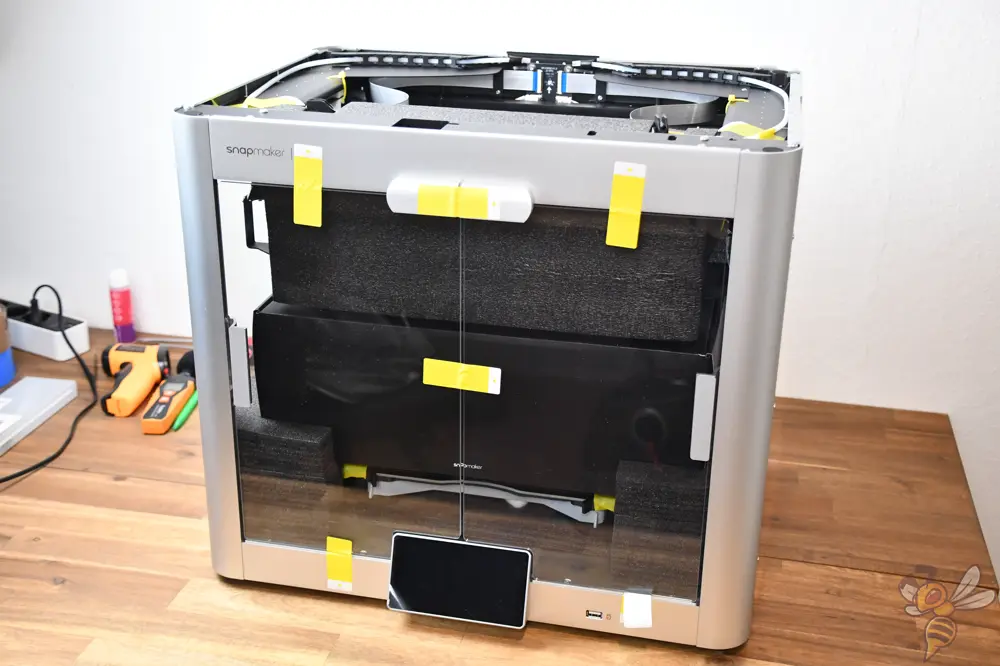
The Snapmaker J1s arrives well-packed in a package that can be carried alone. All moving parts are protected from damage in transit and the complete package is cleverly housed inside the enclosure.
The ease of use displayed by Snapmaker is truly commendable. Because even for unpacking the 3D printer and all its components, there are instructions!
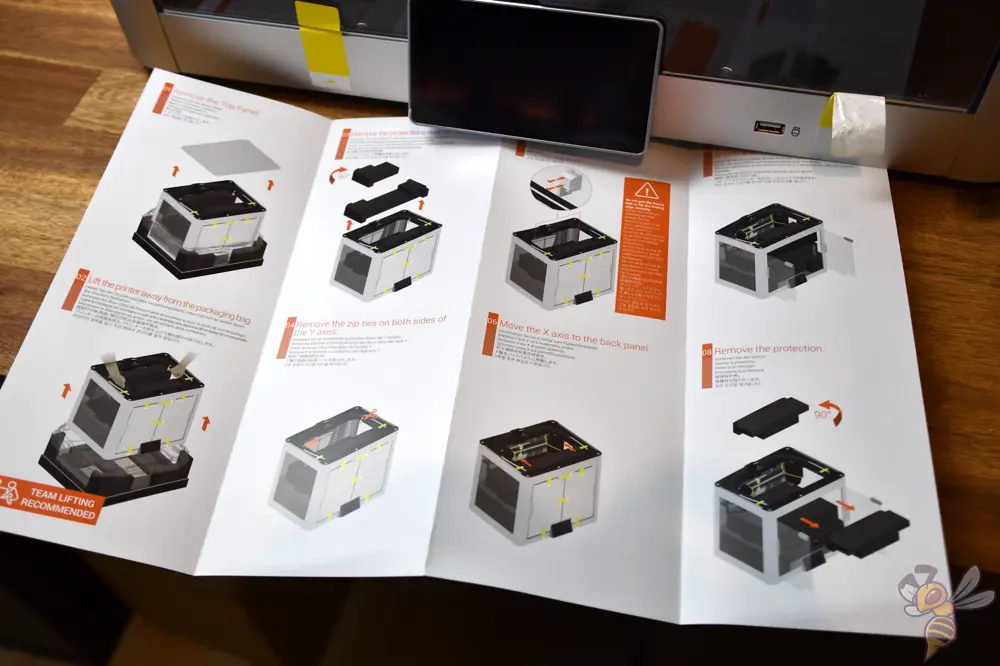
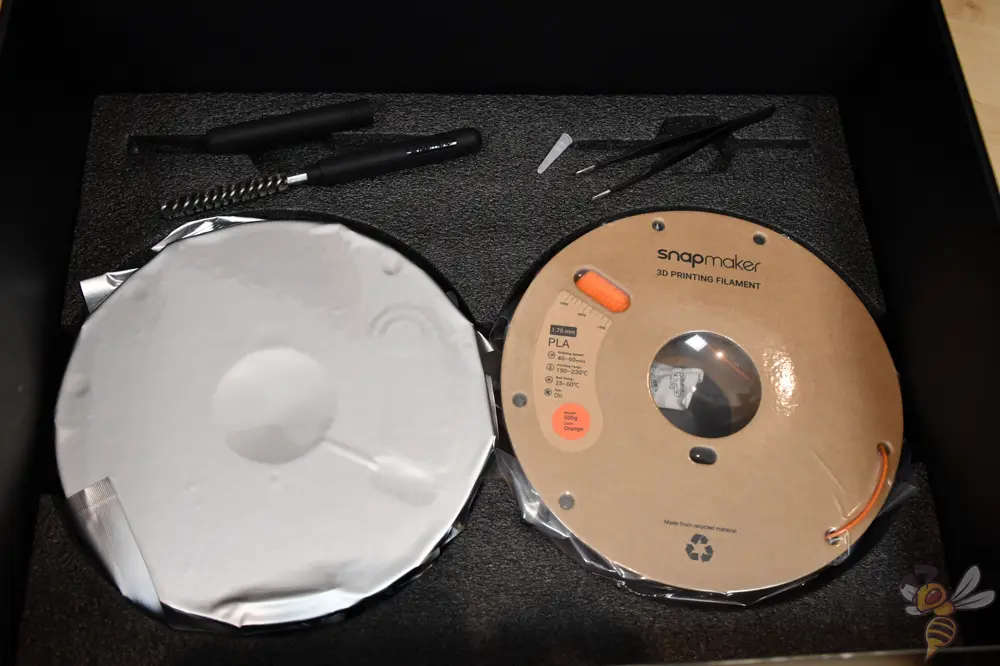
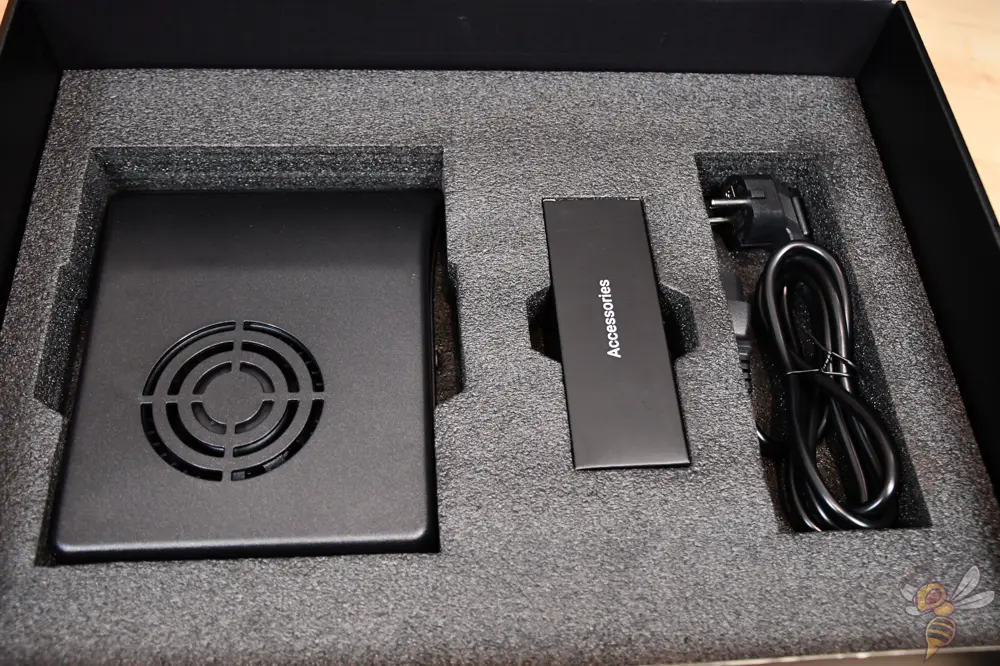

While appearances can be deceiving, of course, it’s clear from the moment you unpack the individual components and the 3D printer itself that you’re dealing with a high-quality product. Snapmaker also seems to focus on quality when it comes to the tools and accessories.
Everything is included to get started with the first test prints. It is also pleasing that not only small filament samples are included in the scope of delivery, but real filament spools.
How to Assemble the Snapmaker J1s

The only difference in assembly between the J1 and the J1s is that the J1s still has an enclosure fan that needs to be installed. It also comes completely pre-assembled, whereas you still have to install the front door and the side panels yourself on the normal J1.
After that, all you need to do is remove the transport locks and you’re ready to go with the on-screen instructions!
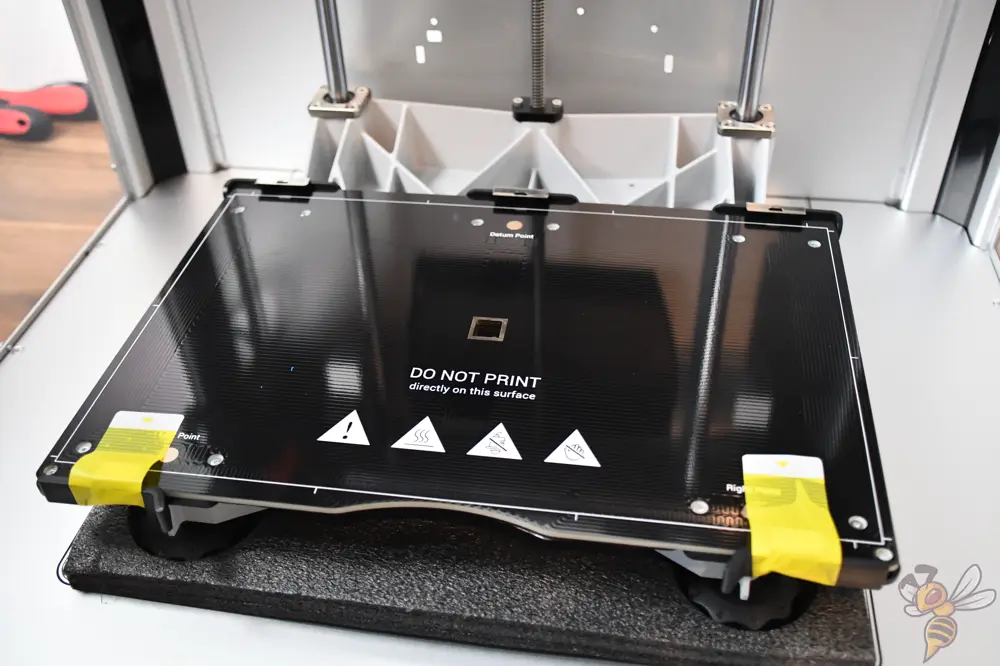
Print Bed of the Snapmaker J1s and Leveling


The print bed of the Snapmaker J1s has two sides. One side has a PEI coating, and the other side is a smooth glass surface. Most filaments will adhere better to the PEI coating, but some filaments will adhere better to glass.
The print bed can be heated up to 100 °C and is attached by a snap mechanism.

Print bed adhesion is quite good for most filaments on the PEI coating. However, for some objects with a very filigree first layer, I sometimes had to resort to an adhesive* because the corners sometimes came off.
The print bed is mounted on a stable frame, which was made from a single casting. It is leveled via three knobs.


The leveling is supported in great detail by the menu. It is designed to be simple enough that you can’t go wrong here.
During print bed leveling, the three set screws under the print bed are adjusted until the orange bar in the display is in the middle. So you don’t have to estimate the distance between the nozzle and the print bed yourself with a piece of paper, as you do with most other 3D printers.
There are three points on the printing plate where the nozzles of both extruders independently measure their distance to the printing plate. The distance measured in this process is represented by the orange bar in the menu.
This also ensures that both extruders have the same z-offset.
This type of print bed leveling surprised me. It really allows anyone to adjust the print bed without error!
IDEX Calibration & Vibration Compensation
In a 3D printer with two extruders, it’s hugely important that they move relative to each other as accurately as possible. We have already taken care of the z-axis when leveling and adjusting the z-offset. The next step is to calibrate the xy-plane.
To do this, there is a square in the printing plate where the extruders alternately feel the outer edges of the square with the nozzle. The whole process is automatic, the Snapmaker J1s calibrates its xy-plane completely automatically!


After all axes of both extruders have been calibrated, an object is printed within the setup procedure for testing. If a calibration is not accurate enough, this will be directly obvious on this object.


At the end of the calibration within the assembly comes the most important part: the vibration compensation.
Again, a pre-made test model is printed. The vibration compensation is given different parameters within the model. At the end of the print, you can then select the layer with the best results to improve the compensation.
Print Volume of the Snapmaker J1s

The print volume of the Snapmaker J1s is 300 × 200 × 200 mm³. Compared to Cartesian 3D printers with only one extruder, this volume is in the upper mid-range. However, among 3D printers with two extruders, a CoreXY structure and a closed print volume, this print volume is already quite large.
The print volume is large enough to print even medium-sized objects in one piece.
To process more exotic filaments, the enclosure can be completely closed. While there is no built-in heater, there is built-in ventilation in the J1s version of the printer.
The Enclosure of the Snapmaker J1s
The high-quality enclosure of the Snapmaker J1s is made of aluminum alloy and is built extremely sturdy to prevent vibrations. The case can be opened and closed via the doors on the front and the lid on the top. The lid is locked in place by magnets.
For filaments like PLA, which require strong cooling, it is advisable to leave the enclosure open and activate the ventilation. However, other filaments, such as ABS require a warm environment without ventilation, where the enclosure should be closed.
Together with the relatively high temperatures that both extruders and the print bed can reach, this allows a wide variety of filaments to be processed.
Various parts of the 3D printer are made from a single casting. The base, the upper part and the suspension of the printing plate are each cast from one piece. This improves the stability of the 3D printer and results in better print quality at high print speeds.
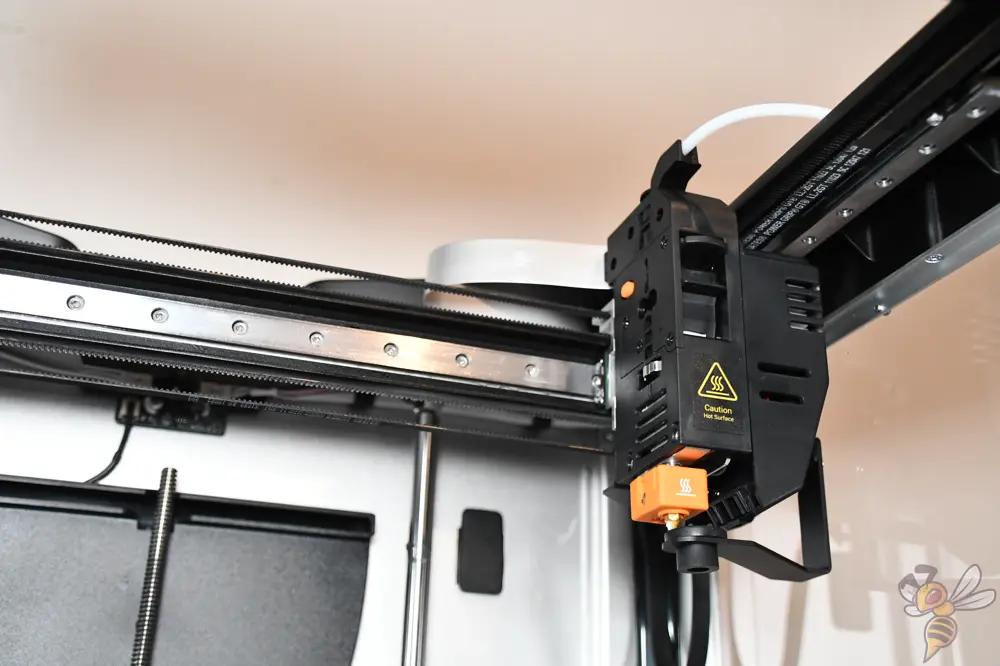
And to ensure that the two print heads can be positioned accurately, they run on high-quality linear rails. Both print heads move on the same linear rail, but do not get in each other’s way during printing.
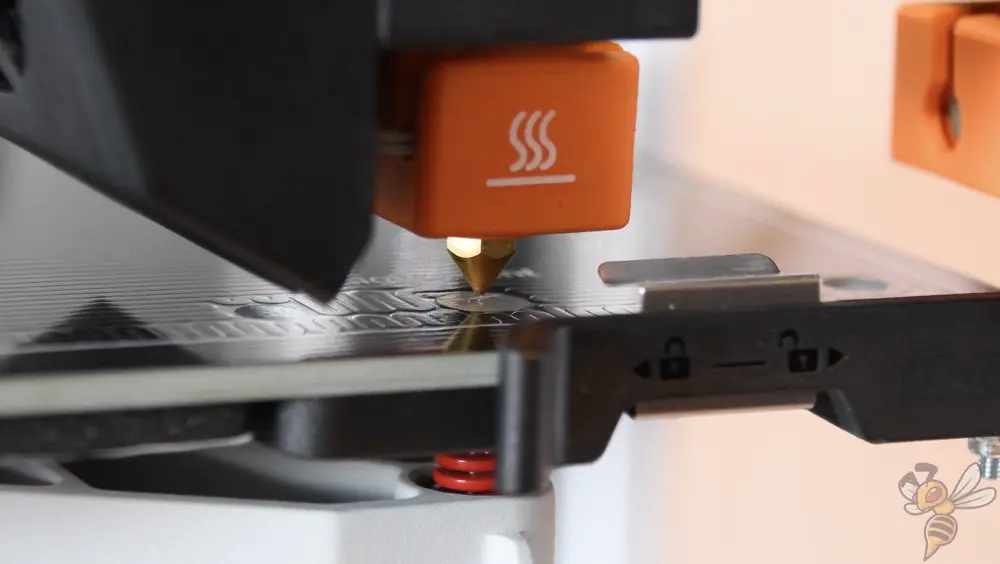
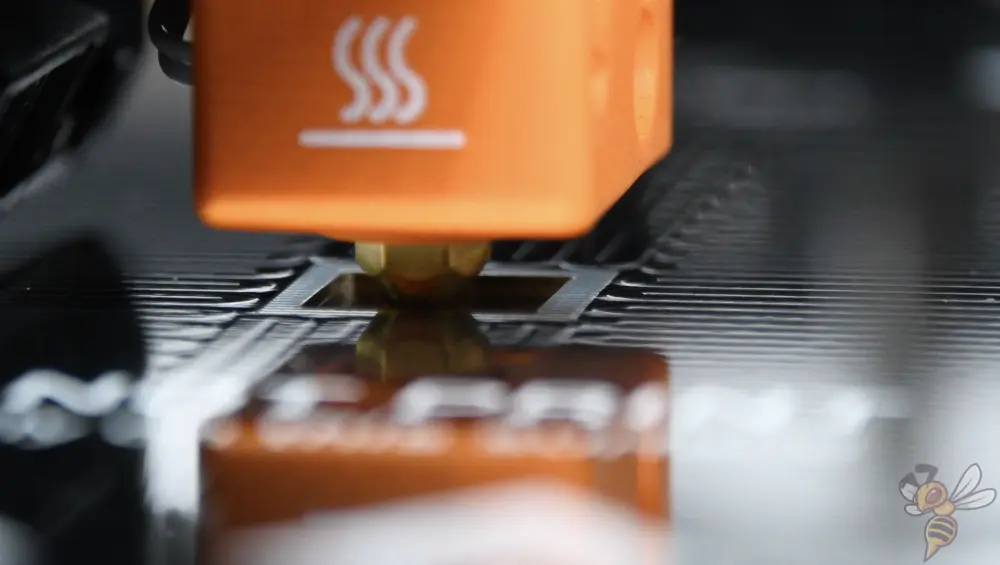
The Snapmaker J1’s Two Extruders
One of the biggest selling points of the Snapmaker J1s is, of course, the two direct-drive extruders that allow you to print with two different filaments at the same time.
Because a direct drive was chosen for both extruders and they can reach up to 300 °C, a high filament compatibility is achieved. Therefore, you can combine a wide variety of filaments, such as a tire that is made of ABS on the inside and the rubber is made of TPU filament.
Of course, it is also possible to work with a dissolving support material. With the Snapmaker J1s, you can use one extruder to print the object and the other extruder to print the support material. If the supports are made of PVA or HIPS, the supports can be easily dissolved after printing. In principle, all conceivable geometries can be printed!
The two print heads move in the CoreXY structure utilizing a sophisticated system of toothed belts on linear rails. This allows them to move independently of each other on the x-axis. This results in the following print modes:
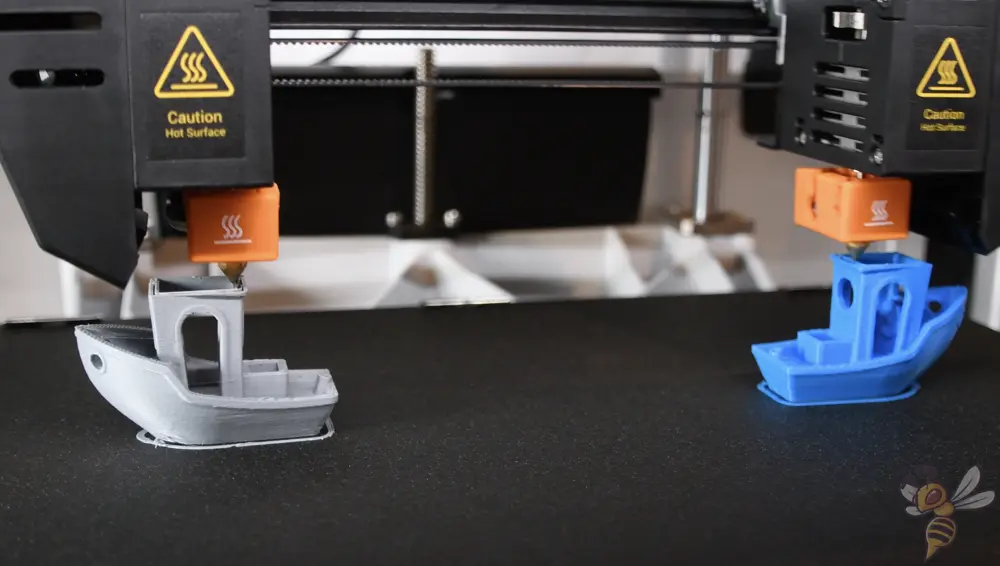
- Default Mode: In this mode, both extruders work on one object. So you can print one object from two different filaments.
- Backup Mode: In this mode, you use the same filament on both extruders. If one extruder runs out of filament, the second extruder will step in and complete the object. This mode is only useful for large objects that are particularly solid and are printed from only one type of filament.
- Copy Mode: In this mode, the object is printed on both sides of the print bed simultaneously by both extruders. Practical for mass production.
- Mirror Mode: In this mode, an object is printed mirrored on the other side simultaneously from the other extruder.

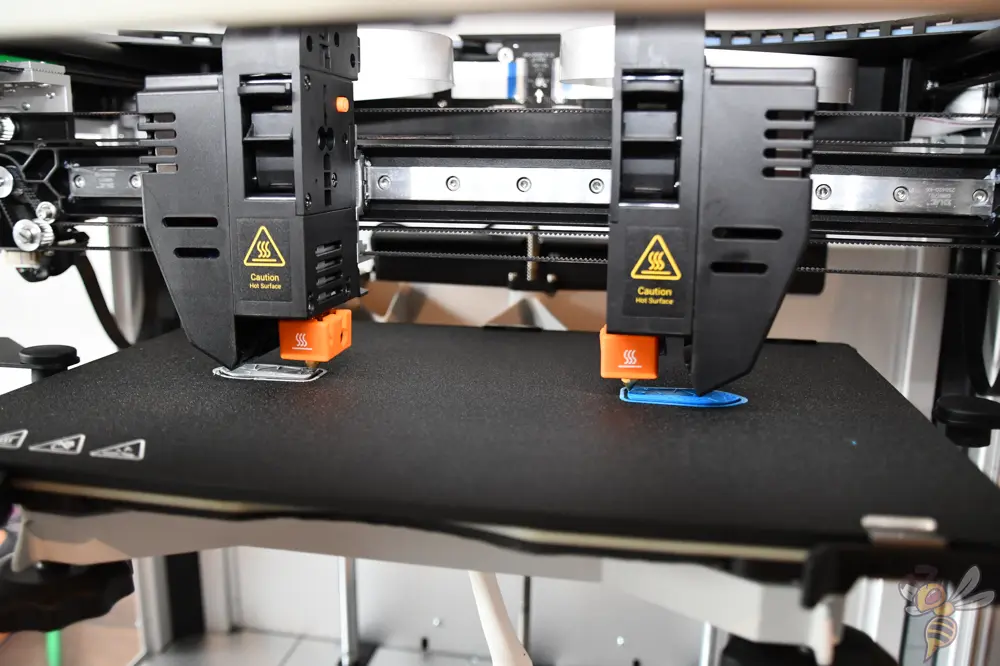
A 3D printer with two extruders needs a system to prevent unnecessary leakage of hot filament from the non-active extruder. In the Snapmaker J1s, this is solved by a small “rubber pad” under the nozzle. When the extruder is not in use, it is parked there to prevent hot filament from escaping.
Slicers Compatible with the Snapmaker J1s
Officially, the Snapmaker J1s is compatible with the in-house slicer “Luban” and third-party slicers like Cura, PrusaSlicer, etc,.
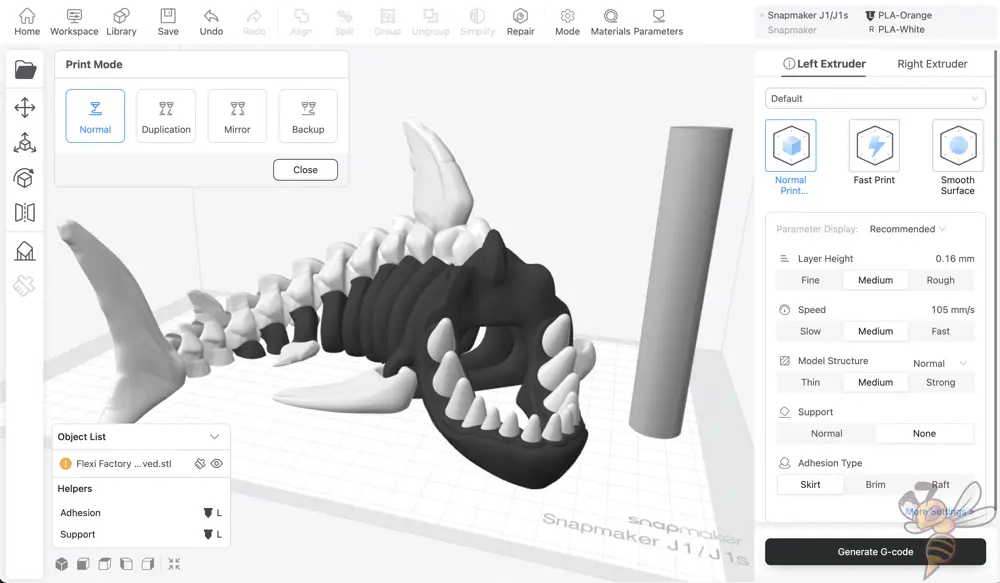
I have only tested the Snapmaker J1s with Luban. In my eyes, the slicer is designed really user-friendly and offers all the settings that you know from other slicers. But in addition, there are a few ingenious features like painting on areas to be printed with the second extruder!
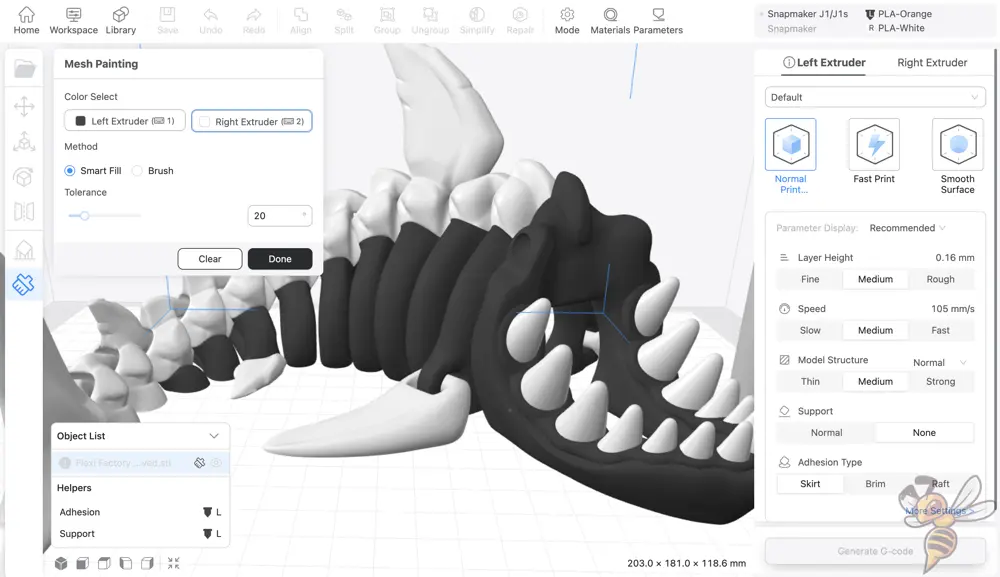

3D printers with two extruders are not too common. Therefore, the problem arises that, at least in the hobby area, you cannot find many objects that are suitable for an IDEX printer or use all its possibilities.
Therefore, I find the assignment of extruders for certain surfaces of the object by brushes or an intelligent selection brilliant! This also allows normal STL files to be printed from different filaments without having to make complicated adjustments to the STL file itself.
All objects with more than one color that I show in this review I processed with this feature.
Test Prints and Calibration of the Snapmaker J1s

Usually, 3D printers have many little things that bother me and also often one or two major problems. With the Snapmaker J1s, there was really only one thing that bothered me a bit and where I see room for improvement. The print temperature and retraction settings need to be meticulously calibrated for perfect results.
TIP: Learn how to calibrate your 3D printer to get perfect results every time in my 3D printing course: FDM 3D Printing: The Comprehensive Course from A to Z
(The course teaches everything you need to know for FDM 3D printing in over 60 lessons. The course will get beginners up to my level in no time!)
Of course, I’m no novice at this, however it took a few passes before I could achieve acceptable print quality. Perhaps Snapmaker is counting on the target audience for this printer being able to calibrate well. After all, this makes it only partially suitable for beginners.
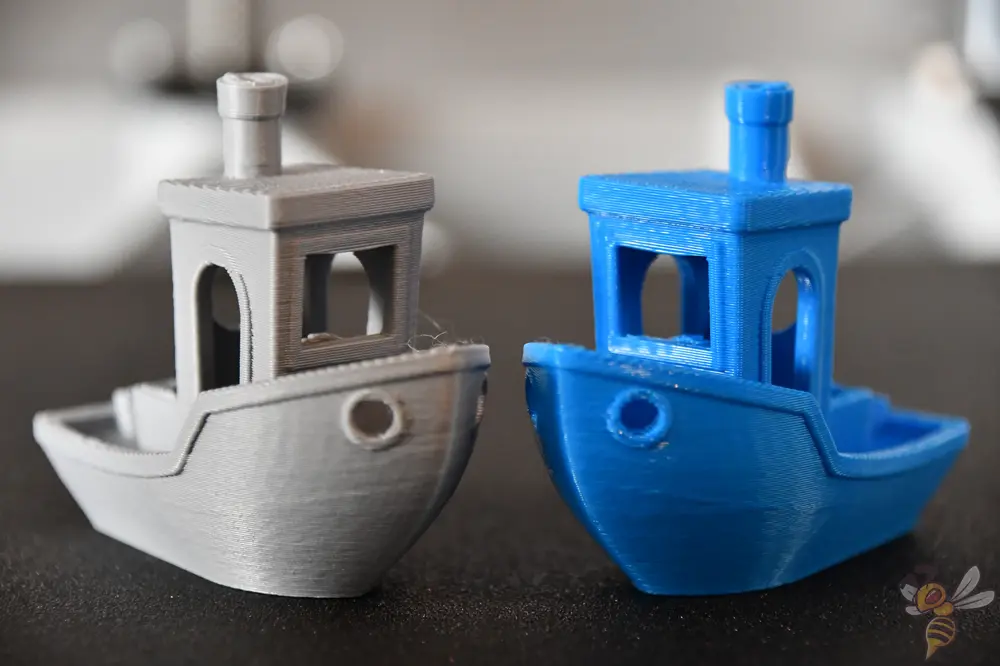
After an accurate calibration, however, the print quality was nearly perfect!
Noise Level of the Snapmaker J1s During Printing
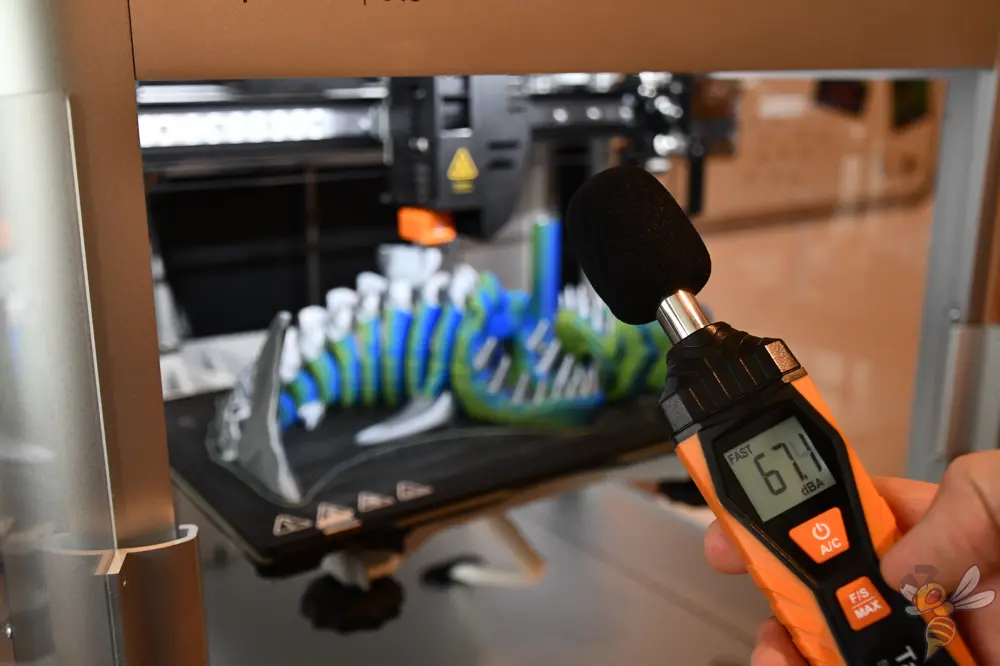

The Snapmaker J1s’ volume isn’t very loud, but it isn’t necessarily quiet either. It’s about in the middle of what you can expect from CoreXY 3D printers with two extruders.
Print Speed of the Snapmaker J1s
Thanks to the vibration compensation, the stable construction and the effective cooling, the Snapmaker J1s gets print speeds of up to 350 mm/s and accelerations of up to 10000 mm/s².
However, if you want to stick to the preset parameters in the slicer, you will mainly print at a speed of 150 to 200 mm/s. For a 3DBenchy, the Snapmaker J1s needs over half an hour.
By comparison, the Creality K1 or QIDI X-Max-3, which can print at 600 mm/s, prints a 3DBenchy in about 13 to 14 minutes. For an IDEX 3D printer, however, the Snapmaker J1s still performs quite good in this regard.
Print Quality of the Snapmaker J1s
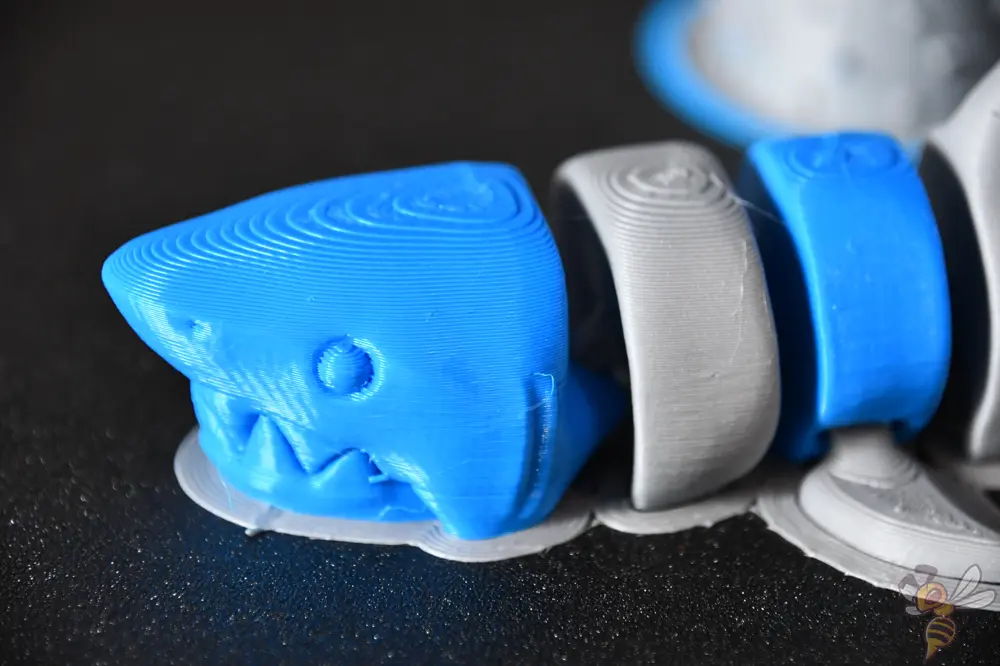
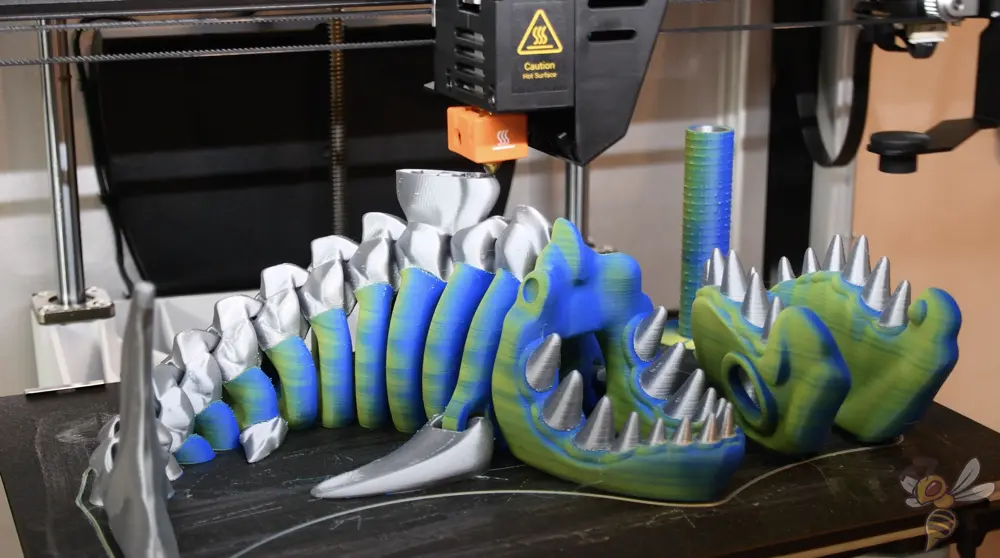
Test objects are stored on the local memory and the Snapmaker J1s. Among others, the shark pictured above. The print quality is okay, but not perfect.
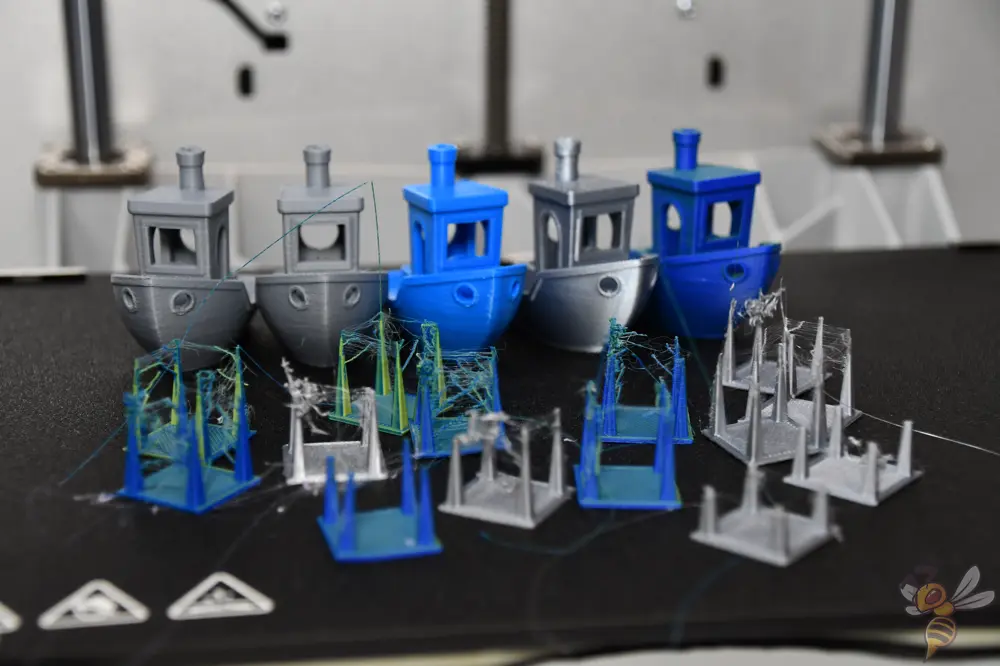
Then I thought I’d swap the blue filament with white (also PLA from the same manufacturer) and print another object. I expected the same print quality, which was a mistake…

As you can see in the first picture, I should have calibrated the new filament. However, before I did that, I wanted to test something else. The white filament was a bit older and was stored in free air. Therefore, the result could have been caused by moisture. Some printers are very sensitive to wet filament.
Therefore, I replaced the gray filament with purple filament (also from the same manufacturer) and dried it beforehand.

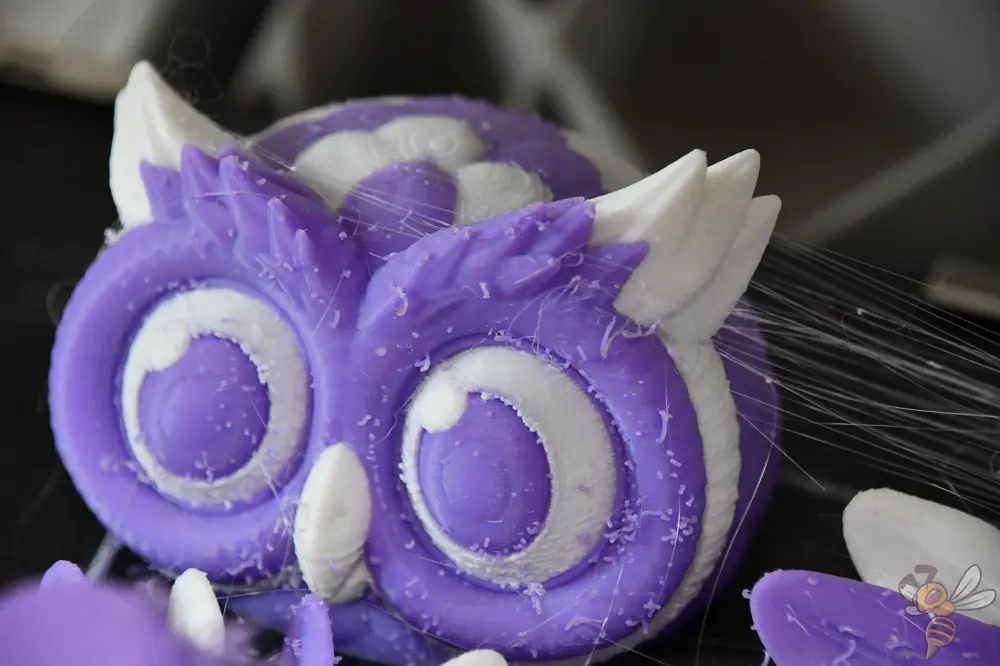
But as you can see, this was apparently not the problem. So I then followed my own advice and calibrated the next filament accurately before starting a new project.
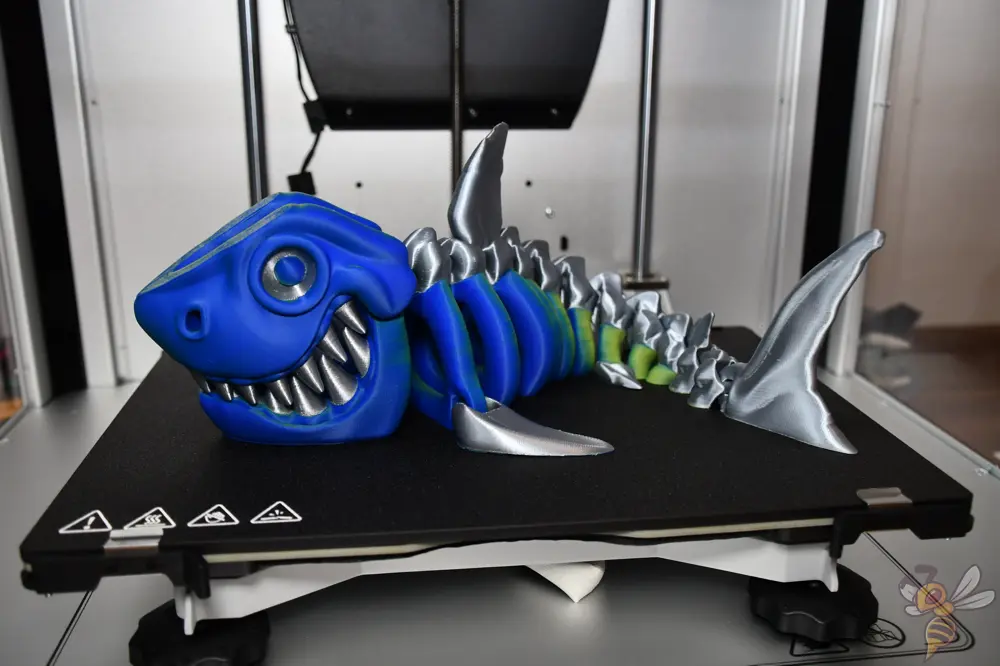
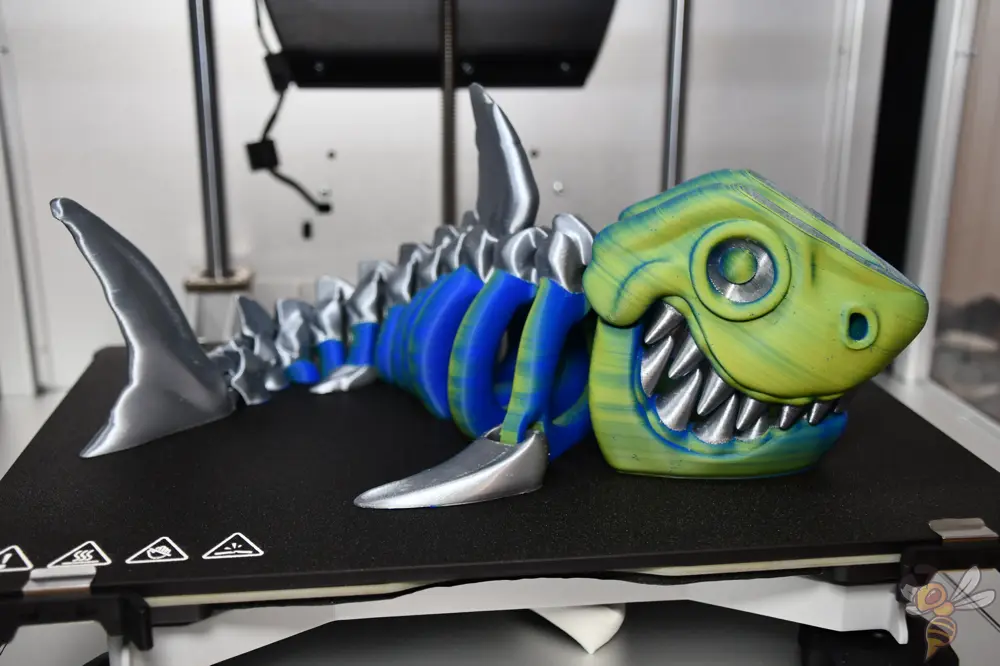
The calibration was definitely worth it. There were no more signs of stringing or blobs on this print. The lines you can see on the two-color blue/yellow filament are not printing errors, but irregularities in the filament.
Even though the Snapmaker J1s takes more time to calibrate than most other 3D printers, the print quality that can be achieved in the end is excellent!
J1 vs. J1s
These are the differences between the Snapmaker J1 and the J1s:
- And J1s is completely pre-assembled. With the regular J1, you have to assemble the doors and side windows yourself.
- The J1s comes with an additional fan that effectively cools the layer you are printing. For certain filaments, like PLA, it leads to better print quality and higher speeds.
- The fan of the J1s is also available as an upgrade kit for the normal J1.
Is the Snapmaker J1s the Right 3D Printer for You?
What I really liked about the Snapmaker J1s:
✓ High-quality workmanship and materials
✓ The IDEX system with the two extruders works perfectly
✓ Stable CoreXY construction
✓ Relatively high printing speed
✓ Sophisticated and user-friendly operation
Snapmaker J1s drawbacks:
× Tricky calibration of retraction and print temperature
The Snapmaker J1s* definitely won me over in this hands-on test. It’s not perfect though, as it needs to be carefully calibrated for perfect results, but this drawback probably falls under the category of “complaining on a high level”.
Nevertheless, it is not really a plug-and-play device that is suitable for absolute beginners. But that’s also probably not Snapmaker’s target audience. But even if you are an absolute beginner and willing to invest some time in calibration, you will have a lot of fun and success with the Snapmaker J1s!
The Snapmaker J1/J1s is an IDEX 3D printer with vibration-compensation. This means that it can use two different filaments in one print with two extruders – and at a high print speed!
Build Volume: 300 × 200 × 200 mm³
Speed: 350 mm/s
Extruder: 2 × Direct Drive
Print Bed: PEI coated glass
Leveling: automatic
Firmware: Marlinbase
Nozzle Temp.: 300 °C
Bed Temp.: 100 °C
Connectivity: Wi-Fi, USB cable/stick
Pros:
✓ IDEX (2 extruders)
✓ Closed printing volume
✓ CoreXY construction
✓ Professional quality
✓ Fast
Cons:
× Tricky retraction calibration
Important Accessories for a FDM 3D Printer
Most filaments need to be stored dry to avoid printing errors such as stringing. Vacuum bags with desiccant are perfect for this.
Filament Storage Vacuum Bags:
Desiccant Silica Gel Packs:
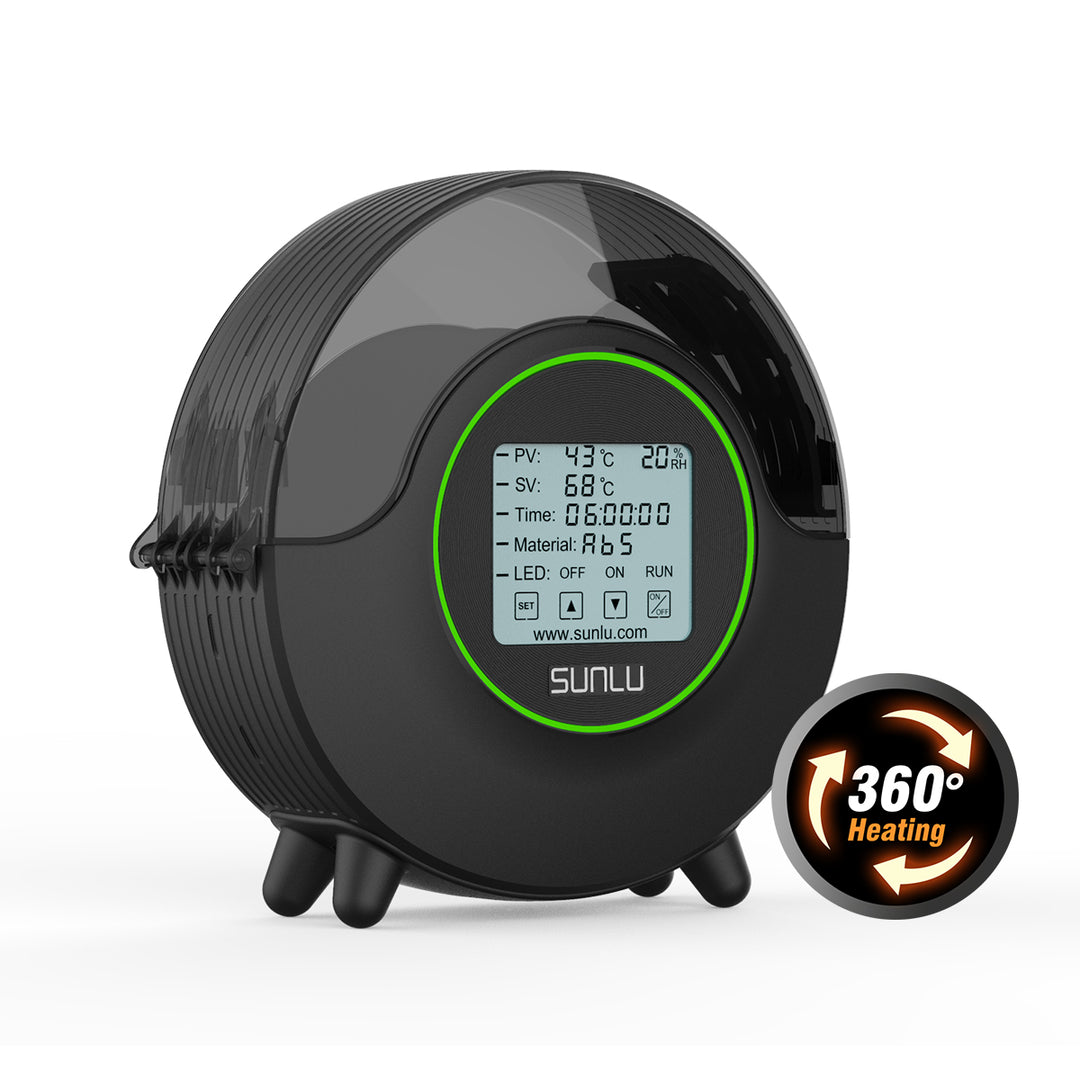
Hydroscopic filaments such as PETG or nylon absorb water from the air. This results in printing errors. A filament dryer dries the filament before printing.
Disclosure: This website is the property of Martin Lütkemeyer and is operated by Martin Lütkemeyer. Martin Lütkemeyer is a member of the Amazon Services LLC and other Affiliate Programs. These are affiliate advertising programs designed to enable websites to earn advertising revenue through advertising and linking to Amazon.com and others. Links marked with * are affiliate links.
